
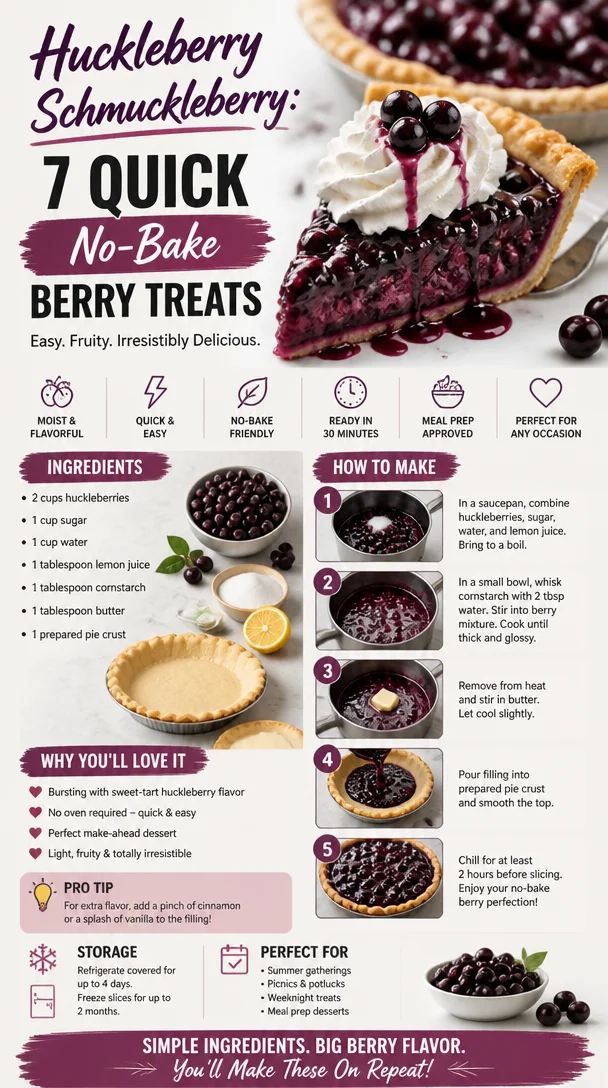
Huckleberry Schmuckleberry: 7 Quick No-Bake Berry Treats
Huckleberry Schmuckleberry: A Cozy Recipe for Sweet Memories
Welcome back to my kitchen, fellow food lovers! Today, I’m inviting you to whip up something that is not just delicious but also packed with warm, fuzzy nostalgia – the delectable Huckleberry Schmuckleberry! This dish isn’t just a recipe; it’s a journey through memories, flavors, and a dash of magic that comes from the heart.
Now, we’re diving into the enchanting world of huckleberries – those tiny, tart berries that are a hidden gem of nature. Growing up in the Pacific Northwest, I was lucky enough to experience the joy of huckleberry-picking with my family every summer. Imagine running through the woods, sun shining, with the sweet scent of wild berries hanging in the air. We’d fill our baskets to the brim, giggling and chatting about the best berry-picking spots. And the best part? Transforming our colorful haul into scrumptious desserts that filled our home with the incredible aroma of baking goodness!
Whether it’s a refreshing huckleberry crumble, a scrumptious pancake topping, or a heavenly jam, these tiny powerhouses of flavor have a way of making everything taste better. And trust me, when you combine huckleberries with some comforting, buttery goodness, you’re in for a real treat.
So, grab your favorite apron and let’s get cooking! I promise you’ll want to share this recipe with your family and friends – they’ll be begging for the secret to this mouthwatering dish!
A Sweet Memory with Huckleberries
Let me take you back to a sun-soaked afternoon in my childhood. It was one of those beautiful days where the sun painted everything golden, and the sweet smell of summer hung in the air like a gentle hug. My family and I ventured into the nearby woods, baskets in hand and excitement bubbling over. We were on the hunt for huckleberries, and let me tell you, it was a quest like no other!
As we trekked through the trails, my little feet would dart from bush to bush, my hands stained with berry juice and my laughter echoing through the trees. The huckleberry bushes seemed to be hiding their treasures just for us, and I remember the thrill of spotting those tiny, plump blue-black berries, glistening like jewels in the dappled sunlight.
Once our baskets were full, it was time for the best part – baking! My mom would turn our treasure into the most scrumptious huckleberry pie, filling our kitchen with warmth and sweet aromas. We’d sit around the kitchen table, eagerly awaiting that first slice, and I’ll never forget the delicious sense of pride that came from tasting something made with love and joy. That’s what I want to share with you today – the beauty of creating something from scratch that brings people together and fills your heart with warmth.
Let’s delve into the ingredients that will bring this huckleberry delight to life!
Ingredients You’ll Need
Here’s a little overview of the ingredients you’ll need to create your Huckleberry Schmuckleberry.
-
Fresh or Frozen Huckleberries (2 cups): These are the star of the show! If you can’t find huckleberries, blueberries or blackberries work too. Just note that huckleberries have a unique tartness that you may want to balance with a little extra sugar.
-
Granulated Sugar (¾ cup): This adds sweetness, balancing the tartness of the berries. Feel free to adjust it based on your preference. You could also substitute with honey or maple syrup for a natural sweetener.
-
Lemon Juice (2 tablespoons): The acidity of lemon juice elevates the flavor. Don’t skip it! If lemons aren’t handy, lime juice works like a charm, or even a splash of vinegar to mimic that tang.
-
Flour (1 cup): For binding everything together! You can use all-purpose flour, or if you’re going gluten-free, almond flour or oat flour can be good substitutes. Just keep an eye on the texture!
-
Old-Fashioned Rolled Oats (1 cup): This adds a fabulous chewy texture. If you’re looking for a gluten-free twist, ensure you choose certified gluten-free oats.
-
Brown Sugar (½ cup): For that hint of caramel flavor. If you don’t have brown sugar, granulated sugar can work as well, though the flavor will be a tad different.
-
Butter (½ cup, melted): The magic ingredient that makes everything come together! Coconut oil can be a fantastic dairy-free alternative.
-
Cinnamon (1 teaspoon): Adds warmth and depth. If you don’t have cinnamon, nutmeg or cardamom could make interesting substitutes.
-
Salt (½ teaspoon): Just a pinch to balance the sweetness.
Step-by-Step Instructions
Grab your apron and let’s get started! Here’s how to create your Huckleberry Schmuckleberry:
-
Preheat the Oven: Set your oven to 350°F (175°C). This way, it’s nice and hot by the time you’re ready to bake, ensuring a bubbly, golden topping!
-
Prepare the Huckleberries: In a medium bowl, combine the huckleberries, granulated sugar, and lemon juice. Stir gently, being careful not to mash the berries. Let this mixture sit for about 10 minutes – this helps the juices release and creates a delicious filling!
-
Mix the Dry Ingredients: In a large bowl, whisk together the flour, rolled oats, brown sugar, cinnamon, and salt until well blended. This is where the cozy aroma begins to fill your kitchen!
-
Incorporate the Butter: Pour the melted butter into the dry ingredients and mix with a fork until everything is combined and crumbly. You want a texture that’s similar to wet sand. If it feels too dry, a splash of milk or a bit of coconut oil can help bring it together.
-
Layer the Dish: Grab a baking dish (8×8 inches works perfectly) and spread half of your oat mixture evenly across the bottom. This is your base!
-
Add the Berry Filling: Spoon the huckleberry mixture on top of the base. Make sure to distribute the berries evenly for a tasty bite every time.
-
Top It Off: Sprinkle the remaining oat mixture over the huckleberries. This will create a lovely topping that crisps up beautifully in the oven.
-
Bake to Perfection: Place your dish in the preheated oven and bake for 30-35 minutes, or until the top is golden brown and bubbly. You’ll know it’s ready when your kitchen smells like a warm hug!
-
Cool and Serve: Once out of the oven, let it cool for about 10-15 minutes. This allows the filling to set up a bit for easier serving.
Serving Suggestions
To serve your delightful Huckleberry Schmuckleberry, scoop generous portions into bowls and top with a dollop of whipped cream or a scoop of vanilla ice cream for a beautiful contrast of temperatures and textures. Drizzling a bit of honey or maple syrup on top adds an extra touch of sweetness! Enjoy it warm, and embrace the wonderful company around you. Remember, this dish is all about sharing and celebrating the flavor!
Recipe Variations
Feel free to get creative with your Huckleberry Schmuckleberry. Here are a few fun twists to consider:
- Nutty Crumble: Add ½ cup of chopped nuts (like almonds or pecans) to the topping for a crunchy texture.
- Berry Duo: Mix huckleberries with raspberries or strawberries for an extra fruity flavor explosion!
- Spiced Up: Add a pinch of nutmeg or allspice to the filling for a warm, aromatic twist.
- Dairy-Free Delight: Swap out regular butter for coconut oil and use almond milk instead to make the recipe completely dairy-free.
- Vegan Version: Use flax eggs (1 tablespoon of ground flaxseed mixed with 3 tablespoons of water) in place of the butter and add maple syrup instead of granulated sugar.
Chef’s Notes
This recipe has evolved from countless kitchen experiments and cherished family gatherings. Each time I make it, I’m reminded of those sun-soaked afternoons spent berry-picking with my loved ones. My mom would often say that the messier I got with the dough and berry juices, the more delicious the dish would turn out. And let me tell you, that’s a philosophy I absolutely live by!
One of my most memorable kitchen mishaps happened when I accidentally forgot to add the sugar one day. I was so worried about making it perfect, I skipped it altogether! But when family arrived and tasted the “experiment,” we all laughed so hard at the unexpectedly tart version. Sometimes, the best memories evolve from little mistakes – just don’t forget the sugar!
FAQs and Troubleshooting
-
Q: My huckleberry filling is too runny. What did I do wrong?
- A: This can happen if your berries are super juicy. Next time, try adding a tablespoon of cornstarch to help thicken the filling while it bakes!
-
Q: How can I make this dish more flavorful?
- A: Adding a teaspoon of vanilla extract to the berry mixture or a citrus zest can amp up the flavors beautifully!
-
Q: Can I prepare this ahead of time?
- A: Absolutely! You can pre-mix the dry ingredients and the huckleberry filling, store them separately in the fridge, and assemble the topping just before you bake.
-
Q: Why is my crumbles topping too crumbly?
- A: If it’s separating too much, you might have added too much butter or flour. Just ensure the mixture stays a bit moist, like wet sand, when you’re mixing.
Nutritional Info
While I believe in enjoying every bite without guilt, it’s also helpful to have a sense of what you’re consuming. Here’s a rough estimate per serving (based on 8 servings):
- Calories: 280
- Carbohydrates: 42g
- Protein: 3g
- Fat: 12g
- Fiber: 4g
And there you have it – your very own Huckleberry Schmuckleberry. I hope this delightful recipe brings as much joy to your kitchen as it has to mine. Remember, the best dishes are made with love, laughter, and a hint of nostalgia. Now, get cooking and share those delicious moments with the people you love! Happy baking!
Print
Huckleberry Schmuckleberry
- Total Time: 50 minutes
- Yield: 8 servings
- Diet: Vegetarian
Description
A nostalgic and delightful dessert featuring huckleberries, perfect for sharing with loved ones.
Ingredients
- Fresh or Frozen Huckleberries (2 cups)
- Granulated Sugar (¾ cup)
- Lemon Juice (2 tablespoons)
- Flour (1 cup)
- Old-Fashioned Rolled Oats (1 cup)
- Brown Sugar (½ cup)
- Butter (½ cup, melted)
- Cinnamon (1 teaspoon)
- Salt (½ teaspoon)
Instructions
- Preheat the Oven: Set your oven to 350°F (175°C).
- Prepare the Huckleberries: In a medium bowl, combine the huckleberries, granulated sugar, and lemon juice. Let this mixture sit for about 10 minutes.
- Mix the Dry Ingredients: In a large bowl, whisk together the flour, rolled oats, brown sugar, cinnamon, and salt until well blended.
- Incorporate the Butter: Pour the melted butter into the dry ingredients and mix until everything is combined and crumbly.
- Layer the Dish: Spread half of your oat mixture evenly across the bottom of an 8×8 inch baking dish.
- Add the Berry Filling: Spoon the huckleberry mixture on top of the base, distributing evenly.
- Top It Off: Sprinkle the remaining oat mixture over the huckleberries.
- Bake to Perfection: Place your dish in the preheated oven and bake for 30-35 minutes.
- Cool and Serve: Let it cool for about 10-15 minutes before serving.
Notes
Serve warm with whipped cream or vanilla ice cream on top.
- Prep Time: 15 minutes
- Cook Time: 35 minutes
- Category: Dessert
- Method: Baking
- Cuisine: American
Nutrition
- Serving Size: 1 serving
- Calories: 280
- Sugar: 15g
- Sodium: 200mg
- Fat: 12g
- Saturated Fat: 7g
- Unsaturated Fat: 4g
- Trans Fat: 0g
- Carbohydrates: 42g
- Fiber: 4g
- Protein: 3g
- Cholesterol: 30mg
Keywords: huckleberry, dessert, nostalgic, baking, summer recipe
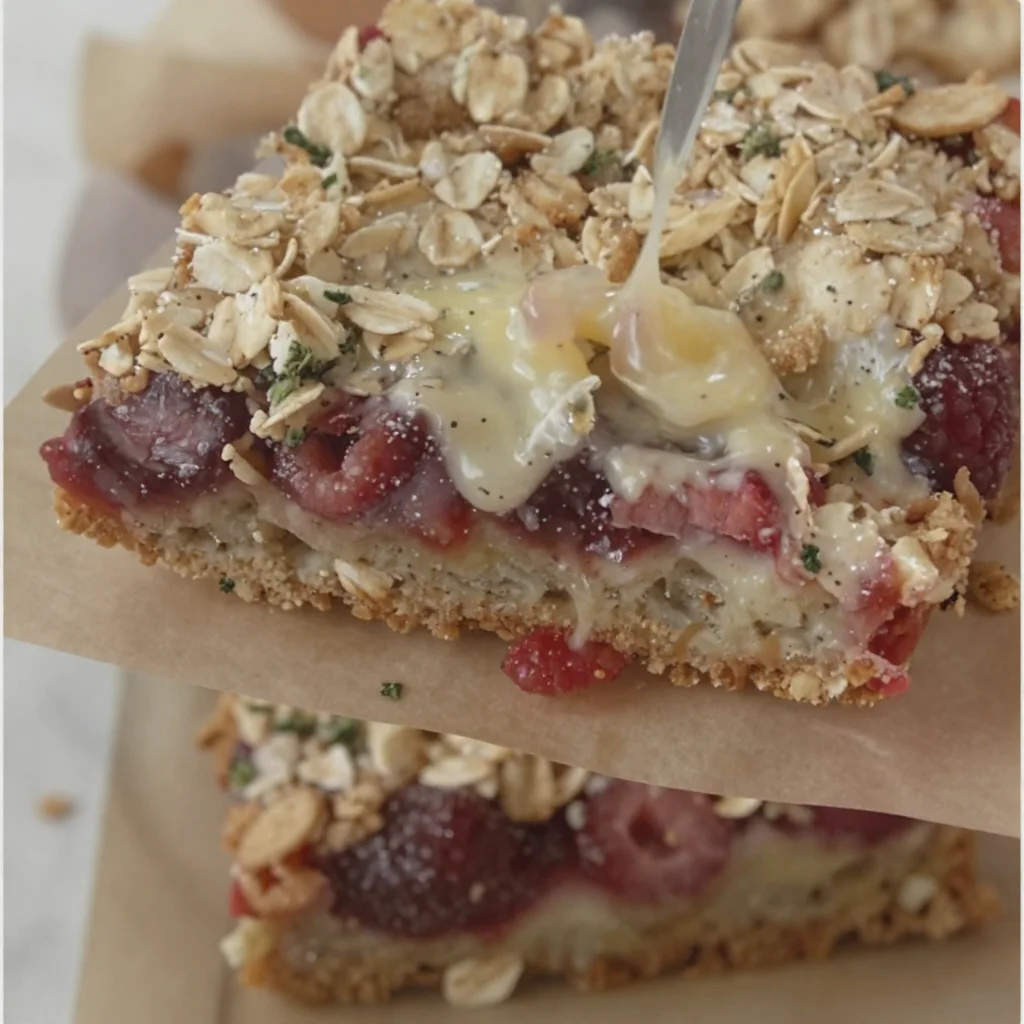
Ingredient Raspberry Oatmeal Crumble Bars (Summer Snack)
Raspberry Oatmeal Crumble Bars: A Cozy Kitchen Delight
Welcome to my cozy corner of the culinary world! Today, I’m excited to share with you one of my favorite recipes that embodies all the warmth and comfort of homemade goodness: Raspberry Oatmeal Crumble Bars. These delightful treats are perfect for breakfast, snacks, or a sweet afternoon pick-me-up. With layers of tangy raspberry and a buttery, crumbly oat topping, these bars are a crowd-pleaser that will have everyone asking for seconds.
The beauty of these Raspberry Oatmeal Crumble Bars lies not only in their delicious flavor but also in their heartwarming backstory. I remember the first time I made them; it was during a rainy Saturday afternoon. I had just returned from the local farmers’ market with a pint of fresh raspberries that were bursting with flavor. The rain pattered against the window as I whisked together the mixture, filled the kitchen with the smell of melting butter, and transformed those vibrant berries into a sweet filling. The sight of my family munching on the bars, their faces lighting up with delight, is a memory I’ll cherish forever.
So, let’s step into the kitchen together and create a batch of these irresistible bars that will fill your home with fragrant joy!
Personal Story
One of my fondest memories with Raspberry Oatmeal Crumble Bars dates back to a summer family reunion at my grandmother’s house. The afternoon sun poured through the kitchen windows, illuminating her old wooden table where she used to knead dough and prepare sweet treats. She pulled out her secret stash of frozen raspberries, a treasure trove from her garden. As she expertly layered the oats and berries in a baking dish, I marveled at her effortless grace in the kitchen. She handed me a spoon and encouraged me to help sprinkle the oat topping—her legacy of cooking was palpable in that moment. Those bars vanished quickly that day, devoured by a bunch of happy faces, and ever since, they’ve held a special place in my heart.
Ingredients
To whip up these delectable Raspberry Oatmeal Crumble Bars, you’ll need the following ingredients:
-
Fresh Raspberries (2 cups)
Fresh raspberries bring a tartness and vibrant color to these bars. If you can’t find fresh ones, feel free to use frozen raspberries—just make sure to thaw and drain them beforehand to avoid excess moisture. -
Rolled Oats (2 cups)
Rolled oats provide the chewy texture and heartiness. Quick oats can be used in a pinch, but avoid instant oats, as they won’t yield the same structure. -
All-Purpose Flour (1 cup)
This gives the crumble its base. For a gluten-free version, substitute with almond flour or a gluten-free flour blend. -
Brown Sugar (1 cup)
Brown sugar adds that lovely caramel flavor. You can use coconut sugar for a healthier substitute, but it will alter the color of the crumble slightly. -
Butter (½ cup, unsalted)
Butter binds it all together and adds richness. For a vegan version, substitute with coconut oil or dairy-free butter. -
Baking Powder (1 tsp)
This helps to give the oatmeal a little lift and lightness. -
Salt (½ tsp)
Just a pinch to enhance the flavors; it balances the sweetness of the sugar and brings out the raspberry’s bright notes. -
Vanilla Extract (1 tsp)
This infuses the mixture with a warm aroma and depth of flavor.
Step-by-Step Instructions
-
Preheat the Oven
Begin by preheating your oven to 350°F (175°C). This is the perfect time to gather your ingredients and prepare your baking dish. Grease a 9×9-inch baking pan with a little butter or line it with parchment paper for easy removal later. -
Mix the Dry Ingredients
In a large mixing bowl, whisk together the rolled oats, flour, brown sugar, baking powder, and salt until well combined. Trust me, this step is key for ensuring an even distribution of flavors. -
Incorporate the Butter
Melt the butter in a small saucepan over low heat or in the microwave. Allow it to cool slightly, then pour it into the dry mixture. Using your fingers (my favorite method!) or a fork, blend it together until the mixture resembles coarse crumbs. You want some larger clumps, as they’ll create a lovely texture on top! -
Reserve Oats for Topping
Take about 1½ cups of this mixture and set it aside—this will be your crumble topping. -
Create the Raspberry Filling
In another bowl, toss the fresh (or thawed) raspberries with a tablespoon of flour to help absorb excess liquid. Gently fold in the vanilla extract. You want those luscious little berries to shine, without drowning in moisture. -
Layer It Up
Spread the remaining oat mixture evenly into the prepared baking pan, pressing it firmly to form the crust. Spoon the raspberry mixture over the crust, spreading it evenly. Finally, sprinkle the reserved crumble topping over the raspberries. Don’t be shy; this is where the magic happens! -
Bake to Perfection
Slide the pan into the preheated oven and bake for about 30–35 minutes, or until the topping is golden brown and the raspberries are bubbly. The delicious aroma wafting through your kitchen will be intoxicating, I promise! -
Cooling Time
Once out of the oven, let the bars cool in the pan for at least 15 minutes before transferring them to a wire rack to cool completely. This step will help them set up for easy slicing. -
Slice and Enjoy
Use a sharp knife to cut the bars into squares or rectangles. Serve them warm for a gooey treat or at room temperature for a delightful snack.
Serving Suggestions
For an extra touch of coziness, serve these Raspberry Oatmeal Crumble Bars with a dollop of whipped cream or a scoop of vanilla ice cream on top. They also pair beautifully with a steaming cup of tea or coffee for a delightful afternoon treat.
Recipe Variations
- Nutty Version: Fold in some chopped nuts like almonds or walnuts into the crumble mixture for added crunch and depth.
- Different Berries: Swap out the raspberries for strawberries, blueberries, or blackberries, depending on the season and your preference.
- Spiced Up: Add a teaspoon of cinnamon or a pinch of nutmeg to the dry ingredients for a warm, spiced flavor.
- Zesty Twist: Incorporate a bit of lemon zest into the raspberry filling for a refreshing citrusy kick.
Chef’s Notes
This recipe is particularly adaptable! I’ve made these bars countless times, experimenting with what I have on hand. One memorable attempt was using a mix of frozen berries leftover from summer and a bit of almond extract instead of vanilla. The flavors melded surprisingly well! Sometimes my kids even get involved in the process, adding their own spin—chocolate chips sneaked in here and there. It’s a lovely way to bond over something delicious!
FAQs and Troubleshooting
-
Why are my crumble bars falling apart?
If your bars aren’t holding together, they may not have cooled long enough before slicing. Give them ample time to set completely—patience is key! -
Can I use other fruits besides raspberries?
Absolutely! Feel free to experiment with your fruit of choice. Just make sure the fruit isn’t overly watery, which could make the filling too soggy. -
How do I store the leftover bars?
Store any leftovers in an airtight container at room temperature for 2–3 days. For longer storage, you can refrigerate them for about a week or freeze them for up to 3 months—perfect for a quick snack! -
Can I make these vegan?
Yes! Simply substitute the butter with a plant-based alternative, and for the egg (if you choose to include it), use a flax or chia seed egg.
Nutritional Info (Optional)
This recipe yields approximately 16 bars. Each bar can be expected to have around 180 calories, with 8g of fat, 24g of carbohydrates, and 2g of protein. For a more precise analysis, consider using a nutritional calculator.
I hope you enjoy making these Raspberry Oatmeal Crumble Bars as much as I do. They’re a hug in dessert form and a fantastic way to celebrate the simple joys of cooking and sharing with loved ones. Happy baking!
Print
Raspberry Oatmeal Crumble Bars
- Total Time: 50 minutes
- Yield: 16 servings 1x
- Diet: Vegetarian
Description
Delightful Raspberry Oatmeal Crumble Bars with layers of tangy raspberry and buttery, crumbly oat topping, perfect for breakfast or snacks.
Ingredients
- 2 cups Fresh Raspberries
- 2 cups Rolled Oats
- 1 cup All-Purpose Flour
- 1 cup Brown Sugar
- ½ cup Unsalted Butter
- 1 tsp Baking Powder
- ½ tsp Salt
- 1 tsp Vanilla Extract
Instructions
- Preheat the oven to 350°F (175°C) and prepare a 9×9-inch baking pan.
- Mix the rolled oats, flour, brown sugar, baking powder, and salt in a large bowl.
- Incorporate the melted butter into the dry mixture until coarse crumbs form.
- Reserve about 1½ cups of the mixture for the topping.
- Create the raspberry filling by tossing fresh raspberries with a tablespoon of flour and folding in vanilla.
- Layer the remaining oat mixture in the baking pan, add the raspberry filling, and top with reserved crumble.
- Bake for 30-35 minutes until golden brown and bubbly.
- Cool in the pan for 15 minutes before transferring to a wire rack.
- Slice into bars and enjoy!
Notes
Serve with whipped cream or ice cream. Store leftovers in an airtight container for up to 3 days.
- Prep Time: 15 minutes
- Cook Time: 35 minutes
- Category: Dessert
- Method: Baking
- Cuisine: American
Nutrition
- Serving Size: 1 bar
- Calories: 180
- Sugar: 10g
- Sodium: 100mg
- Fat: 8g
- Saturated Fat: 4g
- Unsaturated Fat: 4g
- Trans Fat: 0g
- Carbohydrates: 24g
- Fiber: 2g
- Protein: 2g
- Cholesterol: 15mg
Keywords: raspberry, oatmeal, crumble, bars, dessert, baking, cozy




