
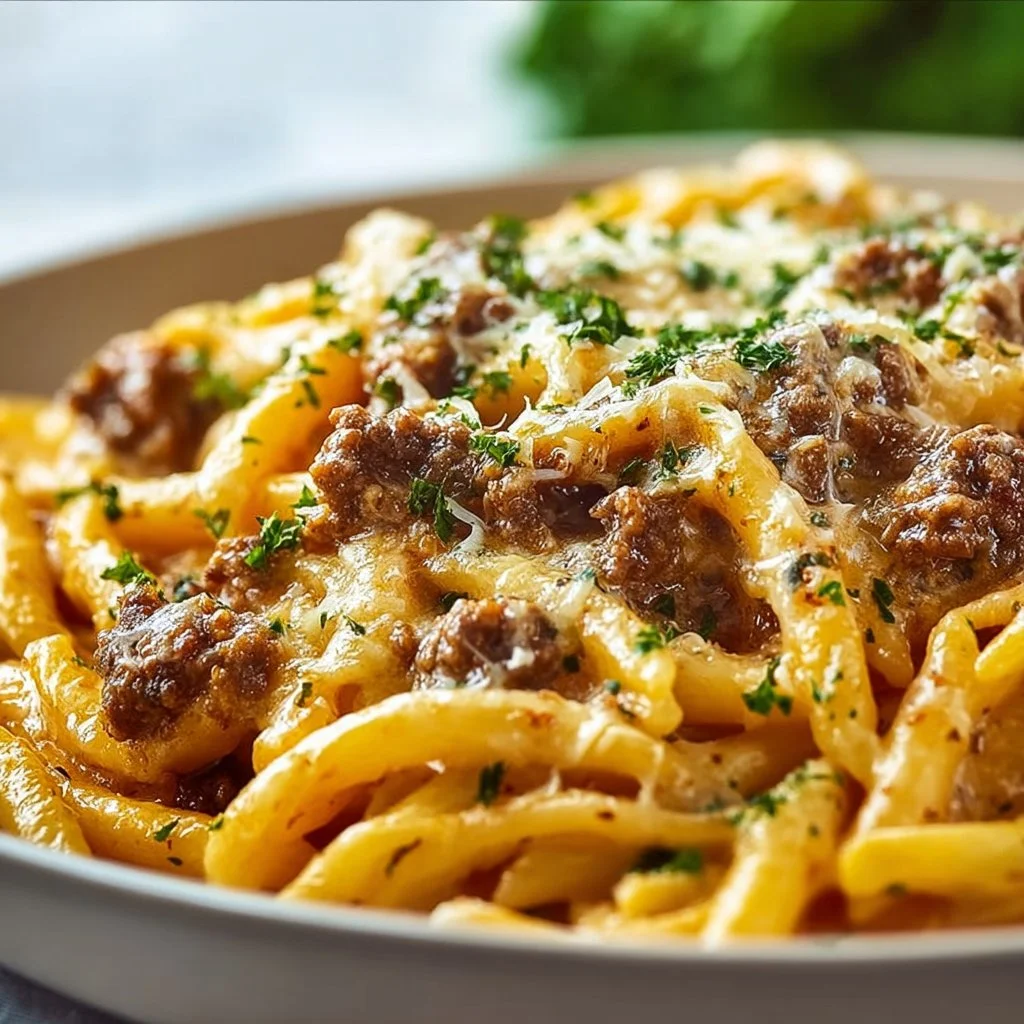
Creamy High Protein Beef Pasta
Creamy High Protein Beef Pasta: Your New Favorite Comfort Dish
Welcome to my cozy corner of the culinary world! I’m thrilled to share with you a dish that’s not only scrumptious but also packed with protein. Get ready to embark on a culinary journey with my Creamy High Protein Beef Pasta! Whether you’re cooking for family or just for yourself, this recipe is so comforting and delicious that it will become a staple in your kitchen.
Imagine this: it’s a chilly evening, you’ve had a long day, and the last thing you want to do is prepare an elaborate meal. But wait! You have a package of ground beef in the fridge, some creamy goodness waiting to be whipped up, and a whirlwind of pasta dreams rolling around in your head! Sounds like the perfect evening to dive into the world of creamy beef pasta. With the rich flavors and comforting texture, this dish is sure to warm your heart and fill your belly.
Now, let’s talk ingredients. Don’t worry if you’re not a culinary genius; I promise this dish is super approachable! We’ll keep it straightforward because cooking should be fun, not stressful. Just a few simple ingredients simmered together thoughtfully, and you’re in for a treat! So roll up your sleeves, put on your favorite apron (messy recommended), and let’s make some pasta magic together!
Personal Story
I vividly remember when I first learned to make pasta from scratch with my grandma when I was about 8 years old. Oh, the flour dust everywhere! She had this incredible wooden board that we used for rolling out the dough while laughing and sharing stories about our family. One particular Saturday, we decided to experiment by adding ground beef to a creamy sauce, inspired by a dish her mother used to make. We didn’t have a recipe; we just threw things together with love and the spirit of adventure.
That day, as the aromas filled the kitchen, I discovered how powerful food could be in bringing people together. The laughter, the stories, and that delicious first bite remain etched in my memory. This Creamy High Protein Beef Pasta is my way of honoring that moment, making it simple yet brimming with flavor, just like my grandma taught me. It’s about sharing joy through food, sparking conversations, and crafting new memories in the kitchen.
Ingredients
For the Beef Pasta
- 8 ounces whole wheat pasta: The star of our show! Whole wheat adds a nice nutty flavor and extra fiber—try substituting with gluten-free pasta if needed.
- 1 pound ground beef: Rich in protein! You can use lean ground beef to cut back on fat, or even swap with ground turkey for a lighter version.
- 1 medium onion, diced: Adds a sweet yet savory base. Feel free to substitute with shallots for a milder taste.
- 2 cloves garlic, minced: The aromatic foundation! Fresh garlic is best, but also consider garlic powder in a pinch.
- 1 cup beef broth: Brings depth to our dish! If you don’t have it, use vegetable broth or even water.
- 1 cup heavy cream: Makes the sauce creamy and luscious! You can use milk or a plant-based alternative (like coconut milk) for a lighter dish.
- 1 tablespoon Worcestershire sauce: Adds umami! You can skip this if you don’t have it, but it adds a delicious depth.
- 1 teaspoon Italian seasoning: A blend that brings out a wonderful flavor! Substitute with dried basil or oregano if that’s what you have.
- Salt and pepper to taste: Essential for seasoning! Always taste as you go.
- Fresh parsley, chopped, for garnish: Optional but pretty! A sprinkle of fresh herbs brightens the dish.
Step-by-Step Instructions
-
Cook the Pasta:
Start by boiling a large pot of salted water. Once it’s bubbling, add in your whole wheat pasta. Cook according to package instructions until al dente—generally about 8-10 minutes. Quick tip: reserve about ½ cup of pasta water before draining! It’s liquid gold for your sauce. -
Brown the Beef:
In a large skillet over medium heat, add a splash of olive oil and the diced onion. Sauté until they become translucent (about 5 minutes). Then, increase the heat slightly, add in the ground beef, and cook until browned. Use a wooden spoon to break up the meat; we want nicely browned bits for extra flavor. -
Add the Garlic:
Toss in the minced garlic and cook for another minute until fragrant. Be cautious not to burn it! A little trick: if your garlic starts to brown too quickly, lower the heat a bit. -
Season and Create the Sauce:
Pour the beef broth into the skillet, scraping any browned bits off the bottom (these bits are packed with flavor!). Mix in the Worcestershire sauce and then the heavy cream. Let it simmer on low heat for about 5-7 minutes, allowing the flavors to meld together. Keep stirring regularly—it should be silky smooth and luxurious! -
Combine the Pasta and Sauce:
Gently toss the cooked pasta into the sauce. If it seems too thick, add a splash of that reserved pasta water. This will help everything stick together and create that creamy consistency we love. -
Final Seasoning:
Add the Italian seasoning, and season with salt and pepper to taste. Give everything one last good stir, and voila!
Serving Suggestions
Plate your creamy high protein beef pasta in hearty bowls. I love to add a little sprinkle of freshly chopped parsley on top for a pop of color. Serving with crusty garlic bread or a vibrant side salad elevates this dish to a whole new level. And don’t forget a glass of red wine—it just pairs beautifully!
Recipe Variations
- Spicy Kick: Add red pepper flakes while cooking the beef for a spicy twist.
- Veggie Packed: Incorporate diced bell peppers, mushrooms, or spinach into the mix for extra nutrition.
- Cheesy Goodness: Stir in shredded mozzarella or parmesan cheese right before serving for a cheesy variation!
- One-Pan Wonder: Replace beef with shredded chicken or cooked chickpeas for a lighter vegetarian version.
- Herb Infusion: Add fresh herbs like basil or thyme in place of Italian seasoning for a fresh herbal note.
Chef’s Notes
This creamy beef pasta is pretty forgiving, and I’ve had my fair share of kitchen adventures (or misadventures!) while perfecting it. Early on, I tried making it with too much cream—whoops! It was delicious, but… a bit too rich for my taste. After some experimenting, I learned to balance the creaminess with the meat and broth for the perfect blend. Every time I make this dish, I can’t help but smile, reminiscing about my grandma in that flour-dusted kitchen, creating something special out of nothing.
FAQs and Troubleshooting
What if my sauce is too thick?
No problem! Just add a bit of the reserved pasta water, a splash at a time, until you reach the desired consistency.
Can I use a different type of pasta?
Absolutely! Feel free to experiment with any pasta shape you love—penne, fusilli, or even spaghetti bring different fun textures to this dish.
What if there are leftovers?
Lucky you! Store them in an airtight container in the fridge for up to 3 days. This dish reheats beautifully in the microwave or on the stove with a splash of broth or cream to keep it saucy!
Can I make this dish ahead of time?
Of course! You can prepare the sauce in advance and simply reheat it when ready to serve. Cook the pasta fresh for the best texture.
Nutritional Info
While the specific nutritional content can vary based on ingredients and serving sizes, this creamy high protein beef pasta is typically high in protein thanks to the beef and dairy, while being lower in fat when you choose lean meats and whole grains. Each serving offers a comforting balance of proteins, carbs, and healthy fats.
And there you have it! A delightful, creamy high protein beef pasta that’s sure to brighten your kitchen and warm your heart. I’m so excited for you to make this at home! Let me know about your pasta adventures, and remember—cooking is as much about the journey as it is about the destination. Happy cooking!
Print
Creamy High Protein Beef Pasta
- Total Time: 30 minutes
- Yield: 4 servings 1x
- Diet: None
Description
A comforting and delicious creamy beef pasta packed with protein, perfect for a chilly evening.
Ingredients
- 8 ounces whole wheat pasta
- 1 pound ground beef
- 1 medium onion, diced
- 2 cloves garlic, minced
- 1 cup beef broth
- 1 cup heavy cream
- 1 tablespoon Worcestershire sauce
- 1 teaspoon Italian seasoning
- Salt and pepper to taste
- Fresh parsley, chopped, for garnish
Instructions
- Cook the pasta: Start by boiling a large pot of salted water. Once it’s bubbling, add in your whole wheat pasta. Cook according to package instructions until al dente—generally about 8-10 minutes. Quick tip: reserve about ½ cup of pasta water before draining!
- Brown the beef: In a large skillet over medium heat, add a splash of olive oil and the diced onion. Sauté until they become translucent (about 5 minutes). Then, increase the heat slightly, add in the ground beef, and cook until browned.
- Add the garlic: Toss in the minced garlic and cook for another minute until fragrant. Be cautious not to burn it!
- Season and create the sauce: Pour the beef broth into the skillet, scraping any browned bits off the bottom. Mix in the Worcestershire sauce and then the heavy cream. Let it simmer on low heat for about 5-7 minutes.
- Combine the pasta and sauce: Gently toss the cooked pasta into the sauce. If it seems too thick, add a splash of that reserved pasta water.
- Final seasoning: Add the Italian seasoning, and season with salt and pepper to taste. Give everything one last good stir, and voila!
Notes
Serve with crusty garlic bread or a vibrant side salad and a glass of red wine.
- Prep Time: 10 minutes
- Cook Time: 20 minutes
- Category: Main Course
- Method: Stovetop
- Cuisine: Italian
Nutrition
- Serving Size: 1 serving
- Calories: 550
- Sugar: 3g
- Sodium: 450mg
- Fat: 28g
- Saturated Fat: 14g
- Unsaturated Fat: 9g
- Trans Fat: 0g
- Carbohydrates: 45g
- Fiber: 5g
- Protein: 30g
- Cholesterol: 75mg
Keywords: creamy pasta, beef pasta, high protein pasta, comfort food, easy recipe
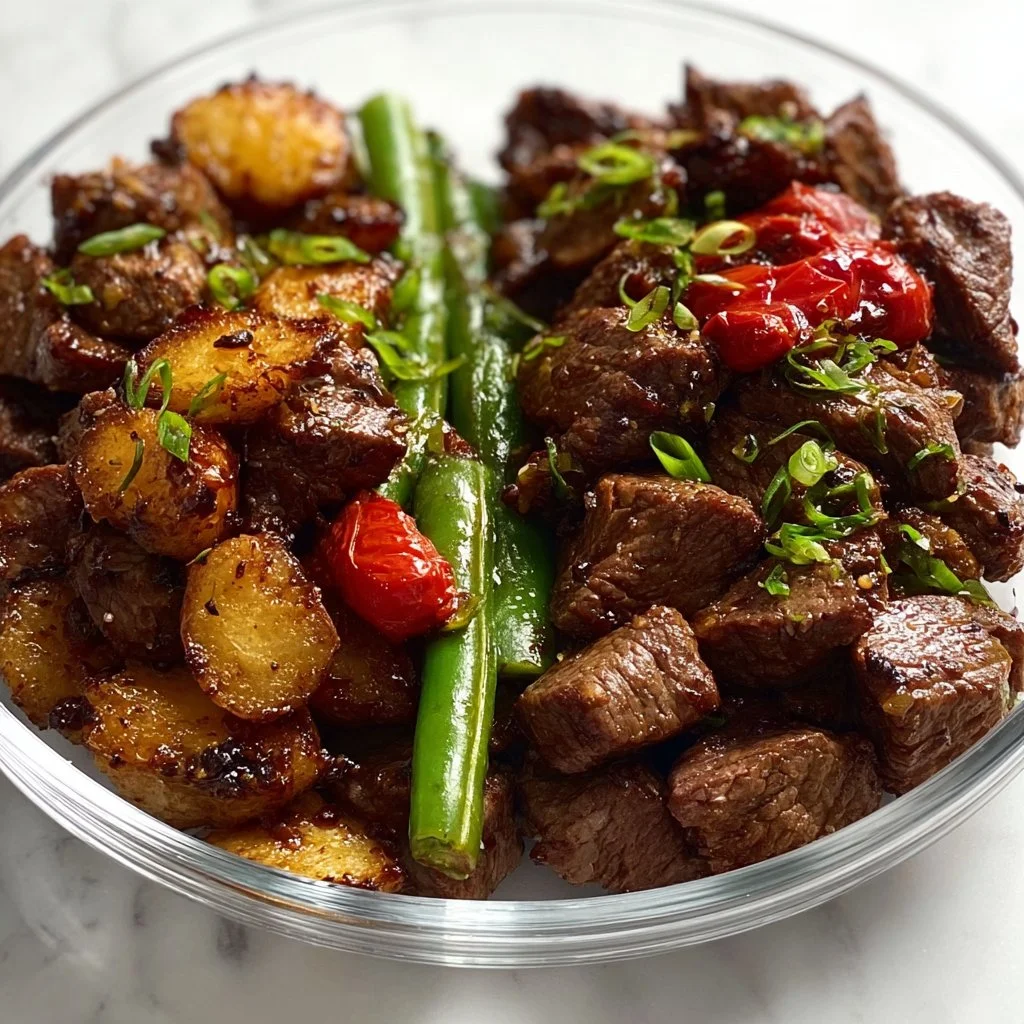
Garlic Balsamic Steak Bites
Garlic Balsamic Steak Bites: A Savory Sensation
Hey there, fellow food lovers! Welcome back to my cozy corner of the kitchen. Today, I am super excited to share a recipe that has not only stolen the hearts of my friends and family but also created unforgettable memories around the dining table: Garlic Balsamic Steak Bites.
Imagine this: it’s a Friday evening, and you’re gathering with your best pals for a casual get-together. You’ve got your favorite playlist thrumming in the background, and the aroma of sizzling steak wafts through the air, mingling with a drizzle of tangy balsamic vinegar and garlic. As you pop these juicy bites of steak into your mouth, a delightful explosion of flavors greets you, and laughs erupt around the table. Yep, that’s the magic of these Garlic Balsamic Steak Bites in action!
This recipe is the perfect blend of savory goodness and comforting nostalgia. It’s become a staple not just for gatherings but also for cozy dinners at home—because sometimes, it’s nice to treat yourself to something special without spending all day in the kitchen. Whether you’re a seasoned home cook or just beginning your culinary adventure, you’ll find that these little gems are simple to whip up and impossible to resist!
So grab your apron (prepare for some delightful messiness!) and let’s dive into making these irresistible bites. Trust me, your taste buds are going to thank you, and your friends will certainly be coming back for seconds!
Personal Story
Ah, the memories! I still remember the first time I shared these steak bites with my best friends during a game night. We had spent hours strategizing over board games (which ended up in friendly arguments), but I couldn’t wait to introduce them to my latest cooking experiment—Garlic Balsamic Steak Bites!
As I pulled them out of the oven, my friends’ eyes lit up. The glorious scent had everyone buzzing. We gathered around the table, and I served the steak bites skewered with toothpicks, allowing us to dive right in. The laughter, the teasing, and the competitive spirit of the game melted away the stress of the week. Every bite elicited moans of delight, and I knew I had struck gold!
Since that night, these steak bites have been a staple at every gathering. They’ve sparked countless conversations, laughter, and memories that I hold dear. So whether it’s a casual game night or an elegant dinner party, these bites have a special place in my kitchen and my heart.
Ingredients
Here’s what you’ll need to create your Garlic Balsamic Steak Bites:
-
Steak – About 1 pound of sirloin or flank steak works wonders here. These cuts are tender and flavorful. If you prefer a leaner option, you can substitute with tenderloin.
-
Garlic – 3-4 cloves of fresh garlic make this dish sing! If you’re in a pinch, garlic powder can work (about 1 teaspoon for a milder flavor), but fresh is always best for that punch.
-
Balsamic Vinegar – ½ cup – This tangy, rich vinegar brings depth to the dish. If you want something sweeter, try balsamic glaze as a substitute, but note that you may want to reduce the cooking time slightly.
-
Olive Oil – 2 tablespoons not only helps to marinate but also adds richness. You could swap with avocado oil for a different flavor profile.
-
Soy Sauce – 2 tablespoons delivers a savory umami kick! If you need a gluten-free option, try tamari instead.
-
Honey – 1 tablespoon for a hint of sweetness to balance the acidity in the vinegar. Maple syrup can be a great vegan alternative.
-
Crushed Red Pepper Flakes – Optional, but they give a lovely touch of heat! If you’re not a fan of spice, feel free to skip it.
-
Salt and Pepper – Essential for seasoning! Always taste as you go for the best results.
Not only are these ingredients easy to find, but you can also mix and match some of them based on what you have. Cooking should be fun and adjustable to your taste!
Step-by-Step Instructions
Ready to create some culinary magic? Here’s how you can whip up these Garlic Balsamic Steak Bites in just a few easy steps:
-
Marinate the Steak: Begin by cutting the steak into bite-sized cubes (about 1-inch squares). In a bowl, mix the minced garlic, balsamic vinegar, olive oil, soy sauce, honey, and crushed red pepper flakes. Toss in the steak cubes and mix until they’re evenly coated. Let them marinate for at least 30 minutes, though if you can do it for a few hours or overnight in the fridge, you’ll really maximize those flavors!
-
Preheat Your Grill or Skillet: If you’re using a grill, preheat it to medium-high heat. If you’re cooking on a skillet, heat about a tablespoon of olive oil over medium-high heat until shimmering.
-
Skewer the Steak: After marination, it’s time to assemble! If you’re using wooden skewers, remember to soak them in water for about 30 minutes to prevent burning. Thread the marinated steak cubes onto the skewers, leaving a bit of space between each piece to ensure even cooking.
-
Cook the Steak: Place the skewers on the grill, or the steak pieces in the skillet. Grill or sear for about 2-3 minutes on each side for a perfect medium-rare finish, adjusting the time if you prefer it more well-done. The key is to keep an eye on them, as overcooking can lead to tough bites!
-
Rest the Steak: Once they’re cooked to your liking, transfer the skewers to a plate and let them rest for about 5 minutes. Resting allows the juices to redistribute, resulting in juicy bites.
-
Serve and Enjoy: You can drizzle with extra balsamic glaze or sprinkle with fresh herbs like parsley for a pop of color before serving. Quick tip: always serve them warm; the flavors are at their best right off the grill or skillet!
And voilà! You now have delicious Garlic Balsamic Steak Bites ready to enjoy. Serve them up on a beautiful platter and watch your guests swoon!
Serving Suggestions
When it comes to serving your Garlic Balsamic Steak Bites, those beautifully skewered morsels can be presented in a variety of ways! I love to arrange them on a rustic wooden board with small bowls of dipping sauces, like a chimichurri or a creamy garlic mayo. They make a stunning and inviting centerpiece for a gathering.
Alternately, you can serve them atop a fresh arugula salad, tossing in cherry tomatoes and drizzling with a bit of balsamic glaze for an extra zing. Trust me, this will create a vibrant and appealing dish that’s sure to impress!
Recipe Variations
Feeling adventurous? Here are some fun twists to customize your Garlic Balsamic Steak Bites:
-
Add Veggies: Toss in some bell peppers or onions with the steak when marinating, then skewer them together for a more colorful and hearty bite.
-
Spiced Up: Add some Worcestershire sauce for an even bolder flavor. Or experiment with different spices like smoked paprika or Cajun seasoning!
-
Herbed Delight: Before serving, sprinkle fresh herbs like rosemary or thyme for an aromatic touch.
-
Sweet Twist: Swap the honey for brown sugar to give the marinade a deeper caramel flavor.
-
Make It a Skewers Platter: Turn these steak bites into a mixed skewer platter by alternating pieces of steak with chunks of grilled shrimp or chicken for a surf-and-turf experience!
Chef’s Notes
Ah, the joy of cooking! This recipe has evolved from a simple idea in my kitchen to a full-fledged fan favorite. Initially, I whipped these up for a cozy family dinner, and over the years, they have become a staple for BBQs and celebrations.
Funny enough, I once attempted to make these during a dinner party, and I accidentally grabbed red wine vinegar instead of balsamic—oh boy! The flavor was totally off! But instead of despair, we rolled with it, creating a whole new dish, and ended up laughing till our bellies hurt. Lessons learned in the kitchen are often the most memorable!
In the years since, I’ve refined the recipe to get just the right balance of sweet and tangy, making sure they are always a crowd-pleaser. So trust me when I say, you can’t go wrong with these bites!
FAQs and Troubleshooting
Q: What if my steak bites turn out tough?
A: The key here is to not overcook the meat! Always watch your cooking times, and remember that steak can continue cooking even after being removed from heat due to residual heat transfer.
Q: Can I use a different type of meat?
A: Absolutely! Chicken, pork, or even firm tofu for a vegetarian option can work beautifully with this marinade. Just adjust your cooking time accordingly based on the protein you choose!
Q: Can I prepare these in advance?
A: Definitely! You can marinate the steak ahead of time and then grill them just before serving. However, cooking them fresh will always ensure maximum juiciness.
Q: How do I store leftovers?
A: If you somehow have leftovers (which is rare!), store them in an airtight container in the refrigerator for up to 3 days. Reheat gently on the stove or in the oven to maintain tenderness.
Nutritional Info
(per serving, assuming 8 servings total)
- Calories: 150
- Protein: 20g
- Carbohydrates: 5g
- Fat: 7g
- Fiber: 0g
In the end, these Garlic Balsamic Steak Bites are more than just a delicious dish; they are a vessel of memories, laughter, and all the good vibes! Eating should be a joyful experience, so I hope these bites bring you as much happiness as they have for me. Now, gather your loved ones, pour yourself a drink, and enjoy the delicious journey of cooking together!
Happy cooking! 🌟
Print
Garlic Balsamic Steak Bites
- Total Time: 25 minutes
- Yield: 4 servings 1x
- Diet: Gluten-Free
Description
A savory blend of tender steak marinated in garlic and balsamic vinegar, grilled to perfection for an unforgettable flavor experience.
Ingredients
- 1 pound sirloin or flank steak, cut into bite-sized cubes
- 3–4 cloves garlic, minced
- ½ cup balsamic vinegar
- 2 tablespoons olive oil
- 2 tablespoons soy sauce
- 1 tablespoon honey
- ½ teaspoon crushed red pepper flakes (optional)
- Salt and pepper, to taste
Instructions
- Marinate the steak: In a bowl, mix garlic, balsamic vinegar, olive oil, soy sauce, honey, and red pepper flakes. Toss steak cubes in marinade and let sit for at least 30 minutes.
- Preheat your grill or skillet to medium-high heat.
- Skewer the steak cubes onto skewers, making sure to leave space between pieces.
- Cook the skewers on the grill or in the skillet for 2-3 minutes on each side for medium-rare.
- Rest the steak for about 5 minutes before serving.
- Serve warm, potentially drizzled with balsamic glaze or sprinkled with fresh herbs.
Notes
For best flavor, marinate the steak overnight. Serve alongside dipping sauces or fresh salad.
- Prep Time: 15 minutes
- Cook Time: 10 minutes
- Category: Appetizer
- Method: Grilling
- Cuisine: American
Nutrition
- Serving Size: 1 serving
- Calories: 150
- Sugar: 7g
- Sodium: 600mg
- Fat: 7g
- Saturated Fat: 2g
- Unsaturated Fat: 3g
- Trans Fat: 0g
- Carbohydrates: 5g
- Fiber: 0g
- Protein: 20g
- Cholesterol: 70mg
Keywords: steak bites, appetizer, grilling, balsamic vinegar, garlic
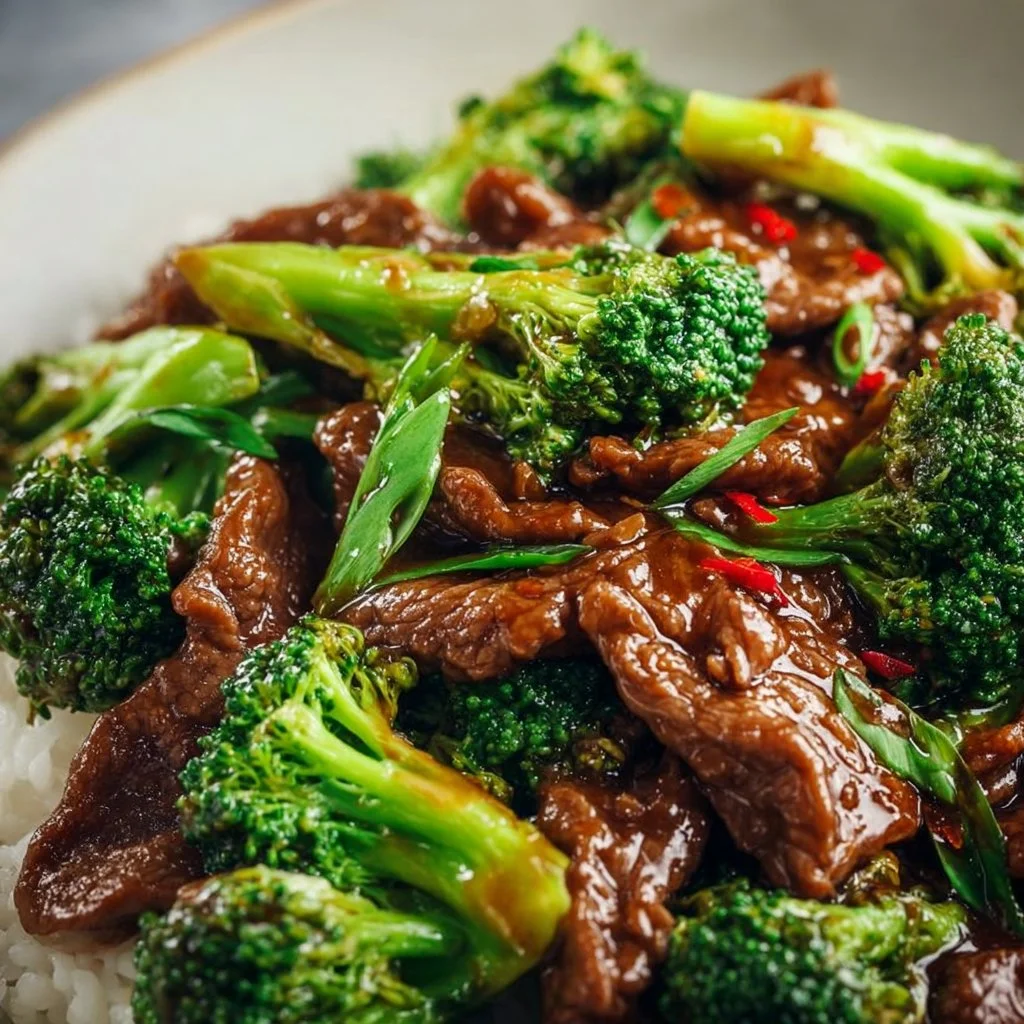
Chinese Beef and Broccoli
Ultimate Chinese Beef and Broccoli: A Cozy Kitchen Classic
Hey there, my fellow flavor lovers! Welcome back to my kitchen, where every pot and pan has a story, and every spatula is ready to whip up something amazing. Today, we’re diving into a dish that holds a special place in my heart: Chinese Beef and Broccoli. If you’ve ever experienced the fragrant aroma of beef marinated in a savory sauce, mingling with crisp broccoli and hints of garlic and ginger, then you know just how comforting and delicious this dish can be!
As I write this, I can’t help but remember the first time I had homemade beef and broccoli. I was about eight years old, and my dad decided to tap into his love for cooking by trying his hand at Asian flavors. The moment that sizzling pan hit the table, my family gathered around, and all chatter came to a hush. We were entranced. With each bite, I was transported to a little corner of my imagination, where chopsticks danced in hand, and laughter echoed through the air. That dinner sparked my lifelong love for simple, hearty meals that bring people together.
In today’s blog post, I’ll not only guide you through the steps to create this culinary experience at home, but I’ll sprinkle in my personal tips, tricks, and stories to make it as enjoyable as possible. Trust me; you don’t need years of experience in the kitchen to create a dish that dazzles! So grab your apron, and let’s have some fun as we explore this classic recipe together!
Personal Story
Growing up, our kitchen was always filled with laughter, secret ingredients, and the mouthwatering aroma of various cuisines. I’ll never forget one memorable family night when we attempted to recreate the local take-out spot’s “best-seller” – a Beef and Broccoli dish that was packed with flavor and charm. My dad, inspired by our favorite restaurant, decided to make it from scratch. I remember bouncing on my toes with excitement as he shared secrets about how to make the beef tender and the broccoli vibrantly green.
With the kitchen buzzing with energy, I held the soy sauce bottle like it was a prized possession and miscalculated the amount a little too liberally. As the rich dark liquid splashed everywhere, we erupted in laughter! Only a sprinkle of that savory seasoning ended up in the bowl, but it made for one memorable evening that taught me a valuable lesson: it’s not just about the food you’re making; it’s about the memories you create along the way.
Ever since then, Beef and Broccoli has become not just a dish but a tradition for us. It’s a recipe that continues to evolve in my kitchen, bringing my loved ones to the table for another kind of adventure.
Ingredients
Let’s gather our dream team of ingredients! Here’s what you’ll need for this delectable dish:
-
Flank Steak (1 lb)
- A lean cut that’s perfect for stir-frying. Look for vibrant red meat with minimal fat. If unavailable, sirloin or skirt steak works well too!
-
Broccoli (2 cups)
- Fresh or frozen, broccoli is your colorful companion here. If you’re using frozen, just let it thaw and drain excess water beforehand.
-
Soy Sauce (¼ cup)
- This salty star ingredient brings umami to your dish. Low-sodium soy sauce can be used if you’re watching your salt intake.
-
Oyster Sauce (2 tablespoons)
- A sweet and savory blend that enhances flavor. If you’re feeling adventurous, try using hoisin sauce for a different sweetness.
-
Garlic (3 cloves, minced)
- No dish is complete without garlic! Fresh minced garlic packs a punch, but garlic powder can serve as an alternative.
-
Ginger (1 tablespoon, minced)
- This zingy root adds warmth and depth. Fresh ginger is preferred for its pungency; dried ginger is a great backup.
-
Cornstarch (1 tablespoon)
- Our secret weapon for silky sauce sauce! Feel free to swap it with arrowroot powder if you’re looking for a gluten-free option.
-
Sesame Oil (1 tablespoon)
- A little drizzle brings a delightful nuttiness to the dish. Olive oil can be used in a pinch, but it won’t provide that signature flavor.
-
Water (½ cup)
- To create that luscious sauce finish.
-
Salt and Pepper to taste
- Always essential for enhancing flavor!
To make sure you have a tasty balance, keep these tips in your back pocket:
- Meat Tenderizer Tip: Marinating flank steak in a little soy sauce for 15-30 minutes can help it become ultra-tender!
- Substitution Insights: You can easily swap out veggies like bell peppers or snap peas if you want to add variety.
- Freshness Matters: Keep your broccoli vibrant and crunchy by opting for the freshest produce available.
Step-by-Step Instructions
Now, let’s roll up our sleeves and get cooking! Follow these simple steps to achieve a scrumptious Beef and Broccoli dish that will have you singing praises.
Step 1: Prepare the Marinade
- In a bowl, whisk together soy sauce, oyster sauce, minced garlic, minced ginger, and cornstarch until smooth. This is your flavor powerhouse! Let your butcher know you’re making a stir-fry, and the beef will be cut properly for you.
Step 2: Marinate the Beef
- Slice your flank steak thinly against the grain, aiming for about 1/4 inch thick. Toss the sliced beef into the marinade, ensuring every piece is well coated. Allow it to marinate for at least 15 minutes; the longer, the better!
Tip: You can prep this ahead of time and let it marinate in the fridge for up to an hour to develop flavor.
Step 3: Prepare the Broccoli
- While your beef is marinating, bring a pot of water to boil. Blanch the broccoli florets for about 2-3 minutes until they turn vibrantly green but remain crisp. Drain and plunge them into ice water to stop the cooking process. This step keeps your broccoli looking fresh!
Step 4: Heat Things Up
- In a large skillet or wok, heat sesame oil over medium-high heat. Once it’s shimmering, toss in the marinated beef in a single layer. Allow it to sear without stirring for about 1-2 minutes to develop a browning effect, then toss everything together until the beef is just cooked through (3–4 minutes total).
Tip: Work in batches for a perfect sear on the beef; too much meat in the pan can cause steaming instead of frying!
Step 5: Cheers to Broccoli
- Add the blanched broccoli to the skillet with the beef. Pour in the water (and a little more soy sauce if desired), and toss everything together, letting it simmer for a couple of minutes. This will help the flavors integrate while keeping everything beautifully coated.
Step 6: Plate it Up
- Once everything is well coated and heated through, taste and adjust seasoning with salt and pepper as needed. Serve it hot over steamed rice or with your favorite noodles for that ultimate comfort dish.
Chef’s Hack: Use a spatula to scoop the beef and broccoli right off the skillet and onto a bed of rice for that Instagram-worthy presentation!
Serving Suggestions
Presentation is key, folks! Serve this vibrant Beef and Broccoli in a wide, colorful bowl over a fluffy mound of jasmine or brown rice. Add a sprinkle of sesame seeds on top for that crunchy finish, and toss in a few slices of green onion for extra flair! Highlight the freshness with a wedge of lime на the side to let your guests spritz some citrus goodness on top.
Recipe Variations
Now, let’s put a creative spin on our classic:
-
Spicy Beef and Broccoli: Add a teaspoon of red pepper flakes to the marinade for a fiery kick or drizzle sesame oil over with the chili oil for extra flavor.
-
Beefless Broccoli: Replace beef with your favorite plant-based protein or tofu for a delightful vegan option!
-
Add More Veggies: Toss in bell peppers, snap peas, or mushrooms for extra color, texture, and nutrition.
-
Sweet and Sour Variation: Swap out oyster sauce for a sweeter sauce like teriyaki if sweet and savory is your style.
-
Cashew Love: Stir in a handful of toasted cashews for that crunchy texture and nutty flavor.
Chef’s Notes
This Beef and Broccoli dish holds a special place in my heart, not only for its amazing taste but also for all the fun, embarrassing kitchen blunders from my childhood. I’ve learned that even mishaps can lead to delicious creations! Over the years, I’ve embraced using whatever veggies I have on hand, allowing this recipe to evolve with the seasons and what’s fresh at the local farmer’s market.
Who knew cooking could create so many memories? Whether you’re gathering the family for dinner or inviting friends over to impress them, I hope this beef and broccoli dish becomes a cherished staple in your home.
FAQs and Troubleshooting
1. Why is my beef not tender?
- If your beef has become tough, it’s likely due to overcooking. Keep an eye on it and aim for medium-rare—the beef will continue to cook off the heat!
2. My broccoli turned mushy; what did I do wrong?
- Overcooking can cause mushiness; ensure you blanch only for a few minutes and scoop them into ice water immediately!
3. Can I make this dish in advance?
- While it’s best to enjoy Beef and Broccoli fresh, you can prep the ingredients ahead of time and cook them right before serving.
4. How can I store leftovers?
- Prepare for the ultimate meal prep by storing leftovers in an airtight container in the fridge for up to 3 days. Reheat gently on the stovetop or in the microwave, stirring to avoid overheating.
Nutritional Info (Optional)
This section is optional, but if you’re interested, here’s a rough estimate for a one-cup serving:
- Calories: 350
- Protein: 32g
- Carbohydrates: 24g
- Fat: 15g
- Fiber: 3g
And there you have it! You now have all the tools to create a delicious, memorable Beef and Broccoli dish in your very own kitchen. Thank you for joining me today and allowing me to share this delightful experience with you. Happy cooking, and may your kitchen be filled with laughter and love!
Print
Ultimate Chinese Beef and Broccoli
- Total Time: 30 minutes
- Yield: 4 servings 1x
- Diet: None
Description
A comforting and flavorful dish of marinated beef and crisp broccoli cooked in a savory sauce.
Ingredients
- 1 lb Flank Steak
- 2 cups Broccoli
- ¼ cup Soy Sauce
- 2 tablespoons Oyster Sauce
- 3 cloves Garlic, minced
- 1 tablespoon Ginger, minced
- 1 tablespoon Cornstarch
- 1 tablespoon Sesame Oil
- ½ cup Water
- Salt and Pepper to taste
Instructions
- Prepare the Marinade: In a bowl, whisk together soy sauce, oyster sauce, minced garlic, minced ginger, and cornstarch until smooth.
- Marinate the Beef: Slice the flank steak thinly against the grain. Toss the sliced beef into the marinade, ensuring every piece is well coated. Allow it to marinate for at least 15 minutes.
- Prepare the Broccoli: Blanch the broccoli florets in boiling water for about 2-3 minutes until vibrantly green. Drain and plunge them into ice water.
- Heat Things Up: In a large skillet or wok, heat sesame oil over medium-high heat. Add the marinated beef in a single layer and sear without stirring for about 1-2 minutes.
- Add the blanched broccoli to the skillet with the beef. Pour in the water and toss everything together.
- Plate it Up: Taste and adjust seasoning with salt and pepper as needed. Serve it hot over rice or noodles.
Notes
For extra flavor, marinate the beef for up to an hour. Use fresh veggies for the best texture.
- Prep Time: 15 minutes
- Cook Time: 15 minutes
- Category: Main Course
- Method: Stir-frying
- Cuisine: Chinese
Nutrition
- Serving Size: 1 serving
- Calories: 350
- Sugar: 5g
- Sodium: 800mg
- Fat: 15g
- Saturated Fat: 3g
- Unsaturated Fat: 8g
- Trans Fat: 0g
- Carbohydrates: 24g
- Fiber: 3g
- Protein: 32g
- Cholesterol: 60mg
Keywords: beef, broccoli, Chinese, stir-fry, comfort food, easy recipe
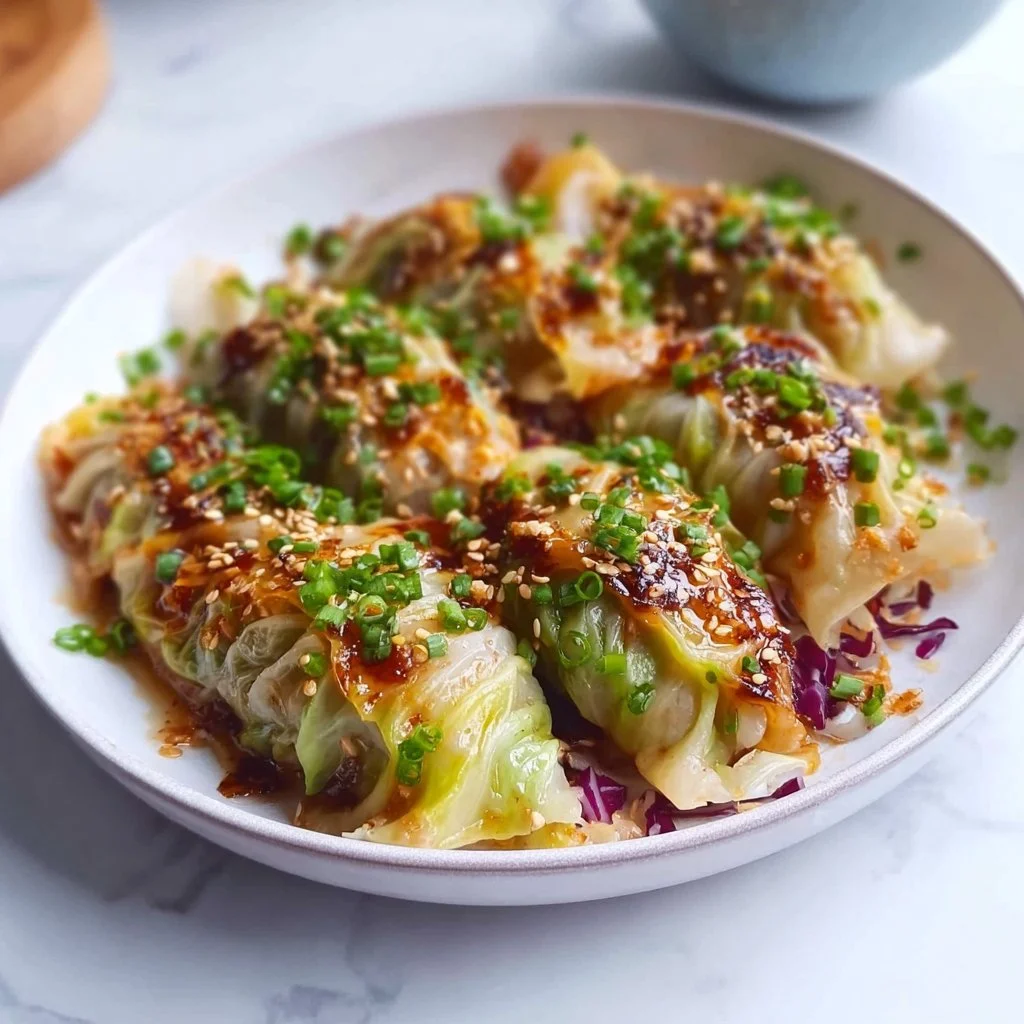
Cabbage Dumplings
Embrace Comfort with Homemade Cabbage Dumplings: A Cozy Recipe to Delight
Welcome to my kitchen, dear foodies! I’m so glad to have you here, and today, we’re diving into a recipe that’s not only heartwarming but also oh-so-delicious: Cabbage Dumplings. These delightful little pockets of joy hold a special place in my heart and are sure to become favorites in your home as well.
Cabbage dumplings have been a part of my culinary journey for as long as I can remember. The first time I tasted them, I was at my grandmother’s kitchen, watching her roll out dough while the fragrant steam wafted from the pot. The kitchen was a symphony of clattering plates and laughter, a home filled with warmth and love. Every bite of those dumplings wrapped around tender cabbage and seasoned meat sent me on a trip down memory lane. They weren’t just food; they were stories, laughter, and memories between family and friends.
As we embark on this cooking adventure together, prepare to roll up those sleeves and embrace the comforting aromas and flavors that come from creating something special. Whether you’re an experienced home chef or someone still learning the ropes, I promise this recipe is beginner-friendly and absolutely rewarding.
So, let’s get those aprons on, and dive right into making these delicious cabbage dumplings!
Personal Story: The Dumpling Love Affair
One of my fondest memories of cooking with my family revolves around a rather chaotic afternoon spent in my grandmother’s kitchen. With pots boiling on the stove and flour dusting the countertop thicker than a winter blanket, we were knee-deep in dumpling-making. My brothers and I would take turns assisting her, trying to form perfectly shaped dumplings while she always insisted that a bit of imperfection added character.
After hours of laughter, a few flour fights, and a couple of burnt edges (sorry, Grandma!), we sat at the dining table, eagerly devouring the delicious dumplings stuffed with tender cabbage, juicy ground meat, and an array of spices. That meal wasn’t just satisfying; it was a celebration! As we reminisced about the day’s escapades, I realized that these delicious treats bridged generations and filled our hearts with love.
That day imprinted the importance of food as more than just sustenance; it became an essential part of who we are as a family. Now, whenever I make cabbage dumplings, that warm nostalgia envelops me, reminding me to cherish both the process and the results. And I hope that when you try your hand at making them, you’ll create your own memories infused with warmth and affection.
Ingredients: What You’ll Need
Here’s your shopping list for these delightful cabbage dumplings! I’ve included tips and ideas for substitutions:
-
Cabbage (1 medium head, green or savoy)
Cabbage is the star of our dish! For a sweeter twist, try using Napa cabbage. Don’t worry if you have leftovers; use them in slaws, salads, or stir-fries! -
Ground Meat (1 pound – pork, beef, or chicken)
Traditionally, a mix of pork and beef works wonders, but turkey or even a meat-free substitute (like lentils or mushrooms for a veggie version) can be fantastic! -
Onion (1 medium, diced)
A vital flavor base! If you’re short on time, use onion powder in a pinch, but fresh adds a depth that can’t be beaten. -
Garlic (2 cloves, minced)
A must for flavor! If you’re feeling adventurous, try roasted garlic for a mellower taste. -
Ginger (1 tablespoon, grated)
This adds a wonderful zing; if you don’t have fresh, ground ginger works as well (just use a little less). -
Soy Sauce (3 tablespoons)
For that rich umami flavor. Tamari or coconut aminos can be great gluten-free alternatives! -
Sesame Oil (1 tablespoon)
Adds a nutty richness; if unavailable, olive oil will do in a pinch! -
Salt and Pepper (to taste)
Essential flavor enhancers! Feel free to add herbs or spices that resonate with your palate. -
Wonton or Dumpling Wrappers (20-30)
You can buy these pre-made for convenience. However, if you’re feeling adventurous, I’ll share a simple dough recipe at the end for homemade wrappers! -
Water (for sealing)
Nothing fancy here! Just plain water helps seal those dumplings up tight.
Step-by-Step Instructions: Get Cookin’!
It’s time to unleash your inner chef! Follow these steps to prepare your cabbage dumplings:
Step 1: Prep the Cabbage
- Remove the Cabbage Core: Start by chopping off the bottom of the cabbage head to remove the core—a sturdy foundation for boiling.
- Boil the Leaves: Bring a large pot of salted water to a boil. Carefully peel off six or seven outer leaves. Blanch them for about 2–3 minutes until they’re tender but still have some crunch. Remember, you want pliable leaves that can be wrapped without tearing!
- Cool and Pat Dry: Once boiled, place the leaves in a bowl of ice water to stop cooking. After a minute, drain and gently pat them dry with a clean towel.
(Chef Tip: If you want to streamline the process, you can chop the cabbage and sauté it instead!)
Step 2: Make the Filling
- Sauté the Base: In a large skillet over medium heat, add a splash of oil, then sauté the diced onion, minced garlic, and grated ginger until fragrant and translucent—about 5 minutes. This draws out their flavors, making your filling vibrant!
- Add the Meat: Stir in your ground meat, cooking until it’s browned and no longer pink. Break it up with your spatula to ensure an even cook.
- Season It Up: Mix in the soy sauce and sesame oil. Add salt and pepper according to your taste. If you’re feeling bold, sprinkle in some red pepper flakes for a kick!
(Pro Chef Insight: Taste your filling! This is your chance to adjust flavors before wrapping them up!)
- Fold in the Cabbage: Finally, finely chop some of the boiled cabbage leaves and fold them into the meat mixture. Let it cool for a few minutes.
Step 3: Assemble the Dumplings
- Prepare Your Workspace: Lay out your wrappers on a clean, flat surface. Grab a small bowl of water to help seal them.
- Fill the Dumpling: Place about a tablespoon of filling in the center of each wrapper. Gently dab the edges of the wrapper with water to help them stick.
- Seal It Up: Fold the wrapper over the filling to create a half-moon shape. Pinch the edges tightly, or if your dumpling is round, gather the sides and twist at the top. No worries if they’re not perfect—just like people, a little character adds charm!
(Insider Tip: If you’re having trouble sealing, use more water!)
Step 4: Cook the Dumplings
- Boilin’ Time: Bring a large pot of salted water to a steady boil. Carefully drop in the dumplings, making sure not to overcrowd the pot. Cook for about 5-7 minutes, or until they float—this means they’re ready!
- Pan-Fry or Steam: For an extra crispy finish, pan-fry them for 3-4 minutes on medium heat in a non-stick skillet with a little oil after boiling. Alternatively, you can steam them for a softer texture.
(Chef Hack: Feel like doubling the batch? Freeze those uncooked dumplings! Just pop them into a freezer bag, and they’re ready to cook straight from the freezer later!)
Serving Suggestions: How to Plate the Dumplings
Once you’ve cooked those beautiful dumplings, it’s time to serve them up! Arrange them neatly on a platter or individual bowls, and drizzle with a bit of soy sauce or sesame sauce for an extra flavor punch. Garnish with thinly sliced green onions, sesame seeds, or a sprinkle of fresh cilantro. You can also pair them with a crisp salad or a warm broth for the ultimate cozy meal.
Recipe Variations: Spice It Up!
Want to mix things up? Here are some fun variations to consider:
- Spicy Korean-Inspired: Add gochujang (Korean chili paste) to your filling for a spicy and tangy twist!
- Asian Sriracha Delight: Drizzle sriracha or a spicy chili oil as a garnish for an extra kick.
- Vegetarian Version: Replace meat with a mix of finely chopped mushrooms, tofu, and diced carrots for a satisfying vegetarian option.
- Cheesy Goodness: Mix in some shredded cheese with your filling for a creamy twist—think mozzarella or feta!
- Herb-Infused Delight: Add your favorite herbs, like dill or cilantro, to the filling for a fresh flavor profile.
Chef’s Notes: The Joy of Dumplings
Every time I make dumplings, I’m reminded of how food connects us. My recipe has evolved over the years; I’ve added more vegetables or tried different meats, but the core essence remains the same: love and laughter. Making these dumplings is an opportunity to invite family and friends to gather in the kitchen, sharing tales and creating cherished memories. And as we all know, the best spice in any dish is the joy we bring into the kitchen.
Not to forget, if you’ve ever had that moment of panic when you realize you’ve overstuffed a dumpling, you’re not alone! Just embrace the quirky shapes, because “perfect” is overrated!
FAQs and Troubleshooting: Common Questions
1. Why do my dumplings fall apart while boiling?
This can happen if they aren’t sealed well or if there’s too much filling. Make sure to pinch them tightly and don’t overstuff!
2. Can I use frozen cabbage leaves?
Absolutely! Frozen cabbage works well; just thaw and gently pat dry before use.
3. How do I store leftover dumplings?
Keep any leftover cooked dumplings in an airtight container in the refrigerator for up to 3 days. Reheat them in a skillet or steamer for the best results.
4. Can I make the filling ahead of time?
Yes! The filling can be made a day in advance. Just store it in the fridge until you’re ready to assemble those dumplings.
Nutritional Info (if applicable)
This recipe provides an excellent source of protein from the meat, vitamins from the cabbage, and wholesome carbohydrates from the wrappers. Each dumpling has approximately:
- Calories: 70
- Protein: 5g
- Carbohydrates: 8g
- Fat: 2g
And there you have it, my lovely foodie friends! Your very own recipe for cabbage dumplings that brings warmth, memories, and lots of love to the table. I hope you create your memories with every bite, just like I did in my grandmother’s kitchen. Let’s make cooking a celebration—one dumpling at a time! Happy cooking! 🍽️❤️
Print
Homemade Cabbage Dumplings
- Total Time: 45 minutes
- Yield: 4 servings 1x
- Diet: Meat-Based
Description
Delightful cabbage dumplings enveloped in tender wrappers, filled with seasoned meat and fresh cabbage. A recipe filled with warmth and love.
Ingredients
- 1 medium head Cabbage (green or savoy)
- 1 pound Ground Meat (pork, beef, or chicken)
- 1 medium Onion, diced
- 2 cloves Garlic, minced
- 1 tablespoon Ginger, grated
- 3 tablespoons Soy Sauce
- 1 tablespoon Sesame Oil
- Salt and Pepper, to taste
- 20–30 Wonton or Dumpling Wrappers
- Water, for sealing
Instructions
- Prep the Cabbage: Remove the cabbage core and boil the leaves.
- Cool and pat dry the boiled leaves.
- Make the Filling: Sauté onions, garlic, and ginger until translucent.
- Add ground meat and cook until browned.
- Season the mixture with soy sauce and sesame oil.
- Fold in chopped cabbage.
- Assemble the Dumplings: Fill wrappers with the meat mixture.
- Seal the dumplings tightly with water.
- Cook the dumplings by boiling or pan-frying.
- Serve warm with soy sauce or sesame sauce.
Notes
Feel free to freeze uncooked dumplings for later use. Adjust the filling ingredients based on your preference for flavor or spiciness.
- Prep Time: 30 minutes
- Cook Time: 15 minutes
- Category: Main Course
- Method: Boiling
- Cuisine: Asian
Nutrition
- Serving Size: 1 serving
- Calories: 70
- Sugar: 1g
- Sodium: 200mg
- Fat: 2g
- Saturated Fat: 0.5g
- Unsaturated Fat: 1g
- Trans Fat: 0g
- Carbohydrates: 8g
- Fiber: 1g
- Protein: 5g
- Cholesterol: 20mg
Keywords: cabbage dumplings, homemade dumplings, comfort food
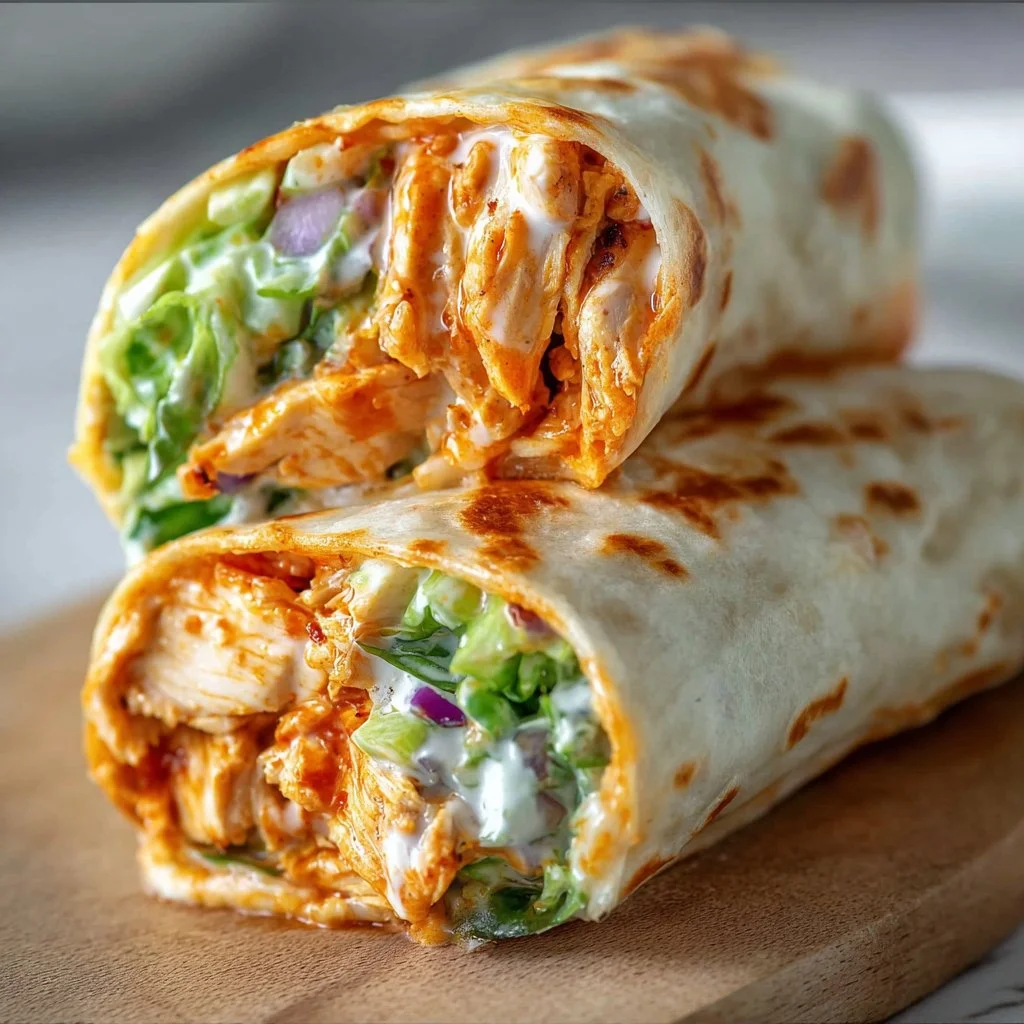
Spicy Buffalo Chicken Wraps for Two
# Spicy Buffalo Chicken Wraps for Two: A Fiery Kick You’ll Love!

## Introduction
Welcome to my cozy culinary corner! Today, we’re diving into a dish that packs a punch — Spicy Buffalo Chicken Wraps, perfect for you and a lucky someone to share. If you’ve ever bitten into a crispy, savory wrap bursting with flavor, you know it’s an experience that’s hard to beat. Whether you’re looking to spice up your weeknight dinners or impress your weekend guests, these wraps are where fun meets flavor.

Buffalo chicken is a classic that has conquered palates everywhere and for good reason! It gives you that exciting kick with each bite, while remaining simple enough to whip up any night of the week. Plus, wraps are just so versatile! By switching up the fillings, the sauces, or even the salad ingredients, you can make this dish perfect for anyone — even those who shy away from spicy foods. So roll up your sleeves, and let’s turn up the heat for an unforgettable dining experience!

For me, nothing evokes warm childhood memories quite like the smell of chicken wings roasting away in the oven, saturated in that dreamy, tangy hot sauce. As a kid, I remember the family gatherings centered around game nights, decorated with baskets of juicy buffalo wings, and my aunt's contagious laughter filling the room. We’d all pile around, tossing crispy wings with glee, seeing how far we could go with the heat without needing copious amounts of ranch dressing as a follow-up!

In this wrap, we're taking that nostalgic flavor combo and wrapping it up in a warm, soft tortilla, paired with crisp greens and a cooling sauce to balance out the spice. Having a cheerful meal like this is such a lovely reminder of the connections food can create. So grab your apron, and let’s bring some zest into your kitchen!


## Personal Story
Ah, buffalo chicken wraps — they always take me back to those lively college days! I remember my roommate and I, with our tight budget and even tighter schedules, relied heavily on quick, delicious meals. One Friday evening, we were determined to kickstart the weekend with something special. We rummaged through our tiny fridge, discovering some leftover rotisserie chicken and a rogue bottle of hot sauce we’d impulsively purchased weeks earlier.

The moment we decided to make buffalo chicken wraps, the aroma dancing in our little kitchen swept us into an evening filled with laughter and creativity. Each spicy bite reminded us of our football game-watching parties, where we would snack until the game was over. As we assembled those wraps filled with our fiery mix, we discovered that not only did they hit the spot, but they also ignited an exciting cooking passion within us. That night we danced around the kitchen, utensils in hand, acting like we were on a cooking show. We conquered those wraps and made a tradition out of them.

Now, years later, buffalo chicken wraps remain a go-to for me, whether I’m entertaining friends or enjoying a cozy night at home. They signify good times and great flavors, transforming ordinary evenings into cherished memories. So let’s create your own memories today!


## Ingredients
Here's what you’ll need for your Spicy Buffalo Chicken Wraps, along with some insights to elevate your cooking:

- **2 cups shredded rotisserie chicken**: A time-saver in the kitchen! Shredded chicken is a great way to quickly infuse flavor without the fuss of cooking chicken from scratch. If you don’t have rotisserie chicken, feel free to boil some chicken breasts, shred them, and toss them in hot sauce.

- **1/4 cup of hot sauce**: Frank's RedHot is the classic choice for that beloved buffalo flavor; however, any hot sauce can work! For a milder version, try using a mixed pepper sauce.

- **1 tablespoon butter**: This adds richness to the sauce and can help mellow the heat slightly. If you want a vegan option, try using olive oil or a plant-based butter.

- **4 medium tortillas**: Whole wheat or spinach tortillas can offer a wholesome twist, while a classic flour tortilla keeps it traditional. Go for gluten-free wraps if you need a dietary swap.

- **1 cup lettuce**: Crunchy Romaine works best, but feel free to use Iceberg or even baby spinach for some fresh greens. This adds a refreshing element to balance the heat.

- **1/2 cup diced tomatoes**: Fresh cherry tomatoes or a chunky salsa can add a zesty burst! And if you’re not keen on tomatoes, avocado is a fabulous alternative.

- **1/2 cup ranch dressing (or your favorite dressing)**: Ranch is the classic pairing, but try blue cheese dressing if you’re feeling adventurous. Or go for hummus or tzatziki for a fun twist.

- **Optional toppings**: Chopped green onions, shredded cheese, or extra hot sauce for those who crave more heat!

## Step-by-Step Instructions

1. **Prepare Your Chicken**:
   - Start by shredding your rotisserie chicken into bite-sized pieces, which should take just a couple of minutes. (Chef's tip: Using two forks does wonders for shredding and can get you a fluffy texture!). Once this is done, transfer the chicken to a bowl.

2. **Create the Buffalo Sauce**:
   - In a small saucepan over medium heat, melt the tablespoon of butter. Pour in your hot sauce and stir until well combined. Allow it to simmer for about 2-3 minutes to meld their delicious flavors. (This is where the magic happens, folks!). Remove from heat and combine with the shredded chicken in the bowl.

3. **Assemble the Wrap**:
   - Lay out your tortillas on a clean surface. Start by placing a generous scoop of the spicy buffalo chicken mixture in the center of each tortilla. Keep it in the middle – you don’t want the filling spilling out when you start wrapping.

4. **Add the Freshness**:
   - Layer in your lettuce and diced tomatoes right on top of the chicken! This crunchy and juicy addition is where the wraps truly shine. (Little Chef Hack: Consider squeezing a tiny bit of lime juice over the veggies for an extra zing!).

5. **Drizzle the Dressing**:
   - Take your ranch (or alternative dressing) and drizzle it generously over the top of the veggies. No such thing as too much dressing — it’ll balance the spice lovably!

6. **Roll It Up**:
   - Grab the sides of the tortilla and fold them over the filling, then roll from the bottom up tightly. Tuck in the sides as you go to secure everything inside. (A good tip is to keep it snug but not too tight; you want it to be easy to bite into).

7. **Grill or Heat (Optional)**:
   - For a crispier wrap, consider grilling it in a pan with a dash of cooking spray for about 2-3 minutes on each side until golden brown. This method adds a delightful crunch - just imagine that satisfying sound when you take a bite!

8. **Cut and Serve**:
   - Slice each wrap in half on a diagonal and serve immediately. I like serving these up with extra ranch and hot sauce on the side for dipping. Perfect for sharing!

## Serving Suggestions
Present your wraps on a colorful platter, garnished with sliced cucumbers or carrot sticks for a vibrant touch! A sprinkle of fresh cilantro or parsley on top can add a lovely visual appeal. Serve with a side of sweet potato fries or a light salad for a complete meal. And don't forget the drinks — an ice-cold lemonade or a craft beer goes wonderfully alongside!

## Recipe Variations
- **Vegetarian Twist**: Swap out the chicken for crispy cauliflower or roasted chickpeas for a satisfying vegetarian version!
- **Southeast Asian Flair**: Toss in hoisin sauce, and add cucumber and shredded carrots to the filling for a sweet and savory kick.
- **Mediterranean Style**: Use tzatziki dressing and add diced cucumbers and olives to transport your taste buds abroad.
- **Mild & Sweet**: Mix some honey or maple syrup with your hot sauce for a sweet and spicy concoction, perfect for those who prefer milder flavors.

## Chef’s Notes
I’ve been making variations of Buffalo chicken wraps for years now. They started as a fun college meal and then grew into a mainstay in my cooking repertoire! I often switch up the toppings based on the season; in the summer, I love adding fresh corn and black beans for a delicious fiesta vibe.

One time, I accidentally grabbed a bottle of extremely potent ghost pepper sauce instead of my regular hot sauce — let me tell you, the result was memorable! Despite my teary-eyed experience, we ended up laughing and just creating a spicy challenge to see who could take the heat!

## FAQs and Troubleshooting

- **What if my wraps fall apart?**
  Make sure to wrap them tightly and ideally grill them for that crispy exterior, which can help keep everything together.

- **How can I make these wraps gluten-free?**
  Use gluten-free tortillas, available at most grocery stores – your wraps will still taste incredible!

- **My chicken is dry; what went wrong?**
  Rotisserie chicken should remain juicy. If you boiled yours, consider adding some chicken broth or a bit of mayo to your mix to enhance moisture.

- **Can I make these ahead of time?**
  Absolutely! Just keep the wraps assembled without dressing and refrigerate. Dress and grill just before you’re ready to serve for the best results.

## Nutritional Info
These wraps are approximately 550 calories each per serving (depending on the ingredients and toppings), making them a hearty and filling option for lunch or dinner. Remember, the nutrition can vary based on specific ingredients used.

Enjoy cooking and feel free to get creative with these spicy buffalo chicken wraps! They’re not only packed with heartwarming memories but are also open to endless possibilities — just like your love for food! Happy cooking!
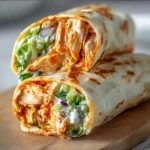
Spicy Buffalo Chicken Wraps
- Total Time: 15 minutes
- Yield: 4 servings 1x
- Diet: Gluten-free Option Available
Description
A delicious and fiery buffalo chicken wrap perfect for sharing, combining shredded chicken, hot sauce, and fresh toppings in a warm tortilla.
Ingredients
- 2 cups shredded rotisserie chicken
- 1/4 cup hot sauce
- 1 tablespoon butter
- 4 medium tortillas
- 1 cup lettuce
- 1/2 cup diced tomatoes
- 1/2 cup ranch dressing (or your favorite dressing)
- Optional toppings: chopped green onions, shredded cheese, or extra hot sauce
Instructions
- Prepare your chicken: Shred the rotisserie chicken into bite-sized pieces and transfer to a bowl.
- Create the buffalo sauce: Melt butter in a saucepan, add hot sauce, simmer for 2-3 minutes, and combine with shredded chicken.
- Assemble the wrap: Lay tortillas on a clean surface and place a scoop of the chicken mixture in the center.
- Add the freshness: Layer in lettuce and diced tomatoes over the chicken.
- Drizzle the dressing over the veggies.
- Roll it up: Fold the sides of the tortilla and roll tightly from the bottom up.
- Grill or heat optionally for a crispy wrap.
- Cut and serve: Slice in half and serve immediately with extra ranch and hot sauce on the side.
Notes
For a crispier wrap, grill it in a pan until golden brown. Consider adding lime juice over the veggies for extra flavor.
- Prep Time: 10 minutes
- Cook Time: 5 minutes
- Category: Main Course
- Method: Grilling
- Cuisine: American
Nutrition
- Serving Size: 1 wrap
- Calories: 550
- Sugar: 3g
- Sodium: 850mg
- Fat: 25g
- Saturated Fat: 10g
- Unsaturated Fat: 12g
- Trans Fat: 0g
- Carbohydrates: 45g
- Fiber: 3g
- Protein: 28g
- Cholesterol: 70mg
Keywords: buffalo chicken wraps, spicy wraps, easy dinner recipes, comfort food
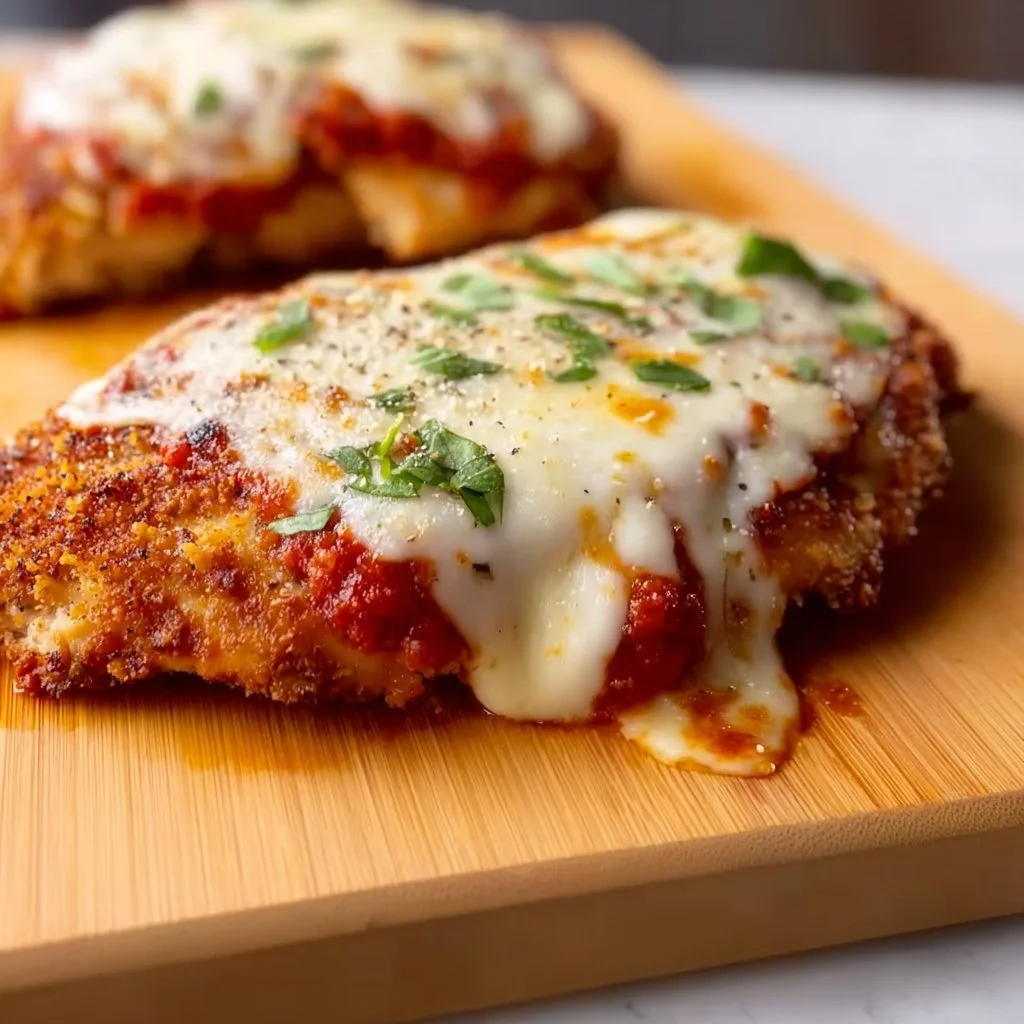
Keto Chicken Parmesan
# Savory Keto Chicken Parmesan: A Delightful Twist on a Classic

## Introduction

Hey there, fellow foodies! Welcome back to my cozy corner of the kitchen. Today, we’re diving into a dish that has always placed my heart right in the center of the dining room—a comforting classic that manages to tickle the taste buds while still keeping our health goals in check: Keto Chicken Parmesan! Now, I know what you might be thinking. “Keto? Chicken Parmesan? How can those two coexist?” Well, my friends, it’s all about making delicious swaps while preserving the essence of a dish that so many of us love.

Picture this: it’s Sunday afternoon, and the smell of marinara sauce bubbling gently on the stove dances through my house, mingling with the rich fragrance of herbs and spices. My dear friends and family gather at the table, laughter echoing through the air as we grab plates piled high with crispy, cheesy goodness, all while delighting in good company. This is more than just food; it’s an experience—a celebration around the dinner table that sparks joy and nourishes the soul.

My journey into the keto lifestyle began out of curiosity but quickly turned into a passion for transforming classic comfort foods while keeping them healthy and satisfying. Chicken Parmesan has always been a part of my culinary repertoire. It’s the kind of dish that brings people together, and I knew that with a few clever twists, I could serve up this Italian favorite without compromising on flavor. So, roll up your sleeves, and let’s make something magical happen in the kitchen!

## Personal Story

Growing up, Sundays were a sacred time in our household. After church, we’d burst through the front door, voices filled with excitement as the scent of my mom's Chicken Parmesan embraced us. I remember reaching for the warm, cheesy pieces, feeling their crunch and ooze blend to create pure bliss. My mom had a knack for taking everyday ingredients and transforming them into something special, and every bite of her Chicken Parmesan left a lasting impression in my heart.

When I started experimenting with keto recipes, I felt an overwhelming urge to recreate that beloved dish. After a few trial runs and endless taste-tests (which, let’s be honest, was the best part), I finally nailed a version that my mom would be proud of—while keeping it keto-friendly. Now, every time I whip up this dish, I'm reminded of those joyful Sundays, surrounded by love, laughter, and the delightful aroma of homemade food.

## Ingredients

Here’s what you’ll need to create this fabulous Keto Chicken Parmesan:

- **Chicken Breasts (4 pieces)**
  Choose thin, boneless, skinless chicken breasts for even cooking. If you're short on time, pre-sliced ones can work just fine.

- **Almond Flour (1 cup)**
  The secret to that crispy coating! Almond flour is low in carbs and is a great gluten-free substitute for traditional breadcrumbs.
  **Tip:** For those who prefer a different flavor profile, crushed pork rinds also work beautifully!

- **Parmesan Cheese (1 cup, grated)**
  Not only does it add a rich flavor to the coating, but it also helps create a delightful crust.
  **Substitution:** Pecorino Romano can also lend a sharp, tangy flavor if you’d like a twist.

- **Eggs (2, beaten)**
  The egg acts as the glue for keeping the almond flour and cheese mix on the chicken. You could also use flax eggs or aquafaba (the chickpea liquid) for a vegan alternative.

- **Marinara Sauce (1 cup, store-bought or homemade)**
  Find a low-carb version at the store or whip up a quick homemade sauce using crushed tomatoes, garlic, and Italian herbs!

- **Mozzarella Cheese (1 cup, shredded)**
  It’s all about that gooey, melty goodness! Use whole-milk mozzarella for the best flavor and texture.
  **Tip:** Swap it for vegan cheese if you’re dairy-free.

- **Olive Oil (2 tablespoons)**
  For a golden-brown finish, I love to use olive oil in this recipe, as it adds an amazing flavor to the chicken.
  **Alternative:** Avocado oil is another fantastic option for high heat cooking.

- **Dried Oregano, Basil, and Garlic Powder (1 teaspoon each)**
  Herbs bring the dish to life! Feel free to mix and match with your favorites—Italian seasoning works great, too.

- **Salt and Pepper (to taste)**
  Essential for bringing out each ingredient's flavors—don’t skimp on this!

## Step-by-Step Instructions

Ready to get cooking? Let’s do this! Here are your steps to whipping up delectable Keto Chicken Parmesan:

1. **Prep Your Chicken:**
   Start by preheating your oven to 400°F (200°C). While it’s warming up, wash and pat dry your chicken breasts. If you have thicker cuts, flatten them using a meat pounder or rolling pin. This ensures even cooking and a delightful texture.

2. **Set Up Your Dipping Station:**
   In one shallow bowl, beat the eggs and add a pinch of salt and pepper. In another bowl, mix together the almond flour, grated Parmesan, dried oregano, basil, and garlic powder. This duo will give your chicken that crave-worthy crust!

3. **Dip, Dip, Baby:**
   Take each chicken breast and dip it into the egg mixture, allowing any excess to drip off. Then, coat it generously in the almond flour mix—make sure you press lightly to ensure it sticks well. Those crispy bits are everything!

4. **Pan-Fry for Perfection:**
   In a large oven-safe skillet, heat olive oil over medium heat. Once hot, add the breaded chicken breasts and cook for about 3-4 minutes on each side, or until golden brown. (Don’t worry if they’re not fully cooked; they’ll finish in the oven!)

5. **Layer the Deliciousness:**
   Once the chicken is golden and gorgeous, remove the skillet from the heat. Spoon marinara sauce over each piece, then top with shredded mozzarella. Go for an extra sprinkle of Parmesan here if you're feeling cheesy!

6. **Bake to Gooey Goodness:**
   Carefully transfer the skillet to the oven and bake for about 20 minutes, or until the chicken reaches an internal temperature of 165°F (74°C) and the cheese is bubbling and slightly golden.

7. **Time to Indulge!**
   Remove from the oven (careful, it’s hot!), and let the Chicken Parmesan sit for a few minutes to settle. Then, serve it up with a side of zoodles (zucchini noodles) or a fresh green salad!

## Serving Suggestions

Once your Keto Chicken Parmesan is out of the oven and looking absolutely divine, here’s how to plate it up for maximum enjoyment:
- Place one piece of Chicken Parmesan on a plate, topping it with a drizzle of extra marinara sauce if you like.
- Garnish with fresh basil leaves or a sprinkle of extra Parmesan for that finished touch.
- Serve with a side of sautéed spinach, garlic roasted broccoli, or my favorite zoodles for a fresh, guilt-free meal that feels indulgent.

## Recipe Variations

Want to switch things up? Here are a few easy variations to enhance your Keto Chicken Parmesan:

1. **Spicy Kick:** Add crushed red pepper flakes to the almond flour mixture for a spicy version.
2. **Stuffed Delight:** Create a stuffed chicken by adding spinach and cream cheese for a creamy center before breading.
3. **Herbaceous Twist:** Swap the traditional dried herbs for fresh basil and oregano for vibrant flavor.
4. **Veggie Power:** Layer some sautéed mushrooms or roasted bell peppers on top before adding mozzarella.

## Chef’s Notes

I can’t deny how many iterations of Keto Chicken Parmesan I’ve gone through to perfect this recipe. Each time I tested a new idea, my kitchen was filled with laughter, spilled marinara, and more than a few mozzarella mishaps! I still vividly remember a particularly chaotic night when I thought I could speed things up by frying too many chicken breasts at once—and that was my cue to serve Margherita pizza instead, because that’s what happens when you don’t respect the crispy process!

This recipe has also evolved to adapt to different family needs and trends, but the love and joy of sharing a hearty meal have remained constant. I truly hope it brings warmth and happiness to your kitchen!

## FAQs and Troubleshooting

### Why is my breading not sticking?
If your breading isn’t adhering properly, make sure you’re properly coating the chicken in egg first and then pressing firmly into the almond flour mixture. A sprinkling of water on the chicken can help enhance adhesion too.

### Can I make this ahead of time?
Absolutely! You can bread the chicken and store it in the fridge for up to 24 hours before cooking. This is a great option for meal prep.

### What if I overcooked my chicken?
If your chicken turns out a bit dry, no worries! A drizzle of olive oil or a splash of marinara sauce can help revive the moisture, making each bite enjoyable.

### How can I adjust the serving size?
This recipe is easily adaptable. Simply halve or double the amounts based on your gathering size!

## Nutritional Info

While exact nutritional values can vary based on specific brands and measurement choices, here’s a general overview of what to expect per serving:

- **Calories:** 450
- **Fat:** 28g
- **Protein:** 40g
- **Total Carbohydrates:** 8g
- **Fiber:** 3g
- **Net Carbs:** 5g

There you have it, my friends! A delicious, cheesy, crispy Keto Chicken Parmesan that is sure to impress your family and friends. I hope you enjoy making and sharing this dish as much as I do. Happy cooking, and remember: good food is all about sharing love and delicious memories!

Savory Keto Chicken Parmesan
- Total Time: 45 minutes
- Yield: 4 servings 1x
- Diet: Keto
Description
A delicious and healthy twist on classic Chicken Parmesan, perfect for those following a keto diet.
Ingredients
- 4 pieces of Chicken Breasts, thin, boneless, skinless
- 1 cup Almond Flour
- 1 cup grated Parmesan Cheese
- 2 Eggs, beaten
- 1 cup Marinara Sauce, store-bought or homemade
- 1 cup shredded Mozzarella Cheese
- 2 tablespoons Olive Oil
- 1 teaspoon Dried Oregano
- 1 teaspoon Dried Basil
- 1 teaspoon Garlic Powder
- Salt and Pepper, to taste
Instructions
- Prep Your Chicken: Preheat your oven to 400°F (200°C). Wash and pat dry your chicken breasts and flatten if needed.
- Set Up Your Dipping Station: Beat the eggs with a pinch of salt and pepper, and mix almond flour with Parmesan and herbs in another bowl.
- Dip, Dip, Baby: Coat each chicken breast in the egg mixture, then in the almond flour mixture, pressing lightly.
- Pan-Fry for Perfection: Heat olive oil in a skillet over medium heat and cook the chicken for 3-4 minutes on each side until golden brown.
- Layer the Deliciousness: Add marinara sauce on each piece, then top with mozzarella.
- Bake to Gooey Goodness: Transfer the skillet to the oven and bake for about 20 minutes until the chicken is cooked through and cheese is bubbly.
- Time to Indulge: Let it sit for a few minutes, then serve with zoodles or a fresh salad.
Notes
Serve with a drizzle of extra marinara and garnish with fresh basil or extra Parmesan.
- Prep Time: 15 minutes
- Cook Time: 30 minutes
- Category: Main Course
- Method: Baking
- Cuisine: Italian
Nutrition
- Serving Size: 1 serving
- Calories: 450
- Sugar: 3g
- Sodium: 600mg
- Fat: 28g
- Saturated Fat: 10g
- Unsaturated Fat: 18g
- Trans Fat: 0g
- Carbohydrates: 8g
- Fiber: 3g
- Protein: 40g
- Cholesterol: 210mg
Keywords: Keto Chicken Parmesan, Healthy Italian Recipe, Low-Carb Dinner
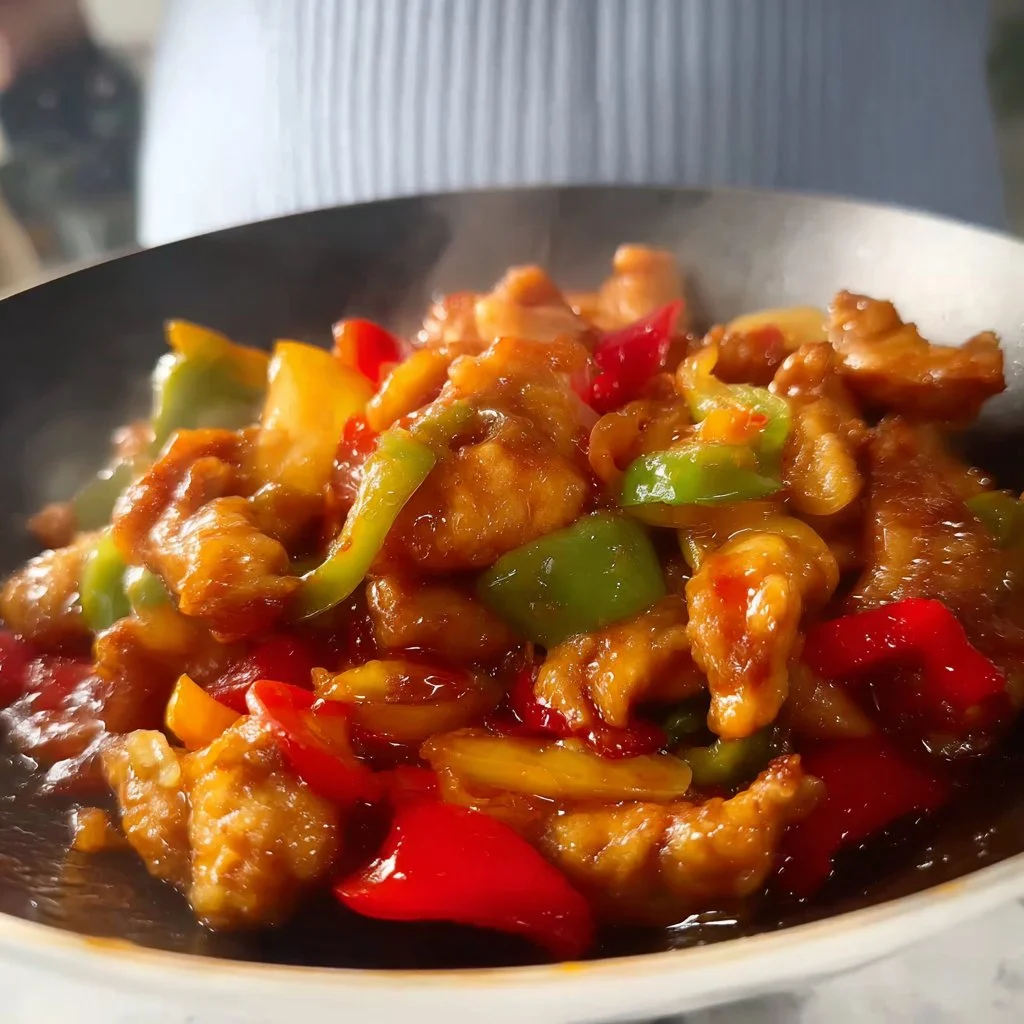
Easy Sweet and Sour Chicken (No batter, stir fry)
Easy Sweet and Sour Chicken (No Batter, Stir Fry)
Hey there, fellow foodies! Welcome back to my cozy corner of the kitchen! Today, we’re diving into a dish that screams comfort yet bursts with bold flavors: Easy Sweet and Sour Chicken. It’s a delightful stir-fry that’s perfect for weeknight dinners and has a tangy-sweet flavor profile that can satisfy the pickiest eaters (and trust me, I’ve met a few).
I think we can all agree that some meals evoke memories that feel like warm hugs. For me, sweet and sour chicken brings back endless family dinner nights with my loved ones, gathered around the table, laughter filling the air, and the tantalizing smells wafting from the kitchen. You know that feeling when you take the first bite of a meal and instantly feel like you’ve been transported to your childhood? That’s the magic we’re cooking up today.
This recipe is not just about whipping up a meal—it’s about creating moments. By the end of this post, you’ll be equipped to make an easy, no-batter sweet and sour chicken that makes dinner feel like a festive occasion. Get your spatula ready because we’re about to stir up some memories and flavors that your family will adore!
Personal Story
I still remember the first time I watched my mom make sweet and sour chicken in our little kitchen. Maybe I was around eight or nine, sitting on the counter, swinging my legs and watching her work her magic. The vibrant colors of the bell peppers sizzling in the pan, the way the sauce turned a glossy shade of orange, and that sweet aroma that hinted at something exciting to eat for dinner. I was fascinated!
Mom always made it without batter because she liked to keep things light and fresh. I recall sneaking bites of the chicken while she wasn’t looking, trying to moodily hover close enough to the pot. It became a staple at our dinner table and was always excitedly anticipated. The way my family would chime in about the flavors and how the sauce danced on their taste buds felt like a glorious culinary symphony.
As I grew older, I realized it wasn’t just about the meal; it was about gathering together, sharing stories, and creating memories. This easy sweet and sour chicken embodies that spirit, and I can’t wait for you to experience it in your own kitchen.
Ingredients
Here’s a friendly rundown of everything you’ll need to whip up this delicious dish. Feel free to get creative with substitutions or let me throw in some chef insights as we go!
-
Chicken Breasts (1 pound)
Choose boneless, skinless chicken breasts for ease. You can swap with chicken thighs if you prefer a richer flavor. -
Bell Peppers (1 red, 1 green)
These colorful gems not only add a delightful crunch but also a splash of color. Yellow and orange peppers work great too! -
Pineapple Chunks (1 cup, canned or fresh)
Sweet and juicy, pineapple is a key player in this dish. If you’re using fresh, make sure it’s ripe for the best flavor. -
Onion (1 medium)
Sweet onions or red onions can be used for a milder taste. If you’re not a fan of onions, feel free to omit them! -
Garlic (2 cloves, minced)
Garlic adds that irresistible aromatic flavor. You can use garlic powder if you’re in a pinch—about half a teaspoon should do! -
Soy Sauce (¼ cup)
The perfect salty element for depth! Low-sodium soy sauce is a great alternative if you’re watching your sodium intake. -
Rice Vinegar (2 tablespoons)
This adds the necessary tang. If you don’t have it, regular white vinegar works too, but the flavor will be slightly different. -
Brown Sugar (2 tablespoons)
Sweetness to balance out the tang. You can swap it with honey or maple syrup for a lighter option. -
Cornstarch (1 tablespoon)
This thickens the sauce slightly. If you want to skip it, just reduce the sauce longer on the stove to reach the desired consistency. -
Olive Oil (2 tablespoons)
For stir-frying. You can swap for any neutral oil of your choice, like canola or sunflower. -
Salt and Pepper (to taste)
Essential for rounding out the flavors. Don’t skip this step; it’s crucial!
Step-by-Step Instructions
Alright, let’s get cooking! Roll up those sleeves, and let’s turn this list of ingredients into a loving, flavorful meal.
-
Prep the Ingredients:
Start by chopping your chicken into bite-sized pieces. This makes for quicker cooking and easier bites later on. Finely chop your garlic, slice the onion, and chop the bell peppers into strips. Don’t forget to drain the pineapple if using canned. -
Heat the Pan:
In a large skillet or wok, heat up the olive oil over medium-high heat. The oil should shimmer but not smoke—this is the perfect heat for a stir-fry. If you have a well-seasoned cast-iron skillet, it’s wonderful for this dish! -
Cook the Chicken:
Add the chicken pieces into the hot oil. Spread them out for even cooking and season lightly with salt and pepper. Let them cook for about 5-7 minutes, stirring occasionally until they’re browned and cooked through. You’ll know they’re ready when they reach an internal temperature of 165°F (75°C). -
Add the Aromatics:
Toss in the minced garlic and onions, stirring them in with the chicken. Allow them a minute to soften and release their flavors. The aroma right now? Absolutely delightful! -
Stir in the Veggies and Pineapple:
Now, it’s time for the vibrant bell peppers and pineapple chunks! Stir them in and cook for another 3-4 minutes. You want the peppers to keep their crunch; nobody loves a soggy stir-fry! -
Create the Sauce:
In a bowl, whisk together the soy sauce, rice vinegar, and brown sugar until well blended. Pour this sauce over the chicken and veggies. Oh boy, can you smell that tangy goodness? Let it simmer for about 2-3 minutes, allowing the sauce to coat every piece and thicken slightly. If you’re using cornstarch, dissolve it in a tablespoon of water before adding to ensure a lump-free sauce. -
Taste and Adjust:
At this point, give everything a taste! Adjust your seasoning with more salt, pepper, or a touch more sugar if desired. This is your creation, so let your taste buds guide you! -
Serve It Up:
Once everything is cooked and well-coated in sauce, take it off the heat. You can garnish it with chopped green onions or sesame seeds for an added pop of flavor!
Serving Suggestions
For a beautiful presentation, serve this Easy Sweet and Sour Chicken over a bed of steamed jasmine or basmati rice. The fluffy grains soak up the delightful sauce perfectly! You can also add a side of stir-fried veggies or a fresh salad for a pop of color and crunch. You could even wrap it up in lettuce leaves for a fun, hands-on meal.
Recipe Variations
Feeling adventurous? Here are a few fun twists you can try with this dish:
-
Add Spice: Toss in some crushed red pepper flakes or a dash of sriracha for a spicy kick.
-
Go Veggie-Heavy: Swap out the chicken for tofu or tempeh for a delicious vegetarian version.
-
Add Cashews or Peanuts: For a nutty crunch, throw in a handful of roasted cashews or peanuts right before serving.
-
Use Different Veggies: Experiment with other seasonal veggies like broccoli, snap peas, or carrots based on what you have at home.
-
Sweet and Sour Sauce Variations: Add a splash of orange juice or a tablespoon of hoisin sauce to the mix for added complexity!
Chef’s Notes
Sweet and sour chicken has evolved in my kitchen over the years. Initially, I was all about the crunchy battered version, but I lean more towards this fresh stir-fry these days. I love how vibrant and colorful it is, plus it doesn’t leave you feeling heavy afterward.
Here’s a little funny kitchen story—I once accidentally used red wine vinegar instead of rice vinegar. It turned a lovely shade of purple, but surprisingly, it worked! A great reminder that sometimes we can make magic happen from a little mistake!
FAQs and Troubleshooting
-
Can I make this dish ahead of time?
Yes! You can prepare the chicken and chop your veggies in advance. Just stir-fry as directed when you’re ready to eat. -
What if my sauce is too thick?
If you find your sauce has thickened too much, just add a splash of water or chicken broth to loosen it up. -
How can I store leftovers?
Store them in an airtight container in the fridge for up to 3 days. Reheat on the stove or in the microwave. -
Can I freeze it?
Absolutely! Cool it completely, then transfer it to freezer-safe bags. It’ll keep for up to 3 months. Just be sure to thaw it in the fridge overnight before reheating.
Nutritional Info
While I don’t usually dive deep into nutritional facts, a standard serving of this dish is relatively balanced. It offers a hearty dose of protein from the chicken, along with essential vitamins and minerals from the veggies. Remember to keep an eye on any added sugars if you’re watching dietary intake, but enjoy it! Cooking is about joy, right?
And there you have it, my lovely culinary friends! An easy, flavor-packed Sweet and Sour Chicken that celebrates both togetherness and deliciousness. Imagine the laughter around your table as you serve this mesmerizing dish. Until next time, happy cooking!
Print
Easy Sweet and Sour Chicken (No Batter, Stir Fry)
- Total Time: 35 minutes
- Yield: 4 servings 1x
- Diet: None
Description
A delightful stir-fry with a tangy-sweet flavor profile, perfect for weeknight dinners and family gatherings.
Ingredients
- 1 pound Chicken Breasts, boneless and skinless
- 1 red Bell Pepper, sliced
- 1 green Bell Pepper, sliced
- 1 cup Pineapple Chunks, canned or fresh
- 1 medium Onion, sliced
- 2 cloves Garlic, minced
- ¼ cup Soy Sauce
- 2 tablespoons Rice Vinegar
- 2 tablespoons Brown Sugar
- 1 tablespoon Cornstarch
- 2 tablespoons Olive Oil
- Salt and Pepper, to taste
Instructions
- Prep the Ingredients: Chop chicken into bite-sized pieces. Finely chop garlic, slice onion, and chop bell peppers into strips. Drain pineapple if using canned.
- Heat the Pan: In a large skillet or wok, heat olive oil over medium-high heat.
- Cook the Chicken: Add chicken pieces to the hot oil, season with salt and pepper, and cook for 5-7 minutes until browned and cooked through.
- Add the Aromatics: Stir in minced garlic and onions, cooking for an additional minute.
- Stir in the Veggies and Pineapple: Add bell peppers and pineapple, cooking for another 3-4 minutes.
- Create the Sauce: Whisk together soy sauce, rice vinegar, and brown sugar in a bowl. Pour over the chicken and veggies, simmer for 2-3 minutes.
- Taste and Adjust: Season with more salt, pepper, or sugar as desired.
- Serve It Up: Garnish with chopped green onions or sesame seeds if desired.
Notes
Store leftovers in an airtight container in the fridge for up to 3 days. This dish can be made ahead by preparing the chicken and veggies in advance.
- Prep Time: 15 minutes
- Cook Time: 20 minutes
- Category: Main Course
- Method: Stir Fry
- Cuisine: Asian
Nutrition
- Serving Size: 1 serving
- Calories: 400
- Sugar: 9g
- Sodium: 600mg
- Fat: 12g
- Saturated Fat: 2g
- Unsaturated Fat: 8g
- Trans Fat: 0g
- Carbohydrates: 45g
- Fiber: 3g
- Protein: 25g
- Cholesterol: 75mg
Keywords: sweet and sour chicken, stir fry, easy chicken recipe, family dinner recipe
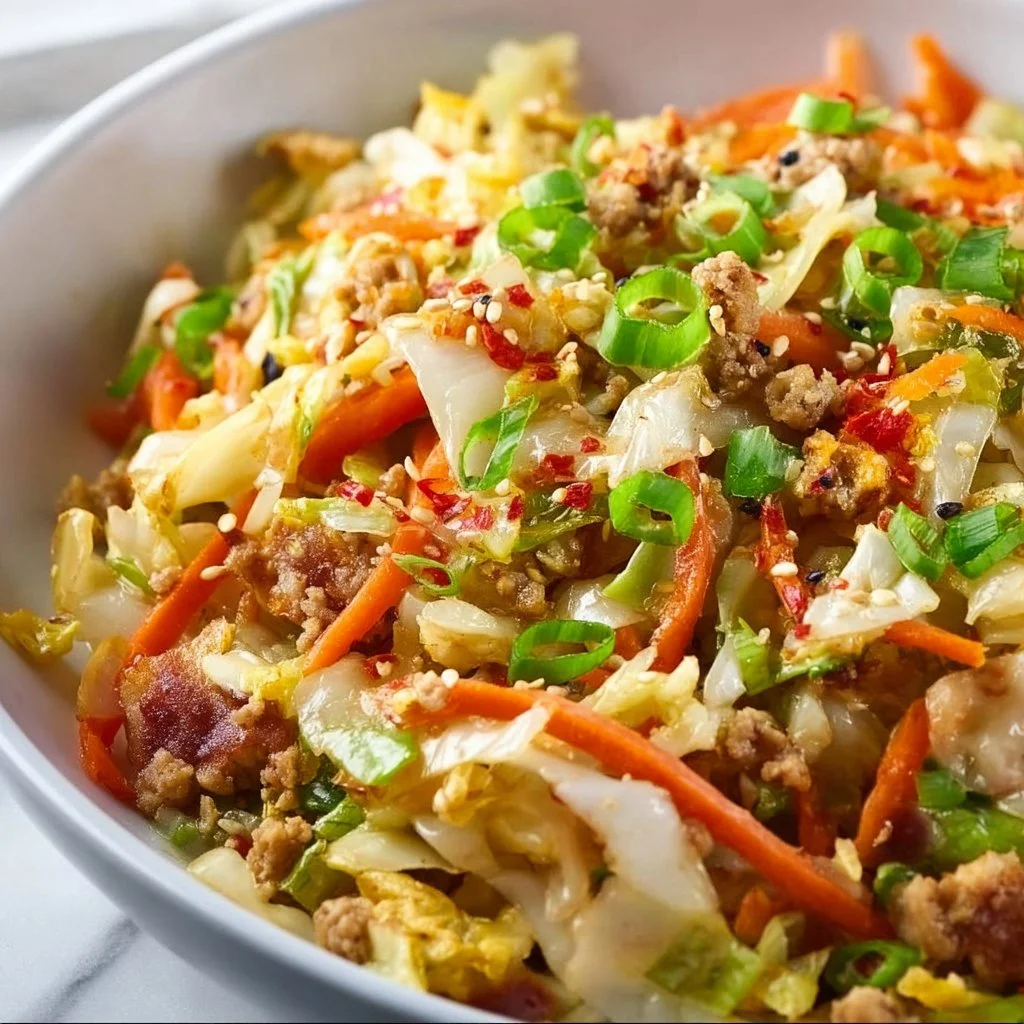
Egg Roll in a Bowl
Egg Roll in a Bowl: A Cozy Delight
Hey there, flavor adventurers! Welcome back to my cozy kitchen. Today, I’m cooking up something that’s a delightful nod to a classic we all love – the egg roll. But instead of deep-frying our way through a kitchen mess, we’re going to create a scrumptious and healthy flavor bomb I like to call Egg Roll in a Bowl. This dish is a perfect mix of cozy and fresh, a bit like wrapping yourself in your favorite blanket on a chilly evening.
Picture this: a vibrant bed of seasoned cabbage, crisp carrots, and more goodies, all topped with a perfectly fried egg or a sprinkle of sesame seeds—yum! Not only does this recipe come together in around 30 minutes, but it’s also a fantastic way to load up on fresh veggies without sacrificing flavor. Plus, you can customize it with your favorite protein or vegan options, making it a versatile meal that’s sure to please everyone at the table.
As someone who finds immense joy in cooking and feeding others, I can’t wait for you to dig into this dish. It’s not just about food; it’s about creating memories, sharing laughter, and gathering around the table with those you love. So roll up your sleeves, grab your apron (or don’t—no judgment here!), and let’s dive into this comforting and delicious recipe that will have you feeling like a pro in your kitchen.
Personal Story
Let me whisk you back for a moment. Growing up, Saturday nights were a feast at my parents’ kitchen. Dad would whip up a batch of homemade egg rolls, their crispy, golden-brown edges practically glowing with deliciousness. The smell of savory pork, ginger, and garlic wafting through the air was pure magic, enticing the whole family to gather around the dining table and share stories.
One particular night, my little brother decided it would be hilarious to dip his egg roll in a dish meant for sweet and sour sauce. The look on my dad’s face—half horror, half amusement—was priceless, and we all burst into laughter. These little moments made those egg rolls so much more than just food; they created a sense of community and warmth. As I grew older, I realized that while egg rolls are delicious, the process of cooking together is what truly binds us. Hence, Egg Roll in a Bowl was born—a simpler way to replicate that dish without the deep-frying fuss, and a new tradition that anyone can whip up.
Ingredients
Let’s get down to the essentials! Here’s what you’ll need for this cozy dish:
-
Ground Pork (or Chicken/Turkey/Tofu):
- The star protein! Ground pork gives you that savory richness, but feel free to substitute with chicken for a leaner option, turkey for a lighter twist, or tofu for a plant-based version.
-
Coleslaw Mix:
- A colorful blend of shredded cabbage and carrots. If you’re feeling adventurous, try using a mix of rainbow carrots or even add shredded Brussels sprouts for a unique twist.
-
Garlic:
- Minced or grated to release those aromatic flavors. Pro tip: fresh garlic is key for depth, but jarred garlic will work if you’re in a pinch.
-
Ginger:
- Freshly grated ginger offers a zing and warmth. If the fresh stuff intimidates you, ground ginger will do, but start with less since it’s more concentrated.
-
Soy Sauce:
- This brings all the umami! If you’re watching your sodium intake or need a gluten-free option, tamari is a great substitute.
-
Sesame Oil:
- Just a drizzle adds a delightful nuttiness. If you can’t find it, a high-quality olive oil will work, but you’ll miss that signature sesame flavor.
-
Green Onions:
- Chopped for garnish and bright flavor. Scallions can also add that fresh crunch, giving a slight kick.
-
Fried Eggs:
- A topping that takes this dish over the top! Serve each bowl with a perfectly fried egg, sunny-side-up or over easy for that gooey goodness.
-
Sesame Seeds (optional):
- These tiny guys add a crunch and an authentic touch. Toast them lightly in a pan to enhance their flavor even more.
Step-by-Step Instructions
Now it’s time to get cookin’! Let’s create this cozy dish that will fill your kitchen with mouthwatering aromas.
1. Prepare Your Ingredients
Start by gathering all your ingredients. This makes the cooking process smoother and more organized. Chop up your garlic, ginger, and green onions; it’s showtime!
2. Heat Up Your Pan
Grab a large skillet or wok and heat it over medium heat. Drizzle about 1 tablespoon of sesame oil into the pan. Wait until the oil shimmers—this is your cue that it’s nicely heated!
3. Sauté the Aromatics
Add your minced garlic and grated ginger to the pan. Sauté them for about 30 seconds until fragrant (but be careful not to burn them!). This step is crucial because it infuses your oil with flavor, setting the stage for the rest of your dish.
4. Cook the Ground Meat
Next, add your ground pork (or chosen protein). Break it apart with a spatula and cook until browned and fully cooked through—about 5-7 minutes. If there’s excess grease, feel free to drain it; we want the tasty bits, not the soggy.
5. Toss in the Cabbage
Once the meat is golden and cooked, toss in the coleslaw mix. Use a spatula or tongs to mix it in with the meat. As the cabbage wilts, we want to retain a bit of crunch, so stir for another 2-3 minutes.
6. Season It Up
Pour in your soy sauce and stir everything together. Allow the flavors to meld for another minute or so. I always recommend tasting at this point—if it’s lacking seasoning, you can sprinkle in a bit more soy sauce or even a dash of salt.
7. Plate it Up!
Spoon generous portions into bowls. This dish is perfect for serving family-style, so don’t be afraid to get in there!
8. Fry Those Eggs
In a separate skillet, add a bit more sesame oil and fry up some eggs—sunny-side-up or however you prefer! Place an egg on top of each bowl of egg roll goodness. The runny yolk will create a luscious sauce that ties everything together.
9. Garnish and Enjoy!
Finish off your masterpiece with sliced green onions and a sprinkle of sesame seeds. Now it’s time to dig in!
Serving Suggestions
This hearty dish is perfect on its own, but if you want to take it up a notch, consider serving it with some steamed jasmine rice or cauliflower rice for a low-carb option. You can also whip up a quick side salad or some pickled vegetables to add a refreshing crunch that complements the rich flavors of the egg roll in a bowl.
Recipe Variations
Now for the fun part—don’t be afraid to get creative! Here are a few twists to inspire you:
-
Spicy Kick: Add a teaspoon of sriracha or chili paste when you mix in the soy sauce for a spicy kick.
-
Veggie-Loaded: Toss in more veggies like bell peppers, snap peas, or even some zucchini ribbons for extra nutrition.
-
Sweet and Savory: Drizzle a touch of hoisin sauce over the top for a sweet twist that pairs beautifully with the savory meat.
-
Low-Carb Alternative: Swap out the coleslaw mix for spiralized zucchini or do a combination for a fun noodle-like texture!
-
Vegan Delight: Use tempeh or a hearty veggie blend in place of meat, and serve with a tofu scramble on top instead of eggs.
Chef’s Notes
In my journey as a home cook, I’ve learned that recipes are living entities; they evolve as our tastes and experiences change. This Egg Roll in a Bowl has been my go-to on busy weeknights, and it’s become a family favorite. Last week, I decided to switch things up and used leftover grilled chicken and some extra veggies in my fridge. Guess what? It was a hit, proving that improvisation can lead to delicious meals!
Also, don’t sweat it if something goes a little off-plan. The kitchen is a place for experimentation; embrace the mishaps and find joy in the process! A good dish can withstand a bit of culinary adventure.
FAQs and Troubleshooting
1. What if I can’t find coleslaw mix?
No problem! You can make your own using finely shredded cabbage and julienned carrots. If you have other veggies like bell peppers or kale, feel free to add those as well.
2. Can I make this dish ahead of time?
Absolutely! You can prepare the egg roll mix ahead of time and store it in the fridge for up to 2 days. Just warm it up and fry your eggs fresh before serving!
3. My dish turned out too salty. What can I do?
If your egg roll in a bowl is overly salty, try adding a splash of a sweet element, like honey or brown sugar, to balance it out. You could also mix in more cabbage to dilute the saltiness.
4. How can I store leftovers?
Store any leftovers in an airtight container in the refrigerator for up to 3 days. When reheating, add a splash of water to keep it moist and flavorful.
Nutritional Info
(Optional but helpful)
- Servings: 4
- Calories: Approximately 350 per serving
- Protein: 25g
- Carbohydrates: 10g
- Fat: 25g
- Fiber: 3g
And there you have it, my friends! A scrumptious and easy-to-make Egg Roll in a Bowl that captures comfort food in a healthy way. I hope you enjoy making and sharing this dish as much as I do. Happy cooking, and may your kitchens be filled with laughter, good food, and lasting memories!
Print
Egg Roll in a Bowl: A Cozy Delight
- Total Time: 45 minutes
- Yield: 4 servings 1x
- Diet: Paleo
Description
A healthy and scrumptious twist on the classic egg roll, packed with fresh veggies and topped with a delicious fried egg.
Ingredients
- 1 lb Ground Pork (or Chicken/Turkey/Tofu)
- 1 bag Coleslaw Mix
- 3 cloves Garlic, minced
- 1 inch Ginger, grated
- 3 tbsp Soy Sauce
- 1 tbsp Sesame Oil
- 3 Green Onions, chopped
- 4 Fried Eggs (for topping)
- 1 tbsp Sesame Seeds (optional)
Instructions
- Prepare your ingredients by chopping garlic, ginger, and green onions.
- Heat a large skillet over medium heat and add sesame oil.
- Sauté the garlic and ginger for 30 seconds until fragrant.
- Cook the ground pork until browned, about 5-7 minutes.
- Toss in the coleslaw mix and stir for another 2-3 minutes until slightly wilted.
- Season with soy sauce, mixing well.
- Plate generous portions into bowls.
- Fry eggs in a separate skillet and place on top of each bowl.
- Garnish with green onions and sesame seeds.
Notes
Feel free to customize with different proteins or extra veggies as desired.
- Prep Time: 15 minutes
- Cook Time: 30 minutes
- Category: Main Course
- Method: Stovetop
- Cuisine: Asian
Nutrition
- Serving Size: 1 serving
- Calories: 350
- Sugar: 5g
- Sodium: 400mg
- Fat: 25g
- Saturated Fat: 6g
- Unsaturated Fat: 10g
- Trans Fat: 0g
- Carbohydrates: 10g
- Fiber: 3g
- Protein: 25g
- Cholesterol: 186mg
Keywords: egg roll, healthy recipe, cozy dish, comfort food, quick meal
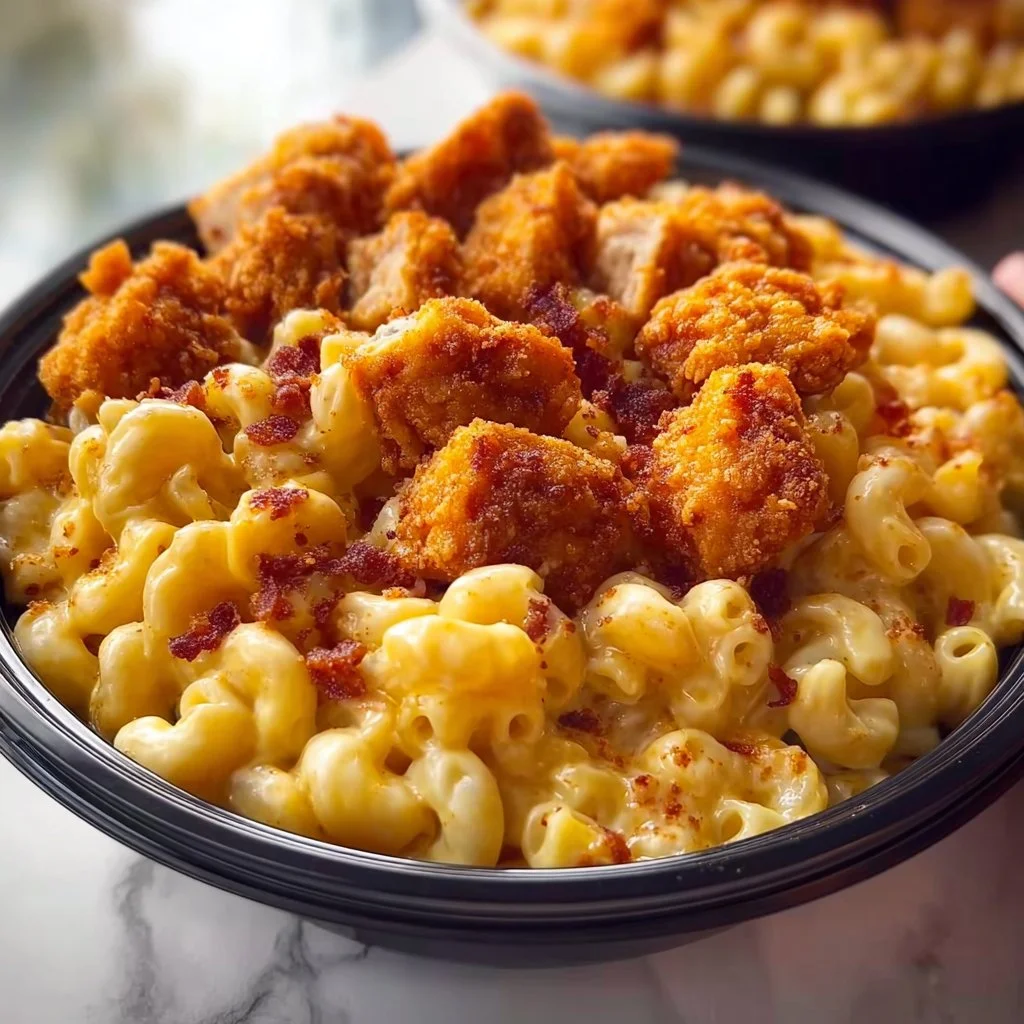
High-Protein KFC Chicken Mac & Cheese
# High-Protein KFC Chicken Mac & Cheese: A Comfort Food Showdown

## Introduction

Welcome back to my cozy corner of the culinary world, friends! Today, I’m super excited to share a dish that perfectly combines two American favorites: fried chicken and creamy mac & cheese. Yes, you heard it right! We're diving into the heart of comfort food with a high-protein twist on KFC Chicken Mac & Cheese. This is not your average mac and cheese; we’re talking crispy, tender chicken resting on a bed of velvety, cheesy pasta.

Now, I know what you're thinking: **“How can I whip up something so indulgent without spending a whole day in the kitchen?”** Don’t worry! This recipe will leave you feeling like a culinary superstar while keeping the process effortless and fun.

Throughout my cooking journey, I’ve learned that the magic truly happens when you bring your own flair to classic dishes. This recipe is all about embracing that creativity and making something that not only satisfies your cravings but also brings a smile to the faces of those you’re feeding. Plus, the added protein will keep you fueled and energized—perfect for those busy weeknights or festive family gatherings.

So, grab your apron, roll up your sleeves, and let’s get cooking! You’ll soon be showered with compliments and requests for seconds.

## Personal Story

Let me take you back to my childhood kitchen, where the air was always infused with the scent of something wonderful. My mom had this magical ability to transform even the simplest ingredients into mouthwatering meals. My favorite nights were when we’d make her legendary chicken and pasta dishes. The kitchen would buzz with excitement as we mixed and stirred, and I’d always be perched on a stool, eyes wide, watching her work her magic.

One evening, I remember her teaching me how to make her special baked mac & cheese. As we sprinkled the breadcrumb topping, she said, “The secret is in the love you put into it!” That’s a mantra I’ve carried with me ever since.

Fast-forward to today, and I find my own version of those cherished memories manifesting in this high-protein KFC Chicken Mac & Cheese. A dish that brings people together, fills the air with delightful aromas, and inspires laughter and stories around the dinner table. It’s not just food; it’s nostalgia plated up with love!

## Ingredients

Here's what you'll need for the star of the show:

- **Chicken Breast (1 lb)**
  *Lean and packed with protein, boneless, skinless chicken breasts are perfect for this dish. You can easily substitute with turkey, or if you prefer dark meat, go for chicken thighs for extra flavor!*

- **Macaroni Pasta (8 oz)**
  *Classic elbow macaroni is the go-to for mac & cheese! For a healthier twist, try whole grain pasta or gluten-free options like chickpea or lentil pasta.*

- **Sharp Cheddar Cheese (2 cups, shredded)**
  *The star of the cheese world! Sharp cheddar adds that iconic, rich flavor. Feel free to mix up cheeses—Gruyère or Monterey Jack are fantastic pairings!*

- **Cream Cheese (8 oz)**
  *This is the secret ingredient that makes our sauce irresistibly creamy! If you’re looking for a lighter option, you can use Greek yogurt or sour cream instead.*

- **Milk (1 cup)**
  *For that creamy consistency! Whole milk works wonders, but you can substitute with almond milk, oat milk, or any milk you prefer.*

- **Egg (1)**
  *A binding agent that adds richness; however, to keep this dish vegan, consider using a flax egg (1 tablespoon flaxseed meal + 2.5 tablespoons water).*

- **Breadcrumbs (1 cup, for topping)**
  *Panko breadcrumbs give a fabulous crunch! You can substitute with crushed crackers or even cheesy potato chips for a twist.*

- **Seasonings (Salt, Pepper, Garlic Powder, and Paprika)**
  *Basic yet essential! Feel free to add your favorite herbs like thyme or oregano to enhance the flavor profile.*

## Step-by-Step Instructions

Now that we've gathered our ingredients, let’s dive into the cooking process!

1. **Prep the Chicken**
   Start by preheating your oven to 375°F (190°C). While it warms up, season the chicken breasts with salt, pepper, and a sprinkle of garlic powder. Get those flavors dancing!

   **Tip from the Chef:** If you’ve got extra time, marinating the chicken in buttermilk for a few hours (or overnight) can add fantastic flavor and tenderness!

2. **Cook the Chicken**
   Heat a pan over medium-high heat with a splash of olive oil. Cook the seasoned chicken breasts for about 5-7 minutes on each side until they are golden brown and no longer pink in the center. Remove from the pan and let them rest for a few minutes before dicing them into bite-sized pieces.

   **Chef Hack:** If you’re running short on time, feel free to use pre-cooked rotisserie chicken. It’s a huge time-saver!

3. **Boil the Macaroni**
   In a large pot, bring salted water to a boil and cook the macaroni according to package instructions until **al dente**. Drain and set aside.

4. **Make the Cheese Sauce**
   In the same pot (yep, less cleanup!), reduce the heat and add the cream cheese and milk. Stir until the cheese melts and the mixture becomes smooth and creamy. Gradually add the shredded cheddar cheese, stirring constantly until it’s melted and gooey.

   **Tip:** If the sauce seems too thick, don’t hesitate to add a splash more milk to reach your desired creamy consistency!

5. **Combine Everything**
   Stir in the cooked macaroni and diced chicken into the cheese sauce. Mix until every noodle and piece of chicken is well covered in that dreamy cheese sauce.

6. **Prepare for Baking**
   Pour the mac and cheese mixture into a greased baking dish, spreading it evenly. Now, sprinkle the breadcrumbs over the top for that perfect crunchy finish!

7. **Bake to Perfection**
   Pop it into the preheated oven for about 20-25 minutes, or until the breadcrumbs are golden brown and delightful. Your kitchen will smell like pure bliss!

8. **Serve and Enjoy!**
   Once out of the oven, let it sit for about 5 minutes—if you can wait! Scoop it onto plates, and voilà! You have a scrumptious high-protein KFC Chicken Mac & Cheese that’s ready to impress!

## Serving Suggestions

For a friendly and inviting presentation, serve this dish in a warm, rustic bowl with a sprinkle of fresh parsley or chives on top. Pair it with a fresh side salad or steamed veggies to balance out that creamy goodness. Oh, and don’t forget a chilled glass of lemonade or iced tea to wash it all down!

## Recipe Variations

- **Buffalo Chicken Mac & Cheese:** Spice it up by adding a few tablespoons of hot sauce to the cheese sauce for a kick, and garnish with blue cheese crumbles.

- **Veggie-Loaded Mac:** Toss in some steamed broccoli, peas, or roasted red peppers for a pop of color and extra nutrition.

- **BBQ Chicken Mac & Cheese:** Mix in your favorite barbecue sauce along with the chicken for a tangy twist!

- **Mushroom & Spinach Mac:** Sauté some mushrooms and spinach along with the chicken for a hearty, earthy version of this dish.

## Chef’s Notes

This recipe has evolved in many ways over the years for me. Initially, my version was simply mac and cheese, but as I started experimenting with flavors and ingredients, the KFC twist came to life. I love being able to make comfort food a little healthier without sacrificing that cheesy, satisfying experience.

And let me tell you, this mac & cheese is always a hit at family gatherings—it’s nearly impossible for anyone to say no to it! Be ready for the requests for the recipe!

## FAQs and Troubleshooting

- **Can I use a different pasta shape?**
  Absolutely! While elbow macaroni is traditional, feel free to switch it up with shells, penne, or any pasta shape you prefer.

- **What if my cheese sauce is too thick?**
  Don’t panic! Just add a little more milk, stirring until you reach your desired creamy consistency.

- **How do I store leftovers?**
  Store any leftovers in an airtight container in the fridge for up to 3-4 days. Simply reheat in the microwave or oven—just add a splash of milk to revive that creaminess!

- **Can I freeze this dish?**
  Yes! You can freeze the mac and cheese before baking. Just cover it well in the freezer. When you’re ready to eat, no need to thaw—just bake it straight from frozen, adding a few extra minutes of cooking time.

## Nutritional Info

While I don’t focus much on strict nutrition guidelines, I believe in balance and enjoying every bite. This High-Protein KFC Chicken Mac & Cheese packs in a good amount of protein thanks to the chicken and cheese. It’s a comforting dish that brings joy and satisfaction, perfect for sharing with family and friends.

---

So, there you have it, my dear foodies! Your go-to recipe for a beloved dish that’s both hearty and high in protein. I can’t wait to hear how yours turns out! Don’t forget to share your photos and experiences in the comments below. Happy cooking!

High-Protein KFC Chicken Mac & Cheese
- Total Time: 45 minutes
- Yield: 4 servings 1x
- Diet: High Protein
Description
A comforting blend of crispy chicken and creamy mac & cheese, packed with protein for a satisfying meal.
Ingredients
- 1 lb Chicken Breast
- 8 oz Macaroni Pasta
- 2 cups Sharp Cheddar Cheese, shredded
- 8 oz Cream Cheese
- 1 cup Milk
- 1 Egg
- 1 cup Breadcrumbs, for topping
- Salt, Pepper, Garlic Powder, and Paprika to taste
Instructions
- Prep the Chicken: Preheat oven to 375°F (190°C). Season chicken breasts with salt, pepper, and garlic powder.
- Cook the Chicken: Heat a pan over medium-high heat with olive oil and cook chicken for 5-7 minutes on each side until golden brown.
- Boil the Macaroni: In a large pot, bring salted water to a boil and cook macaroni until al dente. Drain and set aside.
- Make the Cheese Sauce: In the same pot, add cream cheese and milk, stirring until smooth. Gradually add cheddar cheese until melted.
- Combine Everything: Stir in cooked macaroni and diced chicken into the cheese sauce, mixing well.
- Prepare for Baking: Pour mixture into a greased baking dish and sprinkle breadcrumbs on top.
- Bake to Perfection: Bake in the preheated oven for 20-25 minutes until breadcrumbs are golden brown.
- Serve and Enjoy: Let it rest for 5 minutes before serving.
Notes
You can add hot sauce for a spicy kick or incorporate steamed veggies for added nutrition.
- Prep Time: 15 minutes
- Cook Time: 30 minutes
- Category: Main Course
- Method: Baking
- Cuisine: American
Nutrition
- Serving Size: 1 serving
- Calories: 450
- Sugar: 5g
- Sodium: 600mg
- Fat: 20g
- Saturated Fat: 10g
- Unsaturated Fat: 8g
- Trans Fat: 0g
- Carbohydrates: 40g
- Fiber: 2g
- Protein: 30g
- Cholesterol: 100mg
Keywords: chicken, mac and cheese, comfort food, high protein, baked macaroni
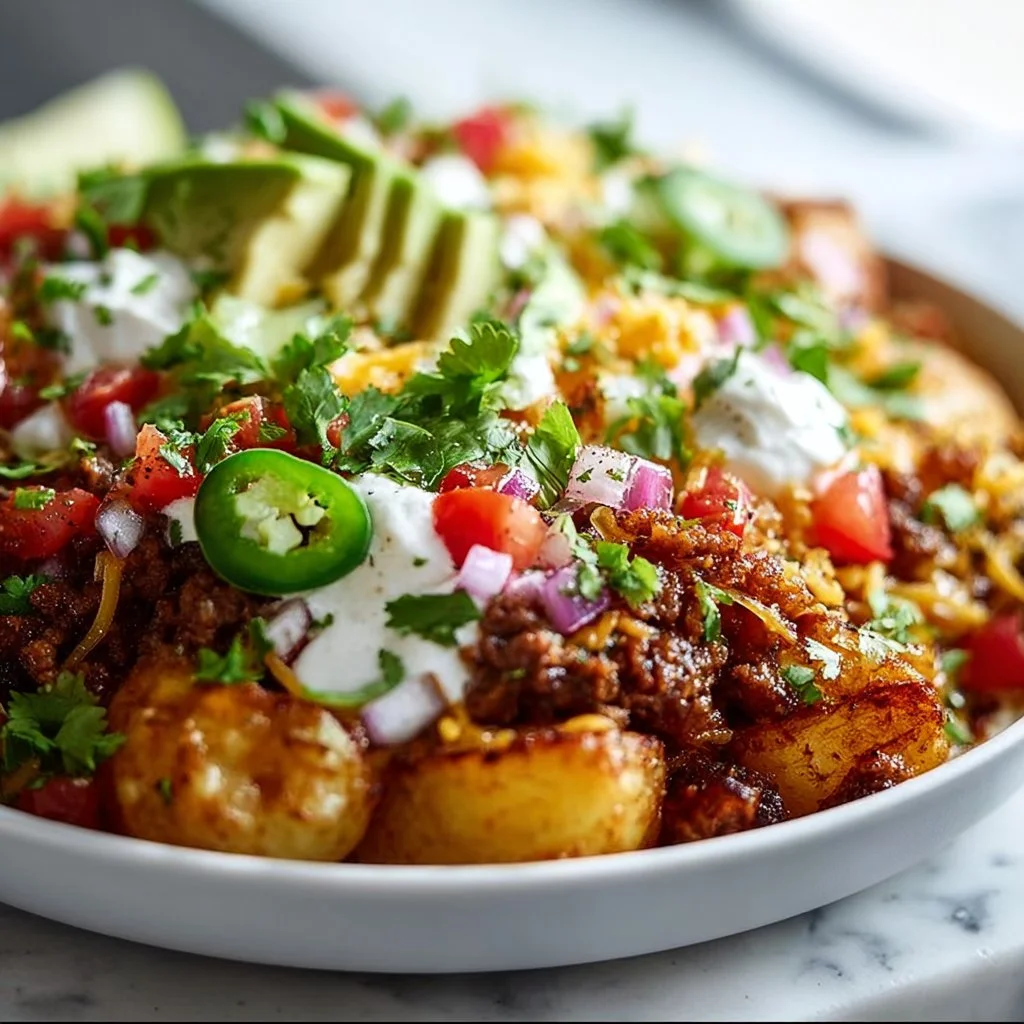
Loaded Potato Taco Bowl
Loaded Potato Taco Bowl: A Cozy, Flavorful Feast
Hey, food lovers! Welcome back to my kitchen. If you’re anything like me, you love meals that bring a blend of comfort and excitement to the table. Today, I’m thrilled to share a recipe that perfectly captures that vibe: the Loaded Potato Taco Bowl! This dish is a delightful mashup of two beloved favorites: loaded baked potatoes and fresh, zesty tacos. Imagine creamy potatoes topped with your favorite taco toppings—all served in a bowl that feels like a warm hug after a long day.
Why do potatoes and tacos work so beautifully together? Well, both are incredibly versatile and provide the perfect canvas for all your favorite flavors. When you take a bite of that soft potato topped with spicy meat, fresh veggies, and creamy sauce, there’s just something that makes you want to say, “Yes, please!” This recipe is not only delicious but also simple enough to whip up on a busy weeknight or to impress your friends at a casual gathering.
As we dive into this recipe, I want to remind you that cooking doesn’t have to be complex to be amazing. With quality ingredients, a sprinkle of love, and some fun spices, you can make a meal that everyone will rave about. So, grab your apron, gather your ingredients, and let’s get started on this culinary adventure! 🎉
Personal Story
Ah, potatoes—my childhood comfort food, and perhaps the most democratic vegetable out there! I remember sitting around the dinner table with my family, eyes glimmering at the sight of a bubbling potato casserole. My mom always had a knack for turning simple ingredients into something magical. One of her go-to recipes was loaded potatoes smothered with cheese, bacon bits, and a dollop of sour cream—a surefire way to make my siblings and me cheer with delight.
Fast forward to my college days, where I discovered tacos, and the magic began again. Late-night study sessions were often accompanied by chipotle-spiced tacos with all the fixings, satisfying those late-night cravings. Eventually, those two delicious experiences collided in my head, giving birth to the Loaded Potato Taco Bowl! I love this recipe because it combines the nostalgia of my childhood with the spontaneous flavors I crave today. Every bite takes me back to my family’s dinner table while also inviting the vibrancy of taco nights with friends. And the best part? Making this dish brings everyone together, just like those cozy meals of my youth.
Ingredients
Here’s a quick rundown of what you’ll need to whip up these Loaded Potato Taco Bowls! Each ingredient contributes to the overall flavor, and I’ve added tips on substitutions to help you get creative in the kitchen.
-
Russet Potatoes (2 large)
These starchy giants are perfect for loading up with toppings due to their fluffy interior after baking. If you prefer a healthier alternative, try using sweet potatoes for a hint of sweetness! -
Ground Beef or Turkey (1 lb)
Season this protein with taco spices for that authentic taco flavor. If you’re looking for a lighter option, lean ground turkey or plant-based ground meats work just fine too! -
Taco Seasoning (2 tablespoons)
Make your own or grab a packet from the store. If you’re feeling adventurous, you can adjust the spices to your liking—more chili powder for heat or smoked paprika for a smoky kick! -
Black Beans (1 can, drained and rinsed)
These legumes add a lovely creaminess and an extra boost of protein. If you don’t have black beans, any bean of your choice (like pinto or kidney) will do the trick! -
Corn (1 cup, fresh or frozen)
Sweet corn adds a pop of color and flavor. If you’re in a pinch, canned corn works well too, but make sure to drain and rinse it! -
Shredded Cheese (1 cup)
Cheddar is a classic choice for this dish, but feel free to mix it up! Monterey Jack or a spicy pepper jack add great depth and flavor. -
Sour Cream or Greek Yogurt (1 cup)
A cool, creamy topping that balances all the flavors. For a healthier option, substituting Greek yogurt will give you that tang without the guilt! -
Chopped Fresh Cilantro (1/4 cup)
This herb adds freshness and brightness to the dish. If you’re not a cilantro fan, you can replace it with green onions or fresh parsley for a burst of flavor. -
Lime (1, for juice)
A squeeze of lime juice elevates this dish and balances the richness of the potatoes and toppings. Don’t skip it!
Step-by-Step Instructions
Now, let’s dive right into the cooking process! 🍽️ Follow these simple steps to create your own Loaded Potato Taco Bowl.
Step 1: Preheat Your Oven
First things first! Preheat your oven to 400°F (200°C). This is the perfect temperature to achieve that crispy, golden skin on your potatoes.
Step 2: Bake the Potatoes
Wash your russet potatoes thoroughly, then pierce them a few times with a fork. This helps steam escape while baking and prevents any unfortunate potato explosions! Wrap them in foil and place them directly on the oven rack. Bake for about 45-60 minutes, or until they are fork-tender. You can also microwave them for a faster option—just remember to pierce them first!
Step 3: Cook the Meat
While those potatoes are baking, let’s bring the taco filling to life. In a skillet over medium heat, add your ground beef or turkey. Cook it until browned, breaking it up with a spoon as it cooks—about 6-8 minutes. Once cooked through, drain any excess fat.
Next, sprinkle in your taco seasoning. Don’t forget to add a splash of water (about 1/4 cup) to help the spices coat the meat evenly. Stir everything together and let it simmer for a few minutes until thickened. The aroma will start wafting through your kitchen, and trust me, you’ll be drooling!
Step 4: Add the Extras
Once the meat is ready, toss in the black beans and corn. Stir them in until warmed through, about 2-3 minutes. This not only amps up the flavor but turns this dish into a hearty meal!
Step 5: Prepare the Toppings
While the meat mixture simmers, it’s time to get creative with your toppings! If you haven’t done so already, shred your cheese, chop the cilantro, and slice the lime. Don’t be shy; make it pretty! The presentation is half the fun, after all!
Step 6: Assemble the Bowls
When your potatoes are done baking, carefully remove them from the oven and unwrap them. Cut them in half and fluff the insides with a fork. Now it’s assembly time! Start with a generous portion of the meat mixture over each potato half. Top it with shredded cheese, sour cream or yogurt, and a sprinkle of fresh cilantro. Finally, add a squeeze of lime for that extra zing!
Step 7: Dig In!
Your Loaded Potato Taco Bowls are now ready to enjoy. Serve immediately and watch as your friends and family indulge in this vibrant and filling dish. You might even want to consider a taco-themed topping bar for everyone to customize their bowls further!
Serving Suggestions
When it comes to serving your Loaded Potato Taco Bowls, presentation can make all the difference! You can serve them in simple white bowls for a classic look, or go colorful with trendy, patterned dishes. Garnish with extra cilantro and a lime wedge on the side for a fresh touch. If you’re feeling festive, you can even throw in some tortilla strips or crispy taco shells as a crunchy garnish to elevate your bowl!
Recipe Variations
-
Vegetarian Option: Swap the meat for a mix of mushrooms, bell peppers, and more black beans for a hearty vegetarian version.
-
Spicy Kick: Add some jalapeños or a drizzle of sriracha on top for those who enjoy a little heat in their meal.
-
BBQ Flavor: Replace the taco seasoning with your favorite BBQ sauce for a smoky twist on this recipe—smoky baked potatoes anyone?
-
Breakfast Bowl: Top your Loaded Potato Taco Bowl with scrambled eggs instead of meat for a fun brunch option!
-
Cheesy Jalapeño: For a cheesy twist, mix diced jalapeños into your meat mixture and top with extra cheese for a spicy, gooey finish.
Chef’s Notes
Oh, the heart and soul of this recipe come from experimentation! I remember one time attempting to make a taco night platter with these potatoes as the base. You should have seen my kitchen—spices everywhere and a few things that may have ‘accidentally’ spilled onto the floor! Yet, out of that chaos came this beautiful dish, and it became a family favorite.
This recipe has evolved over time as I’ve played with ingredients and flavors. Sometimes, I throw in seasonal veggies for added color and nutrients. The possibilities are endless, and I encourage you to let your creativity shine in the kitchen!
FAQs and Troubleshooting
Q1: My potatoes are hard! What happened?
A: Sometimes, baking times can vary based on the size of your potatoes. If you find them undercooked, simply put them back in the oven and check every 10 minutes until they are soft.
Q2: How can I make this gluten-free?
A: This dish is naturally gluten-free! Just check your taco seasoning to ensure it doesn’t contain gluten (some store-bought versions do).
Q3: Can I prepare the ingredients ahead of time?
A: Absolutely! You can bake your potatoes in advance and keep them covered in the fridge. The meat mixture can also be prepped and stored in an airtight container, making weeknight cooking a breeze.
Q4: What if I don’t have ground meat?
A: No worries! You can easily substitute shredded chicken, pulled pork, or even cooked lentils for a wonderful variation.
Nutritional Info (Optional)
While I love indulging in delicious food, I also believe in balance! Here’s a rough estimate of the nutritional breakdown for one Loaded Potato Taco Bowl:
- Calories: Approx. 600
- Protein: 30g
- Fat: 20g
- Carbohydrates: 75g
- Fiber: 10g
Remember, these numbers can vary based on your specific ingredients and portion sizes, but it gives you a ballpark. Enjoy this dish with an open heart, knowing you’re savoring every delicious bite!
And there you have it, friends—your ultimate guide to crafting a warm and welcoming Loaded Potato Taco Bowl that’ll surely become a new favorite in your home! I hope you make this recipe, share it with loved ones, and find joy in every bite. Let’s keep the cozy, homemade goodness flowing in our kitchens. Happy cooking! 🥔💖🌮
Print
Loaded Potato Taco Bowl
- Total Time: 75 minutes
- Yield: 4 servings 1x
- Diet: Gluten-Free
Description
A cozy blend of loaded baked potatoes and zesty tacos, topped with your favorite ingredients for a delightful meal.
Ingredients
- 2 large Russet Potatoes
- 1 lb Ground Beef or Turkey
- 2 tablespoons Taco Seasoning
- 1 can Black Beans, drained and rinsed
- 1 cup Corn, fresh or frozen
- 1 cup Shredded Cheese
- 1 cup Sour Cream or Greek Yogurt
- 1/4 cup Chopped Fresh Cilantro
- 1 Lime, for juice
Instructions
- Preheat your oven to 400°F (200°C).
- Bake the potatoes wrapped in foil for 45-60 minutes, until fork-tender.
- Cook the ground beef or turkey in a skillet over medium heat until browned, about 6-8 minutes.
- Add taco seasoning and a splash of water; let simmer.
- Incorporate black beans and corn into the meat mixture and warm through, about 2-3 minutes.
- Prepare toppings by shredding cheese, chopping cilantro, and slicing lime.
- Assemble bowls by halving the baked potatoes and topping with meat mixture, cheese, sour cream, cilantro, and lime juice.
- Serve immediately and enjoy!
Notes
Feel free to customize toppings and try variations like vegan or breakfast bowls!
- Prep Time: 15 minutes
- Cook Time: 60 minutes
- Category: Main Course
- Method: Baking
- Cuisine: Mexican
Nutrition
- Serving Size: 1 bowl
- Calories: 600
- Sugar: 5g
- Sodium: 750mg
- Fat: 20g
- Saturated Fat: 10g
- Unsaturated Fat: 8g
- Trans Fat: 0g
- Carbohydrates: 75g
- Fiber: 10g
- Protein: 30g
- Cholesterol: 75mg
Keywords: potato taco bowl, loaded potato meal, comfort food




