

Smothered Chicken and Rice
Smothered Chicken and Rice: A Comfort Food Classic
Welcome back to my cozy kitchen, my dear foodie friends! Today we’re diving headfirst into one of my all-time favorite dishes: Smothered Chicken and Rice. Whether it’s a chilly evening or you just need a little comfort food to warm your soul, this dish is your ticket to happiness. It’s like a big hug on a plate!
Picture this: tender chicken pieces braised to perfection and enveloped in a creamy, savory sauce that melds beautifully with fluffy rice. It’s a dish that not only fills your stomach but also fills your home with the warm, inviting aromas that only come from a labor of love. What’s even better? It’s uncomplicated, which means anyone can whip it up—even if you’re a kitchen newbie!
The magic of Smothered Chicken and Rice lies in its simplicity. It’s the perfect way to turn a busy weeknight into something special, or maybe transform your Sunday dinner into a delightful culinary experience. I can practically hear your loved ones saying, “Wow, this is amazing!” as they dig in. Trust me, once you try this recipe, it’ll hold a special place in your heart, just as it does in mine.
So roll up your sleeves, get that apron on, and let’s get down to the delicious details of how we can make this comforting dish together!
Personal Story
Ah, Smothered Chicken and Rice! This dish holds a treasure trove of memories for me. It was a staple during my childhood, a meal that my mother prepared with so much love that just the smell of it cooking could make everything feel right in the world. I fondly remember coming home from school to find the kitchen filled with that rich aroma, heavy with spices and the comforting tones of simmering chicken.
Every Sunday, without fail, my family would gather around the table to enjoy a dinner that wrapped around us like a cozy blanket. After the first bite, there would always be a delightful pause, followed by a chorus of “Yum!” and “Wow, Mom!” She would just smile, telling us that the secret was in the homemade gravy, and you can bet I tried more than a few times to replicate it!
Years later, as I became a passionate home cook myself, Smothered Chicken and Rice became my go-to dish for family gatherings. I love watching everyone’s faces light up with every forkful as they savor the flavor and nostalgia. It’s more than just a meal; it’s a way to keep my family’s traditions alive while creating new memories in my own kitchen.
Ingredients
Here’s everything you’ll need to pull together this fabulous dish:
-
Chicken Thighs (bone-in, skin-on)
These are my favorite for flavor and moisture. You can opt for chicken breasts as a lighter swap, but thighs add richness that makes the dish luxurious. -
Olive Oil
For sautéing and bringing out the flavors. You can use vegetable oil or butter if preferred, but olive oil gives a delightful depth. -
Onion
The backbone of flavor! Sweet onions work best, but yellow onions are just fine too. If you’re not a fan, leeks can be a wonderful alternative. -
Garlic
A few cloves minced will add a fragrant kick. If you’re in a pinch, garlic powder can work, though fresh is always best! -
Bell Peppers
This adds color and sweetness. Feel free to use a mix of red and green or swap them out for other veggies like zucchini or mushrooms for a twist. -
Chicken Broth
Use low-sodium for better control over saltiness. Alternatively, vegetable broth can work, but it will affect the flavor slightly. -
Heavy Cream
For that creamy, dreamy sauce. If you’re looking for a healthier version, half-and-half or even coconut milk can work wonderfully. -
Rice (long grain)
Jasmine or basmati rice not only adds flavor but fluffy texture. If you want to swap for brown rice, cook it a bit longer. -
Seasonings (Salt, Pepper, Paprika, Thyme)
Essential for flavor! You can mix in garlic powder, onion powder, or even Cajun seasoning for an added kick.
Step-by-Step Instructions
Now that we’ve gathered our ingredients, let’s get cooking! Follow these steps to create your Smothered Chicken and Rice masterpiece.
-
Prepare the Chicken
Start by seasoning your chicken thighs with salt, pepper, and paprika. This is a foundational step that builds flavor right from the get-go! Heat a tablespoon of olive oil in a large, heavy-bottomed skillet over medium-high heat. Place the chicken skin side down into the skillet and sear it until golden brown, about 5-7 minutes. Flip and sear the other side for another 5 minutes. We want that nice caramelization for flavor! Once done, remove the chicken and set aside. -
Sauté the Veggies
In the same skillet, add a little more olive oil if necessary. Toss in the chopped onion and sauté until it’s translucent, about 3-4 minutes. This is the moment to add that minced garlic! Sauté for an additional minute until fragrant; trust me, your kitchen is about to smell heavenly! -
Mix in Bell Peppers
Add your diced bell peppers. Let them cook for about 5 minutes until they soften and sweeten up. This will not only build flavor but add color to your dish. -
Create the Sauce
Slowly stir in the chicken broth while scraping the bottom of the pan to release all those delicious bits. Bring it to a simmer, then mix in the heavy cream. Oh, this is getting good! You can also add thyme at this stage for that aromatic kick. -
Return the Chicken to the Pan
Nestle the seared chicken thighs back into the skillet, skin side up. This way, it helps to lock in flavors. Bring the mixture to a gentle simmer again, then cover and reduce heat to low. Let it cook for about 20-25 minutes, or until the chicken is cooked through and reaches an internal temperature of 165°F (74°C). -
Prepare the Rice
While the chicken is simmering, prepare your rice. Rinse it under cold water until the water runs clear to remove excess starch. In a pot, bring double the amount of water (or broth for added flavor) to a boil, then add the rice. Cover and simmer on low for 15-20 minutes until tender, then fluff with a fork. -
Combine
Once the chicken is done, taste the sauce for seasoning and adjust if necessary. If you want it thicker, let it simmer for a few more minutes uncovered. Serve a generous scoop of rice on a plate, topped with that luscious sauce and chicken. There you go—a delicious, comforting dish to share with loved ones!
Serving Suggestions
To serve your Smothered Chicken and Rice, I recommend plating a bed of fluffy rice first, then topping it generously with the saucy chicken and veggies. A sprinkle of freshly chopped parsley or scallions adds a pop of color and freshness. Don’t forget a large spoon for those who want extra sauce! Pair it with a crisp green salad or some buttery cornbread to make it a full meal that warms the heart.
Recipe Variations
Feeling adventurous? Here are some fun twists on this classic:
- Spicy Smothered Chicken: Add diced jalapeños or a splash of hot sauce to the gravy for some heat!
- Mushroom Madness: Toss in sliced mushrooms along with the other vegetables for an umami punch.
- Mediterranean Flair: Swap in olives, sun-dried tomatoes, and sprinkle some feta cheese before serving.
- Vegan Delight: Use tofu or chickpeas instead of chicken, almond milk in place of cream, and vegetable broth to keep it plant-based.
- One-Pot Wonder: Toss uncooked rice into the pot with the chicken and broth for a full meal in one!
Chef’s Notes
Over the years, the Smothered Chicken and Rice recipe has evolved in my kitchen. Initially, I would follow my mother’s classic recipe to a T, but I began experimenting with different spices and vegetables. One day, I added a splash of white wine to the sauce, and let me tell you, it took the dish to a whole new level!
There have been occasions where friends unexpectedly dropped by, and I had to whip this recipe up on a whim. It’s always a hit! I like to say that cooking is like telling stories; each ingredient has a voice, and each step builds on the last to create something truly special. So don’t hesitate to make it your own and enjoy the process!
FAQs and Troubleshooting
1. My chicken is tough; what did I do wrong?
This usually happens from overcooking. Ensure you simmer the chicken just until it’s done—juicy and tender is the goal!
2. Can I use boneless chicken?
Absolutely! Just reduce the cooking time as boneless chicken cooks faster, around 15-20 minutes would be sufficient.
3. The sauce turned out too thin. How can I fix it?
If your sauce is too thin, simply simmer it uncovered for a few extra minutes to help thicken it up. Alternatively, you can create a quick slurry with corn starch and water to add back in.
4. How can I make this dish gluten-free?
All the ingredients here can be adapted for gluten intolerance. Use gluten-free flour to thicken, or simply allow the sauce to reduce for a natural thickening without any flour!
Nutritional Info (Optional)
This recipe serves approximately 4 people. Basing it off my specific ingredient choices, here is a rough nutritional breakdown per serving:
- Calories: 550
- Protein: 30g
- Carbohydrates: 50g
- Fat: 25g
- Fiber: 2g
Of course, these values will vary based on your specific choices—especially if you opt for any of the variations mentioned!
And there you have it—a comforting, warm Smothered Chicken and Rice that surely hugs your heart and fills your belly. With every mouthful, you’re not just tasting food; you’re experiencing love, warmth, and connection. So why not put on your apron and bring this dish to your table? Happy cooking, friends!
Print
Smothered Chicken and Rice
- Total Time: 45 minutes
- Yield: 4 servings 1x
- Diet: None
Description
A comforting dish featuring tender chicken thighs smothered in a creamy sauce served over fluffy rice.
Ingredients
- 4 Chicken Thighs (bone-in, skin-on)
- 2 tablespoons Olive Oil
- 1 Onion, chopped
- 4 cloves Garlic, minced
- 1 Bell Pepper, diced
- 2 cups Chicken Broth (low-sodium)
- 1 cup Heavy Cream
- 1 cup Rice (long grain, jasmine or basmati)
- Salt, to taste
- Pepper, to taste
- Paprika, to taste
- Thyme, to taste
Instructions
- Prepare the chicken by seasoning with salt, pepper, and paprika, then sear in olive oil until golden brown.
- Sauté the onion in the same skillet until translucent, then add garlic and sauté.
- Mix in the diced bell peppers and cook until softened.
- Create the sauce by adding chicken broth and heavy cream, stirring to combine.
- Return the chicken to the pan, cover, and simmer until cooked through.
- Prepare the rice by rinsing, then cooking it in boiling water until tender.
- Combine the cooked rice with the chicken and sauce for serving.
Notes
Serve with a sprinkle of freshly chopped parsley or scallions and a side of salad or cornbread.
- Prep Time: 15 minutes
- Cook Time: 30 minutes
- Category: Main Course
- Method: Stovetop
- Cuisine: American
Nutrition
- Serving Size: 1 serving
- Calories: 550
- Sugar: 3g
- Sodium: 750mg
- Fat: 25g
- Saturated Fat: 10g
- Unsaturated Fat: 15g
- Trans Fat: 0g
- Carbohydrates: 50g
- Fiber: 2g
- Protein: 30g
- Cholesterol: 80mg
Keywords: comfort food, chicken, rice, easy recipe, family meal
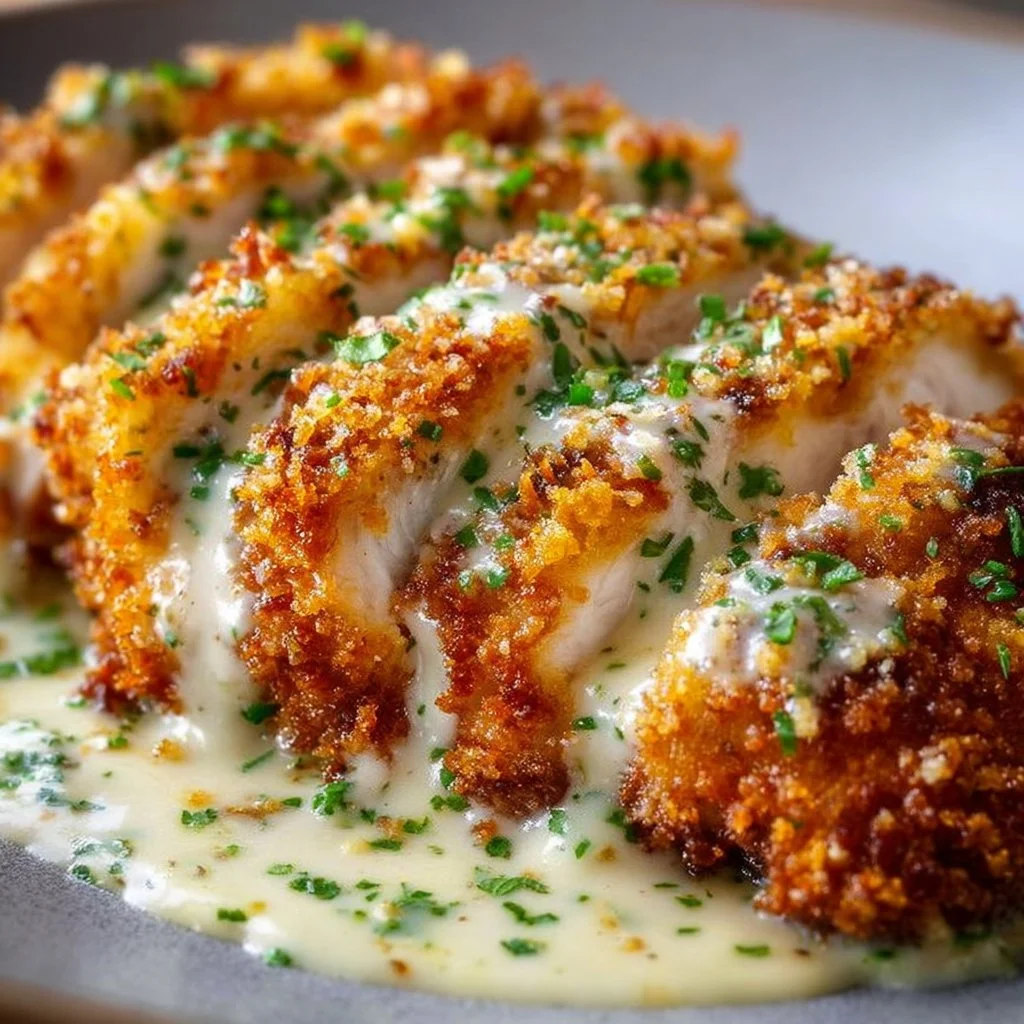
Crispy Parmesan Chicken with Creamy Garlic Sauce
# Crispy Parmesan Chicken with Creamy Garlic Sauce

## Introduction

Welcome, dear food lovers! Today in my cozy kitchen, we’re embarking on a culinary adventure that will transform your weeknight dinners. If you’re a fan of crispy textures, rich flavors, and that warm, cozy feeling that comes from homemade meals, then you’re in for a treat. Let’s talk about one of my all-time favorites: **Crispy Parmesan Chicken with Creamy Garlic Sauce**. This dish hits all the right notes and has the power to turn an ordinary evening into something special.

Picture this: tender chicken breasts coated in a golden, crispy Parmesan crust, served alongside a luscious garlic sauce that drapes over the chicken like a warm hug. This dish is not just a meal; it's a journey into flavor town!

When I first discovered the magic of cooking with Parmesan, I became obsessed with finding ways to incorporate it into just about everything. Let me tell you, there’s something about that nutty richness combined with the crunch of breadcrumbs that simply elevates a simple chicken dinner. In fact, this recipe has become a staple in my home and has surely earned its place in the hearts (and bellies!) of my family and friends.

Whether you’re cooking for a small weeknight dinner or prepping a casual weekend get-together, this dish is versatile and sure to impress. Plus, it's surprisingly easy to make! So roll up those sleeves, grab that apron (messy ones are my favorite!), and let’s dive into this crispy delight.

## Personal Story

Let me take you back to a cozy autumn evening a few years ago. It was a chilly day, and I was craving something comforting. I remembered a time from my childhood when my mom would whip up her famous chicken dish, which was always accompanied by a creamy concoction she loved to make. I'll never forget that smell wafting through our house—the aroma of sizzling chicken mixed with garlic made the entire neighborhood's mouth water.

As I brainstormed for that night’s dinner, I recalled my mom's classic dish, but with a twist of my own. Instead of her seasoning, I went bold with Parmesan and breadcrumbs, giving it a crispy edge. The first bite sent me back to those cherished memories of family dinners filled with laughter and love. This Crispy Parmesan Chicken quickly became my way of recreating those beautiful moments, where food is not just nourishment but a connector of souls.

## Ingredients

Let’s get those ingredients lined up! Here's what you'll need to create this delectable dish:

- **Chicken Breasts (4 pieces)**: The star of our show! Choose skinless, boneless chicken breasts for an easy cooking experience. You can substitute with thighs for a juicier option.

- **Parmesan Cheese (1 cup, grated)**: This cheese brings a nutty flavor and promotes that crispy crust. If you’re not a fan of Parmesan, Pecorino Romano or even a blend of your favorite cheeses works well.

- **Breadcrumbs (1 cup)**: These add incredible crunch. I suggest panko breadcrumbs for an extra crispy texture. If you need a gluten-free option, go for gluten-free breadcrumbs or crushed cornflakes.

- **Garlic (4 cloves, minced)**: Garlic is the key aromatic. For a milder flavor, try roasted garlic instead, which adds a lovely sweetness to the sauce.

- **Heavy Cream (1 cup)**: This is what makes our sauce rich and indulgent. If you want a lighter option, you can use half-and-half or a plant-based cream.

- **Butter (2 tablespoons)**: It adds richness to the sauce. For a vegan version, use a plant-based butter alternative.

- **Olive Oil (2 tablespoons)**: Necessary for frying the chicken. Feel free to replace it with avocado oil for a higher smoke point and a subtle flavor.

- **Salt & Pepper (to taste)**: Always season your food—don't skip this vital step! For an extra flavor boost, consider adding Italian seasoning or paprika.

- **Fresh Parsley (for garnish)**: Adds a pop of color and freshness. Chives or basil can be used for a different herbal experience.

## Step-by-Step Instructions

Now that we have our ingredients, let’s dive into the cooking process! Follow along, and I’ll share some little tips along the way to make your chicken perfection achievable.

### Step 1: Prepare the Chicken
Start by patting your chicken breasts dry with paper towels. This helps achieve that wonderful crispiness we’re after. Next, season both sides generously with salt and pepper. It’s amazing how a little seasoning brings out the natural flavors of the chicken!

### Step 2: Dredging Station
Set up your dredging station! You’ll need three shallow bowls: one with the grated Parmesan cheese, another with the breadcrumbs, and the third one with a bit of olive oil mixed in. This oil will help our breadcrumbs to get golden brown and crispy.

### Step 3: Coat the Chicken
Take each marinated chicken breast and first dip it in the Parmesan cheese, making sure to coat it fully. Then, transfer it to the breadcrumb bowl and press down gently, ensuring the crumbs adhere well. Repeat for all the pieces—lay them carefully on a plate once done.

### Step 4: Searing the Chicken
Heat a large skillet over medium-high heat and add in a generous drizzle of olive oil. Once hot, gently add the chicken pieces, making sure to leave space between them—you don’t want overcrowding! Let them cook for about 6-7 minutes per side. You'll know they’re ready to flip when they're golden and crisp.

### Step 5: Making the Creamy Garlic Sauce
While your chicken is searing away, let’s whip up that sauce! In a separate saucepan, melt your butter over medium heat and sauté the minced garlic until fragrant—about 1-2 minutes. Be careful not to let it burn; we want it soft and aromatic!

Now add the heavy cream to the saucepan, stirring continuously to combine. Let it simmer gently while it thickens (~5 minutes). If you like a bit of richness, throw in another pinch of Parmesan! Taste it and add salt and pepper as needed.

### Step 6: Bringing it all together
Once your chicken is done, transfer it to a serving platter and generously drizzle with that creamy garlic sauce. I like to garnish with freshly chopped parsley; it adds a wonderful pop of color and flavor!

## Serving Suggestions

To plate your Crispy Parmesan Chicken, consider serving it with a side of roasted vegetables or a fresh green salad for balance. For a polished look, why not serve it alongside creamy mashed potatoes or garlic bread to complete the cozy vibe? Don’t forget to pour a little extra sauce on the side for dipping!

## Recipe Variations

Feel free to get creative! Here are a few twists you might consider:

1. **Lemon Zest**: Add some grated lemon zest to the breadcrumb mixture for a fresh, zesty kick!
2. **Spicy Chicken**: Incorporate some cayenne pepper into your Parmesan mix for a bit of heat.
3. **Herb-Infused**: Mix in some dried herbs like oregano or thyme into the breadcrumbs for an extra flavor dimension.
4. **Vegetable Medley**: Replace the chicken with eggplant slices or even cauliflower for a delightful meatless option!
5. **Crispy Capers**: Add crispy capers to your creamy sauce for an unexpected salty twist.

## Chef’s Notes

I can’t emphasize enough how versatile this recipe is—over the years, I’ve adapted it countless times based on what I had at home or the season. I’ve swapped chicken for turkey, experimented with different cheeses, and even thrown in seasonal vegetables. One time, I invited friends over and ended up mixing herbs from my garden into the sauce—it was a hit! I always encourage you to make it your own. After all, cooking is about joy, creativity, and a bit of delicious experimentation.

## FAQs and Troubleshooting

**1. Why isn’t the chicken crispy?**
If your chicken isn’t crisping up, check if the oil was hot enough before adding the chicken. A too-low temperature can result in soggy breading.

**2. Can I make the sauce ahead of time?**
Absolutely! The sauce can be made in advance and stored in the fridge. Just reheat it gently over low heat when you’re ready to serve.

**3. How do I know when the chicken is done?**
The best way to determine doneness is by checking the internal temperature. It should reach a minimum of 165°F (75°C). If you don’t have a thermometer, ensure the juices run clear when pierced with a fork.

**4. What should I do if the chicken is dry?**
Don’t let it cook too long! If you find yourself with dry chicken, try serving it sliced in the creamy sauce or add a bit of broth to rehydrate.

## Nutritional Info (Optional)

While this recipe is indulgent and meant for treating yourself, here’s a general breakdown (for one serving):

- Calories: 520
- Protein: 36g
- Fat: 30g
- Carbohydrates: 22g
- Fiber: 1g

## Conclusion

There you have it—my ultimate recipe for Crispy Parmesan Chicken with Creamy Garlic Sauce! I hope you feel inspired to gather your ingredients and create this dish that’s bound to be a crowd-pleaser at the dinner table. Remember, cooking is not just about following a recipe; it’s about making memories, experimenting with flavors, and, most importantly, enjoying the process! I can’t wait to hear about your own kitchen adventures with this recipe. Happy cooking, and may your kitchen always be filled with joy and love!

Crispy Parmesan Chicken with Creamy Garlic Sauce
- Total Time: 45 minutes
- Yield: 4 servings 1x
- Diet: Non-Vegetarian
Description
Tender chicken breasts coated in a golden, crispy Parmesan crust, served with a luscious garlic sauce.
Ingredients
- 4 pieces skinless, boneless Chicken Breasts
- 1 cup grated Parmesan Cheese
- 1 cup Breadcrumbs (preferably panko)
- 4 cloves Garlic (minced)
- 1 cup Heavy Cream
- 2 tablespoons Butter
- 2 tablespoons Olive Oil
- Salt & Pepper (to taste)
- Fresh Parsley (for garnish)
Instructions
- Prepare the chicken by patting dry and seasoning with salt and pepper.
- Set up a dredging station with bowls of Parmesan, breadcrumbs, and olive oil.
- Coat each chicken piece in Parmesan, then in breadcrumbs.
- Heat a skillet over medium-high heat with olive oil and sear chicken for 6-7 minutes per side.
- Make the creamy garlic sauce by sautéing garlic in butter, then adding heavy cream and simmering until thickened.
- Drizzle the cooked chicken with the creamy sauce and garnish with parsley.
Notes
For variations, consider adding lemon zest for freshness or substituting chicken with eggplant for a vegetarian option.
- Prep Time: 15 minutes
- Cook Time: 30 minutes
- Category: Main Course
- Method: Searing
- Cuisine: Italian
Nutrition
- Serving Size: 1 serving
- Calories: 520
- Sugar: 1g
- Sodium: 800mg
- Fat: 30g
- Saturated Fat: 15g
- Unsaturated Fat: 12g
- Trans Fat: 0g
- Carbohydrates: 22g
- Fiber: 1g
- Protein: 36g
- Cholesterol: 100mg
Keywords: chicken, parmesan, garlic, creamy sauce, crispy, dinner recipe
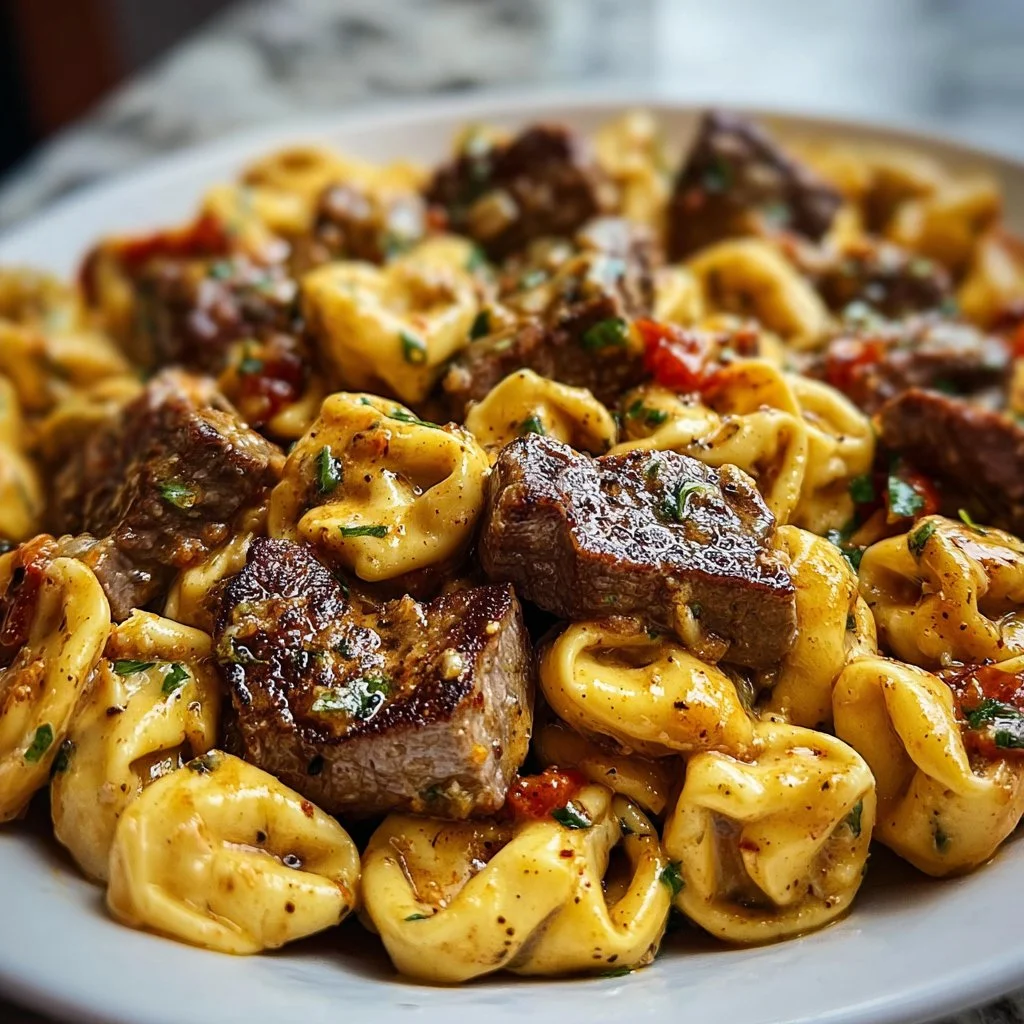
One-Pan Cowboy Butter Tortellini Steak Bites Recipe
One-Pan Cowboy Butter Tortellini Steak Bites Recipe
Hey there, fellow food lovers! Welcome back to my cozy little corner of the culinary world! Today, I’m thrilled to share with you a recipe that is equal parts comforting and adventurous: One-Pan Cowboy Butter Tortellini Steak Bites. If you’re like me and find joy in the exhilarating sizzle of steak, the richness of seasoned butter, and the delightful chew of tortellini, then you’re in for a real treat!
This dish is all about the harmony of flavors and textures. Picture succulent marinated steak bites sizzling in a buttery, garlicky sauce that envelops every piece of tortellini. It’s the perfect solution for busy weeknights when you crave a home-cooked meal without spending hours in the kitchen. Plus, everything cooks in just one pan – yes, you heard that right! Less mess and more deliciousness.
But wait, it gets better! This recipe embodies cozy family dinners while also being a crowd-pleaser for gatherings with friends. The ease of preparation doesn’t skimp on flavor, making it ideal for impressing that special someone or simply treating yourself to a well-deserved feast. So, grab your apron (and your favorite playlist) because we’re diving into this flavorful adventure together!
Personal Story
Let me take you back to a chilly autumn evening a few years ago when I first concocted a casual version of this hearty dish. It was one of those nights where the leaves were swirling outside, and the air was filled with the aroma of wood smoke. My friends were coming over for dinner, and I wanted to whip up something that would warm their hearts and tickle their taste buds.
I had a bag of tortellini in the fridge, leftover steak from a summer barbecue, and an irresistible craving for comfort food. As I combined the ingredients and drizzled that decadent cowboy butter, memories poured in of my family gathered around the table, laughing and tasting my latest culinary experiments. When the dish was finally ready, we couldn’t stop raving about it. I remember my friend Sara looking up with a mouthful of buttery goodness and declaring, “This needs to be a regular in your kitchen!” It was that moment that sparked the inspiration to refine the recipe into the one I’m sharing today.
So, let’s get into the kitchen and recreate that magic!
Ingredients
Here’s what you’ll need to create this mouthwatering One-Pan Cowboy Butter Tortellini Steak Bites. Don’t worry; these ingredients are straightforward and versatile!
-
Steak (1 lb, sirloin or ribeye): Opt for a good cut that can be easily cubed. If you’re looking for a leaner alternative, try chicken breast or diced portobello mushrooms for a vegetarian twist.
-
Cheese tortellini (12 oz): You can use fresh or frozen tortellini, depending on what you have handy. If you want a gluten-free option, look for gluten-free tortellini, often made with chickpea or lentil flour.
-
Unsalted butter (4 tbsp): This is where the magic happens! Unsalted butter allows you to control the seasoning. If you want a healthier option, coconut oil can be a great substitute for a slightly different flavor.
-
Olive oil (1 tbsp): A splash of olive oil adds flavor and helps to prevent sticking. You could also use avocado oil for a mild flavor and higher smoke point.
-
Garlic (4 cloves, minced): Freshly minced garlic is a game changer in this dish. If you’re in a pinch, garlic powder will work, but fresh garlic just makes everything better!
-
Cowboy seasoning (2 tbsp): If you don’t have cowboy seasoning on hand, make your own with a blend of paprika, chili powder, cumin, garlic powder, and a pinch of cayenne for heat.
-
Fresh parsley (for garnish): A pop of green for presentation! You can swap it with basil or chives if you prefer a different herb flavor.
-
Salt & Pepper (to taste): Always a must-have to elevate flavors! Feel free to use sea salt for a more intense flavor.
Let’s gather these ingredients and get cooking!
Step-by-Step Instructions
Now, let’s roll up our sleeves and dive right into the cooking process of this One-Pan Cowboy Butter Tortellini Steak Bites. Trust me; it’s easier than it sounds!
-
Prepare the Steak:
Start by trimming any excess fat from the steak, if necessary. Cut the steak into bite-sized cubes, approximately 1 inch thick. Season generously with salt, pepper, and cowboy seasoning. This will ensure every piece is packed with flavor. Chef’s tip: Letting the seasoned steak sit for about 15 minutes at room temperature will help with even cooking. -
Cook the Tortellini:
In a large pot of salted boiling water, cook the tortellini according to the package directions until they are al dente. Fresh tortellini usually takes about 3-5 minutes, while frozen may take a bit longer. Once done, drain the tortellini and set it aside. Hack: Add a splash of olive oil to the pasta after draining to prevent it from sticking. -
Sear the Steak:
In a large skillet (a cast iron or non-stick works great), heat 1 tablespoon of olive oil over medium-high heat. Once hot, add the steak cubes in a single layer. Cook for about 2-3 minutes on each side until they are wonderfully browned and cooked to your desired doneness. You might want them medium-rare for the juiciest bites. Pro tip: Avoid overcrowding the pan – cook in batches if necessary to achieve a good sear. -
Make the Cowboy Butter:
After removing the steak, reduce the heat to medium and add the unsalted butter to the skillet. Once melted, toss in the minced garlic, stirring for about 30 seconds until fragrant. Then add the remaining cowboy seasoning and quickly stir to combine. The aroma is already dreamy, right? -
Combine Everything:
In this step, add the cooked tortellini directly to the skillet, tossing it in that lush cowboy butter to coat. Sprinkle the cooked steak back into the pan, gently combining everything so every piece gets that delicious garlic-y flavor. Little chef hack: If the mixture looks dry, a splash of pasta water will help it come together beautifully! -
Final Touches:
Let it all simmer for about 2-3 minutes, allowing the flavors to meld, and then taste and adjust seasoning with additional salt and pepper if necessary. Before serving, sprinkle freshly chopped parsley over the top for that delightful pop of color.
Serving Suggestions
To serve your One-Pan Cowboy Butter Tortellini Steak Bites, scoop generous portions into shallow bowls or on rustic plates. You can drizzle a little extra melted butter or a sprinkle of freshly grated Parmesan cheese for an extra cheesy touch. Pair it with a simple side salad or garlic bread to complete this cozy meal. Everyone at the table will want seconds, trust me!
Recipe Variations
Here are some creative twists you can try with this recipe:
-
Veggie Boost: Add in some sautéed vegetables like spinach, bell peppers, or sun-dried tomatoes for a vibrant, nutritious kick!
-
Spicy Kick: Incorporate some crushed red pepper flakes or jalapeños to spice things up.
-
Creamy Twist: For a richer dish, throw in a splash of heavy cream or cream cheese when combining the tortellini and steak for a delightful creamy texture.
-
Herbed Up: Swap out the cowboy seasoning for an Italian herb mix to give it an entirely different flavor profile.
-
Gluten-Free Goodness: Use gluten-free tortellini and ensure the seasoning is also gluten-free for a dish that fits dietary needs without losing flavor.
Chef’s Notes
Looking back on my culinary journey, I chuckle sometimes at my earlier days in the kitchen – like the time I accidentally swapped salt with sugar in a sauce! The contrasts can create some comedy gold, but thankfully, I haven’t had that experience with this recipe. Over the years, I’ve seen it evolve from a haphazard mix of leftovers into a go-to dish that friends and family rave about. Now, as I share this with you, it makes me feel all warm and fuzzy thinking about all the kitchens it’ll find its way into!
FAQs and Troubleshooting
-
What type of steak is best for this recipe?
Sirloin and ribeye are great choices due to their flavor and tenderness, but feel free to experiment with flank or filet mignon. -
Can I make this dish ahead of time?
While you can prep the steak and tortellini in advance, I’d recommend cooking them just before serving to retain optimal flavor and texture. -
What if I overcooked the steak?
Try using thinner cut steak next time, or keep a close eye on the time while cooking. If it’s too chewy, consider slicing it thinner before serving for a more tender bite. -
How do I know when the steak is done?
For medium-rare, aim for an internal temperature of about 130°F-135°F. Use an instant-read thermometer for the best results.
Nutritional Info
(Optional as this remains a personal choice, but if you want to include, you could provide:)
- Calories: Approximately 550 per serving (includes steak and tortellini)
- Protein: 35g
- Carbohydrates: 50g
- Fat: 25g
- Fiber: 3g
And there you have it, my dear food friends! From heartfelt kitchen stories to a delightful recipe, I hope this One-Pan Cowboy Butter Tortellini Steak Bites finds a special place in your home. Whether you’re cooking for family or just treating yourself, food is about connection, love, and sharing. Enjoy every bite, and remember, cooking is all about having fun! Happy cooking! 🥳
Print
One-Pan Cowboy Butter Tortellini Steak Bites
- Total Time: 35 minutes
- Yield: 4 servings 1x
- Diet: Non-Vegetarian
Description
A comforting and adventurous dish combining marinated steak bites, seasoned butter, and tortellini, all cooked in one pan for a quick and flavorful meal.
Ingredients
- 1 lb Sirloin or ribeye steak, cubed
- 12 oz Cheese tortellini, fresh or frozen
- 4 tbsp Unsalted butter
- 1 tbsp Olive oil
- 4 cloves Garlic, minced
- 2 tbsp Cowboy seasoning
- Fresh parsley, for garnish
- Salt & Pepper, to taste
Instructions
- Prepare the steak by trimming excess fat and cutting into bite-sized cubes. Season with salt, pepper, and cowboy seasoning.
- Cook the tortellini in a large pot of boiling water according to package directions until al dente.
- Sear the steak in a skillet with olive oil for 2-3 minutes on each side until browned.
- Make the cowboy butter by melting the unsalted butter in the skillet, then adding garlic and seasoning.
- Combine the cooked tortellini with the cowboy butter and add the cooked steak back in.
- Final touches: Simmer for 2-3 minutes, taste, adjust seasoning, and garnish with parsley.
Notes
For a lighter version, substitute coconut oil for butter. You can also add vegetables or spices to customize the dish.
- Prep Time: 15 minutes
- Cook Time: 20 minutes
- Category: Main Course
- Method: Stovetop
- Cuisine: American
Nutrition
- Serving Size: 1 serving
- Calories: 550
- Sugar: 2g
- Sodium: 700mg
- Fat: 25g
- Saturated Fat: 12g
- Unsaturated Fat: 10g
- Trans Fat: 0g
- Carbohydrates: 50g
- Fiber: 3g
- Protein: 35g
- Cholesterol: 90mg
Keywords: tortellini, steak bites, one-pan, cowboy butter, comfort food
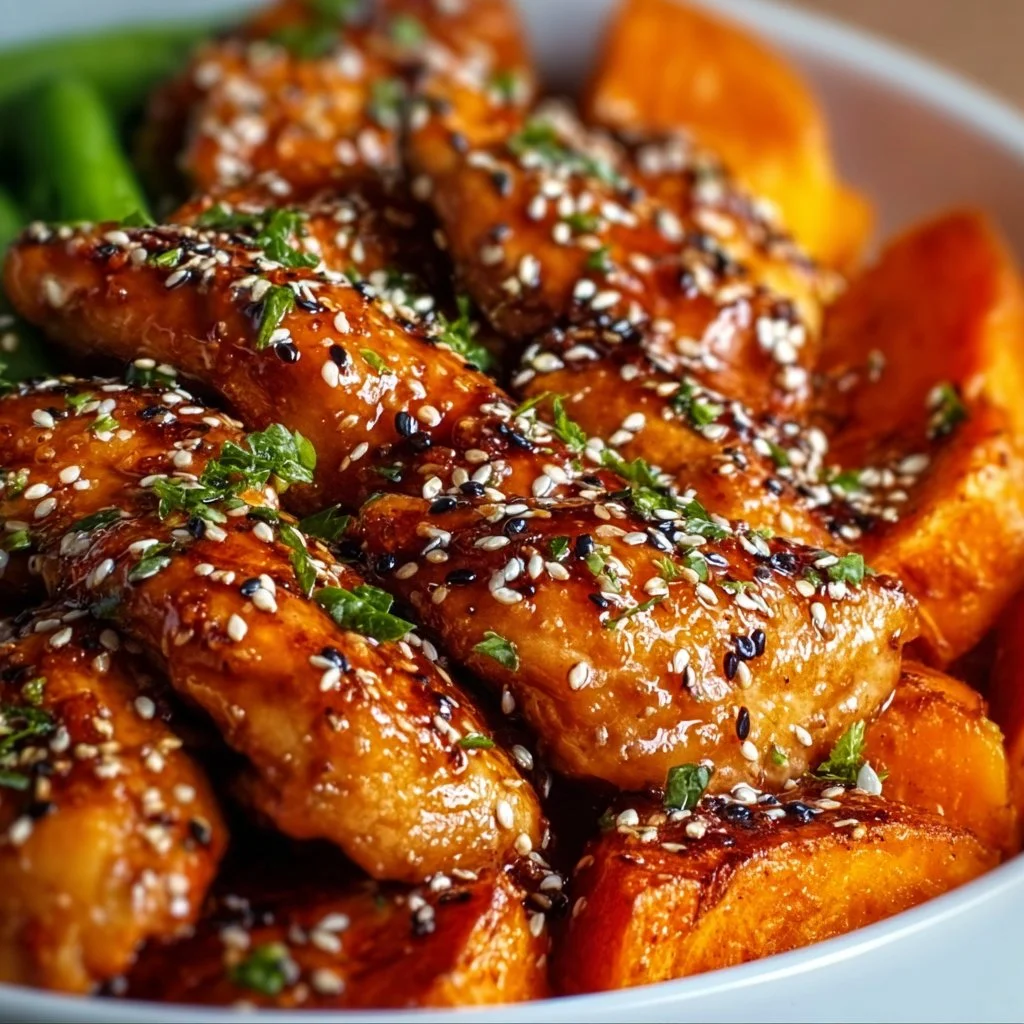
Discover the Best Honey Garlic Chicken and Sweet Potato Recipe for a Quick and Delicious Dinner
Discover the Best Honey Garlic Chicken and Sweet Potato Recipe for a Quick and Delicious Dinner
Welcome to my cozy corner of the internet! I’m Olivia Bennett, your passionate home cook and culinary cheerleader. If you’ve ever found yourself giddy at the smell of something baking or felt that warm glow of satisfaction as you feed your loved ones, you’re in the right place. Today, I’m thrilled to share one of my all-time favorite recipes: Honey Garlic Chicken with Sweet Potatoes! This dish embodies everything I adore about cooking—simple ingredients transformed into something memorable with minimal fuss.
As the leaves start changing color and the days grow shorter, there’s nothing like cozying up at the dinner table with hearty, flavor-packed meals. Honey Garlic Chicken is perfect for those busy weekdays when you want something delightful that doesn’t need an army of ingredients or hours of prep. Oh, and did I mention that it’s delicious? Spoiler alert: It’s a weeknight superstar!
Personal Story
This recipe brings back delightful memories of family dinners at my childhood home. I still picture my mom in our sunlit kitchen, whipping up her signature honey garlic chicken on a chilly autumn evening. The sweet and tangy aroma would waft through the house, making our stomachs rumble with anticipation. We’d gather around the table, sharing stories about our days while devouring those tender chicken pieces, each bite a reminder of home and love. It’s incredible how a simple dish can hug your heart, isn’t it? When I make this recipe now, I can’t help but feel those warm memories flooding back. It’s a tradition I carry forward, creating new memories with my friends and family while sharing the love over this meal.
Ingredients
Gather up the tasty goodness—here’s what you’ll need to whip up this heartwarming dish:
-
Chicken Thighs (bone-in or boneless, skin-on or skinless)
- Flavor Insight: Thighs are juicier compared to chicken breasts, making them perfect for this dish. If you’re looking for a leaner option, go for boneless skinless breasts.
-
Sweet Potatoes
- Chef Tip: Sweet potatoes provide a delightful sweetness that complements the savory chicken. You can substitute with butternut squash or even regular potatoes for a twist.
-
Honey
- Substitution: Clover honey or local honey works wonders; for a vegan approach, maple syrup is a great alternative!
-
Garlic (fresh cloves or minced)
- Pro Insight: Fresh garlic packs a punch! For convenience, use jarred minced garlic, but fresh always wins in flavor.
-
Soy Sauce (low sodium)
- Chef’s Choice: This adds umami depth. For gluten-free options, try tamari or coconut aminos.
-
Olive Oil
- Tip: A great all-purpose oil for sautéing, but feel free to use avocado oil for a higher smoke point.
-
Salt and Pepper
- Seasoning Pro: Always taste and adjust as you go. It’s better to start with less and add than to over-season!
-
Fresh Herbs (like parsley or cilantro) for garnish
- Flavors: Fresh herbs brighten up the dish! If you’re looking for a twist, try fresh basil or rosemary.
Step-by-Step Instructions
Now let’s dive into the cooking process, where the magic happens! Here are the steps to create this incredible Honey Garlic Chicken and Sweet Potatoes dish:
-
Preheat the Oven
- Start by preheating your oven to 425°F (220°C). This step ensures that your chicken and sweet potatoes cook evenly and get that lovely golden crispiness!
-
Prepare the Sweet Potatoes
- Peel and chop the sweet potatoes into bite-sized chunks. The uniformity in size helps them cook evenly!
- Toss them in a bowl with a drizzle of olive oil, salt, and pepper. Give them a good mix until they’re well-coated—this will enhance their flavors in the oven.
-
Season the Chicken
- Pat your chicken thighs dry with a paper towel (this helps them crisp up nicely) and season generously with salt and pepper.
- In a separate bowl, mix together the minced garlic, honey, soy sauce, and a hint of olive oil to create a sticky glaze. If you’re feeling adventurous, throw in a pinch of red pepper flakes for some heat!
-
Combine and Bake
- In a large baking dish, arrange the sweet potatoes in a single layer and place the seasoned chicken on top. Spoon the honey garlic mixture evenly over the chicken.
- It’s okay if some of the glaze covers the sweet potatoes; they’ll soak up all that delicious flavor as they cook.
-
Bake to Perfection
- Pop the dish into your preheated oven and bake for about 30-35 minutes (or until the chicken is fully cooked and the sweet potatoes are tender). About halfway through the bake, flip the chicken and give the sweet potatoes a stir to ensure even cooking.
-
Caramelization is Key
- Look for that nice caramelization on the chicken when it’s done. If you want an extra edge of crispiness, you can broil it for the last couple of minutes—keep an eye on it so it doesn’t burn!
-
Final Touches
- Once it’s out of the oven, let it rest for a few moments. This allows the juices to redistribute, making for a moist chicken. Just before serving, garnish with fresh herbs for that burst of color and flavor.
Serving Suggestions
When it comes to serving, presentation is everything! Plate the tender chicken and colorful sweet potatoes on a large, rustic serving platter. Drizzle any remaining honey garlic sauce from the dish directly on top for that extra flavor explosion. Serve with a refreshing green salad on the side or steamed broccoli for a pop of color and texture—your guests (or family!) won’t be able to resist!
Recipe Variations
Here are a few fun twists to make this dish your own:
- Spicy Honey Garlic Chicken: Add chili paste or sriracha to the honey garlic marinade for a spicy kick!
- Lemon Herb Chicken: Replace honey with lemon juice and use rosemary or thyme in place of garlic for a bright flavor.
- Sheet Pan Dinner: Add seasonal vegetables like Brussels sprouts or carrots alongside the chicken and sweet potatoes for a complete one-pan meal.
- BBQ Twist: Substitute the honey for your favorite BBQ sauce for a smoky flavor. Just be careful with the salt as BBQ sauce can be quite salty!
- Coconut Honey Chicken: Use coconut aminos instead of soy sauce and add a can of coconut milk to the dish for a tropical touch.
Chef’s Notes
This recipe has been a staple in my kitchen for years, evolving along with my taste and the seasons. I love the way the honey caramelizes, creating that sticky goodness. Funny enough, this was the dish that won over my husband’s heart! He often jokes that he could eat this every day—no complaints from me either: it’s that good! If you find the sweetness a touch overwhelming, adding a squeeze of lime just before serving can perfectly balance the dish while brightening up all the flavors.
FAQs and Troubleshooting
1. Why isn’t my chicken crispy?
If your chicken isn’t crisping up, make sure it’s dry before seasoning, and don’t overcrowd the baking dish. Air circulation is key to achieving that beautiful crisp!
2. Can I prepare this ahead of time?
Absolutely! You can marinate the chicken up to a day in advance. Just toss everything together and let it soak in those flavors in the fridge.
3. What if I don’t have honey?
You can substitute with maple syrup or agave nectar for a different sweet twist. Both keep that delightful glaze!
4. My sweet potatoes are mushy, what went wrong?
If your sweet potatoes are overcooked, it may be due to their size. Cutting them larger can help them hold their shape and achieve that perfect tender texture.
Nutritional Info
While I typically focus on the love and joy of cooking rather than strict dietary details, here’s a rough estimate of the nutrition in a serving of this dish (including chicken and sweet potatoes):
- Calories: ~450 kcal
- Protein: ~30g
- Carbohydrates: ~50g
- Fat: ~15g
- Fiber: ~6g
Cooking doesn’t have to be a high-stress experience! Even on busy weeknights, this Honey Garlic Chicken and Sweet Potatoes recipe holds a special place on my dinner table, filling both bellies and hearts. I hope you enjoy making it as much as I do. Dive in, get your apron messy, and let the flavors and memories begin to flow. Happy cooking, my friends!
Print
Honey Garlic Chicken with Sweet Potatoes
- Total Time: 50 minutes
- Yield: 4 servings 1x
- Diet: Gluten-Free
Description
A quick and delicious Honey Garlic Chicken dish paired with sweet potatoes, perfect for busy weeknights.
Ingredients
- 4 Chicken Thighs (bone-in or boneless, skin-on or skinless)
- 2 Sweet Potatoes, peeled and chopped
- 1/4 cup Honey
- 4 cloves Garlic, minced
- 1/4 cup Soy Sauce (low sodium)
- 2 tablespoons Olive Oil
- Salt and Pepper, to taste
- Fresh Herbs (like parsley or cilantro) for garnish
Instructions
- Preheat the oven to 425°F (220°C).
- Prepare the sweet potatoes by peeling and chopping them into bite-sized chunks.
- Toss them in a bowl with olive oil, salt, and pepper.
- Pat the chicken thighs dry and season with salt and pepper.
- Mix together the minced garlic, honey, soy sauce, and olive oil in a bowl.
- Arrange the sweet potatoes in a baking dish and place the seasoned chicken on top.
- Spoon the honey garlic mixture over the chicken.
- Bake for about 30-35 minutes, flipping the chicken halfway through.
- Garnish with fresh herbs before serving.
Notes
For a spicy kick, add chili paste or sriracha to the marinade. This dish is also great with a squeeze of lime to balance the sweetness.
- Prep Time: 15 minutes
- Cook Time: 35 minutes
- Category: Main Course
- Method: Baking
- Cuisine: American
Nutrition
- Serving Size: 1 serving
- Calories: 450
- Sugar: 22g
- Sodium: 600mg
- Fat: 15g
- Saturated Fat: 2g
- Unsaturated Fat: 9g
- Trans Fat: 0g
- Carbohydrates: 50g
- Fiber: 6g
- Protein: 30g
- Cholesterol: 80mg
Keywords: Honey Garlic Chicken, Sweet Potatoes, Easy Dinner, Quick Recipe
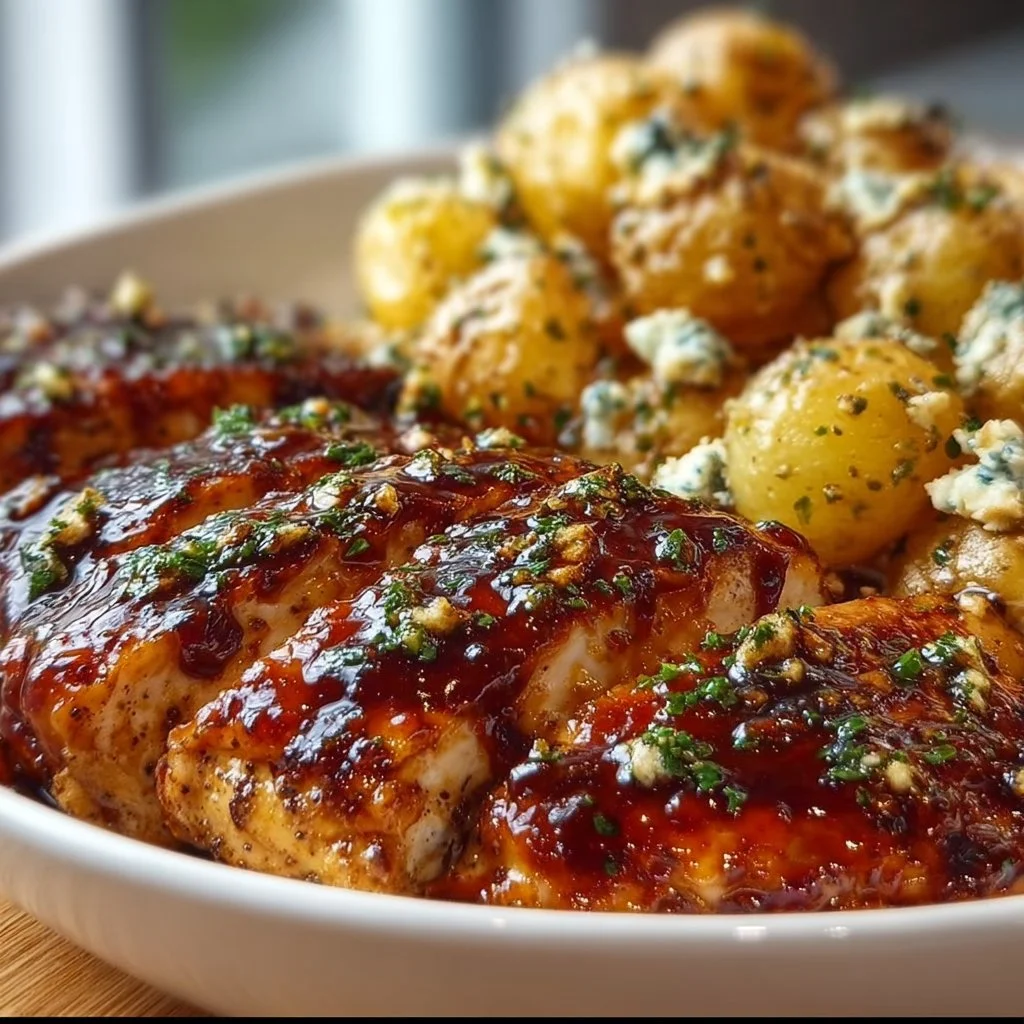
Honey BBQ Chicken with Garlic Parmesan Potatoes
Honey BBQ Chicken with Garlic Parmesan Potatoes: A Flavorful Journey in Your Kitchen
Welcome back to my cozy kitchen, fellow food lovers! Today, we’re diving into a dish that’s not only bursting with flavor but also comes with a sprinkle of nostalgia. I’m talking about Honey BBQ Chicken paired with the most delectable Garlic Parmesan Potatoes you can imagine. The combination is simply blissful, and it’s the kind of meal that brings people to the table, smiles on their faces, and the sweet scent of home-cooked goodness wafting through the air.
I can still remember the first time I made Honey BBQ Chicken. It was a warm summer evening, and my family had gathered for our traditional Saturday night barbecue. The sun was setting, painting the sky in stunning shades of pink and orange, when my dad fired up the grill. I decided to whip up a new recipe I found that promised a tangy, sweet glaze that would dance on the chicken. Fast forward to that first bite: the chicken was tender, juicy, and coated in a sticky sweetness that I still dream about today!
Combine that with the crispy, crunchy Garlic Parmesan Potatoes—a side dish that feels like comfort food wrapped in a warm hug—and you’ve got a meal that’s worth celebrating. Whether you’re preparing dinner for your loved ones, hosting a get-together, or just indulging in some self-care through cooking, this recipe is your ticket to flavor town. Grab your apron, because we’re going to make something special.
Personal Story
Ah, the memories attached to food can be so powerful! For me, the first encounter with Honey BBQ Chicken has a special place in my heart. It was during a family reunion, where laughter filled the air, and the aroma of grilled meat wafted around. I was slightly younger—and a little more mischievous—than I am now! My aunt decided to hand me the brush to slather on the homemade BBQ sauce, and I remember thinking I was the star of the show.
As I brushed the sauce onto the chicken, my younger cousins hovered around, lured in by the smell. It was a chaotic scene, with sticky hands trying to sneak little bites and the adults joking about it. But when the chicken was finally served, we all sat together, sharing stories and fun moments while enjoying the tender, tangy, sweet feast I felt proud to have helped prepare. The joy of that gathering lives on in every bite I take of Honey BBQ Chicken, making it a go-to in my kitchen whenever I want to recreate that cozy, familial atmosphere.
Ingredients
Here’s what you’ll need to whip up this fantastic Honey BBQ Chicken and Garlic Parmesan Potatoes:
For the Honey BBQ Chicken:
- Chicken Pieces (thighs, drumsticks, or breasts): I recommend bone-in, skin-on chicken for juiciness, but feel free to use skinless for a healthier option.
- Honey (½ cup): The star of the show! It adds natural sweetness and deliciously caramelizes when cooked. Substitute with maple syrup for a different flavor profile.
- BBQ Sauce (1 cup): Use your favorite bottled sauce or make your own! Look for one with natural ingredients and low sugar.
- Olive Oil (2 tbsp): This helps create a lovely golden crust on the chicken. Avocado oil is a great substitute if you prefer.
- Garlic (2 cloves, minced): Fresh garlic packs a punch! You can use garlic powder in a pinch, about ½ teaspoon, but I always prefer the real deal.
- Salt & Pepper: Essential for seasoning. Try smoked salt for an extra hint of flavor.
- Lemon Juice (from 1 lemon): It balances the sweetness and adds acidity. Lime juice works well too!
For the Garlic Parmesan Potatoes:
- Baby Potatoes (1.5 pounds): These will be your canvas! You can use Yukon Gold or red potatoes, too—just make sure they’re all roughly the same size for even cooking.
- Olive Oil (¼ cup): Ensures those crispy edges! Again, just like with the chicken, avocado oil works well.
- Parmesan Cheese (½ cup, grated): Freshly grated is best, but pre-packaged can do in a hurry! You can swap with vegan cheese alternatives if needed.
- Garlic Powder (1 tsp): A shortcut for flavor! Use fresh garlic if you want that extra kick.
- Dried Herbs (1 tsp mixed Italian herbs): Gets them singing! Oregano, thyme, and rosemary are classics, but feel free to mix it up.
- Salt & Pepper: Same as before; seasoning is key!
Step-by-Step Instructions
Alright, let’s get cooking!
Step 1: Prepping the Chicken
-
Preheat your oven to 375°F (190°C): While that oven warms up, give your chicken a good rinse under cold water. Pat it dry with paper towels—you want that skin crispy, right?
-
Make the marinade: In a bowl, mix together honey, BBQ sauce, olive oil, minced garlic, lemon juice, salt, and pepper. The combination will create a delightful, sticky glaze.
-
Marinate the chicken: Place your chicken pieces in a large zip-top bag or bowl, pour the marinade over, and give it a good massage (no need to be gentle—set those flavors free!). Let this sit for at least 30 minutes, or if you have more time, overnight in the fridge adds amazing depth to the flavors.
Step 2: Get Those Potatoes Going
-
Prep the potatoes: While the chicken is marinating, grab a pot and wash your baby potatoes. Halve them (or quarter if they’re larger) to help them cook evenly.
-
Season the potatoes: In a large bowl, toss the potatoes with olive oil, garlic powder, dried herbs, salt, and pepper. Make sure each potato piece gets a lovely coating!
-
Roast the potatoes: Spread the seasoned potatoes evenly on a baking sheet lined with parchment paper. Pop them in the preheated oven for about 20 minutes, stirring halfway through—trust me, you want those golden edges!
Step 3: Cooking the Chicken
-
Prepare for roasting: After the potatoes have been in the oven for about 20 minutes, take them out. Push them to one side of the sheet, and lay the marinated chicken on the other. This way, you have a complete meal going at once!
-
Bake it all together: Return the baking sheet to the oven and let everything cook for another 30-40 minutes, or until the chicken reaches an internal temperature of 165°F (74°C) and the potatoes are fork-tender and crispy.
-
Brush with more sauce: About 10 minutes before it’s done, brush on a little more BBQ sauce to caramelize those flavors further. The smell will be incredible—I promise you won’t be able to resist!
Step 4: The Finishing Touch
-
Broil for that perfect crisp: If you like a bit of char on your chicken skin, turn on the broiler for 2-3 minutes at the end. Keep an eye on it though; no one likes burnt chicken!
-
Serve it hot: Once fully cooked, let your honey BBQ chicken and garlic Parmesan potatoes rest for 5 minutes. This is important for the juices to redistribute, making for tender bites.
Serving Suggestions
Now, let’s talk presentation! Plate the Honey BBQ Chicken on a large serving platter, arranging the pieces beautifully, and don’t forget to sprinkle some fresh chopped parsley on top for a pop of color. Surround the chicken with the crispy Garlic Parmesan Potatoes, and perhaps a light salad on the side to balance the richness. Trust me; your table will not only look inviting but feel like a warm embrace of home-cooked love!
Recipe Variations
Here are some fun twists and variations you can try:
- Spicy Honey BBQ Chicken: Add a dash of cayenne pepper or red pepper flakes to the marinade for a spicy kick!
- Herbed Potatoes: Switch up the herbs and use fresh rosemary or thyme for a fragrant touch.
- Vegan Version: Use tofu or tempeh marinated in the same honey BBQ sauce (swap honey for agave) and substitute the cheese with a vegan variety.
- Fruit-Infused BBQ: Toss in some pineapple chunks while cooking for a tropical flair.
- Sweet Potato Version: Swap out regular potatoes for sweet potatoes for a healthier twist that pairs beautifully with the honey BBQ!
Chef’s Notes
Over the years, this Honey BBQ Chicken and Garlic Parmesan Potatoes recipe has gone through some evolution. I started off with store-bought BBQ sauce and simple seasoning, but I began experimenting and adding my twist—and it truly transformed the dish. Sometimes, I even add a splash of apple cider vinegar to the marinade for a hint of tang! If you have your favorite BBQ sauce that’s homemade or locally sourced, please use it! Cooking should feel joyful, so don’t hesitate to make the recipe your own.
FAQs and Troubleshooting
Q: What if my chicken is dry?
A: Make sure you’re not overcooking it! Use a meat thermometer to check the internal temperature, and be sure to let the chicken rest before serving. This ensures those juices stay locked in!
Q: Can I marinate the chicken overnight?
A: Absolutely! In fact, allowing the chicken to marinate overnight enhances the flavors. Just remember to cover it tightly in the fridge.
Q: What if I don’t have BBQ sauce?
A: No worries! You can make a quick BBQ sauce using ketchup, honey, vinegar, and spices that you might have on hand. It’s all about getting creative!
Q: Can the potatoes be prepped in advance?
A: Yes! You can parboil the potatoes earlier in the day and store them in the fridge. When you’re ready, toss them in seasoning and roast away. They’ll cook quicker and taste just as fantastic!
Nutritional Info
If you’re keen on knowing the nutritional breakdown, here’s a general overview for one serving:
- Calories: Approximately 480
- Protein: 35g
- Carbohydrates: 40g
- Fats: 20g
And there you have it—Honey BBQ Chicken with Garlic Parmesan Potatoes that’ll make your kitchen smell divine and your taste buds do a happy dance! I hope you enjoy making this recipe as much as I do. Don’t forget to share your kitchen adventures with me! Happy cooking! 🍽️
Print
Honey BBQ Chicken with Garlic Parmesan Potatoes
- Total Time: 80 minutes
- Yield: 4 servings
- Diet: Gluten-Free
Description
A flavorful combination of Honey BBQ Chicken and crispy Garlic Parmesan Potatoes that brings warmth and joy to your table.
Ingredients
- Chicken Pieces (thighs, drumsticks, or breasts), bone-in, skin-on (for juiciness)
- Honey (½ cup)
- BBQ Sauce (1 cup)
- Olive Oil (2 tbsp)
- Garlic (2 cloves, minced)
- Salt & Pepper
- Lemon Juice (from 1 lemon)
- Baby Potatoes (1.5 pounds)
- Olive Oil (¼ cup)
- Parmesan Cheese (½ cup, grated)
- Garlic Powder (1 tsp)
- Dried Herbs (1 tsp mixed Italian herbs)
- Salt & Pepper (for potatoes)
Instructions
- Preheat your oven to 375°F (190°C).
- Mix together honey, BBQ sauce, olive oil, minced garlic, lemon juice, salt, and pepper to create a marinade.
- Marinate the chicken pieces in the marinade for at least 30 minutes.
- Wash the baby potatoes and halve or quarter them for even cooking.
- Toss the potatoes with olive oil, garlic powder, dried herbs, salt, and pepper.
- Spread the seasoned potatoes on a baking sheet and roast for about 20 minutes.
- Push the potatoes to one side of the baking sheet and add the marinated chicken on the other side.
- Bake for an additional 30-40 minutes until chicken reaches 165°F (74°C) and potatoes are fork-tender.
- Brush with more BBQ sauce about 10 minutes before done.
- Broil for 2-3 minutes for extra crispiness on the chicken skin.
- Serve hot, letting rest for 5 minutes before serving.
Notes
For a spicy kick, add cayenne pepper to the marinade, or substitute honey with agave for a vegan version.
- Prep Time: 30 minutes
- Cook Time: 50 minutes
- Category: Main Course
- Method: Baking
- Cuisine: American
Nutrition
- Serving Size: 1 serving
- Calories: 480
- Sugar: 20g
- Sodium: 600mg
- Fat: 20g
- Saturated Fat: 6g
- Unsaturated Fat: 10g
- Trans Fat: 0g
- Carbohydrates: 40g
- Fiber: 4g
- Protein: 35g
- Cholesterol: 85mg
Keywords: Honey BBQ Chicken, Garlic Parmesan Potatoes, Family Meal

Garlic Parmesan Chicken and Potatoes (One-Pan Dinner) Recipe
# Garlic Parmesan Chicken and Potatoes: The Ultimate One-Pan Dinner Recipe

## Introduction

Welcome back to my cozy corner of the kitchen, where flavors dance and delicious memories are made! Today, we’re diving into a recipe that perfectly marries simplicity and comfort — **Garlic Parmesan Chicken and Potatoes**. This one-pan wonder isn’t just easy to make; it’s a dish that fills the air with an aroma you won’t soon forget. Imagine tender chicken, crispy golden potatoes, seasoned to perfection, all coming together in a symphony of garlic and Parmesan. It’s culinary magic that brings a smile to your face and warmth to your heart.

Now, I don’t know about you, but I’ve always been a sucker for a good one-pan meal. They’re the ultimate time savers, leaving you with minimal cleanup and maximum flavor. Whether it’s a whirlwind Tuesday night after work or a lazy Sunday family gathering, this Garlic Parmesan Chicken and Potatoes recipe fits the bill. Every bite whispers comfort, all while being incredibly versatile.

As we go through this recipe together, I’ll be sharing not just the steps but also the little tips and tricks that will make your experience even better. So, let’s roll up our sleeves, put on our favorite apron (messy is totally allowed), and get cooking!

## Personal Story

This dish brings me back to one of my favorite family traditions — Sunday dinners at my grandparents’ house. My grandma would prepare a delicious feast, always featuring some form of chicken roasting away in the oven. The whole house would smell incredible, a combination of garlic, herbs, and that unmistakable warmth of family love.

One particular Sunday, she decided to try something new, and she made her garlic Parmesan chicken and potatoes. I still remember how the crispy potatoes flirted with the garlicky chicken, forking bits from the plate while we shared stories and laughter around the table. That dinner became a cherished memory, and years later, I started my journey of recreating that beloved meal in my own kitchen. It's funny how food has this magical power to connect us to our past, isn’t it?

## Ingredients

Let’s gather the stars of the show! Here’s what you’ll need for this sumptuous dish:

- **Chicken Thighs (Bone-In, Skin-On)**: Juicy and flavorful, chicken thighs are perfect for this recipe. You can substitute with boneless chicken for quicker cooking, but you may lose some of that delicious juiciness.

- **Baby Potatoes**: These little gems are creamy and cook evenly. Feel free to swap them with fingerling potatoes or even sweet potatoes for a twist.

- **Garlic**: Ah, the heart of flavor! Fresh garlic is a must, but garlic powder can save you if you’re in a pinch.

- **Parmesan Cheese**: This adds a nutty depth. Grated works best, but if you have a block, grate it fresh for enhanced flavor.

- **Olive Oil**: A drizzle of high-quality olive oil brings everything together. You can swap it for melted butter or avocado oil if preferred.

- **Dried Italian Herbs (Oregano, Thyme, Rosemary)**: These herbs amplify the dish. If you’re missing any, feel free to substitute with whatever dried herbs you have on hand.

- **Salt and Pepper**: Simple but essential for enhancing all the flavors.

- **Fresh Parsley (for garnish)**: Adds a pop of color and freshness! You can also swap it with other fresh herbs like basil or chives for a different flair.

## Step-by-Step Instructions

Now, with our ingredients ready, let’s jump into the cooking process! Follow these steps for a delightful experience:

1. **Preheat the Oven**: Preheat your oven to 400°F (200°C). This ensures your chicken and potatoes will roast to golden perfection.

2. **Prepare the Ingredients**: Begin by washing the baby potatoes. If they’re a bit larger, cut them in half to ensure even cooking. Set them aside for now.

3. **Create the Seasoning Mix**: In a large bowl, combine minced garlic (about 4 cloves, depending on your love for garlic), olive oil, dried herbs, salt, and pepper. Whisk it all together. This mixture will be the flavor bomb that binds our dish.

4. **Marinate the Chicken**: Add your chicken thighs to the bowl, ensuring they are generously coated in the seasoning mix. Allow them to sit for about 15 minutes if you have time — it enhances the flavor, but if you’re in a hurry, you can skip this step.

5. **Prep the Baking Dish**: Grab a large oven-safe skillet or baking dish and spread the washed baby potatoes evenly across the bottom. Drizzle with olive oil, sprinkle with salt and pepper, and add a few herbs for good measure.

6. **Nestle the Chicken**: Place the marinated chicken thighs on top of the potatoes, skin-side up. This way, as the chicken cooks, the juices will seep down, flavoring those lovely potatoes.

7. **Grate Parmesan**: Now, for the magic touch! Generously sprinkle grated Parmesan over the chicken and potatoes. This will form a crispy, cheesy crust as it bakes. Yum!

8. **Bake**: Place your skillet or baking dish in the oven and bake for 35-40 minutes. The internal temperature of the chicken should reach 165°F (75°C) when done.

9. **Broil for Extra Crispiness**: If you want that extra crispy edge, switch your oven to broil during the last 2-3 minutes. But keep a close eye on it; we don’t want burnt cheese!

10. **Garnish and Serve**: Once out of the oven, let it rest for about 5 minutes. Then, garnish with fresh parsley before serving. This little addition brightens up the dish both visually and flavor-wise!

## Serving Suggestions

This Garlic Parmesan Chicken and Potatoes can easily stand alone, but if you’d like to elevate your dinner, serve it alongside a fresh garden salad or some steamed green beans tossed in lemon and olive oil. For a cozy night in, pair it with a comforting glass of white wine or a refreshing mocktail. And don’t forget the crusty bread to soak up all those delightful juices!

## Recipe Variations

Feeling adventurous? Here are some creative twists:

1. **Add Vegetables**: Toss in some broccoli, bell peppers, or carrots for a colorful and nutritious touch.

2. **Spicy Kick**: Add red pepper flakes to the garlic mixture for a bit of heat.

3. **Herbaceous Upgrade**: Swap out the dried herbs for fresh herbs like rosemary or thyme for a fresher flavor profile.

4. **Zesty Lemon**: Drizzle fresh lemon juice over the chicken just before serving for a zing that brightens up all those rich flavors.

5. **Creamy Sauce**: After baking, craft a simple cream sauce to drizzle over the chicken and potatoes using heavy cream and more Parmesan.

## Chef’s Notes

Every recipe has a little story, and this one started with my nostalgic Sundays. Over the years, I’ve adapted and tinkered, sometimes adding a twist or focusing on different sides. I once tried making this with honey mustard glaze instead of garlic, and although it went down well, there’s just something timeless about the garlic and Parmesan combo that’s hard to beat!

And here’s a little tip: don’t shy away from using leftovers! The flavor becomes even richer the next day. Reheat it gently, and you’ve got an instant meal that feels like a culinary hug!

## FAQs and Troubleshooting

**1. Why is my chicken not cooking through?**
   Ensure your oven is preheated properly and avoid opening the oven door too much to maintain temperature. If you’re using larger chicken pieces, they may need a bit more time.

**2. Can I use chicken breast instead?**
   Absolutely! Just be aware that chicken breasts can dry out more easily. Keep an eye on the cooking time and ensure they reach 165°F (75°C).

**3. What should I do if my potatoes are not crispy?**
   The potatoes need soaking up the juices of the chicken and the high heat. Make sure they are evenly spaced and check that they weren’t crowded in the pan.

**4. Can I prepare this in advance?**
   Yes! You can marinate the chicken and pre-cut the vegetables a day ahead. Just assemble and bake when you’re ready to enjoy!

## Nutritional Info

(Servings: 4)
- **Calories**: Approximately 450 per serving
- **Protein**: 32g
- **Carbohydrates**: 30g
- **Fat**: 20g

This one-pan Garlic Parmesan Chicken and Potatoes is not just about eating but creating memories and sharing love. I hope this recipe inspires you to cook with joy and share the fruits of your labor with those you hold dear. Now, let’s get cooking — your taste buds will thank you!

Garlic Parmesan Chicken and Potatoes
- Total Time: 55 minutes
- Yield: 4 servings 1x
- Diet: Gluten Free
Description
A delicious one-pan meal featuring tender chicken thighs and crispy baby potatoes, all seasoned with garlic and Parmesan.
Ingredients
- 4 Chicken Thighs (Bone-In, Skin-On)
- 1.5 lbs Baby Potatoes
- 4 cloves Garlic, minced
- 1/2 cup Parmesan Cheese, grated
- 2 tbsp Olive Oil
- 1 tsp Dried Italian Herbs (Oregano, Thyme, Rosemary)
- Salt and Pepper, to taste
- Fresh Parsley, for garnish
Instructions
- Preheat the oven to 400°F (200°C).
- Prepare the baby potatoes by washing them and cutting larger ones in half.
- Create the seasoning mix by combining minced garlic, olive oil, dried herbs, salt, and pepper in a large bowl.
- Marinate the chicken thighs in the seasoning mix for about 15 minutes.
- Prep a large oven-safe skillet by spreading the washed baby potatoes across the bottom, drizzling with olive oil, and seasoning.
- Nestle the marinated chicken thighs on top of the potatoes, skin-side up.
- Grate Parmesan over the chicken and potatoes.
- Bake for 35-40 minutes or until the chicken reaches an internal temperature of 165°F (75°C).
- Broil for an additional 2-3 minutes to achieve extra crispiness.
- Garnish with fresh parsley before serving.
Notes
Feel free to add other vegetables or spices to suit your taste.
- Prep Time: 15 minutes
- Cook Time: 40 minutes
- Category: Main Course
- Method: Baking
- Cuisine: Italian
Nutrition
- Serving Size: 1 serving
- Calories: 450
- Sugar: 2g
- Sodium: 600mg
- Fat: 20g
- Saturated Fat: 6g
- Unsaturated Fat: 10g
- Trans Fat: 0g
- Carbohydrates: 30g
- Fiber: 5g
- Protein: 32g
- Cholesterol: 100mg
Keywords: one-pan meal, garlic, parmesan, chicken, dinner
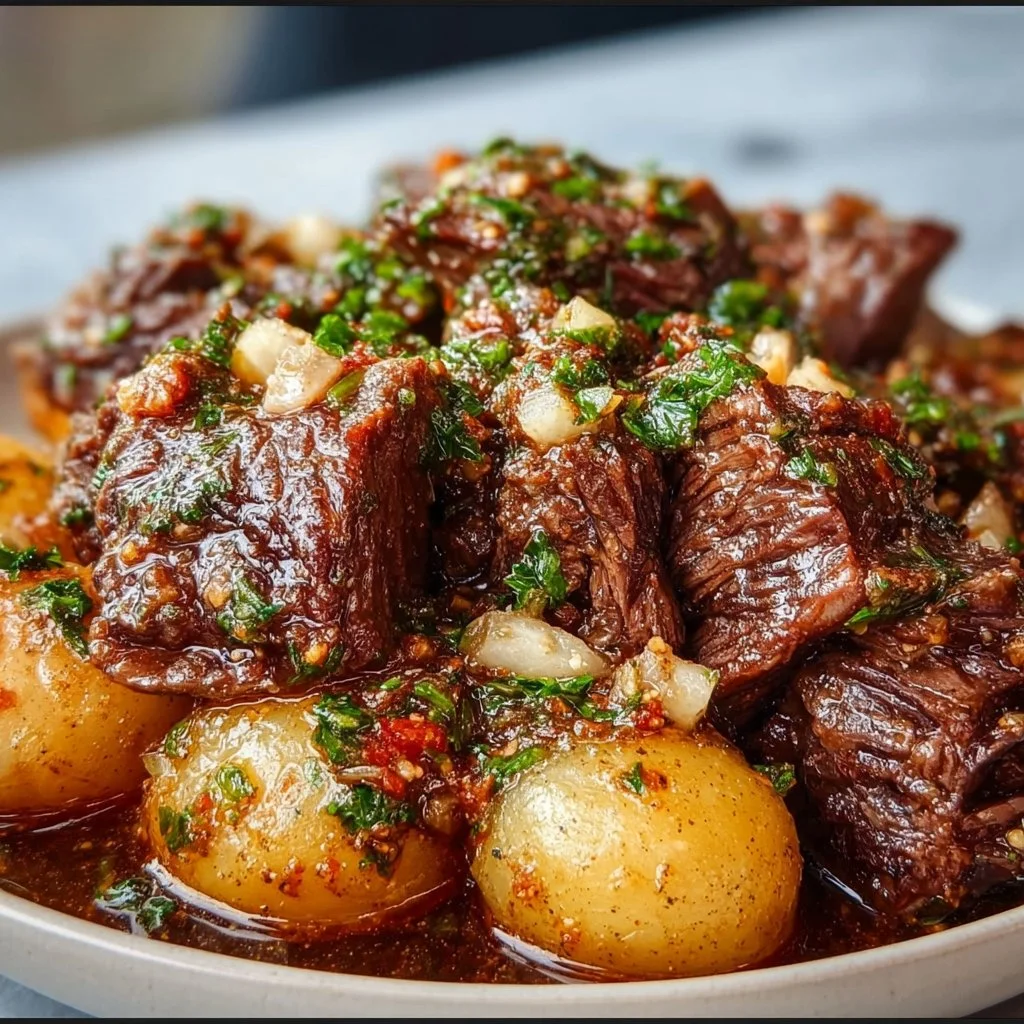
Slow Cooker Garlic Butter Beef with Potatoes
Slow Cooker Garlic Butter Beef with Potatoes: A Heartwarming Comfort Food
Welcome back to my cozy kitchen! Today, I’ve got a recipe that’ll wrap you in warmth, just like a big hug on a chilly evening. We’re talking about Slow Cooker Garlic Butter Beef with Potatoes! If there’s one dish that embodies everything I love about cooking, it’s this one. Imagine tender beef, rich garlic butter, and perfectly cooked potatoes coming together to create a symphony of mouthwatering flavors that fill your home with an irresistible aroma.
This dish is the ultimate comfort food that’s perfect for any day of the week, whether you’re hustling through a busy workday or sharing a leisurely Sunday meal with family. The best part? You can set it and forget it! Toss everything into your slow cooker, and let your kitchen do the magic while you kick back, relax, and maybe even sneak in a bit of quality time with loved ones or an episode of your favorite show.
I love how this recipe manages to be both fancy and laid-back at the same time. It’s the kind of meal that makes you feel like a culinary rockstar without needing to slave away in the kitchen for hours. So grab your apron (and perhaps a glass of wine?), and let’s dive headfirst into this delectable dish that’s perfect for weeknight dinners or special occasions alike.
Personal Story
Let me take you on a little trip down memory lane. Growing up, Sundays were sacred family time in our house. After church, my mom would often pop a pot roast into the slow cooker, and the house would fill with an aroma that was just intoxicating. I can still remember the clunks of the spoon as she stirred in her special blend of spices, the sizzle of beef meeting heat, and later, that excited chatter around the table.
One particular Sunday, she decided to change things up and threw in a bunch of garlic butter instead of her usual seasoning. I remember walking in after playtime in the backyard and getting engulfed in the scent of roasted garlic mingling with beef. It was pure magic! That meal became a tradition in our home, evolving from a simple pot roast into what I now call my Garlic Butter Beef. Inspired by those sweet memories, I’ve made this dish a staple in my own kitchen. Each time I cook it, I’m transported back to those laughter-filled Sundays, and I can’t help but think about how food has a remarkable way of keeping us connected to our loved ones and our past.
Ingredients
Let’s talk about what you’ll need to whip up this masterpiece! Here’s a rundown of the ingredients, plus some handy tips:
-
Beef Chuck Roast (3-4 pounds)
This cut is perfect for slow cooking because it becomes incredibly tender and flavorful. If you can’t find chuck, brisket or round roast can work as substitutes, but keep in mind that they may differ slightly in flavor and tenderness. -
Garlic (6-8 cloves, minced)
Fresh garlic gives a fragrant, buttery touch to the dish. If you’re in a pinch, you can use pre-minced garlic or garlic powder, but fresh is always best to bring out that rich flavor! -
Unsalted Butter (½ cup)
The star ingredient for the sauce! Unsalted allows you to control the seasoning better. If you prefer a vegan option, you could try dairy-free butter or coconut oil, which will provide a different flavor profile. -
Yellow Potatoes (2 pounds, cut into chunks)
I love using Yukon Golds for their buttery texture, but you can also use red potatoes or even sweet potatoes for a twist. Just keep an eye on cooking times as they’ll vary. -
Beef Broth (2 cups)
This adds depth and sustains moisture during cooking. Vegetable broth can be a good substitute if you’re aiming for a different flavor or a lighter option. -
Dried Thyme (1 teaspoon)
Thyme pairs wonderfully with beef! A pinch of rosemary can be a delightful alternative if you have it on hand. -
Salt and Pepper (to taste)
Essential for bringing out all the flavors. Feel free to experiment with other seasoning options like a sprinkle of paprika or crushed red pepper for a hint of heat. -
Fresh Parsley (for garnish)
This is optional, of course, but it adds a lovely pop of color and freshness that brightens the dish beautifully.
Step-by-Step Instructions
Ready to bring this dish to life? Let’s get cookin’ with these simple-to-follow steps:
-
Prep Your Slow Cooker
Gather your trusty slow cooker! A 6-quart size works perfectly for this recipe. Plug it in and set it to low heat for a longer cook or high heat for a quicker meal. -
Sear the Beef (optional but recommended)
If you have a few extra minutes, heat a tablespoon of olive oil on high heat in a skillet. Sear the beef chuck roast on all sides for about 3-4 minutes per side until it’s golden brown. This step adds a layer of flavor through caramelization, though it’s not necessary if you’re short on time. -
Add Garlic and Butter
Place the seared beef or raw chuck roast directly into the slow cooker. Then, melt the butter in your skillet and add the minced garlic. Cook for 1-2 minutes until fragrant, and pour this buttery goodness over the beef. -
Layer the Veggies
Toss the potato chunks directly around the beef roast in the slow cooker. Make sure they’re nicely nestled for even cooking. -
Season
Sprinkle the dried thyme, salt, and pepper over the entire mixture. Pour the beef broth in as well, ensuring it surrounds the meat and potatoes but does not completely submerge them. -
Set and Forget
Cover your slow cooker and let it work its magic! Cook on low for about 8 hours (or 4 hours on high). You’ll know it’s ready when the beef is fork-tender and the potatoes are tender. -
Final Touch
Once cooked, taste the broth and adjust seasoning if desired. This is where you can get creative—feel free to mix in some fresh herbs like parsley or even a splash of balsamic vinegar for extra zest. -
Serve and Enjoy!
Shred or slice the beef, and serve it alongside the buttery potatoes, drizzling the luscious broth over everything. A sprinkle of fresh parsley adds that final touch of brightness.
Serving Suggestions
This dish is delightful served warm in a deep bowl, where you can showcase all that savory sauce! You can also add a slice of crusty bread on the side for a complete meal. For a touch of elegance, consider using a shallow plate and laying a bed of mashed potatoes instead of chunked potatoes for a more refined presentation. The creamy potatoes will absorb all that garlic butter goodness beautifully!
Recipe Variations
Looking to switch things up? Here are a few variations you can try:
- Spicy Kick: Add a diced jalapeño or a sprinkle of red pepper flakes into the slow cooker for a bit of heat.
- Herbaceous Twist: Swap the thyme for herbs de Provence or Italian seasoning for a flavor makeover.
- Veggie Boost: Experiment with adding carrots, celery, or parsnips for added veggies and nutrients.
- Lighter Option: Substitute the potatoes with cauliflower for a lower-carb alternative that’s still delicious!
Chef’s Notes
This recipe has evolved over time, and I’ve often turned to it when I need something comforting yet uncomplicated. One of my fondest memories is when I made it for a potluck dinner; I walked in with the slow cooker still bubbling away, and everyone gathered around me excited to dig in! We ended up bonding over food stories, proving once again that meals have an uncanny ability to bring people together. The garlic buttery aroma floating through the air was so inviting that I remember watching everyone’s faces light up as they tasted it. It reminded me that simple, heartfelt cooking can create precious moments in our lives.
FAQs and Troubleshooting
1. Why isn’t my beef tender?
Ensure you’re using the right cut (like chuck) and that it’s cooked for the appropriate time. Tough cuts require low and slow cooking to break down the connective tissue.
2. Can I cook this on the stovetop instead?
Absolutely! You can sear the meat and then simmer everything in a large pot on the stovetop for about 2-3 hours on low heat.
3. What if I don’t have a slow cooker?
No problem! You can use a Dutch oven or any heavy pot with a lid and slow cook it in your oven at 275°F until the meat is tender (around 3-4 hours).
4. Can I freeze the leftovers?
Yes! After it cools completely, store in an airtight container and freeze for up to 3 months. Just reheat on low when you’re ready to enjoy it again.
Nutritional Info (Optional)
While the exact nutritional info can vary based on specific ingredients and portion sizes, a standard serving of Slow Cooker Garlic Butter Beef with Potatoes yields about:
- Calories: 550
- Protein: 40 grams
- Carbohydrates: 45 grams
- Fats: 25 grams
Remember, though, cooking is meant to be enjoyed! Adjust portion sizes according to your appetite and dietary needs.
There you have it, folks! A heartfelt, delicious recipe that will surely become a staple in your kitchen. I hope you give this Slow Cooker Garlic Butter Beef with Potatoes a try soon. I can’t wait to hear how it turns out for you, and don’t forget to share the love around the dinner table—because that’s what it’s all about! Happy cooking! 🍽️✨
Print
Slow Cooker Garlic Butter Beef with Potatoes
- Total Time: 495 minutes
- Yield: 6 servings
- Diet: None
Description
A heartwarming comfort food featuring tender beef, rich garlic butter, and perfectly cooked potatoes, ideal for any day of the week.
Ingredients
- Beef Chuck Roast (3-4 pounds)
- Garlic (6-8 cloves, minced)
- Unsalted Butter (½ cup)
- Yellow Potatoes (2 pounds, cut into chunks)
- Beef Broth (2 cups)
- Dried Thyme (1 teaspoon)
- Salt and Pepper (to taste)
- Fresh Parsley (for garnish)
Instructions
- Prep your slow cooker! A 6-quart size works perfectly for this recipe. Plug it in and set it to low heat for a longer cook or high heat for a quicker meal.
- Sear the beef (optional but recommended). Heat a tablespoon of olive oil on high heat in a skillet and sear the beef chuck roast on all sides for about 3-4 minutes per side until golden brown.
- Add the seared beef or raw chuck roast directly into the slow cooker. Then, melt the butter in your skillet and add the minced garlic. Cook for 1-2 minutes until fragrant, and pour this buttery goodness over the beef.
- Layer the potato chunks directly around the beef roast in the slow cooker for even cooking.
- Season with dried thyme, salt, and pepper. Pour the beef broth in, ensuring it surrounds the meat and potatoes.
- Set your slow cooker and let it work its magic! Cook on low for about 480 minutes (or 240 minutes on high).
- Final touch: adjust seasoning if desired and serve the shredded or sliced beef alongside the potatoes.
- Enjoy!
Notes
For extra zest, mix in fresh herbs like parsley or balsamic vinegar. This dish can also be served with a side of crusty bread.
- Prep Time: 15 minutes
- Cook Time: 480 minutes
- Category: Main Course
- Method: Slow Cooking
- Cuisine: American
Nutrition
- Serving Size: 1 serving
- Calories: 550
- Sugar: 3g
- Sodium: 600mg
- Fat: 25g
- Saturated Fat: 10g
- Unsaturated Fat: 12g
- Trans Fat: 1g
- Carbohydrates: 45g
- Fiber: 4g
- Protein: 40g
- Cholesterol: 120mg
Keywords: slow cooker, beef, garlic butter, potatoes, comfort food
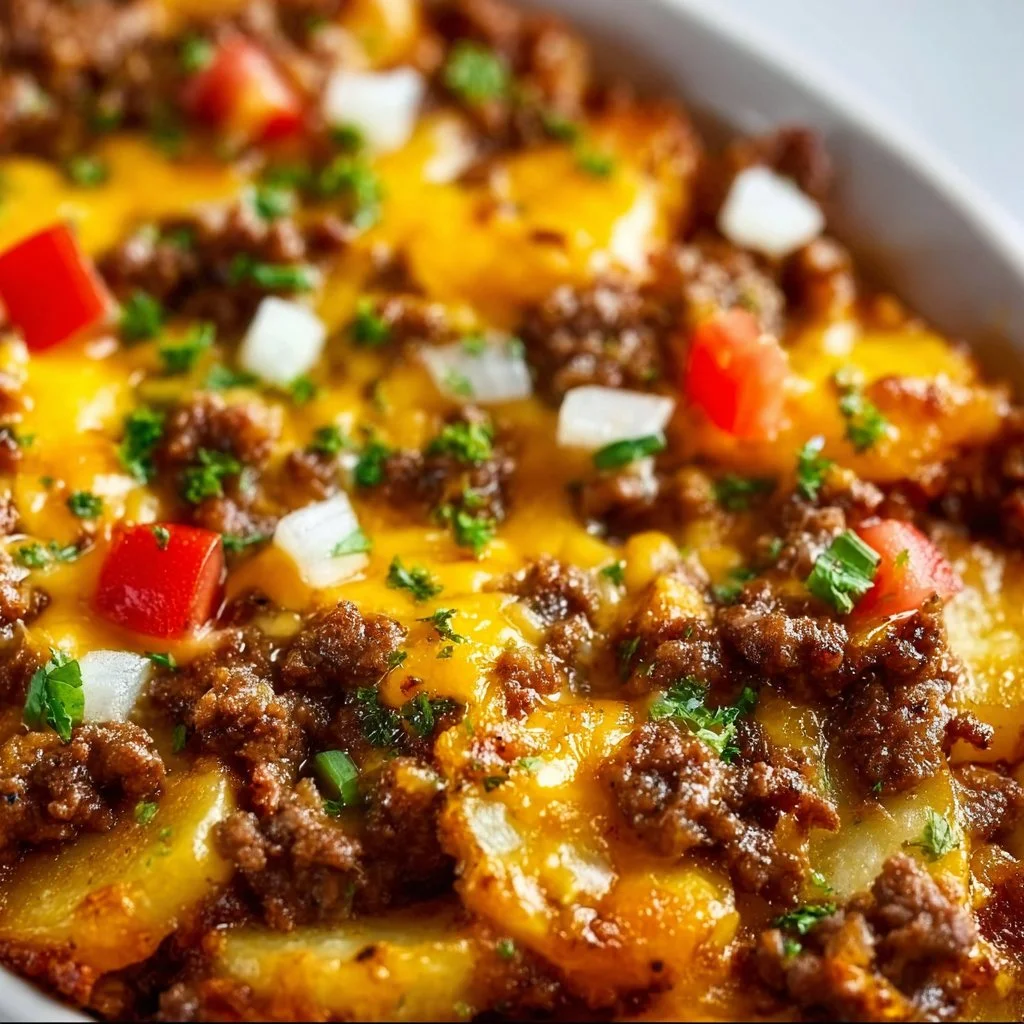
Hobo Casserole Ground Beef
Hobo Casserole Ground Beef: A Homestyle Delight
Hey there, fellow food lovers! Welcome back to my cozy kitchen, where the aroma of something delicious is always in the air. Today, we’re diving into the warmth of nostalgia with a classic dish that’s just as comforting as a big hug — Hobo Casserole! If you’re searching for a simple yet satisfying meal that brings everyone together, you’re in the right spot. This dish is fantastic for busy weeknights or lazy Sundays when you want something hearty without spending all day in the kitchen.
Years ago, I stumbled upon this recipe while flipping through my grandmother’s old recipe box. The handwritten notes, slightly smudged and yellowed at the edges, brought back fond memories of family gatherings where laughter echoed and every bite was savored. Hobo Casserole was one of those magical dishes that had a unique way of making everyone feel right at home, no matter what was happening outside. It combines basic ingredients — ground beef, veggies, and some warm spices — creating something truly special.
As we get cooking, remember that the beauty of Hobo Casserole lies in its adaptability. You can throw in whatever leftover veggies you have, swap out different meats for the ground beef, or spice it up based on your mood. So, roll up those sleeves and let’s dive into a culinary adventure that’s all about comfort, connection, and, of course, deliciousness!
Personal Story
I’ll never forget the first time I made Hobo Casserole. I was just a teenager, trying to impress my friends with my burgeoning cooking skills. My mom had taught me the basics, but I wanted to push my culinary boundaries. I raided the fridge and pulled out some ground beef, canned beans, and whatever frozen vegetables I could find. It wasn’t the prettiest dish, but as I pulled it out of the oven, the bubbling cheese and savory aroma filled our tiny kitchen, enticing everyone to come and take a peek.
They say the way to someone’s heart is through their stomach, and that night, I learned it rings true! My friends and I devoured the hobo casserole, eagerly sharing stories and laughter over each bite. We even managed to create our own “secret” ingredient — a splash of hot sauce that added a delightful kick! It was a memorable evening filled with good food and even better company, igniting my love for cooking and feeding people. That night, I became aware of the sheer magic that food could create, and Hobo Casserole holds a special place in my heart (and recipe book) ever since!
Ingredients
Let’s gather our ingredients to create this heartwarming dish. Hobo Casserole is all about simple, wholesome ingredients you likely already have in your pantry! Here’s what you’ll need:
-
Ground Beef (1 lb): The star of the show! Choose 80/20 (lean to fat ratio) for the perfect balance of flavor and moisture. You can also swap ground turkey or chicken for a leaner option.
-
Onion (1 medium, diced): Adds a savory depth to our casserole. If you’re not a fan of onions, leeks or shallots make excellent substitutes!
-
Garlic (2 cloves, minced): Because what’s cooking without a little garlic love? Feel free to use garlic powder in a pinch — about 1 teaspoon will do!
-
Bell Peppers (1 cup, diced): Any color works! They contribute vibrant flavor and a pop of color. Swap with zucchini or mushrooms for different tastes.
-
Canned Diced Tomatoes (1 can, 14 oz): Juicy and tangy; they bind the casserole. Choose fire-roasted for an additional smoky flavor.
-
Canned Beans (1 can, 15 oz, drained): Kidney or black beans work beautifully here. If you want, leave them out for a grain-rich option like quinoa.
-
Frozen Mixed Veggies (1 cup): A great way to throw in even more nutrients! Use what you have: green beans, corn, or peas all work wonders.
-
Beef Broth (1 cup): Adds moisture and flavor. Vegetable broth is a great substitute for a vegetarian version.
-
Cheddar Cheese (1 cup, shredded): The gooey goodness we all love! Don’t want cheese? Nutritional yeast gives a cheesy flavor without the dairy.
-
Seasonings (1 tsp each of salt, pepper, paprika, and Italian herbs): Customize as you like; these ties the whole dish together. Want some heat? Add cayenne pepper for a spicy kick!
Step-by-Step Instructions
Now it’s time for the fun part — cooking! Let’s bring this delicious dish to life, step by step.
Step 1: Preheat Your Oven
Let’s start getting things ready! Preheat your oven to 350°F (175°C). This ensures that when we’re ready to pop the casserole in, it will bake evenly and beautifully.
Step 2: Brown the Ground Beef
In a large skillet over medium heat, add the ground beef.
Chef Tip: Use a wooden spatula to break it up as it cooks. This ensures consistent browning and prevents clumping!
Let it cook until it’s browned and no longer pink, about 5-7 minutes. Don’t forget to drain any excess fat — we want all that deliciousness to stay packed in.
Step 3: Sauté the Veggies
Add the diced onion and minced garlic to the skillet with the beef.
Commentary: Cooking these together allows the flavors to meld fabulously. The aroma of onions caramelizing with garlic is honestly one of the best scents in the world!
Step 4: Stir in the Peppers
Next, toss in the diced bell peppers and sauté everything together for another 3-4 minutes until they soften slightly.
Step 5: Mix in the Canned Goods
Add the canned diced tomatoes (with juices), drained beans, and frozen mixed veggies to the skillet. Pour in the beef broth.
Chef Hack: If you want a thicker filling, let it simmer for an extra 5-10 minutes while stirring occasionally.
Step 6: Season to Taste
Sprinkle in your seasonings — salt, pepper, paprika, and Italian herbs. Give it a good stir to combine everything beautifully. This is where the magic truly happens!
Step 7: Transfer to a Baking Dish
Pour the beef and veggie mixture into a greased baking dish.
Chef Insight: Make sure to spread it evenly so every bite gets that lovely flavor!
Step 8: Cheesy Goodness
Let’s finish it off! Sprinkle the shredded cheddar cheese over the top. You can add more or less depending on how cheesy you like it—no judgment here!
Step 9: Bake
Pop the casserole into your preheated oven and bake for about 25-30 minutes, or until the cheese is bubbly and golden brown.
Tip: Check it halfway through to ensure it’s baking evenly and give it a little stir if you feel adventurous!
Step 10: Let It Rest
Once it’s out of the oven, let it sit for about 10 minutes. This helps the flavors meld and makes it easier to serve.
Serving Suggestions
To plate your Hobo Casserole, serve a generous scoop onto a rustic plate or a colorful bowl. A sprinkle of chopped parsley or green onion not only adds a pop of color but also freshens things up. Pair it with a side salad or some crusty bread for a complete meal that’ll leave everyone satisfied and smiling!
Recipe Variations
Now, let’s get creative! Here are a few fun variations you can try:
-
Southwestern Twist: Add corn, jalapeños, and a sprinkle of cumin for a zesty kick.
-
Mediterranean Delight: Swap ground beef for lamb, adding olives and feta cheese.
-
Vegetarian Version: Replace ground beef with lentils or chickpeas and load up on all the veggies you love.
-
Cheesy Broccoli Edition: Mix in chopped broccoli before baking for added crunch and nutrition.
-
Spicy Taco Casserole: Incorporate taco seasoning and serve with tortilla chips instead of bread!
Chef’s Notes
Every time I make Hobo Casserole, I’m reminded of how versatile cooking can be. What started as a simple recipe has grown into so many variations in my kitchen. My friends have taught me to personalize it, making it theirs — whether by adding unique spices or unique ingredients. The soul of this dish beats stronger with every plate shared, every laugh shared, and every story told around the table.
Funny story: Once, my younger cousin decided to make a “Hobo Casserole” on her own. She used peanut butter instead of cheese! Let’s just say, that unique culinary experiment didn’t quite take off, but it gave us all a big laugh!
FAQs and Troubleshooting
Q1: My casserole looks too watery; what happened?
A: This might happen if you used too much liquid or didn’t let it simmer long enough. Next time, reduce the beef broth or cook it a little longer on the stovetop before baking.
Q2: Can I make this ahead of time?
A: Absolutely! Prepare it the day before, cover it tightly with foil, and refrigerate. Just add a few extra minutes to the baking time if it’s coming out cold.
Q3: What if I don’t have certain veggies?
A: No worries! This recipe is incredibly adaptable; use whatever veggies you have! Zucchini, spinach, or even leftover roasted vegetables all work well.
Q4: Is there a way to freeze Hobo Casserole?
A: Yes! After baking, let it cool completely, then portion it into freezer-safe containers. It’ll last for about 3 months. When you’re ready, just reheat in the oven until warmed through!
Nutritional Info
While this dish is hearty and satisfying, here’s a basic breakdown (per serving):
- Calories: 450 (varies with ingredients)
- Protein: 30g
- Carbs: 40g
- Fat: 20g
(Note: Nutritional info can change based on ingredient brands and specific quantities used.)
So, there you have it — a delightful dive into Hobo Casserole, packed full of flavor, warmth, and cherished memories! I hope you feel inspired to spend some time in your kitchen whipping up this classic dish. Happy cooking, and here’s to creating delicious moments with the people you love! 🥘✨
Print
Hobo Casserole Ground Beef
- Total Time: 45 minutes
- Yield: 4 servings 1x
- Diet: Omnivore
Description
A heartwarming dish combining ground beef, veggies, and spices; perfect for busy weeknights or family gatherings.
Ingredients
- 1 lb Ground Beef (80/20)
- 1 medium Onion, diced
- 2 cloves Garlic, minced
- 1 cup Bell Peppers, diced
- 1 can (14 oz) Canned Diced Tomatoes
- 1 can (15 oz) Canned Beans, drained
- 1 cup Frozen Mixed Veggies
- 1 cup Beef Broth
- 1 cup Cheddar Cheese, shredded
- 1 tsp Salt
- 1 tsp Pepper
- 1 tsp Paprika
- 1 tsp Italian Herbs
Instructions
- Preheat your oven to 350°F (175°C).
- Brown the ground beef in a large skillet over medium heat for about 5-7 minutes.
- Add the diced onion and minced garlic; sauté until fragrant.
- Toss in the diced bell peppers and sauté for another 3-4 minutes.
- Mix in the canned diced tomatoes, drained beans, and frozen mixed veggies.
- Pour in the beef broth and stir to combine.
- Season with salt, pepper, paprika, and Italian herbs.
- Transfer the mixture to a greased baking dish.
- Sprinkle cheddar cheese over the top.
- Bake in the oven for about 25-30 minutes until the cheese is bubbly and golden.
- Let it rest for about 10 minutes before serving.
Notes
This dish is versatile; feel free to swap in leftover veggies or use different proteins.
- Prep Time: 15 minutes
- Cook Time: 30 minutes
- Category: Main Course
- Method: Baking
- Cuisine: American
Nutrition
- Serving Size: 1 serving
- Calories: 450
- Sugar: 6g
- Sodium: 600mg
- Fat: 20g
- Saturated Fat: 8g
- Unsaturated Fat: 10g
- Trans Fat: 0g
- Carbohydrates: 40g
- Fiber: 6g
- Protein: 30g
- Cholesterol: 70mg
Keywords: Hobo Casserole, Ground Beef, Comfort Food, Hearty Dinner, Family Meal
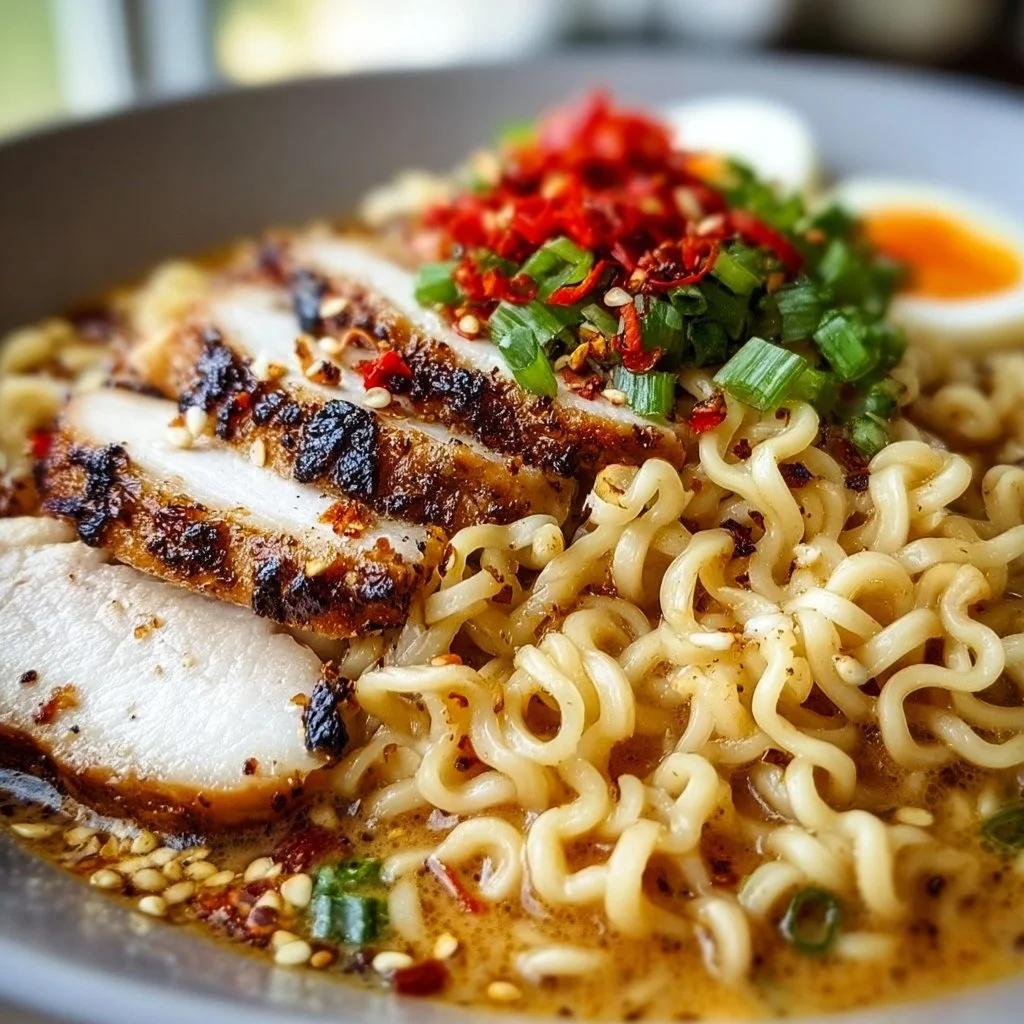
Creamy Garlic Chicken Ramen
Creamy Garlic Chicken Ramen: Comfort in a Bowl
Welcome, dear readers, to my little culinary corner! Today, we’re diving deep into a dish that’s about as comforting as a warm hug on a cold day: Creamy Garlic Chicken Ramen. Ah, ramen! Just saying the word brings back a flood of memories — twirling the noodles around my fork while eagerly slurping up that savory broth, the aroma of garlic wafting through the air, and the cozy weight of a steaming bowl in my hands. It’s a dish that doesn’t just fill your belly, but warms your soul.
I can’t think of a better cozy meal than a bowl of creamy, garlicky ramen, especially on a rainy day or during chilly evenings when the light outside fades into a soft twilight glow. Ramen is a favorite in our home — a celebratory dish for special occasions, lazy Sundays, or even a simple weeknight dinner that feels a little extra special. You’ll find variations of this recipe all over the world, but today we’re making it my way, filled to the brim with luscious cream, plenty of garlic, juicy chicken, and of course, those beloved noodles!
Whether you’re a seasoned kitchen warrior or a newbie who just inherited a spatula, don’t fret! This recipe is straightforward and accommodating. I promise you’ll feel like a kitchen rockstar whipping up this comforting bowl of goodness.
So grab your apron, and let’s get started! The smell of garlic sizzling in melted butter is about to take over your kitchen, and your taste buds will thank you!
Personal Story
I’ll never forget the first time I made ramen from scratch. It was during my college days, and I was living with a few friends. We decided it was time to throw our worries aside and have our very own ramen night. In true college fashion, we rummaged through our pantries and came up with an assortment of interesting ingredients—everything from frozen veggies to leftover rotisserie chicken.
As I minced cloves of garlic while my friends prepared the noodles, we cranked up our favorite music, turning the kitchen into a mini dance party. The laughter and chatter were just as essential as the ingredients — a reminder that cooking is really about bringing people together. When we finally sat down to enjoy our creations, the combination of flavors, the delightful creaminess, and the satisfying slurp of those noodles made it a night to remember.
Since then, ramen has become more than just a meal; it’s a celebration of friendships, creativity, and flavors. Every time I make it now, I’m transported back to that night, surrounded by good food and even better company. And it’s my joy to pass down this simple, yet delightful dish to you all.
Ingredients
Let’s take a look at what you’ll need for this creamy garlic chicken ramen. Here’s a straightforward yet flavorful list of ingredients:
-
Ramen Noodles: The star of the show! Fresh or dried, both work well. If using dried, ensure they’re of good quality. You can also substitute with udon or soba noodles for a different texture.
-
Chicken Breast: Juicy, tender pieces that add a hearty protein boost. If you prefer, substitute with chicken thighs or even shredded rotisserie chicken for a quick fix.
-
Garlic: About 6 cloves for that punch of flavor! Feel free to adjust this for your garlic-loving heart. Garlic powder can be a substitute in a pinch, but fresh garlic truly shines here.
-
Butter: Rich and creamy! It’s always better to use unsalted butter so you can control the saltiness of your dish.
-
Heavy Cream: This is what gives the ramen its luxurious, creamy texture. For a lighter option, you can use half-and-half, or for a dairy-free version, substitute with coconut milk.
-
Chicken Broth: Use homemade for the best flavor, or a good-quality store-bought one works as well. Bone broth can be a nutrient-rich alternative.
-
Soy Sauce: For that umami kick! You can substitute with tamari for a gluten-free option or liquid aminos for a healthier version.
-
Green Onions: These add a lovely brightness. Feel free to use chopped chives or shallots if you’re not a fan.
-
Sesame Oil: A little drizzle brings another layer of flavor to this dish. You can swap it with olive oil, but the unique nutty flavor of sesame oil is something special.
-
Optional Toppings: Soft-boiled eggs, seaweed, corn, or even a sprinkle of chili flakes for those who like a kick! Adapt it to what you enjoy.
Step-by-Step Instructions
Now that we have our ingredients, let’s dive into the cooking process that will fill your kitchen with delicious aromas and your family’s hearts with joy!
Step 1: Prepare the Ingredients
- Chop your garlic finely and set it aside to release its goodness.
- Slice your chicken into bite-sized pieces. This not only helps with cooking but also makes it easier to eat!
Chef Tip: To save time, try to chop all your vegetables and prepare your ingredients before you start cooking. It’s a game-changer and makes the process much smoother!
Step 2: Cook the Chicken
- In a large pot, melt 2 tablespoons of butter over medium heat until it’s bubbly and slightly golden.
- Add the chicken pieces and season with a pinch of salt and pepper. Sauté until the chicken is fully cooked and lightly browned, about 6–8 minutes.
Chef Hack: Let the chicken rest for a few minutes before cutting, as it helps retain all those delicious juices inside!
Step 3: Add Garlic
- Once the chicken is cooked, toss in the minced garlic and stir for about a minute, just until fragrant. Be careful not to burn it!
Step 4: Build the Broth
- Pour in your chicken broth and bring it to a gentle boil. Add in the soy sauce and the remaining butter. Stir to combine.
Comfort Tip: This is where the magic happens! Feel free to taste and adjust flavors at this point—a splash more soy sauce? Go for it!
Step 5: Add Cream and Noodles
- Reduce heat to low and whisk in the heavy cream until well combined. Allow this creamy goodness to heat through without boiling.
- Next, add the ramen noodles directly into the pot. If using fresh noodles, they may take about 2–3 minutes to cook; if dried, follow the package instructions.
Step 6: Finishing Touches
- Once the noodles are perfectly cooked, stir in a drizzle of sesame oil and toss in chopped green onions for that fresh crunch. Mix everything well.
Step 7: Serve
- Ladle your creamy garlic chicken ramen into bowls and top with your favorite optional toppings. A soft-boiled egg, a sprinkle of chili flakes, or a sheet of nori all add that extra special touch to your bowl!
Serving Suggestions
You can elevate your ramen experience by serving it along with a side of steamed vegetables or some crispy tofu bites for extra protein. A refreshing cucumber salad dressed with rice vinegar would create a lovely contrast to the rich flavors of the ramen. Garnish your bowls with a few slices of fresh lime for a zesty twist!
Recipe Variations
Now, let’s get creative! Here are a few ways you can change things up with this creamy garlic chicken ramen:
-
Vegetarian Option: Swap the chicken for tofu and use vegetable broth instead of chicken broth for a satisfying vegetarian meal.
-
Spicy Kick: Add some sriracha or chili oil to the broth for those who love a bit of heat.
-
Extra Veggies: Toss in some fresh spinach, bok choy, or snap peas right before you serve for added nutrition and color.
-
Miso Flavor: Blend in a tablespoon or two of miso paste to your broth for an extra layer of depth and umami!
-
Zoodle Ramen: Swap out the noodles for spiralized zucchini (zoodles) for a low-carb, veggie-packed alternative.
Chef’s Notes
This creamy garlic chicken ramen has evolved over the years, and I can honestly say it’s one of those recipes that has been tailored through experimentation and love! Initially, I used pre-made broths and sauces, but I’ve found that cooking from scratch really boosts the flavor. I still chuckle when I remember the time I thought doubling the garlic meant double the flavor. Spoiler: It did—but my friends also needed a breath mint afterward!
Every time I make this ramen, I remind myself that cooking is about joy and sharing. This is a dish that’s meant to be enjoyed with family and friends, a reminder to sit back, savor, and truly connect over a warm meal together.
FAQs and Troubleshooting
Q1: My broth is too salty; what should I do?
A: You can balance it out by adding a splash of water or an extra dollop of cream to dilute the saltiness. Just keep in mind the consistency of your broth!
Q2: Can I use store-bought ramen noodles?
A: Absolutely! Just follow the cooking instructions on the package, and you’ll still end up with a delicious dish.
Q3: What should I do if my noodles are overcooked?
A: Overcooked noodles can be disheartening, but they can be salvaged! Use them in a stir-fry or salad, where texture is less crucial!
Q4: Can I make this vegan?
A: Yes! Swap the chicken for tofu, use plant-based cream or coconut milk, and vegetable broth. It’s just as delicious without the animal products!
Nutritional Info (Optional)
Each serving of this creamy garlic chicken ramen provides approximately:
- Calories: 550
- Protein: 32g
- Carbohydrates: 60g
- Fat: 20g
- Fiber: 3g
Note: Nutritional information will vary based on specific ingredients used and serving sizes.
And there you have it! Your very own bowl of Creamy Garlic Chicken Ramen! I hope this recipe fills your home with warmth, delicious aromas, and wonderful memories shared around the dinner table. Happy cooking, and may your ramen nights be as cozy and inviting as mine! 😊
Print
Creamy Garlic Chicken Ramen
- Total Time: 35 minutes
- Yield: 4 servings
- Diet: None
Description
A comforting bowl of creamy garlic chicken ramen, perfect for chilly evenings.
Ingredients
- Ramen Noodles
- Chicken Breast
- Garlic (6 cloves)
- Butter (2 tablespoons)
- Heavy Cream
- Chicken Broth
- Soy Sauce
- Green Onions
- Sesame Oil
- Optional Toppings (soft-boiled eggs, seaweed, corn, chili flakes)
Instructions
- Prepare the ingredients: Chop garlic finely and slice chicken into bite-sized pieces.
- Cook the chicken: Melt butter in a pot over medium heat, add chicken, season, and sauté until cooked (6-8 minutes).
- Add garlic: Toss in minced garlic and stir for about a minute.
- Build the broth: Pour in chicken broth, bring to a gentle boil, and add soy sauce and remaining butter.
- Add cream and noodles: Whisk in heavy cream, then add ramen noodles and cook based on packaging instructions.
- Finishing touches: Stir in sesame oil and chopped green onions.
- Serve: Ladle ramen into bowls and top with optional toppings.
Notes
Feel free to customize with extra veggies or spices to suit your taste.
- Prep Time: 15 minutes
- Cook Time: 20 minutes
- Category: Main Course
- Method: Stovetop
- Cuisine: Japanese
Nutrition
- Serving Size: 1 bowl
- Calories: 550
- Sugar: 5g
- Sodium: 900mg
- Fat: 20g
- Saturated Fat: 10g
- Unsaturated Fat: 8g
- Trans Fat: 0g
- Carbohydrates: 60g
- Fiber: 3g
- Protein: 32g
- Cholesterol: 70mg
Keywords: ramen, garlic, chicken, comfort food, easy recipe
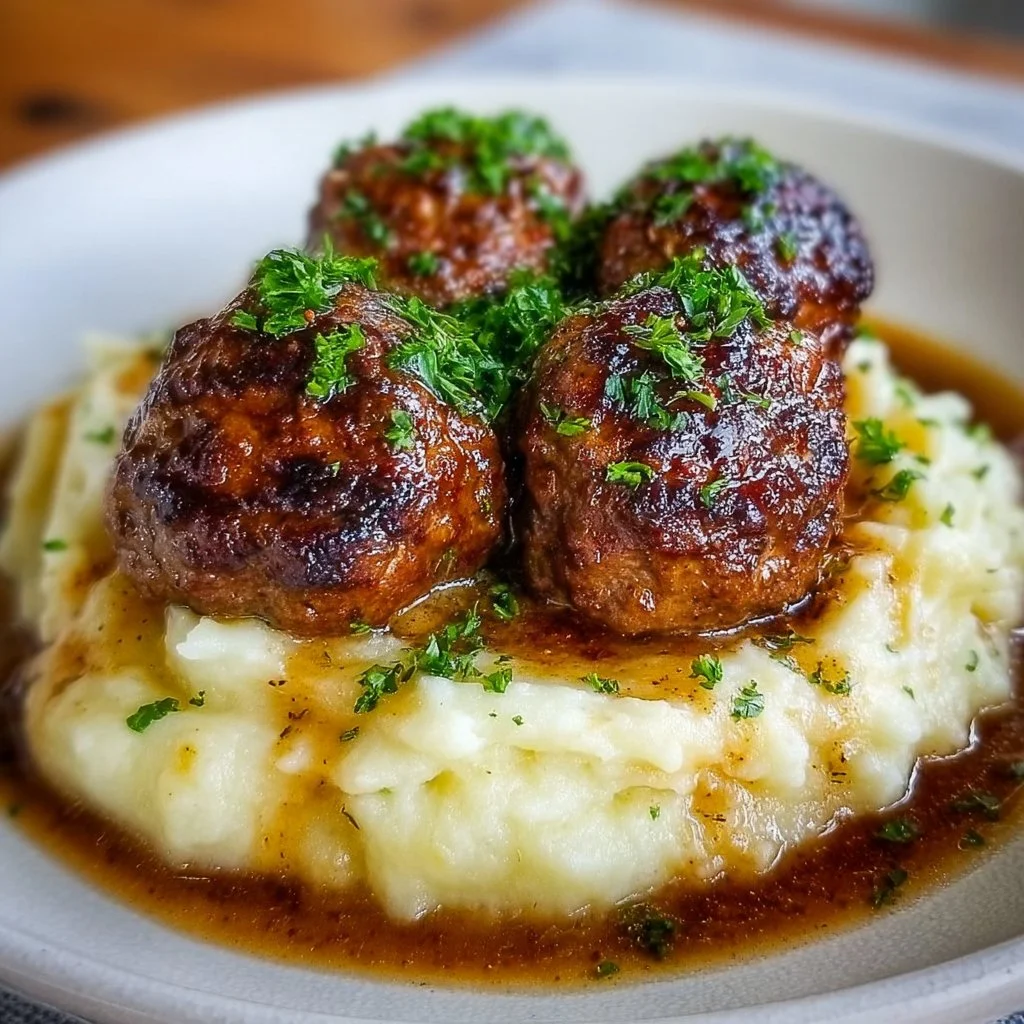
Salisbury Steak Meatballs with Garlic Herb Mashed Potatoes
Salisbury Steak Meatballs with Garlic Herb Mashed Potatoes
Hello, my food-loving friends! Welcome back to my cozy kitchen where the smell of something delicious is always wafting through the air! Today, I’m extra excited to share a classic dish that has stolen my heart and my family’s — Salisbury Steak Meatballs with Garlic Herb Mashed Potatoes. If you have ever savored the rich flavors of Salisbury steak and longed for a comforting meal that’s just as easy to whip up at home, you’re in for a treat!
Now, let’s be honest here. Life can get hectic; sometimes we need a quick yet satisfying meal that brings a wave of nostalgia and warmth. That’s where our savory meatballs come in! Tender, juicy, and brimming with flavor, these meatballs transform the traditional Salisbury steak into an easy-to-handle, family-friendly dish that’s perfect for any night of the week.
Imagine cozying up at the dinner table surrounded by loved ones, each of you diving into hearty meatballs drizzled with a luscious gravy atop a luscious bed of garlic herb mashed potatoes. Just thinking about it warms my heart and makes my stomach rumble. Plus, it’s a fantastic way to transform simple ingredients into something unforgettable.
What I love about this recipe is that it nudges me to create fond memories in the kitchen. Whether you’re cooking for two or throwing a small dinner party, it encourages you to savor the moment and enjoy the process. So grab your apron, gather your loved ones, and let’s get cooking! ❤️
Personal Story
Growing up, Fridays were sacred in our household. My mom was the reigning queen of comfort food, and it was on those golden Fridays that she would serve up the classic Salisbury steak. I can still hear the sizzle of the meat hitting the pan and the rich aroma of onions and beef simmering together. It felt like magic.
Fast forward to my early days of cooking, and you’ll find me yearning for those flavors but inspired to add my twist. One day, during the hustle of life, I thought, "Why not combine these juicy flavors into meatballs?" And just like that, my Salisbury Steak Meatballs were born! They brought me right back to those cozy family dinners. It became a tradition in my home as well — Friday nights became a culinary family affair!
Each time I make this dish, it’s not just about the food; it’s about gathering the people I adore and sharing laughter and stories over our table. Food has this incredible power to connect us, doesn’t it? And these meatballs? Well, they just might be the key to creating your own cherished kitchen moments.
Ingredients
Let’s dive into the ingredients that make these delectable Salisbury Steak Meatballs shine. Here’s what you’ll need:
-
Ground Beef (1 lb): This is your base; 80/20 ground beef is perfect for a juicy meatball. You could substitute with ground turkey or chicken for a leaner option – but don’t skip on the seasoning!
-
Breadcrumbs (¾ cup): These help bind the meatballs. Panko breadcrumbs add extra crunch, but regular breadcrumbs will work too! For a gluten-free option, try crushed gluten-free crackers.
-
Egg (1 large): This acts like a glue, helping to bind everything together. If you’re vegan, a flax egg (1 tablespoon ground flaxseed mixed with 2.5 tablespoons water) does the trick!
-
Onion (1 small, finely chopped): A key flavor component! Don’t skimp here. You can use shallots for a sweeter flavor or even caramelize red onions for a lovely touch.
-
Garlic (2 cloves, minced): Because who doesn’t love garlic? Roasted garlic can also bring a new level of sweetness and depth!
-
Worcestershire Sauce (2 tablespoons): Adds umami and rich flavor. If you’re out, soy sauce is a great substitute, though it will alter the flavor a tad.
-
Beef Broth (1 cup and for the gravy): For simmering and making the sauce. If you need a low-sodium option, look for that on the label! Homemade broth? Even better!
-
Fresh Herbs (parsley, thyme, or chives): A little brightness goes a long way! You can use dried herbs in a pinch—just use less, as they are more concentrated.
-
Salt and Pepper: Essential, but don’t be shy! These enhance flavors, adjusting is key.
-
Butter (2 tablespoons for the potatoes): For creaminess! If you want to lighten it up, use olive oil or a good dairy-free butter.
-
Milk (½ cup for the potatoes): For those creamy mashed potatoes. Substituting with plant-based milk is perfect for a dairy-free option.
Take notes here; these little bits of information will make your cooking more enjoyable, and your final dish will taste even better!
Step-by-Step Instructions
Let’s get our hands a little dirty and create some culinary magic! Follow my step-by-step guide to making these mouthwatering Salisbury Steak Meatballs.
1. Preheat Oven and Prepare Baking Sheet
Start by preheating your oven to 400°F (200°C). Line a baking sheet with parchment paper for easy clean-up (that’s one less thing to worry about later!).
2. Make the Meatball Mixture
In a large bowl, combine the ground beef, chopped onion, minced garlic, breadcrumbs, egg, Worcestershire sauce, and herbs. Sprinkle in salt and pepper to taste.
Chef Tip: Use your hands! It’s the best way to combine the ingredients without overmixing. And don’t be afraid to get a little messy; it’s all part of the fun!
3. Form the Meatballs
Scoop out portions of the mixture and shape them into golf-ball-sized meatballs. Aim for about 1.5 ounces each.
Chef Hack: Wet your hands with a little water to prevent sticking while shaping the meatballs.
4. Bake the Meatballs
Place the meatballs on your prepared baking sheet, making sure they have space to breathe! Bake for about 20-25 minutes, until they’re cooked through and browned on the outside.
Chef Insight: While those meatballs bake, let’s switch our attention to the gravy.
5. Make the Gravy
In a medium saucepan, heat a couple of tablespoons of olive oil over medium heat. Add in any leftover onion and garlic from your earlier prep, sautéing until they’re soft and translucent.
Next, slowly whisk in beef broth, letting it simmer. You can thicken it with cornstarch mixed in water (1 tablespoon cornstarch + 1 tablespoon cold water), or just let it reduce if you like a richer flavor.
6. Prepare Garlic Herb Mashed Potatoes
While your meatballs are baking, let’s whip up those mashed potatoes! Start boiling peeled and diced potatoes in salted water until fork-tender. Drain and return them to the pot.
Chef’s Note: Don’t skip seasoning your water; it’s where the potatoes absorb their initial flavor!
Mash with butter, milk, and minced garlic. Stir in your favorite fresh herbs until everything is creamy and dreamy!
7. Combine and Serve
Once the meatballs are ready, drench them generously with your homemade gravy and serve atop a pillow of garlic herb mashed potatoes. Garnish with chopped parsley or some extra herbs for a beautiful presentation.
Serving Tip: You can serve it with a side of steamed veggies or a simple green salad to round out the meal.
Serving Suggestions
To plate this delightful dish, pile the buttery garlic herb mashed potatoes on one side of a large plate, and nestle the Salisbury steak meatballs alongside. Drizzle with that luscious gravy, and don’t forget to sprinkle some fresh herbs on top for color & flavor.
Want to add a little pizzazz? Consider pairing with a side of sautéed green beans or roasted Brussels sprouts to give a pop of color and crunch!
Recipe Variations
This recipe is versatile, and there’s room to play around! Here’s how you can give it your own twist:
-
Spicy Meatballs: Add some crushed red pepper flakes or a dash of hot sauce to the meat mixture for a kick!
-
Mushroom Gravy: Sauté sliced mushrooms with the onions in your gravy for an earthy depth.
-
Cheesy Surprise: Insert a small chunk of cheese at the center of each meatball before baking — a fun surprise inside!
-
Herbed Potato Mash: Swap out the garlic for roasted red peppers or alternate herbs like rosemary for a flavor change.
-
Zucchini Noodles: Serve the meatballs over zoodles (zucchini noodles) instead of mashed potatoes for a lighter option!
Chef’s Notes
As a self-taught cook, I’ve made my fair share of blunders, and creating this dish was no exception! Once, I accidentally grabbed a container of cinnamon instead of paprika. Let me tell you, that meal was an adventure! But that’s the beauty of being in the kitchen—learning from those mistakes leads to fabulous results!
Originally, Salisbury steak was a way to stretch ingredients and create a hearty dish, which truly resonates with me. This meatball twist came from my love of turning traditional meals into contemporary, fun offerings. Inspired by my roots but crafted through my experiences, I’m excited to share this with you.
FAQs and Troubleshooting
-
What if my meatballs fall apart?
If this happens, it’s likely you need a little more binder (like breadcrumbs or egg). Also, be gentle when handling and shaping the meatballs to avoid overworking the mixture. -
My mashed potatoes are too lumpy! What can I do?
Make sure to mash them while they are hot and don’t forget to use a potato ricer for super creamy results! If they’ve cooled down, simply give them another mash with a splash of hot milk. -
Can I make the meatballs in advance?
Absolutely! You can prepare the meatballs ahead of time, freeze them uncooked, and bake when you’re ready. They’ll cook beautifully from frozen, just add a few extra minutes. -
What should I serve with it?
Try pairing it with a light salad or some pretty roasted vegetables for balance! It truly pairs well with anything fresh overall.
Nutritional Info (Optional)
While I always advise enjoying your food without guilt, here’s the rough nutritional breakdown per serving (including meatballs and mashed potatoes):
- Calories: 630
- Protein: 39g
- Carbohydrates: 55g
- Fat: 32g
- Fiber: 4g
And there you have it! Your ultimate guide to perfect Salisbury Steak Meatballs with Garlic Herb Mashed Potatoes. I hope you enjoy creating this cozy meal as much as I do. Mythical flavors and delightful memories await, so what are you waiting for? Let’s get cooking and creating memories together! 🥰🍴
Print
Salisbury Steak Meatballs with Garlic Herb Mashed Potatoes
- Total Time: 45 minutes
- Yield: 4 servings 1x
- Diet: Gluten-Free Option
Description
A comforting dish that combines the rich flavors of Salisbury steak in easy-to-handle meatballs served over creamy garlic herb mashed potatoes.
Ingredients
- 1 lb Ground Beef (80/20)
- ¾ cup Breadcrumbs
- 1 large Egg
- 1 small Onion, finely chopped
- 2 cloves Garlic, minced
- 2 tablespoons Worcestershire Sauce
- 1 cup Beef Broth
- Fresh Herbs (parsley, thyme, or chives)
- Salt and Pepper to taste
- 2 tablespoons Butter (for potatoes)
- ½ cup Milk (for potatoes)
Instructions
- Preheat oven to 400°F (200°C) and line a baking sheet with parchment paper.
- Combine ground beef, chopped onion, minced garlic, breadcrumbs, egg, Worcestershire sauce, and herbs in a large bowl; season with salt and pepper.
- Shape into golf-ball-sized meatballs, about 1.5 ounces each.
- Bake meatballs on the prepared sheet for 20-25 minutes until cooked through and browned.
- Heat olive oil in a medium saucepan; sauté any leftover onion and garlic until soft.
- Whisk in beef broth and let simmer, thickening with cornstarch if desired.
- Boil peeled and diced potatoes in salted water until fork-tender; drain and mash with butter, milk, garlic, and fresh herbs.
- Serve meatballs drenched in gravy atop garlic herb mashed potatoes, garnished with fresh herbs.
Notes
You can prepare the meatballs ahead of time and freeze them uncooked. They cook beautifully from frozen; just add a few extra minutes.
- Prep Time: 15 minutes
- Cook Time: 30 minutes
- Category: Main Course
- Method: Baking
- Cuisine: American
Nutrition
- Serving Size: 1 serving
- Calories: 630
- Sugar: 4g
- Sodium: 750mg
- Fat: 32g
- Saturated Fat: 12g
- Unsaturated Fat: 18g
- Trans Fat: 1g
- Carbohydrates: 55g
- Fiber: 4g
- Protein: 39g
- Cholesterol: 120mg
Keywords: Salisbury steak, meatballs, garlic mashed potatoes, comfort food, family dinner, easy recipe




