
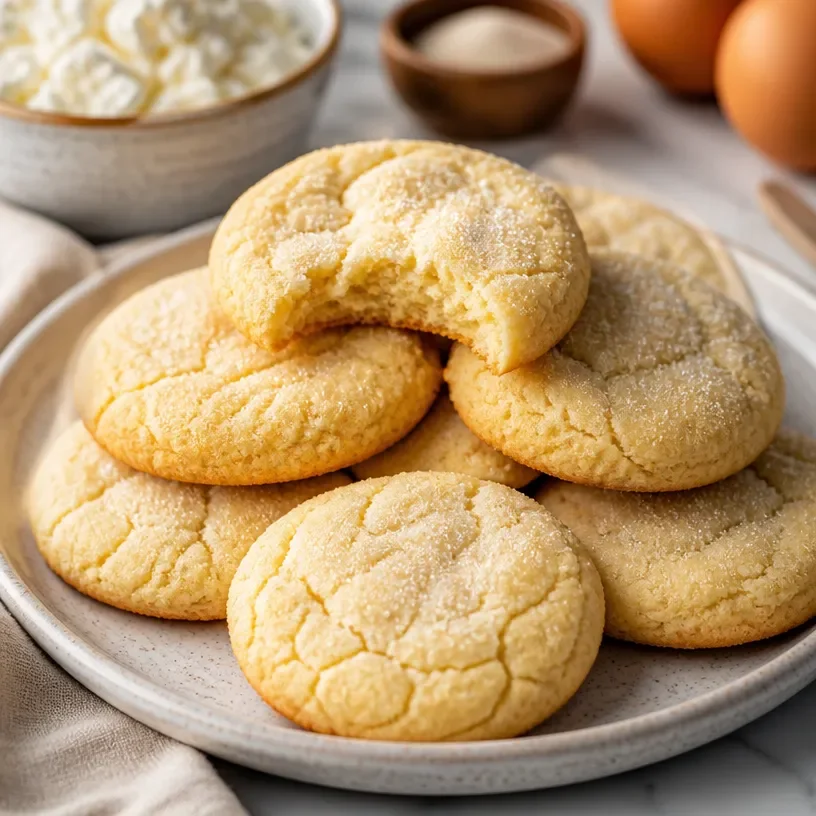
High-Protein Cottage Cheese Sugar Cookies for Meal Prep
Protein Cottage Cheese Sugar Cookies
Welcome to my kitchen! I’m Olivia Bennett, your go-to friend for cozy recipes that are exciting, nostalgic, and bursting with flavor. Today, I’m thrilled to dive into a delightful treat that’s as wholesome as it is scrumptious: Protein Cottage Cheese Sugar Cookies. Yes, you heard that right! These little jewels have found their way into my heart (and my kitchen) because they blend the comfort of homemade cookies with a protein-packed twist. Let’s embark on this tasty adventure together!
Whether you’re a health-conscious baker looking to satisfy your sweet tooth or a busy foodie trying to sneak in some extra nutrition, these cookies are the perfect solution. You get the essential protein benefits from cottage cheese while indulging in a classic dessert that refreshes childhood memories. As I mix and fold, the memories of baking with my grandma weave through my mind like warm vanilla scent wrapping around us—there’s something truly magical about sharing a kitchen.
These cookies are not just any sugar cookies; they have a delightful texture that makes them chewy on the inside while slightly crisp on the edges. Trust me, you’ll be itching to share these with family and friends, and they won’t even guess they’re made healthier! So put on your apron, grab your mixing bowl, and let’s create something delicious together.
A Sweet Memory
Growing up, the kitchen was always the heart of my home. Every Sunday, my grandma would whip up a batch of her famous sugar cookies, filling the house with the scent of melted butter and vanilla. I still remember how we would giggle as we snuck spoonfuls of the dough when Grandma’s back was turned. It was a sacred ritual, and each cookie was a little piece of joy.
One summer, she decided to experiment with adding cottage cheese to her dough. I remember thinking it was a strange idea at first. Still, when the cookies emerged warm and golden from the oven, all doubts vanished. The cottage cheese made the cookies wonderfully tender and gave them a unique flavor that made them irresistible. Fast forward to today, and this recipe has transformed into my own version of our Sunday tradition, adding this protein boost to keep up with my busy lifestyle!
Ingredients
Here’s what you’ll need to create these delightful Protein Cottage Cheese Sugar Cookies:
-
1 cup cottage cheese:
- This creamy goodness is the star of the show! It adds a protein boost and moisture to the cookies. You can substitute it with Greek yogurt if you prefer a tangier flavor or need a lactose-free option.
-
1 cup granulated sugar:
- The sweetness essential for sugar cookies! If you’re looking for a lower-calorie option, you can replace half of it with a sugar substitute like erythritol or coconut sugar.
-
1/2 cup unsalted butter, softened:
- Butter brings richness and flavor. If you’re looking for a vegan twist, a plant-based butter works wonders, too.
-
1 large egg:
- Essential for binding the ingredients together. If you’re baking without eggs, you can use a flax egg (1 tablespoon ground flaxseed mixed with 2.5 tablespoons of water) as a substitute.
-
2 cups all-purpose flour:
- This is your base! For a whole-wheat option, use 1 ½ cups whole wheat flour mixed with ½ cup all-purpose flour for added fiber.
-
1/2 teaspoon baking powder:
- Helps your cookies rise and keep a lovely chewy texture. You can combine it with baking soda if you wish for a little more lift.
-
1 teaspoon vanilla extract:
- Adds depth and warmth to the cookies. I always prefer pure vanilla extract—it’s worth the splurge!
-
1/4 teaspoon salt:
- It enhances all the flavors. Don’t skip it, as a touch of salt is essential in baked goods.
-
Optional: sugar for rolling (about 1/4 cup):
- For that classic sugar cookie finish! You can also roll the cookies in a bit of cinnamon-sugar if you want a spicy twist.
Step-by-Step Instructions
Let’s get to the fun part—baking these delicious cookies! Follow these steps, and you’ll have a batch of delightful treats in no time.
-
Preheat your oven:
- Begin by preheating your oven to 350°F (175°C). This step is crucial to ensure even baking.
-
Mix the wet ingredients:
- In a large mixing bowl, cream together the softened butter and granulated sugar until it’s light and fluffy. This should take about 3-4 minutes. The air you incorporate here is going to give your cookies that delightful texture!
-
Add the egg and cottage cheese:
- Beat in the egg along with the cottage cheese and vanilla extract. Mix until well combined. I love using a hand mixer for this step; it makes everything creamy and smooth!
-
Combine the dry ingredients:
- In a separate bowl, whisk together the flour, baking powder, and salt. Gradually incorporate this mixture into your wet ingredients, stirring until just combined. Be careful not to overmix; you want to keep it tender!
-
Chill the dough (optional but recommended):
- This step is not mandatory but will elevate your cookies! Chill the dough for about 30 minutes in the refrigerator. This helps prevent spreading and enhances the flavors.
-
Shape the cookies:
- Using a cookie scoop or your hands, form balls of dough about 1 tablespoon in size. Roll them gently in your palms for a smooth finish.
-
Roll in sugar:
- If you’re using the optional sugar for rolling, now’s the time! Pour some sugar into a small bowl, roll each cookie ball in it, and place them about 2 inches apart on a parchment-lined baking sheet.
-
Bake to perfection:
- Pop the baking sheet in the preheated oven and bake for 10-12 minutes, or until the edges are lightly golden. Don’t worry if they seem soft when you pull them out; they’ll continue to firm up as they cool.
-
Let them cool:
- Allow your cookies to cool on the baking sheet for about 5 minutes before transferring them to a wire rack. The cooling process is just as important as baking—they need that time to set!
Serving Suggestions
These Protein Cottage Cheese Sugar Cookies are best enjoyed warm, served with a glass of cold milk or your favorite tea! For a fun presentation, stack them up on a cheerful plate, dust with a little extra sugar, and garnish with fresh berries or a sprig of mint. If you’re hosting, serve them along with a cheese platter; the sweet-savory combo is sure to impress!
Recipe Variations
-
Chocolate Chip Twist: Add 1 cup of semi-sweet chocolate chips to the dough for a classic spin on cottage cheese cookies.
-
Nutty Delight: Fold in 1/2 cup of chopped nuts such as walnuts or pecans for a lovely crunch.
-
Citrus Burst: Add the zest of one lemon or orange for a refreshing citrus note.
-
Dairy-Free Option: Substitute the cottage cheese with almond or cashew cream for a delicious vegan version.
-
Spiced Cookies: Sprinkle in 1/2 teaspoon of cinnamon or pumpkin spice for the warmer months!
Chef’s Notes
As I reflect on the evolution of my baking over the years, these Protein Cottage Cheese Sugar Cookies stand out as not just a recipe but a story. The blend of comfort and nutrition is a perfect mirror of how I try to live my life: balanced yet joyful. The first batches often ended with a bit of chaos—cottage cheese everywhere, a sprinkle of flour on my face—but each cookie reminds me that perfection is not the goal; joy and creativity in the kitchen are what truly matter.
FAQs and Troubleshooting
Q1: Why are my cookies so flat?
- If your cookies spread too much while baking, it could be due to too much butter or not chilling the dough. Make sure to measure your butter correctly and chill the dough for at least 30 minutes.
Q2: Can I freeze the cookie dough?
- Absolutely! You can scoop out the dough balls and freeze them on a baking sheet. Once frozen, transfer them to a zip-top bag. They’ll keep well for up to three months; bake straight from the freezer, just add a minute or two to the baking time.
Q3: What if my cottage cheese is lumpy?
- No worries! Simply give it a quick blend or whisk before adding it to your other ingredients. Smooth is what we’re aiming for!
Q4: How do I store these cookies after baking?
- Store your cookies in an airtight container at room temperature for up to a week (though they never last that long in my house!). If you want them to keep even longer, consider freezing them!
Nutritional Info
Serving Size: 1 cookie
- Calories: 120
- Protein: 4g
- Carbohydrates: 18g
- Fat: 5g
- Fiber: 0.5g
- Sugar: 8g
Dive into these delightful Protein Cottage Cheese Sugar Cookies, and I promise you’ll be whisked back to joyful moments in the kitchen while embracing a nourishing bite! Happy baking!
Print
Protein Cottage Cheese Sugar Cookies
- Total Time: 27 minutes
- Yield: 24 servings 1x
- Diet: Vegetarian
Description
Delightful and wholesome cookies made with cottage cheese for a protein-packed twist on a classic dessert.
Ingredients
- 1 cup cottage cheese
- 1 cup granulated sugar
- 1/2 cup unsalted butter, softened
- 1 large egg
- 2 cups all-purpose flour
- 1/2 teaspoon baking powder
- 1 teaspoon vanilla extract
- 1/4 teaspoon salt
- Optional: 1/4 cup sugar for rolling
Instructions
- Preheat your oven to 350°F (175°C).
- Mix together the softened butter and granulated sugar until light and fluffy, about 3-4 minutes.
- Add in the egg, cottage cheese, and vanilla extract; mix until well combined.
- Combine the flour, baking powder, and salt in a separate bowl, then gradually incorporate this into the wet ingredients, stirring just until combined.
- Chill the dough for about 30 minutes in the refrigerator (optional but recommended).
- Shape the dough into balls about 1 tablespoon in size.
- Roll the cookie balls in sugar if using, then place them on a parchment-lined baking sheet about 2 inches apart.
- Bake for 10-12 minutes, or until the edges are lightly golden.
- Let the cookies cool on the baking sheet for 5 minutes before transferring them to a wire rack.
Notes
For variations, consider adding chocolate chips or nuts. These cookies are best enjoyed warm with milk or tea.
- Prep Time: 15 minutes
- Cook Time: 12 minutes
- Category: Dessert
- Method: Baking
- Cuisine: American
Nutrition
- Serving Size: 1 cookie
- Calories: 120
- Sugar: 8g
- Sodium: 150mg
- Fat: 5g
- Saturated Fat: 2g
- Unsaturated Fat: 3g
- Trans Fat: 0g
- Carbohydrates: 18g
- Fiber: 0.5g
- Protein: 4g
- Cholesterol: 30mg
Keywords: cottage cheese cookies, protein sugar cookies, healthy dessert
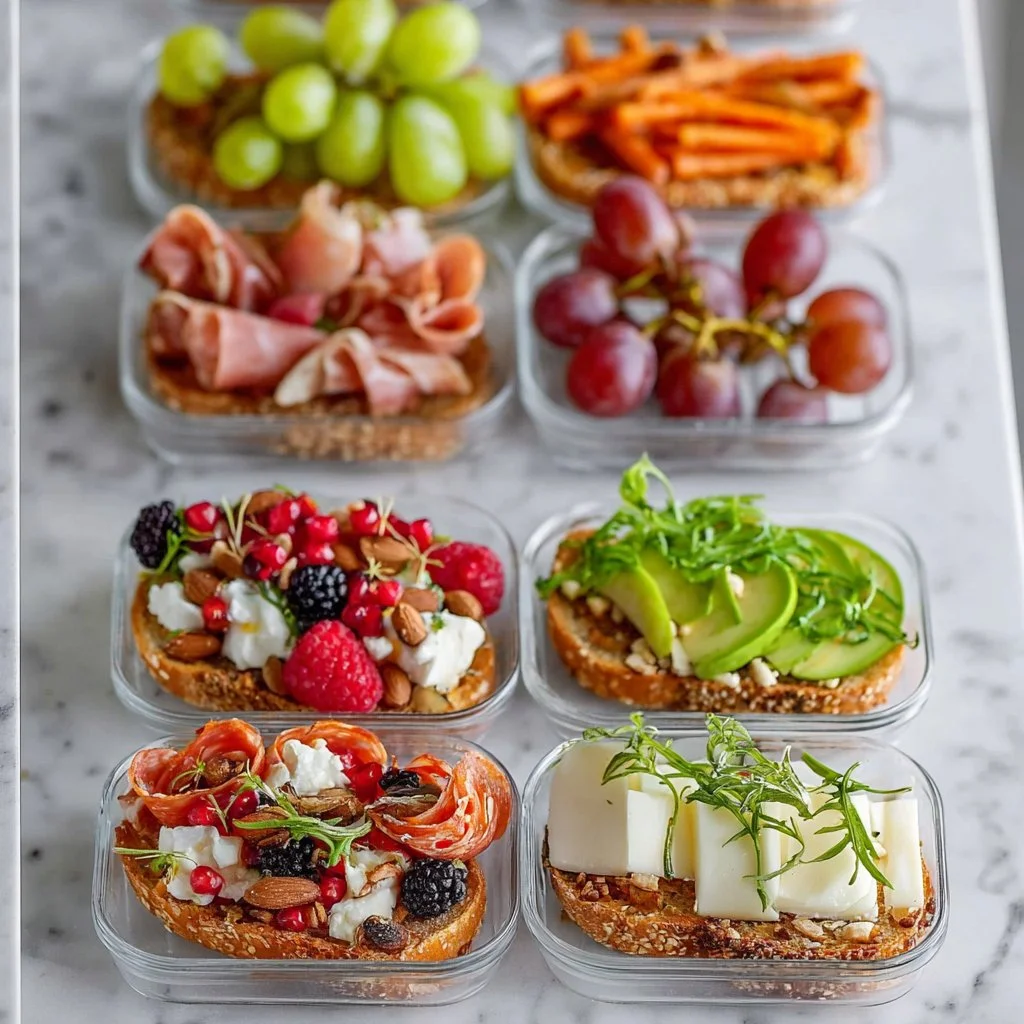
Healthy Meal Prep Snack Ideas
Healthy Meal Prep Snack Ideas for a Wholesome Life
Welcome back, my culinary friends! I’m Olivia Bennett, and I’m here to sprinkle a little joy into your kitchen adventures. If you’re like me and your love for good food is only rivaled by your desire to eat healthy, then you’re in for a treat today! We’re diving into the glorious world of healthy meal prep snack ideas that are as nourishing as they are delicious.
Let’s face it—snacking can sometimes feel like a guilty pleasure, but it doesn’t have to be! With a few healthful ingredients and some creative inspiration, you can whip up snacks that serve as both fuel and fun. Imagine crunching on homemade nut bars or dipping fresh veggies in a dreamy hummus while binge-watching your favorite show. Picture making snack time something to look forward to instead of a last-minute grab of whatever is lying around!
Meal prepping is a game-changer, especially for those of us juggling busy schedules. It allows you to fill your fridge with delicious snacks, so you can say goodbye to reach-for-the-chips moments. The key is to make snacks that not only fulfill your cravings but also provide essential nutrients to keep your energy levels soaring.
In this post, I’ll share my favorite healthy snack ideas that you can prep ahead of time, including tips, tricks, and personal stories to inspire you to get creative in the kitchen. So grab your apron (and maybe a snack!), and let’s get cooking!
Personal Story
Ah, the memories of my childhood kitchen come rushing back when I think about making snacks. I remember my mom whipping up a big batch of energy balls for our post-school treat, which didn’t just satisfy our sweet tooth but also kept us fueled for playtime. She’d let my little fingers roll the mixture into perfect balls, while I couldn’t help but sneak bites of dough along the way. It was a time for laughter, a bit of messiness, and a whole lot of flavor.
Fast forward a couple of decades, and here I am, still whipping up energy balls! I’ve refined the recipe over time, adding new flavors, but the essence remains the same: wholesome ingredients, a sweet kick, and a way to spark joy. Those cherished moments of cooking alongside my mom inspired my passion for creating snacks that are healthy and fun. Now, I’m passing this tradition on to you, hoping to inspire new kitchen adventures for you and loved ones alike.
Ingredients
Let’s gather our friendly ingredients! Here’s what you’ll need to create some scrumptious, healthy meal prep snacks:
-
Oats:
- What They Do: They serve as the base for countless snacks, providing fiber and keeping you full.
- Tip: Use rolled oats for better texture; you can also swap with quinoa flakes for a gluten-free option.
-
Nut Butter (peanut, almond, etc.):
- What They Do: Brings creaminess and healthy fats into the mix—perfect for energy and flavor.
- Tip: You can swap out for sunflower seed butter for a nut-free alternative, perfect for schools.
-
Honey or Maple Syrup:
- What They Do: Acts as a natural sweetener, binding everything together.
- Tip: Use agave syrup for a lower-glycemic option, or skip the sweetener for a no-sugar-added option!
-
Chia Seeds:
- What They Do: These little powerhouses add omega-3s and help to bind ingredients.
- Tip: Flax seeds can be a great substitute and add a nutritional punch too!
-
Dark Chocolate Chips or Dried Fruits:
- What They Do: Adds sweetness and indulgence, because hey, balance is key!
- Tip: Use cacao nibs for a healthier treat or try unsweetened coconut flakes for a tropical twist.
-
Nuts and Seeds:
- What They Do: Provide crunch and protein—and who doesn’t love a good bite?
- Tip: Feel free to use whatever you have on hand—walnuts, pumpkin seeds, or pecans—all work wonders!
Step-by-Step Instructions
Alright, now that we have our delicious ingredients lined up, let’s dive into the fun part—actually making our snacks! I’m excited to share my energy ball recipe that’s perfect for meal prep. Let’s get started:
-
Gather Your Ingredients:
- First thing’s first, measure out 2 cups of oats, ½ cup of nut butter, ½ cup of honey, and a ½ cup of add-ins like chocolate chips or dried fruit.
-
Mix the Base:
- In a large bowl, combine the oats and nut butter. Use a spatula to mix these until they’re well incorporated. You’ll notice it getting sticky—this is where the magic starts. Chef’s Tip: A little arm workout never hurt, but if you’re feeling fancy, use a stand mixer for a quick blend!
-
Add Sweetness:
- Drizzle in that honey (or maple syrup) and mix until combined. This is where you can decide if you want it sweeter—taste a little! Adjust if needed. Chef’s Tip: If it feels too dry, add more nut butter or a splash of plant-based milk.
-
Toss in the Extras:
- Now for the best part: stir in your chia seeds, nuts, and any add-ins like chocolate chips or dried fruits. Make sure everything is evenly distributed. Tip: Use your hands! It’s messy, but it’s part of the fun.
-
Chill Out:
- Once everything’s mixed, cover the bowl and let it chill in the fridge for about 30 minutes. This helps the mixture firm up, making it easier to roll into balls.
-
Roll the Energy Balls:
- After chilling, take out the mixture and roll it into 1-inch balls. They don’t have to be perfect; remember, we’re going for homemade vibes! Chef’s Tip: If they’re sticking to your hands, wet them slightly with water.
-
Store Your Snacks:
- Place the rolled energy balls in an airtight container; they can last in the fridge for up to a week, or you can freeze them for a month. Tip: Label your containers—nothing like a surprise snack from the freezer!
Serving Suggestions
These tasty energy balls can be served as a quick on-the-go snack, a yummy addition to your lunchbox, or even as a light dessert after dinner. For some flair, you can plate them beautifully on a colorful serving dish, dust them with shredded coconut, or even drizzle a little extra dark chocolate on top. Just remember to have fun with it!
Recipe Variations
Here are a few delightful twists you can try to make these snacks uniquely yours:
-
Tropical Bliss: Add chopped pineapple and coconut flakes for a sweet, island-inspired treat.
-
Spicy Chocolate: Mix in a pinch of cinnamon and a dash of cayenne for a zesty chocolate kick.
-
Protein-Packed: Toss in your favorite protein powder to transform these snacks into a post-workout pick-me-up.
-
Oatless Option: Substitute oats with ground nuts for a lower-carb version while packing in extra protein.
-
Fruit and Nut Medley: Get adventurous by using old-school trail mix—just mix in your favorite combinations!
Chef’s Notes
Cooking is all about experimenting! I’ve taken this energy ball recipe and made countless variations over the years. Some may say it’s a simple dish, but to me, it’s a canvas. You can mix in what you have, based on the seasons or cravings, and it will still be delicious. I once added leftover granola to a batch, which turned out surprisingly delightful! These moments in the kitchen are what keep my passion alive.
FAQs and Troubleshooting
Q1: My mixture is too dry; what do I do?
A: If your mixture feels too dry and isn’t coming together, simply add a splash of plant-based milk or an extra tablespoon of nut butter to help it bind.
Q2: Can I make these energy balls nut-free?
A: Absolutely! Use sunflower seed butter or even tahini for a wonderful, nut-free alternative. You can also increase the amount of seeds to keep the protein content high.
Q3: What can I use instead of honey?
A: Maple syrup works great as a vegan alternative! You can also try date syrup if you want to keep it all-natural.
Q4: Can I add fresh fruit?
A: I recommend sticking to dried fruits for this recipe. Fresh fruit might make the mixture mushy due to moisture. Save those for a separate snack!
Nutritional Info
While precise nutritional information can vary based on specific ingredients used, these energy balls generally offer a balanced mix of protein, healthy fats, and carbs. A typical serving (about 2 balls) provides roughly 150 calories, 6g protein, 10g fat, and 15g carbohydrates.
And there you have it! A wholesome journey through the world of healthy meal prep snacks. I hope you feel inspired to get creative in your kitchen. Remember, cooking is about joy and connection—share these snacks with loved ones, and let the good times roll. Happy cooking, everyone!
Print
Healthy Meal Prep Energy Balls
- Total Time: 15 minutes
- Yield: 24 servings 1x
- Diet: Vegetarian
Description
Delicious and nutritious energy balls perfect for meal prep and snacking.
Ingredients
- 2 cups rolled oats
- ½ cup nut butter (peanut, almond, or sunflower seed)
- ½ cup honey or maple syrup
- ½ cup chia seeds
- ½ cup dark chocolate chips or dried fruits
- Nuts and seeds (walnuts, pumpkin seeds, or pecans) to taste
Instructions
- Gather your ingredients.
- Mix the base: combine oats and nut butter in a large bowl.
- Add sweetness by drizzling in honey and mixing until combined.
- Toss in the extras: stir in chia seeds, nuts, and add-ins.
- Chill the mixture in the fridge for about 30 minutes.
- Roll the chilled mixture into 1-inch balls.
- Store the energy balls in an airtight container.
Notes
These energy balls can last in the fridge for up to a week or be frozen for a month.
- Prep Time: 15 minutes
- Cook Time: 0 minutes
- Category: Snack
- Method: No-Cook
- Cuisine: American
Nutrition
- Serving Size: 1 ball
- Calories: 150
- Sugar: 8g
- Sodium: 5mg
- Fat: 10g
- Saturated Fat: 1g
- Unsaturated Fat: 8g
- Trans Fat: 0g
- Carbohydrates: 15g
- Fiber: 3g
- Protein: 6g
- Cholesterol: 0mg
Keywords: energy balls, healthy snacks, meal prep, vegetarian snacks, no-bake snacks




