
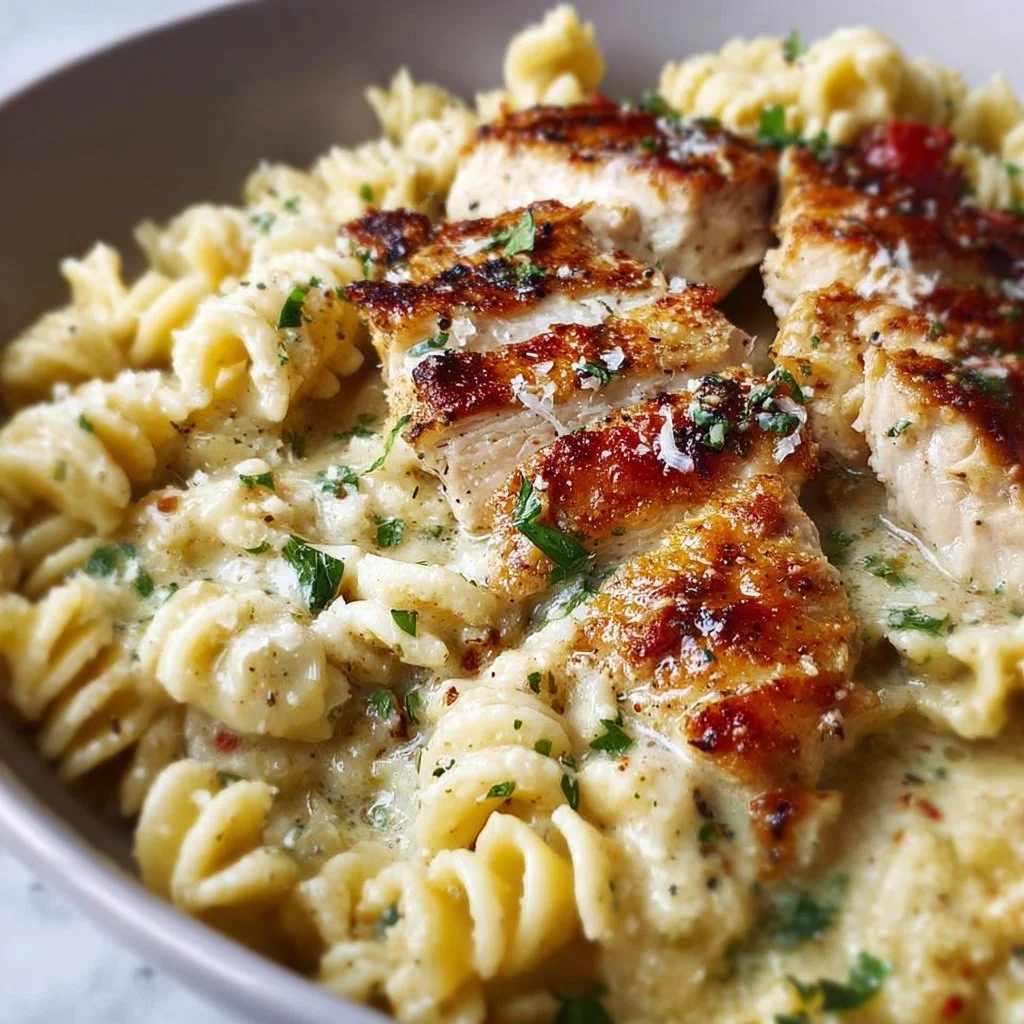
Chicken Garlic Parmesan Pasta
Chicken Garlic Parmesan Pasta: A Cozy Culinary Adventure
Hey there, fellow food lovers! Welcome to my kitchen, where we’re about to embark on a flavorful journey with a dish that’s as comforting as a warm hug after a long day—Chicken Garlic Parmesan Pasta. If the mere mention of golden-brown chicken tossed with luscious garlic and creamy parmesan gets your taste buds tingling, then stay right here. Let’s mix, mingle, and make some magic happen!
Imagine this: it’s a chilly evening, and you’re cozied up in your kitchen, the warm aroma of sizzling garlic and melting cheese wafting through the air. You can practically hear your family gathering around the table, the sound of laughter mixing with the clatter of forks against plates. Chicken Garlic Parmesan Pasta is not just a recipe; it’s an invitation to create memories that linger long after dinner is over.
I mean, who doesn’t love a dish that combines tender chicken, al dente pasta, and a rich, creamy sauce that makes every bite feel like a celebration? This recipe is perfect for busy weeknights or leisurely weekends spent cooking with loved ones. Plus, it’s versatile enough that you can easily adapt it to what you’ve got on hand. With a few simple steps, we’ll turn simple ingredients into an unforgettable meal. So grab your apron—let’s make some magic happen!
Personal Story
This Chicken Garlic Parmesan Pasta recipe holds a special place in my heart. I’ll never forget the first time I attempted to make it. It was a rainy Saturday afternoon, and I was determined to impress my then-boyfriend (now husband). I had seen a recipe online, but of course, I thought I could wing it! In classic Olivia fashion, I ended up with a garlicky mess that could have rivaled a science experiment gone wrong. But you know what? He loved it anyway—charmingly flawed and all.
We spent the evening laughing, reminiscing, and enjoying what had turned into a rather unorthodox version of pasta, complete with unintentional “extra” garlic. We ended up making it our own over the years, tweaking it with different ingredients and flavors. This dish became a staple for cozy nights in, family gatherings, and even potlucks with friends. It’s funny how the dishes that challenge us can become the most cherished, isn’t it?
Ingredients
Now, let’s gather our ingredients! Here’s what you’ll need for this delicious Chicken Garlic Parmesan Pasta:
-
Pasta: 8 ounces of your favorite (fettuccine, penne, or spaghetti are fantastic choices!)
Tip: Feel free to pick whole wheat or gluten-free pasta for a healthier option. -
Chicken breast: 2 medium-sized, boneless, skinless chicken breasts
Substitution: You can substitute with thighs for a richer flavor or leftover rotisserie chicken for convenience. -
Garlic: 4 cloves, minced
Chef Insight: The fresher the garlic, the better. Even pre-minced garlic will work in a pinch, but nothing beats fresh! -
Heavy cream: 1 cup
Substitution: You can use half-and-half for a lighter sauce or a plant-based cream if you prefer dairy-free. -
Parmesan cheese: 1 cup, grated
Tip: Grate it yourself for the best flavor and texture! -
Olive oil: 2 tablespoons for sautéing
Pro Tip: You can also use butter for a richer flavor, or a blend of both. -
Salt and pepper: to taste
Quick Insight: Seasoning is key, so don’t be shy—taste as you go! -
Fresh parsley: for garnish
Substitution: Fresh basil adds a delightful twist!
Step-by-Step Instructions
Ready to dive into cooking? Let’s get that pasta boiling and chicken sizzling!
-
Cook the Pasta:
Bring a large pot of salted water to a boil. Add your pasta, cooking until al dente (usually about 1-2 minutes less than the package directions). Reserve about a cup of pasta water before draining—trust me, this liquid gold will help your sauce!Chef Hack: Adding a bit of olive oil to the boiling water can help prevent the pasta from sticking.
-
Prep the Chicken:
While your pasta is cooking, season the chicken breasts with salt and pepper. Heat a tablespoon of olive oil in a large skillet over medium-high heat. Add the chicken and cook for about 6-7 minutes per side, or until golden brown and cooked through. Remove the chicken from the skillet and let it rest before slicing.Tip: For extra flavor, marinate your chicken in some garlic, olive oil, and herbs the night before!
-
Sauté the Garlic:
In the same skillet, reduce the heat to medium and add another tablespoon of olive oil. Toss in the minced garlic and sauté for 1-2 minutes until it becomes fragrant but not browned—burnt garlic can be bitter! -
Make the Sauce:
Pour in the heavy cream, stirring to combine it with the garlic. Allow it to simmer gently for about 3-4 minutes, letting it thicken slightly. Don’t forget to scrape up any delicious brown bits from the chicken!Chef’s Insight: If you want an extra cheesy sauce, add in half a cup of parmesan at this stage!
-
Combine Everything:
Slice your cooked chicken and add it back to the skillet along with the drained pasta. Toss everything together gently, ensuring the sauce clings to the pasta. If the sauce seems too thick, add a little reserved pasta water, a tablespoon at a time, until you reach your desired consistency.Tip: This is the time to adjust your seasoning—taste it and see if it needs more salt or pepper!
-
Finishing Touch:
Remove the skillet from heat and sprinkle the remaining parmesan cheese on top, allowing it to melt into the warm pasta.Quick Tip: Fresh herbs like parsley or basil can elevate the dish—just toss them in before serving!
Serving Suggestions
To serve this delightful Chicken Garlic Parmesan Pasta, plate it in warm bowls and garnish with fresh parsley. A sprinkle of extra parmesan on top wouldn’t hurt either! Pair it with a crisp green salad or some garlic bread for a full meal experience. And don’t forget a glass of white wine or sparkling water to wash it all down!
Recipe Variations
While the classic version is always a hit, here are a few fun twists to keep things interesting:
- Add Vegetables: Toss in some sautéed spinach, cherry tomatoes, or asparagus for a pop of color and nutrition.
- Pesto Power: Swap out some cream for a few spoonfuls of pesto for a bright, herbaceous flavor.
- Spicy Kick: Add a pinch of red pepper flakes to the garlic for an exciting kick!
- Mushroom Medley: Include sautéed mushrooms for an earthy flavor addition.
- Zoodles: For a lighter, low-carb option, use spiralized zucchini instead of traditional pasta.
Chef’s Notes
This recipe has been a beloved staple in our home for years. I love how it’s adaptable—some evenings, it’s a simple weeknight dinner, and other nights, I turn it into a fancy affair by adding a glass of wine and dim lighting. I once even served it to the in-laws, and they requested it for every family gathering thereafter! It’s funny how a single dish can hold such a rich tapestry of memories, isn’t it?
FAQs and Troubleshooting
-
What if my sauce is too thick?
If your sauce thickens more than you’d like, just stir in some reserved pasta water a little at a time. This will loosen it up while keeping the flavor intact! -
Can I make this dish in advance?
While it’s best enjoyed fresh, you can prepare the components ahead of time. Just remember that the pasta may absorb the sauce and become mushy over time, so if you make it ahead, store the pasta and sauce separately. -
What can I do if my chicken is dry?
If your chicken turns out dry, try slicing it thinly and tossing it back into the pasta with more sauce. It will help keep the flavors alive and moist! -
Can this be made vegetarian?
Absolutely! Substitute chicken with hearty vegetables like mushrooms and bell peppers, or even chickpeas for added protein.
Nutritional Info
Per serving (based on 4 servings):
- Calories: 620
- Protein: 32g
- Fat: 28g
- Carbohydrates: 60g
- Fiber: 3g
(These values may vary based on ingredient choices and portion sizes.)
And there you have it, my friends! A nested Christmas of flavors, warmth, and all the cozy feelings you can fit in a bowl. I hope you give this Chicken Garlic Parmesan Pasta recipe a try and make it your own. Whether shared around the dining table or enjoyed alone on a quiet night, it’s bound to warm your heart.
Happy cooking, and may your kitchen always smell of garlic and butter! 🍽️✨
Print
Chicken Garlic Parmesan Pasta
- Total Time: 45 minutes
- Yield: 4 servings 1x
- Diet: Non-Vegetarian
Description
A comforting blend of tender chicken, al dente pasta, and a rich creamy garlic parmesan sauce, perfect for cozy nights.
Ingredients
- 8 ounces pasta (fettuccine, penne, or spaghetti)
- 2 medium-sized boneless, skinless chicken breasts
- 4 cloves garlic, minced
- 1 cup heavy cream
- 1 cup grated parmesan cheese
- 2 tablespoons olive oil
- Salt and pepper to taste
- Fresh parsley for garnish
Instructions
- Cook the pasta: Bring a large pot of salted water to a boil, add your pasta, and cook until al dente. Reserve about a cup of pasta water before draining.
- Prep the chicken: Season the chicken with salt and pepper, heat olive oil in a skillet, and cook the chicken until golden brown, about 6-7 minutes per side. Remove and let rest before slicing.
- Sauté the garlic: In the same skillet, add more olive oil and minced garlic, sauté for 1-2 minutes until fragrant.
- Make the sauce: Pour in the heavy cream and let it simmer for about 3-4 minutes. Optionally add half a cup of parmesan for extra creaminess.
- Combine everything: Slice the chicken, add it back to the skillet along with the drained pasta, and toss gently. Adjust consistency with reserved pasta water as needed.
- Finishing touch: Remove from heat and sprinkle remaining parmesan on top before serving.
Notes
For added flavor, marinate the chicken overnight and customize with your favorite veggies or herbs.
- Prep Time: 15 minutes
- Cook Time: 30 minutes
- Category: Main Course
- Method: Sautéing
- Cuisine: Italian
Nutrition
- Serving Size: 1 serving
- Calories: 620
- Sugar: 3g
- Sodium: 600mg
- Fat: 28g
- Saturated Fat: 15g
- Unsaturated Fat: 10g
- Trans Fat: 0g
- Carbohydrates: 60g
- Fiber: 3g
- Protein: 32g
- Cholesterol: 90mg
Keywords: chicken, pasta, garlic, parmesan, comfort food, weeknight dinner
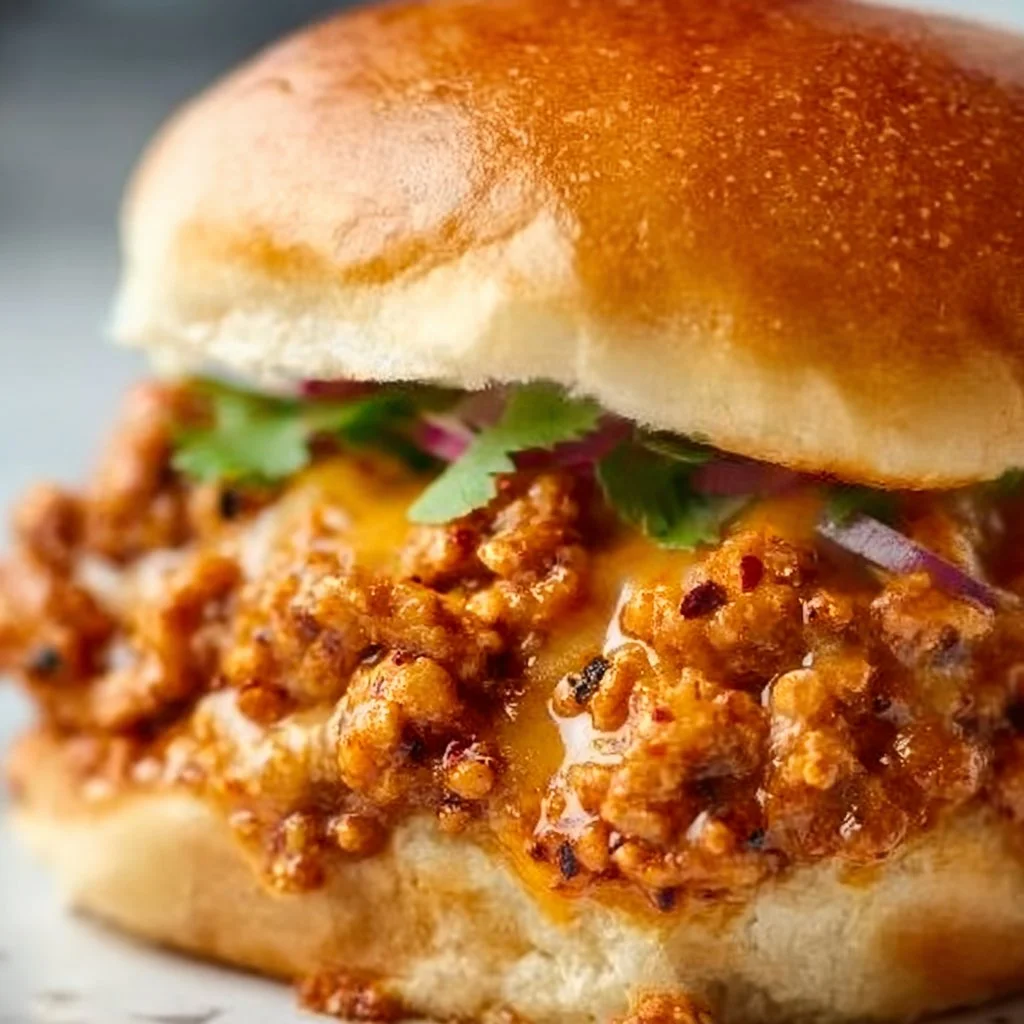
Cajun Chicken Sloppy Joes
Cajun Chicken Sloppy Joes: A Flavorful Twist on a Classic Comfort Dish
Welcome back to my cozy corner of the culinary world! Today, I have a recipe for you that’s not only packed with flavor but also perfect for those busy weeknight dinners that call for something delicious and easy to whip up. Enter: Cajun Chicken Sloppy Joes! This is the dish that strikes the perfect balance between nostalgia and excitement, combining the classic American sloppy joe with a delightful Cajun twist that will dance on your taste buds.
When I think of sloppy joes, I can’t help but recall lazy Sunday afternoons spent in the kitchen with family, surrounded by laughter and the smell of something heartwarming bubbling on the stove. There’s something deeply comforting about a messy sandwich, a vibrant filling, and the joy of sharing with loved ones. Now, picture that comfort but with an explosion of Cajun spices and tender chicken that will take you straight to a bustling street market in New Orleans.
What makes this dish even more special is how versatile it is! You can tailor the spice level to suit your crowd, serve it up on any bread you have on hand, or even make it gluten-free or dairy-free. It’s the ultimate crowd-pleaser that’s sure to impress both family and friends. Plus, it comes together in about 30 minutes—perfect for those evenings when you want a home-cooked meal but don’t have hours to spend in the kitchen. So roll up those sleeves, grab an apron (don’t worry if it’s messy — that’s the sign of a good cook!), and let’s dive into this flavorful journey together!
Personal Story
I’ll never forget the first time I stumbled upon a Cajun chicken recipe while flipping through an old cookbook I inherited from my grandma. She had a way of infusing every meal with love and tradition, and I could sense her spirit lingering in the pages. One chilly fall evening, I decided to experiment with her sloppy joe recipe, adding the vibrant flavors of Cajun cuisine that I had come to adore from my travels in Louisiana.
The kitchen filled with aromas that sent me straight back to that little restaurant tucked away in a New Orleans alley where the air was thick with spices and notes of jazz danced in the background. That first bite was like a warm hug—comforting, savory, and just a little spicy. I remember my family gathering around the table, their eyes lighting up with each savory mouthful. That night, I realized that cooking is not just about following a recipe; it’s about creating experiences, memories, and connections. Somehow, this Cajun Chicken Sloppy Joe became our new family favorite, and it has made an appearance in our home on countless occasions since then, always inviting smiles and good conversation.
Ingredients
Let’s get cooking! Here’s what you’ll need for these delightful Cajun Chicken Sloppy Joes:
-
Ground Chicken:
A lean alternative to ground beef, chicken absorbs flavors beautifully. If you’re looking for a richer option, feel free to replace it with ground turkey or even a plant-based ground meat if you want a vegetarian version! -
Cajun Seasoning:
This magical blend usually includes paprika, cayenne, garlic powder, onion powder, thyme, and oregano. If you don’t have Cajun seasoning, you can easily mix your own or use Creole seasoning for a different flavor profile. -
Onion:
Chop it finely to add sweetness and depth. For a twist, try using shallots or green onions to give your sloppy joes a different flavor base. -
Bell Pepper:
A colorful addition that brings freshness and crunch. You can use red, yellow, or even green bell peppers—or swap in jalapeños for a spicier kick! -
Garlic:
Fresh minced garlic not only adds flavor but also boosts the dish’s aromas. If you’re in a pinch, you can use garlic powder, but the fresh stuff reigns supreme! -
Tomato Sauce:
This is the saucy base that brings it all together. For extra flavor, use crushed tomatoes, diced tomatoes, or even add a splash of Worcestershire sauce. -
Brown Sugar:
Just a hint to balance out the spices and acidity from the tomatoes. If you’re looking for a sugar substitute, feel free to use honey or maple syrup. -
Buns:
Choose your favorites for serving! Traditional hamburger buns work perfectly, but if you’re feeling adventurous, try using crusty bread, slider rolls, or even lettuce wraps for a low-carb alternative. -
Coleslaw (optional):
A crunchy topping that adds texture and a little creaminess if you’re into that! You can make it from scratch or grab a bag of pre-made slaw mix for convenience.
Step-by-Step Instructions
Alright, foodies, let’s get cooking! Here’s how you can create these scrumptious Cajun Chicken Sloppy Joes in just a few simple steps!
-
Prep Your Ingredients:
Start by chopping your onions and bell peppers, and mincing your garlic. Having everything pre-cut makes the cooking process faster and more enjoyable. -
Cook the Chicken:
In a large skillet over medium heat, drizzle some olive oil and add your ground chicken. Use a wooden spoon to break it apart and cook until it’s no longer pink, about 5-7 minutes. This is where the magic starts!Chef’s Tip: If you want to enhance the flavor of the chicken, sprinkle a little salt as it cooks to bring out its natural juices.
-
Sauté the Veggies:
Once the chicken is cooked through, toss in the onions and bell peppers. Sauté them for about 4-5 minutes until they’re soft and fragrant. The combination of chicken and veggies will start to fill your kitchen with an incredible aroma! -
Add Garlic and Seasonings:
Stir in the minced garlic and Cajun seasoning, and allow everything to cook together for another minute. Trust me, the combination of flavors will have your taste buds dancing.Chef’s Tip: If you love heat, you can add a pinch of cayenne or red pepper flakes at this stage!
-
Incorporate the Sauces:
Pour in the tomato sauce and sprinkle the brown sugar. Stir it all together until well combined. Let the mixture simmer for about 5-10 minutes on low heat. This simmering step is crucial as it allows the flavors to meld beautifully.Chef’s Tip: If you want a saucier joe, just add a little more tomato sauce!
-
Taste and Adjust:
Now’s the fun part! Taste your filling and adjust the seasoning if necessary. Want more spice? Go for it! A little squeeze of lemon juice can brighten up the flavors too. -
Toast the Buns (Optional):
If you love a little texture, toast your buns under the broiler for a minute or two until golden brown. This will add a nice crunch to your sloppy joes. -
Assemble Your Sandwiches:
Load up those buns with the Cajun chicken mixture. If you’re feeling fancy, pile on some coleslaw for a delightful crunch and check mark on the flavor scale!
Serving Suggestions
Once your scrumptious Cajun Chicken Sloppy Joes are ready, it’s time to plate up! For a cozy feel, serve them on a cute wooden cutting board with a side of crunchy chips or crispy sweet potato fries. You can even serve them open-faced on a plate, topped high with coleslaw, and a sprinkle of fresh parsley or green onions for a pop of color.
Recipe Variations
While I absolutely adore the classic version of these Cajun Chicken Sloppy Joes, here are a few creative variations for you to explore:
-
Spicy Buffalo Chicken Sloppy Joes: Replace the Cajun seasoning with buffalo sauce for a zesty twist that packs a punch.
-
BBQ Chicken Sloppy Joes: Swap the tomato sauce with your favorite BBQ sauce for a sweet and tangy finish.
-
Veggie-Loaded Sloppy Joes: Add extra veggies like zucchini, carrots, or mushrooms for added texture and nutrition.
-
Cheesy Sloppy Joes: Top with a slice of cheese (cheddar or pepper jack is a winner) just before serving so it melts beautifully.
-
Keto-Friendly Version: Use ground turkey and serve it on lettuce wraps instead of buns for a low-carb option.
Chef’s Notes
I can’t help but chuckle every time I think about the first time I served these to my friends. I accidentally grabbed the spicy Cajun seasoning—let’s just say it ended up being a hilarious night with lots of water and ice cream to cool off the heat! Cooking is all about experimenting and having fun, and sometimes those little mishaps turn into the best kitchen stories. Over the years, I’ve adjusted this recipe to suit my family’s taste, switching out ingredients based on what we have in stock. It’s become a canvas for creativity, and I encourage you to make it your own too!
FAQs and Troubleshooting
1. What if my mixture is too dry?
No worries! Just add a splash of chicken broth or more tomato sauce to moisten it up.
2. Can I make this ahead of time?
Absolutely! You can prep the filling a day in advance and store it in the fridge. Just reheat when you’re ready to serve and assemble on fresh buns.
3. How can I store leftovers?
Keep any leftover filling in an airtight container in the fridge for up to 3 days. It’s just as delicious, if not better, the next day!
4. What are good sides to serve with Sloppy Joes?
Great sides include coleslaw, potato chips, corn on the cob, or even a light salad for some freshness.
Nutritional Info (Optional)
While I won’t bore you with numbers, keep in mind that this meal is packed with protein from the chicken and a healthy dose of veggies! Adjust the toppings and buns to suit your dietary preferences!
And there you have it, friends! A flavorful, satisfying recipe that brings warmth, zest, and comfort to your dinner table. I hope you enjoy making and savoring these Cajun Chicken Sloppy Joes as much as my family and I do. Don’t forget to share your creations with me—I love seeing what you cook up! Happy cooking! 🍽️
Print
Cajun Chicken Sloppy Joes
- Total Time: 30 minutes
- Yield: 4 servings 1x
- Diet: Poultry
Description
A flavorful twist on the classic American sloppy joe, infused with vibrant Cajun spices and tender chicken, perfect for busy weeknight dinners.
Ingredients
- 1 lb ground chicken
- 2 tbsp Cajun seasoning
- 1 onion, chopped
- 1 bell pepper, chopped
- 3 cloves garlic, minced
- 1 cup tomato sauce
- 2 tbsp brown sugar
- Buns for serving (hamburger, slider rolls, or crusty bread)
- Coleslaw (optional)
Instructions
- Prep your ingredients by chopping onions, bell peppers, and mincing garlic.
- Cook the chicken in a large skillet over medium heat with olive oil until no longer pink, about 5-7 minutes.
- Sauté the veggies by adding the onions and bell peppers to the skillet for 4-5 minutes until soft.
- Add garlic and Cajun seasoning, cooking for another minute.
- Incorporate the tomato sauce and brown sugar, stirring well and letting it simmer for 5-10 minutes.
- Taste and adjust seasoning as needed.
- Toast the buns under the broiler for a minute if desired.
- Assemble your sandwiches by loading the Cajun chicken mixture onto buns, adding coleslaw if desired.
Notes
Adjust spice levels according to your preference. This recipe can be made gluten-free and dairy-free as needed.
- Prep Time: 15 minutes
- Cook Time: 15 minutes
- Category: Main Course
- Method: Skillet
- Cuisine: American
Nutrition
- Serving Size: 1 sandwich
- Calories: 450
- Sugar: 7g
- Sodium: 600mg
- Fat: 16g
- Saturated Fat: 3g
- Unsaturated Fat: 10g
- Trans Fat: 0g
- Carbohydrates: 44g
- Fiber: 2g
- Protein: 32g
- Cholesterol: 100mg
Keywords: Cajun, Sloppy Joes, Chicken, Easy Dinner, Comfort Food, Weeknight Meal
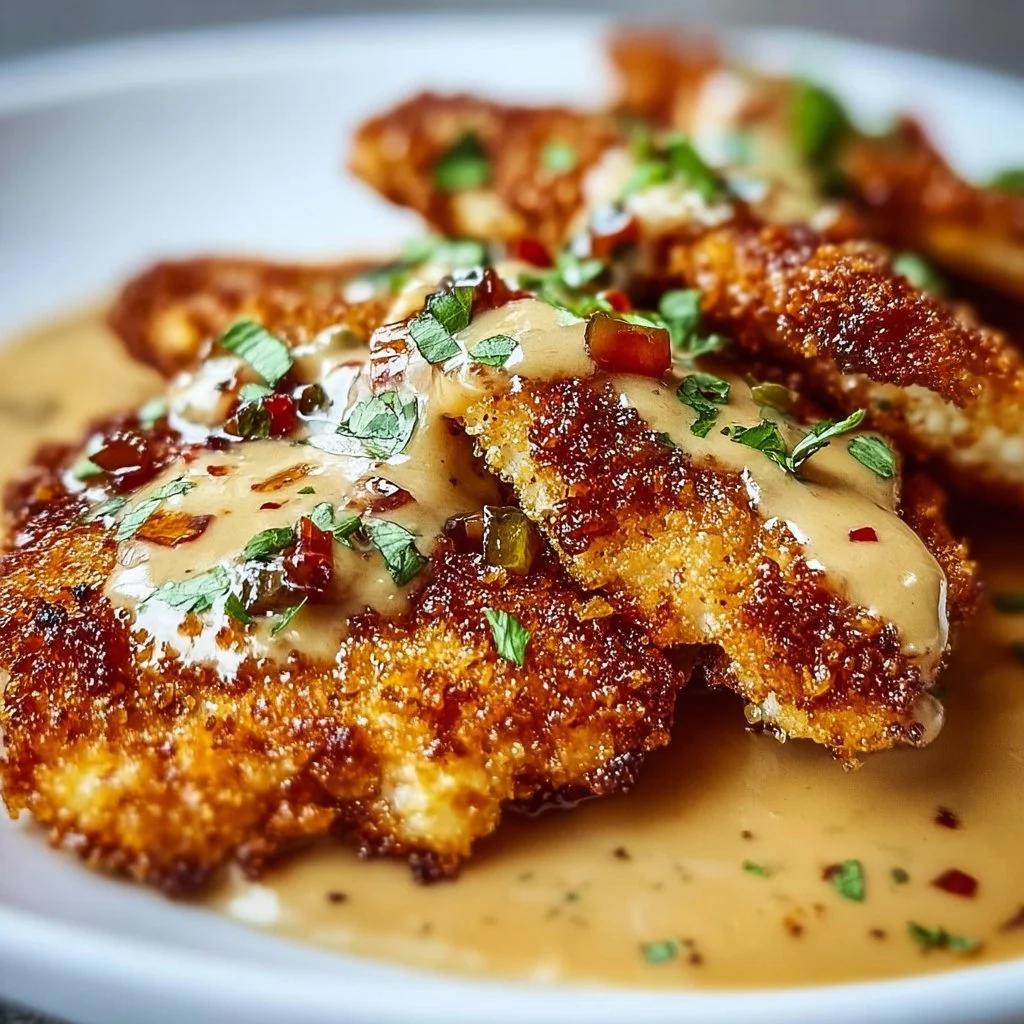
Crispy Parmesan Chicken with a Rich Garlic Sauce – Easy Dinner Idea
Crispy Parmesan Chicken with a Rich Garlic Sauce – Easy Dinner Idea
Welcome to my cozy kitchen! I’m Olivia Bennett, and today, I’m excited to share a dish that’s sure to bring a smile to your face and warmth to your heart: Crispy Parmesan Chicken with a Rich Garlic Sauce. If you’re like me and adore the enticing aroma of something delicious sizzling away, then grab your apron and get ready to dive into this mouthwatering recipe!
Picture this: the sun is setting, casting a warm glow in your kitchen, and you’re about to embark on a culinary adventure. You reach into your fridge, pulling out some chicken breasts, and suddenly a vision of golden-brown, crispy chicken coated in Parmesan alongside a rich, buttery garlic sauce dances in your mind.
Crispy Parmesan Chicken isn’t just any meal; it’s a celebration of textures and flavors that elevates a humble weeknight dinner into something truly special. This dish is not only super easy to whip up—perfect for any busy schedule—but it’s also a fantastic way to impress family and friends without spending hours in the kitchen. Plus, who doesn’t love the crunch of crispy chicken paired with the buttery richness of garlic?
Whether you’re cooking for yourself after a long day, hosting a dinner party, or just want to treat the family to something delightful, this recipe is your culinary best friend. So, let’s roll up our sleeves and journey through this recipe where comfort meets simplicity, and every bite feels like a warm hug.
Personal Story
Growing up, Sunday dinners were a sacred tradition in my family. My mom would always whip up something special, and one of my favorites was her crispy chicken. I remember standing on a chair beside her, watching in amazement as she expertly seasoned the chicken, dipped it into the egg wash, and coated it with breadcrumbs and Parmesan. The kitchen would fill with laughter and the beautiful aroma of garlic as she made her rich garlic sauce, always saying, “Never rush the sauce—it needs love to develop its flavors!”
Those dinners were about more than just food; they were about connection, joy, and the stories we shared around the table. Now, whenever I make Crispy Parmesan Chicken, I’m transported back to those cherished moments—sandwiched between delicious bites of crispy, garlicky goodness, I carry forward the love my mom infused in her cooking. I hope this recipe brings a little piece of that nostalgia to your kitchen, too.
Ingredients
Let’s take a look at the star players in this culinary adventure! Here’s what you’ll need, along with a few tips:
-
Chicken Breasts (4 pieces)
Look for boneless, skinless chicken breasts for this recipe. If you prefer, you can substitute them with thighs for richer flavor. Alternatively, you can use tofu or eggplant slices for a vegetarian option. -
Parmesan Cheese (1 cup, grated)
Freshly grated Parmesan works wonders for flavor and texture. If you’re short on time, pre-grated is acceptable, but it might not melt as smoothly. For a dairy-free version, nutritional yeast can provide a cheesy flavor! -
Panko Breadcrumbs (1 cup)
These Japanese-style breadcrumbs give a fantastic crunch! You can swap them for regular breadcrumbs or even crushed cornflakes for added texture. For gluten-free options, look for certified gluten-free breadcrumbs. -
Eggs (2, beaten)
Eggs help the coating stick to the chicken. For a vegan alternative, use a mixture of flaxseed meal and water or unsweetened applesauce. -
Garlic (6 cloves, minced)
Garlic is the heart of the sauce! If you’re a garlic lover, feel free to add more. You can substitute with 1 tablespoon of garlic powder in a pinch, but fresh garlic is best. -
Butter (4 tablespoons)
This is for the sauce’s richness! You can lighten it up by using olive oil or a vegan butter substitute if necessary. -
Parsley (for garnish)
Fresh parsley adds a lovely pop of color and freshness. Basil or spinach can work well too. -
Salt and Pepper (to taste)
Quality sea salt and freshly cracked black pepper enhance the flavors beautifully. Adjust to your personal preference!
Step-by-Step Instructions
Now, let’s cook up some delicious, crispy goodness!
Step 1: Prepare the Chicken
- Preheat your oven to 425°F (220°C). This high heat will make your chicken crispy and cook evenly.
- Place the chicken breasts between two pieces of plastic wrap. Using a meat mallet, gently pound them to about 1/2 inch thick. This helps them cook evenly and stay juicy!
Step 2: Set Up Your Breading Station
- In one bowl, beat the eggs until frothy. In a second bowl, combine the grated Parmesan and panko breadcrumbs with a healthy pinch of salt and pepper. This delightful mix will give our chicken a crispy, cheesy crust.
Step 3: Bread the Chicken
- Working with one piece of chicken at a time, dip it first into the egg wash, allowing any excess to drip off, and then dredge it into the panko-Parmesan mixture, pressing gently to make sure it adheres well. Place it on a parchment-lined baking sheet. Repeat with the remaining pieces.
Step 4: Bake the Chicken
- Drizzle a little olive oil over the breaded chicken or spray with cooking spray to encourage extra crispiness. Pop them into the preheated oven and bake for about 20-25 minutes or until they are golden brown and fully cooked (an internal temperature of 165°F or 74°C).
Step 5: Make the Rich Garlic Sauce
- While the chicken is baking, let’s whip up that luscious garlic sauce! In a skillet over medium heat, melt the butter. Add the minced garlic and sauté for about 30 seconds until fragrant—don’t let it burn, my friend!
- Stir in a pinch of salt, a bit of pepper, and maybe a splash of lemon juice for brightness. Let it simmer for a minute to meld those flavors together, then remove from heat.
Step 6: Assemble and Enjoy!
- Once your chicken is out of the oven, plate it up drizzled with that rich garlic sauce. A sprinkle of fresh parsley adds color and a burst of freshness. Grab a fork; you’re ready to dig in!
Serving Suggestions
Crispy Parmesan Chicken is a versatile dish! Serve it with a side of buttery mashed potatoes, roasted veggies, or a fresh, tangy salad. For a cozy dinner, pair it with garlic bread and your favorite pasta. Don’t forget to drizzle a bit more of that garlic sauce on top for an extra punch of flavor!
Recipe Variations
Feel free to mix things up! Here are a few creative twists to keep your meals exciting:
- Herb-Infused Chicken: Add dried herbs like oregano, thyme, or Italian seasoning to the breadcrumb mixture for extra aroma.
- Spicy Kick: Incorporate crushed red pepper flakes into the garlic sauce for a spicy twist that’ll set your taste buds alight!
- Crispy Chicken Sandwich: Serve the crispy chicken on a toasted bun with lettuce, tomato, and a dollop of garlic mayo for a fabulous sandwich experience.
- Lemon Garlic Sauce: Swap out butter for olive oil and add lemon zest to your sauce for a refreshing, zesty flavor.
- Parmesan Crusted Veggies: Use the same breading technique for roasted vegetables like zucchini or eggplant for a delightful side dish!
Chef’s Notes
Cooking is all about love and creativity! One of my fondest memories is making this crispy chicken for friends who came over for a movie night; we had a blast enjoying each bite while sharing our favorite films. Since then, I’ve experimented with various sauces and toppings. This recipe has evolved, but the heart remains constant—bringing joy and comfort through food.
Don’t be afraid to get your hands dirty—literally! The messier the apron, the better the food (trust me!). Cooking should be fun, so make it your own!
FAQs and Troubleshooting
1. Why is my chicken not crispy?
If the chicken is soggy instead of crispy, it could be due to too much moisture. Make sure to pat your chicken dry before breading and ensure it’s not overcrowded on the baking sheet. A little olive oil or cooking spray helps create that golden crust.
2. Can I use skin-on chicken?
Yes! Skin-on chicken may need a little longer to cook, so keep an eye on the internal temperature. The skin will add even more flavor and crunch—what’s not to love?
3. How do I store leftovers?
Store any leftover chicken in an airtight container in the fridge for up to three days. It’s best enjoyed fresh, but you can reheat in the oven to bring back some crispiness.
4. Can I make this dish ahead of time?
Absolutely! You can bread the chicken ahead of time and keep it in the fridge until you’re ready to bake. Just allow it to sit at room temperature for a few minutes before popping it in the oven.
Nutritional Info
While the specific nutritional info can vary based on ingredient brands and quantities, a general estimate per serving (serving size: 1 chicken breast with sauce) looks like this:
- Calories: 350
- Protein: 30g
- Carbohydrates: 15g
- Fat: 20g
(These values are approximate! Adjust based on substitutions or portion sizes.)
And there you have it—your guide to a delicious, nostalgic dinner that will warm your heart and please your taste buds: Crispy Parmesan Chicken with a Rich Garlic Sauce! I can’t wait for you to make it. Happy cooking, and may your kitchen always be filled with love and laughter!
Print
Crispy Parmesan Chicken with a Rich Garlic Sauce
- Total Time: 40 minutes
- Yield: 4 servings 1x
- Diet: Paleo
Description
A delightful dish of crispy chicken breasts coated in Parmesan and served with a rich garlic sauce, perfect for weeknight dinners.
Ingredients
- 4 pieces boneless, skinless chicken breasts
- 1 cup grated Parmesan cheese
- 1 cup panko breadcrumbs
- 2 eggs, beaten
- 6 cloves garlic, minced
- 4 tablespoons butter
- Fresh parsley (for garnish)
- Salt and pepper (to taste)
Instructions
- Preheat your oven to 425°F (220°C).
- Place the chicken breasts between two pieces of plastic wrap and gently pound them to about 1/2 inch thick.
- In one bowl, beat the eggs until frothy. In a second bowl, combine the grated Parmesan and panko breadcrumbs with a pinch of salt and pepper.
- Working with one piece of chicken at a time, dip it into the egg wash, then dredge it into the breading mixture.
- Drizzle olive oil over the breaded chicken and arrange on a parchment-lined baking sheet.
- Bake for about 20-25 minutes until golden brown and fully cooked, reaching an internal temperature of 165°F (74°C).
- While the chicken is baking, melt the butter in a skillet over medium heat, add the minced garlic, and sauté for about 30 seconds.
- Stir in a pinch of salt, pepper, and a splash of lemon juice, and let it simmer for a minute.
- Plate the chicken drizzled with the garlic sauce and garnish with fresh parsley.
Notes
Crispy Parmesan Chicken pairs well with mashed potatoes, roasted veggies, or a fresh salad.
- Prep Time: 15 minutes
- Cook Time: 25 minutes
- Category: Main Course
- Method: Baking
- Cuisine: Italian
Nutrition
- Serving Size: 1 serving
- Calories: 350
- Sugar: 1g
- Sodium: 400mg
- Fat: 20g
- Saturated Fat: 10g
- Unsaturated Fat: 10g
- Trans Fat: 0g
- Carbohydrates: 15g
- Fiber: 1g
- Protein: 30g
- Cholesterol: 150mg
Keywords: Crispy Chicken, Parmesan Chicken, Garlic Sauce, Easy Dinner, Comfort Food
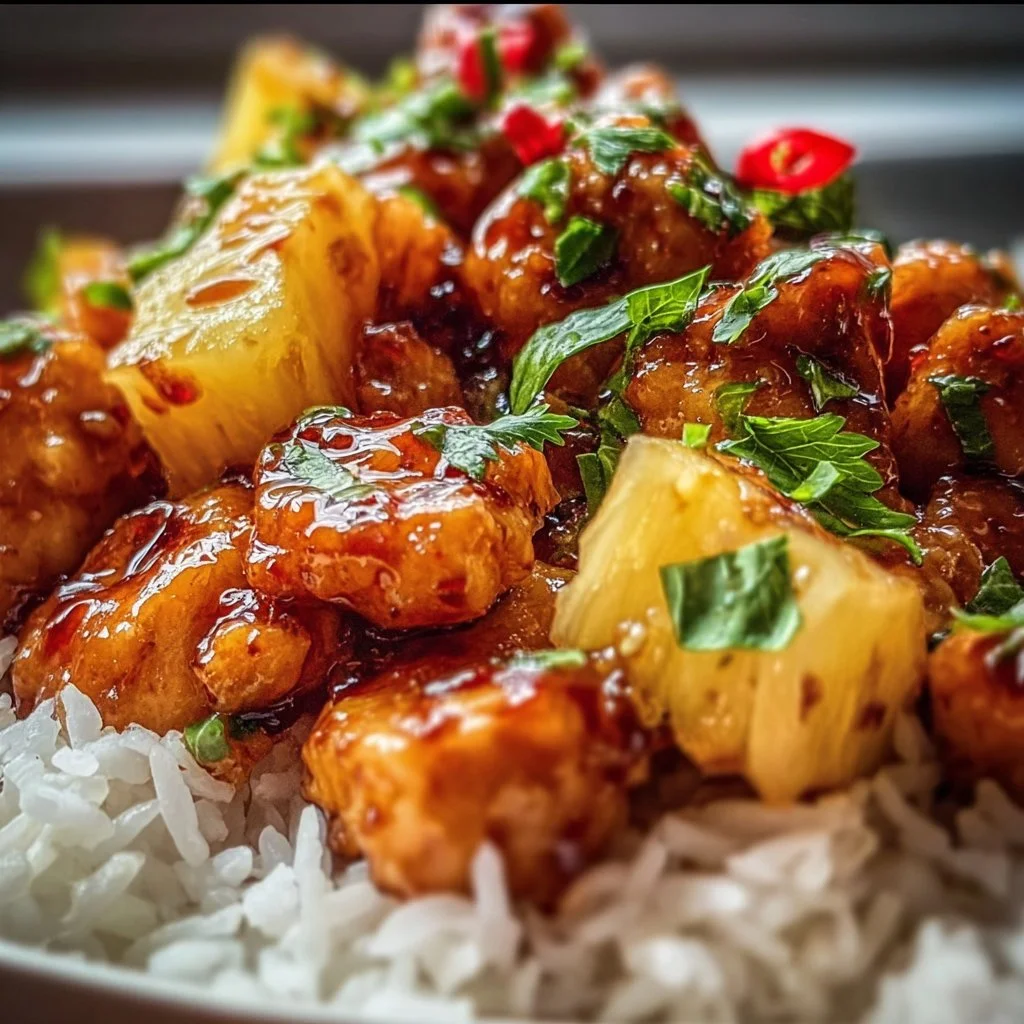
Pineapple Chicken and Rice: Sweet, Savory, Effortlessly Easy
# Pineapple Chicken and Rice: Sweet, Savory, Effortlessly Easy

## Introduction

Welcome back to my cozy kitchen, my fellow foodies! Today, we’re diving into a dish that radiates warmth, joy, and a touch of tropical charm: **Pineapple Chicken and Rice**. Picture this: tender chicken mingling with juicy pineapple chunks, all resting atop a bed of fluffy rice. It’s like a mini vacation on your dinner plate! Whether you’re looking to impress friends, whip up something special for family night, or simply savor the flavors of summer, this dish has got you covered.

I first stumbled upon this delightful combination in a little restaurant tucked away on a busy street. The moment I took a bite, I was hooked. The sweet, caramelized pineapple paired with the savory chicken felt like a warm hug—comforting and utterly satisfying. Since then, I’ve made it countless times in my own kitchen, always tweaking things here and there to make it uniquely mine. What I love most about Pineapple Chicken and Rice is its versatility! It can be dressed up for a dinner party or enjoyed as a casual weeknight meal.

Now, don’t let the tropical vibes fool you—this dish is easy-peasy to make! With just a handful of ingredients, you can create something that feels a bit fancy yet is totally achievable for cooks of all skill levels. So, roll up your sleeves, grab your apron (perhaps a messy one will do!), and let’s get cooking—we’re about to make magic happen in the kitchen!

## Personal Story

One of my fondest memories of cooking this dish was during a summer family reunion a few years back. My cousins, aunts, and uncles all gathered in our backyard for a barbecue and good times. The sun was shining, laughter filled the air, and the unmistakable scent of grilled chicken wafted through the breeze. As I prepared my version of Pineapple Chicken and Rice under the eaves of our old wooden porch, I couldn’t help but feel a sense of nostalgia for the family gatherings of my childhood.

My grandma used to make a similar dish on special occasions, filling the house with sweet and savory aromas. As I diced the pineapple, I reminisced about her using fresh fruit and hand-picking every ingredient—each slice connected us through time. That day, as I passed around my creation, it sparked conversations and smiles, reminding us all of the love that really comes through in homemade meals. The joy in my family’s eyes as they dug into the dish was the best compliment I could ask for.

Now, every time I make Pineapple Chicken and Rice, I find myself transported back to those carefree summer days, surrounded by the people I cherish. This dish isn’t just food; it’s a connection to my roots, making it all the more special.

## Ingredients

Let’s gather our ingredients, shall we? Here’s what you’ll need to whip up this delectable Pineapple Chicken and Rice:

- **2 cups jasmine rice**
  *This aromatic rice adds a subtle floral fragrance and fluffy texture to our dish. If jasmine isn’t available, white basmati or brown rice work well too.*

- **1 pound chicken breast, diced**
  *Use boneless, skinless chicken for a quick cook. Alternatively, you can swap for thigh meat for extra juiciness, or even tofu for a plant-based option!*

- **1 can (20 ounces) pineapple chunks**
  *Canned pineapple is sweet and convenient, but feel free to use fresh pineapple for a brighter flavor! Just cut it into bite-sized pieces.*

- **1 medium onion, finely chopped**
  *Onions add depth to your dish. If you prefer milder flavors, you could use green onions or scallions instead.*

- **2 cloves garlic, minced**
  *Garlic gives this dish a fragrant kick. If you’re feeling adventurous, try using shallots for a sweeter flavor or garlic powder if you’re in a pinch!*

- **1 bell pepper (red or yellow), diced**
  *Bell peppers contribute a lovely sweetness and crunch. You can mix it up with different colors or opt for zucchini if you prefer.*

- **Soy sauce (¼ cup)**
  *This savory sauce enhances the flavors beautifully. Low-sodium soy sauce is a great way to cut back on salt without sacrificing taste.*

- **Olive oil (2 tablespoons)**
  *A touch of olive oil will help cook everything to perfection. You could also use sesame oil for a nutty flavor twist.*

- **Salt and pepper** (to taste)
  *Simple yet essential! You can elevate the flavors by adding spices like paprika or black pepper, or even a sprinkle of red pepper flakes for heat.*

- **Fresh cilantro (for garnish)**
  *A handful of fresh cilantro adds a bright finish to the dish. If you’re not a fan of cilantro, green onions make a lovely substitute for garnish!*

With these ingredients gathered, you’re almost ready to create your masterpiece!

## Step-by-Step Instructions

Now let’s get into the fun part—the actual cooking! Follow these steps to bring your Pineapple Chicken and Rice to life.

1. **Cook the Rice:**
   Start by rinsing your jasmine rice under cold water until the water runs clear. This step helps remove excess starch, giving you fluffy rice. In a pot, combine 2 cups of rice with 4 cups of water. Bring it to a boil, then reduce the heat and cover. Let it simmer on low for about 18-20 minutes, or until the water is absorbed. Fluff with a fork when done.

   *Tip: Remember to check if your rice is cooked to your liking. If you prefer it softer, add an extra splash of water during the cooking process!*

2. **Sauté the Chicken:**
   In a large skillet or wok, heat 2 tablespoons of olive oil over medium-high heat. Once hot, add your diced chicken and season with a pinch of salt and pepper. Cook the chicken for about 5-7 minutes, tossing occasionally until beautifully browned and no longer pink in the center.

   *Chef Hack: For maximum flavor, you can marinate the chicken in soy sauce for about 30 minutes before cooking! This step intensifies the taste!*

3. **Add Aromatics and Veggies:**
   Once the chicken is fully cooked, add your chopped onion and garlic to the skillet. Sauté them for about 2-3 minutes until they’re translucent and fragrant. Then, toss in the bell pepper and continue to cook for another 2-3 minutes until it’s tender-cooked.

   *Note: If you love crunchier veggies, feel free to add them after the chicken is cooked. This will keep them crisp!*

4. **Incorporate Pineapple and Sauce:**
   Next, drain the canned pineapple (reserve a bit of juice if you'd like to add later!) and add it to the skillet with the chicken and veggies. Pour in the ¼ cup of soy sauce and stir everything together gently, bringing it to a simmer. If you’ve reserved pineapple juice, add a splash to enhance the caramelization!

   *Pro Tip: Allow the pineapple to slightly caramelize for about 2-3 minutes. This creates those divine, golden-brown edges that truly elevate the dish!*

5. **Combine with Rice:**
   Finally, lower the heat and add your fluffy, cooked rice to the skillet, mixing it thoroughly with the chicken and pineapple mixture. Stir gently to avoid breaking up the rice grains. Adjust the seasoning with additional soy sauce, salt, or pepper if necessary!

   *Extra Touch: For a hint of sweetness, add a tablespoon of brown sugar into the mix. It’ll create a lovely balance!*

6. **Serve it Stylishly:**
   Once everything is combined and heated through, it’s time to serve! Dish the Pineapple Chicken and Rice into bowls or on plates, and sprinkle freshly chopped cilantro on top for a bright finishing touch.

   *Tip: For an extra zest, squeeze some lime juice over it before serving! It adds a delightful zing you won't want to miss!*

## Serving Suggestions

When it comes to serving, the presentation matters! If you're aiming for a cozy family dinner setup, scoop generous portions of Pineapple Chicken and Rice into deep bowls. For more formal gatherings, use white plates to make the vibrant colors pop! Pair with a refreshing cucumber salad or tropical fruit on the side for a complete meal.

And don't forget those shiny lime wedges perched alongside—presentation is key, and those wedges are like little jewels that scream freshness!

## Recipe Variations

Need to switch things up? Here are a few creative variations you can try:

1. **Spicy Pineapple Chicken:** Add a teaspoon (or more) of sriracha or red pepper flakes while cooking for a spicy kick!

2. **Curry Pineapple Chicken:** Incorporate 1-2 tablespoons of your favorite curry powder when cooking the chicken for a warming, aromatic twist.

3. **Quinoa Alternative:** Swap rice for quinoa for a protein-packed, gluten-free variation!

4. **Vegetable Medley:** Throw in diced carrots, snap peas, or broccoli for an extra colorful veggie boost!

5. **Sweet and Sour Twist:** Replace soy sauce with sweet and sour sauce for a more tangy flavor profile!

## Chef’s Notes

This Pineapple Chicken and Rice recipe has been a cherished staple in my kitchen for years, evolving with every new experience and gathering. The memories it brings me are the heart of this dish! One time, I added too much soy sauce and had to add more rice to balance out the flavors. Surprisingly, it became a hit for its extra savory notes!

Cooking is all about experimentation, and it’s okay to make mistakes. Sometimes those “oops” moments turn into the most cherished recipes! So, feel free to adapt this dish to suit your taste—embrace the chaos and enjoy the journey!

## FAQs and Troubleshooting

**Q: My rice turned out mushy; what went wrong?**
A: This could happen if you added too much water or overcooked the rice. Next time, try measuring the water carefully and cooking the rice until just tender!

**Q: What can I substitute for soy sauce?**
A: You can use tamari for a gluten-free option or coconut aminos for a sweeter flavor.

**Q: Can I make this dish ahead of time?**
A: Absolutely! You can prep everything and store it in the fridge for a day, then just reheat before serving!

**Q: My chicken is tough; how can I make it tender?**
A: Make sure not to overcook your chicken as it can become chewy. Also, marinating it helps break down proteins, making for a juicy bite!

## Nutritional Information (Optional)

If you’re curious about the nutritional breakdown, Pineapple Chicken and Rice typically offers:

- **Calories:** ~400 per serving
- **Protein:** ~25g
- **Fat:** ~10g
- **Carbohydrates:** ~60g

Remember, these values can change based on the specific ingredients you use, so consider this a rough guide!

---

And there you have it, my culinary adventurers! Your very own Pineapple Chicken and Rice recipe, packed with personal stories and chef insights to guide you. I hope you find as much joy making this dish as I have sharing it with you. Until next time, keep cooking with love and passion, and remember that every meal is an opportunity to create connections!
Pineapple Chicken and Rice
- Total Time: 45 minutes
- Yield: 4 servings 1x
- Diet: Gluten-Free
Description
A delightful dish of tender chicken and juicy pineapple served on a bed of fluffy jasmine rice, perfect for a cozy family dinner or a special gathering.
Ingredients
- 2 cups jasmine rice
- 1 pound chicken breast, diced
- 1 can (20 ounces) pineapple chunks
- 1 medium onion, finely chopped
- 2 cloves garlic, minced
- 1 bell pepper (red or yellow), diced
- ¼ cup soy sauce
- 2 tablespoons olive oil
- Salt and pepper (to taste)
- Fresh cilantro (for garnish)
Instructions
- Cook the rice: Rinse jasmine rice under cold water until clear. Combine 2 cups rice with 4 cups water in a pot. Bring to a boil, reduce heat, and cover. Simmer for 18-20 minutes until water is absorbed. Fluff with a fork.
- Sauté the chicken: Heat olive oil in a skillet. Add diced chicken, season with salt and pepper, and cook for 5-7 minutes until browned and cooked through.
- Add onions and garlic: Stir in chopped onion and minced garlic, sauté for 2-3 minutes until fragrant. Add diced bell pepper and cook for another 2-3 minutes.
- Incorporate pineapple and sauce: Drain pineapple and add to skillet along with soy sauce. Stir gently, bring to a simmer, and let pineapple caramelize for 2-3 minutes.
- Combine with rice: Lower heat and mix in the cooked rice gently with the chicken and pineapple mixture. Adjust seasoning as needed.
- Serve stylishly: Portion into bowls, garnish with cilantro, and optional lime juice before serving.
Notes
Feel free to substitute ingredients or add more vegetables as desired. Adjust tofu for a plant-based option.
- Prep Time: 15 minutes
- Cook Time: 30 minutes
- Category: Main Course
- Method: Sautéing
- Cuisine: American
Nutrition
- Serving Size: 1 serving
- Calories: 400
- Sugar: 12g
- Sodium: 800mg
- Fat: 10g
- Saturated Fat: 1g
- Unsaturated Fat: 8g
- Trans Fat: 0g
- Carbohydrates: 60g
- Fiber: 2g
- Protein: 25g
- Cholesterol: 60mg
Keywords: Pineapple Chicken, Easy Dinner, Tropical Recipes, Chicken and Rice
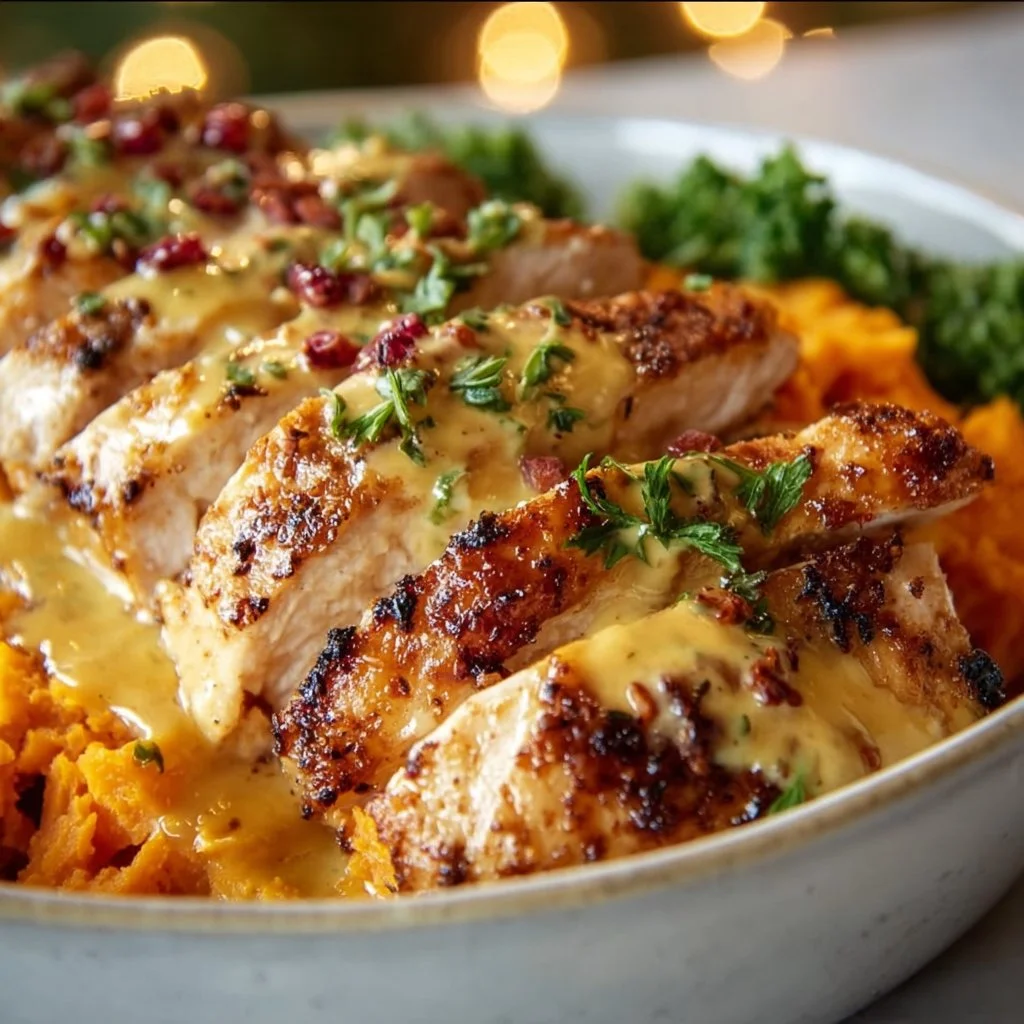
Easy Maple Dijon Chicken Bowl Recipe with Sweet Potatoes for Cozy Fall Dinner
Easy Maple Dijon Chicken Bowl Recipe with Sweet Potatoes for Cozy Fall Dinner
Hey friend! Welcome back to my cozy kitchen, where the scent of delicious food and warm spices fills the air. As the leaves begin to turn and the nights get a little chillier, there’s nothing quite like a comforting dinner that brings a sense of warmth and togetherness. Today, I’m so excited to share with you a recipe that perfectly captures the essence of fall: the Easy Maple Dijon Chicken Bowl with Sweet Potatoes.
If you’ve ever experienced that sense of comfort while enjoying a warm meal, you know exactly what I mean. This dish is not only cozy but incredibly easy to make, meaning you can whip it up even on the busiest of nights. Picture this: crispy chicken glazed with a sweet and tangy maple mustard sauce, roasted sweet potatoes that have caramelized to perfection, and a bed of greens that’s as vibrant as the fall foliage outside your window. Trust me, this bowl of goodness will not only warm your heart but also fill your belly!
I’ve always had a special place in my heart for bowls. They’re like a tapestry where different flavors, colors, and textures come together in perfect harmony. The joy of creating a meal that feels like a big, warm hug is something I cherish deeply, and I know you will too. Let’s get those apron strings tied and dive into this delightful recipe that’s perfect for cozy dinners with friends, family, or just yourself!
Personal Story
Let me take you back to a crisp autumn afternoon when I was a kid, exploring the local farmer’s market with my mom. The vibrant colors of the pumpkins and the smell of freshly-baked goods always stirred a sense of excitement in me. One particular stall, overflowing with sweet potatoes, caught our eye. My mom picked up a few and said, “These are perfect for roasting!” That evening, we turned those golden-orange gems into a scrumptious dinner that I still remember vividly.
As we sat around the table, the sweet potatoes caramelized just right, their natural sugars bringing out the flavors in our simple chicken dish. That meal was filled with laughter and stories — the kind that lingers, just like the warmth of that delicious food. It’s those moments that inspire me to create recipes like this Maple Dijon Chicken Bowl today. It’s a harmony of flavors that remind me of those fall afternoons spent in the heart of the kitchen with family, and now, I can’t wait for you to create your own memories with this dish!
Ingredients
Let’s gather our ingredients! This recipe is all about simple, wholesome components that you can easily find at your local store. Here’s what you’ll need:
-
Chicken Breasts (4 pieces)
Choose boneless, skinless chicken breasts for quick cooking. You can substitute thighs if you prefer dark meat for more juiciness. -
Maple Syrup (1/4 cup)
Look for pure maple syrup for the best flavor! If you can’t find it, honey can be a great alternative, though the flavor will be sweeter and less complex. -
Dijon Mustard (2 tablespoons)
This adds a tangy kick! If you’re sensitive to spice, consider using a milder mustard for a gentler flavor. -
Olive Oil (2 tablespoons)
A great cooking oil! You can swap it for avocado oil if you want something with a higher smoke point. -
Sweet Potatoes (2 medium-sized)
The stars of this bowl! Feel free to substitute with butternut squash for a slightly different taste. -
Fresh Spinach or Arugula (4 cups)
A bed of greens brightens the dish! You can use any leafy green you love, such as kale or mixed salad greens. -
Salt and Pepper (to taste)
Essential for enhancing flavor! Freshly ground black pepper adds an extra kick. -
Optional Toppings: Chopped Pecans, Cranberries, or Feta Cheese
Add texture and extra flavor! These can be interchanged with sunflower seeds or any cheese you like.
Step-by-Step Instructions
Now that we’ve rounded up our ingredients, let’s dive into the step-by-step process of crafting this yummy Maple Dijon Chicken Bowl!
Step 1: Preheat Your Oven
Start by preheating your oven to 400°F (200°C). This is the perfect temperature for roasting those sweet potatoes to golden perfection!
Step 2: Prepare the Sweet Potatoes
- Peel and Cube: Peel the sweet potatoes and cut them into bite-sized cubes. This not only makes them cook faster but also ensures they’re easy to eat.
- Seasoning: Toss the cubes in a bowl with a drizzle of olive oil, salt, and pepper. (Pro tip: Use your hands to mix — it’s more fun, and you get to feel like a real chef!) Lay the cubes in a single layer on a lined baking sheet.
Step 3: Roast the Sweet Potatoes
Pop those sweet potato cubes in the oven and roast for about 25-30 minutes. Make sure to flip them halfway through so they caramelize evenly. Keep an eye on them; you want them tender and lightly browned — that’s when the magic happens!
Step 4: Prepare the Chicken
While the sweet potatoes roast, let’s work on the chicken!
- Make the Marinade: In a small bowl, whisk together the maple syrup, Dijon mustard, and olive oil. (Oh, this sauce smells heavenly!)
- Season the Chicken: Season the chicken breasts with salt and pepper on both sides.
Step 5: Cook the Chicken
- Sear First: In a large skillet over medium-high heat, add a little olive oil. Once hot, add your seasoned chicken breasts. Let them sear without moving them for about 5 minutes until they develop a lovely golden crust.
- Add the Sauce: Pour the maple mustard sauce over the chicken, turning each piece to coat well. Reduce the heat to medium-low and cover the skillet. Cook for an additional 7-10 minutes, or until the chicken reaches an internal temperature of 165°F (75°C). (Tip: Use a meat thermometer for perfect results!)
Step 6: Assemble Your Bowls
Once the chicken is cooked and the sweet potatoes are beautifully roasted, it’s time to build your bowls!
- Base Layer: Start with a generous handful of fresh spinach or arugula in each bowl.
- Add Sweet Potatoes: Top with the roasted sweet potato cubes.
- Slice the Chicken: Slice the chicken breasts against the grain and arrange them artfully on top.
- Optional Toppings: Sprinkle with pecans, cranberries, or feta cheese for that extra burst of flavor and texture.
Step 7: Enjoy!
Now comes the best part! Dive into your cozy Maple Dijon Chicken Bowl and savor every bite. Take a moment to appreciate the flavors, the warmth, and the love that went into making this delicious meal.
Serving Suggestions
For an extra touch of festivity, consider serving your Maple Dijon Chicken Bowl with freshly baked dinner rolls or a crunchy autumn salad on the side.
And don’t forget to pour yourself a glass of a warm spiced apple cider! It adds to the cozy vibe and pairs beautifully with the sweet and savory flavors of the chicken bowl.
Recipe Variations
Of course, this recipe can be a fantastic canvas for your creativity! Here are a few variations to mix things up:
- Spicy Kick: Add a pinch of cayenne pepper or red pepper flakes to the marinade for a spicy touch!
- Swap Vegetables: Swap sweet potatoes for other roasted veggies like Brussels sprouts or carrots for a different flavor profile.
- Grainy Base: Serve the chicken bowl over quinoa or farro instead of greens for added texture and nutrition.
- Herbaceous Twist: Incorporate fresh herbs like thyme or rosemary in the marinade to elevate the flavors.
- Vegan Version: Substitute chicken with roasted chickpeas or tempeh for a plant-based option, and use maple syrup without Dijon for a sweeter marinade.
Chef’s Notes
Isn’t it amazing how certain flavors can transport us back in time? This Maple Dijon Chicken Bowl has evolved beautifully over the years since I first tried that roasted sweet potato dish with my mom. I’ve added my own twists, like the maple-Dijon glaze, but the essence of comfort and family dinner remains the same. Each time I make this dish, I’m reminded of that special moment at the farmer’s market, and I love sharing it with all of you! So, let’s keep cooking and creating new memories together!
FAQs and Troubleshooting
1. What if my chicken isn’t cooking through?
Make sure to slice the chicken against the grain after cooking. If it’s still pink, give it an extra few minutes in the skillet while covered. A meat thermometer is your best friend to ensure it’s cooked perfectly!
2. Can I make this dish ahead of time?
Absolutely! You can prep the sweet potatoes and chicken ahead of time. Store them separately in airtight containers in the refrigerator. When ready to serve, reheat and assemble!
3. What should I do if I don’t have maple syrup?
If you’re all out of maple syrup, honey is a great substitute, although it will be sweeter. You could also use brown sugar mixed with a bit of water to create a syrup-like consistency.
4. How to store leftover bowls?
Store leftovers in an airtight container in the fridge for up to 3-4 days. Reheat gently in the microwave or in a skillet over low heat, adding a splash of water to keep things moist!
Nutritional Info (if applicable)
Please note that the nutritional content can vary based on specific ingredients used, but here’s an estimate for one serving:
- Calories: 475
- Protein: 35g
- Carbohydrates: 52g
- Fiber: 8g
- Sugars: 12g
- Fat: 15g
And there you have it! An easy, scrumptious Maple Dijon Chicken Bowl with Sweet Potatoes to make your fall dinners not just delicious, but heartwarming. I hope you enjoy this recipe as much as I do! So, grab your apron, call your loved ones, and let’s make some memories in the kitchen together. Happy cooking, my friend! 🍂💖
Print
Easy Maple Dijon Chicken Bowl with Sweet Potatoes
- Total Time: 45 minutes
- Yield: 4 servings 1x
- Diet: Gluten-Free
Description
A cozy, comforting bowl of crispy chicken glazed with a sweet and tangy maple mustard sauce, complemented by roasted sweet potatoes and fresh greens.
Ingredients
- 4 pieces Boneless Skinless Chicken Breasts
- 1/4 cup Pure Maple Syrup
- 2 tablespoons Dijon Mustard
- 2 tablespoons Olive Oil
- 2 medium-sized Sweet Potatoes
- 4 cups Fresh Spinach or Arugula
- Salt and Pepper (to taste)
- Optional Toppings: Chopped Pecans, Cranberries, or Feta Cheese
Instructions
- Preheat your oven to 400°F (200°C).
- Peel and cube the sweet potatoes into bite-sized pieces. Toss in a bowl with olive oil, salt, and pepper, then lay on a lined baking sheet.
- Roast the sweet potatoes for about 25-30 minutes, flipping halfway through.
- Make the marinade by whisking together maple syrup, Dijon mustard, and olive oil.
- Season the chicken with salt and pepper on both sides.
- Sear the chicken breasts in a skillet over medium-high heat for about 5 minutes until golden, then add the sauce and cover to cook for another 7-10 minutes until the chicken reaches 165°F (75°C).
- Assemble in bowls with spinach, sweet potatoes, and sliced chicken on top. Finish with optional toppings.
- Enjoy your delicious Maple Dijon Chicken Bowl!
Notes
Feel free to customize with your favorite veggies or grains for added texture and nutrition.
- Prep Time: 15 minutes
- Cook Time: 30 minutes
- Category: Main Course
- Method: Baking
- Cuisine: American
Nutrition
- Serving Size: 1 serving
- Calories: 475
- Sugar: 12g
- Sodium: 400mg
- Fat: 15g
- Saturated Fat: 2g
- Unsaturated Fat: 5g
- Trans Fat: 0g
- Carbohydrates: 52g
- Fiber: 8g
- Protein: 35g
- Cholesterol: 75mg
Keywords: Maple Dijon, Chicken Bowl, Sweet Potatoes, Fall Recipes, Comfort Food
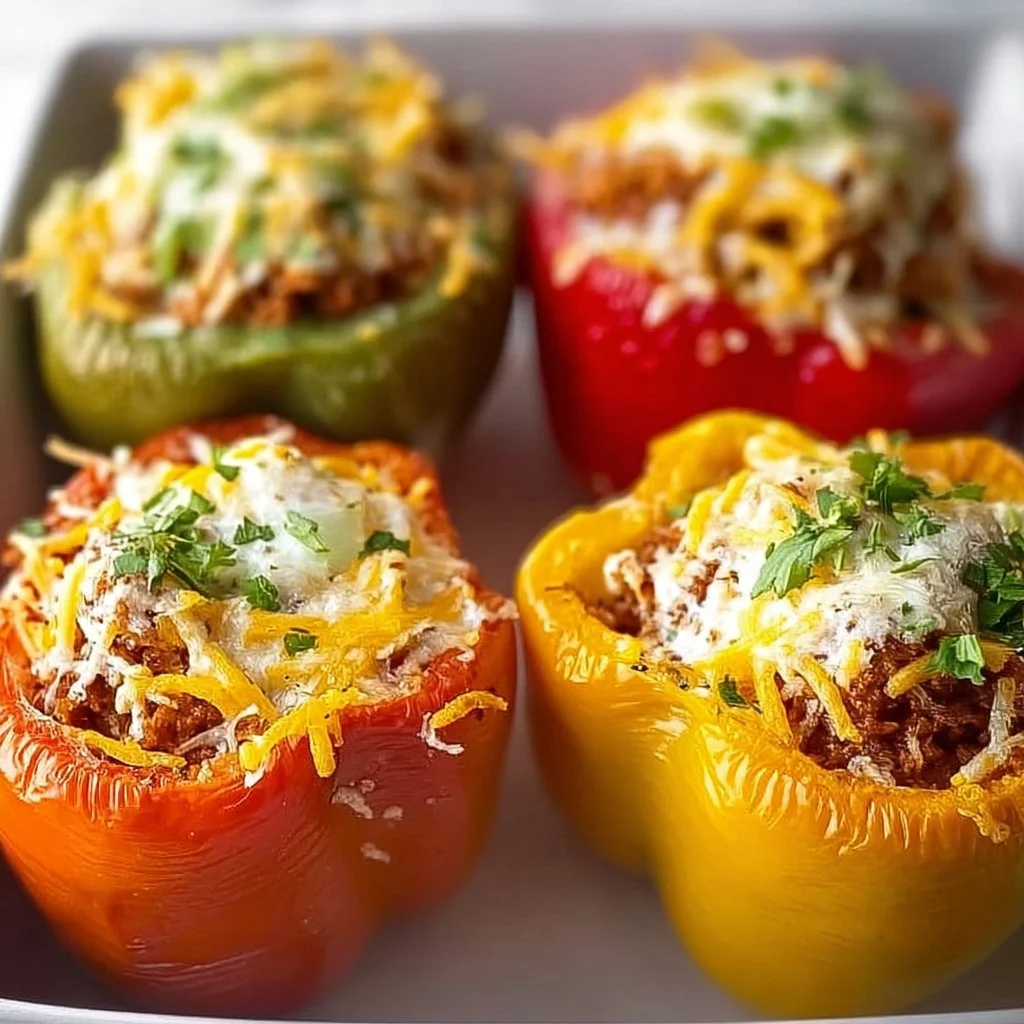
Stuffed Bell Peppers
Cozy Stuffed Bell Peppers: A Flavorful Journey in Every Bite
Hey there, fellow kitchen adventurer! I’m Olivia Bennett, and I’m so excited to have you here in my cozy corner of the culinary world. Today, we’re diving into a dish that warms the heart and feeds the soul: Stuffed Bell Peppers! 🌶️ These vibrant little vessels of flavor are not only delicious but also incredibly versatile, making them a go-to recipe in my home on busy weeknights or when I’m entertaining friends and family.
What’s the magic behind stuffed bell peppers? Just picture it: a juicy bell pepper, bursting with color, cradling a savory filling of rice, meat, and aromatic herbs. When you take that first bite, it’s a delightful explosion of flavors that reminds you of home-cooked meals shared with loved ones. I can practically smell the comforting aroma wafting through the air, inviting everyone to gather around the table.
The best part is that stuffed bell peppers are adaptable and forgiving—perfect for both novice cooks and seasoned chefs alike! You can mix and match ingredients based on what you have on hand or cater them to your dietary preferences. Are you a meat lover? Vegetarian? Gluten-free? I’ve got you covered!
So, tie on your apron (and maybe pour yourself a glass of wine), because we’re about to embark on a flavorful journey that’s sure to inspire joy and creativity in your kitchen. Let’s get those stuffing skills fired up and make some bell peppers that will have your family asking for seconds!
Personal Story
Ah, stuffed bell peppers—they’ve been part of my culinary repertoire for as long as I can remember. I recall one warm summer evening in my childhood home, bustling with laughter and the sounds of sizzling pans. My mom was whipping up her famous stuffed bell peppers as we prepped for a family reunion. The entire kitchen was enveloped in tantalizing aromas—ground beef, spices, and herbs mingling together, while the bell peppers sat expectantly on the counter, their bright colors intensifying my excitement.
As a kid, I loved helping out in the kitchen, even if it meant tearing up from chopping onions or getting a little too enthusiastic with the spice shaker. That evening, I took charge of mixing the filling while my dad turned on the grill for that smoky finish. After assembling the peppers, we popped them into the oven, and I couldn’t wait to dig in!
When the timer finally rang, the bell peppers emerged, golden brown and bubbling, looking like little edible treasures. I remember feeling so proud—we had prepared something together that brought the whole family together at the table. Each bite was a reminder of family love and joy, and even now, I can feel those summer nights in every stuffed pepper I make. Whether it’s the nostalgia of my childhood or the warmth of togetherness, stuffed bell peppers will always hold a special place in my heart—and hopefully in yours, too!
Ingredients
To create our cozy stuffed bell peppers, you’ll need the following ingredients:
-
Bell Peppers:
- Choose vibrant colors like red, yellow, or green! Each has a slightly different flavor profile. Green peppers tend to be more bitter, while red or yellow ones are sweeter. Pro tip: Select peppers that feel heavy for their size with firm skin!
-
Ground Meat (beef, turkey, chicken, or plant-based meat):
- This is the heart of your filling! Substitute with beans or lentils for a vegetarian option. Ground turkey and chicken are lighter alternatives if you’re watching your fat intake.
-
Cooked Rice:
- A common base for your stuffing! Brown or white rice works well. Quinoa or cauliflower rice can be great low-carb substitutes.
-
Onion:
- Adds depth and sweetness. You can substitute with shallots or even leeks for a different flavor twist.
-
Garlic:
- Fresh garlic is ideal, but garlic powder can be a handy substitute if you’re in a pinch.
-
Tomato Sauce:
- This creates a luscious filling with moisture! Use homemade or store-bought, or swap in diced tomatoes for a chunkier texture.
-
Cheese:
- Optional, but who can resist melty cheese? Opt for mozzarella, cheddar, or a vegan cheese alternative.
-
Herbs and Spices:
- The classic combo of Italian seasoning, salt, and pepper cannot be beaten! Get creative with fresh herbs like basil or parsley—or add a touch of cumin for an ethnic twist!
-
Olive Oil:
- Use this to sauté your onions and garlic. It adds richness. Avocado oil or coconut oil can work as substitutes.
Now that we’ve gathered our ingredients, we’re ready to create some stuffed bell pepper magic!
Step-by-Step Instructions
-
Preheat Your Oven:
- Preheat your oven to 375°F (190°C). This is a crucial first step because you want your stuffed peppers to bake evenly and come out sizzling hot!
-
Prepare the Bell Peppers:
- Slice the tops off your bell peppers and remove the seeds. If they don’t stand straight, trim a tiny bit off the bottom—just enough to make them stable! Place the peppers upright in a baking dish, ready to be filled with deliciousness.
-
Sauté the Aromatics:
- In a large skillet, heat a drizzle of olive oil over medium heat. Add chopped onions and sauté until they’re translucent (about 5 minutes). Throw in minced garlic and sauté for an additional minute until fragrant. Chef hack: If you want to elevate the flavor, add a splash of balsamic vinegar to deglaze the skillet—yum!
-
Cook the Meat:
- Add your choice of ground meat to the skillet and season with salt, pepper, and Italian seasoning. Cook until browned, stirring frequently—about 5-7 minutes. Make sure to break up any large chunks. Tip: Using a wooden spoon with a flat edge makes it easier to crumble the meat.
-
Combine the Filling:
- Stir in the cooked rice and tomato sauce until everything is well blended. Let it simmer for about 5 minutes to meld those flavors together. If it gets too thick, add a splash of broth or water to loosen it up.
-
Fill the Peppers:
- Once your filling is ready, generously spoon it into the prepared bell peppers. If you’re adding cheese, feel free to mix it right into the stuffing or sprinkle it on top before baking—either way is delish!
-
Bake:
- Cover the baking dish with foil and bake for 25 minutes. Remove the foil and bake for an additional 10-15 minutes until the peppers are tender and the tops are beautifully browned.
-
Garnish and Serve:
- Once out of the oven, let your stuffed peppers cool for a few minutes. Garnish with fresh herbs or an extra sprinkle of cheese for a lovely finishing touch. Chef note: Pair your peppers with a side salad or some crusty bread to soak up all that delicious sauce!
Serving Suggestions
To serve your stuffed bell peppers, place them upright on a colorful plate, drizzling any extra sauce from the baking dish over the top. You can add a dollop of sour cream or a sprinkle of fresh parsley for that beautiful finishing touch. Set out a side of your favorite green salad for a complete meal, or serve them with roasted vegetables for an extra boost of nutrition. Enjoy every cozy bite!
Recipe Variations
-
Mexican Fiesta: Swap in black beans, corn, and diced tomatoes for the filling, and top with shredded pepper jack cheese. Serve with avocado slices and fresh cilantro.
-
Mediterranean Twist: Use ground lamb or turkey, add feta cheese, olives, and a sprinkle of oregano. Drizzle with tzatziki sauce for added flavor!
-
Vegan Delight: Use lentils or quinoa in place of meat, toss in chopped spinach, chopped walnuts, and spices for a hearty, plant-based meal.
-
Italian Classic: Mix in some Italian sausage for an extra kick, and add chopped mushrooms and zucchini to the filling for more flavor and texture.
-
Breakfast Stuffed Peppers: Swap the meat for scrambled eggs, throw in diced bell peppers, and use breakfast sausage or bacon. Top with shredded cheddar for a delightful breakfast twist!
Chef’s Notes
Stuffed bell peppers are one of those recipes that have totally evolved for me over the years. I started with my mom’s recipe, but the more I cooked, the more I experimented! I’ve added different grains and proteins based on what I had instead of sticking to a strict recipe. The beauty lies in the creativity and freedom you can embrace in the kitchen!
Let’s be honest; there have been times when I’ve accidentally made a filling that’s too spicy or forgot to sauté the onions—oops! But I always remember my key mantra: cooking is about trying, learning, and enjoying the process. Don’t stress if things deviate from ‘the plan’—some of my best culinary adventures have come from those unexpected moments.
FAQs and Troubleshooting
-
Why are my peppers tough?
- If this happens, try roasting your peppers slightly before stuffing them. This will help to soften them more.
-
Can I prep stuffed peppers in advance?
- Absolutely! You can prep the filling and stuff the peppers ahead of time. Just cover and refrigerate until you’re ready to bake.
-
Is there a way to make them lower in calories?
- Yes! Use lean ground turkey or chicken, swap the rice for cauliflower rice, and skip the cheese—these little changes can still deliver delicious flavors!
-
What do I do with extra filling?
- No problem! Bake that extra filling in a small dish alongside your stuffed peppers for a delicious side. The flavors will still meld beautifully.
Nutritional Info (Optional)
For an approximate breakdown per stuffed pepper (with ground beef and rice):
- Calories: 350
- Protein: 22g
- Carbohydrates: 40g
- Fat: 12g
- Fiber: 5g
Remember, nutrition can vary based on the ingredients used! Customize your stuffed peppers to fit your dietary needs and enjoy!
And there you have it! A charming journey into the world of stuffed bell peppers. I hope this recipe inspires you to create something beautiful in your kitchen—from my heart to yours. Happy cooking, and let those bell peppers shine! 🍽️❤️
Print
Cozy Stuffed Bell Peppers
- Total Time: 45 minutes
- Yield: 4 servings 1x
- Diet: Vegetarian or Meat-based options available
Description
A heartwarming recipe for delicious stuffed bell peppers filled with rice, meat, and aromatic herbs, perfect for busy weeknights or entertaining.
Ingredients
- 4 Bell Peppers (red, yellow, or green)
- 1 pound Ground Meat (beef, turkey, chicken, or plant-based meat)
- 1 cup Cooked Rice (brown or white)
- 1 Onion, chopped
- 2 cloves Garlic, minced
- 1 cup Tomato Sauce
- 1 cup Cheese (optional, mozzarella or cheddar)
- 1 tablespoon Italian seasoning
- Salt and pepper to taste
- 2 tablespoons Olive Oil
Instructions
- Preheat your oven to 375°F (190°C).
- Prepare the bell peppers by cutting tops off and removing seeds.
- Sauté the onions in olive oil until translucent, then add minced garlic.
- Cook the ground meat, seasoning with salt, pepper, and Italian seasoning until browned.
- Combine the cooked rice and tomato sauce into the meat mixture.
- Fill the prepared bell peppers with the filling and add cheese if desired.
- Bake covered for 25 minutes, then uncover and bake for an additional 10-15 minutes.
- Garnish with fresh herbs and serve.
Notes
These stuffed bell peppers are customizable; swap ingredients based on your preferences or dietary restrictions. Great served with a side salad or crusty bread.
- Prep Time: 15 minutes
- Cook Time: 30 minutes
- Category: Main Course
- Method: Baking
- Cuisine: Italian
Nutrition
- Serving Size: 1 stuffed bell pepper
- Calories: 350
- Sugar: 5g
- Sodium: 400mg
- Fat: 12g
- Saturated Fat: 4g
- Unsaturated Fat: 6g
- Trans Fat: 0g
- Carbohydrates: 45g
- Fiber: 3g
- Protein: 22g
- Cholesterol: 30mg
Keywords: stuffed bell peppers, comfort food, easy dinner, family meal, Italian recipe
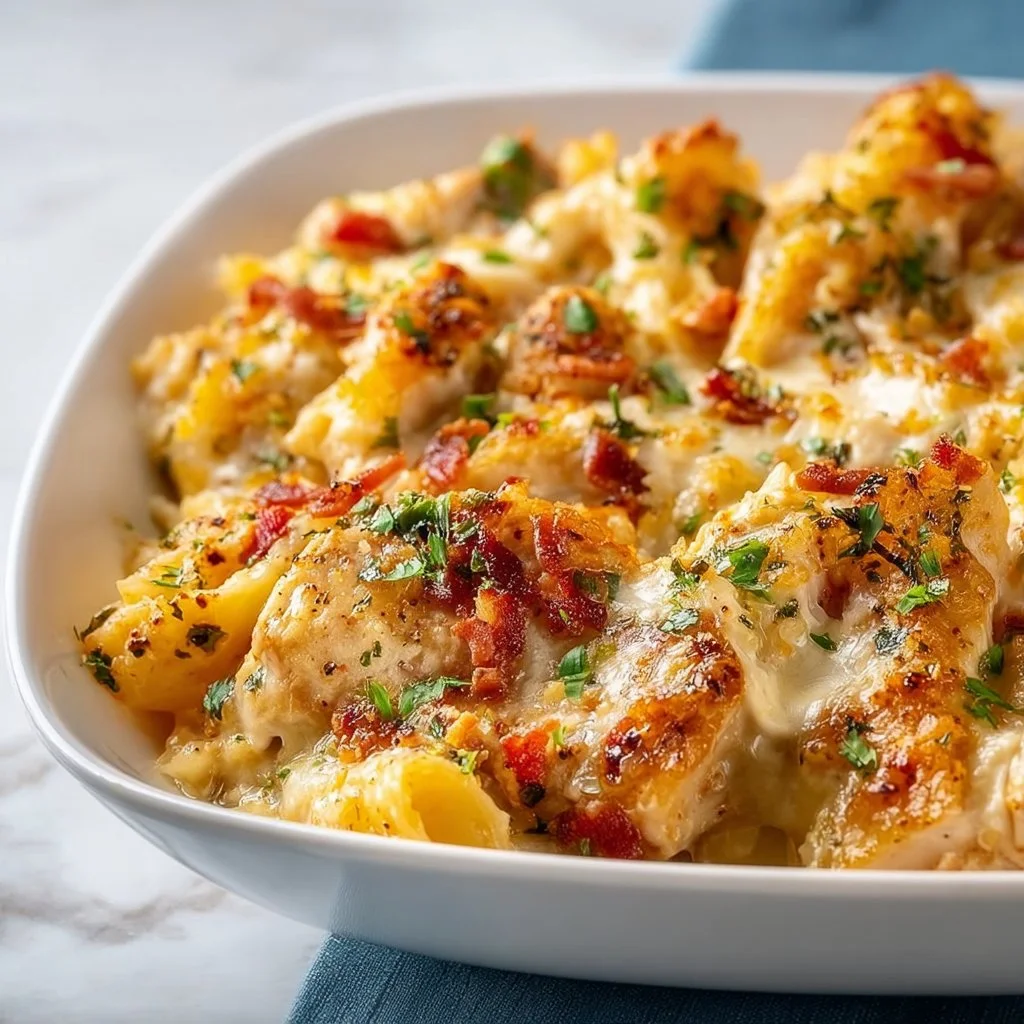
Irresistible Crack Chicken Casserole
Irresistible Crack Chicken Casserole: A Comforting Dish for Every Occasion
Welcome back to my cozy corner of the internet! Today, I am thrilled to share one of my absolute favorite comfort food recipes: Crack Chicken Casserole. Picture this: a creamy, cheesy chicken dish baked to golden perfection that spirals into the hearts of everyone around the table. Whether you’re prepping for a family gathering, a laid-back weeknight dinner, or just craving some hearty goodness, this casserole is your go-to!
Let me tell you, the origins of this dish are quite delightful. It’s known to be a crowd-pleaser for its rich flavors and the simple joy of homemade cooking. Every time I whip this up, I can’t help but reminisce about family gatherings where the table was overflowing with love, laughter, and delicious food. It’s those relatable moments behind every spoonful that make cooking truly special.
What’s not to love? This casserole is packed with tender chicken, crispy bacon, tangy ranch seasoning, and gooey cheese — an ensemble cast that transforms ordinary ingredients into sheer magic. And the best part? You don’t need to be a culinary whiz to get it right; anyone can master this dish with a little guidance. Plus, the scent wafting through your kitchen? That’s the smell of happiness!
So strap on your apron and let’s jump into this delicious journey together. Get ready to create some unforgettable bites — trust me, you’ll want to make this time and time again. Let’s heat up those ovens and dive into the world of crack chicken casserole!
Personal Story
I still remember the first time I made this dish for my family. It was a rainy evening, and I was feeling a bit nostalgic. My grandmother used to make chicken casseroles whenever the weather turned chilly, filling the house with warmth and love. I decided to recreate that comforting feeling by experimenting in my kitchen.
I didn’t have a specific recipe at hand, just a few memories and a heart full of enthusiasm. After some trial and error, I finally found the right combination of flavors that brought me back to my grandmother’s kitchen. As I pulled it out of the oven, the candlelight flickered around the table, turning that rainy evening into a treasure trove of laughter and delicious bites. My family loved it, and that sealed the deal for me. I knew I needed to share this lovely dish so others could feel the joy it brings.
Ingredients
Let’s gather our ingredients to create this delicious Crack Chicken Casserole! Here’s what you’ll need:
-
2 cups cooked chicken, shredded: Leftover rotisserie chicken works great here! You can substitute with turkey or even canned chicken if you’re in a pinch.
-
6 slices of crispy bacon, crumbled: You can fry your bacon in advance, or go for turkey bacon for a healthier twist.
-
1 packet ranch seasoning mix: This is the secret ingredient! You can either buy premade seasoning or whip up your own with a mix of dried parsley, dill, garlic powder, and onion powder.
-
1 cup cream cheese, softened: Full-fat cream cheese will give you the best flavor and creaminess. For a lighter option, go for low-fat cream cheese.
-
1 cup shredded cheddar cheese: Sharp cheddar adds a wonderful flavor! If you’re dairy-free, try a plant-based cheese alternative.
-
1 cup sour cream: This adds richness to our casserole, but Greek yogurt works just as well for a healthier alternative.
-
1 cup frozen mixed veggies (peas and carrots): Not mandatory but adds color and nutrition! Feel free to add your favorites, like broccoli or bell peppers.
-
1 cup chicken broth: Homemade is fabulous, but store-bought works just fine. Use veggie broth for a vegetarian option or simply water if you’re in a bind.
-
Salt and pepper to taste: Essential for enhancing flavors! Don’t shy away from seasoning as per your palate.
Get excited, because each ingredient is a step towards something delightful. Now that we have everything, let’s get cooking!
Step-by-Step Instructions
-
Preheat Your Oven: Start by preheating the oven to 350°F (175°C). This ensures your cheese will melt perfectly, creating that irresistible gooey texture we crave.
-
Prepare the Chicken: If you’re starting from scratch, boil or bake your chicken until fully cooked. Shred it into bite-sized pieces, leaving it slightly chunky for texture.
Chef Tip: If you have leftover chicken, even better! That flavor is truly the best.
-
Stir Together the Base: In a large mixing bowl, combine the cooked chicken, crumbled bacon, cream cheese, and sour cream. Use a spatula or wooden spoon to mix until they’re well blended.
Little Hack: You can soften cream cheese quicker by microwaving it in a bowl for about 20-30 seconds. Just be careful it doesn’t get too hot!
-
Add the Flavoring: Toss in the ranch seasoning and chicken broth. Stir until everything is uniform and creamy. You should see that glorious ranch sauce coating everything evenly.
-
Incorporate Veggies and Cheese: Fold in the frozen mixed veggies and half of the shredded cheddar cheese. This is where the dish starts to look colorful and inviting!
Chef Insight: If you want to sneak in extra nutrients, try adding some finely chopped spinach or kale.
-
Transfer to Baking Dish: Pour the mixture into a greased 9×13 baking dish, spreading it evenly.
-
Top It Off: Sprinkle the remaining cheddar cheese generously on top. Don’t hold back — cheese makes everything better!
-
Bake in the Oven: Slide the dish into the preheated oven and bake for about 25-30 minutes, or until the casserole is bubbly and golden on top.
Pro Tip: If you like a crunchier topping, you can broil it for the last 2-3 minutes — just keep an eye on it!
-
Let It Rest: Once it’s out of the oven, let it rest for about 5-10 minutes. This helps it set up just right and allows you to serve perfect portions.
-
Serve and Enjoy: Dig in with a big spoonful of goodness! It can be served on its own, with a side salad, or some warm crusty bread.
Serving Suggestions
Presentation is key! Serve your Crack Chicken Casserole on a lovely platter with a sprig of parsley for garnish. Pair it with a fresh green salad drizzled with a lemon-basil vinaigrette for a burst of flavor. If you’re feeling adventurous, serve it over rice or quinoa for a hearty meal. Don’t forget to have extra bacon bits and cheese on the side for those who like to go the extra mile!
Recipe Variations
-
Buffalo Style: Add buffalo sauce to the mixture for a spicy kick. You can even top it off with blue cheese crumbles!
-
Mexican Twist: Incorporate black beans, corn, and taco seasoning for a fiesta-style casserole. Top with tortilla chips before baking for an extra crunch!
-
Vegetarian Option: Swap out the chicken for chickpeas, lentils, or your favorite veggies. Just make sure to adjust the seasonings accordingly.
-
Pasta Bake: Mix in cooked pasta to create a hearty pasta bake! Macaroni, penne, or fusilli would work beautifully.
-
Cheesy Broccoli Version: Mix in steamed broccoli florets for added health benefits and a nice crunch!
Chef’s Notes
Every time I make this casserole, it reminds me how food leads the way to joy and connection. I’ve even experimented with different flavors over the years—once, I added some sun-dried tomatoes, and oh, what a game-changer! This recipe has evolved into a beloved family staple, but you have the freedom to make it your own with whatever you have at hand. Just remember, cooking is all about playing and improvising!
FAQs and Troubleshooting
-
Can I use rotisserie chicken?
- Absolutely! It’s a fantastic shortcut that saves time and adds great flavor.
-
What if it’s too thick?
- If your mixture seems too thick while mixing, add a splash more chicken broth or sour cream to loosen it up without sacrificing creaminess.
-
Can I make this ahead of time?
- Yes! You can assemble the casserole the night before and store it in the fridge until baking time. Just be sure to let it sit out for a few minutes before it goes into the oven.
-
How do I store leftovers?
- Store leftovers in an airtight container in the fridge. It should be good for 3-4 days, and you can reheat in the oven or microwave.
Nutritional Info (Optional)
While I didn’t dive deep into numbers here, I encourage you to be mindful of portion sizes when indulging. With ingredients like cream cheese and sour cream, it’s deliciously rich but worth every bite. If you’re health-conscious, swapping in low-fat versions can lighten the dish without losing the flavor!
And there you have it! Irresistible Crack Chicken Casserole is waiting for you, filled with flavors that will warm your heart and bring smiles to your loved ones. Dig in, enjoy every bite, and remember: cooking is about joy, creativity, and sharing with those who matter most. Happy cooking!
Print
Irresistible Crack Chicken Casserole
- Total Time: 45 minutes
- Yield: 4 servings 1x
- Diet: Non-Vegetarian
Description
A creamy, cheesy chicken casserole packed with tender chicken, crispy bacon, and tangy ranch seasoning – a true crowd-pleaser!
Ingredients
- 2 cups cooked chicken, shredded
- 6 slices of crispy bacon, crumbled
- 1 packet ranch seasoning mix
- 1 cup cream cheese, softened
- 1 cup shredded cheddar cheese
- 1 cup sour cream
- 1 cup frozen mixed veggies (peas and carrots)
- 1 cup chicken broth
- Salt and pepper to taste
Instructions
- Preheat your oven to 350°F (175°C).
- Prepare the chicken by boiling or baking until fully cooked, then shred into bite-sized pieces.
- Stir together the cooked chicken, crumbled bacon, cream cheese, and sour cream in a large mixing bowl.
- Add the ranch seasoning and chicken broth, mixing until creamy.
- Incorporate the frozen mixed veggies and half of the shredded cheddar cheese.
- Transfer the mixture to a greased 9×13 baking dish.
- Top with the remaining cheddar cheese.
- Bake in the oven for about 25-30 minutes, or until bubbly and golden.
- Let it rest for 5-10 minutes before serving.
- Serve and enjoy!
Notes
Feel free to add your own twist with different veggies or flavors!
- Prep Time: 15 minutes
- Cook Time: 30 minutes
- Category: Main Course
- Method: Baking
- Cuisine: American
Nutrition
- Serving Size: 1 serving
- Calories: 500
- Sugar: 4g
- Sodium: 900mg
- Fat: 30g
- Saturated Fat: 12g
- Unsaturated Fat: 15g
- Trans Fat: 0g
- Carbohydrates: 25g
- Fiber: 2g
- Protein: 35g
- Cholesterol: 90mg
Keywords: crack chicken casserole, comfort food, cheesy chicken dish, easy casserole, family dinner
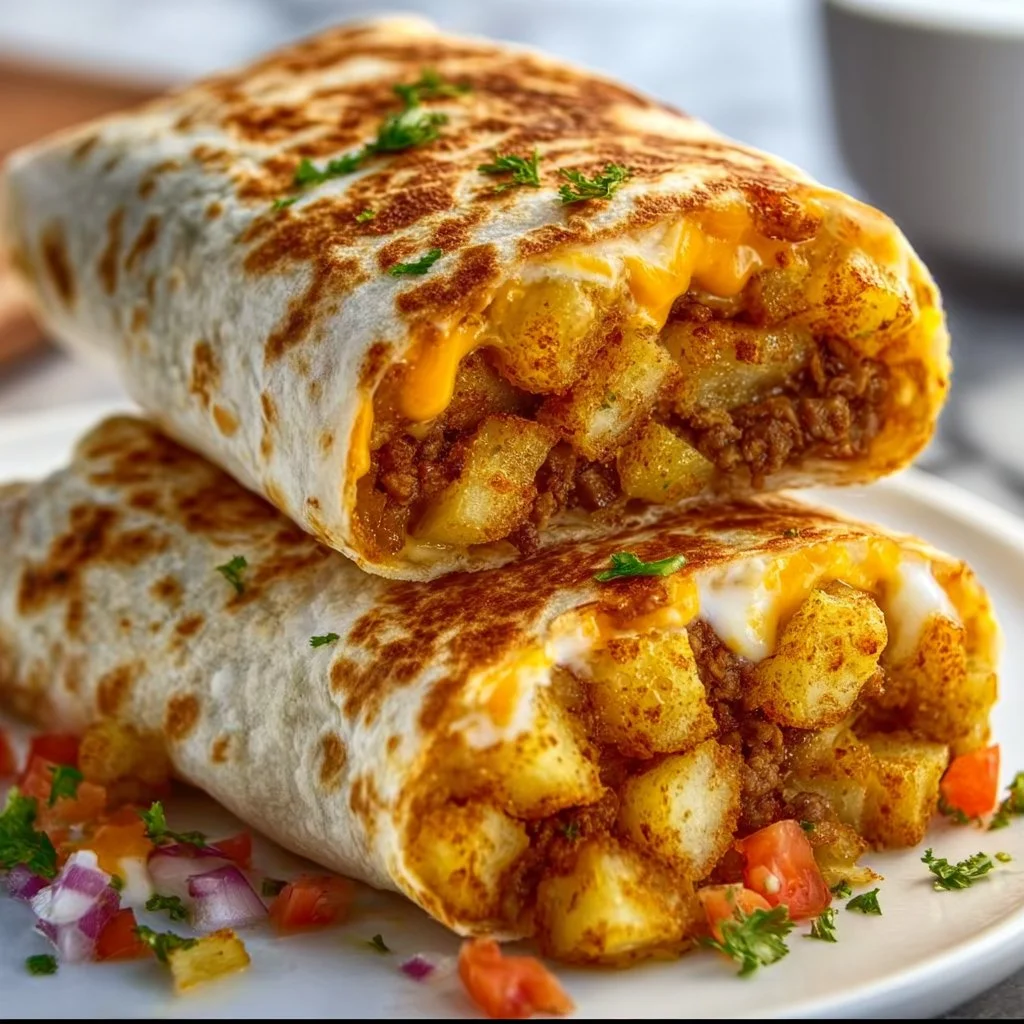
Cheesy Potato Burritos
# Cheesy Potato Burritos: From My Kitchen to Yours

Welcome back, dear foodies! Today, I’m absolutely thrilled to share a beloved recipe with you—Cheesy Potato Burritos. If you’re like me, you know there’s something undeniably cozy about loading up on comforting flavors and wrapping them in a warm tortilla. This dish isn’t just a meal; it’s an experience—one that sparks joy, laughter, and delightful memories around the dining table.

Picture this: a chilly evening, the smell of something delicious wafting through the air, and loved ones gathered together, diving into a platter of cheesy, hearty burritos. With their crispy edges and warm, cheesy centers, these burritos are the culinary equivalent of a loving hug. Whether it’s breakfast, brunch, or dinner, they can make any occasion feel special.

The beauty of these Cheesy Potato Burritos is you don’t need to be a gourmet chef to whip them up—trust me! They come together in just a few steps, and the result is an explosion of cheesy goodness that will leave everyone asking for seconds. So, grab your apron, let’s get cozy in the kitchen, and create a burrito masterpiece together!

## Personal Story: A Cozy Family Tradition

My love for burritos started at a young age. Every Sunday, my family would gather for brunch, and one of my mom’s signature dishes was her cheesy potato burritos. She’d whip them up so effortlessly, the kitchen would fill with that glorious smell of melting cheese, tender potatoes, and spices that made my stomach flutter with anticipation.

I remember sitting at the kitchen counter, my little hands rolling the tortillas and getting as much filling as possible—because, honestly, who wouldn’t want an extra helping of gooey cheese? Those Sunday brunches became a cherished tradition filled with laughter and the delight of sharing food made with love.

Now, taking the helm in my own kitchen, I’ve made this recipe my own while keeping the spirit of those joyful moments alive. It's all about the warmth and the memories we create around the table, and I can’t wait for you to experience it too!

## Ingredients

For these delicious Cheesy Potato Burritos, you’ll need the following ingredients:

- **4 medium-sized Russet potatoes**: Creamy and starchy, these potatoes are the stars of the show. If you prefer, you can substitute with Yukon Gold for a richer flavor.

- **1 cup shredded cheese (cheddar, Monterey Jack, or a blend)**: Use your favorite cheese to elevate the meltiness! For vegan options, try dairy-free cheese shreds.

- **1 small onion, diced**: Sweet and savory, onions add an aromatic foundation. Red or yellow onions work beautifully here.

- **2 cloves garlic, minced**: Garlic enhances the flavor profile. Feel free to use garlic powder as a substitute—about half a teaspoon should do the trick.

- **1 tsp cumin**: This earthy spice brings warmth to the dish. Smoked paprika is a great alternative for added depth.

- **Salt and pepper to taste**: Essential for balancing the flavors. Season as you go for best results!

- **4 large flour tortillas**: Flour tortillas are soft and pliable for stuffing. Corn tortillas can offer a gluten-free option but might require careful handling.

- **Oil for frying**: I love using olive oil for a touch of fruity flavor, but vegetable or canola oil will work just as well.

- **Optional toppings (sour cream, salsa, guacamole)**: Don’t forget these to take your burritos over the top!

## Step-by-Step Instructions

Let’s roll up our sleeves and get to the good stuff! Here’s how you can make these Cheesy Potato Burritos:

1. **Boil the Potatoes**: Start by peeling and dicing your Russet potatoes into cubes, about 1-inch thick. Place them in a large pot, cover with cold water, add a pinch of salt, and bring to a boil. Once boiling, reduce to a simmer for about 15–20 minutes or until fork-tender.

    *Chef’s Tip*: If you want to infuse a bit of flavor, toss in a garlic clove or bay leaf while the potatoes cook.

2. **Saute the Onion and Garlic**: While the potatoes boil, heat a tablespoon of oil in a large skillet over medium heat. Add the diced onion and sauté until it becomes translucent (about 5 minutes). Then, add the minced garlic and cumin, letting everything cook for another minute until fragrant.

    *Commentary*: This combo creates an aromatic base that will beautifully complement the potatoes.

3. **Mash the Potatoes**: Once the potatoes are soft, drain them and return them to the pot. Using a potato masher, mash them up until smooth. Stir in the sautéed onion, garlic, and half of your cheese, seasoning with salt and pepper to taste.

    *Chef Insight*: For a little kick, feel free to add jalapeños or crushed red pepper flakes.

4. **Wrap the Burritos**: Lay out a tortilla on a clean surface and spoon a generous amount of the potato mixture into the center. Fold the sides over the filling and then roll it up tightly. Repeat with remaining tortillas and filling.

    *Little Chef Hack*: If you’re having trouble with your burritos staying closed, a toothpick can help keep them together while frying!

5. **Fry the Burritos**: Heat more oil in the skillet over medium heat. Once hot, place the burritos seam-side down in the pan. Cook for about 3–4 minutes on each side or until crispy and golden brown.

    *Tip*: Don't overcrowd the skillet; give them some space to get that perfect crispy texture!

6. **Melt the Cheese**: After flipping the burritos, sprinkle the remaining cheese on top and cover the skillet with a lid. This will allow the cheese to melt beautifully while the burritos crisp up.

7. **Serve Warm**: Once golden and crunchy, remove them from the skillet and let them rest for a minute. Serve them up with your favorite toppings.

## Serving Suggestions

Presentation is key, right? Arrange the Cheesy Potato Burritos on a platter and serve them with dollops of sour cream, fresh salsa, and guacamole. Garnish with a sprinkle of fresh cilantro or sliced green onions for that pop of color—totally Instagram-worthy!

## Recipe Variations

Feeling adventurous? Here are some fun twists on the classic Cheesy Potato Burrito:

- **Breakfast Burrito**: Add scrambled eggs and cooked bacon or sausage to your filling for a hearty breakfast option.

- **Veggie Delight**: Stir in sautéed bell peppers, spinach, or mushrooms for an extra nutritional punch.

- **Spicy Southwest**: Mix in some diced green chiles or hot sauce with the potatoes for a flavorful kick.

- **Black Bean Addition**: For added protein, mix black beans into your potato filling.

## Chef’s Notes

Over time, I've discovered that this recipe is incredibly flexible. The beauty of cooking lies in creating your variations based on what you have on hand. One time, I unexpectedly ran out of cheese and used a mix of Greek yogurt and herbs instead—it turned out to be a delightful creamy topping! Always feel free to experiment; you might just discover your next favorite flavor combination!

## FAQs and Troubleshooting

**Q: Why did my burritos fall apart?**
A: This can happen if the filling is too watery. Make sure to mash the potatoes well and avoid adding excess cooking liquid.

**Q: Can I make the filling ahead of time?**
A: Absolutely! You can prepare the potato mixture a day ahead and store it in the fridge. Just warm it up before filling the tortillas.

**Q: Are these burritos freezer-friendly?**
A: Yes! You can wrap them tightly in foil and freeze them for up to a month. Just pop them into the oven to reheat!

**Q: Can I bake the burritos instead of frying them?**
A: Of course! Simply brush them with a bit of oil and bake at 400°F (200°C) for about 20-25 minutes until crispy.

## Nutritional Info

This is a cozy comfort dish, and while it's hearty, moderation is key! Each burrito provides a good source of carbohydrates from potatoes and some protein from cheese. Pair with a salad for a balanced meal.

---

I hope you enjoy making these Cheesy Potato Burritos as much as I do! They’re a love letter to comfort food and a reminder that the best moments often happen around the table. So, roll up your sleeves, share them with family or friends, and create memories cooked with love. Happy cooking, friends!

Cheesy Potato Burritos
- Total Time: 45 minutes
- Yield: 4 servings 1x
- Diet: Vegetarian
Description
Deliciously comforting burritos filled with creamy mashed potatoes, cheese, and spices, perfect for any meal.
Ingredients
- 4 medium-sized Russet potatoes
- 1 cup shredded cheese (cheddar, Monterey Jack, or a blend)
- 1 small onion, diced
- 2 cloves garlic, minced
- 1 tsp cumin
- Salt and pepper to taste
- 4 large flour tortillas
- Oil for frying
- Optional toppings (sour cream, salsa, guacamole)
Instructions
- Boil the Potatoes: Start by peeling and dicing your Russet potatoes into cubes, about 1-inch thick. Place them in a large pot, cover with cold water, add a pinch of salt, and bring to a boil. Once boiling, reduce to a simmer for about 15–20 minutes or until fork-tender.
- Saute the Onion and Garlic: While the potatoes boil, heat a tablespoon of oil in a large skillet over medium heat. Add the diced onion and sauté until it becomes translucent (about 5 minutes). Then, add the minced garlic and cumin, letting everything cook for another minute until fragrant.
- Mash the Potatoes: Once the potatoes are soft, drain them and return them to the pot. Using a potato masher, mash them up until smooth. Stir in the sautéed onion, garlic, and half of your cheese, seasoning with salt and pepper to taste.
- Wrap the Burritos: Lay out a tortilla on a clean surface and spoon a generous amount of the potato mixture into the center. Fold the sides over the filling and then roll it up tightly. Repeat with remaining tortillas and filling.
- Fry the Burritos: Heat more oil in the skillet over medium heat. Once hot, place the burritos seam-side down in the pan. Cook for about 3–4 minutes on each side or until crispy and golden brown.
- Melt the Cheese: After flipping the burritos, sprinkle the remaining cheese on top and cover the skillet with a lid. This will allow the cheese to melt beautifully while the burritos crisp up.
- Serve Warm: Once golden and crunchy, remove them from the skillet and let them rest for a minute. Serve them up with your favorite toppings.
Notes
Feel free to experiment with the filling ingredients or toppings to create your own variations.
- Prep Time: 15 minutes
- Cook Time: 30 minutes
- Category: Main Course
- Method: Frying
- Cuisine: Mexican
Nutrition
- Serving Size: 1 burrito
- Calories: 350
- Sugar: 1g
- Sodium: 400mg
- Fat: 12g
- Saturated Fat: 4g
- Unsaturated Fat: 6g
- Trans Fat: 0g
- Carbohydrates: 45g
- Fiber: 3g
- Protein: 15g
- Cholesterol: 30mg
Keywords: burritos, cheesy potatoes, comfort food, vegetarian burritos, Mexican cuisine
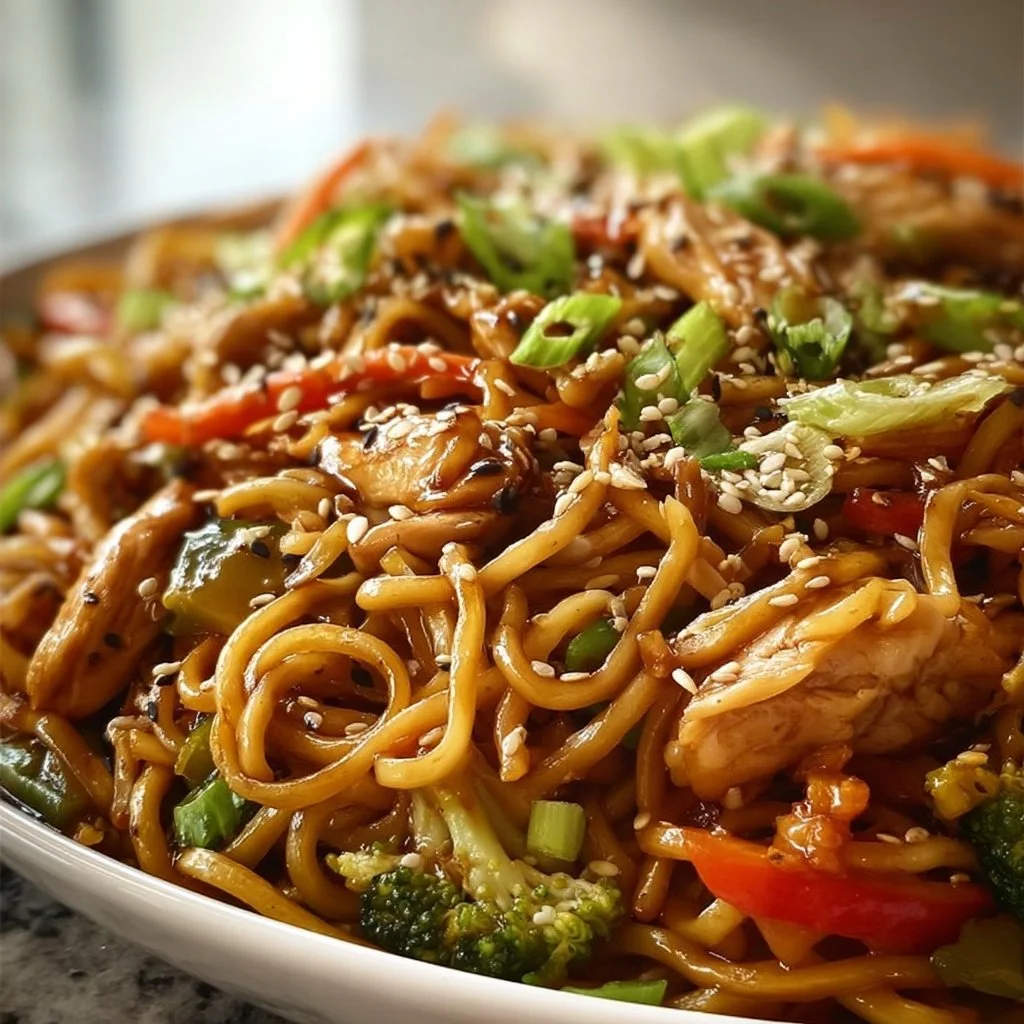
Chicken Teriyaki Stir Fry With Noodles
Chicken Teriyaki Stir Fry With Noodles
Hey there, culinary adventurers! Welcome back to my cozy kitchen! Today, I’m thrilled to share one of my absolute favorite dishes that brings back such warm memories and delightful flavors. We’re whipping up a classic Chicken Teriyaki Stir Fry with Noodles. This dish is a symphony of vibrant colors and delicious tastes, and trust me, it’s as simple as it is scrumptious!
The beauty of stir-fry? You can whip it up in a jiffy while infusing your kitchen with a delightful, mouthwatering aroma. Plus, it’s a fantastic way to sneak in loads of veggies and make everyone at your dinner table happy. It’s the sort of meal that sparks joy not just in the cooking, but also in the eating! When you pull together tender pieces of chicken, crunchy veggies, and perfectly chewy noodles all drizzled with that sweet and savory homemade teriyaki sauce, you’ve got pure magic.
I can totally remember the first time I tried making stir-fry. It was a cool evening, and the scent of garlic and ginger dancing on the stove had my family drifting into the kitchen like bees to honey. Now, I can’t cook without thinking back to that moment — the joyous conversations and laughter, with smiles all around as we divvied up heaping plates of my stir-fry experiment. That bustling energy is akin to what I hope to create in your kitchens today as you embark on making this delightful dish.
So gather your favorite spices and your trusty apron, let’s dive into this cheerful culinary adventure together! I promise you will be adding this recipe to your weekly rotation, and your loved ones will be begging for seconds!
Personal Story
When I was a kid, takeout was always an exciting event. I still remember those Saturday nights when my family would order from the local Chinese restaurant. The clatter of chopsticks, the chatter of excitement, and the irresistible aromas wafting from the kitchen filled the air. Teriyaki chicken was always a family favorite, every piece of chicken glistening with that glossy sauce.
But it wasn’t until a chilly winter evening that I decided I could recreate that magic in my own kitchen. Armed only with curiosity and a plethora of veggies from my fridge, I turned to my mom’s hidden stash of recipes and found a simple stir-fry recipe, which ignited my culinary passion. The first bite was a revelation – it was as if I was transported back to those joyful evenings. Each forkful brought a new wave of flavor, and I knew I had discovered something special. Making Chicken Teriyaki Stir Fry with Noodles not only satisfied my cravings but also turned into a heartfelt tradition I can share with friends and family alike. It’s amazing how food can tell our stories, right?
Ingredients
To create the perfect Chicken Teriyaki Stir Fry, you’ll need a list of vibrant, fresh ingredients that come together beautifully. Let’s check out what you’ll be needing!
-
Chicken Breast (1 pound): My go-to protein! Boneless, skinless chicken breast is lean and cooks quickly. If you’re aiming for a healthier option, try skinless chicken thighs for more flavor, or even go for tofu for a vegetarian twist!
-
Colored Bell Peppers (1 each of red, yellow, and green): Not only do these beauties add a pop of color to your dish, but they also bring a sweet crunch! Don’t have them on hand? Zucchini or snap peas work wonders here too!
-
Broccoli Florets (1 cup): Bright green and packed with nutrients! If your family isn’t a big fan, try green beans or bok choy instead; just be sure to cook them until they’re bright and still slightly crunchy.
-
Carrots (2 medium-sized): Slice them thinly, and they’ll add a beautiful orange hue and a sweet flavor. Frozen mixed vegetables can save time, just be mindful of adding them towards the end of cooking.
-
Garlic (3 cloves): Nothing whets the appetite like the aroma of sizzling garlic! For those less keen on garlic, shallots can add a milder flavor.
-
Ginger (1 inch fresh piece): Fresh ginger brings a zing that brightens up the dish. If you don’t have fresh ginger, a pinch of ground ginger will do in a pinch, just use less.
-
Noodles (8 ounces): Choose your favorite — lo mein, ramen, or even rice noodles! Whole wheat or gluten-free noodles work beautifully, depending on your dietary needs.
-
Soy Sauce (1/4 cup): A must-have for the teriyaki flavor. If you’re watching your sodium intake, there’s always low-sodium soy sauce or tamari!
-
Brown Sugar (1/4 cup): Adds that lovely sweetness and helps with the saucy consistency. Honey or maple syrup can be delightful substitutes but adjust the quantity based on taste.
-
Rice Vinegar (1 tbsp): For a little tanginess to balance the sweetness. Apple cider vinegar can work in a pinch!
-
Sesame Oil (1 tbsp): Infuses a nutty aroma into the dish, making it shine. Olive oil can be a viable alternative but won’t give the same flavor.
-
Cornstarch (1 tbsp): For thickening the sauce. If you don’t have cornstarch, arrowroot or even flour can work; just ensure you mix it well with cold water first.
These ingredients may seem simple, but they create a lively meal bursting with fresh flavors. You don’t need to be a master chef to use them; just your passion for cooking!
Step-by-Step Instructions
Now let’s get cooking! Here’s a step-by-step guide to making this Chicken Teriyaki Stir Fry with Noodles. Follow along, and don’t worry if things get a bit messy — trust me, it’s all part of the fun!
Step 1: Marinate the Chicken
Start by slicing your chicken breast into bite-sized pieces. In a mixing bowl, combine about 2 tablespoons of soy sauce, 1 tablespoon of brown sugar, and a teaspoon of rice vinegar with the chicken. Toss everything together until each piece is coated. Let it marinate for at least 15 minutes. This simple step will ensure your chicken is full of flavor. If you’ve got extra time, marinating for an hour can take the flavor up a notch!
Step 2: Prepare the Vegetables
While the chicken is getting all saucy, take this time to wash and chop your vegetables. Slice the bell peppers, chop the broccoli into bite-sized pieces, and thinly slice the carrots. I often find that using a sharp knife makes everything easier (and more fun!). Having everything prepped ahead is essential for a successful stir-fry since the cooking process goes quickly!
Step 3: Cook the Noodles
Bring a pot of water to boil and cook your noodles as per the package instructions until al dente. I suggest saving a cup of the pasta water before draining! It can be a lifesaver when tossing everything together later if you need to loosen the sauce.
Step 4: Start Stir-Frying
In a large skillet or wok, heat 1 tablespoon of sesame oil over medium-high heat. It’s time to toss in your marinated chicken. Cook for about 5-6 minutes until it’s golden and cooked through. Remember to give it some space — overcrowding the pan will just steam the chicken instead of searing it! Once cooked, remove the chicken from the pan and set it aside.
Step 5: Add Garlic and Ginger
In the same skillet (hey, don’t waste that flavorful residue!), add a splash more sesame oil if needed, and toss in your minced garlic and ginger. Sauté for about 30 seconds until the kitchen is filled with that irresistible aroma. Be careful not to burn it; nobody likes bitter garlic!
Step 6: Veggies Galore!
Next, add in the chopped bell peppers, broccoli, and carrots. Stir-fry for about 2-3 minutes until they’re bright and slightly tender-crisp. Treat your veggies gently; they should still have a bit of crunch!
Step 7: Combine Everything
Now, it’s time to reunite the chicken with the veggies! Add the chicken back into the skillet, along with the remaining soy sauce, brown sugar, and rice vinegar. Don’t forget to sprinkle in the cornstarch mixed with a tablespoon of water to thicken the sauce (make sure to stir it first). Toss everything together for another minute or two. If the sauce feels a bit thick, add a little pasta water to achieve your desired consistency!
Step 8: Add Noodles
Finally, toss in the cooked noodles and give everything a good mix, letting all those flavors meld together. If it looks too dry, add more of that reserved pasta water until everything is nicely coated and glistening!
Serving Suggestions
Now for the fun part — plating! Grab your favorite bowls or plates and serve this Chicken Teriyaki Stir Fry with a generous sprinkle of sesame seeds on top. For professional flair, you can even garnish with sliced green onions for that pop of fresh color. Serve it hot, and let everyone dig in family-style or plated.
Recipe Variations
Want to riff on this stir fry? Here are some delicious variations you can try:
- Protein Swaps: Swap chicken for shrimp, beef, or tofu for a variation in texture and flavor.
- Veggie Power: Add snap peas, mushrooms, or baby corn — whatever you have in your fridge. Use what’s in season to keep things fresh.
- Heat It Up: Add red pepper flakes or Sriracha for a spicy kick. Spice lovers will adore this twist!
- Noodle Upgrade: Use zoodles or quinoa for a gluten-free and low-carb option. It’s a delicious way to lighten up the dish!
- Sauce Variations: Experiment with adding pineapple juice or orange juice to the teriyaki for a sweet and fruity flavor twist!
Chef’s Notes
This recipe has a special place in my heart, not only for the flavors and memories it conjures, but also for its versatility. Over the years, I’ve dabbled with various sauces and ingredients, and each time it evolves just a bit more. There was that one time I accidentally dumped half a jar of hoisin sauce into the mix! While it was slightly too sweet, it opened my eyes to the great world of flavors. Cooking, to me, is about these happy accidents and exploration in everyday ingredients.
FAQs and Troubleshooting
1. My chicken is tough! What went wrong?
It’s likely overcooked. For a tender bite, ensure you cook the chicken until just done and try not to crowd the pan while browning.
2. My sauce is too thick!
No problem! Just add a splash of the reserved pasta water to loosen it up. It’s a lifesaver!
3. Can I prep it ahead of time?
Absolutely! Chop your veggies and marinate the chicken earlier in the day. Just store everything separately in the fridge and stir-fry when you’re ready to eat.
4. Can I use frozen veggies?
You sure can! Just add them to the pan towards the end of cooking, as they often need less time to heat through compared to fresh produce.
Nutritional Info
(While it’s optional, here’s a basic overview! Adjust according to your ingredients.)
- Calories: 450 per serving
- Protein: 32g
- Fat: 8g
- Carbohydrates: 62g
- Fiber: 4g
And there you have it, my dear food lovers! This Chicken Teriyaki Stir Fry with Noodles is not just delicious — it’s a journey through flavors and memories. Now, roll up those sleeves and bring this vibrant dish to life in your kitchen. Whether you’re cooking for friends, family, or just for you, I hope this recipe invokes the same warmth and joy it has in my home. Happy cooking! 🍽️
Print
Chicken Teriyaki Stir Fry With Noodles
- Total Time: 35 minutes
- Yield: 4 servings 1x
- Diet: Poultry
Description
A colorful and flavorful Chicken Teriyaki Stir Fry with Noodles, perfect for a quick and satisfying meal that bursts with fresh ingredients.
Ingredients
- 1 pound Chicken Breast, sliced into bite-sized pieces
- 1 each Colored Bell Peppers (red, yellow, and green), sliced
- 1 cup Broccoli Florets
- 2 medium-sized Carrots, sliced thinly
- 3 cloves Garlic, minced
- 1 inch fresh Ginger, minced
- 8 ounces Noodles (lo mein, ramen, or rice noodles)
- 1/4 cup Soy Sauce
- 1/4 cup Brown Sugar
- 1 tbsp Rice Vinegar
- 1 tbsp Sesame Oil
- 1 tbsp Cornstarch
Instructions
- Marinate the Chicken: Combine chicken with soy sauce, brown sugar, and rice vinegar; let marinate for at least 15 minutes.
- Prepare the Vegetables: Wash and chop the bell peppers, broccoli, and carrots.
- Cook the Noodles: Boil water and cook noodles according to package instructions; save a cup of pasta water.
- Start Stir-Frying: Heat sesame oil in a skillet, add marinated chicken, and cook until golden (about 5-6 minutes).
- Add Garlic and Ginger: Sauté minced garlic and ginger in the same skillet for about 30 seconds.
- Veggies Galore: Add bell peppers, broccoli, and carrots; stir-fry for 2-3 minutes until tender-crisp.
- Combine Everything: Return chicken to skillet, add remaining soy sauce, brown sugar, rice vinegar, and cornstarch mixed with water.
- Add Noodles: Toss in cooked noodles and mix until coated.
Notes
For added flavor, garnish with sesame seeds and green onions. Adjust the sauce thickness with reserved pasta water if necessary.
- Prep Time: 15 minutes
- Cook Time: 20 minutes
- Category: Main Course
- Method: Stir-frying
- Cuisine: Asian
Nutrition
- Serving Size: 1 serving
- Calories: 450
- Sugar: 20g
- Sodium: 800mg
- Fat: 8g
- Saturated Fat: 1.5g
- Unsaturated Fat: 4.5g
- Trans Fat: 0g
- Carbohydrates: 62g
- Fiber: 4g
- Protein: 32g
- Cholesterol: 85mg
Keywords: stir fry, chicken teriyaki, noodles, homemade teriyaki, quick dinner
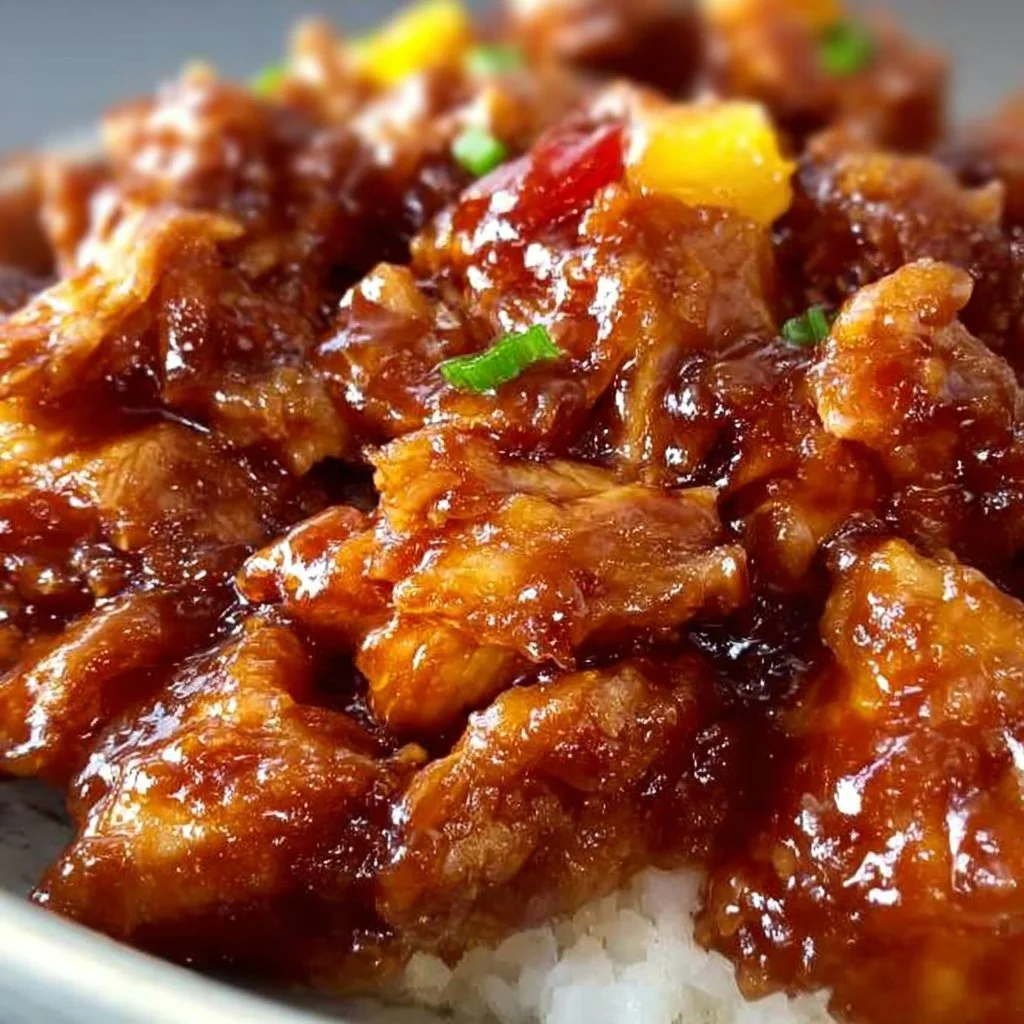
Sweet Hawaiian Crock Pot Chicken
Sweet Hawaiian Crock Pot Chicken: A Flavorful Journey Home
Welcome, food lovers! Today, we’re diving into a dish that wraps you in a warm embrace, just like a cozy blanket on a rainy day. Let me introduce you to my Sweet Hawaiian Crock Pot Chicken. Imagine the inviting aroma wafting through your home as juicy, tender chicken melds with the rich, tropical flavors of pineapple, soy sauce, and a hint of ginger. Trust me; it’s the culinary equivalent of a spontaneous beach getaway!
Cooking in my kitchen is always an adventure, and this dish is one of my all-time favorites for a multitude of reasons. For starters, it’s incredibly easy to make—set it and forget it! Plus, the slow-cooking process transforms everyday ingredients into something absolutely unforgettable. I love how this recipe benefits from a little patience, allowing all those beautiful flavors to blend perfectly. You’ll love the way it fills your home with sweetness and comfort!
What really makes this dish a star in my kitchen is how customizable it is. Whether you’re cooking for a family gathering, a simple weeknight dinner, or perhaps a potluck with friends, Sweet Hawaiian Crock Pot Chicken brings everyone together around the table. So, grab your apron and let’s get cooking. You’re just a few ingredients away from a tropical feast that feels like a mini-vacation!
Personal Story
I can’t help but smile when I think back to the first time I made Sweet Hawaiian Crock Pot Chicken. I was hosting a cozy get-together with old college friends, and let me tell you, deciding on the menu felt like a massive undertaking! Amid the chaos of juggling work schedules and busy lives, I sought a dish that was not only delicious but also easy to prepare.
While thumbing through my trusty recipe binder, I stumbled upon this gem. It reminded me of a summer spent in Hawaii during my early twenties, where I first tasted the enticing blend of sweet and savory. The flavor was a revelation! I remembered how perfectly tender the chicken was, soaking up all that incredible sauce. With a wave of nostalgia, I decided to try my hand at recreating something similar.
As the night unfolded, the pot’s enticing aroma filled my home. Friends arrived, and the moment we gathered around the dinner table, laughter and stories flowed just like the sweet sauce dripping from the tender chicken. It became an unforgettable evening, reminding me that food is so much more than just nourishment—it’s a way to connect, to share stories, and to create memories. This recipe has stuck with me ever since, and I’m excited to share it with you all!
Ingredients
Here’s what you will need for this tasty dish:
-
2 pounds boneless, skinless chicken thighs
Tender and juicy, chicken thighs are perfect for slow cooking. They don’t dry out like chicken breasts, giving you that melt-in-your-mouth texture. If you prefer a leaner option, you can substitute chicken breasts, but you may need to adjust the cooking time. -
1 cup pineapple chunks (fresh or canned)
The star of the show! Pineapple adds, not just sweetness, but a delightful tanginess to the dish. If you’re using canned, make sure to drain it to avoid excess liquid. For a twist, use mango chunks instead! -
½ cup soy sauce
This salty goodness enhances the flavor of the chicken and ties the dish together. Try low-sodium soy sauce if you’re watching your salt. Additionally, coconut aminos can be a fantastic gluten-free alternative. -
1/3 cup brown sugar
This lends a sticky sweetness that compliments the pineapple beautifully. You can use coconut sugar or even honey as a healthier swap. -
1 tablespoon minced fresh ginger
Ginger brings warmth and depth. Fresh ginger is always more vibrant than ground. If you don’t have any on hand, try substituting with ½ teaspoon of ground ginger. -
1 tablespoon minced garlic
Ah, garlic! It’s a kitchen superstar that adds a rich savory undertone. Feel free to increase this amount if you love that garlicky flavor! -
1 tablespoon cornstarch (optional)
For those who love a thicker sauce, cornstarch is your friend! Combine it with a little cold water before adding it to the slow cooker in the last hour. -
Green onions, chopped (for garnish)
A pop of color and a sprinkle of fresh onion flavor! Feel free to use chopped parsley or cilantro for a different twist.
Step-by-Step Instructions
Step 1: Prep the Chicken
Start by placing your chicken thighs in the bottom of the crock pot. You don’t need to sear them first—let the slow cooker work its magic! While you process, you can visualize yourself on the beach, just relaxing. It’ll make the wait that much sweeter!
Step 2: Make the Sauce
In a separate bowl, whisk together the soy sauce, brown sugar, minced ginger, minced garlic, and pineapple chunks. The sweet and savory aroma will have you excited in no time! Pour this glorious concoction over the chicken, ensuring every piece is coated with that delicious sauce.
Step 3: Cook Low and Slow
Cover your crock pot and set it to low for about 6-8 hours or high for about 3-4 hours. If you’re as eager as I am when it comes to flavor, go for the low setting—it will yield even more flavorful results. Just remember, patience is a virtue in the kitchen!
Step 4: Thicken the Sauce (Optional)
If you desire a thicker sauce (I know I do!), mix 1 tablespoon of cornstarch with 1 tablespoon of water to create a slurry. About 30 minutes before serving, stir it into the sauce. It will give you that glossy finish that makes everything look gourmet!
Step 5: Serve It Up!
Once cooked, you can shred the chicken right in the pot for saucy goodness or serve it whole, depending on your presentation preference.
Serving Suggestions
When it comes to serving Sweet Hawaiian Crock Pot Chicken, think tropical vibes! A bed of fluffy jasmine rice pairs beautifully to soak up the delicious sauce. Add a side of fresh steamed vegetables, like snap peas or broccoli, to balance out the sweetness. Feeling adventurous? Serve it on a pineapple boat for show-stopping flair!
Recipe Variations
- Vegetarian Twist: Substitute chicken with cubed tofu or tempeh for a delightful plant-based option.
- Add Heat: For spice lovers, include sliced jalapeños or red pepper flakes for a sweet and spicy kick!
- Tropical Salsa: Top the chicken with a fresh mango salsa made with diced mango, red onion, and lime juice for a refreshing garnish.
- Slow Cooker BBQ Hawaiian Chicken: Swap out the soy sauce for your favorite BBQ sauce and add in some diced red bell peppers for an extra crunch.
- Coconut Variation: Add coconut milk in place of half the soy sauce for a rich, creamy twist!
Chef’s Notes
Oh, the memories I’ve made with this recipe! I once made a massive batch thinking I would have plenty of leftovers. That evening, my friends ate until their bellies were full—leaving just enough for a single lunch serving the next day. We all loved it, and the way my friends devoured it was a pure testament to the magic of food. I’ve since learned to make double batches!
This dish has evolved over time, too. I keep experimenting with different flavors and ingredients, and it always turns out fantastic. Don’t be afraid to make it your own!
FAQs and Troubleshooting
1. My chicken is dry; what went wrong?
- Chicken can dry out if overcooked. Make sure to adjust the cooking time based on your slow cooker’s heat settings. If using chicken breasts, check for doneness early on!
2. Can I cook this dish on the stovetop?
- Absolutely! Just bring the ingredients to a simmer in a large pot on medium heat. Once simmering, reduce to low and cover for 30-40 minutes, until chicken is cooked through.
3. My sauce didn’t thicken. Why?
- If you skipped the cornstarch step or added it too late, the sauce might not thicken properly. Also, if there’s too much liquid in the pot, try leaving the lid off during the last 30 minutes of cooking to let some moisture evaporate.
4. Can I freeze leftovers?
- Yes! This dish freezes beautifully. Store in an airtight container and enjoy it within 3 months. Just make sure to thaw it in the fridge before reheating.
Nutritional Information
While I’m not a nutritionist, I can share that Sweet Hawaiian Crock Pot Chicken is a hearty meal packed with protein. If you’re curious about tracking your macros, consider adjusting portion sizes or using healthier swaps mentioned above.
And there you have it! A warm, inviting dish that embodies flavors of the tropics. It’s perfect for any occasion that calls for comfort and togetherness. So, gather your loved ones around the table, share stories, and dig into this delightful Sweet Hawaiian Crock Pot Chicken. Happy cooking!
Print
Sweet Hawaiian Crock Pot Chicken
- Total Time: 375 minutes
- Yield: 4 servings 1x
- Diet: Gluten-Free
Description
A delightful slow-cooked dish featuring tender chicken infused with tropical flavors of pineapple and soy sauce, perfect for any gathering.
Ingredients
- 2 pounds boneless, skinless chicken thighs
- 1 cup pineapple chunks (fresh or canned)
- ½ cup soy sauce
- 1/3 cup brown sugar
- 1 tablespoon minced fresh ginger
- 1 tablespoon minced garlic
- 1 tablespoon cornstarch (optional)
- Green onions, chopped (for garnish)
Instructions
- Prep the chicken by placing your thighs in the bottom of the crock pot.
- Make the sauce by whisking together soy sauce, brown sugar, minced ginger, minced garlic, and pineapple chunks in a separate bowl.
- Cook on low for about 6-8 hours or high for about 3-4 hours.
- Thicken the sauce by mixing cornstarch with water and stirring it into the sauce 30 minutes before serving.
- Serve it up! Shred the chicken right in the pot or serve it whole, as desired.
Notes
Pairs well with jasmine rice and steamed vegetables. Can be customized with vegetarian options or spicy additions.
- Prep Time: 15 minutes
- Cook Time: 360 minutes
- Category: Main Course
- Method: Slow Cooking
- Cuisine: Hawaiian
Nutrition
- Serving Size: 1 serving
- Calories: 400
- Sugar: 15g
- Sodium: 700mg
- Fat: 10g
- Saturated Fat: 2g
- Unsaturated Fat: 8g
- Trans Fat: 0g
- Carbohydrates: 30g
- Fiber: 1g
- Protein: 30g
- Cholesterol: 80mg
Keywords: Crock Pot, Hawaiian Chicken, Slow Cooker, Easy Dinner, Comfort Food




