

Crispy 5-Ingredient Butternut Squash Fritters for Weeknights
5-Ingredient Butternut Squash Fritters: A Cozy Kitchen Adventure
Introduction
Hey there, kitchen warriors! I’m Olivia Bennett, your friendly neighborhood cooking enthusiast, and today, we’re diving into a dish that is not only simple to make but will also leave your taste buds dancing with delight: 5-Ingredient Butternut Squash Fritters! These little gems are crispy on the outside, tender on the inside, and absolutely bursting with flavor. If you haven’t yet discovered the joy of cooking with butternut squash, let me tell you — you’re in for a treat.
Butternut squash has been my favorite fall vegetable for years. Its natural sweetness and buttery texture make it a versatile ingredient that can be used in everything from soups to salads. But when I discovered the magic of fritters, it was like a light bulb went off in my kitchen. This recipe is all about highlighting the squash while keeping things easy and approachable — perfect for busy weeknights or a cozy weekend gathering!
Imagine yourself at home, the smell of fritters sizzling away in the skillet, perhaps a podcast playing in the background, or your favorite playlist setting the mood. Fritters are communal by nature — great finger food for sharing and perfect for dipping. Whether you pair them with a spicy yogurt sauce, a vibrant salsa, or keep it classic with some sour cream, these Butternut Squash Fritters are destined to become a staple in your kitchen.
So grab that apron and get ready to unleash your inner chef! Let me walk you through this delightful recipe filled with personal anecdotes, handy tips, and, of course, some good old-fashioned kitchen fun.
Personal Story
I remember the first time I made fritters; it was during my college years, just before a big family gathering. With my family notoriously known for their culinary critiques, I was determined to impress everyone with my newfound cooking skills. I decided to create something special using butternut squash, which was abundant at the farmer’s market that week.
After some trial and error, I landed on these fritters. The first bite was met with silence around the table — the kind of silence that only happens when you’ve hit the jackpot in flavor! My cousin, with a small fry in hand, leaned over and exclaimed, “These taste like fall!” Suddenly, everyone was grabbing seconds, and I felt like a kitchen rock star! It was in that moment that I knew I had a hit on my hands. Ever since, these butternut squash fritters have been a beloved recipe in our family, and I’m excited to share them with you!
Ingredients
Here’s what you’ll need to make these delicious 5-Ingredient Butternut Squash Fritters, along with some nifty tips for each ingredient:
-
1 medium butternut squash (about 2 cups, grated)
- The star of the show! When picking one, look for a squash that feels heavy for its size and has a smooth, tan skin. If you can’t find butternut squash, you can use sweet potatoes or zucchini — just remember to squeeze out any extra moisture from the zucchini!
-
1/2 cup all-purpose flour
- This helps bind the fritters together. If you’re looking for a gluten-free option, quinoa flour or chickpea flour works beautifully as alternatives!
-
1 large egg
- The egg is crucial for binding. If you’re egg-free, try substituting it with a flax egg (1 tablespoon ground flaxseed mixed with 2.5 tablespoons water) or applesauce (1/4 cup works)!
-
1/4 teaspoon salt
- Don’t underestimate salt! It enhances the flavors, making each bite pop. Feel free to adjust the amount to suit your taste.
-
1/4 teaspoon pepper (optional; adjust to taste)
- A little kick adds depth! If you’re feeling adventurous, try adding some smoked paprika or chili powder for an extra flavor boost.
Step-by-Step Instructions
Alright, friends, it’s time to get cooking! Follow these simple steps to whip up your fritters, and remember, cooking is all about having fun and experimenting. Let’s go!
-
Prep the Squash:
- Start by peeling the butternut squash. This can be a bit tough, so make sure to use a sharp vegetable peeler or a sturdy knife. Once peeled, slice it in half lengthwise and scoop out the seeds. Grate the squash using a box grater or the grating attachment of a food processor. You’ll want about 2 cups of grated squash.
Chef Hack: If you have a busy schedule, you can bake the squash whole for about 45-60 minutes at 400°F (204°C) until soft, cool, peel, and then grate. This makes the process a breeze!
-
Mix the Ingredients:
- In a bowl, combine the grated butternut squash, all-purpose flour, egg, salt, and pepper. Stir until well incorporated. You should have a thick batter that holds together nicely.
Tip: Don’t be afraid to get your hands in there! Mixing with your hands can help better combine the ingredients and ensure everything is evenly distributed.
-
Heat the Skillet:
- Heat a medium skillet over medium heat and add a tablespoon of oil (olive oil or vegetable oil works well). You want enough oil to coat the bottom of the pan for frying.
Chef Insight: If you prefer baking, preheat your oven to 375°F (190°C) and line a baking sheet with parchment paper. You can scoop out the fritter mixture and flatten them a bit before popping them in the oven.
-
Form and Fry the Fritters:
- Once the oil is hot, take about 2 tablespoons of the fritter mixture and form them into small patties with your hands. Place them in the skillet, making sure to leave enough space between each fritter. Cook for about 3-4 minutes on one side or until golden brown and crispy. Flip them over carefully and cook for another 3-4 minutes on the other side.
Chef Hack: If you find the fritters falling apart, try adding a touch more flour until the consistency holds together better.
-
Drain and Cool:
- Once cooked, transfer the fritters to a paper towel-lined plate to absorb any excess oil. Let them cool slightly before digging in — they’re perfect while still warm!
Serving Suggestions
Served up hot and delicious, these Butternut Squash Fritters can be plated simply for an elegant touch. Stack fritters high and drizzle with your favorite dipping sauce, possibly a zesty yogurt mix with lemon and herbs, or even serve them with a side of tangy apple chutney. They also pair beautifully with fresh salad greens and a splash of vinaigrette!
Recipe Variations
- Herbed Versions: Add chopped fresh herbs like parsley, cilantro, or chives for an extra burst of freshness.
- Spiced Fritters: Consider folding in some feta cheese and spice it up with cumin or coriander for a Mediterranean twist.
- Vegan Delight: Swap the egg for a flax egg and use chickpea flour instead of all-purpose flour for a vegan take.
- Cheesy Goodness: Add a handful of grated cheese like cheddar or parmesan for an extra savory flavor.
- Baked Not Fried: Prefer a lighter option? Bake them at 375°F (190°C) for about 20-25 minutes, flipping halfway through until golden brown.
Chef’s Notes
These Butternut Squash Fritters hold a special place in my heart as they always remind me of that gathering years ago. As I’ve shared them with friends and family, I’ve witnessed how they can bring people together. The recipe has evolved over time, adapting to the flavors and spices I’ve fallen in love with throughout my cooking journey. There’s something magical about cooking that transcends beyond just feeding people — it creates memories, laughter, and bonds.
FAQs and Troubleshooting
-
Why are my fritters falling apart?
- Ensure you have enough binding agents like flour and eggs. If they’re too wet, adding a bit more flour can help!
-
Can I make these in advance?
- Absolutely! You can prep and form the fritters in advance, just pop them in the fridge until you’re ready to fry. They can also be frozen — fry right from frozen, but increase cooking time.
-
How can I tell when the fritters are done?
- They should be golden brown and crispy on the outside. A quick poke with a fork should show they are tender on the inside without any raw spots.
-
Can I air-fry these fritters?
- Yes! Preheat your air fryer and cook the fritters at 375°F (190°C) for about 15 minutes, flipping halfway through for evenly crisp perfection!
Nutritional Info
(Per fritter, based on the recipe yielding 8 fritters)
- Calories: 120
- Fat: 5g
- Carbohydrates: 15g
- Protein: 2g
And there you have it, friends! Your guide to creating delightful 5-Ingredient Butternut Squash Fritters that are sure to delight your family and friends. Get ready to enjoy the coziness of cooking, the joy of sharing, and the satisfaction of creating something delicious from scratch. Happy cooking!
Print
5-Ingredient Butternut Squash Fritters
- Total Time: 30 minutes
- Yield: 4 servings 1x
- Diet: Vegetarian
Description
Crispy on the outside and tender on the inside, these Butternut Squash Fritters are easy to make and bursting with flavor. Perfect for sharing!
Ingredients
- 1 medium butternut squash (about 2 cups, grated)
- 1/2 cup all-purpose flour
- 1 large egg
- 1/4 teaspoon salt
- 1/4 teaspoon pepper (optional; adjust to taste)
Instructions
- Prep the squash: Peel, halve, seed, and grate the butternut squash to yield about 2 cups.
- Mix the ingredients: Combine grated squash, flour, egg, salt, and pepper in a bowl until well incorporated.
- Heat the skillet: Heat a medium skillet over medium heat with a tablespoon of oil.
- Form and fry the fritters: Shape 2-tablespoon amounts of the mixture into patties and fry until golden brown, about 3-4 minutes per side.
- Drain and cool: Transfer cooked fritters to a paper towel-lined plate to absorb excess oil before serving.
Notes
These fritters can be baked at 375°F (190°C) for a lighter option. You can also make them in advance and freeze for later use.
- Prep Time: 15 minutes
- Cook Time: 15 minutes
- Category: Appetizer
- Method: Frying
- Cuisine: American
Nutrition
- Serving Size: 2 fritters
- Calories: 120
- Sugar: 2g
- Sodium: 200mg
- Fat: 5g
- Saturated Fat: 1g
- Unsaturated Fat: 3g
- Trans Fat: 0g
- Carbohydrates: 15g
- Fiber: 2g
- Protein: 2g
- Cholesterol: 25mg
Keywords: butternut squash, fritters, vegetarian appetizer, fall recipe, easy cooking

Discover the Best Honey Garlic Chicken and Sweet Potato Recipe for a Quick and Delicious Dinner
# Discover the Best Honey Garlic Chicken and Sweet Potato Recipe for a Quick and Delicious Dinner
## Introduction
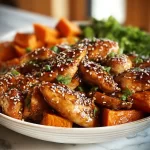
Hey there, fellow food lovers! Welcome back to my cozy corner of the kitchen! Today, I’m excited to share with you a recipe that’s not just quick but also bursting with flavors that will make your taste buds dance. I’m talking about Honey Garlic Chicken and Sweet Potatoes—an irresistible combination of tender chicken, sweet potatoes, and a zesty honey-garlic glaze that’s so good it’ll have you coming back for more.
Life gets busy, and sometimes the last thing we want to think about is dinner. But fear not! This dish is perfect for those hectic weeknights when you want something homemade but don’t have hours to spend in the kitchen. It’s the type of meal that’ll make your kitchen smell incredible, creating a comforting ambiance that’s perfect for reconnecting with family or simply indulging in some well-deserved “me time”.
What I love most about this dish is that it’s incredibly versatile. The sweet and savory combination is perfect for all ages, making it an instant crowd-pleaser. Whether you're cooking for your partner, your kids, or your friends, this Honey Garlic Chicken is sure to shine on the dinner table. Plus, it’s packed with nutrients from the sweet potatoes, making it not just delicious, but nutritious too!
So, roll up your sleeves, tie on that apron, and let’s dive into making this delightful dinner that will have everyone raving, “What’s the secret?!” Spoiler alert: it’s all about balancing flavors and a few simple ingredients. Sounds fun, right? Let’s get cooking!
## Personal Story
Let me take you back to when I was a kid, eagerly waiting for my mom to return from the grocery store. Every Saturday, she would whip up her signature dish: Honey Garlic Chicken. The aroma would fill our home, and my siblings and I would rush to set the table, vying for the spot closest to the oven. It was a family affair—dancing around the kitchen while we caught stories about our week, all punctuated by laughter and the occasional kitchen mishap.
One evening, in a rush to get dinner on the table, my mom accidentally doubled the honey in the marinade! By some divine intervention (or sheer luck), it turned out to be the best batch of Honey Garlic Chicken we ever had. We ended up nicknaming it “Sweet Victory Chicken.” From that day on, we embraced the idea that mistakes can lead to delightful surprises in cooking! And that’s the spirit I want to keep alive in our kitchen—explore, experiment, and most importantly, enjoy the process.
## Ingredients
Here’s what you’ll need to create this mouthwatering meal:
- **Chicken Thighs (or Breast)**:
- This recipe calls for juicy chicken thighs for maximum flavor, but if you prefer leaner meat, chicken breasts work just as well. Just keep an eye on cooking time, as breasts might cook faster.
- **Sweet Potatoes**:
- Sweet potatoes add a natural sweetness that pairs perfectly with the savory garlic. You can substitute with other root vegetables like carrots or butternut squash for a twist.
- **Honey**:
- The star of the dish! Honey adds that delightful glaze, giving the chicken a beautiful caramelization. For a healthier alternative, you can use maple syrup or agave nectar.
- **Garlic**:
- Fresh minced garlic is a must for that aromatic kick. If you’re in a pinch, garlic powder can be used, although the flavor won’t be quite as bold.
- **Soy Sauce**:
- This adds a depth of umami flavor. Look for low-sodium soy sauce if you’re watching your salt intake, or use tamari for a gluten-free option.
- **Olive Oil**:
- Essential for drizzling over the sweet potatoes to help them roast to perfection. Feel free to substitute with avocado oil or melted coconut oil.
- **Salt and Pepper**:
- Simple seasoning that enhances the natural flavors of our ingredients. Always season to taste and adjust based on your preference.
- **Optional Garnish: Fresh Parsley or Green Onions**:
- A sprinkle of these fresh herbs adds a lovely pop of color and freshness to the final dish. They can elevate the presentation and brighten up the flavors!
## Step-by-Step Instructions
### Step 1: Prepping the Ingredients
First things first—let’s get our ingredients prepped! Preheat your oven to 400°F (200°C). While that warms up, peel and chop your sweet potatoes into bite-sized cubes. Aim for uniform pieces so they cook evenly. I like to toss them in a little olive oil, salt, and pepper for flavor. Spread them out on a baking sheet lined with parchment paper—this will keep them from sticking and make cleanup a breeze!
### Step 2: Make the Sauce
Now, let’s whip up the delicious honey garlic sauce! In a bowl, combine 1/4 cup honey, 1/4 cup soy sauce (or tamari), and 3-4 cloves of minced garlic. Whisk until combined. The magic happens here; you’ll notice the honey creating a lovely blend with the soy sauce, and the fragrance of garlic is going to make your kitchen feel like a culinary oasis.
### Step 3: Marinate the Chicken
Place your chicken thighs in a large zip-lock bag or a mixing bowl. Pour half of the honey garlic mixture over the chicken, reserving the other half for later. Seal the bag (or cover the bowl) and give it a gentle shake or mix to ensure all the chicken is coated in that delicious glaze. Let it marinate while you tackle the next steps—10 to 20 minutes is ideal, but even a short time will infuse the flavors.
### Step 4: Roast Time
Once your sweet potatoes are prepped and your chicken is marinated, it’s time to bring it all together! In a separate baking dish, arrange the chicken thighs skin-side up (if using skin-on) and place it alongside your sweet potatoes. Don’t crowd the pan; give everything a little room if you have space. Drizzle any leftover olive oil over the sweet potatoes.
### Step 5: Bake It All Together
Pop both the chicken and sweet potatoes into the preheated oven. Bake for about 25-30 minutes or until the chicken is cooked through (internal temperature should reach 165°F/75°C) and the sweet potatoes are tender and golden around the edges. You might want to baste the chicken with the reserved honey garlic sauce halfway through baking for an extra layer of flavor and that gorgeous glaze.
### Step 6: Finish and Rest
When everything is perfectly baked, remove it from the oven and allow it to rest for about 5 minutes. This step is especially important to let the juices settle back into the chicken, keeping it extra moist!
## Serving Suggestions
Now, let’s plate up this sumptuous dish! Once the chicken has rested, serve it alongside a generous helping of those caramelized sweet potatoes. Drizzle any remaining honey garlic sauce over the top for an added flavor boost, then sprinkle with fresh parsley or chopped green onions for that beautiful finish. Don’t forget to bring everyone to the table because this meal is meant to be shared!
## Recipe Variations
Feeling adventurous? Here are a few fun variations to try out:
1. **Spicy Kick**: Add a teaspoon of red pepper flakes to the honey garlic sauce if you like a little heat in your dish.
2. **Citrus Twist**: Squeeze a bit of fresh orange juice into the marinade for an added zesty flavor that brightens up the sweetness.
3. **Veggie Delight**: Toss in some brussels sprouts, broccoli, or bell peppers with the sweet potatoes for additional nutrients and flavors!
4. **Herb Roasted**: Add fresh herbs like rosemary or thyme into the roasting pan, which will infuse the dish with fragrant herby goodness.
5. **One-Pan Wonder**: If you’re short on time, toss everything into a single pan for easy cleanup. Just layer the sweet potatoes and chicken together on one sheet tray.
## Chef’s Notes
Cooking is all about learning, and I’ve had my fair share of kitchen adventures. I remember the first time I made this dish for friends — my excitement got the better of me, and I added too much soy sauce! But instead of panic, I creatively added coconut milk to balance it out. It turned out to be one of the best meals we’ve had! This recipe has come a long way since then, adapting to my growing collection of flavors and techniques. Remember, cooking is a journey; mistakes can lead to delicious discoveries, so don’t be afraid to experiment!
## FAQs and Troubleshooting
**1. What if my chicken turns out dry?**
If your chicken ever ends up dry, it could be due to overcooking. Always use a meat thermometer, and remember that chicken thighs are more forgiving than breasts due to their fat content. If you’re using breasts, check them at the 20-minute mark.
**2. Can I make this dish in advance?**
Absolutely! You can marinate the chicken the night before and simply pop it in the oven when you’re ready to cook. This can even enhance the flavors!
**3. What can I serve with this?**
While it’s delightful on its own, a simple mixed green salad or some steamed veggies are excellent accompaniments for a complete meal.
**4. What if I don't have honey? Can I skip it?**
Don’t skip it! For a substitute, consider maple syrup or a combination of brown sugar and water for that caramelized sweetness.
## Nutritional Info (if applicable)
While I’m not a nutritionist, I love keeping things balanced. This Honey Garlic Chicken with Sweet Potatoes provides a great mix of protein, healthy carbs, and vitamins. A serving typically contains around 350-450 calories, depending on portion sizes and specific ingredients used.
---
I hope you enjoy making this Honey Garlic Chicken and Sweet Potatoes as much as I do! Remember, the best part of cooking is sharing it with others—don’t forget to snap and share your creations with me! Happy cooking, and until next time, stay hungry for flavor!
Honey Garlic Chicken and Sweet Potatoes
- Total Time: 45 minutes
- Yield: 4 servings 1x
- Diet: Gluten-Free
Description
A quick and delicious recipe for Honey Garlic Chicken served with sweet potatoes, coated in a tasty honey-garlic glaze.
Ingredients
- 4 Chicken Thighs (or Breasts)
- 2 Sweet Potatoes, peeled and cubed
- 1/4 cup Honey
- 1/4 cup Soy Sauce (or Tamari)
- 3–4 cloves Garlic, minced
- 2 tablespoons Olive Oil
- Salt and Pepper, to taste
- Optional Garnish: Fresh Parsley or Green Onions
Instructions
- Preheat your oven to 400°F (200°C). While that warms up, peel and chop your sweet potatoes into bite-sized cubes.
- Toss the sweet potatoes in olive oil, salt, and pepper, and spread them out on a baking sheet lined with parchment paper.
- In a bowl, combine honey, soy sauce, and minced garlic. Whisk until combined.
- Place chicken thighs in a zip-lock bag or bowl, pour half of the honey garlic mixture over the chicken, and let it marinate for 10-20 minutes.
- Arrange the marinated chicken in a baking dish alongside the sweet potatoes and drizzle any leftover olive oil over the sweet potatoes.
- Bake both the chicken and sweet potatoes for about 25-30 minutes or until done. Baste the chicken with the reserved honey garlic sauce halfway through baking.
- Remove from oven and let it rest for about 5 minutes before serving.
Notes
Feel free to experiment with additional vegetables or spices to customize the dish to your liking.
- Prep Time: 15 minutes
- Cook Time: 30 minutes
- Category: Main Course
- Method: Baking
- Cuisine: American
Nutrition
- Serving Size: 1 serving
- Calories: 400
- Sugar: 8g
- Sodium: 600mg
- Fat: 15g
- Saturated Fat: 2g
- Unsaturated Fat: 10g
- Trans Fat: 0g
- Carbohydrates: 50g
- Fiber: 6g
- Protein: 25g
- Cholesterol: 80mg
Keywords: Honey Garlic Chicken, Sweet Potatoes, Quick Dinner, Easy Recipe, Gluten-Free


