
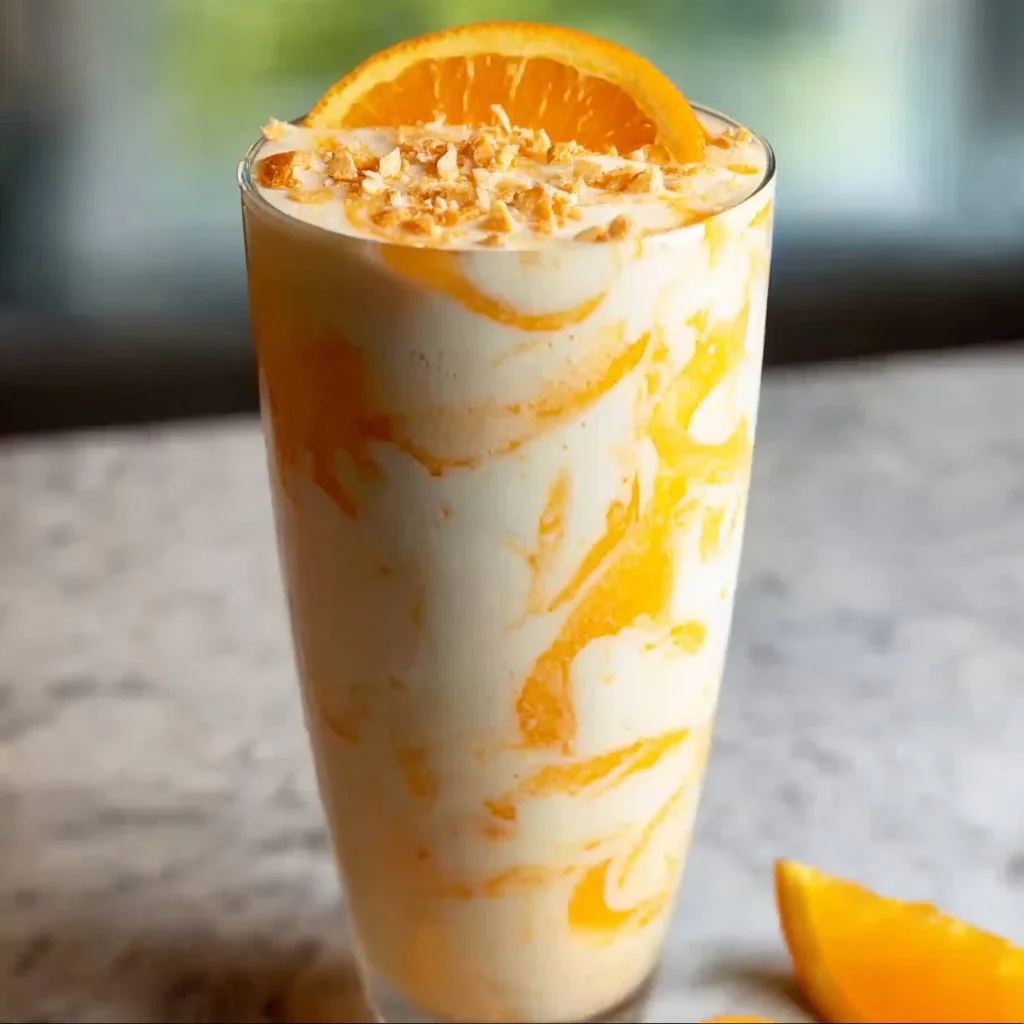
Refreshing Orange Creamsicle Smoothie for Summer
Refreshing Orange Creamsicle Smoothie for Summer
Welcome to my kitchen! I’m thrilled to share one of my absolute favorite summer recipes with you: the Refreshing Orange Creamsicle Smoothie. Picture this: it’s a hot, sun-soaked day, and as you sip on this dreamy, creamy smoothie, you’re transported right back to those carefree childhood afternoons when life was all about ice cream trucks and warm sunshine. This smoothie is not just a drink; it’s a nostalgic trip down memory lane, packed with vibrant flavors and the promise of a fun summer day!
Whether you’re soaking up the sun, unwinding by the pool, or looking for a quick breakfast treat, this Orange Creamsicle Smoothie is as refreshing as a cool breeze! It’s a delightful mashup of sweet, juicy oranges and rich, creamy yogurt, giving you the perfect balance of health and indulgence. It’s quick to whip up, and you probably have most of the ingredients lying around. So slip on your favorite apron, and let’s stir up some sunshine together!
A Sweet Memory
Let me take you back to my childhood—a time filled with the innocent excitement of summer breaks. I vividly remember running into the living room, my cheeks flushed from playing outside, when I caught that famous jingle of the ice cream truck ringing in the air. That sound was pure magic! When I finally made my way to the truck, my heart raced as I scanned the menu—my eyes landing on the iconic orange creamsicle.
Oh, the taste! The sweet and tangy orange flavor combined with that silky vanilla cream took me to cloud nine. It felt like pure joy in every single bite. Years later, while experimenting in my kitchen, I decided to recreate that nostalgic flavor for a healthier twist. What emerged was this Refreshing Orange Creamsicle Smoothie. It’s a tribute to those sunny days of my youth—a vibrant drink that brings joy and brings back memories every time I sip it.
Ingredients
Now, let’s assemble the ingredients! This smoothie is not only delicious but also packed with nutrients. Here’s what you’ll need:
-
2 large oranges
Sweet, juicy oranges are the star here! Look for ones that feel heavy for their size and have smooth skin. If you’re in a pinch, feel free to swap these with orange juice (about 1 cup), but fresh is always best! -
1 banana
A medium-sized ripe banana adds natural sweetness and creaminess. If bananas aren’t your thing, a handful of frozen mango or a scoop of vanilla Greek yogurt can work wonders too. -
1 cup vanilla yogurt
This is where you get that dreamy, creamy texture. Greek yogurt is my favorite for added protein, but plain yogurt or a dairy-free version like coconut yogurt will also do the trick. -
1 tablespoon honey (optional)
If you like things a little sweeter, drizzle in some honey. Adjust it according to your taste. Maple syrup or agave syrup can be great substitutes! -
1 cup ice cubes
To give your smoothie that frosty texture, ice cubes are essential. If you prefer, you can freeze the oranges ahead of time for an extra chill. -
Zest of 1 orange
For a burst of flavor, don’t skip the zest! It brightens the smoothie and adds an aromatic touch. If you don’t have a zester, a grater can work, but be careful not to grate any of the white pith, which is bitter. -
A splash of almond milk (optional)
If you want a thinner consistency, add a splash of almond milk or any milk of your choice. Just be mindful of how much you’re adding; you want your smoothie thick and luscious!
Step-by-Step Instructions
Now that we have our ingredients, let’s dive into the fun part—making the smoothie! Don’t worry; it’s super easy.
-
Prep the oranges: Start by peeling the oranges. Carefully remove the skin and as much of the white pith as you can without losing too much fruit. This makes for a sweeter and smoother smoothie. Also, remove any seeds you come across!
-
Gather and blend: Toss the peeled oranges into your blender along with the banana, vanilla yogurt, and honey if you’re using it. Don’t forget the orange zest—it’s such a game-changer!
-
Ice, ice, baby: Add that crucial cup of ice cubes to the mix. If it helps, you can add a little at a time and adjust based on your desired texture.
-
Blend it up: Secure the lid on the blender and blend until your mixture is smooth and creamy, usually about 30–45 seconds. You might need to stop and scrape down the sides to ensure everything incorporates beautifully.
-
Check the consistency: Give your smoothie a quick taste test! If it’s too thick, add a splash of almond milk and blend again. If it’s not sweet enough, adjust with more honey or perhaps throw in another banana for good measure.
-
Serve and enjoy: Pour the smoothie into tall glasses, and just like that, you’ve created a refreshing orange creamsicle in liquid form! Feel free to garnish with a sprinkle of extra zest or a slice of orange on the rim for that extra touch.
Serving Suggestions
To serve this refreshing smoothie, I love sticking a colorful straw in each glass. It makes sipping so much more fun! You can also rim the glasses with sugar for a fancy touch—just dampen the rim with a little orange juice and dip it in sugar. Plus, pair this smoothie with a light salad or some crunchy granola to elevate your meal.
Recipe Variations
Here are some exciting twists you can try with this Orange Creamsicle Smoothie:
- Tropical Twist: Add a scoop of pineapple for a tropical vibe that screams beach vacation!
- Berry Blast: Toss in a handful of mixed berries like strawberries or blueberries for a beautiful color and added antioxidants.
- Nutty Delight: Blend in a tablespoon of almond or cashew butter for a delightful nutty flavor and a boost of creaminess!
- Vegan Option: Substitute the yogurt with plant-based yogurt or silken tofu for a vegan-friendly version that still packs a creamy punch.
Chef’s Notes
As a self-proclaimed smoothie enthusiast, I’ve whipped up countless variations of this Orange Creamsicle Smoothie. I once experimented with adding ginger to give it a spicy kick, and let me tell you, it was a fun detour! Each time I make it, I find new little tweaks to keep things interesting. It’s incredible how a simple recipe can evolve based on what you have on hand or what mood you’re in. There’s a certain joy in keeping it fresh and playful in the kitchen!
As you dive into the world of smoothies, remember that the best part is making it your own. Don’t be afraid to play around with flavors—your kitchen is your playground!
FAQs and Troubleshooting
1. Can I make this smoothie ahead of time?
Yes! You can prepare the orange and banana mixture and store it in airtight containers in the fridge for up to one day. However, the texture is best when freshly made.
2. My smoothie is too thick. What can I do?
No worries! Just add a splash of your favorite milk (dairy or plant-based), then continue blending until you reach your desired consistency.
3. What if I don’t have oranges?
You can definitely use other fruits! Try substituting with mandarins, tangerines, or even peach slices for a different twist.
4. Can I use frozen fruit?
Absolutely! Using frozen oranges and bananas can create an even thicker smoothie. Just skip the ice cubes or add them as needed.
Nutritional Info
While nutritional info can vary depending on exact ingredients used, here’s a rough estimate per serving (about 1 glass):
- Calories: ~220
- Protein: ~7g
- Fat: ~3g
- Carbohydrates: ~45g
- Fiber: ~4g
- Sugars: ~30g
This Orange Creamsicle Smoothie is not only a delicious treat but a great source of vitamins, minerals, and natural sugars. Perfect for those hot summer days or as a quick breakfast!
So, there you have it! Your very own refreshing Orange Creamsicle Smoothie. It’s a summery delight that’s simple, delicious, and full of nostalgia. Whether you drink it alone or share it with friends, it’s sure to bring smiles all around. Happy blending!
Print
Refreshing Orange Creamsicle Smoothie
- Total Time: 10 minutes
- Yield: 2 servings 1x
- Diet: Vegetarian
Description
A delicious and nostalgic smoothie that combines sweet oranges and creamy yogurt, perfect for summer days.
Ingredients
- 2 large oranges
- 1 banana
- 1 cup vanilla yogurt
- 1 tablespoon honey (optional)
- 1 cup ice cubes
- Zest of 1 orange
- A splash of almond milk (optional)
Instructions
- Prep the oranges: Start by peeling the oranges and removing as much of the white pith as you can.
- Gather and blend: Toss the peeled oranges into your blender with the banana, vanilla yogurt, and honey if using.
- Add that crucial cup of ice cubes to the mix.
- Blend until your mixture is smooth and creamy, about 30–45 seconds.
- Check the consistency and adjust with almond milk or honey as needed.
- Serve the smoothie into tall glasses and garnish if desired.
Notes
You can rim the glasses with sugar or serve with a crunchy granola for a delightful combo.
- Prep Time: 10 minutes
- Cook Time: 0 minutes
- Category: Beverage
- Method: Blending
- Cuisine: American
Nutrition
- Serving Size: 1 serving
- Calories: 220
- Sugar: 30g
- Sodium: 50mg
- Fat: 3g
- Saturated Fat: 1g
- Unsaturated Fat: 2g
- Trans Fat: 0g
- Carbohydrates: 45g
- Fiber: 4g
- Protein: 7g
- Cholesterol: 10mg
Keywords: smoothie, orange, refreshing, summer, healthy
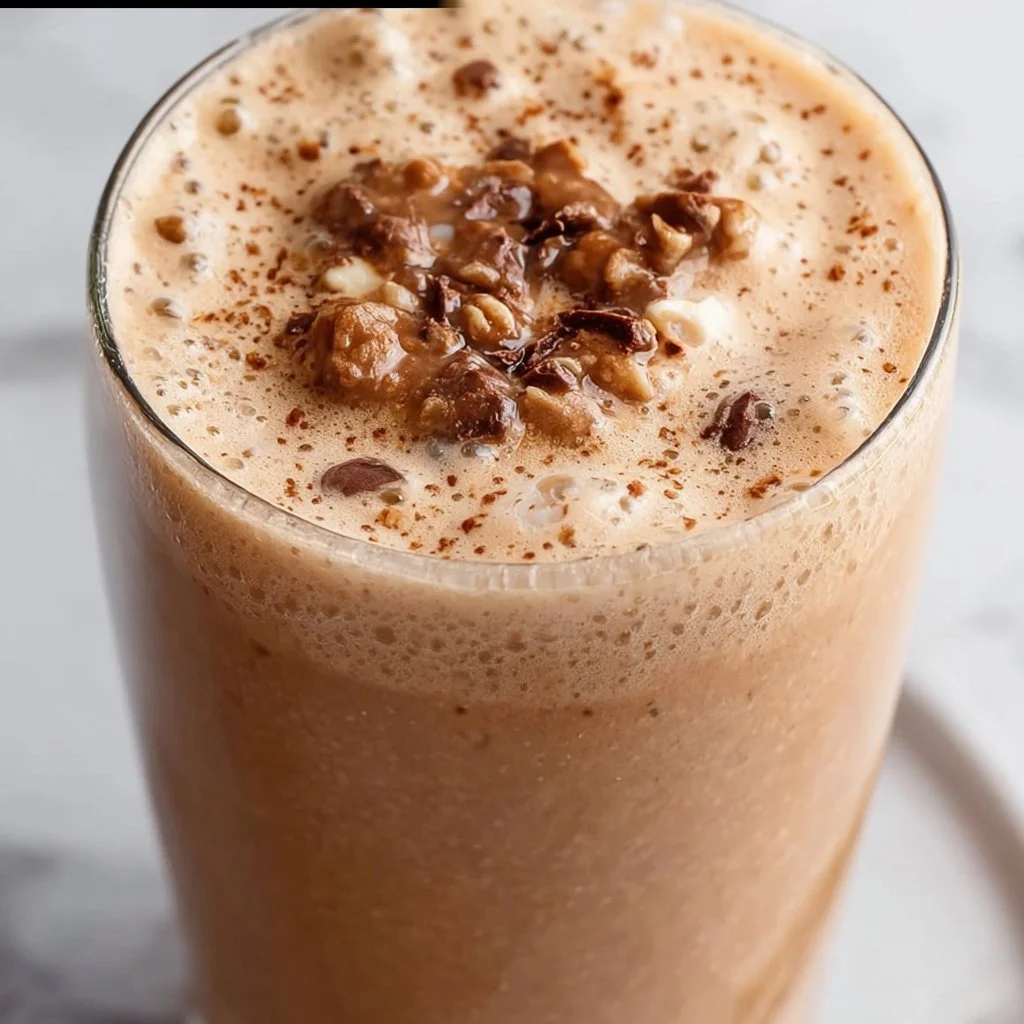
Cold Brew Coffee Protein Smoothie
Cold Brew Coffee Protein Smoothie: Your Ultimate Energizing Treat
Welcome back to my kitchen! Today, I can’t wait to share with you a recipe that has won my heart and fills my mornings with radiant energy—my Cold Brew Coffee Protein Smoothie. If you’re someone who loves the rich aroma of coffee but also craves a healthy boost, you’re in for a treat! This smoothie not only provides a delicious way to wake up your senses but also gives you that extra jolt to power through your day. It’s perfect for those busy mornings when you need more than just a cup of coffee.
This delightful drink combines the smooth, bold flavor of cold brew with creamy yogurt, nutty peanut butter, and a hint of banana sweetness. Trust me, it’s a hug in a glass—fuel for your body and soul as you navigate your busy life. So, grab your blender and let’s whip up something fabulous!
A Whirlwind of Cold Brew Memories
Every great recipe comes with a story, and this one is no different! I remember the first time I ever tasted cold brew coffee. I was visiting a quaint little café in my college town, eager to kick my caffeine routine into high gear. The barista recommended the house-made cold brew, served over ice, with a splash of almond milk. I took a sip, and it was like the clouds parted! The coffee was so smooth and rich, without that bitter punch that sometimes comes with traditional brews.
That day, I knew I had stumbled onto something special. Soon enough, I found myself experimenting with cold brew at home, tossing it into different recipes to see how it could elevate flavors. It was during one of those adventurous mornings, blending away in my kitchen, that the idea of a cold brew protein smoothie was born. Little did I know, this would become my go-to breakfast and a staple in my recipe book!
Ingredients
Here’s what you’ll need for your Cold Brew Coffee Protein Smoothie:
-
Cold Brew Coffee (1 cup): A smooth, caffeine-rich coffee that gives this smoothie a delicious base without any bitterness. You can make your own by steeping coarsely ground coffee in cold water overnight, or grab a bottle from your favorite café or store.
-
Greek Yogurt (½ cup): This adds creaminess and protein. It also brings a slight tanginess that balances the sweetness. If you’re looking for a dairy-free option, feel free to swap it with coconut yogurt!
-
Banana (1 ripe): Adds natural sweetness and creaminess. If bananas aren’t your thing, try frozen mango for a tropical twist!
-
Peanut Butter (2 tablespoons): This is my go-to for a nutty flavor and an extra punch of protein! Want to mix it up? Almond butter works just as well, or you can use sunflower seed butter for a nut-free version.
-
Honey or Maple Syrup (1-2 tablespoons): For sweetness! Adjust based on your preference. If you want a low-sugar option, leave this out or use stevia.
-
Ice (1 cup): A smoothie needs to be chilled, and ice helps achieve that perfect texture. If you prefer a creamier consistency, use frozen banana or yogurt instead of ice.
-
Optional Add-ins: A scoop of protein powder, a sprinkle of cinnamon, or a handful of spinach for an extra nutrient boost!
Step-by-Step Instructions
Let’s get blending! Here’s how to make your Cold Brew Coffee Protein Smoothie:
-
Gather Your Ingredients: Line up all your ingredients on the counter. Having everything within reach makes the process smooth and enjoyable—just like your smoothie will be!
-
Add Cold Brew Coffee and Yogurt: Start by pouring 1 cup of cold brew coffee into your blender. Next, add ½ cup of Greek yogurt. These two ingredients create the flavorful base of the smoothie. Using a high-quality cold brew will make a noticeable difference, so don’t hesitate to get the good stuff!
-
Toss in the Banana and Peanut Butter: Peel your banana and break it into chunks before adding it to the blender (it helps with blending!). Now, add 2 tablespoons of peanut butter. Pro tip: if your peanut butter is on the thicker side, you can microwave it for a few seconds to make it easier to blend.
-
Sweeten It Up: Drizzle in honey or maple syrup to add sweetness. Remember, this is adjustable—taste as you go, and make it your own!
-
Ice, Ice Baby: Add 1 cup of ice to the blender. If you’re using fresh banana or yogurt, feel free to add a bit more ice to get that perfect chill.
-
Blend Away: Secure the lid on your blender, and blend on high until everything is smooth. I like to pulse a few times to make sure all the chunks are broken down. You might need to stop and scrape down the sides to get everything blended evenly.
-
Taste Test: Here’s where the magic happens! Taste your smoothie and adjust the sweetness or add a bit more coffee, if needed. You can also add a splash of milk or more ice for a thinner consistency.
-
Pour and Enjoy: Once you’re happy with the flavor and texture, pour the smoothie into your favorite glass. If you feel fancy, top with a sprinkle of cinnamon or some cacao nibs for that extra touch!
Serving Suggestions
Serve this Cold Brew Coffee Protein Smoothie in a tall glass—perhaps your favorite travel mug if you’re in a rush! Add a cute straw (or go for the reusable kind—let’s save the planet, friends!), and if you’re feeling a bit extra, garnish with a slice of banana or a dollop of yogurt on top. Perfect for enjoying on your porch or while heading out the door!
Recipe Variations
Want to put a spin on your smoothie? Here are a few variations to try:
-
Mocha Delight: Add a tablespoon of cocoa powder or chocolate protein powder for a chocolatey twist.
-
Nutty Banana: Swap peanut butter for almond butter and add crushed almonds on top for a nutty crunch.
-
Green Boost: Throw in a handful of spinach or kale for added nutrients. The coffee flavor will balance it out perfectly!
-
Chai Spice: Mix in some ground cinnamon and ginger for a cozy chai-inspired vibe. Uplifting and aromatic!
-
Berry Blast: Add a handful of frozen mixed berries for a fruity kick—deliciously refreshing!
Chef’s Notes
This smoothie has become a ritual of mine, especially during the summer months. I perfected it during a particularly hot week when I needed a way to stay cool while getting my caffeine fix. On a funny note, I once tried to add too many ingredients in one go and ended up with a smoothie explosion that left my kitchen looking like a coffee-flavored Jackson Pollock painting! Lesson learned: less is sometimes more—especially when blending!
Over the years, I’ve adjusted this recipe based on input from friends and taste-testing sessions. I encourage you to make it your own, too!
FAQs and Troubleshooting
-
What if my smoothie is too thick?
If your smoothie is too thick, simply add a splash of milk (dairy or non-dairy) or cold brew to loosen it up and blend again until smooth. -
Can I use regular brewed coffee instead of cold brew?
Yes, you can! Just allow regular brewed coffee to cool completely before adding it to your smoothie. -
How can I make this smoothie vegan?
Use plant-based yogurt and swap the honey for maple syrup or agave nectar to keep it entirely plant-based! -
What if I don’t have a blender?
In a pinch, you can use a whisk to combine the ingredients in a large bowl, but the texture will be different! You can also try an immersion blender.
Nutritional Info
While I do believe in enjoying food without counting every calorie, I know many love to keep an eye on their nutrition. This Cold Brew Coffee Protein Smoothie is packed with protein, healthy fats, and vitamins to kick-start your day. Here’s a quick overview for one serving:
- Calories: Approximately 400
- Protein: 20g
- Carbohydrates: 40g
- Fats: 15g
- Fiber: 5g
There you have it! Your delicious Cold Brew Coffee Protein Smoothie is ready to brighten your mornings. As always, I’d love to hear how your creation turns out. Share your thoughts, favorite variations, or kitchen mishaps in the comments below! Happy blending, my friends!
Print
Cold Brew Coffee Protein Smoothie
- Total Time: 5 minutes
- Yield: 1 serving 1x
- Diet: Vegetarian
Description
A smooth and energizing Cold Brew Coffee Protein Smoothie perfect for busy mornings.
Ingredients
- 1 cup Cold Brew Coffee
- ½ cup Greek Yogurt
- 1 ripe Banana
- 2 tablespoons Peanut Butter
- 1–2 tablespoons Honey or Maple Syrup
- 1 cup Ice
- Optional Add-ins: protein powder, cinnamon, or spinach
Instructions
- Gather Your Ingredients: Line up all your ingredients on the counter.
- Add Cold Brew Coffee and Yogurt: Pour cold brew coffee and Greek yogurt into your blender.
- Toss in the Banana and Peanut Butter: Peel and chunk the banana, then add it along with peanut butter to the blender.
- Sweeten It Up: Drizzle honey or maple syrup into the mix.
- Add Ice: Throw in the ice to chill your smoothie.
- Blend Away: Secure the lid and blend until smooth.
- Taste Test: Adjust flavor and sweetness as desired.
- Pour and Enjoy: Serve in your favorite glass, optionally garnishing with cinnamon or cacao nibs.
Notes
For a dairy-free option, substitute yogurt with coconut yogurt. Adjust sweetness based on preference.
- Prep Time: 5 minutes
- Cook Time: 0 minutes
- Category: Drink
- Method: Blending
- Cuisine: American
Nutrition
- Serving Size: 1 smoothie
- Calories: 400
- Sugar: 18g
- Sodium: 150mg
- Fat: 15g
- Saturated Fat: 3g
- Unsaturated Fat: 8g
- Trans Fat: 0g
- Carbohydrates: 40g
- Fiber: 5g
- Protein: 20g
- Cholesterol: 10mg
Keywords: smoothie, cold brew, coffee, protein, breakfast
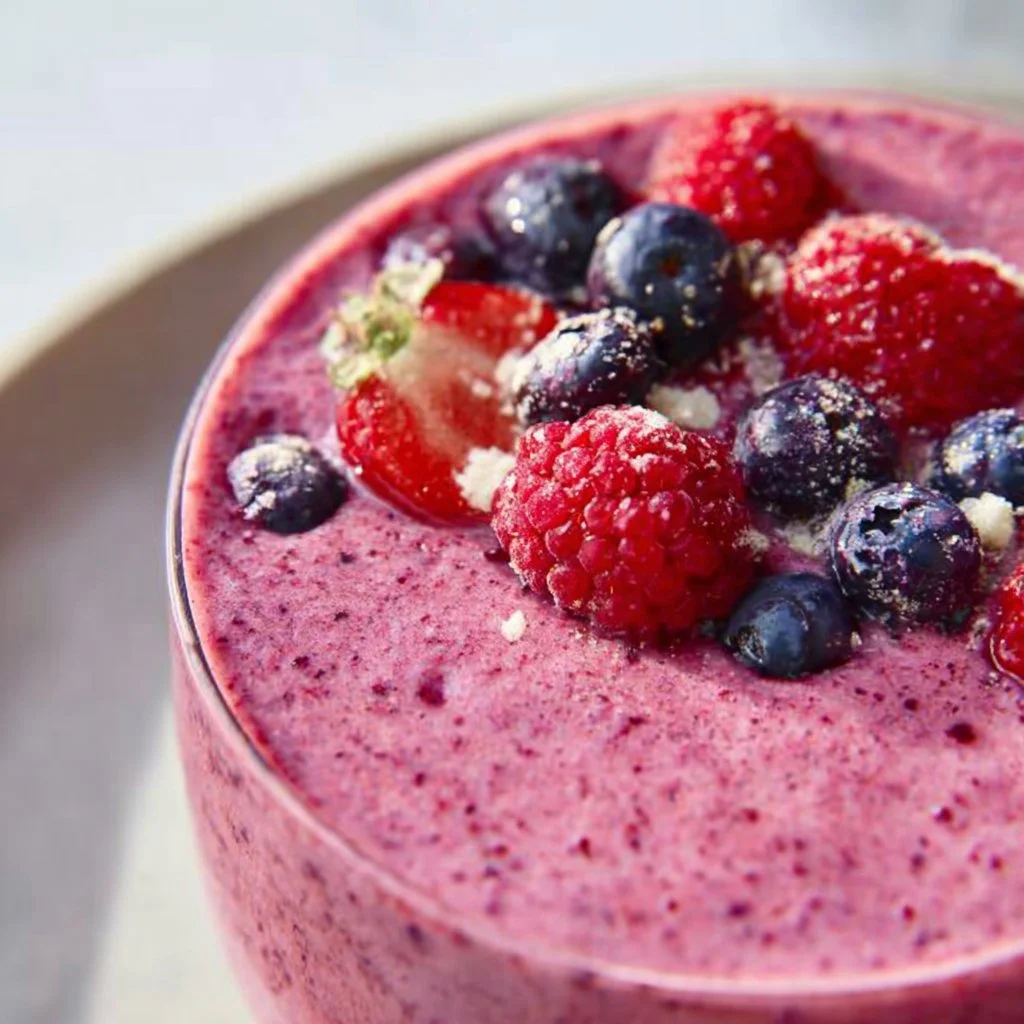
Berry Smoothie
Berry Smoothie: A Tasty Tribute to Simple Joys
Welcome to my kitchen, friends! Today, we’re diving into a refreshing treat that’s perfect for any time of day: the glorious berry smoothie! This vibrant blend of fruits is not only delicious but also packs in a nutritious punch—ideal for breakfast, a quick snack, or even a post-workout rejuvenator. Berries are like nature’s candy, bursting with flavor and color, and I can’t wait to share with you my favorite way to whip them up!
A Little Blast from the Past
Let me take you back to a sunny afternoon when I was about ten years old. It was the kind of day that whispered "summertime" with every gentle breeze. My mom was in the kitchen, blending up something special. The smell of ripe strawberries and tart blueberries wafted through the house, and I was instantly intrigued. She always had a knack for turning simple ingredients into magic, and this occasion was no different.
I watched in awe as she tossed fresh berries into her old, trusted blender—something that had probably seen better days, but still worked like a charm. With a quick flick of the switch, the blender roared to life, and soon the kitchen was filled with the delightful sound of rattling berries and smooth whirls of yogurt. I remember the excitement bubbling inside me; those little seeds of anticipation for the moment we would finally taste the colorful creation.
When she served the smoothie in our favorite glasses, decorated with funny farm animals, it was almost like a celebration. We topped them with a sprinkle of granola and a few whole berries for good measure. I took that first sip, and wow! It was like summer on my tongue—sweet, refreshing, and utterly delightful. Even now, I recreate that moment whenever I whip up a berry smoothie, filled with nostalgia and joy as I offer it to the people I love.
So, let’s get blending, shall we?
Ingredients
Here’s what you’ll need to create your berry smoothie masterpiece:
-
1 cup of mixed berries (frozen or fresh): Berries like strawberries, blueberries, blackberries, and raspberries all work wonderfully! Use frozen for that frosty texture, or fresh if they’re in season. Feel free to mix and match based on what you have available.
-
1 banana: The banana adds natural sweetness and creaminess. If you’re not a fan of bananas, you can substitute with half an avocado for a creamy texture without the banana flavor.
-
1 cup of Greek yogurt: Full of protein and probiotic goodness, Greek yogurt gives the smoothie thickness. If you’re lactose intolerant, try coconut yogurt or almond yogurt instead for a dairy-free alternative.
-
½ cup of milk (dairy or plant-based): This is your liquid base. Almond milk, oat milk, or even coconut water can replace regular milk for a delightful twist.
-
1 tablespoon of honey or maple syrup (optional): Depending on your sweetness preference, this can enhance the flavors. If you’re trying to keep it sugar-free, just skip this or add a Medjool date for natural sweetness.
-
A handful of spinach (optional): Want to sneak in some greens? Spinach is a fantastic way to boost the nutritional value without altering the taste too much.
With these ingredients on hand, you’re well on your way to creating a refreshing berry smoothie that will have everyone coming back for seconds!
Step-by-Step Instructions
-
Gather Your Tools: First things first, make sure you have all your ingredients and a high-speed blender on the counter. A good blender will efficiently break down the berries and banana, creating that velvety texture we all love.
-
Add First Ingredients: Start by placing your mixed berries into the blender. If you’re using fresh berries, give them a quick rinse beforehand. If they’re frozen, there’s no need to thaw—just toss them in!
-
In with the Banana: Next, peel the banana (your hands will thank you for this!). Break it into smaller pieces and add it to the blender. The smaller pieces will blend better and mix more evenly into your smoothie.
-
Add the Yogurt: Scoop out your Greek yogurt and plop that creamy goodness right into the mix. You can use flavored yogurt if you want some added zing, but plain Greek yogurt is a great go-to for versatility.
-
Pour in the Milk: Measure out your milk of choice and pour it over your smoothie base. Remember, you can adjust this to make your smoothie thicker or thinner—add more milk for a lighter smoothie or less for a thicker one.
-
Sweeten It Up: Add your honey or maple syrup if you like your smoothie on the sweeter side. Give it a little taste test—this is your creation, after all!
-
Spinach Boost (optional): If you’re adding spinach, toss it in now. This is a fantastic way to sneak in some greens without losing the berry flavor.
-
Blend, Baby, Blend: Secure the lid on your blender and pulse until you see a vertiginous whirl of colors! Blend for about 30 seconds to a minute, until your mixture is smooth and creamy. If you notice it getting stuck, stop and use a spatula to give it a little mix.
-
Taste and Adjust: Give it a little taste! Does it need more sweetness? A splash more milk? Adjust as needed until you find that perfect balance.
-
Serve and Enjoy: Once you’re happy with your mixture, pour it into your favorite glass—don’t forget to have a straw ready! If you’re feeling fancy, you can add a few whole berries or a sprinkle of granola on top for a cute garnish.
Serving Suggestions
There’s something so satisfying about a beautifully presented smoothie. Try serving it in clear glasses so that stunning, vibrant colors are on display. You could even add a few whole berries on top for decoration, or a dollop of yogurt for extra creaminess. Pair it with a light breakfast, like avocado toast or a slice of whole-grain bread topped with your favorite spreads, for a well-rounded meal.
Recipe Variations
Feeling a bit adventurous? Here are some twists and turns you can take to spice up your berry smoothie:
-
Tropical Twist: Add some pineapple or mango for a tropical vibe. It’ll give your smoothie a sunny, sweet kick!
-
Nutty Flavor: Incorporate a spoonful of almond or peanut butter for a protein boost and a delicious nutty flavor.
-
Chocolate Lover’s Dream: Toss in a tablespoon of cocoa powder or a scoop of chocolate protein powder for a decadent treat that doesn’t compromise nutrition.
-
Oats for Staying Power: Add in some rolled oats to keep you full longer. This is particularly good for a breakfast smoothie!
-
Chia Seed Power: Add a tablespoon of chia seeds for extra fiber and omega-3 fatty acids, perfect for that nourishing touch.
Chef’s Notes
Over the years, I’ve played with this recipe so much; it feels like an old friend who always surprises you! I remember a time when I attempted to make this smoothie for a brunch gathering, and I accidentally used sour yogurt. Let me tell you, that was a flavor adventure I never wanted to repeat!
This recipe has evolved to not just suit my taste but offer something for everyone. Feel free to make it your own! I love hearing about the little tweaks and changes you make to fit your family’s palate. That’s what cooking is all about: experimenting, laughing at the mishaps, and finding joy in the process.
FAQs and Troubleshooting
-
Why is my smoothie too thick?
If your smoothie is thicker than you’d like, simply add more milk a tablespoon at a time until you reach your desired consistency. Just remember, if you’re pouring it into a straw, you’ll want it sippable! -
Can I make this smoothie ahead of time?
Absolutely! You can prep the ingredients the night before and store them in the fridge. Then, in the morning, just blend and go! Alternatively, you can pour it into a mason jar and keep it in the fridge for later (just remember to give it a good shake before drinking!). -
What can I do with leftover smoothie?
If you have any leftover smoothie (which is a rarity in my house!), pour it into ice cube trays and freeze. Those cubes make a great addition to future smoothies or can be used to cool down beverages. -
Can I use other fruits?
Of course! While berries are the star here, you can easily substitute them with whatever fruit you have on hand—just adjust the other ingredients to keep the flavors balanced.
Nutritional Info (per serving, approx.)
- Calories: 250
- Protein: 12g
- Carbohydrates: 40g
- Dietary Fiber: 5g
- Sugars: 18g
- Fats: 4g
And there you have it—your guide to crafting the perfect berry smoothie. I hope you enjoy this as much as I do! Share your own twists in the comments below, and let’s keep this flavorful journey going together. Happy blending!
Print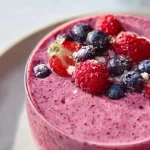
Berry Smoothie
- Total Time: 10 minutes
- Yield: 2 servings 1x
- Diet: Vegetarian
Description
A refreshing berry smoothie, perfect for breakfast or a snack, packed with flavor and nutrition.
Ingredients
- 1 cup mixed berries (frozen or fresh)
- 1 banana
- 1 cup Greek yogurt
- ½ cup milk (dairy or plant-based)
- 1 tablespoon honey or maple syrup (optional)
- A handful of spinach (optional)
Instructions
- Gather your tools: Make sure you have all your ingredients and a high-speed blender on the counter.
- Add the mixed berries into the blender.
- In with the banana: Peel and break it into smaller pieces before adding it to the blender.
- Add the yogurt and pour in the milk of choice.
- Sweeten it up with honey or maple syrup if desired.
- Toss in the spinach if using.
- Blend until the mixture is smooth and creamy.
- Taste and adjust for sweetness or consistency as needed.
- Serve: Pour into glasses and enjoy, garnishing as desired.
Notes
You can prep ingredients ahead of time and store them in the fridge. Freeze leftover smoothie in ice cube trays for later use.
- Prep Time: 10 minutes
- Cook Time: 0 minutes
- Category: Snack
- Method: Blending
- Cuisine: American
Nutrition
- Serving Size: 1 serving
- Calories: 250
- Sugar: 18g
- Sodium: 80mg
- Fat: 4g
- Saturated Fat: 2g
- Unsaturated Fat: 2g
- Trans Fat: 0g
- Carbohydrates: 40g
- Fiber: 5g
- Protein: 12g
- Cholesterol: 10mg
Keywords: smoothie, berry, healthy snack, breakfast, refreshing drink
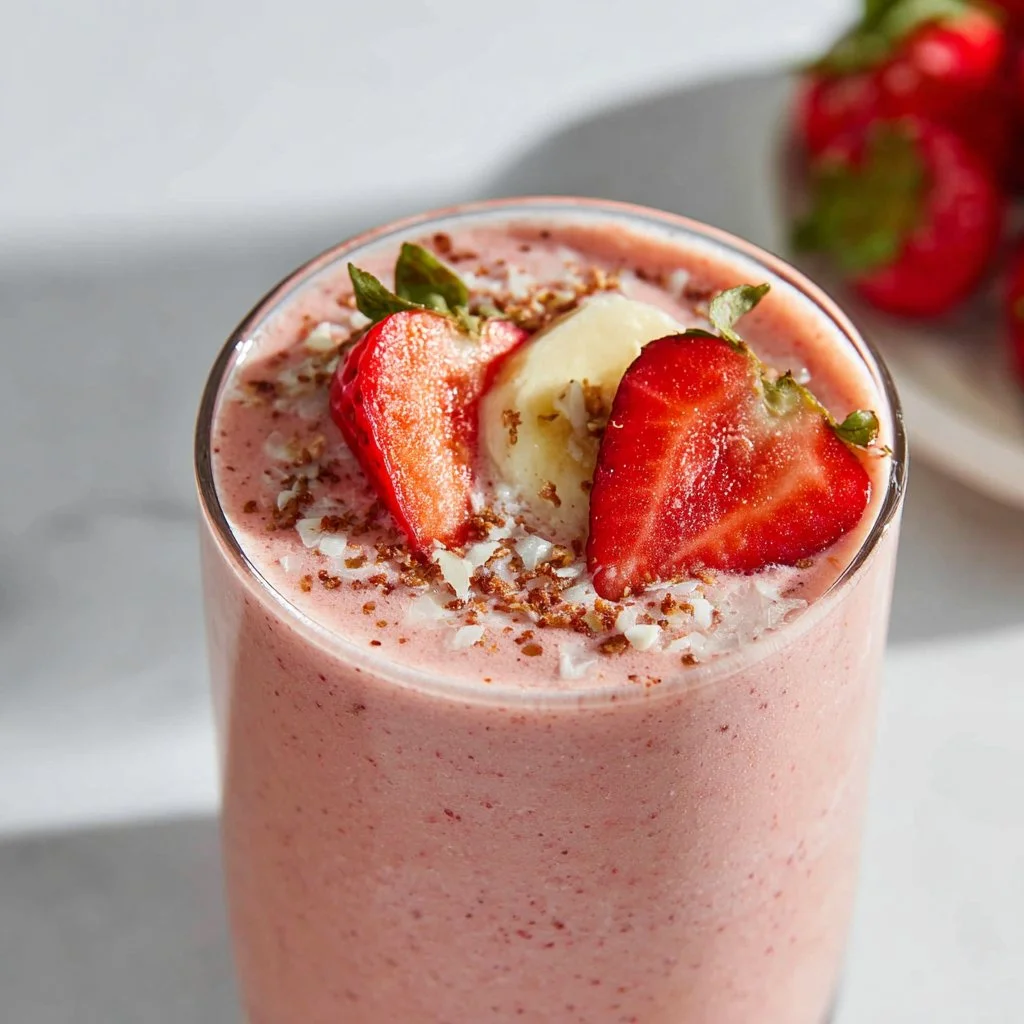
Strawberry Banana Smoothie
Strawberry Banana Smoothie: A Deliciously Nourishing Treat
Welcome to my kitchen, my fellow food lovers! Today, we’re diving into a vibrant and refreshing recipe that’s as delightful as a warm sunny day spent with friends—a strawberry banana smoothie! This drink is a staple in my household and has a special place in my heart. Not only is it a quick and easy way to get your daily dose of fruit, but it’s also a burst of nostalgia wrapped in a creamy, frosty glass. So grab your blender, and let’s blend some sunshine together!
A Taste of Nostalgia
I can still remember the first time my mom made a strawberry banana smoothie for me. It was a hot summer afternoon, and I came home from playing outside, parched and ready for something refreshing. I could smell the sweet strawberries before I even reached the kitchen. That fruity aroma wafting through the air made me feel right at home. I watched in wonder as my mom tossed fresh strawberries and ripe bananas into the blender, adding a splash of milk and a dollop of yogurt. The whirring of the blender and the bright pink hue that emerged was nothing short of magic. The first sip was like a mini-vacation for my taste buds, and ever since, I’ve been hooked. Now, as I share this recipe with you, it’s almost like passing down a delicious family tradition that we can all enjoy. So, let’s fire up those blenders!
Ingredients
Here’s what you’ll need for a creamy, dreamy strawberry banana smoothie:
-
2 cups fresh strawberries: The stars of our show! Choose ripe, red strawberries for maximum flavor. You can use frozen if they’re out of season—just remember to adjust the liquid!
-
1 ripe banana: Bananas add natural sweetness and creaminess. If you’re out of bananas, avocado is a great alternative for a similar texture.
-
1 cup plain yogurt: For a creamy base with a little tang. Greek yogurt ups the protein factor, but any yogurt will do, including dairy-free versions!
-
1/2 cup milk: Adjust the creaminess to your liking! Use almond milk, oat milk, or coconut milk for a dairy-free option.
-
1 tablespoon honey or maple syrup (optional): Sweeten to taste! Omit this if your strawberries are sweet enough, or use agave syrup for a vegan twist.
-
Ice cubes: To achieve that frosty consistency! Just a handful will do unless you prefer your smoothie extra icy.
Step-by-Step Instructions
-
Prep your ingredients: Start by washing your strawberries thoroughly. Remove the green tops and slice them in half. As for the banana, peel it and cut it into chunks. Trust me, this makes blending so much easier!
-
Combine ingredients in your blender: Place the halved strawberries, banana chunks, yogurt, and milk into your blender. If you’re adding honey or maple syrup, toss that in now, too!
-
Blend it up: Close your blender with the lid tightly (we don’t want any smoothie explosions, do we?). Start blending on low speed and gradually increase to high. Blend for about 30-60 seconds until smooth and creamy. If your smoothie is too thick, just add a splash more milk!
-
Check the consistency: Stop the blender and take a peek. If you want a thicker smoothie, add some ice and blend again. For a thinner texture, add more milk until it reaches your desired consistency.
-
Taste and adjust: Give it a little taste. If you’d like it sweeter, throw in a bit more honey or syrup and blend briefly to mix.
-
Serve it up: Pour the smoothie into tall glasses, and don’t forget to give it a little swirl for that fancy look! You can also garnish it with a few whole strawberries or banana slices on top for some extra pizazz.
Serving Suggestions
Serve your strawberry banana smoothie in a chilled glass with a colorful straw for that extra flair! It’s perfect for breakfast or as a refreshing snack after a workout. Consider pairing it with a slice of toast topped with peanut butter or some granola on the side for a wholesome meal.
Recipe Variations
Feeling adventurous? Here are a few fun twists to shake up your strawberry banana smoothie:
-
Berry Blast: Add a handful of blueberries or raspberries for an extra antioxidant boost.
-
Green Machine: Toss in a handful of spinach or kale for a vibrant green smoothie—don’t worry, you won’t taste it!
-
Tropical Paradise: Swap half the strawberries for pineapple or mango for a tropical flavor explosion.
-
Peanut Butter Banana: Add a tablespoon of peanut butter for a nutty twist that pairs beautifully with banana.
-
Cocoa Delight: Stir in a tablespoon of cocoa powder for a chocolatey version—perfect for chocolate lovers!
Chef’s Notes
This smoothie recipe has become one of my go-to snacks, evolving over the years as I’ve incorporated seasonal fruits and made it more adventurous. I often reminisce about those summer afternoons spent in my mom’s kitchen. It’s amazing how a simple smoothie can bring back such wonderful memories and create new ones with my friends and family. I love to experiment with whatever fruits I have on hand, and the blender has become my best friend!
FAQs and Troubleshooting
Q: Can I use frozen fruit?
A: Absolutely! Frozen strawberries and bananas work well. Just remember to adjust the milk for your desired consistency!
Q: My smoothie turned out too watery. What did I do wrong?
A: If you used a lot of ice or thin milk, that could be the reason. Next time, try less liquid or more fruit to thicken it up.
Q: Can I make this smoothie ahead of time?
A: While it’s best fresh, you can prep and store the ingredients in the fridge the night before. A quick blend in the morning will bring it back to life!
Q: What else can I add for extra nutrition?
A: Consider adding flaxseeds, chia seeds, or protein powder for an additional health punch!
Nutritional Info
This recipe provides a great balance of carbohydrates, protein, and healthy fats, making it ideal as a meal replacement or snack. Each serving is packed with vitamins, minerals, and antioxidants from the fresh fruit and yogurt, giving you a deliciously nutritious start to your day.
So there you have it, my friends! A simple yet scrumptious strawberry banana smoothie recipe that is bound to be a hit in your kitchen. May it fill your home with delightful aromas and happy memories, just like it has in mine. Happy blending!
Print
Strawberry Banana Smoothie
- Total Time: 10 minutes
- Yield: 2 servings 1x
- Diet: Vegetarian
Description
A refreshing strawberry banana smoothie that’s quick and easy to prepare, perfect for a nutritious treat.
Ingredients
- 2 cups fresh strawberries
- 1 ripe banana
- 1 cup plain yogurt
- 1/2 cup milk
- 1 tablespoon honey or maple syrup (optional)
- Ice cubes
Instructions
- Prep your ingredients: Start by washing your strawberries thoroughly, removing the green tops, and slicing them in half. Peel and cut the banana into chunks.
- Combine ingredients in your blender: Place strawberries, banana, yogurt, and milk into your blender. Add honey or syrup if desired.
- Blend it up: Tightly close the lid and blend starting on low, gradually increasing to high for about 30-60 seconds until smooth and creamy.
- Check the consistency: Stop the blender and adjust thickness by adding ice or more milk as desired.
- Taste and adjust: Taste your smoothie and add more honey or syrup if you want it sweeter, then blend briefly.
- Serve it up: Pour into tall glasses, garnish with strawberries or banana slices, and enjoy!
Notes
This smoothie can be made with frozen fruits—just adjust milk for desired consistency.
- Prep Time: 10 minutes
- Cook Time: 0 minutes
- Category: Beverage
- Method: Blending
- Cuisine: American
Nutrition
- Serving Size: 1 serving
- Calories: 250
- Sugar: 17g
- Sodium: 70mg
- Fat: 5g
- Saturated Fat: 2g
- Unsaturated Fat: 3g
- Trans Fat: 0g
- Carbohydrates: 45g
- Fiber: 3g
- Protein: 10g
- Cholesterol: 10mg
Keywords: smoothie, strawberry banana, healthy drink, refreshing, quick breakfast
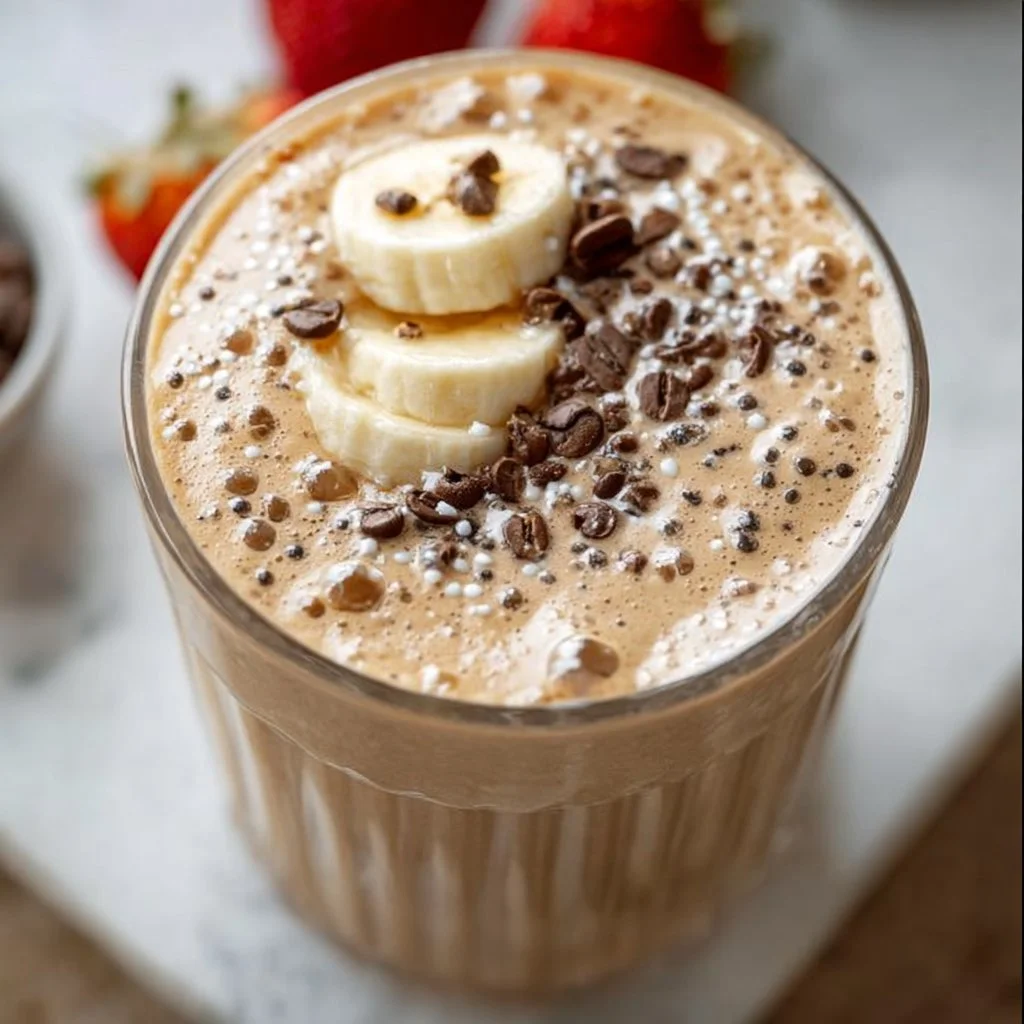
Creamy Coffee Smoothie
The Ultimate Creamy Coffee Smoothie: A Deliciously Energizing Start to Your Day
Welcome to my kitchen! I’m Olivia Bennett, and today, I’m thrilled to share one of my all-time favorite energizing recipes: the Creamy Coffee Smoothie. If you’ve ever found yourself craving that perfect blend of coffeehouse vibes with the convenience of your own home, you’re in for a treat! This creamy delight is like a hug in a glass, combining rich coffee flavor with wholesome ingredients that make it even better for your body and soul.
Mornings can be chaotic, right? Between the hustle and bustle of getting everyone out the door and tackling the day’s tasks, it’s all too easy to skip breakfast. Trust me; I’ve been there! But that’s where this smoothie comes in—it’s quick, delicious, and oh-so-satisfying. Think of it as your secret weapon for those busy mornings when you need a little pick-me-up and a nutritious breakfast rolled into one. This Creamy Coffee Smoothie is ready to power you through your day, and it’s perfect for those days when you want to feel like you’re indulging but know you’re truly nourishing your body.
Let’s dive into the memories behind this recipe. It all started during my college years. Picture this: my tiny kitchen was crammed full of mismatched furniture, with a coffee maker constantly buzzing and a blender that was definitely seen better days. One particular morning, feeling bleary-eyed and needing to jumpstart my brain for a big exam, I rummaged through my pantry and found some instant coffee and the last bits of Greek yogurt. Voila! The first sip was transformational—smooth, creamy, and just sweet enough to make me forget how many late nights I’d spent studying. Since then, I’ve tweaked and perfected this recipe to create the ultimate morning smoothie that can be enjoyed anytime you need a delicious caffeine fix.
Now that you’ve got a taste of the story behind this delightful drink let’s get to the good stuff! Here’s everything you need to whip up your own Creamy Coffee Smoothie.
Ingredients
-
1 cup brewed coffee: It’s better if you use chilled coffee to keep the smoothie refreshing. You can brew some the night before and pop it in the fridge! If you’re in a pinch, instant coffee will also work—just dissolve 1-2 tablespoons in warm water.
-
1 banana: This adds natural sweetness and creamy texture. If you don’t have one, frozen bananas are a superb alternative. They make the smoothie even thicker!
-
½ cup Greek yogurt: For that luscious creaminess and a protein boost! You can swap it for dairy-free yogurt if you’re keeping it plant-based, or even cottage cheese for a different flavor profile.
-
1 tablespoon maple syrup (or honey): This is optional, but a little sweetener takes it to another level. You can also use agave or stevia if you’re watching your sugar intake.
-
1 tablespoon peanut butter (or almond butter): This gives a nutty flavor that feels indulgent! Swap with sunflower seed butter for nut-free options.
-
½ cup almond milk (or any milk of your choice): Adding this helps adjust the thickness. Use coconut milk for a tropical twist or oat milk for a creamier texture.
-
A pinch of cinnamon: This subtle spice adds warmth. You can also experiment with vanilla extract for an aromatic kick!
Step-by-Step Instructions
-
Brew Your Coffee: Start by brewing your favorite coffee. If you like a rich flavor, go for dark roast. Let it cool while you prepare the other ingredients, or better yet, brew it the night before!
-
Prepare the Ingredients: Grab your blender and toss in the banana. If you’re using a frozen banana, no need to worry about thawing—it’ll help create a cold, creamy texture!
-
Add the Yogurt: Next, add the Greek yogurt. If you want a thicker smoothie, you can up the amount of yogurt or even add a scoop of your favorite protein powder.
-
Sweeten It Up: Pour in your maple syrup (or honey) and the peanut butter. Remember, if you’re using flavored nut butter, it can add an exciting twist to your smoothie!
-
Include Your Coffee and Milk: Add the cooled coffee and almond milk. Feel free to adjust the milk based on the thickness you like—more milk for a thinner smoothie, less for a thicker one.
-
Spice It Up: Toss in a pinch of cinnamon for that extra flavor burst. It’s amazing how a little spice can elevate your smoothie!
-
Blend It All Together: Put the lid on your blender (and make sure it’s secure—no one wants a smoothie explosion!). Blend on high until everything is smooth and creamy. Stop to scrape down the sides if needed.
-
Taste and Adjust: Give it a quick taste! If you feel it needs a little more sweetness, add more maple syrup or banana. If it’s too thick for your liking, add a splash more milk.
-
Serve Up Some Smiles: Pour your smoothie into a glass (or a travel mug if you’re on the go) and enjoy immediately. You can even top it with a sprinkle of cinnamon or a few chocolate chips for some fun.
Serving Suggestions
For a delightful brunch treat, serve your Creamy Coffee Smoothie alongside a slice of banana bread or some homemade granola. If you want a fun twist, add a dollop of whipped cream on top and a drizzle of chocolate syrup to turn it into a special dessert smoothie!
Recipe Variations
-
Mocha Madness: Add a tablespoon of unsweetened cocoa powder for a chocolatey mocha flavor. Delicious!
-
Nutty Banana: Swap out the peanut butter for hazelnut spread to create a Nutella-inspired treat.
-
Spicy Ginger: Throw in a small piece of fresh ginger for a spicy kick that pairs beautifully with the coffee.
-
Tropical Coffee: Replace the almond milk with coconut milk and add a handful of pineapple chunks for a tropical twist.
-
Protein-Packed: Add a scoop of your favorite protein powder and a handful of spinach for an energized and nutritious boost.
Chef’s Notes
This Creamy Coffee Smoothie has evolved quite a bit over the years. I remember that first trial with instant coffee and yogurt; it has transformed into a go-to breakfast that powers my mornings. Experimenting with flavors has been the most fun part of this journey! Each twist offers something new, and it’s exciting to see how a simple recipe can become a canvas for creativity. Don’t hesitate to adjust it to your personal tastes; the kitchen is your playground!
FAQs and Troubleshooting
-
My smoothie is too thick; how can I fix it?: Simply add a splash more milk and blend again! Adjust based on your desired thickness.
-
What if I don’t like coffee?: No problem! You can replace coffee with brewed chai or matcha for a different flavor profile that still gives you that morning boost.
-
Can I prepare it the night before?: Absolutely! Just blend all ingredients except the milk, store it in the fridge, and add the milk in the morning before blending again to freshen it up.
-
How long will it last in the fridge?: Smoothies are best enjoyed fresh, but they can be stored in the fridge for up to 24 hours. Give it a good shake or stir before drinking!
Nutritional Info
Each serving (1 smoothie) is approximate:
- Calories: 350
- Protein: 15g
- Carbohydrates: 50g
- Fat: 12g
- Fiber: 5g
Start your day right with this Creamy Coffee Smoothie, and elevate your breakfast game! I hope you enjoy making this recipe as much as I love sharing it with you. Here’s to more delicious mornings ahead!
Print
Creamy Coffee Smoothie
- Total Time: 10 minutes
- Yield: 1 serving 1x
- Diet: Vegetarian
Description
A delicious and energizing smoothie that combines rich coffee flavor with wholesome ingredients, perfect for busy mornings.
Ingredients
- 1 cup brewed coffee (preferably chilled)
- 1 banana (or frozen banana)
- ½ cup Greek yogurt (or dairy-free yogurt)
- 1 tablespoon maple syrup (or honey)
- 1 tablespoon peanut butter (or almond butter)
- ½ cup almond milk (or any milk of your choice)
- A pinch of cinnamon
Instructions
- Brew your coffee and let it cool.
- Prepare the banana and add it to a blender.
- Add the Greek yogurt to the blender.
- Sweeten the mixture with maple syrup and peanut butter.
- Include the cooled coffee and almond milk.
- Spice it up with a pinch of cinnamon.
- Blend everything until smooth and creamy.
- Taste and adjust sweetness or consistency as desired.
- Serve in a glass and enjoy immediately.
Notes
Feel free to customize with different nut butters, sweeteners, or add-ins like protein powder or fresh ginger.
- Prep Time: 10 minutes
- Cook Time: 0 minutes
- Category: Breakfast
- Method: Blending
- Cuisine: American
Nutrition
- Serving Size: 1 smoothie
- Calories: 350
- Sugar: 18g
- Sodium: 120mg
- Fat: 12g
- Saturated Fat: 2g
- Unsaturated Fat: 8g
- Trans Fat: 0g
- Carbohydrates: 50g
- Fiber: 5g
- Protein: 15g
- Cholesterol: 10mg
Keywords: smoothie, coffee, breakfast, healthy, energizing
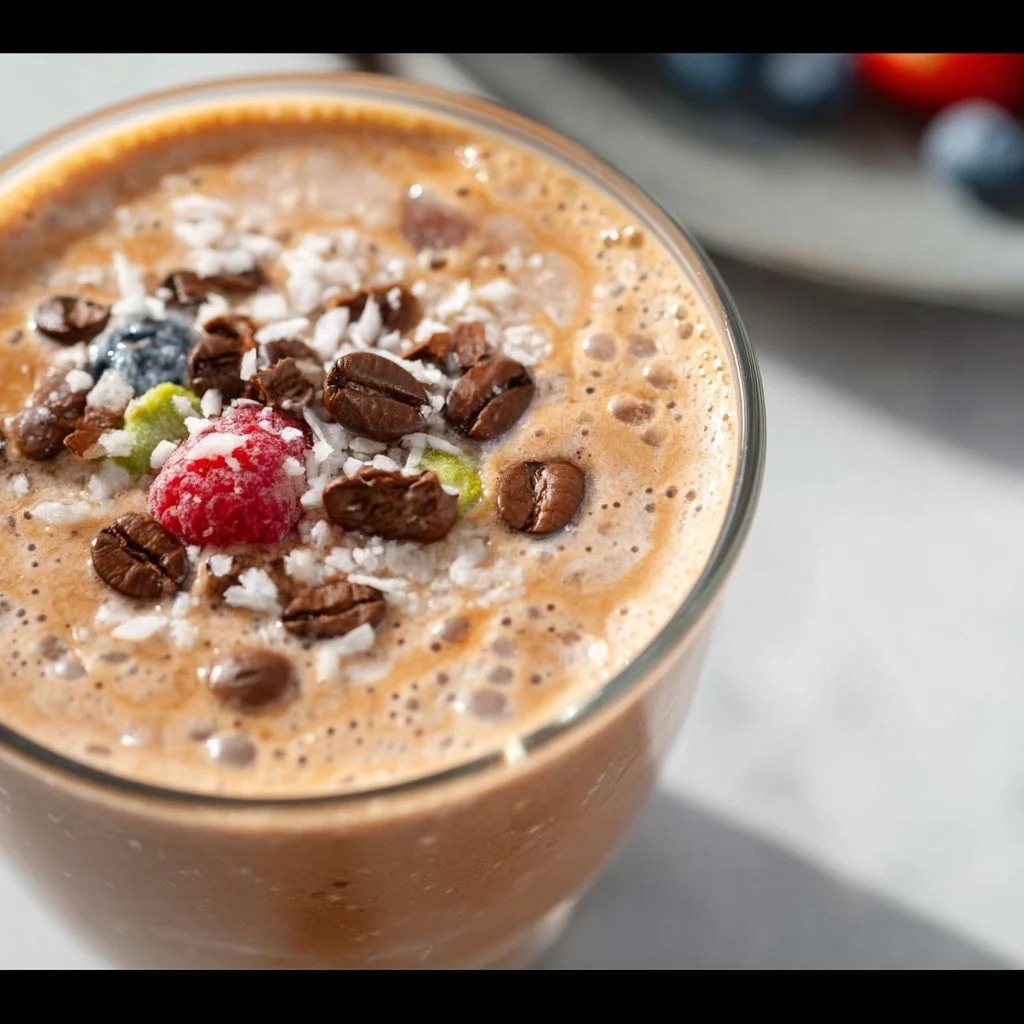
Coffee Smoothie
Energizing Coffee Smoothie: A Flavorful Start to Your Day
Welcome to my cozy kitchen, my lovely readers! Today, we’re diving into a deliciously energizing coffee smoothie that’s sure to kickstart your mornings with a burst of flavor and a boost of energy. If you adore the rich aroma of freshly brewed coffee and the creamy, delightful texture of a smoothie, you’re in for a real treat. This easy coffee smoothie combines the boldness of coffee with wholesome ingredients, transforming your regular cup of joe into a breakfast favorite!
There’s something so captivating about the morning ritual of brewing coffee. The aroma fills the kitchen, calling everyone to wake up and join in. This smoothie, however, was inspired by my late-night coffee-fueled study sessions during my college years. I remember huddling in my tiny apartment, messy hair, and half-read textbooks scattered everywhere, while trying to stay alert for that final push to finish my assignments. On one particularly groggy morning, I decided to whip up a quick smoothie, tossing in leftover coffee from the day before, and voilà! That’s how my love for coffee smoothies was born—a delicious meld of convenience and comfort.
So, grab your blender, and let’s get mixing! This recipe is perfect for busy mornings, lazy weekends, or whenever you crave something tasty and satisfying. Whether you’re looking to combine your love for coffee with the wholesomeness of fruits or just need a quick breakfast fix, this smoothie delivers. Without further ado, here are the ingredients and how to whip up your very own coffee smoothie!
Ingredients
-
1 cup brewed coffee, cooled
A key ingredient that provides that rich, robust flavor. Feel free to use decaf if you’re looking to avoid caffeine, or try cold brew for a smoother taste. -
1 banana (fresh or frozen)
This adds natural sweetness and creaminess. Frozen bananas work great here, giving your smoothie a thick and indulgent texture. Plus, they’re perfect for using up any overripe bananas lying around! -
1/2 cup Greek yogurt
Full of protein, Greek yogurt will give your smoothie a nice creamy consistency while boosting its nutritional value. Substitute with plant-based yogurt for a vegan option. -
1 tablespoon almond butter (or peanut butter)
This adds a delightful nuttiness and healthy fats. If you’re allergic to nuts, sunflower seed butter is a great substitute! -
1 tablespoon honey or maple syrup
A natural sweetener to balance the bitterness of coffee. Adjust based on how sweet you like your smoothie, or skip it altogether if you prefer your drinks less sweet. -
1/2 cup milk of choice (dairy or plant-based)
Adjust the thickness of your smoothie with milk. Almond, oat, or regular dairy milk all work well. Use unsweetened varieties for a healthier choice. -
Optional: Ice cubes
If you’re using fresh bananas, some ice can help chill your smoothie. Perfect for those hot summer mornings!
Step-by-Step Instructions
-
Prepare Your Coffee
Brew your coffee as you normally would, but keep in mind that letting it cool enhances the smoothie experience. You can make your coffee the night before and store it in the fridge. This way, you’ll have cold coffee ready to go when inspiration strikes! -
Add Ingredients to Blender
Start with the cooled coffee in your blender. Next, layer in the banana, Greek yogurt, almond butter, honey (or maple syrup), and milk. If you’re feeling adventurous, throw in some ice cubes here too—especially if you love that ice-cold coffee vibe. -
Blend Until Smooth
Secure the lid and blend all the ingredients together on high speed. If your smoothie needs a little extra love, feel free to scrape down the sides of the blender to ensure all ingredients are well combined. Blend until you reach a silky-smooth consistency; this usually takes around 30-60 seconds. -
Taste and Adjust
Here’s where you get to be the chef! Give your smoothie a taste. Want it sweeter? Add another drizzle of honey or a splash more milk. Too strong? Add a bit more milk or yogurt to lighten it up. You’re the artist here, so don’t be afraid to adjust it to your liking! -
Serve with Style
Pour your delightful coffee smoothie into a tall glass or mason jar for a nice aesthetic touch. Top with a sprinkle of cinnamon or a drizzle of almond butter if you’re feeling fancy. -
Enjoy Immediately
This smoothie is best enjoyed right away when it’s fresh and icy cold. Grab a straw or a spoon and dive in!
Serving Suggestions
Serving this coffee smoothie is all about the presentation! You can embellish your glass with some whipped cream and a sprinkle of cocoa powder if you’re treating yourself, or add a few chocolate shavings for an extra indulgent twist. For a nice crunch, toss in some granola or chopped nuts on top. Enjoy it as a breakfast staple or a mid-afternoon pick-me-up!
Recipe Variations
- Mocha Delight: Add a tablespoon of unsweetened cocoa powder for a chocolatey treat!
- Spiced Chai Coffee: Combine a teaspoon of chai spice mix for a warm, comforting twist.
- Minty Fresh: Toss in a handful of fresh mint leaves for a refreshing mint mocha experience.
- Protein Power: Add a scoop of your favorite protein powder for an extra kick, perfect post-workout!
- Vegan Bliss: Substitute Greek yogurt with coconut yogurt and opt for plant-based milk and sweeteners for a completely vegan smoothie.
Chef’s Notes
I remember one weekend waking up late and completely missing breakfast; I had the idea to blend my leftover coffee with whatever I could find in the fridge. What started as a desperation move turned into an exciting kitchen experiment! Now, I can’t start a busy day without whipping up this delicious coffee smoothie; it’s become a staple in my house, perfect for those on-the-go moments but with all the comfort of a homemade treat.
Not only is this smoothie wonderfully energizing, but it’s also a reminder of the little joys in the kitchen—exploring flavors and making dishes that awaken our senses. Plus, who doesn’t love the fact that you can use yesterday’s coffee in the coolest way?
FAQs and Troubleshooting
-
Can I make this smoothie ahead of time?
While this smoothie is best enjoyed fresh, you can prep the ingredients the night before and store them in your fridge. Just blend in the morning! -
Why is my smoothie too thick?
If your smoothie turns out thicker than you’d like, just add a bit more milk or water to loosen it up. Blend again to reach your desired consistency! -
Can I use instant coffee?
Absolutely! If instant coffee is your go-to, just dissolve it in your preferred amount of water and follow the same steps. -
What if my smoothie tastes too bitter?
Coffee can be a bit tricky! If it’s too bitter for your taste, add a touch more banana or a pinch of sweetener, and blend again. You can never go wrong with a little more love!
Nutritional Info (if applicable)
While not necessary, here’s a rough nutritional breakdown to keep in mind:
- Calories: Approximately 300
- Protein: 10-15g (depending on yogurt and milk choices)
- Carbohydrates: 40g
- Fats: 10g (depends on nut butter choice)
So there you have it—a delightful coffee smoothie recipe that’s as comforting as it is energizing. I hope you enjoy making it as much as I do. Grab your blender, unleash your inner barista, and watch how this simple recipe can brighten up your day. Happy blending, and let’s keep cooking together!
Print
Energizing Coffee Smoothie
- Total Time: 5 minutes
- Yield: 1 serving 1x
- Diet: Vegetarian
Description
A deliciously energizing coffee smoothie that combines the boldness of coffee with wholesome ingredients for a flavorful start to your day.
Ingredients
- 1 cup brewed coffee, cooled
- 1 banana (fresh or frozen)
- 1/2 cup Greek yogurt
- 1 tablespoon almond butter (or peanut butter)
- 1 tablespoon honey or maple syrup
- 1/2 cup milk of choice (dairy or plant-based)
- Optional: ice cubes
Instructions
- Prepare your coffee. Brew your coffee as you normally would, but let it cool for the best experience.
- Add ingredients to the blender. Start with the cooled coffee, then layer in the banana, Greek yogurt, almond butter, honey, and milk.
- Blend until smooth. Secure the lid and blend until you reach a silky-smooth consistency, about 30-60 seconds.
- Taste and adjust. Give your smoothie a taste and adjust sweetness or thickness as desired.
- Serve with style. Pour your smoothie into a glass and garnish as desired.
- Enjoy immediately for the best flavor.
Notes
Try adding cocoa powder for a mocha version or chai spices for a comforting twist. You can prep ingredients the night before for a quick breakfast.
- Prep Time: 5 minutes
- Cook Time: 0 minutes
- Category: Breakfast
- Method: Blending
- Cuisine: American
Nutrition
- Serving Size: 1 serving
- Calories: 300
- Sugar: 20g
- Sodium: 100mg
- Fat: 10g
- Saturated Fat: 2g
- Unsaturated Fat: 8g
- Trans Fat: 0g
- Carbohydrates: 40g
- Fiber: 3g
- Protein: 15g
- Cholesterol: 5mg
Keywords: coffee smoothie, energizing breakfast, healthy smoothie, quick breakfast, nutritious drink
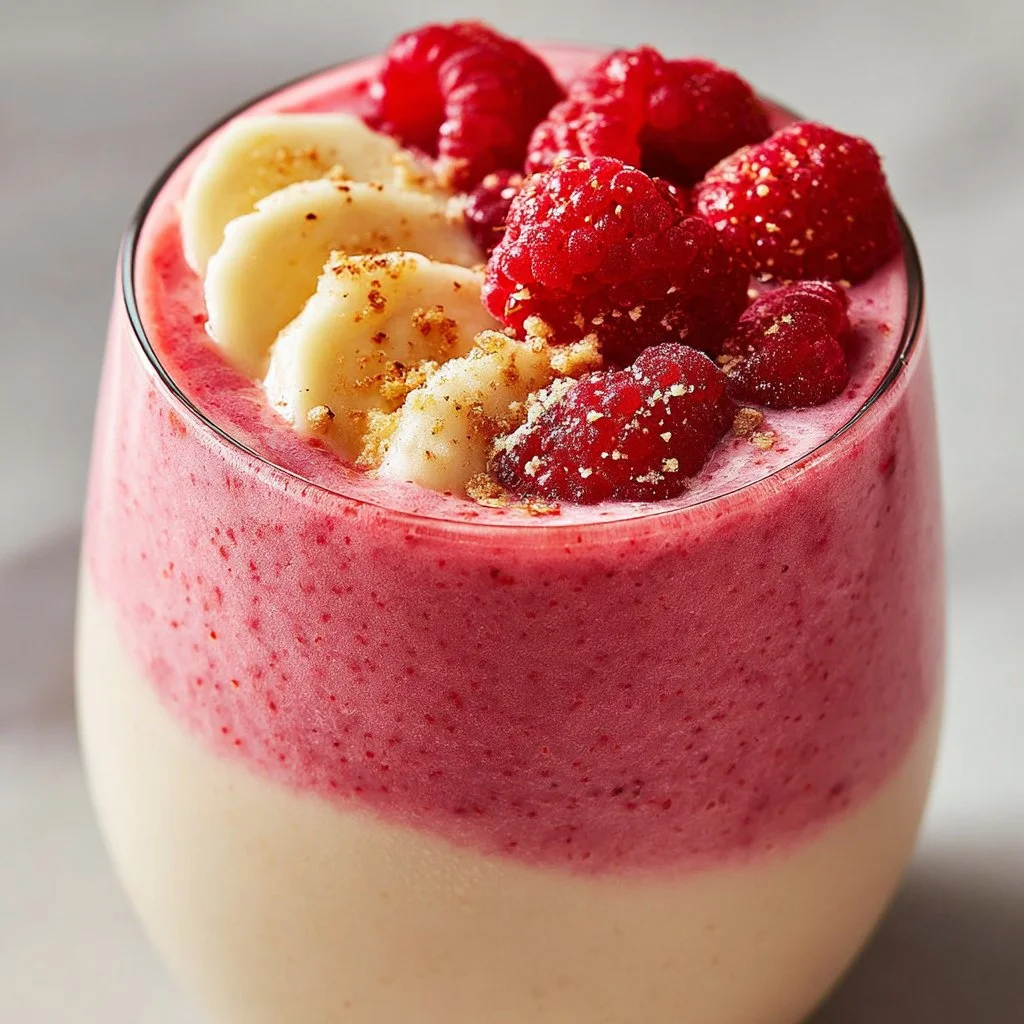
Strawberry-Raspberry-Banana Protein Smoothie: Never was it healthier!
Never Was It Healthier: Strawberry-Raspberry-Banana Protein Smoothie!
Welcome to my cozy kitchen! Today, we’re diving into a concoction that’s as vibrant as a summer day — the Strawberry-Raspberry-Banana Protein Smoothie. If you’ve ever looked in your fridge and felt that familiar tug toward something delicious yet nutritious, this delightful drink is exactly what you need. It’s not just a smoothie; it’s a celebration of flavors that’s packed with protein and sure to keep you fueled all day long.
Smoothies are the ultimate canvas for your culinary creativity. They can be tailored to suit morning routines, fitness journeys, or even that afternoon slump. Plus, they’re quick to whip up, meaning you can blend in all the goodness in just five minutes! The combination of strawberries, raspberries, and bananas not only fills your kitchen with a sweet fragrance but also brings a splash of color to your glass that just invites you to take a sip.
Now, you might be thinking, “Olivia, I’ve had smoothies before! What makes yours so special?” Well, grab your blender, because we’re about to elevate the classic smoothie with not just flavor and texture but also a protein boost that will keep you satisfied. Whether you’re post-workout or simply craving something refreshing, this Strawberry-Raspberry-Banana Protein Smoothie is the answer!
What I love about this recipe is how it brings together different tastes and textures into one lovely glass. The tartness of the raspberries, the sweetness of strawberries, and the creaminess of the banana create a dance party for your taste buds. And when you add in your choice of protein — whether it’s a scoop of protein powder, Greek yogurt, or nut butter — you end up with a smoothie that not only tastes fantastic but also supports your health goals. Let’s get this smoothie party started!
A Taste of Nostalgia
Smoothies have been my go-to breakfast since I could remember; they symbolize warmth and love for me. I vividly recall mornings spent in my mother’s kitchen, where she’d effortlessly blend up various fruits and veggies into colorful concoctions. The loud whir of the blender became a morning anthem, signaling the start of our day together. She always used whatever was fresh in the fridge, creating unique flavor combinations.
One of my favorite smoothie experiments was after a summer trip to the farmer’s market. Armed with fresh strawberries and raspberries, I watched as she transformed those vibrant berries and a single banana into our breakfast treat. We’d sip our smoothies from reusable cups, feeling like we had whisked summer into our morning routine.
As I’ve grown into my own cooking style, I often find myself turning back to that nostalgic swirl of flavors and colors. And of course, I had to add a protein twist to make it more than just a morning treat — it’s now a powerhouse smoothie for every occasion!
Ingredients
Here’s what you’ll need to whip up your very own Strawberry-Raspberry-Banana Protein Smoothie:
-
1 cup fresh strawberries
Sweet and juicy strawberries are the star of our show! They are packed with vitamin C and antioxidants, making them a nutritious addition. If strawberries are out of season, feel free to use frozen ones, which are often picked at peak ripeness and are just as delicious! -
1 cup fresh raspberries
These little gems not only add a tart zing but are also high in fiber. If you can’t find fresh raspberries, don’t sweat it! Frozen raspberries work perfectly, too, and you won’t lose any flavor. -
1 ripe banana
A banana brings creaminess to our smoothie, along with natural sweetness and potassium. If you’re trying to cut back on sugar, you can reduce the amount of banana or substitute it with half an avocado for a creamy base with healthy fats. -
1 scoop protein powder (your choice)
Whether you choose whey, pea, or hemp protein, this addition gives your smoothie an awesome boost. Look for varieties with no artificial sweeteners to keep it wholesome, or you can skip it altogether and opt for Greek yogurt instead! -
3/4 cup almond milk (or milk of choice)
Almond milk keeps this smoothie dairy-free and light. Use any milk you love, like oat or coconut milk, and adjust for desired thickness. -
1 tablespoon honey (optional)
Sweeten to your liking! Depending on how sweet your fruit is, you might want a little drizzle of honey. For a vegan option, maple syrup works beautifully! -
Ice cubes (optional)
If you prefer your smoothie chilled, simply toss in a handful of ice cubes before blending!
Step-by-Step Instructions
Making your Strawberry-Raspberry-Banana Protein Smoothie is a breeze! Here’s how to do it, step by step:
-
Prep Your Ingredients
Start by washing your strawberries and raspberries. If they’re fresh, just give them a gentle rinse. If using frozen, you can directly add them to the blender — no thawing needed! Peel your ripe banana and slice it for easier blending. -
Measure and Combine
In your blender, add the strawberries, raspberries, banana, and your scoop of protein powder. Pour in the almond milk. If you’re going for that honey sweetness, drizzle it in now. And remember, you can always adjust the sweetness at the end! -
Blend Until Smooth
Now, secure that lid and blend on high for about 30–60 seconds. You want it to reach a smooth and creamy consistency without any chunks. But don’t worry if it’s a bit thick — you can add more almond milk to reach your desired texture. -
Taste and Adjust
Give your smoothie a quick taste. If you think it needs more sweetness, add a touch more honey or maple syrup, and blend again briefly. You want it just right for your palate! -
Serve and Enjoy
Once you’re happy with the flavor and texture, pour your smoothie into your favorite glass or tumbler. If you’re feeling fancy, add a few whole raspberries or strawberries on top for garnish! A little sprinkle of chia seeds could add a fun texture, too, and make it Instagram-worthy.
Serving Suggestions
The best part about this Strawberry-Raspberry-Banana Protein Smoothie? You can enjoy it any time of the day! It makes for a fabulous breakfast, a post-workout revitalizer, or a snack between meals. You can drink it on its own, or pair it with a slice of whole grain toast topped with almond butter or a handful of nuts for a balanced bite.
Recipe Variations
Here are a few creative twists to keep this smoothie fresh and exciting:
-
Tropical Twist: Add a half-cup of mango for a tropical flair. The sweetness of mango pairs beautifully with the berries!
-
Green Machine: Toss in a handful of spinach or kale for an added nutritional boost and a vibrant green color.
-
Nutty Delight: Blend in a tablespoon of almond butter or peanut butter for a nutty flavor and added creaminess.
-
Choco-Berry: Want to satisfy that chocolate craving? Add a tablespoon of cocoa powder or chocolate protein powder!
-
Berry Blast: Experiment with other berries like blueberries or blackberries for an explosion of flavor!
Chef’s Notes
I’ve played around with this recipe over the years, and it’s amazing how just a couple of tweaks can bring a whole new vibe to your smoothie! I remember the first time I tried adding spinach — it felt like a bold move, but I was hooked! The greens became a staple, making every smoothie richer in nutrients without compromising taste.
And while I love playing with flavors and ingredients, what remains constant is that each blend brings a wave of joy and comfort. I consider this smoothie a form of self-care — something I can make for myself that’s both delicious and packed with goodness!
FAQs and Troubleshooting
1. My smoothie is too thick; how can I fix it?
No problem! Simply add a splash of almond milk (or whatever milk you’re using) and blend again. This will help thin it out to your desired consistency.
2. Can I use frozen fruits?
Absolutely! Frozen fruits work wonderfully, and they’ll give your smoothie a frosty texture. Just keep in mind that they might make your smoothie even thicker, so add a little extra liquid if needed.
3. What if I don’t have protein powder?
You can always replace it with Greek yogurt or cottage cheese for a creamy texture and protein boost. If you prefer to keep it simple, you can make it without any additional protein!
4. How long will my smoothie last in the fridge?
Smoothies are best enjoyed fresh, but if you have leftovers, you can store them in an airtight container for up to 24 hours in the fridge. Just give it a good shake or stir before drinking, as separation may occur.
Nutritional Info
Each serving of this Strawberry-Raspberry-Banana Protein Smoothie offers an energizing boost, packing roughly 300 calories, depending on specific ingredients and proportions used. With protein, healthy fats, and a blend of vitamins from the fruit, it’s a wholesome choice to fuel your day.
As you can see, making your own Strawberry-Raspberry-Banana Protein Smoothie is not just simple — it’s a flavorful joyride through the world of nutritious ingredients! So, gather those ingredients and get blending! Your taste buds will thank you. Cheers to delicious and healthy living!
Print
Strawberry-Raspberry-Banana Protein Smoothie
- Total Time: 5 minutes
- Yield: 2 servings 1x
- Diet: Vegetarian, Vegan Option
Description
A vibrant and nutritious protein smoothie packed with strawberries, raspberries, and bananas, perfect for fueling your day.
Ingredients
- 1 cup fresh strawberries
- 1 cup fresh raspberries
- 1 ripe banana
- 1 scoop protein powder (your choice)
- 3/4 cup almond milk (or milk of choice)
- 1 tablespoon honey (optional)
- Ice cubes (optional)
Instructions
- Prep your ingredients by washing the strawberries and raspberries. Peel and slice the banana.
- Measure and combine in a blender: strawberries, raspberries, banana, protein powder, and almond milk. Add honey if desired.
- Blend until smooth, about 30–60 seconds.
- Taste the smoothie and adjust sweetness as necessary, blending briefly if needed.
- Serve in your favorite glass, adding garnishes if desired.
Notes
Adjust the sweetness with honey or maple syrup as per your taste. For a vegan option, replace protein powder with Greek yogurt or skip it altogether.
- Prep Time: 5 minutes
- Cook Time: 0 minutes
- Category: Beverage
- Method: Blending
- Cuisine: American
Nutrition
- Serving Size: 1 serving
- Calories: 300
- Sugar: 25g
- Sodium: 200mg
- Fat: 5g
- Saturated Fat: 0.5g
- Unsaturated Fat: 4g
- Trans Fat: 0g
- Carbohydrates: 60g
- Fiber: 8g
- Protein: 15g
- Cholesterol: 0mg
Keywords: smoothie, protein smoothie, healthy drink, strawberry raspberry banana
Raspberry Vanilla Breakfast Smoothie – Healthy Start!
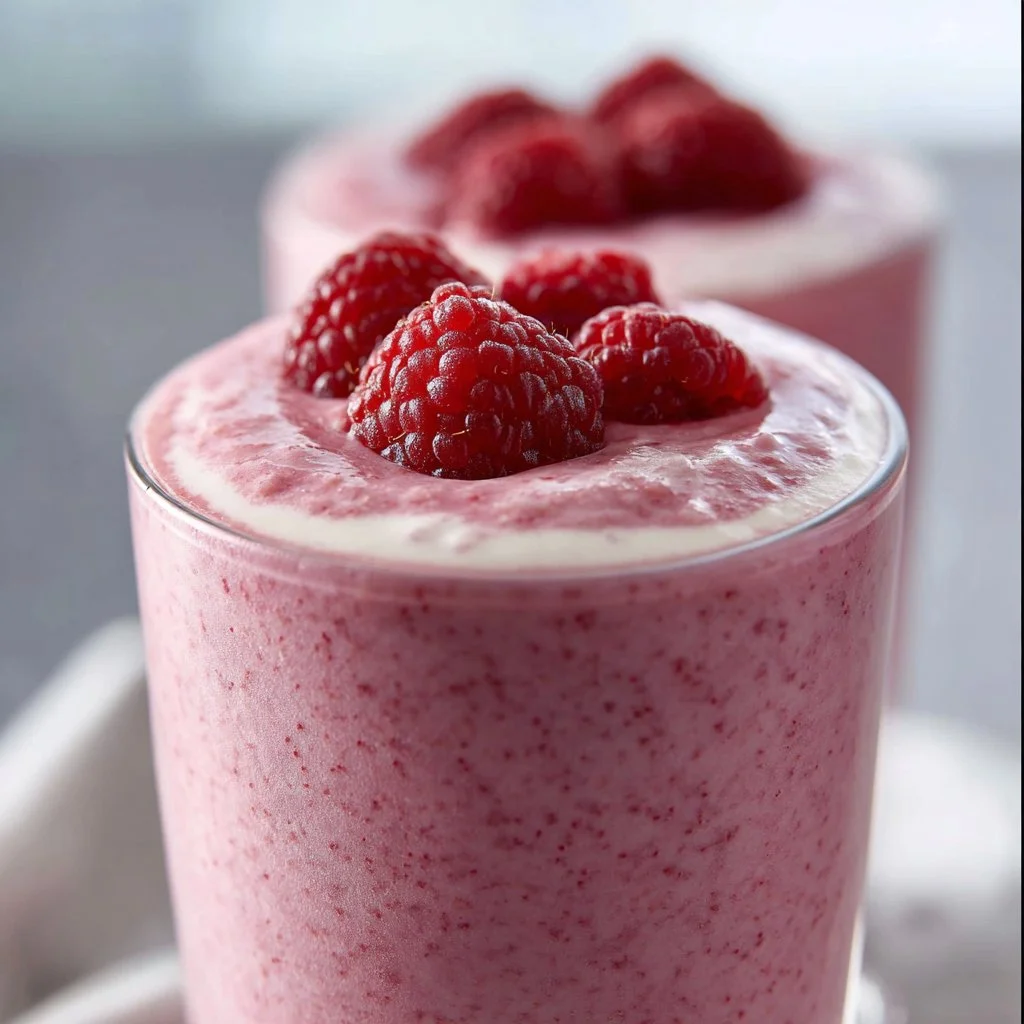
Raspberry Vanilla Breakfast Smoothie – Healthy Start!
Welcome to my kitchen, food lovers! Today, we’re diving into a refreshing and scrumptious Raspberry Vanilla Breakfast Smoothie that’s not only delicious but also packed with nutrients to kickstart your day. If you’re like me and the thought of a creamy, fruity smoothie brightens your morning, you’re in for a treat. Imagine waking up to the sweet aroma of fresh raspberries mixed with the warm notes of vanilla — it’s like a hug in a glass!
Smoothies are a magical thing. They’re versatile, quick, and the perfect canvas for showing off your creative side! Whether you’re racing out the door or tinkering in the kitchen on a slow Sunday, this smoothie will elevate your breakfast game. I love how each sip feels like a little celebration of flavors, and it hardly takes any time to make. The best part? You can customize it to fit your dietary preferences or craving of the day!
I’m excited to share this recipe with you because it holds a special place in my heart. Smoothies were a big part of my childhood mornings. My mom would whip up the freshest fruit smoothies before school — always filled with love and, usually, whatever fruit we had on hand. I remember watching her blend ingredients together, mesmerized by the whirl of color and the delightful smell that filled the kitchen.
Now, as a home cook, I relish recreating those cherished moments and flavors with my own twist. The Raspberry Vanilla Breakfast Smoothie reminds me of my childhood, and each sip takes me back to those carefree mornings. So grab your blender, and let’s whip up something delightful together!
Ingredients
Here’s what you’ll need for your Raspberry Vanilla Breakfast Smoothie:
-
1 cup fresh raspberries: These little gems are bursting with flavor and antioxidants! If you can’t find fresh ones, frozen will work just fine.
-
1 banana, sliced: A great natural sweetener that adds creaminess to your smoothie. If you’re avoiding bananas, try a ripe avocado for a creamy texture without the sweetness.
-
1 cup spinach (optional): This adds a beautiful green hue and boosts the nutritional value without altering the taste much. Kale works too, but spinach is milder in flavor.
-
1 cup unsweetened almond milk (or milk of choice): Almond milk is a nutty delight, but feel free to swap it out with oat milk, coconut milk, or regular dairy milk for a creamier texture.
-
1-2 tablespoons vanilla yogurt: For creaminess and a hint of tang. You can use any flavored yogurt, like coconut or strawberry, if you want to mix things up!
-
1 teaspoon vanilla extract: This is the magic touch! Vanilla extract lifts the entire flavor profile.
-
A drizzle of honey or maple syrup (optional): Only if you want it a touch sweeter! Adjust based on your personal taste.
-
Ice (optional): For a frosty, refreshing smoothie — use a handful of ice cubes if you like it extra cold and thick.
Step-by-Step Instructions
Now that we have our ingredients ready let’s get to the fun part — blending! Follow these simple steps, and you’ll have a delicious smoothie in no time.
-
Prep Your Ingredients: Start by rinsing the raspberries and any other fresh ingredients. Make sure your banana is ripe — the sweeter, the better! If you’re using spinach, give it a good rinse as well. Clean ingredients result in a better-tasting smoothie!
-
Blend It Up: In a blender, add the raspberries, banana, spinach, and almond milk. Start with the liquids first; this helps create a smoother blend. My little trick? Always layer softer and juicy ingredients at the bottom!
-
Add the Creamy Elements: Next, throw in the vanilla yogurt and a splash of vanilla extract. Blend on high speed until everything is well combined and smooth. It should take about 30-60 seconds.
-
Adjust the Consistency: If your smoothie is too thick, add a splash more almond milk to reach your desired consistency. If it’s too thin, toss in a few ice cubes to thicken it up or add a bit more yogurt.
-
Taste Test!: At this stage, it’s crucial to taste your masterpiece. If you want more sweetness, drizzle in some honey or maple syrup and blend again for a couple of seconds.
-
Serve and Enjoy: Pour the smoothie into your favorite glass. If you have time, garnish with a sprinkle of chopped nuts or seeds on top for a little crunch.
Don’t forget to clean your blender while these delightful colors brighten your kitchen. Just fill it with warm water and a drop of dish soap, blend, and rinse – easy peasy!
Serving Suggestions
Serve your Raspberry Vanilla Breakfast Smoothie with a sprig of fresh mint for a lovely touch, or pop a few extra raspberries on top for presentation. If you’re in the mood for a power breakfast, pair it with a slice of whole-grain toast or some peanut butter and banana rice cakes for an extra protein boost.
Recipe Variations
Here are a few creative twists to make this smoothie even more fun:
-
Berry Blast: Swap out raspberries for strawberries or blueberries for a whole different flavor profile.
-
Protein Boost: Add a scoop of your favorite protein powder for a post-workout fuel-up.
-
Nutty Treat: Blend in a tablespoon of peanut butter or almond butter for a nutty sensation!
-
Chia Surprise: Add a tablespoon of chia seeds for an extra boost of fiber and omega-3 fatty acids.
-
Tropical Vibes: Toss in some pineapple or mango to make it a tropical delight!
Chef’s Notes
This recipe has evolved over time — from a quick morning fuel for my busy schedule to a delightful treat I look forward to making, especially on busy weekdays! I’ll admit, I’ve sometimes added a pinch of cinnamon for a warm undertone; it creates a cozy feeling, especially when autumn rolls around.
Oh, and here’s a funny kitchen story — the first time I made a smoothie without measuring, I accidentally added a whole bag of spinach! Let’s just say it was more like a swamp in a glass than the vibrant drink I had hoped for. Now, I stick to careful measuring and consider every ingredient, which leads to far tastier results!
FAQs and Troubleshooting
Q1: My smoothie is too thick. What should I do?
A: Simply add more almond milk or a splash of water to thin it out. Blend until smooth!
Q2: How can I make it vegan?
A: This recipe is already vegan! Make sure that your yogurt is plant-based and you’re good to go.
Q3: Can I use frozen fruit?
A: Absolutely! Frozen raspberries work wonderfully and can even make your smoothie colder and creamier. Just be mindful of the quantity, as frozen fruit tends to be denser.
Q4: My smoothie turned out too sweet! How can I fix that?
A: Try adding more spinach or a squeeze of lemon juice to add a tang and balance out the sweetness.
Nutritional Info (Optional)
Each serving of this Raspberry Vanilla Breakfast Smoothie contains approximately:
- Calories: 250
- Protein: 6g
- Fat: 5g
- Carbohydrates: 45g
- Fiber: 7g
Feel free to tweak the ingredients for your nutritional needs!
Now you’re ready to create a Raspberry Vanilla Breakfast Smoothie that will dazzle the taste buds of everyone around you! Whether you enjoy it solo or share it with loved ones, remember, the heart of every meal is about connection and love. Happy blending, my kitchen friends!
Print
Raspberry Vanilla Breakfast Smoothie
- Total Time: 10 minutes
- Yield: 2 servings 1x
- Diet: Vegan
Description
A refreshing and nutritious Raspberry Vanilla Breakfast Smoothie to kickstart your day.
Ingredients
- 1 cup fresh raspberries
- 1 banana, sliced
- 1 cup spinach (optional)
- 1 cup unsweetened almond milk
- 1–2 tablespoons vanilla yogurt
- 1 teaspoon vanilla extract
- A drizzle of honey or maple syrup (optional)
- Ice (optional)
Instructions
- Prep your ingredients: Rinse the raspberries and any other fresh ingredients, ensuring the banana is ripe and sweet.
- Blend it up: In a blender, add the raspberries, banana, spinach, and almond milk, starting with the liquids for a smoother blend.
- Add the creamy elements: Include the vanilla yogurt and vanilla extract, and blend on high speed until smooth.
- Adjust the consistency: If too thick, add more almond milk; if too thin, add ice cubes or more yogurt.
- Taste test: Sweeten with honey or maple syrup if desired and blend again briefly.
- Serve and enjoy: Pour into a glass and garnish with nuts or seeds if you like.
Notes
Serve with a sprig of fresh mint or some whole-grain toast for a complete breakfast. Be sure to clean your blender afterward for convenience.
- Prep Time: 10 minutes
- Cook Time: 0 minutes
- Category: Breakfast
- Method: Blending
- Cuisine: American
Nutrition
- Serving Size: 1 serving
- Calories: 250
- Sugar: 18g
- Sodium: 120mg
- Fat: 5g
- Saturated Fat: 1g
- Unsaturated Fat: 4g
- Trans Fat: 0g
- Carbohydrates: 45g
- Fiber: 7g
- Protein: 6g
- Cholesterol: 0mg
Keywords: smoothie, breakfast, raspberry, healthy, vegan
Tropical Pineapple Orange Smoothie
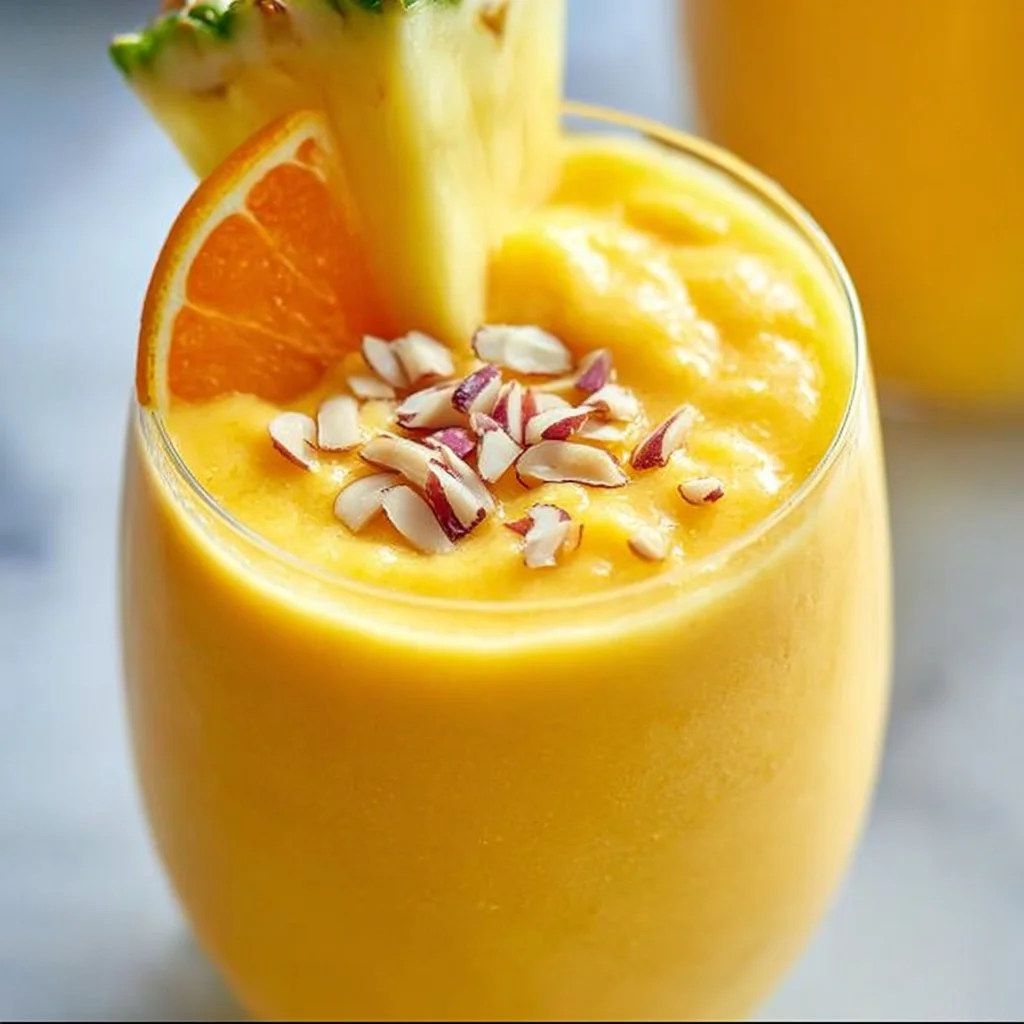
Refreshing Tropical Pineapple Orange Smoothie Recipe: A Slice of Sunshine in a Glass
Welcome to my kitchen! Today, I’m thrilled to share a recipe that truly embodies the essence of summer, sunshine, and everything fresh and fruity—the Tropical Pineapple Orange Smoothie. If you’re like me and find joy in sipping something deliciously refreshing, especially after a long day or as a morning pick-me-up, this smoothie is going to be your new best friend.
Imagine it: you wake up, the sun is shining through your window, and all you crave is something fruity that transports you to a tropical paradise. This smoothie is basically a mini-vacation in a glass! Packed with vitamins and natural flavors, it’s not only a delight for your taste buds but also a nutritious option to kickstart your day—or to keep you cool during an afternoon slump.
Now, I know there are countless smoothie recipes out there, but what sets this one apart is its perfect balance of sweet and tangy, creamy and refreshing. Plus, it’s incredibly easy to whip up! Whether you’re an experienced home cook or just starting your culinary journey, I’m here to guide you through the process with love and a few fun stories along the way. So grab your blender, and let’s dive into the world of tropical flavors!
A Trip Down Memory Lane
Let me take you back to a sunny afternoon a few summers ago. I was visiting my dear friend, Maria, in Hawaii—yes, paradise found! We spent our days lounging on the beach, trying out local cuisine, and exploring hidden waterfalls. While we were there, Maria introduced me to her favorite tropical smoothie, made with the freshest pineapples and oranges from her backyard. She would blend them right there on the patio, and the aroma wafting in the air was simply divine!
I’ll never forget the first sip—the sweet pineapple mingled so perfectly with the zesty orange, and just like that, I was in heaven! When I got home, I knew I had to recreate that sunshine-in-a-glass experience. After a few tweaks and experiments, I developed this Tropical Pineapple Orange Smoothie recipe, and it has since become a staple in my kitchen. So, let’s bring a taste of Hawaii to your home!
Ingredients
Here’s what you need for your Tropical Pineapple Orange Smoothie:
-
Fresh Pineapple Chunks (1 cup)
Pineapples are the star of this show! Sweet, tangy, and packed with vitamins, they create a delightful base. If fresh isn’t available, you can use frozen pineapple. -
Fresh Orange Juice (1/2 cup)
Freshly squeezed orange juice adds that citrusy zing! If you’re short on oranges, store-bought juice will do, but look for one without added sugar for the best flavor. -
Banana (1 medium)
Bananas add creaminess and natural sweetness, plus they’re a great source of potassium. Overripe bananas that you might have lying around are perfect for this! -
Greek Yogurt (1/2 cup)
This adds a creamy texture and a protein boost. If you’re dairy-free, you can substitute with plant-based yogurt or a banana for extra creaminess. -
Coconut Water (1/2 cup)
Bringing in the tropical vibes, coconut water hydrates and adds a subtle sweetness. Feel free to replace it with regular water or milk for a creamier texture. -
Honey or Maple Syrup (1-2 tablespoons)
Sweeten to your liking! Depending on the ripeness of your fruit, you may or may not need this. Local honey gives an extra layer of flavor, but maple syrup is a beautiful vegan alternative. -
Ice Cubes (1/2 cup)
Essential for that refreshing chill! If you’re using frozen fruit, you may want to adjust the amount.
Step-by-Step Instructions
Now that we have our ingredients gathered, let’s get blending!
-
Prepare the Ingredients
Start by peeling and chopping your pineapple and banana. If you’re using fresh pineapple, make sure to cut away the tough core and slice it into chunks. As for the banana, just peel it and break it into smaller pieces. This helps create a smooth blend! -
Juice the Oranges
If you’re using fresh oranges, grab a juicer or just squeeze by hand for fresh orange juice. Aim for about half a cup of juice. Remember, the more fresh, the better the flavor! -
Add Ingredients to the Blender
Into your blender, add the pineapple chunks, fresh orange juice, banana, Greek yogurt, coconut water, and if you choose, honey or maple syrup. Layering the ingredients is key, so place the softer items on top for easier blending. -
Blend Until Smooth
Secure the lid on your blender and blend on high speed for about 30 seconds. Stop to scrape down the sides if necessary, then blend for another 30 seconds or until everything is perfectly smooth. You’re looking for that velvety consistency that encourages second sips! -
Adjust to Taste
This is where you can get creative! If you want it sweeter, add more honey or maple syrup. If you prefer it thicker, throw in more yogurt or banana. For a thinner consistency, simply add more coconut water or juice and blend again. -
Add Ice and Blend Again
Once you’re happy with the base, add ice cubes to the blender. Blend on high until you achieve your desired chill factor. This part is super fun; it’s like the final sprinkle of joy on your tropical creation! -
Taste and Adjust
Don’t forget to taste your smoothie! This is your chef moment—do a little shimmy of delight as you enjoy this fruity concoction. Adjust flavors as needed, then you’re ready to pour!
Serving Suggestions
Pour your Tropical Pineapple Orange Smoothie into a tall glass and serve it with a slice of orange or a pineapple wedge perched on the rim for that added tropical flair. You can even top it off with a sprinkle of shredded coconut or a few chia seeds for texture!
Feel free to grab a colorful straw and let the sunshine vibes brighten your day. It’s best enjoyed immediately, ideally outside in the sun or while listening to your favorite tunes!
Recipe Variations
-
Berry Bliss: Add a handful of strawberries or blueberries for a berry twist. They pair beautifully with pineapple and orange!
-
Green Paradise: Toss in a handful of spinach or kale for an added dose of nutrients. You won’t even taste it with all that tropical sweetness!
-
Protein Power: Add a scoop of your favorite protein powder for a post-workout boost.
-
Spice It Up: A pinch of cayenne pepper or a few slices of fresh ginger will add a warming kick that contrasts delightful with the smoothness.
-
Creamy Avocado: Throw in a quarter of an avocado for extra creaminess and healthy fats. It also adds a unique flavor!
Chef’s Notes
This Tropical Pineapple Orange Smoothie has seen plenty of iterations in my kitchen. The first few times, I experimented with various fruits, experimenting until I found this heavenly combination that perfectly encapsulates that vibrant, tropical goodness.
I’ve had friends take one sip and immediately declare they’re “transported to an island paradise.” There’s something magical about food that brings people together, and this smoothie does just that! Plus, it’s a wonderful way to use up leftover fruit in your kitchen.
Fun fact: the idea of “smoothing” my ingredients came to fruition one chaotic morning when I realized I was running late for work. I threw everything in the blender, and voila! The rest is history.
FAQs and Troubleshooting
What’s the best way to store leftover smoothie?
If you have some smoothie left over—first, let me say, good for you! Store it in an airtight container in the refrigerator for up to 24 hours. Just give it a good shake or stir before enjoying again, as it may separate a bit.
Can I freeze this smoothie?
Absolutely! Pour the smoothie into ice cube trays to preserve the flavors. You can then toss the frozen smoothie cubes into your blender again for a super quick and icy treat down the road!
What if my smoothie is too thick?
If you find your smoothie is thicker than you’d like, just add a splash more coconut water or orange juice to loosen it up. Blend again until you reach your desired consistency.
Why is my smoothie not sweet enough?
The sweetness level is really down to personal preference and the ripeness of your fruits. If it’s not sweet enough for your taste, feel free to add more honey, maple syrup, or even a pitted date for an extra natural sweet kick!
Nutritional Info
This delightful smoothie serves as a refreshing breakfast option or a healthy snack. Full of vitamins A, C, and potassium, it provides a good balance of carbohydrates and protein, making it a nutritious choice for any time of day!
Enjoy this Tropical Pineapple Orange Smoothie whenever you crave sunshine in a glass. It’s sure to be a staple in your kitchen just like it is in mine! Happy blending! 🌴🍹
Print
Tropical Pineapple Orange Smoothie
- Total Time: 10 minutes
- Yield: 2 servings 1x
- Diet: Vegan
Description
A refreshing and nutritious smoothie packed with tropical flavors of pineapple and orange, perfect for kickstarting your day or keeping you cool.
Ingredients
- 1 cup Fresh Pineapple Chunks
- 1/2 cup Fresh Orange Juice
- 1 medium Banana
- 1/2 cup Greek Yogurt
- 1/2 cup Coconut Water
- 1–2 tablespoons Honey or Maple Syrup
- 1/2 cup Ice Cubes
Instructions
- Prepare the ingredients by peeling and chopping your pineapple and banana.
- Juice the oranges for half a cup of fresh orange juice.
- Add the pineapple chunks, orange juice, banana, Greek yogurt, coconut water, and honey or maple syrup to the blender.
- Blend on high speed for about 30 seconds until smooth.
- Adjust sweetness or thickness by adding more honey, yogurt, or coconut water as needed.
- Add ice and blend again until you reach your desired chill factor.
- Taste and adjust flavors before serving.
- Pour into a tall glass and serve with a slice of orange or pineapple.
Notes
This smoothie can also be stored in an airtight container in the refrigerator for up to 24 hours or frozen for later use.
- Prep Time: 10 minutes
- Cook Time: 0 minutes
- Category: Beverage
- Method: Blending
- Cuisine: Tropical
Nutrition
- Serving Size: 1 glass
- Calories: 250
- Sugar: 30g
- Sodium: 50mg
- Fat: 3g
- Saturated Fat: 1g
- Unsaturated Fat: 2g
- Trans Fat: 0g
- Carbohydrates: 56g
- Fiber: 5g
- Protein: 6g
- Cholesterol: 10mg
Keywords: smoothie, tropical, pineapple, orange, healthy drink, refreshing, vegan
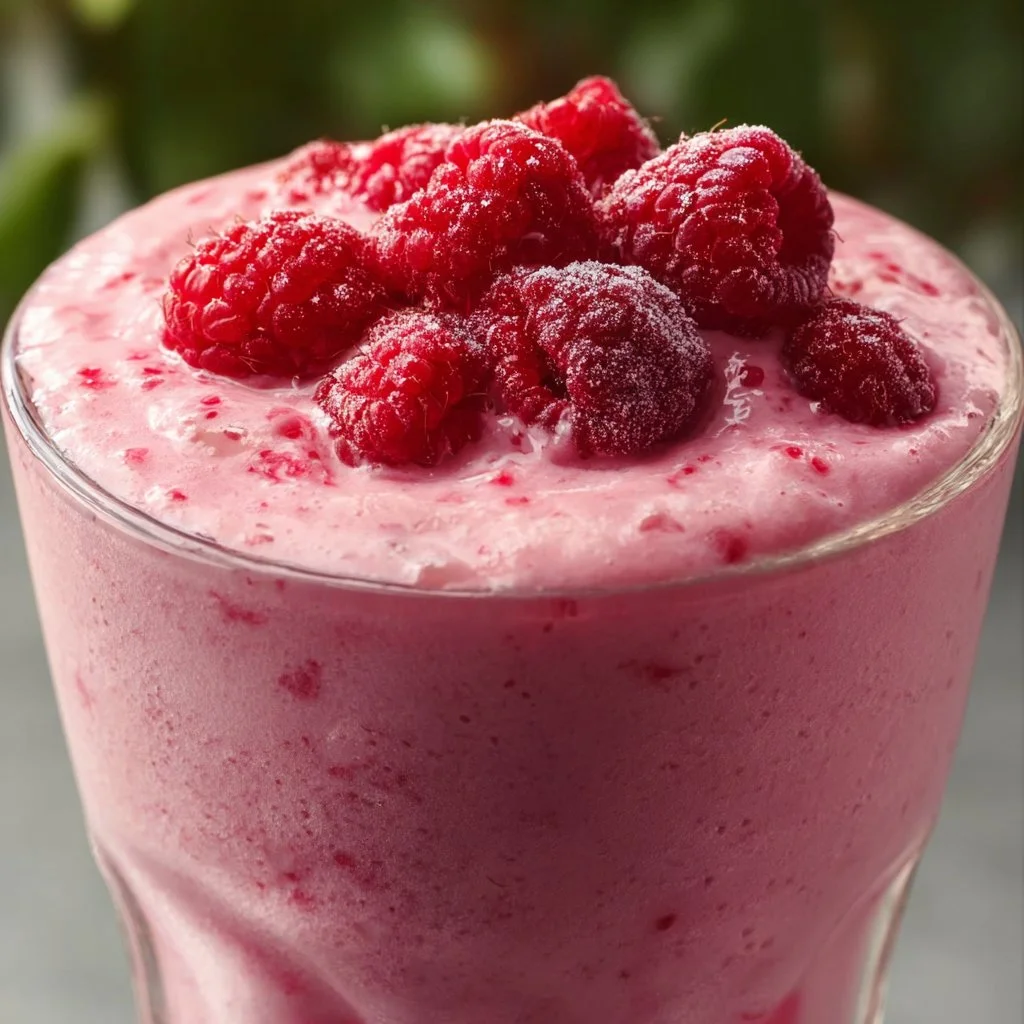
Raspberry Cream Smoothie Recipe
Raspberry Cream Smoothie: A Delightful Burst of Flavor
Welcome to my kitchen, friends! Today, we’re diving into a recipe that feels like a hug in a glass—my delightful Raspberry Cream Smoothie. A smoothie that’s not only bursting with bright, tangy raspberry flavor but also offers a rich creaminess that makes it feel indulgent without any guilt. It’s the perfect breakfast for those busy mornings, an energizing mid-afternoon snack, or even a refreshing dessert that feels like a treat. So, grab your blender and let’s whip up something special together!
A Little Background on My Raspberry Love
Ah, raspberries! I have such fond memories tied to these vibrant, little gems. Growing up, my grandmother had the most incredible raspberry bush in her backyard. During the summer months, it became our little playground, where my cousins and I would make a game of seeing who could gather the most. I remember the sparkle of warm sunlight filtering through the leaves as we rushed to pick the plumpest berries, giggling over who would get the biggest basket. The intoxicating smell of fresh raspberries always drew us in, and we ended up eating more than we ever took home!
One of my favorite treats was my grandmother’s raspberry cream popsicles. She would blend fresh raspberries with sweet cream, freeze them in fun molds, and we would devour them on the porch while watching the fireflies dance in the twilight. This smoothie is inspired by those sunny afternoons filled with laughter and sweet, creamy flavors. Let’s bring a bit of that nostalgia into your kitchen!
Ingredients: What You’ll Need
Here’s what you need to whip up a fantastic Raspberry Cream Smoothie:
-
1 cup fresh or frozen raspberries
Raspberries are the star of the show! If you can, opt for fresh ones when in season for the best flavor. If they’re out of season, frozen is a great option—just make sure they’re unsweetened. -
1 banana
This acts as a natural sweetener while adding creaminess to the smoothie. If you’re not a banana fan, you can swap it for half an avocado for a creamier texture, though it will slightly alter the flavor. -
1/2 cup Greek yogurt
Adding protein and creaminess, Greek yogurt is perfect for texture. If you want a dairy-free version, coconut yogurt works beautifully, but be mindful of the coconut flavor it may impart. -
1/2 cup milk of choice
Use whatever milk you love—almond, oat, or dairy milk all work! This will help blend the smoothie smoothly. Adjust the amount based on your preferred consistency. -
1 tablespoon honey or maple syrup
Sweeten it up! Both options add a lovely touch. If you like your smoothies less sweet, feel free to leave it out or adjust according to taste. -
1/2 teaspoon vanilla extract
This adds an aromatic depth and rounds out the flavors. If you’re feeling adventurous, try adding a dash of almond extract instead for a different twist. -
Ice (optional)
If you prefer a chilled smoothie, especially during hot summer days, add a handful of ice for a frosty finish.
Step-by-Step Instructions: Let’s Blend It Up!
Now that we have our ingredients ready, let’s get blending! This part is where the magic happens, and I know you’re going to love it.
-
Gather Your Ingredients
On your kitchen counter, lay out all your ingredients. Trust me; it helps ease the process and makes you feel like a rockstar chef! -
Add the Raspberries
Start by adding the raspberries into the blender. If you’re using frozen ones, there’s no need to thaw them beforehand, as they’ll blend beautifully with the other ingredients. -
In Go the Banana and Greek Yogurt
Next, peel and chop the banana into a couple of chunks and toss it in. Add the Greek yogurt after the banana—this will help create a creamy texture throughout the smoothie. -
Pour in the Milk
Carefully add your milk of choice. If you want a thicker smoothie, start with half a cup, then add more as needed. Blend judiciously at first until it all starts to combine. -
Sweeten It Up
Drizzle in your honey or maple syrup, and add the vanilla extract. Blend again until it’s all smooth. You want to see the vibrant pink color come through! -
Adjust the Consistency
If your smoothie is too thick, don’t hesitate to add a little more milk or some water. If it’s too thin, throw in a bit more Greek yogurt or a handful of ice and blend once again until everything is well-combined. -
Taste Test!
Here’s a little chef hack: before you pour it into your favorite glass, take a small sip and adjust the sweetness or add a tad more banana if preferred. This is your creation! -
Serve It Up
Pour the luscious smoothie into your favorite glass. Feel free to top with a few whole raspberries, a sprinkle of granola, or even a dollop of whipped cream for an over-the-top treat!
Serving Suggestions: The Final Touch
When it comes to serving this Raspberry Cream Smoothie, presentation matters! I love pouring it into a tall glass to showcase that beautiful, rich pink hue. You can garnish with fresh raspberries or a mint sprig for a pop of color. For extra flair, drizzle some honey over the toppings or sprinkle a handful of crushed nuts or granola on top.
Serve this delicious smoothie chilled, and you will have a refreshing delight that’s ready to impress family and friends!
Recipe Variations: Get Creative!
The beauty of the Raspberry Cream Smoothie is its versatility! Feel free to switch things up with these fun variations:
-
Berry Medley: Swap the raspberries for strawberries, blueberries, or blackberries for a mixed berry smoothie.
-
Peanut Butter Twist: Add a tablespoon of peanut or almond butter for a nutty flavor and added protein.
-
Green Smoothie: Toss in a handful of spinach or kale to sneak in some greens—it’ll be a vitamin powerhouse!
-
Choco-Raspberry Delight: Add a tablespoon of unsweetened cocoa powder for a chocolatey twist that pairs beautifully with raspberries.
-
Vegan Option: Substitute the Greek yogurt for a plant-based yogurt and use almond milk to keep it vegan-friendly.
Chef’s Notes: Embracing the Kitchen Adventure
As I’ve perfected this Raspberry Cream Smoothie over the years, I’ve learned to embrace the messy side of cooking. There were countless trials where I spilled half the blender’s contents everywhere, or I forgot that I had a banana on the counter until it was too brown to use. But that’s what makes the kitchen fun—a little chaos and a lot of deliciousness.
And just like life, cooking isn’t about perfection; it’s about expression and love. This recipe has evolved with me—adding ingredients, taking some away—but it always circles back to that fundamental idea: it’s about creating something that brings joy. So, don’t be afraid to make it your own!
FAQs and Troubleshooting
1. Can I use a different fruit instead of raspberries?
Absolutely! Feel free to swap in your favorite berries or even tropical fruits like mango or pineapple for a whole new flavor profile.
2. Why is my smoothie too thick?
If it’s too thick, simply add a bit more milk or water until you reach your desired consistency. Remember, the type of banana and yogurt can affect thickness too!
3. How can I make it sweeter?
If you find your smoothie isn’t sweet enough, try adding a bit more honey, maple syrup, or even a splash of orange juice for natural sweetness.
4. Can I meal prep this smoothie?
While it’s best enjoyed fresh, you can prep the ingredients ahead of time by freezing the raspberries and banana slices together. Just blend with yogurt and milk when you’re ready!
Nutritional Info (Optional)
A generous serving of this Raspberry Cream Smoothie contains:
- Calories: Approximately 240
- Protein: 9g
- Fat: 4g
- Carbohydrates: 45g
(Final nutritional breakdown may vary based on ingredient choices.)
And there you have it—my delightful Raspberry Cream Smoothie recipe that captures the essence of summer and cozy family memories. I hope you enjoy making it as much as I do! Remember, cooking is an adventure, so have fun, play around with flavors, and share your creations with those you love. Happy blending, friends!
Print
Raspberry Cream Smoothie
- Total Time: 10 minutes
- Yield: 2 servings 1x
- Diet: Vegetarian
Description
A delightful Raspberry Cream Smoothie bursting with tangy raspberry flavor and rich creaminess. Perfect for breakfast, a snack, or a refreshing dessert.
Ingredients
- 1 cup fresh or frozen raspberries
- 1 banana
- 1/2 cup Greek yogurt
- 1/2 cup milk of choice
- 1 tablespoon honey or maple syrup
- 1/2 teaspoon vanilla extract
- Ice (optional)
Instructions
- Gather your ingredients.
- Add the raspberries into the blender.
- In go the banana and Greek yogurt.
- Pour in the milk.
- Sweeten it up with honey or maple syrup and add the vanilla extract.
- Adjust the consistency as needed.
- Taste test!
- Serve it up in your favorite glass.
Notes
Feel free to garnish with whole raspberries, granola, or whipped cream. You can also try variations like adding peanut butter or using a different type of yogurt.
- Prep Time: 10 minutes
- Cook Time: 0 minutes
- Category: Smoothie
- Method: Blending
- Cuisine: American
Nutrition
- Serving Size: 1 serving
- Calories: 240
- Sugar: 20g
- Sodium: 75mg
- Fat: 4g
- Saturated Fat: 2g
- Unsaturated Fat: 2g
- Trans Fat: 0g
- Carbohydrates: 45g
- Fiber: 6g
- Protein: 9g
- Cholesterol: 10mg
Keywords: Raspberry Smoothie, Healthy Smoothie, Breakfast Recipe




