Sugar-Free Sex In A Pan
Sugar-Free Sex In A Pan: A Deliciously Decadent Dessert Recipe
Welcome, fellow foodies! Today, we’re diving into a recipe that’s as cheeky as its name — Sugar-Free Sex In A Pan. Now, before you raise your eyebrows or giggle behind your hands, let me clarify! This dessert is not just a playful title; it’s a delightful, layered creation that’s bound to impress your guests and fill your kitchen with the sweet scent of love and happiness.
Imagine a dessert that captivates with its rich creamy layers, chocolatey goodness, and the best part? It’s entirely sugar-free! Yes, you read that right! With the right ingredients, you can have all the indulgence without the guilt. I’ve designed this dessert to cater to various dietary needs, while still delivering on flavor. It’s perfect for those of us looking to indulge without compromising our healthy lifestyles or giving in to a sugar crash!
What makes Sugar-Free Sex In A Pan so special? It’s the perfect blend of textures and flavors: a silky cream cheese filling, a decadent chocolate layer, and a satisfying crust that ties it all together. It’s the kind of dessert that makes you melt, both in terms of flavor and in the warm, cozy vibe it brings to any gathering.
So roll up those sleeves, preheat that oven, and let’s create some magic together. Whether it’s a special occasion or just a cozy night in, this dessert will make your kitchen feel like a warm hug. Are you ready? Let’s jump right in!
Personal Story
Let’s rewind to my childhood for a moment. I vividly remember my grandmother, dressed in her flowery apron and with flour dusted on her cheek, creating her own version of layered desserts. Every Sunday, she’d whip up something delicious, and we kids would eagerly gather ’round the kitchen table, our eyes wide with anticipation, just waiting to hear the story behind each treat.
One particular Sunday, she introduced us to a dish that would become a family favorite — a decadent layered dessert in a pan, rich with chocolate and cream. As she prepared it, she’d weave tales of her own childhood, and we’d all revel in the warmth and love that filled the room. That dessert, which I later learned was affectionately dubbed “Sex In A Pan” by some, left an indelible mark on my heart (and taste buds!).
Years later, when I embarked on my journey as a home cook, I wanted to recreate that sense of warmth but with a healthier twist. That’s how this sugar-free version was born! It carries all the delightful memories and flavors of my grandmother’s cooking while being something I can enjoy guilt-free. Now, I’m excited to share it with all of you!
Ingredients
To create your very own Sugar-Free Sex In A Pan, you’ll need some simple yet impactful ingredients. Let’s break them down:
For the Crust:
- Almond Flour (1 ½ cups)
A great base for a gluten-free crust! If you’re not a fan of almond flour, you can substitute it with coconut flour, but make sure to reduce the quantity, as coconut flour is more absorbent. - Unsweetened Cocoa Powder (¼ cup)
This adds a rich chocolate flavor. Look for high-quality cocoa powder for the best taste! If you want to keep it lighter, you can use carob powder for a different but delightful flavor. - Salt (½ teaspoon)
Just a pinch to enhance all the flavors. A little salt goes a long way in balanced baked goods! - Sugar-Free Granulated Sweetener (½ cup)
This is your sugar substitute. I recommend erythritol or a stevia blend for a zero-calorie option. If you prefer something with a bit more flavor, coconut sugar can also work, but it’s not entirely sugar-free! - Unsalted Butter, melted (½ cup)
This binds the crust together beautifully. If you’re opting for a dairy-free version, coconut oil works wonderfully too!
For the Cream Cheese Layer:
- Cream Cheese (8 oz, softened)
Always make sure your cream cheese is at room temperature for the creamiest texture. Vegan cream cheese can be a great substitution if you need a dairy-free option! - Vanilla Extract (1 teaspoon)
This adds a lovely depth of flavor. Use pure vanilla extract if possible for an authentic taste! - More Sugar-Free Granulated Sweetener (½ cup)
Your go-to sweetener here again! Adjust according to your preferred sweetness!
For the Chocolate Layer:
- Sugar-Free Chocolate Pudding Mix (1 box, prepared according to package instructions)
A quick and easy way to add a chocolatey layer. If homemade pudding is your thing, go ahead and make it from scratch! (Just keep it sugar-free!) - Milk (2 cups, or any dairy-free milk of your choice)
This is used to prepare the pudding. You can also use almond milk or coconut milk for a different creaminess.
Topping:
- Whipped Cream (for garnish)
Use any kind you like, whether store-bought or homemade! For a dairy-free option, coconut whipped cream is a luscious choice!
Step-by-Step Instructions
Now that we’ve gathered our ingredients, let’s get down to the fun part — making this fabulous dessert!
Step 1: Prepare the Crust
- Preheat Your Oven: Preheat your oven to 350°F (175°C). This allows the crust to bake evenly.
- Mix the Dry Ingredients: In a large mixing bowl, combine the almond flour, cocoa powder, salt, and sweetener. Don’t skimp on mixing! You want everything to be well-integrated for a consistent crust.
- Add the Wet Ingredients: Pour in the melted butter and mix until your dough holds together. The texture should be slightly crumbly, but it should stick when pressed.
- Press into the Pan: Grease a 9×13 inch pan and evenly press the crust mixture into the bottom. Aim for an even layer, and don’t forget to press down firmly!
- Bake: Pop it into the oven for about 10-12 minutes, or until it’s set. Let it cool completely before adding the next layers. A little patience goes a long way here!
Step 2: Create the Cream Cheese Layer
- Cream the Cheese: In a medium bowl, beat the softened cream cheese until smooth. You can use a hand mixer or a whisk—whatever you have on hand!
- Add Sweetener and Vanilla: Gradually add in the sugar-free sweetener and vanilla extract, mixing until fully incorporated. The mixture should be smooth and creamy.
- Spread the Layer: Once the crust is cooled, spread the cream cheese mixture evenly over it. Don’t worry if it seems thick; just use a spatula to smooth it out!
Step 3: Make the Chocolate Layer
- Prepare the Pudding: Follow the instructions on your sugar-free pudding mix. Whisk with your milk of choice until it reaches the desired pudding-like consistency, which usually takes a few minutes.
- Spread Over Cream Cheese: Once the pudding is ready, pour it over the cream cheese layer, carefully spreading it to avoid disturbing the layer beneath.
- Chill: Cover the pan with plastic wrap and refrigerate for at least 4 hours (or overnight if you can wait!). This helps the layers to set beautifully!
Step 4: Serve Time!
- Top with Whipped Cream: Right before serving, generously dollop whipped cream on top. The lightness of the cream offsets the rich layers below, creating a perfect balance!
- Garnish (optional): Sprinkle a little cocoa powder or some shaved dark chocolate on top for an extra touch of elegance.
- Cut and Serve: Slice into squares (or rectangles if you’re feeling rebellious) and serve to your lucky guests. They won’t believe it’s sugar-free!
Serving Suggestions
To make your presentation even more special, serve Sugar-Free Sex In A Pan with fresh berries on the side or drizzle some unsweetened chocolate sauce for added flair. Consider garnishing with mint leaves for that extra touch — it’s all about making your dessert look as delightful as it tastes!
Recipe Variations
- Flavored Cream Cheese Layer: Add some lemon or orange zest into the cream cheese layer for a fresh twist!
- Nutty Crust: Mix in some chopped nuts like pecans or walnuts into the crust for an extra crunch.
- Boozy Chocolate: For the adults, add a splash of coffee liqueur to the chocolate pudding for an irresistibly rich flavor!
- Fruit Layer: Layer in some sliced strawberries or raspberries between the cream cheese and pudding layers for a fruity touch!
Chef’s Notes
One of my favorite things about this recipe is how easy it is to assemble and customize! Whenever I have friends over, this dessert is my go-to. I even remember one time I experimented with adding a hint of hazelnut flavor to the chocolate layer, and oh my goodness, it was a game changer!
Also, don’t be shy about inviting your friends into the kitchen to help. Cooking together not only makes the process more fun but also gives you the chance to create new memories, just like I did with my grandmother!
FAQs and Troubleshooting
Q1: My crust came out too crumbly. What went wrong?
Don’t lose hope! If your crust isn’t holding together, it might be due to too much dry ingredient or not enough binding from the butter. Add a splash of water or a bit more melted butter to help it come together in the future.
Q2: How do I know if the cream cheese layer is set enough?
It should feel firm to the touch and not jiggle when you lightly shake the pan! If you’re unsure, let it chill for a bit longer.
Q3: My pudding layer isn’t thickening. What can I do?
Ensure you’ve mixed it well with the proper amount of milk. If it’s still runny, you might want to refrigerate it for a little while longer until it sets.
Q4: Can I make this dessert dairy-free?
Absolutely! Substitute the cream cheese with a dairy-free or nut-based cream cheese and opt for plant-based milk for the pudding as well.
Nutritional Info
This delightful dessert is not only indulgent but also a guilt-free treat. Assuming a yield of 16 squares, here’s an approximate breakdown per square (without toppings):
- Calories: 160
- Protein: 4g
- Fat: 12g
- Carbohydrates: 8g
- Sugar: 2g (from sugar-free sweeteners)
Well, there you have it! A delectable, sugar-free dessert that’s sure to tantalize the taste buds and warm the heart. I hope you enjoy making and sharing this Sugar-Free Sex In A Pan as much as I have. Happy cooking, friends!
PrintSugar-Free Sex In A Pan
- Total Time: 240 minutes
- Yield: 16 servings 1x
- Diet: Sugar-Free
Description
A deliciously decadent dessert that features rich creamy layers and chocolatey goodness, all without the guilt of sugar.
Ingredients
- 1 ½ cups Almond Flour
- ¼ cup Unsweetened Cocoa Powder
- ½ teaspoon Salt
- ½ cup Sugar-Free Granulated Sweetener
- ½ cup Unsalted Butter, melted
- 8 oz Cream Cheese, softened
- 1 teaspoon Vanilla Extract
- ½ cup More Sugar-Free Granulated Sweetener
- 1 box Sugar-Free Chocolate Pudding Mix, prepared according to package instructions
- 2 cups Milk (or any dairy-free milk)
- Whipped Cream (for garnish)
Instructions
- Preheat your oven to 350°F (175°C).
- Mix the dry ingredients: Combine almond flour, cocoa powder, salt, and sweetener.
- Add the wet ingredients: Pour melted butter and mix until the dough holds together.
- Press the mixture into a greased 9×13 inch pan.
- Bake for 10-12 minutes, and let it cool completely.
- Cream the cream cheese until smooth.
- Add sweetener and vanilla, mixing until creamy.
- Spread the cream cheese layer over the cooled crust.
- Prepare the pudding according to the package instructions.
- Spread the pudding over the cream cheese layer.
- Chill in the fridge for at least 4 hours.
- Top with whipped cream before serving.
- Cut into squares and serve.
Notes
Feel free to customize with different flavors or toppings. This dessert is also fully dairy-free if you use the right substitutes!
- Prep Time: 15 minutes
- Cook Time: 12 minutes
- Category: Dessert
- Method: Baking
- Cuisine: American
Nutrition
- Serving Size: 1 serving
- Calories: 160
- Sugar: 2g
- Sodium: 200mg
- Fat: 12g
- Saturated Fat: 7g
- Unsaturated Fat: 5g
- Trans Fat: 0g
- Carbohydrates: 8g
- Fiber: 3g
- Protein: 4g
- Cholesterol: 40mg
Keywords: sugar-free dessert, layered dessert, creamy dessert, chocolate dessert, healthy dessert
Sugar Free Peanut Butter Cookies
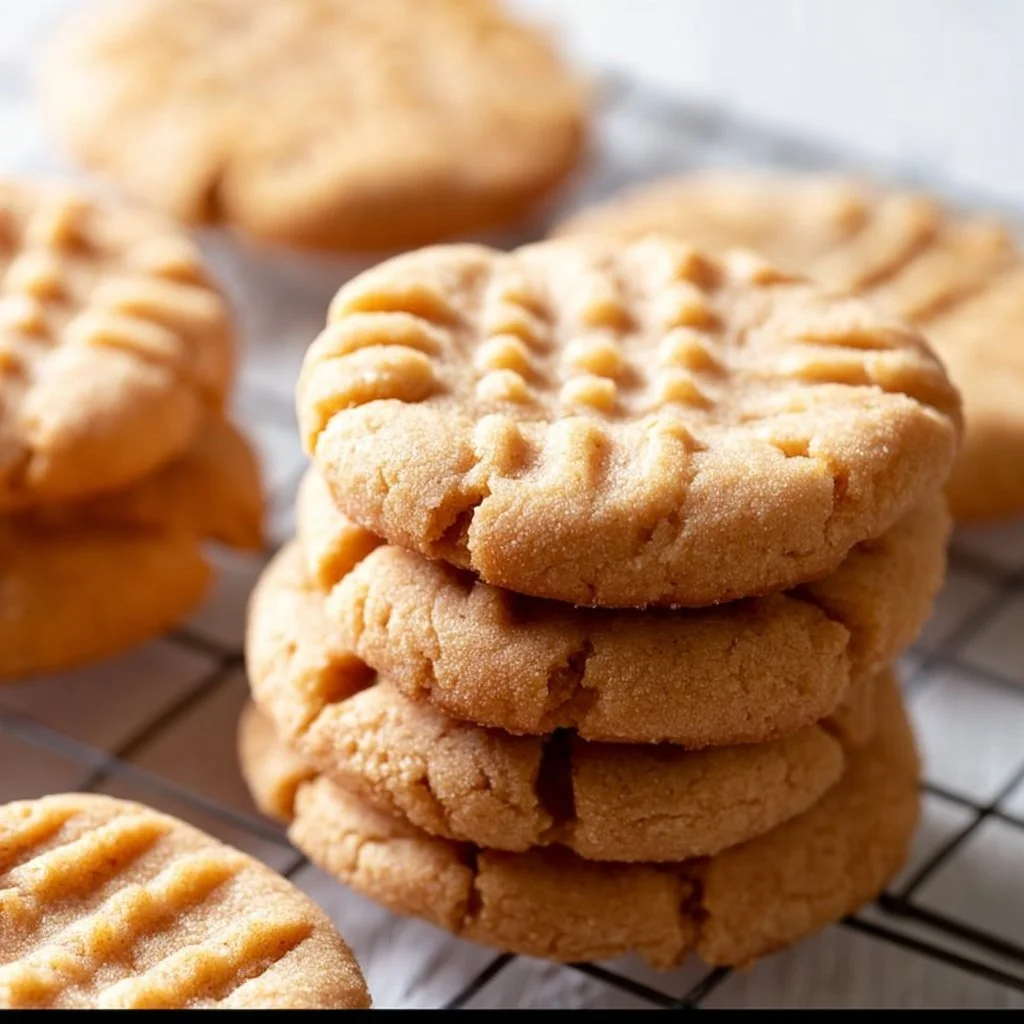
Sugar-Free Peanut Butter Cookies: A Guilt-Free Delight!
Welcome, fellow food lovers, to my cozy kitchen! I’m Olivia Bennett, and today we’re diving into a delightful batch of cookies that’ll satisfy your sweet tooth without a hint of refined sugar. That’s right—I’m talking about Sugar-Free Peanut Butter Cookies! These treats are not only scrumptious but also easy to whip up, perfect for when you need a little indulgence that aligns with your health goals.
Why sugar-free, you ask? Well, like most home cooks, I’ve had my fair share of sugar-laden desserts that leave me feeling sluggish and heavy. A few years ago, I decided to cut back on sugar but didn’t want to give up my favorite goodies. After countless experiments and taste tests (oh, the joy of tasting!), I finally perfected the ultimate recipe for sugar-free peanut butter cookies that are chewy, rich, and oh-so-delicious.
These cookies take me back to my childhood, when my mom would bake batches of peanut butter cookies during chilly winter evenings. The aroma would fill our home, wrapping us in a warm embrace, and I remember the joy of sneaking one (or two!) before dinner. Today, I want to share that nostalgic comfort with you, all while keeping things healthy and delightful!
In this blog post, you’ll discover everything you need to know about making these fabulous cookies—from the ingredients that make them shine to hints on serving and some tasty variations. So roll up your sleeves, grab your apron, and let’s get baking!
Personal Story
In my family, cookies were always a form of love. For my birthday every year, my mom would bake my favorite peanut butter cookies, and I’d be there, perched on a kitchen stool, ready to help with the mixing. I’d measure out the creamy peanut butter and watch with excitement as she melted the butter on the stove. As soon as those cookies were in the oven, the sweet scent would envelop us, and my heart would race with anticipation.
One particular year, I decided to “surprise” my mom by making the cookies all on my own. I followed her handwritten recipe, scribbled in her perfect, looping cursive. Unfortunately, I accidentally reached for salt instead of sugar! To my dismay, the cookies turned out incredibly salty—definitely not what I had hoped for! But rather than disappointment, we ended up with a good laugh and a new family memory.
That salty mishap taught me a valuable lesson: it’s the love in cooking that counts. Now, I’ve taken that lesson to heart and transformed my family’s favorite recipe into this sugar-free version, ensuring that you can enjoy a treat that tastes just as good without the guilt.
Ingredients
Here’s what you’ll need to make these delicious sugar-free peanut butter cookies:
-
Natural Peanut Butter: Use 100% peanut butter made from just peanuts (and maybe salt). Avoid brands that add sugar or oils. If you’re looking for a substitution, almond butter or sunflower seed butter works beautifully too!
-
Sugar-Free Sweetener: You can use monk fruit sweetener, erythritol, or stevia. Each has a different sweetness level, so check the packaging for the equivalent measurements to replace the sugar.
-
Egg: This binds the cookies together and adds a bit of richness. If you’re vegan, you can mix 1 tablespoon of flaxseed meal with 2.5 tablespoons of water to create a "flax egg" for a perfect substitute.
-
Vanilla Extract: A splash of pure vanilla extract enhances the flavor. You could also toss in some almond extract for a nutty twist!
-
Baking Soda: This helps the cookies puff up nicely as they bake. You can replace it with baking powder if you’re out, but keep in mind they may not be as chewy.
-
Salt: Just a pinch! If you’re using salted peanut butter, you might want to skip additional salt.
With these simple ingredients, you’ll craft cookies that are nothing short of spectacular! There’s something incredibly satisfying about creating a delicious treat with minimal components—and the flavor becomes even more pronounced.
Step-by-Step Instructions
Now, let’s get into the heart of the matter—making these irresistible sugar-free peanut butter cookies! Follow along, and I promise you’ll have delicious cookies popping out of your oven in no time.
Step 1: Preheat Your Oven
Preheat your oven to 350°F (175°C). This is an essential step; it ensures that your cookies bake evenly. While you’re at it, line a baking sheet with parchment paper or a silicone baking mat to prevent sticking.
Step 2: Mix with Love
In a mixing bowl, combine 1 cup of natural peanut butter with 1/2 cup of your chosen sugar-free sweetener. Use a whisk or a spatula to mix until well incorporated. You’re aiming for a nice, creamy consistency here. Don’t be afraid to channel your inner chef and give it some elbow grease!
Step 3: Add in the Goodness
Next, crack an egg into the bowl and pour in a teaspoon of vanilla extract. Mix again until everything is well blended. The egg will give your cookies that delightful chewiness, and the vanilla… oh, the vanilla! It adds warmth and depth to the overall flavor.
Step 4: Sprinkle in the Dry Ingredients
Now, sprinkle in 1 teaspoon of baking soda and a pinch of salt. Fold the dry ingredients into the peanut butter mixture gently. You don’t want to overmix—the goal is to just combine everything until it forms a dough. A little bit of texture is perfectly fine!
Step 5: Form the Cookies
Using a tablespoon or a cookie scoop, portion out your dough and roll it into balls. Don’t worry about making them perfect; cookies that have character are the best kind! Place them on the prepared baking sheet, leaving about 2 inches of space between each ball.
Step 6: The Perfect Fork Press
Here comes a classic move! Take a fork and gently press down on each cookie dough ball to create a crisscross pattern. This not only flattens the cookies but gives them that signature homemade look. Plus, who doesn’t love a little aesthetic in their baking?
Step 7: Bake to Perfection
Pop your baking sheet into the preheated oven and let those cookies bake for about 8-10 minutes. Keep an eye on them! You’ll know they’re done when the edges look set and the centers are just slightly soft. When they come out of the oven, they’ll poof up a bit but settle down as they cool.
Step 8: Cool and Enjoy
Let the cookies cool on the baking sheet for about 5 minutes before transferring them to a wire rack to cool completely. This step is crucial; they’re super soft when they come out of the oven, and they need a little time to firm up. Once cooled, it’s time to dig in—and trust me, they won’t last long!
Serving Suggestions
These sugar-free peanut butter cookies are delightful on their own, but if you’re feeling fancy, you can serve them with a dollop of homemade sugar-free chocolate spread or alongside a glass of almond milk for that classic cookie-and-milk moment! Stack them high for a beautiful presentation or pair them with fresh fruit for a refreshing contrast. The options are endless, and your guests will be raving!
Recipe Variations
Looking to mix things up? Here are a few creative variations to try:
-
Chocolate Chip Twist: Fold in sugar-free chocolate chips for a gooey, indulgent treat! Dark chocolate chunks add depth without the sugar.
-
Nutty Add-Ins: Toss in chopped nuts like almonds or walnuts to give your cookies an extra crunch.
-
Spiced Version: Add a teaspoon of cinnamon for a warm, inviting flavor—perfect for the cooler months.
-
Coconut Delight: Mix in unsweetened shredded coconut for a chewy, tropical treat!
-
Fruit Fusion: Incorporate some dried fruit, like apricots or cranberries, for a chewy surprise with each bite.
Chef’s Notes
Before I wrap up, let me share a little secret: I consider my kitchen a playground. Every recipe is an opportunity to experiment. This sugar-free peanut butter cookie recipe evolved over years of tweaks, flops, and successes. I remember the time I tried to replace the peanut butter with pumpkin puree—let’s just say it was a “unique” experience. While that batch didn’t hit the sweet spot, it taught me the importance of knowing when to embrace classic flavors. So don’t hesitate to make this recipe your own, and don’t take it too seriously! Baking should be fun, lighthearted, and creative.
FAQs and Troubleshooting
-
Why are my cookies crumbling?
- If your cookies are falling apart, you might need to add a tad more peanut butter or use slightly more egg. The dough should hold together yet remain pliable.
-
Can I make these cookies vegan?
- Absolutely! Simply use a flax egg instead of a regular egg, and they’ll still come out yummy.
-
Can I use crunchy peanut butter?
- Yes! Crunchy peanut butter will add delightful texture to your cookies, making for a fun experience with each bite.
-
What if I want to make a bigger batch?
- Just double the ingredients! These cookies freeze well, so you can bake a big batch and save some for later by storing them in an airtight container.
Nutritional Info (Per Cookie)
(Optional and based on typical ingredients)
- Calories: ~90
- Total Fat: 7g
- Saturated Fat: 1g
- Carbohydrates: 5g
- Fiber: 1g
- Sugars: 0g (naturally)
Now you have a trusty resource for making delicious, sugar-free peanut butter cookies that bring joy to your kitchen and your taste buds. As you take your first bite, remember this: whether it’s the aroma that fills your home or the smiles on your friends and family’s faces, it’s all about creating memories filled with love. Happy baking!
Print
Sugar-Free Peanut Butter Cookies
- Total Time: 20 minutes
- Yield: 12 servings 1x
- Diet: Vegan
Description
Delightful sugar-free peanut butter cookies that satisfy your sweet tooth without refined sugar.
Ingredients
- 1 cup natural peanut butter
- 1/2 cup sugar-free sweetener
- 1 egg (or 1 flax egg for vegan)
- 1 teaspoon vanilla extract
- 1 teaspoon baking soda
- Pinch of salt
Instructions
- Preheat your oven to 350°F (175°C) and line a baking sheet with parchment paper.
- Mix together the peanut butter and sugar-free sweetener until creamy.
- Add the egg and vanilla extract, mixing until well combined.
- Sprinkle in the baking soda and salt, folding them into the mixture gently.
- Form dough balls using a tablespoon and place them on the baking sheet.
- Press each cookie dough ball with a fork to create a crisscross pattern.
- Bake for about 8-10 minutes until edges are set and centers slightly soft.
- Cool on the baking sheet for 5 minutes, then transfer to a wire rack to cool completely.
Notes
Experiment with adding sugar-free chocolate chips or nuts for variations.
- Prep Time: 10 minutes
- Cook Time: 10 minutes
- Category: Dessert
- Method: Baking
- Cuisine: American
Nutrition
- Serving Size: 1 cookie
- Calories: 90
- Sugar: 0g
- Sodium: 100mg
- Fat: 7g
- Saturated Fat: 1g
- Unsaturated Fat: 4g
- Trans Fat: 0g
- Carbohydrates: 5g
- Fiber: 1g
- Protein: 3g
- Cholesterol: 20mg
Keywords: sugar-free, peanut butter cookies, healthy dessert, vegan cookies, easy baking