

Quick Ghostly Halloween Desserts: 25 Spooky Treats in 30 Minutes
25 Ghost Themed Dessert Recipes for Halloween
Welcome to my kitchen! I’m Olivia Bennett—your friendly neighborhood chef and lover of all things cozy and homemade. You know, Halloween is one of those magical times of the year when the air is crisp, the leaves are crunchy, and everything around us is peppered with delightfully spooky characters. And, let’s not forget the sweet treats!
As the days grow shorter, I can’t help but feel inspired to whip up some cute, ghostly desserts that not only tantalize your taste buds but also add a dash of whimsy to your celebrations. Whether you’re hosting a spooky soirée, throwing a kids’ Halloween party, or just want to indulge in some sweet Halloween spirit, there’s something incredibly special about baking spooky sweets that bring everyone together. I’ve gathered 25 of my favorite ghost-themed dessert recipes that are sure to charm and delight. Let’s dive in, and may your Halloween be filled with laughter, treats, and maybe a few friendly ‘ghosts’ in the kitchen!
A Whimsical Halloween Memory
Growing up, Halloween was a big deal in our house. Mom would transform our kitchen into a mini haunted bakery, where we’d create spooky goodies together. I vividly remember a Halloween when she made the most adorable ghost cookies—simple sugar cookies decorated with royal icing. I was her little helper, always ready to dip my fingers into the colorful icing or sneak a sweet treat when I thought she wasn’t looking.
One night, we decided to host a small Halloween gathering with our neighbors. With the lights dimmed, we set up a spooky dessert table with those delightful ghost cookies, bat-shaped brownies, and pumpkin spice cupcakes with tiny candy corn toppers. I’ll never forget the giggles as our friends scurried around, trying to dodge ghosts while taste-testing everything. That Halloween solidified my love for baking and sharing food with loved ones. It was about more than just treats; it was about creating memories, connections, and a hint of magic—all of which I hope to replicate for you with these recipes.
Ingredients You’ll Need
Here are some ingredients that you’ll commonly find across our ghostly dessert recipes, complete with tips and tricks to make your spooky creations a hit!
-
All-Purpose Flour: The backbone of most desserts. If you’re looking for a gluten-free option, feel free to swap it with almond flour, coconut flour, or a gluten-free blend.
-
Granulated Sugar: This sweetener adds the necessary sweetness to your desserts. Brown sugar can provide a deeper flavor if you like a hint of molasses.
-
Eggs: The binding agent! If you’re vegan or have an egg allergy, you can use flax eggs (1 tablespoon of ground flaxseed mixed with 2-1/2 tablespoons of water).
-
Baking Powder or Baking Soda: Essential for leavening! Just make sure they’re fresh to avoid flat desserts—try the baking soda fizz test!
-
Butter: Adds richness to your desserts. For a dairy-free option, substitute with coconut oil or vegan butter.
-
Milk: A moisture booster in many recipes. Sweetened almond or oat milk works great as plant-based alternatives.
-
Vanilla Extract: This classic flavor enhancer elevates your desserts wonderfully. Feel free to experiment with other extracts like almond or peppermint for a spooky twist!
-
Food Coloring: Great for creating those ghostly white and eerie black features on your desserts. Gel colors are more vibrant and won’t thin out your batter.
-
Chocolate Chips or Melting Chocolate: Perfect for creating spooky decorations! Dark chocolate can add a little extra richness.
-
Candy Eyes: These adorable little decorations turn anything into a ghost! If you can’t find them, you can use chocolate chips or make little fondant eyes!
These ingredients will be the building blocks for our ghostly delights, ensuring a Halloween full of taste and fun!
Step-by-Step Instructions
Let’s get our chef hats on and dive into the fun part—cooking! Here are a few step-by-step guides for some crowd-favorite spooky desserts.
1. Ghostly Cupcakes
Ingredients:
- Cupcake batter (your favorite flavor)
- Whipped frosting
- Candy eyes
Instructions:
-
Preheat the oven to 350°F (175°C). This sets up the perfect environment for your cupcakes to rise beautifully, keeping your ghosts fluffy and light.
-
Prepare your cupcake tin by lining it with cute Halloween-themed liners. This step is crucial—besides the festive look, it keeps the cupcakes from sticking.
-
Mix your batter according to the recipe. Pro tip: If you’re adding spooky flavors (like pumpkin or cinnamon), now’s the time!
-
Fill each liner about two-thirds full with batter. This ensures room for the cupcakes to rise without spilling over.
-
Bake in the oven for about 18-20 minutes or until a toothpick comes out clean. Trust your nose here—the aroma will signal when they’re ready!
-
While they bake, make your frosting by whipping cream, powdered sugar, and a hint of vanilla.
-
Once the cupcakes have cooled, frost generously to create a ghostly mound.
-
Add candy eyes to give personality. Do you want them to be spooky or cute? You decide!
2. Ghostly Meringue Cookies
Ingredients:
- 4 large egg whites
- 1 cup granulated sugar
- ½ teaspoon vanilla extract
- A pinch of salt
- Dark chocolate (for eyes)
Instructions:
-
Preheat your oven to 200°F (93°C). Low and slow is key for meringues to get that delicate crunch!
-
Whip egg whites in a clean mixing bowl until foamy. Add a pinch of salt, then gradually mix in sugar until you get stiff peaks (the kind that make you feel like a kitchen wizard).
-
Add vanilla and gently fold; you want to keep the mix airy!
-
Spoon or pipe onto parchment-lined baking sheets in ghostly shapes. Don’t worry about perfection—quirkiness is part of the charm!
-
Bake for 1.5-2 hours until completely dry and crunchy. You can leave them in the oven to cool off with it for a softer center, if you like.
-
Melt dark chocolate and use it for little eyes. You can use a toothpick to dot them on for a spook-tacular effect!
3. Ghost Brownies
Ingredients:
- 1 box brownie mix (or homemade recipe)
- Whipped white frosting
- Candy corn (for decoration)
Instructions:
-
Prepare the brownie mix as directed on the box. Don’t forget to add a dash of espresso powder to enhance that chocolate flavor!
-
Pour it into your prepared pan and bake according to instructions.
-
Once cooled, frost them all over with the whipped white icing — this will provide the perfect base for ghostly decorations!
-
Cut into squares and use your frosting to create ghostly faces. Top off with candy corn to add a fun twist—like mini ghostly props!
By following these steps, I assure you’ll have a variety of delicious ghost treats ready for your Halloween festivities. Remember, cooking can be just as playful as it is practical!
Serving Suggestions
These ghostly desserts can be arranged on a spooky-decorated platter, accompanied by creepy treats like eyeball cake pops or themed candies. Serve them alongside a signature Halloween punch or spooky-themed drinks—perhaps a bubbling cauldron of apple cider? You can even add some dry ice for fog effects. Trust me, your guests will love the effort!
Recipe Variations
-
Spicy Ghosts: Add a hint of cinnamon or nutmeg to your dessert bases for a seasonal spice kick.
-
Nutty Ghosts: For a nuttier flavor in brownies, add chopped walnuts or pecans into the mix.
-
Vegan Ghostly Treats: Substitute traditional ingredients with plant-based alternatives, keeping all spooky flavors intact!
-
Fruit-Filled Ghosts: Add layers of fruit compote between cake layers to surprise your guests with a burst of flavor.
-
Gluten-Free Wonders: Use gluten-free flour blends to cater to guests with dietary restrictions without sacrificing the deliciousness!
Chef’s Notes
As you embark on this ghostly baking adventure, remember that the kitchen can be a playful place! I once had an epic battle with frosting consistency while trying to decorate a ghost cake—the result was messy, but we laughed it off while enjoying the lovely “abstract art” I created! Over the years, I’ve swapped ingredients, experimented with flavors, and, honestly, even made mistakes! Each ghostly dessert out of my kitchen tells a story, and I hope yours will too.
FAQs and Troubleshooting
-
Why did my meringue turn out flat?
Your egg whites need to be free of any grease or yolk. Ensure your bowl and whisk are perfectly clean. And make sure to add sugar gradually! -
How can I prevent brownies from becoming too cakey?
Avoid overmixing your batter and check your brownies a couple of minutes before the instructed time with a toothpick. -
My ghost icing keeps running off the cupcakes—what gives?
Ensure your frosting is thick enough and allow the cupcakes to cool completely before frosting. -
Can I freeze these ghost treats?
Absolutely! Both the cupcakes and brownie bites freeze well. Just make sure to wrap them tightly in plastic wrap.
If you encounter any other magical mishaps, feel free to reach out! Together, we can create a spook-tacular Halloween filled with fantastic flavors, memories, and plenty of ghostly treats!
Optional Nutritional Info:
While every spooky dessert will vary, I encourage you to be mindful of portion sizes. Enjoy these treats during Halloween festivities and embrace the joy they bring!
There you have it—a collection of 25 ghost-themed dessert recipes that will enchant your gatherings and make for unforgettable moments. Whether you’re making intricate ghost cupcakes or simple spooky brownies, it’s all about having fun in the kitchen! Just like my mom used to do, let your creativity run wild, and most importantly, don’t forget to share your delicious creations with those you love. Happy Halloween baking! 🎃
Print
25 Ghost Themed Dessert Recipes for Halloween
- Total Time: 40 minutes
- Yield: 12 servings
- Diet: Vegetarian
Description
A delightful collection of spooky dessert recipes perfect for Halloween celebrations.
Ingredients
- All-Purpose Flour
- Granulated Sugar
- Eggs
- Baking Powder or Baking Soda
- Butter
- Milk
- Vanilla Extract
- Food Coloring
- Chocolate Chips or Melting Chocolate
- Candy Eyes
Instructions
- Preheat the oven to 350°F (175°C) for the cupcakes.
- Prepare your cupcake tin with Halloween-themed liners.
- Mix your batter according to your recipe.
- Fill each liner about two-thirds full with batter.
- Bake for 18-20 minutes until a toothpick comes out clean.
- Make your frosting by whipping cream, powdered sugar, and vanilla.
- Frost the cooled cupcakes generously.
- Add candy eyes for decoration.
Notes
Experiment with flavors and toppings for added fun! These desserts are not only tasty but visually fun for Halloween.
- Prep Time: 20 minutes
- Cook Time: 20 minutes
- Category: Dessert
- Method: Baking
- Cuisine: American
Nutrition
- Serving Size: 1 cupcake
- Calories: 250
- Sugar: 18g
- Sodium: 150mg
- Fat: 10g
- Saturated Fat: 6g
- Unsaturated Fat: 2g
- Trans Fat: 0g
- Carbohydrates: 35g
- Fiber: 1g
- Protein: 3g
- Cholesterol: 30mg
Keywords: Halloween, ghost desserts, spooky treats, cupcakes, baking
Oreo Halloween: 10 Easy, Tested Recipes to Wow Guests
10 Easy Halloween Recipe Ideas Featuring Oreos That Are Sure to Delight Your Guests! 🎃💀
Welcome to my kitchen! As the vibrant shades of autumn creep in and Halloween approaches, there’s something undeniably cozy about whipping up treats that not only taste great but also capture the spirit of the season. From spooky gatherings to delightful family celebrations, I believe that baking should be both fun and a little whimsical. It’s the perfect opportunity to gather friends and family around some delicious and creative goodies — especially when Oreos are involved!
I can’t tell you how many times I’ve reached for a package of Oreos when brainstorming dessert ideas. These iconic cookies are not just a sweet treat on their own; they make the perfect base for a variety of Halloween-themed recipes! Whether you’re a cookie monster or just looking for ways to impress your guests with minimal effort, this blog post has something special for you. We’ll dive into 10 easy Halloween recipe ideas that feature Oreos as a star ingredient, and I’ll share tips and tricks to make them even more delightful. So, grab your favorite apron, turn up the tunes, and let’s create some fun and spooky treats!
A Sweet Memory in the Kitchen
Growing up, Halloween was always a big deal at our house. My mom would transform our kitchen into a baking lab, and my sisters and I would be her eager little helpers. My favorite part? The sugar rush from all the sweet creations, especially when we dove into making spooky treats for our Halloween party. One year, we decided to incorporate those delightful, cream-filled Oreos into our recipes.
I’ll never forget the giggles we shared while designing “monster” cupcakes topped with crushed Oreos and gummy eyes. It was messy, chaotic, and downright hilarious — flour in our hair, vanilla frosting on our faces, but the result was pure magic! Those sweet, silly moments not only filled our bellies but created memories that I cherish to this day. Now, as I share these easy Oreo-inspired Halloween recipes with you, I hope you’ll create your own special moments in the kitchen!
Ingredients
Before we dig into the recipes, let’s check out the necessary ingredients that will help turn Oreos into something truly exciting!
- Oreos: The classic! Whether you prefer regular or double-stuffed, these will make up the base of many recipes. Not a fan of Oreos? Try any chocolate sandwich cookie!
- Cream Cheese: This adds richness and creaminess to our treats. If you’re looking for a lighter alternative, go for Greek yogurt.
- Candy Melts: These are great for dipping and decorating. They come in various colors — use orange and black for a Halloween vibe! You can also substitute with chocolate chips.
- Sprinkles: From spooky-themed to autumn colors, sprinkles can take your dessert to the next level. Feel free to swap them for nuts or crushed candies!
- Whipped Topping: This provides a nice light texture. Want to make it healthier? You can use whipped coconut cream.
- Licorice: Great for spider legs or other spooky decorations! If you’re not a fan, you could use pretzel sticks for an unexpected crunch.
- Mini Marshmallows: Perfect for creating ghostly shapes or adding texture. You can skip the marshmallows or use meringue for a firmer structure.
- Gel Food Coloring: Use this to tint your batters or frosting for that vibrant Halloween spirit. If food coloring isn’t your thing, natural colorings from beet juice or turmeric can work as substitutes.
- Nuts: Chopped nuts make a fantastic addition for extra crunch. Swap them for seeds if there are allergies.
- Sugar: An essential ingredient for sweetness. If trying for a healthier option, consider using maple syrup or agave nectar.
Ready to start creating some yummy, creepy, and delightful treats? Let’s get to the step-by-step instructions!
Step-by-Step Instructions
Now that we have our ingredients lined up, it’s time to create some eerie and mouth-watering treats. Here are a few recipes, so let’s roll up our sleeves and get to work!
1. Oreo Spider Cookies
What You’ll Need:
- 1 package of Oreos
- Candy melts (black)
- Licorice
- Mini candy eyes
Instructions:
-
Melt the Candy Melts: Start by melting your black candy melts according to package instructions. Make sure to stir them gently to achieve a smooth consistency.
-
Prepare the Oreos: Carefully separate the Oreos to expose the cream filling.
-
Dip the Cookie Halves: Using a fork, dip each half into the melted candy. Let excess drip off.
-
Reassemble and Decorate: Place the halves together to recreate the Oreo and stick on the mini candy eyes using some melted candy as glue.
-
Create Spider Legs: Cut the licorice into strips and insert three on each side of the Oreo to create a spider! Allow them to sit for a few minutes for the candy to set.
-
Serve: These creepy crawly creations can be displayed on a platter lined with spooky spiderweb decorations!
2. Oreo Graveyard Cups
What You’ll Need:
- 1 package of Oreos
- Cream cheese
- Sugar
- Whipped topping
- Mini marshmallows (for ghosts)
Instructions:
-
Crush the Oreos: In a zip-top bag, crush the Oreos until they resemble dirt. Set aside.
-
Make the Cream Mixture: In a bowl, mix cream cheese, sugar, and whipped topping until smooth and creamy.
-
Layer in Cups: Start layering in clear cups — begin with a layer of the cream mixture, followed by the broken Oreo pieces for dirt. Repeat until cups are filled!
-
Add Ghosts: For added flair, stick mini marshmallows on top, creating little ghost decorations. Use gel food coloring to draw eyes if desired.
-
Final Touches: Garnish with an extra sprinkle of crushed Oreos on top.
-
Serve: Present these fun cups in your Halloween setup, and watch those eerie smiles appear!
3. Oreo Mummy Cupcakes
What You’ll Need:
- 1 box of cupcake mix (your choice)
- Oreos
- White frosting
- Candy melts (for eyes)
- Sprinkles or edible glitter (optional)
Instructions:
-
Bake Your Cupcakes: Follow the directions on your cupcake mix box and allow them to cool once baked.
-
Prepare Oreos: While cupcakes are cooling, melt some candy melts for eyes. Dip mini marshmallows into the melted candy, let them cool, and place them on the Oreos as eyes.
-
Frost the Cupcakes: Use white frosting to cover the cupcakes. Create zig-zag patterns to mimic mummy wrappings.
-
Attach Oreos: Place your Oreo mummies on top of the frosting for the finishing touch.
-
Optional Sprinkles: If desired, sprinkle edible glitter or sprinkles for added fun!
-
Serve and Enjoy: These look amazing presented on a spooky platter!
4. Oreo Halloween Bark
What You’ll Need:
- 1 package of Oreos
- Candy melts (orange and black)
- Halloween sprinkles
Instructions:
-
Melt Candy Melts: Melt orange and black candy melts in separate bowls.
-
Crush Oreos: Chop the Oreos into large chunks and spread them out evenly on a parchment-lined baking sheet.
-
Drizzle: Drizzle the melted candy over the chopped Oreos, alternating colors for a festive look.
-
Sprinkle Topping: While the candy is still wet, sprinkle with festive Halloween sprinkles.
-
Set: Allow the candy bark to cool and harden completely before breaking into pieces.
-
Serve: This bark makes for an easy grab-and-go treat!
5. Oreo Pumpkin Truffles
What You’ll Need:
- 1 package of Oreos
- Cream cheese
- Orange candy melts
- Pumpkin spice (optional)
Instructions:
-
Crush Oreos: Crush the Oreos finely in a food processor.
-
Mix with Cream Cheese: In a bowl, combine the crushed Oreos with cream cheese until mixture is fully combined.
-
Shape into Balls: Roll the mixture into small balls and place them on a parchment-lined tray.
-
Melt and Dip: Melt orange candy melts and dip the balls in for a pumpkin-like appearance.
-
Add Decoration: Use a toothpick to create a small stem with melted chocolate if desired.
-
Serve: Let these sit in the fridge until set, then enjoy your pumpkin truffles!
Serving Suggestions
When it comes to serving these spooky Halloween treats, presentation is key! Use colorful plates or trays adorned with Halloween decorations like cobwebs, mini pumpkins, or ghosts to create a festive display. You can also prepare small treat bags for your guests to take home, which makes it even more special! Remember to embrace the fun of the occasion — it’s not just about the sweets but the joy-filled moments shared over good food!
Recipe Variations
Now that I’ve shared some classic recipes, here are a few creative variations to play around with:
- Vegan Versions: Substitute traditional cream cheese and whipped topping with non-dairy options for plant-based treats.
- Gluten-Free Options: Use gluten-free cookie alternatives to make these spooky desserts friendly for everyone.
- Flavored Oreos: Experiment with different Oreo flavors like Mint, Pumpkin Spice, or Red Velvet for unique twists on these recipes.
- Savory Halloween Treats: Incorporate crushed Oreos into savory presentations such as topping for a cheeseball — playfully designing it as a monster!
Chef’s Notes
As a passionate home cook, I adore the evolution of recipes over time. These Oreo Halloween treats have become a staple in my kitchen, and I love experimenting with seasonal flavors and ingredients. I remember one year when I tried adding peppermint to my Oreos in an effort to bring a fresh flavor dimension. While it didn’t go as planned – let’s just say peppermint and chocolate sometimes clash instead of harmonize! But hey, that’s the beauty of cooking — some experiments flop, and others lead to delicious discoveries. Each mishap is a humorous kitchen story that brings friends and family closer together.
Isn’t it fun to add a little twist and see where it takes you?
FAQs and Troubleshooting
-
Can I use other cookies instead of Oreos?
Absolutely! Any chocolate sandwich cookie will work just fine, or you can get creative with your favorite treats! -
How do I get the perfect texture for my Oreo mix?
It’s all about the smooth blend of cream cheese with crushed Oreos. If it’s too crumbly, add more cream cheese; if it’s too wet, sprinkle more crushed Oreos. -
What should I do if my melted chocolate is too thick?
If your melted candy melts are too thick, you can thin them out with a little bit of coconut oil or vegetable shortening. -
How long do these treats last?
Most Oreo treats can last about 4-5 days when stored properly in an airtight container or in the fridge.
If you follow these tips and instructions, you are bound to create some vibrant and tasty Halloween treats. So gather your friends, roll up your sleeves, and let the spooky baking begin! Happy Halloween! 🎃💀
Print
10 Easy Halloween Treats Featuring Oreos
- Total Time: 25 minutes
- Yield: 20 servings
- Diet: Vegetarian
Description
Delight your guests this Halloween with these easy and fun Oreo-inspired treats. Perfect for spooky gatherings!
Ingredients
- Oreos: 1 package
- Cream Cheese: 8 oz
- Candy Melts: black, orange
- Sprinkles: assorted Halloween-themed
- Whipped Topping: 8 oz
- Licorice: for decoration
- Mini Marshmallows: for ghostly shapes
- Gel Food Coloring: for coloring
- Nuts: chopped (optional)
- Sugar: 1/2 cup
Instructions
- Melt the Candy Melts according to package instructions.
- Prepare the Oreos by separating them to expose the cream filling.
- Dip each half into the melted candy and let excess drip off.
- Reassemble and place mini candy eyes on top using melted candy as glue.
- Create spider legs with licorice strips and insert them into the sides of the cookie.
- Serve on a spooky platter.
Notes
These treats can last about 4-5 days in an airtight container. Feel free to substitute ingredients according to dietary preferences.
- Prep Time: 15 minutes
- Cook Time: 10 minutes
- Category: Dessert
- Method: No-bake
- Cuisine: American
Nutrition
- Serving Size: 1 piece
- Calories: 150
- Sugar: 12g
- Sodium: 90mg
- Fat: 7g
- Saturated Fat: 3g
- Unsaturated Fat: 4g
- Trans Fat: 0g
- Carbohydrates: 20g
- Fiber: 1g
- Protein: 2g
- Cholesterol: 5mg
Keywords: Halloween, Oreo, spooky treats, desserts, easy recipes
Min Halloween Skeleton Oreos: Kid-Approved Spooky Snack
Spooky Skeleton Oreos: The Perfect Halloween Treat!
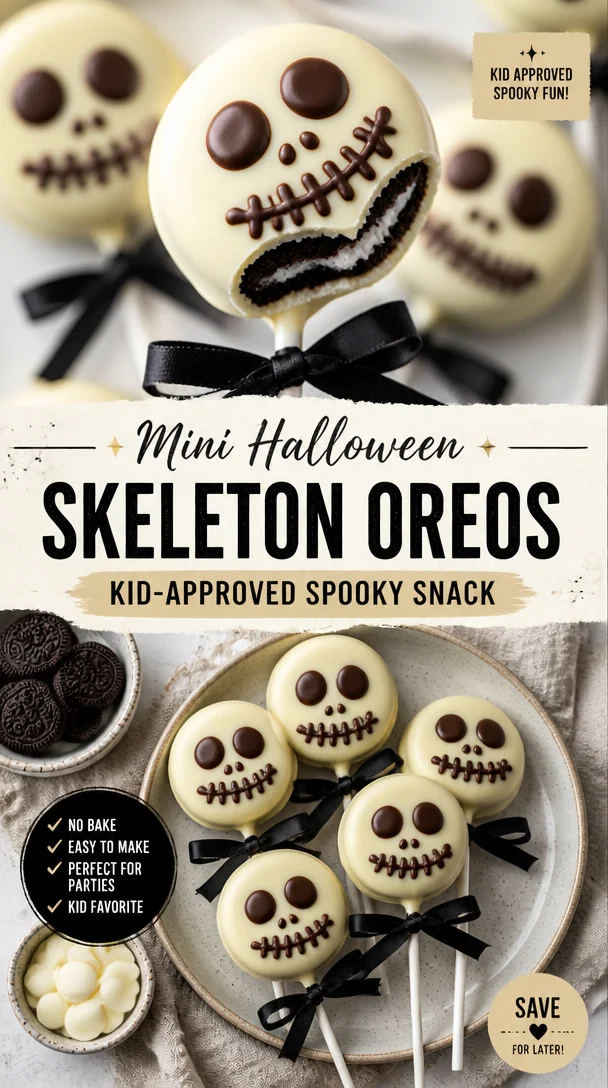
Welcome, fellow food lovers, to my cozy kitchen! Halloween is just around the corner, and you know what that means—it’s time for treats that are frightfully fun and delicious! Today, I’m excited to share a recipe that combines two of my favorite things: Oreos and spooky vibes. Say hello to Spooky Skeleton Oreos, your new go-to Halloween delight!
Just imagine the scene: a crisp autumn evening, the air filled with the scent of fallen leaves, and your favorite Halloween movie playing in the background. Now, picture a platter of these adorable Skelly Oreos, all decked out in white chocolate and spooky designs. Whether you’re hosting a Halloween party, attending a potluck, or simply want to treat your family, these delightful cookies are sure to impress and bring a smile to faces of all ages.
What I love about this recipe is that it bridges the gap between the creativity of cooking and the joy of sharing. You don’t have to be a professional pastry chef to whip up these cuties, just a bit of imagination and the willingness to get a little messy in the kitchen—my favorite pastime!
Let’s dive into this sweet and spooky experience together. I promise these Spooky Skeleton Oreos will not only be a treat but also a fun-filled activity to enjoy with friends and family. So, gather your ingredients, roll up your sleeves, and let’s get started on making some memorable Halloween treats!
A Trip Down Memory Lane
I have to tell you, one of my fondest memories is intertwined with Halloween and, of course—cookies! Every year, my mom and I would transform our kitchen into a spooky bakery. It was a tradition; we’d crank up the Halloween playlist, don our festive aprons, and begin mixing, baking, and decorating.
One year, inspired by the skeletons from the Halloween decorations, we decided to create our own spooky treats. We dipped Oreos in white chocolate and drew ghoulish faces on them with icing. I remember giggling as I tried to create the perfect ‘skull’ face, but they ended up looking more like cartoon characters! Still, we had a blast and the cookies were a hit at our neighborhood block party. Each bite was filled with laughter, and they disappeared faster than we could keep up with them.
That experience has stayed with me and inspired me to create these Spooky Skeleton Oreos with my own little twist. So let’s channel that nostalgia, dive into our creative juices, and make some skeleton friends of our own!
Ingredients
To whip up your spooky skeleton cookies, you’ll need a handful of fun and simple ingredients. Here’s what you’ll need:
-
Oreos: The star of our show! You can use classic Oreos or try Golden Oreos for a different flavor profile. If you’re looking for a gluten-free option, try using gluten-free chocolate sandwich cookies instead.
-
White Chocolate Melts: These will give our skeletons a spooky glow! Consider using almond bark if you prefer, as it melts smoothly and sets quickly. If you want to color it, feel free to add gel food coloring.
-
Black Food Coloring Gel: Essential for creating those spooky details. Gel coloring is best as it doesn’t water down the chocolate.
-
Decorating Icing: Look for piping icing in a tube—it’s perfect for detailed designs. It makes it easy to create expressions and patterns. If you’re feeling adventurous, make your own icing with powdered sugar, egg whites, and a dash of lemon juice for a more homemade touch.
-
Candy Eyes: Because every skeleton needs to see! You can find these at most craft stores or online, or opt for chocolate chips if you’d like something more straightforward.
-
Lollipop Sticks (optional): If you want to create skeleton pops, grab some lollipop sticks to insert into your Oreos before dipping them. This adds a fun presentation touch!
Step-by-Step Instructions
Now that we’ve gathered our ingredients, let’s get cooking! Here’s your step-by-step guide to crafting your Spooky Skeleton Oreos.
-
Prepare Your Workspace: Start by setting up a clean workspace. Lay down some parchment paper on a baking tray where you’ll place your finished Oreos. This will make clean-up a breeze.
-
Melt the White Chocolate: In a microwave-safe bowl, melt the white chocolate melts. Heat them in 30-second intervals, stirring well after each. This helps prevent burning. You want the chocolate to be smooth and entirely melted—think of it as a velvety pool of sweetness.
-
Dip the Oreos: Once the chocolate is melted, take each Oreo and dip it in the melted chocolate, ensuring it’s wholly coated. Use a fork to lift it out, letting the excess chocolate drip off before placing it on the prepared parchment. If you’re using lollipop sticks, dip them into the chocolate before inserting them into the Oreo for that pop effect.
-
Chill to Set: Place your dipped Oreos in the fridge for about 15-20 minutes to allow the chocolate to harden. This step is crucial; you want the chocolate to be firm before you start decorating.
-
Get Creative with Decorating: Once the white chocolate is set, it’s time to create our spooky faces! Take your decorating icing and pipe on eyes, noses, and smiles to form the skeleton’s visage. Remember, they don’t have to be perfect—let your creativity flow and enjoy the process!
-
Add Candy Eyes: While the icing is still wet, place the candy eyes in position on each Oreo for a fun, whimsical touch. This step adds personality and is bound to bring giggles!
-
Rest and Enjoy: Allow the decorative icing to set for another 10-15 minutes before carefully transferring the Spooky Skeleton Oreos to a serving dish.
And voila! You have crafted some eye-catching, fun, and festive Skelly Oreos just in time for Halloween!
Serving Suggestions
When it comes to serving your Spooky Skeleton Oreos, keep it simple yet fun! Arrange them on a festive platter and add some Halloween-themed decorations like mini pumpkins or spooky confetti for extra flair. If you’re feeling extra festive, you can even place them in clear cellophane bags tied with orange ribbons—perfect for giving away as treats!
Recipe Variations
Want to put your own twist on these delightful cookies? Here are a few creative ideas:
-
Dark Chocolate Dipped: Try dipping Oreos in dark chocolate for a richer flavor. The contrast with the white decorations will create a striking look.
-
Flavored Oreos: Use specialty flavored Oreos like Pumpkin Spice or Peppermint to mix things up! These seasonal selections can add a delightful surprise!
-
Nut Butter Dip: For a twist on the classic, why not dip Oreos in melted peanut butter or almond butter? Once set, drizzle with white chocolate for a fun fusion!
-
Sugar Skull Inspiration: Go wild with colors by using various colored chocolate melts, mixing and matching the designs, mimicking the beautiful sugar skulls seen in Dia de los Muertos celebrations.
-
Spooky Sprinkles: Add some texture with festive sprinkles after the chocolate dip—think orange, black, and purple shapes. They can provide a fun pop!
Chef’s Notes
Looking back, this recipe has evolved a bit from when my mom and I first dipped our Oreos all those years ago. I’ve learned to create more detailed designs and make them even more fun and festive. The laughter shared while decorating is what I cherish the most when I think of creating these treats. Don’t stress about making them perfect; embrace a bit of messiness—it adds to the charm!
I once had a little mishap when a batch of chocolate seized up on me, not wanting to melt. Instead of tossing it, I added a splash of coconut oil and it turned into an amazing creamy texture that worked perfectly for dipping! Who knew that ‘disaster’ would lead to deliciousness? Always be open to a little kitchen improv!
FAQs and Troubleshooting
-
What if the chocolate is too thick?
If your melted chocolate is too thick, you can thin it out by adding a small amount of coconut oil or vegetable oil. This will help achieve a smoother consistency for dipping. -
How do I store leftover cookies?
Store your decorated Spooky Skeleton Oreos in an airtight container at room temperature for up to one week. If you need them for longer, consider freezing them—layer them between parchment paper to avoid sticking. -
Can I use a different type of cookie?
Absolutely! Feel free to experiment with different cookies—try vanilla wafers, graham crackers, or chocolate chip cookies for a fun variation! -
What if I don’t have decorating icing?
If you don’t have piping icing, you can make a quick icing using powdered sugar and water or milk. Combine until you achieve a drizzling consistency!
Nutritional Information
(If applicable: Include a brief table or summary of calories, fat content, etc. If you choose to omit, that is fine! Just note it here.)
And that’s a wrap on our Spooky Skeleton Oreos! I hope you enjoyed this recipe and that it inspires creativity and laughter in your kitchen this Halloween season. Don’t forget, cooking should be fun, so gather your loved ones, get a little messy, and whip up some delightful treats to share! Happy Halloween, and happy baking! 🎃👻
Print
Spooky Skeleton Oreos
- Total Time: 30 minutes
- Yield: 20 servings 1x
- Diet: Vegetarian
Description
Delightfully spooky Oreos dipped in white chocolate, perfect for Halloween.
Ingredients
- 1 package Oreos (classic or Golden)
- 1 cup White Chocolate Melts
- Black Food Coloring Gel
- Decorating Icing (or homemade)
- Candy Eyes
- Lollipop Sticks (optional)
Instructions
- Prepare your workspace with parchment paper on a baking tray.
- Melt the white chocolate in a microwave-safe bowl at 30-second intervals, stirring well.
- Dip each Oreo into the melted chocolate, ensuring it’s fully coated.
- Chill dipped Oreos in the fridge for 15-20 minutes until the chocolate sets.
- Get creative and pipe on decorating icing to form spooky faces.
- Add candy eyes while the icing is still wet.
- Rest the decorated Oreos for another 10-15 minutes before serving.
Notes
These treats can be presented on festive platters with Halloween decorations. If desired, customize with different Oreos and decorations.
- Prep Time: 20 minutes
- Cook Time: 10 minutes
- Category: Dessert
- Method: Dipping
- Cuisine: American
Nutrition
- Serving Size: 1 cookie
- Calories: 120
- Sugar: 12g
- Sodium: 50mg
- Fat: 6g
- Saturated Fat: 4g
- Unsaturated Fat: 2g
- Trans Fat: 0g
- Carbohydrates: 15g
- Fiber: 0g
- Protein: 1g
- Cholesterol: 5mg
Keywords: Halloween, spooky treats, Oreo recipes, festive cookies, easy desserts
Witches Brew Oreo Milkshake
Witches Brew Oreo Milkshake: Spooktacularly Delicious
Hello, fellow food adventures! 🌟 As the leaves start to change and the air turns crisper, there’s one thing on my mind: Halloween treats! I can’t help but get excited about the magic of the season, especially when it comes to food. One of my absolute favorite creations to whip up during this time is the Witches Brew Oreo Milkshake. It’s not just a drink; it’s a delightful experience that brings a little extra charm and a sprinkle of fun to your Halloween festivities.
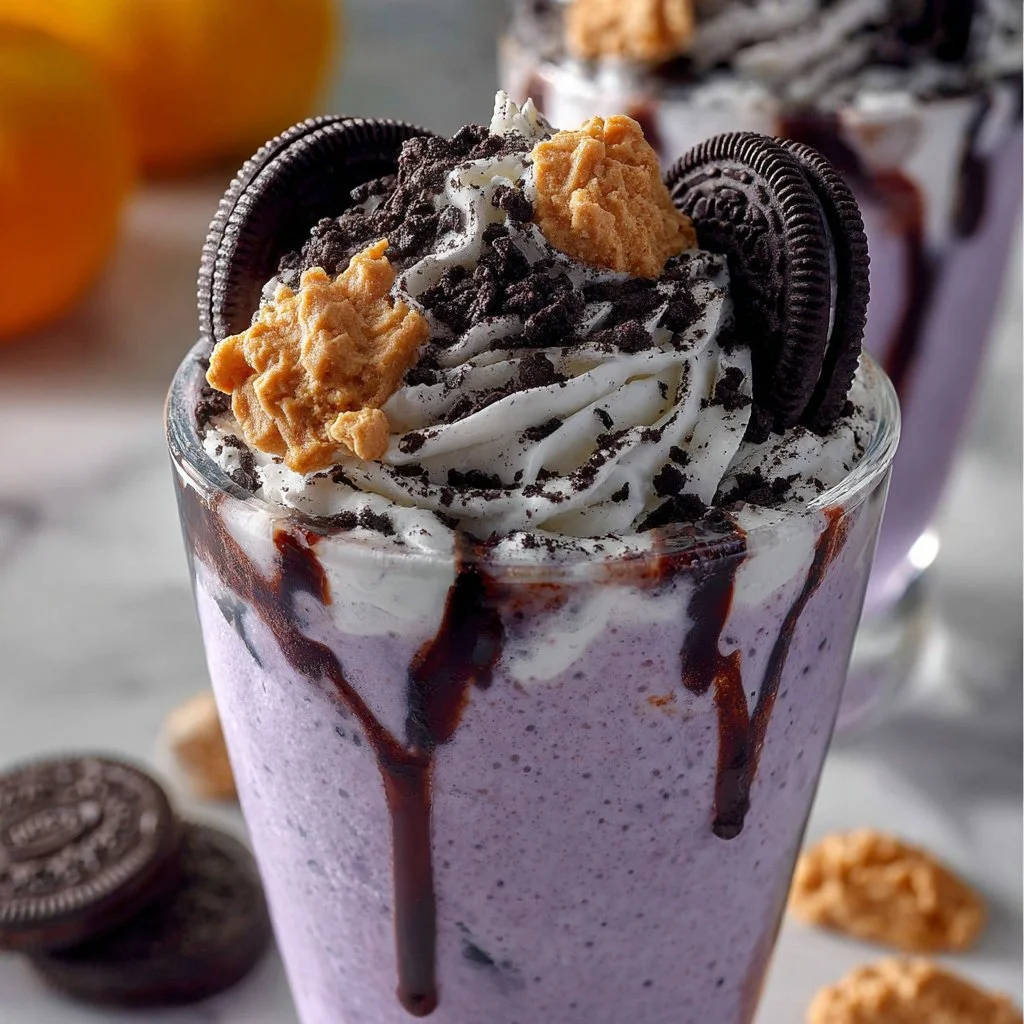
Imagine this: you gather around with friends and family, laughter fills the room, and suddenly that first sip of creamy, chocolatey goodness hits your taste buds. It’s like diving into a cauldron of sweet nostalgia, with just the right amount of spooky vibes to get everyone in the Halloween spirit. Honestly, what could be better than a milkshake that not only tastes divine but also looks like something straight out of a fun Halloween movie?
In this post, we’re going to blend up this delightful milkshake together. It’s packed with that hauntingly delicious flavor of Oreos, creamy vanilla ice cream, and some surprising ingredients that add flair without breaking the bank or your spirit! So grab your blender, and let’s make your Halloween party unforgettable with this quick and easy recipe.
Personal Story
Ah, memories of Halloween back in the day! As a kid, I was always that one who took Halloween way too seriously—costumes, decorations, and of course, treats galore. One year, my mom decided to host a Halloween party, which meant a lot for an eight-year-old Olivia filled with excitement. She whipped up a delightful mix of snacks, but what stole the show was her special spooky milkshake.
She called it the “Witches Brew,” and it was simply magical! I remember sitting on the couch, clad in my fluffy witch costume, straw in hand, and instantly falling in love with the delicious blend of chocolate, cookies, and creamy goodness. That milkshake quickly turned into the highlight of our celebration, its rich, chocolately essence sparking spontaneous dance parties in our living room as we raised our cups to the air and cheered each time someone took a sip.
Now, every Halloween, I like to carry on that tradition in my own kitchen. I’ve added my twists to the recipe over the years, and now I’m excited to share my version—the Witches Brew Oreo Milkshake! It’s guaranteed to bring the same joy and laughter to your celebrations as it did back then. Let’s dive right into the magical ingredients!
Ingredients
Here’s what you’ll need to create this enchanting concoction:
-
Oreos (1 package)
- Chef Insight: Oreos are the classic cookie choice here, but you can switch it up with any flavored Oreo (like mint or pumpkin spice) for a fun twist!
-
Vanilla Ice Cream (3 cups)
- Substitution Tip: Need a dairy-free option? Use a plant-based vanilla ice cream made from coconut or almond milk!
-
Milk (1 cup)
- Quick Insight: Whole milk gives you that creamy texture, but you can use almond milk or oat milk for a lighter version.
-
Chocolate Syrup (1/4 cup)
- Chef Hack: Consider using a homemade chocolate syrup for that extra special touch—just combine equal parts cocoa powder, sugar, and water and simmer until thick!
-
Whipped Cream (for topping)
- Substitution Tip: For a fun Halloween presentation, consider using green-tinted whipped cream or even flavored whipped cream like marshmallow!
-
Green Food Coloring (optional, for spooky vibes)
- Chef Insight: This is optional, but a few drops can really elevate the witchy aesthetic!
-
Sprinkles or Edible Glitter (for garnish)
- Chef Hack: Go wild with the sprinkles—think Halloween colors like orange and purple for extra flair!
Step-by-Step Instructions
Ready to get blending? Let’s make this Witches Brew Oreo Milkshake step by step!
-
Gather Your Ingredients:
Make sure you have all your ingredients ready to go. Nothing worse than realizing halfway through you’re out of Oreos! -
Crush the Oreos:
In a large zip-top bag, crush your Oreos into smaller pieces. You want chunks, not powder—so swing by with a rolling pin, or just use your hands! This will add that delightful texture to your milkshake.Tip: Save a few cookie pieces for garnishing later—they’ll add that extra yum factor on top!
-
Blend it All Together:
In a blender, combine the vanilla ice cream, milk, chocolate syrup, and about two-thirds of your crushed Oreos.Chef Hack: From experience, it’s often easier to start with the milk and ice cream first, as they create a smooth base. Blend on medium speed until everything is well combined and creamy. Adjust the thickness by adding more milk if it’s too thick or more ice cream for a richer flavor.
-
Add Green Food Coloring (Optional):
If you’re going for that spooky look, this is the time to add your green food coloring. Just a couple of drops will do. Blend again until the color is evenly distributed. -
Pour & Garnish:
Now comes the fun part! Pour the luscious milkshake into tall glasses. Top with a generous dollop of whipped cream, sprinkle on those saved Oreo chunks, and add your Halloween sprinkles or glitter for a dramatic flair.Serving Tip: To make it even more festive, serve with colorful straws or spooky-themed drink stirrers.
-
Enjoy!
Gather your family and friends around, and toast to a delicious Halloween treat! Take a moment to appreciate the delightful blend of flavors before diving in.
Serving Suggestions
This milkshake is fabulous on its own, but feel free to make it a full-on dessert experience! Pair it with Halloween cookies, ghost-shaped cupcakes, or even a platter of chocolate-dipped fruit for a little balance. Each sip will feel like a cozy hug on a chilly October evening!
Recipe Variations
Want to mix things up? Here are some creative twists:
- Minty Witch’s Brew: Use mint-flavored Oreos and a splash of peppermint extract for a fresh mint chocolate taste!
- Peanut Butter Swirl: Add a couple of tablespoons of creamy peanut butter in the blend for a deliciously nutty flavor.
- Pumpkin Spice Surprise: Swap out some vanilla ice cream with pumpkin ice cream or add a few tablespoons of pumpkin puree and pumpkin spice.
- Chocolate Overload: Toss in some chocolate chips for extra chocolate chunks and a rich texture.
- Vegan-Friendly: Make it vegan by choosing plant-based ice cream and almond milk—so everyone can enjoy.
Chef’s Notes
This recipe has been a staple in my kitchen since I can remember! Each time I make it, I find myself reminiscing about that precious Halloween night spent with family and friends. Over the years, I’ve definitely rambled on about my favorite ingredients, trying to perfect that blend of creamy, crunchy, and sugary goodness. One funny episode was when I accidentally dumped in way too much food coloring and ended up with a glowing green concoction that made for great Instagram material—just slightly less appealing for my guests!
It’s all about experimenting, so don’t shy away from putting your spin on this milkshake. After all, cooking should be as fun and whimsical as the holiday itself!
FAQs and Troubleshooting
-
Why is my milkshake too thick?
- No worries! Simply add a little more milk and blend again until you reach your desired consistency.
-
What if I don’t have a blender?
- You can use a milkshake maker or even a whisk to combine the ingredients. It’ll take more elbow grease, but homemade always has a touch of love!
-
Can I make this ahead of time?
- Yes! You can prepare the milkshake mix (minus the whipped cream and garnishes) and store it in the freezer until you’re ready to serve. Just give it a quick blend before pouring!
-
My whipped cream isn’t holding its shape—what did I do wrong?
- Often, this is because the whipped cream wasn’t beaten enough or the cream wasn’t cold enough. Make sure the cream is chilled and whip until stiff peaks form!
Nutritional Info
(Per serving, approximate values):
- Calories: 450
- Protein: 8g
- Carbohydrates: 64g
- Fat: 22g
There you have it—a Halloween treat that’s sure to conjure up nostalgia and delight in every scoop. I hope you find as much joy making and sharing this Witches Brew Oreo Milkshake as I do! So gather those ghouls and goblins, and let the festive fun begin. Happy sipping! 🍬🧙♀️
Print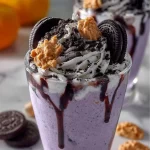
Witches Brew Oreo Milkshake
- Total Time: 15 minutes
- Yield: 4 servings 1x
- Diet: Vegetarian
Description
A spooktacular Oreo milkshake that’s perfect for Halloween gatherings, combining chocolatey creaminess with festive flair.
Ingredients
- 1 package Oreos
- 3 cups vanilla ice cream
- 1 cup milk
- 1/4 cup chocolate syrup
- Whipped cream (for topping)
- Green food coloring (optional)
- Sprinkles or edible glitter (for garnish)
Instructions
- Gather your ingredients.
- Crush the Oreos in a zip-top bag.
- Blend the vanilla ice cream, milk, chocolate syrup, and two-thirds of the crushed Oreos.
- Add green food coloring if desired and blend again.
- Pour into tall glasses and top with whipped cream, saved Oreo chunks, and sprinkles.
- Enjoy with family and friends!
Notes
Feel free to mix and match ingredients for creative variations like mint or pumpkin flavors.
- Prep Time: 15 minutes
- Cook Time: 0 minutes
- Category: Dessert
- Method: Blending
- Cuisine: American
Nutrition
- Serving Size: 1 serving
- Calories: 450
- Sugar: 40g
- Sodium: 150mg
- Fat: 22g
- Saturated Fat: 12g
- Unsaturated Fat: 8g
- Trans Fat: 0g
- Carbohydrates: 64g
- Fiber: 2g
- Protein: 8g
- Cholesterol: 30mg
Keywords: Halloween, milkshake, dessert, Oreo, festive




