
One-Pan Chocolate Zucchini Sheet Cake (Easy Make-Ahead)
The Ultimate Chocolate Zucchini Sheet Cake Recipe: A Slice of Heaven
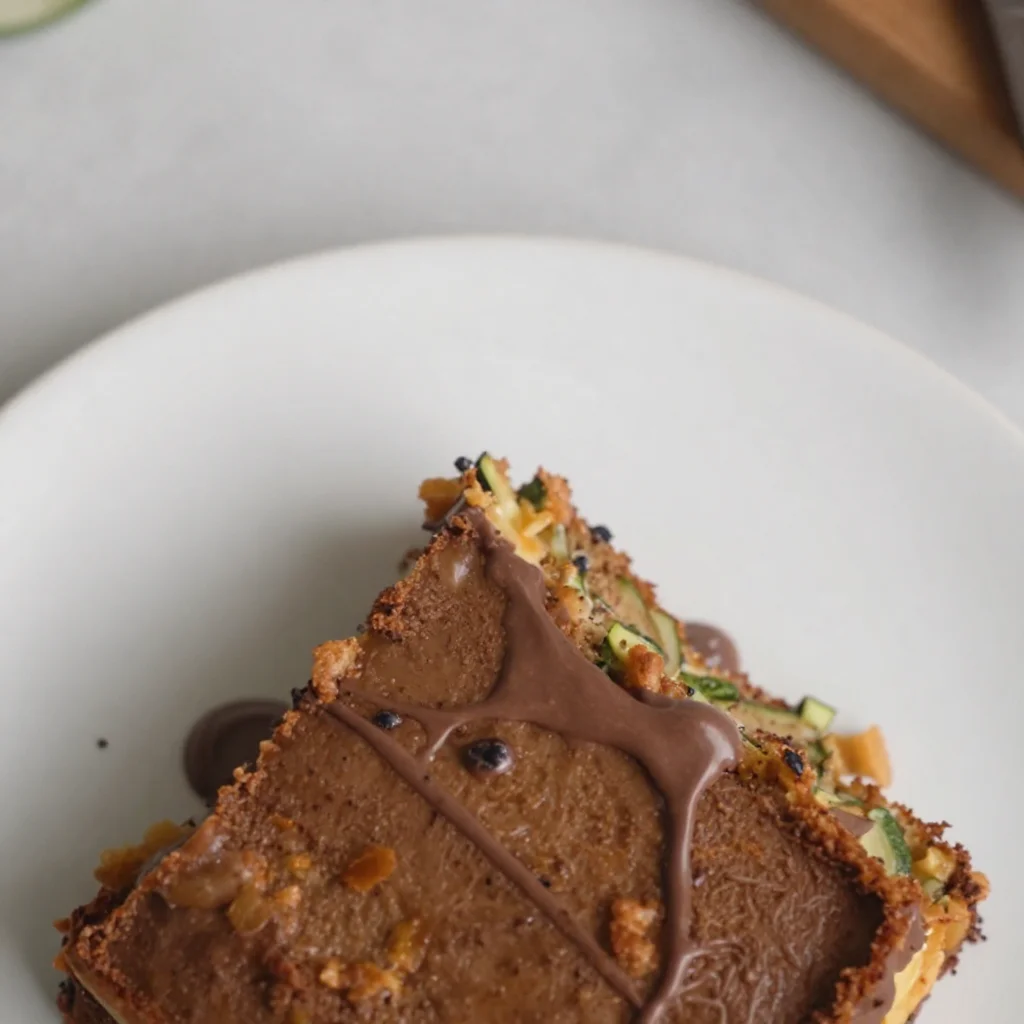
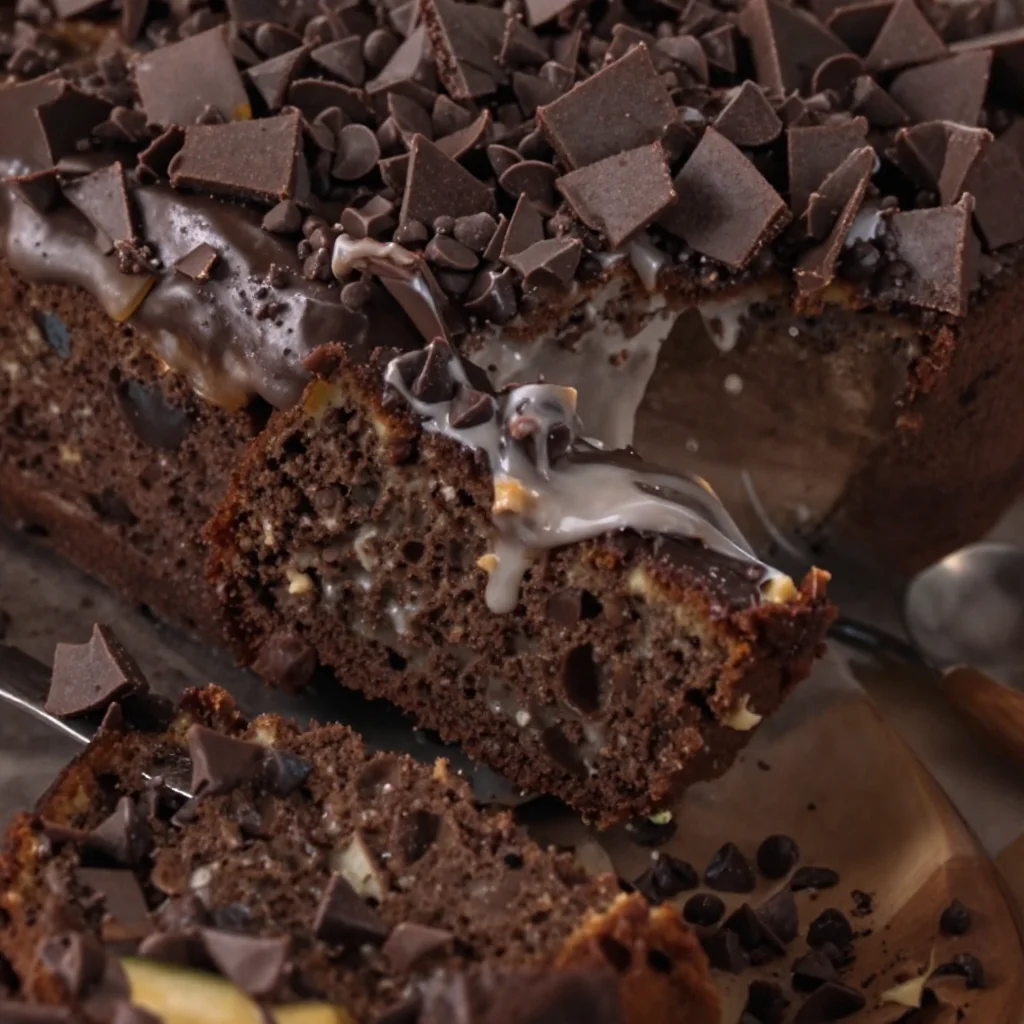
Welcome to my kitchen, dear friends! Today, we’re diving into a recipe that combines two unlikely heroes: chocolate and zucchini. Before you raise an eyebrow, let me tell you, this Chocolate Zucchini Sheet Cake is nothing short of a culinary masterpiece that even the pickiest eaters won’t be able to resist. Think rich, moist chocolate cake with the unexpected twist of tender zucchini hidden within.
If you’re anything like me, you love the thrill of a surprise ingredient. It adds character to the dish and spices up the cooking experience. Trust me, no one will ever suspect there’s a green vegetable lurking in this indulgent slice of heaven — and that’s the beauty of it! This cake is perfect for everything from potlucks to birthday parties or just a cozy night at home.
It was on a sunny autumn afternoon in my grandmother’s kitchen when I first laid eyes (and taste buds) on a chocolate zucchini cake. The aroma of cocoa and something utterly delightful wafted through the air, and I was instantly intrigued. As my grandmother whipped up this rich dessert, she told me how zucchini helped to keep the cake moist. I watched in awe as she sprinkled the batter with mini chocolate chips and popped it into the oven. The moment we pulled that cake out, the entire family gathered around, ready to dig in. That day marked my love affair with chocolate zucchini cake, and I’ve been making my own versions ever since.
Ingredients You’ll Need
To make this beautiful creation, you’ll need the following simple ingredients:
-
Zucchini (about 2 cups, grated): The star ingredient! Zucchini adds moisture and a subtle flavor without overpowering the chocolate. It’s best to use young zucchini for this recipe as they have a milder taste and smaller seeds. No zucchini? No problem! You can substitute with grated carrots for a similar texture.
-
All-Purpose Flour (1 ¾ cups): This is the backbone of your cake. For a gluten-free version, feel free to use a 1:1 gluten-free flour blend.
-
Granulated Sugar (1 ½ cups): To balance the chocolate flavor. You could replace some of this with coconut sugar for a deeper flavor and lower glycemic index.
-
Unsweetened Cocoa Powder (½ cup): The heart and soul of your cake. Sift it before using to ensure there are no lumps! Want to skip the cocoa? You can opt for carob powder, though the flavor will differ.
-
Baking Soda (1 tsp): This is your leavening agent, ensuring the cake rises beautifully.
-
Baking Powder (1 tsp): Works alongside the baking soda for extra lift. They’re a dynamic duo!
-
Salt (½ tsp): Don’t skip this! Salt enhances all the flavors in the cake.
-
Large Eggs (2): Eggs bind the ingredients and give structure to your cake. You can substitute with flaxseed meal mixed with water for a vegan version (1 tablespoon of flax + 2.5 tablespoons of water per egg).
-
Vegetable Oil (¾ cup): This keeps your cake moist and tender. You can switch to melted coconut oil for a subtly sweet flavor.
-
Vanilla Extract (2 tsp): For that warm, inviting flavor. You can also use almond extract for a different twist.
-
Chocolate Chips (1 cup): A delightful addition that melts in your mouth! Use dark chocolate chips for a richer flavor or white chocolate for a sweeter contrast.
Step-by-Step Instructions
-
Prep Your Oven and Pan: Preheat your oven to 350°F (175°C). Grab a 9×13-inch baking dish and grease it lightly with oil or use parchment paper for easy removal.
-
Grate that Zucchini: Rinse your zucchini and grab the grater. No need to peel! Just grate them using the coarse side of the grater. Don’t forget to squeeze out the excess moisture using a clean kitchen towel or cheesecloth — we want a moist cake, but we don’t need it swimming!
-
Mix Your Dry Ingredients: In a large bowl, whisk together the flour, cocoa powder, baking soda, baking powder, and salt until well combined. Your cocoa may want to form clumps, so give it some extra love with that whisk!
-
Blend the Wet Ingredients: In another bowl, beat the eggs and sugar together until light and fluffy (about 2–3 minutes using an electric mixer). This step is key because it incorporates air, resulting in a lighter cake. Add in the oil and vanilla extract, and mix until combined.
-
Combine Dry and Wet Mixtures: Gradually add the dry ingredients into the wet mixture. Fold gently using a spatula — be careful not to overmix, or your cake will end up tough. Just mix until the flour is incorporated.
-
Stir in the Zucchini and Chocolate Chips: Gently fold in the grated zucchini and chocolate chips until evenly distributed throughout the batter. Taste test a bit of that batter — yum!
-
Pour and Bake: Transfer the batter to your prepared baking dish, spreading it evenly. Bake for 30-35 minutes or until a toothpick inserted in the center comes out clean. Don’t let it overbake; a little gooeyness is desirable!
-
Cool Down: Allow the cake to cool in the pan for about 10 minutes, then transfer it to a wire rack to cool completely. You could frost it while it’s still slightly warm, but I like to wait for the fun of layering!
Serving Suggestions
Now that you’ve created this scrumptious Chocolate Zucchini Cake, it’s time to indulge! Serve it warm, dusted with powdered sugar, or go all out and slather on some rich chocolate frosting for a dessert that’s totally show-stopping. Paired with a scoop of vanilla ice cream or whipped cream? Pure bliss! Don’t forget to grab a slice for yourself before someone else snatches the last piece!
Recipe Variations
- Spiced Zucchini Cake: Add a teaspoon of cinnamon and a pinch of nutmeg for a warm, spiced version.
- Nutty Delight: Fold in a half cup of toasted walnuts or pecans for a delightful crunch.
- Fruity Twist: Add some mashed bananas or applesauce if you want to pack in extra flavor and moisture.
- Gluten-Free Option: Swap out the all-purpose flour for almond flour or a gluten-free flour blend.
- Double Chocolate: Use chocolate cake mix instead of flour and replace half the oil with unsweetened applesauce to make it even fudgier.
Chef’s Notes
Every time I whip up this Chocolate Zucchini Sheet Cake, I can’t help but reminisce about those sweet afternoons in my grandmother’s kitchen. There’s something so comforting about the smell of chocolate and the warmth of family gathered around the table. Over the years, I’ve played with this recipe, and it’s evolved from my grandma’s classic to a modern delight with my own twists. Each time, it brings smiles and happy memories with every slice!
FAQs and Troubleshooting
1. My cake came out dry! What happened?
Don’t fret! If the cake is dry, it’s likely overbaked. Make sure to check it towards the end of the baking time and rely on the toothpick test — moist crumb is okay!
2. Can I make this ahead of time?
Absolutely! This cake stays moist for several days, making it perfect for meal prep or entertaining. Just store it covered at room temperature or in the fridge for longer freshness.
3. Can I freeze this cake?
Yes, you can! Once the cake has completely cooled, wrap it tightly in plastic wrap, followed by aluminum foil, and store it in the freezer for up to three months. Thaw in the fridge overnight before serving.
4. How do I know if my zucchini is fresh?
Fresh zucchini should be firm, with smooth skin and vibrant color. Avoid any that feel soft or show signs of wrinkles!
Nutritional Info
Note: Nutritional values may vary based on ingredient brands and specific measurements used in the recipe. Always consult a nutritionist for personalized dietary advice.
Now that you have the full scoop on creating this Chocolate Zucchini Sheet Cake, get ready to impress your friends and family. Remember, cooking is all about fun and creativity — so don’t be afraid to make it your own! Happy baking and enjoy every delicious bite!
Print
Ultimate Chocolate Zucchini Sheet Cake
- Total Time: 50 minutes
- Yield: 12 servings 1x
- Diet: Vegetarian
Description
Indulge in a moist chocolate cake with a twist of zucchini that’s perfect for any occasion.
Ingredients
- 2 cups Zucchini, grated
- 1 ¾ cups All-Purpose Flour
- 1 ½ cups Granulated Sugar
- ½ cup Unsweetened Cocoa Powder
- 1 tsp Baking Soda
- 1 tsp Baking Powder
- ½ tsp Salt
- 2 Large Eggs
- ¾ cup Vegetable Oil
- 2 tsp Vanilla Extract
- 1 cup Chocolate Chips
Instructions
- Preheat your oven to 350°F (175°C). Grease a 9×13-inch baking dish.
- Grate the zucchini using the coarse side of a grater, then squeeze out excess moisture.
- Whisk together flour, cocoa powder, baking soda, baking powder, and salt in a large bowl.
- Beat eggs and sugar in another bowl until light and fluffy, then mix in oil and vanilla.
- Fold the dry ingredients into the wet mixture until just combined.
- Gently fold in grated zucchini and chocolate chips.
- Pour the batter into the prepared baking dish and spread evenly.
- Bake for 30-35 minutes, or until a toothpick comes out clean.
- Cool in the pan for about 10 minutes, then transfer to a wire rack.
Notes
Serve warm or with chocolate frosting and vanilla ice cream for a delightful treat.
- Prep Time: 15 minutes
- Cook Time: 35 minutes
- Category: Dessert
- Method: Baking
- Cuisine: American
Nutrition
- Serving Size: 1 slice
- Calories: 350
- Sugar: 22g
- Sodium: 370mg
- Fat: 15g
- Saturated Fat: 2g
- Unsaturated Fat: 10g
- Trans Fat: 0g
- Carbohydrates: 49g
- Fiber: 2g
- Protein: 4g
- Cholesterol: 60mg
Keywords: chocolate cake, zucchini cake, desserts, baking, sweet treats
One-Bowl Chocolate Zucchini Cake: Easy Weeknight Dessert
Indulge in the Sweetness of Chocolate Zucchini Cake
Welcome to my kitchen, everyone! I’m Olivia Bennett, and today we’re diving into something truly delightful — Chocolate Zucchini Cake. Now, I know what you might be thinking: “Zucchini? In a cake?” But trust me, this is a match made in heaven that will leave your taste buds dancing with joy. Picture warm, chocolatey goodness sprinkled with a hint of moisture from zucchini — a secret ingredient that makes this cake incredibly rich and fudgy!
Baking has always been my love language, a way to spread joy and comfort to the people around me. The aroma of something sweet bubbling away in the oven can turn any ordinary day into a special occasion. Chocolate Zucchini Cake is one of those recipes that embodies both comfort and surprise. It’s the kind of dessert that everyone raves about, and yet, no one really needs to know it has veggies sneaking in!
I adore this cake not just for its flavor but also for the memories it brings. Picture a warm summer afternoon in my grandmother’s kitchen: she’s elbow-deep in flour, insisting that every great cake needs a secret twist. One day, she decided to throw in some grated zucchini from her overflowing garden. We giggled at the idea at first, but let me tell you, that cake quickly became a household favorite. It was luscious and moist, and we devoured every crumb!
So, if you’re ready to get your hands a little messy and treat yourself (and your loved ones) to something special, let’s pull on our aprons and jump right into making this scrumptious Chocolate Zucchini Cake. I promise you won’t be disappointed!
Ingredients
Here’s what you’ll need to whip up this delectable treat. Remember, cooking is all about adapting to what you have, so feel free to make substitutions if you need to!
-
Zucchini (2 medium-sized): Zucchini adds moisture to the cake without overpowering the flavor. If you don’t have zucchini, you can use grated carrots for a similar moisture level and sweetness.
-
All-purpose flour (1 ¾ cups): This is the base of the cake. For a gluten-free option, try almond flour or a 1:1 gluten-free blend, which has worked well for me in the past!
-
Cocoa powder (¾ cup): Unsweetened cocoa powder gives richness and depth to the chocolate flavor. You can use Dutch-processed cocoa for a smoother taste.
-
Granulated sugar (1 cup): Adds sweetness and balances the bitterness of cocoa. For a healthier twist, you can substitute it with coconut sugar or honey (but remember to adjust the liquid in the recipe).
-
Baking soda (1 tsp): This helps the cake rise. Be careful with this ingredient, as too much can make your cake taste soapy.
-
Baking powder (½ tsp): Gives the cake a bit of extra lift. Make sure it’s fresh for the best results!
-
Salt (½ tsp): A humble but crucial ingredient that enhances the flavors.
-
Eggs (2 large): Eggs act as a binding agent, giving structure to the cake. If you want to make it vegan, you can substitute each egg with ¼ cup of unsweetened applesauce.
-
Vegetable oil (½ cup): This keeps the cake moist and tender. You can also use melted coconut oil or melted butter for added flavor.
-
Vanilla extract (1 tsp): Adds depth and warmth. Don’t skip this one! You could also experiment with almond extract for a unique twist.
-
Chocolate chips (optional, ½ cup): Because, why not? Chocolate chips can turn a good cake into an unforgettable one! You can swap these for nuts if you prefer some crunch.
Step-by-Step Instructions
Ready to bake? Let’s roll up our sleeves and get started!
-
Preheat Your Oven: Preheat your oven to 350°F (175°C). This step is crucial! A properly heated oven ensures even baking.
-
Prep Your Zucchini: Grate the zucchini using a box grater. Make sure to squeeze out any excess moisture using a clean kitchen towel. It’s important to keep the cake from getting soggy. Trust me, I’ve made that mistake before, and it’s not a good time!
-
Mix Dry Ingredients: In a large bowl, whisk together your flour, cocoa powder, baking soda, baking powder, and salt. This helps distribute the leavening agents evenly, ensuring your cake rises beautifully.
-
Combine Wet Ingredients: In a separate bowl, whisk the sugar, eggs, oil, and vanilla until combined. The mixture should be slightly frothy, which means you’re incorporating air — a good sign of a fluffy cake!
-
Combine It All: Gradually add the dry mixture to the wet ingredients, stirring gently until just combined. Overmixing can lead to a dense cake, and no one wants that!
-
Fold in Zucchini: Gently fold in the grated zucchini and chocolate chips (if using). This is my favorite part, watching the lovely green flecks combine with the rich chocolate batter!
-
Prepare Your Baking Pan: Grease a 9×13 inch baking pan or line it with parchment paper for easy removal. Trust me; this step can save you a lot of frustration later.
-
Pour and Smooth: Pour the batter into the prepared pan and smooth the top with a spatula. Give it a little jiggle to let any air bubbles escape.
-
Bake: Place the pan in the oven and bake for about 30-35 minutes, or until a toothpick inserted in the center comes out clean. The aroma wafting through your kitchen will be irresistible at this point!
-
Cool Completely: Once baked, remove the cake from the oven and allow it to cool in the pan for 10 minutes. Then, transfer it to a wire rack to cool completely. Patience is key, my friends — we want the icing to stick nicely later!
Serving Suggestions
Now comes the fun part: serving up this beauty! Once your chocolate zucchini cake is completely cool, you can dust it with powdered sugar for a simple yet elegant look, or slather on your favorite frosting. A classic chocolate frosting pairs beautifully, but you could also go for a cream cheese frosting to add a nice tang. Slice it into squares and serve it with a scoop of vanilla ice cream on the side for a decadent treat. Trust me, your guests will be begging for seconds!
Recipe Variations
Don’t be afraid to get creative with this recipe! Here are a few ideas to switch things up:
-
Add Spices: Experiment with adding cinnamon or a pinch of nutmeg for a cozy flavor twist.
-
Nutty Goodness: Fold in some chopped walnuts or pecans for an extra crunch.
-
Fruit Medley: Mix in some chocolate or banana to create a chocolate-zucchini-banana combo that’s absolutely scrumptious.
-
Vegan Delight: Replace the eggs with flax eggs (1 tbsp of flaxseed meal mixed with 2.5 tbsp of water for each egg). You can also substitute oil with applesauce for a lighter version!
-
Frosting Flavors: Change the chocolate frosting to peanut butter frosting for a delightful nutty pairing!
Chef’s Notes
This recipe has been through a few iterations in my kitchen. I remember experimenting with it during one summer when my garden was just overflowing with zucchini. Initially, I hesitated to share it because of the secret veggie, but it ended up delighting everyone! Over the years, I’ve refined it into what I think is the perfect balance of rich chocolate and moist texture. I love hearing the surprise in people’s voices when they find out there’s zucchini in it. It’s like revealing a little culinary secret that brings joy!
And let me tell you, if you have any leftovers (which is rare!), the cake tastes even better the next day; the flavors have more time to meld together. Just make sure to store it covered at room temperature!
FAQs and Troubleshooting
Q: Why did my cake sink?
A: This can happen if you overmixed the batter or if your baking soda/powder is expired. Make sure to gently combine your ingredients and check the freshness of your leavening agents!
Q: My cake turned out dry. Help!
A: This usually means it was over-baked or overmeasured. Always keep an eye on the time and check with a toothpick a few minutes before it’s supposed to be done.
Q: Can I freeze leftover cake?
A: Absolutely! Wrap the cooled cake tightly in plastic wrap and then foil before freezing. Just thaw it in the fridge overnight when you’re ready to eat it again.
Q: Can I use other vegetables?
A: Yes! While this recipe is specifically for zucchini, you can try using finely grated carrots or even beets for a fun twist!
Nutritional Info
Calories per serving (1 slice): approximately 230 calories (varies depending on serving size and specific ingredients used).
Total Fat: 10g, Saturated Fat: 2g, Carbohydrates: 33g, Fiber: 2g, Sugar: 16g, Protein: 3g.
And there you have it! A decadent Chocolate Zucchini Cake that’s perfect for any occasion. I hope you enjoy making this recipe as much as I do! Remember, every bite is a little hug from your kitchen. Happy baking, and I can’t wait to hear about your baking adventures!
Print
Chocolate Zucchini Cake
- Total Time: 50 minutes
- Yield: 12 servings 1x
- Diet: Vegetarian
Description
A delightful Chocolate Zucchini Cake that’s rich, moist, and full of surprise with the addition of zucchini!
Ingredients
- 2 medium-sized Zucchini
- 1 ¾ cups All-purpose flour
- ¾ cup Cocoa powder
- 1 cup Granulated sugar
- 1 tsp Baking soda
- ½ tsp Baking powder
- ½ tsp Salt
- 2 large Eggs
- ½ cup Vegetable oil
- 1 tsp Vanilla extract
- ½ cup Chocolate chips (optional)
Instructions
- Preheat your oven to 350°F (175°C).
- Prep the zucchini by grating it and squeezing out excess moisture.
- Mix the flour, cocoa powder, baking soda, baking powder, and salt in a large bowl.
- Combine the sugar, eggs, oil, and vanilla in another bowl.
- Combine the dry mixture with the wet ingredients.
- Fold in the grated zucchini and chocolate chips (if using).
- Prepare a 9×13 inch baking pan.
- Pour the batter into the pan and smooth the top.
- Bake for 30-35 minutes or until a toothpick comes out clean.
- Cool the cake completely before serving.
Notes
Feel free to experiment with spices or nuts for added flavor and texture. Leftovers taste even better the next day!
- Prep Time: 15 minutes
- Cook Time: 35 minutes
- Category: Dessert
- Method: Baking
- Cuisine: American
Nutrition
- Serving Size: 1 slice
- Calories: 230
- Sugar: 16g
- Sodium: 200mg
- Fat: 10g
- Saturated Fat: 2g
- Unsaturated Fat: 8g
- Trans Fat: 0g
- Carbohydrates: 33g
- Fiber: 2g
- Protein: 3g
- Cholesterol: 30mg
Keywords: Chocolate Cake, Zucchini Cake, Dessert, Baking, Vegetarian

One-Bowl Chocolate Zucchini Cake (30-Minute Weeknight)
The Ultimate Chocolate Zucchini Cake Recipe
Welcome to my kitchen! I’m so excited you’re here. Today, we’re diving into a delightful recipe that combines two of life’s best things: chocolate and zucchini. Yes, you heard that right! A chocolate zucchini cake is an unexpected treat that will blow your mind (and your taste buds). This cake is rich and moist, with a lovely chocolate flavor that hides the fact that it’s also packing in some sneaky veggies. Whether you’re baking for a special occasion or just as an excuse to enjoy a slice or three, you’re in for a real treat!
I can still remember the first time I tasted chocolate zucchini cake. I was at a friend’s house during the summer, and her mom said, “You won’t believe what’s in this cake!” I was skeptical, especially at that age when veggies were often the enemy. My first bite was all chocolatey goodness, and then… bam! There was that hint of moistness that made me think, “Could it really be? Is there zucchini in this?” That unexpected twist was a game-changer for me. It’s been a beloved recipe in my personal collection ever since, and now I can’t wait to share it with you!
Personal Story
One summer afternoon, I spent hours helping my grandmother in her garden. We pulled up zucchini the size of small baseball bats, a common scenario when you’ve got a garden that just won’t quit! It was a delightful day filled with laughter and stories, our hands dirty from digging in the earth. After our hard work, we marched into the kitchen, ready to transform those zucchinis into something magical.
That was the day my grandmother introduced me to her famous chocolate zucchini cake. I watched in awe as she grated the fresh zucchini and folded it into the chocolate batter. I’ll never forget the thrill of tasting the final product. Each rich, chocolatey bite felt like a secret waiting to be shared. A zucchini cake that didn’t taste like a vegetable at all? It felt like a miracle.
Since then, I’ve adapted her recipe over the years, playing with flavors and textures to make it my own. It’s a cake that carries with it the warmth of family, summers spent in the garden, and all the lovely memories tied to food – and now it’s your turn to make new memories with it!
Ingredients
Here’s what you’ll need to create this chocolate zucchini magic:
-
2 cups grated zucchini
Zucchini adds moisture and keeps the cake incredibly tender. No need to peel it; just wash and grate. If you don’t have zucchini handy, you can substitute with grated carrots for a different but equally moist cake. -
1½ cups all-purpose flour
This is your base. For a gluten-free version, consider using a 1:1 gluten-free flour blend which works beautifully in this recipe. -
½ cup unsweetened cocoa powder
Go for high-quality cocoa powder for the richest flavor. If you’re feeling adventurous, try using dark cocoa powder for an intense chocolate punch. -
1 teaspoon baking soda
This helps the cake rise. Make sure it’s fresh—using expired baking soda could result in a flat cake. -
1 teaspoon baking powder
A little boost to give the cake a fluffy texture. -
½ teaspoon salt
Salt enhances and balances the sweetness of the chocolate. -
1 cup granulated sugar
You can swap half of this for brown sugar to add complexity and moisture. -
½ cup vegetable oil or melted coconut oil
Oil keeps the cake moist. If you prefer, you can use applesauce for a healthier alternative, although it may slightly alter the texture. -
3 large eggs
Eggs bind the ingredients together. For a vegan option, replace each egg with ¼ cup of unsweetened applesauce or a flax egg (1 tablespoon ground flaxseed mixed with 2.5 tablespoons water). -
1 teaspoon vanilla extract
A must-have for flavor. You can also experiment with other extracts like almond for a unique twist. -
½ cup chocolate chips (optional!)
Because more chocolate is never a bad idea! Substitute with nuts or dried fruit if you want to change it up.
Step-by-Step Instructions
Let’s get our hands dirty and bring this chocolate zucchini cake to life!
-
Preheat the Oven: Start by preheating your oven to 350°F (175°C). This is essential for a perfectly fluffy cake. While the oven is heating, an amazing aroma will fill your kitchen—talk about a win-win!
-
Prep the Baking Pan: Grease and flour a 9×13-inch baking pan or line it with parchment paper. This will ensure that your cake comes out easily and doesn’t stick. (Psst, a quick tip: you can also use cocoa powder instead of flour for a no-white-residue finish.)
-
Grate the Zucchini: Grate your zucchini using a box grater or food processor. Once you’ve got a solid two cups, place it in a clean dish towel or cheesecloth and wring out excess moisture. This step is crucial as it prevents your cake from being soggy.
-
Mix the Dry Ingredients: In a large bowl, whisk together the flour, cocoa powder, baking soda, baking powder, and salt. Mixing them first ensures even distribution of the leavening agents.
-
Combine Wet Ingredients: In another bowl, beat together the sugar, oil, eggs, and vanilla extract until well combined. You can use a whisk or mixer; just make sure that it’s all blended smoothly.
-
Fold in the Zucchini: Add the grated zucchini to the wet mixture and stir until it’s fully integrated. This is where the magic happens; it may look odd, but trust me on this.
-
Combine Wet and Dry: Gradually add the dry ingredients to the wet mixture, stirring gently until just combined. Avoid overmixing; you want a tender cake! If you’re using chocolate chips, this is the time to fold them into the mix.
-
Pour and Bake: Pour the batter into your prepared baking pan and spread it out evenly. Bake for 30-35 minutes, or until a toothpick inserted in the center comes out with just a few moist crumbs. The smell wafting through your home will be tempting—don’t open the oven door too soon or it may sink!
-
Cool: Once baked, let the cake cool in the pan for about 10 minutes before transferring it to a wire rack. Allow it to cool completely before frosting or serving. This part tests your patience, but it’s worth the wait!
-
Frost (Optional): If you’d like to take it to the next level, whip up a simple chocolate ganache or cream cheese frosting. Spread it on top once the cake is completely cool.
Pro tip: For an extra flair, sprinkle some toasted nuts or shavings for garnish. It’s all about that presentation!
Serving Suggestions
Slice your chocolate zucchini cake and serve it on a beautiful platter. Pair it with a scoop of vanilla ice cream or a dollop of fresh whipped cream, if you really want to impress. For an elegant touch, consider a light dusting of powdered sugar or cocoa powder on top. Trust me, your guests will ooh and aah over it, and you’ll bask in the glory of providing the perfect dessert!
Recipe Variations
Feeling adventurous? Here are some options to make this recipe your own:
- Spices: Add a teaspoon of cinnamon or nutmeg for a warm, cozy flavor.
- Chocolate Variations: Use white chocolate chips instead of semi-sweet for a sweet twist, or add espresso powder for a coffee-infused cake.
- Fruit Zing: Toss in a cup of chopped nuts or dried fruits like cranberries for texture and flavor bursts.
- Frosting Fun: Try topping with a peanut butter frosting for a twist or a cream cheese frosting for an indulgent touch.
- Healthier Take: Swap out half the sugar with ripe bananas for sweetness, or replace part of the oil with unsweetened applesauce.
Chef’s Notes
One thing I’ve learned in my baking adventures is that sometimes, recipes can feel intimidating at first, but they’re all about enjoying the process. When I first set out to recreate my grandmother’s famous chocolate zucchini cake, I had several flops and some seriously sad cakes! But every attempt helped me evolve and discover what works best. It’s okay to stir things up a little and make the recipe yours. After all, cooking is about exploration and fun!
So grab that apron, take a deep breath, and remember—there’s no such thing as a perfect kitchen! Just think about all the deliciousness that awaits you.
FAQs and Troubleshooting
1. Why does my cake come out dense?
Overmixing can make the cake dense. Make sure you mix until just combined and don’t skip the wringing out of the zucchini—too much moisture can weigh down your cake.
2. How can I store leftovers?
Store your chocolate zucchini cake in an airtight container at room temperature for up to 3 days or in the fridge for longer freshness. You can also freeze slices for later enjoyment; just wrap them tightly in plastic wrap and place in a freezer-safe bag.
3. Can I use other types of zucchini?
Absolutely! While green zucchini is traditional, yellow zucchini works just as well and can give a beautiful golden hue to your cake.
4. What if I don’t have enough zucchini?
If you’re short on zucchini, you can supplement with mashed bananas to reach the required measure. It’ll change the flavor slightly, but still delicious!
Nutritional Info
(Per slice—based on 12 servings, with optional frosting):
- Calories: 220
- Protein: 3g
- Fat: 10g
- Carbohydrates: 31g
- Fiber: 2g
- Sugar: 15g
Now that you have the perfect recipe for chocolate zucchini cake, I hope you feel inspired to get cooking! Share your creations with friends and family, and watch the smiles spread across their faces. Happy baking, fellow foodies!
Print
The Ultimate Chocolate Zucchini Cake
- Total Time: 50 minutes
- Yield: 12 servings 1x
- Diet: Vegetarian
Description
A delightful combination of chocolate and zucchini, resulting in a rich, moist cake that’s perfect for any occasion.
Ingredients
- 2 cups grated zucchini
- 1½ cups all-purpose flour
- ½ cup unsweetened cocoa powder
- 1 teaspoon baking soda
- 1 teaspoon baking powder
- ½ teaspoon salt
- 1 cup granulated sugar
- ½ cup vegetable oil or melted coconut oil
- 3 large eggs
- 1 teaspoon vanilla extract
- ½ cup chocolate chips (optional)
Instructions
- Preheat the Oven: Start by preheating your oven to 350°F (175°C).
- Prep the Baking Pan: Grease and flour a 9×13-inch baking pan or line it with parchment paper.
- Grate the Zucchini: Grate your zucchini and wring out excess moisture using a cheesecloth.
- Mix the Dry Ingredients: In a large bowl, whisk together flour, cocoa powder, baking soda, baking powder, and salt.
- Combine Wet Ingredients: In another bowl, beat together sugar, oil, eggs, and vanilla extract until well combined.
- Fold in the Zucchini: Add the grated zucchini to the wet mixture and stir until fully integrated.
- Combine Wet and Dry: Gradually add the dry ingredients to the wet mixture and stir gently until just combined.
- Pour and Bake: Pour the batter into your prepared pan and bake for 30-35 minutes or until a toothpick comes out with a few moist crumbs.
- Cool: Let the cake cool in the pan for about 10 minutes before transferring it to a wire rack.
- Frost (Optional): Frost with chocolate ganache or cream cheese frosting if desired.
Notes
For added flavor, consider experimenting with spices like cinnamon or using different types of chocolate.
- Prep Time: 15 minutes
- Cook Time: 35 minutes
- Category: Dessert
- Method: Baking
- Cuisine: American
Nutrition
- Serving Size: 1 slice
- Calories: 220
- Sugar: 15g
- Sodium: 200mg
- Fat: 10g
- Saturated Fat: 1g
- Unsaturated Fat: 8g
- Trans Fat: 0g
- Carbohydrates: 31g
- Fiber: 2g
- Protein: 3g
- Cholesterol: 60mg
Keywords: chocolate cake, zucchini cake, dessert recipe, baking, moist cake

One-Bowl Easy Chocolate Zucchini Cake (Moist & Quick)
Easy Chocolate Zucchini Cake: A Delicious Twist on Sweet Indulgence
Welcome to my kitchen, fellow foodies! Today, we’re diving into a delightful dessert that’s sure to wow your taste buds — Easy Chocolate Zucchini Cake! Yes, you heard that right; we’re throwing zucchini into the mix! But trust me; this isn’t just any vegetable loaded cake; it’s a moist, chocolaty treat that’s perfect for any occasion.
I know what you’re thinking: Zucchini? In a cake? But here’s the twist — this magnificent green vegetable adds moisture and a boost of nutrition without overpowering the rich chocolate flavor you love. Plus, who wouldn’t want to sneak in a veggie while indulging in dessert? It’s like the ultimate secret weapon for baking. With its dense, fudgy texture, this cake is not only delicious but also incredibly versatile, making it an instant favorite for family gatherings, kids’ birthdays, or just a cozy night in.
Now, let’s embark on this culinary journey together. Whether you’re baking for yourself or sharing it with loved ones, I assure you this cake will leave everyone raving. Grab your mixing bowl, and let’s get started!
A Sweet Zucchini Memory
I have a special place in my heart for this chocolate zucchini cake, thanks to my grandmother, who had the warmest, coziest kitchen filled with love and laughter. I remember spending summers with her, and every time zucchini season rolled around, we’d raid the garden to gather the freshest veggies. Once we had our hands on those green beauties, it was a race to see who could invent the most delicious zucchini recipe.
But the crowning jewel was always her chocolate zucchini cake — a family tradition passed down through generations. The sound of the mixer whirring! The sweet aroma of baking chocolate wafting through the house! It brought us together, creating cherished memories of giggles, frosting smudges, and a fair share of taste-testing! This cake became a symbol of all those joyous moments, and it’s my pleasure to share this cherished recipe with you today. Trust me, it’s a game-changer, and just like my grandmother taught me, it’s filled with love in every bite.
Ingredients
For this Easy Chocolate Zucchini Cake, you’ll need the following ingredients:
-
2 cups grated zucchini
(A fantastic way to sneak in veggies! You can use fresh zucchini or even frozen. If using frozen, make sure to thaw and squeeze out excess moisture before using.) -
1 ½ cups all-purpose flour
(Perfect for that lovely structure. If you’re gluten-free, you can substitute it with a gluten-free blend!) -
1 cup granulated sugar
(Adds sweetness and moisture. You can swap in coconut sugar, though it may alter the color slightly.) -
1/2 cup unsweetened cocoa powder
(Rich chocolatey flavor! For a different take, try dark cocoa for deeper flavor.) -
½ cup vegetable oil (or melted coconut oil)
(Provides moisture and richness. You can also use applesauce for a lighter version.) -
3 large eggs
(Binding agents that keep everything together. For a vegan option, use flax eggs — mix 1 tablespoon ground flaxseed with 2.5 tablespoons water.) -
1 teaspoon vanilla extract
(A must-have for a flavor boost! You can also use almond extract for a unique twist.) -
1 teaspoon baking soda
(Helps the cake rise. Make sure it’s fresh for the best results!) -
1 teaspoon baking powder
(For extra lift! Just like with baking soda, freshness matters.) -
½ teaspoon salt
(Balances the sweetness and enhances flavors.) -
1 cup chocolate chips (optional)
(Because you can never have too much chocolate! You can use dark, milk, or even white chocolate, depending on your mood.)
Step-by-Step Instructions
Let’s get our hands dirty and make some delicious magic happen! Follow these steps closely, and you’ll have a beautiful cake in no time.
-
Preheat your oven
To kick things off, preheat your oven to 350°F (175°C). Grease and flour a 9×13-inch baking pan while you’re at it, so the cake doesn’t stick later. (Remember: No one likes a cake that won’t budge!) -
Prepare the zucchini
Grate that beautiful zucchini! You can use a box grater or a food processor — whichever you fancy. No need to peel it; the skin just adds a pop of color and extra nutrients. Don’t forget to squeeze out any excess water after grating; this step is crucial to avoid a soggy cake. -
Mix the dry ingredients
In a large mixing bowl, whisk together the flour, cocoa powder, baking soda, baking powder, and salt. Make sure these ingredients are well combined; it ensures an even distribution of flavors! -
Combine the wet ingredients
In another bowl, mix the sugar and oil, creating a fluffy texture. Add the eggs, one at a time, followed by the vanilla extract. Beat until everything is nice and smooth. -
Join the flavors!
Gradually add the dry ingredients to the wet mixture. Stir gently until just combined. (Tip: Overmixing can lead to a dense cake, so be gentle, my friend!) -
Incorporate the zucchini
Fold in the grated zucchini and chocolate chips if you’re using them. Your batter should look beautifully dense and rich at this point. How good does that smell? -
Bake it!
Pour the batter into the prepared baking pan and spread it evenly. Pop it into your preheated oven and bake for about 30–35 minutes or until a toothpick inserted into the center comes out clean. (Keep an eye on it; ovens can be sneaky!) -
Cool it down
Once baked, take it out of the oven and let it cool in the pan for about 10 minutes. Then gently transfer it to a wire rack to cool completely. Patience is a virtue, but I know how tempting it is to dive in!
Serving Suggestions
Now that your cake has cooled, it’s time to serve it up! I love to dust a bit of powdered sugar on top for a simple presentation or slather on a layer of rich chocolate frosting. For an extra touch, serve it warm with a scoop of vanilla ice cream or a dollop of whipped cream. Trust me, the combo of warm cake and cold ice cream is pure bliss!
Recipe Variations
-
Nutty Delight: Add chopped walnuts or pecans to the batter for a crunch and texture variation.
-
Fruity Twist: Swap out half of the zucchini for finely shredded carrots or even crushed pineapples for a tropical vibe.
-
Spiced Up: Add a teaspoon of cinnamon or a pinch of nutmeg for a warm, spiced flavor — perfect for fall weather!
-
Gluten-Free and Vegan: Use a gluten-free flour mix and substitute the eggs with flax eggs for a plant-based version of this delicious cake.
-
Frosting Options: Instead of a chocolate ganache, try cream cheese frosting for a tangy contrast that will elevate your cake!
Chef’s Notes
This cake has evolved over the years in my kitchen. Initially, I followed my grandmother’s recipe religiously, but as I began experimenting and playing with ingredients, I discovered how versatile it really is! I’ve had friends swap the sugar for maple syrup, and you wouldn’t even know it was a healthier alternative. Also, don’t be surprised if you find sneaky little veggies buried in your cake — that’s half the fun!
My kitchen has witnessed flour fights, frosting experiments gone awry, and endless laughter. This cake reminds me of those delightful days spent with loved ones, and I know it will bring you or someone you love just as much joy.
FAQs and Troubleshooting
1. Why is my cake too dense?
This usually happens from overmixing the batter, so be gentle when folding in the dry ingredients. Just mix until combined.
2. Can I use yellow squash instead of zucchini?
Absolutely! Yellow squash works just as well, and it adds a slight twist in color.
3. How do I store leftovers?
Once cooled, keep the cake in an airtight container at room temperature for up to three days or refrigerate for up to a week.
4. My cake is too dry! What did I do wrong?
Check your measurements! Over-measuring flour can happen quite easily. Make sure to spoon it into the measuring cup rather than scooping directly from the bag.
Nutritional Info
Not sure about the calories? Here’s a quick breakdown for a slice (based on 16 slices per cake):
- Calories: 200
- Protein: 3g
- Carbohydrates: 30g
- Fat: 8g
- Fiber: 2g
Please adjust based on specific ingredients used and portion sizes!
And there you have it! Your very own Easy Chocolate Zucchini Cake that’s perfect for any occasion. I can’t wait for you to try it out; I promise it’ll be a hit! Whether you’re baking for a crowd or indulging in a slice all on your own, this cake is going to bring warmth, joy, and a little bit of nostalgia into your kitchen. Happy baking!
Print
Easy Chocolate Zucchini Cake
- Total Time: 50 minutes
- Yield: 16 servings 1x
- Diet: Vegetarian
Description
A delightful dessert that combines zucchini with rich chocolate flavor for a moist, fudgy cake.
Ingredients
- 2 cups grated zucchini
- 1 ½ cups all-purpose flour
- 1 cup granulated sugar
- ½ cup unsweetened cocoa powder
- ½ cup vegetable oil (or melted coconut oil)
- 3 large eggs
- 1 teaspoon vanilla extract
- 1 teaspoon baking soda
- 1 teaspoon baking powder
- ½ teaspoon salt
- 1 cup chocolate chips (optional)
Instructions
- Preheat your oven to 350°F (175°C) and grease a 9×13-inch baking pan.
- Grate the zucchini and squeeze out excess moisture.
- Whisk together flour, cocoa powder, baking soda, baking powder, and salt in a bowl.
- Mix sugar and oil in another bowl, then add eggs one at a time and vanilla extract.
- Gradually add the dry ingredients to the wet mixture and stir until just combined.
- Fold in zucchini and chocolate chips.
- Pour the batter into the prepared baking pan and bake for 30-35 minutes.
- Cool the cake for 10 minutes in the pan, then transfer to a wire rack.
Notes
Dust with powdered sugar or top with chocolate frosting for serving. Pair it with vanilla ice cream for a delightful treat.
- Prep Time: 15 minutes
- Cook Time: 35 minutes
- Category: Dessert
- Method: Baking
- Cuisine: American
Nutrition
- Serving Size: 1 slice
- Calories: 200
- Sugar: 12g
- Sodium: 200mg
- Fat: 8g
- Saturated Fat: 1g
- Unsaturated Fat: 3g
- Trans Fat: 0g
- Carbohydrates: 30g
- Fiber: 2g
- Protein: 3g
- Cholesterol: 50mg
Keywords: chocolate cake, zucchini cake, dessert, healthy dessert, baking
Moist Chocolate Zucchini Bundt Cake (Weeknight-Ready)
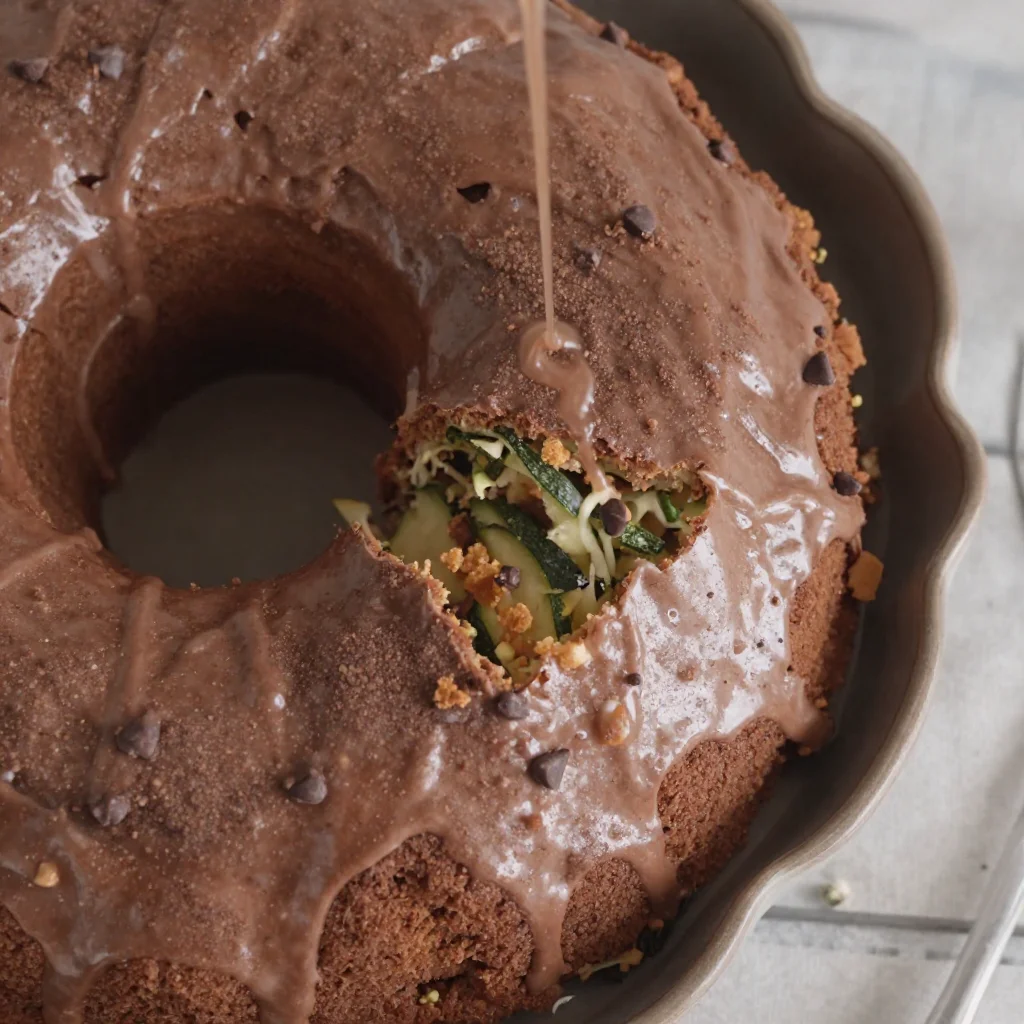
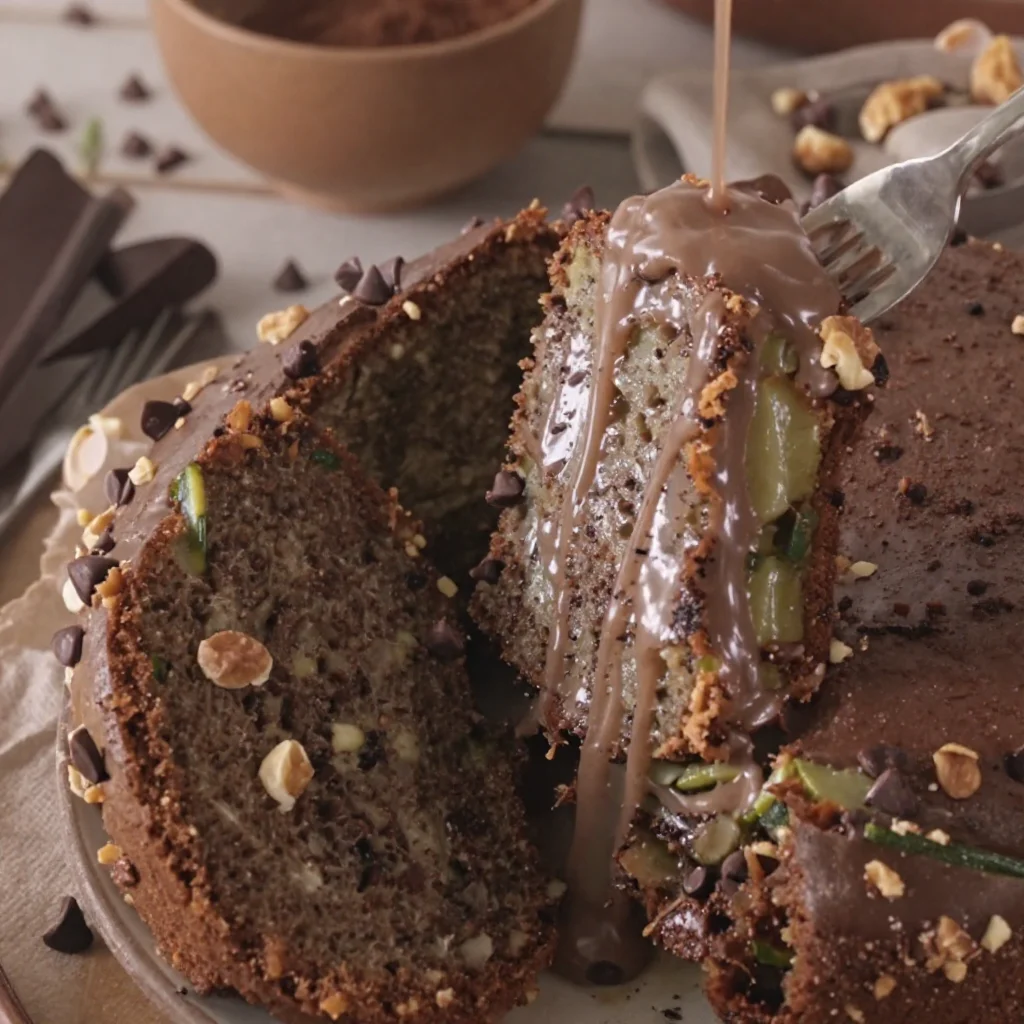
The Best Chocolate Zucchini Bundt Cake
Welcome to my cozy little corner of the internet! I’m Olivia Bennett, your friendly neighborhood cooking enthusiast, and today I’m absolutely thrilled to share with you a recipe that embodies everything I love about baking: its ability to bring people together, spark joy, and create delicious memories. We’re diving into the wonders of the Best Chocolate Zucchini Bundt Cake, a delightful treat that perfectly combines rich, chocolatey goodness with the subtle earthiness of fresh zucchini.
Now, I know what you might be thinking, “Zucchini in cake? Really?” But trust me when I say this cake is a game-changer! The zucchini adds moisture and helps create a wonderfully soft texture without overpowering the rich chocolaty flavor. If you’re anything like me, the smell of this cake baking will have you dancing around your kitchen with glee.
Picture this: The warm, inviting aroma of chocolate wafting through your home, making it impossible for anyone to resist asking, “What’s baking?” It’s the perfect cake to whip up on a lazy Sunday afternoon or to impress your friends at a gathering. Let’s roll up our sleeves, preheat the oven, and create something scrumptious that you’ll be proud to share.
A Slice of Nostalgia
Let me take you back a few years. One summer afternoon, as I was rummaging through my parents’ garden, I discovered an abundance of zucchini growing like they were preparing to take over the world. I remembered my mom’s secret recipe for a chocolate zucchini cake that had been a family favorite for as long as I could remember. Every time she made it, our house filled with the sweet aroma of baking chocolate, and we’d eagerly gather around the kitchen to sneak bites of the batter (because who can resist raw chocolate, am I right?).
That cake was more than just a dessert; it was a focal point of laughter, stories, and family bonding. We’d talk about our day, listen to the radio in the background, and enjoy that moist, chocolatey goodness together. It’s the kind of cake that invites second helpings and encourages you to slow down, savor the moment, and share it with those you love.
Inspired by those lazy summer days, I decided to recreate that essence in my Chocolate Zucchini Bundt Cake. The memories of the garden, the smiles around the table, and the best chocolate cake all come together in a delicious marriage of flavors. So, let’s get started on this sweet adventure!
Ingredients
Here’s what you’ll need to make this delightful cake:
-
2 cups grated zucchini: Fresh zucchini is best. You can substitute with yellow squash if you’re in a pinch, but avoid overcooked or mushy zucchini.
-
1 ½ cups all-purpose flour: This is the base of your cake. For a gluten-free option, use a 1:1 gluten-free flour blend.
-
1 cup unsweetened cocoa powder: Use the best quality cocoa for that rich chocolate flavor. If you’re looking for a milder taste, you could opt for Dutch-processed cocoa.
-
1 tsp baking soda: This will give your cake a great lift. If you run out, you can use baking powder instead (just double the amount).
-
1 tsp baking powder: Together with baking soda, this will ensure your cake rises beautifully.
-
½ tsp salt: Enhances the flavors of the chocolate. Don’t skip it!
-
1 cup granulated sugar: For sweetness. You can substitute part of it with coconut sugar or try using agave syrup (reduce liquid content slightly).
-
½ cup brown sugar: Adds moisture and a hint of caramel flavor.
-
¾ cup vegetable oil: For moisture. You can swap it with melted coconut oil or applesauce to reduce fat.
-
3 large eggs: Binding agents that add richness. Can be replaced with flax eggs (1 tablespoon ground flaxseed mixed with 3 tablespoons water per egg).
-
1 tsp vanilla extract: For that warm, comforting flavor. Use real vanilla extract for the best results.
-
1 cup chocolate chips (semi-sweet or dark): Because you can never have too much chocolate! You can substitute with white chocolate or even nuts for a different crunch.
These ingredients combine to create a cake that is not only visually stunning but also ridiculously delicious. Remember, the key to a great cake is fresh, quality ingredients!
Step-by-Step Instructions
Alright, let’s get baking! Follow these detailed steps, and you’ll have a mouthwatering Chocolate Zucchini Bundt Cake ready to impress!
-
Preheat the Oven:
Preheat your oven to 350°F (175°C). Greasing and flouring your bundt pan will ensure that your cake releases smoothly after baking. Trust me, no one wants a cake that gets stuck in the pan! -
Gather Your Ingredients:
Before you dive into mixing, gather all of your ingredients. It makes the process seamless and fun. Plus, you’ll feel like a pro chef! -
Grate the Zucchini:
Using a box grater or food processor, grate your zucchini. There’s no need to peel it; the skin adds lovely flavor and a pop of color. After grating, place the zucchini in a clean kitchen towel and squeeze out the excess moisture. This step is crucial for ensuring your cake isn’t soggy! -
Mix the Dry Ingredients:
In a large bowl, whisk together the flour, cocoa powder, baking soda, baking powder, and salt. This ensures an even distribution of the leaveners and makes for a lighter cake. -
Cream the Sugars and Oil:
In another bowl, beat together the granulated sugar, brown sugar, and vegetable oil until well blended. This will take about 2-3 minutes. It’s a simple step, but it adds air to the mixture, making your cake wonderfully fluffy. -
Add Eggs and Vanilla:
One by one, add the eggs, followed by the vanilla extract, mixing well after each addition. The mixture should resemble a slightly thick batter. -
Combine Everything:
Gradually mix in the dry ingredients to the wet mixture, being careful not to overmix—this is a cake, not a workout! Gently fold in the grated zucchini and chocolate chips. -
Bake:
Pour the cake batter into your prepared bundt pan, smoothing the top with a spatula. Bake for 50-60 minutes, or until a toothpick inserted in the center comes out clean. The smell will be heavenly—trust me! -
Cool:
Once baked, allow the cake to cool in the pan for about 10-15 minutes, then gently invert it onto a wire rack to cool completely. This step is not just for appearance; it also helps develop that signature bundt shape. -
Glaze (Optional):
If you’re feeling a little fancy, whip up a simple glaze with powdered sugar and milk, drizzling it over the cooled cake for a touch of sweetness.
Serving Suggestions
When it comes to serving your Chocolate Zucchini Bundt Cake, presentation is key! A simple dusting of powdered sugar or a drizzle of chocolate ganache can elevate its appearance. Slice it into generous portions and serve it on a rustic wooden board alongside a dollop of whipped cream or a scoop of vanilla ice cream. If you’re feeling extra festive, sprinkle some chopped walnuts or almonds on top for a delightful crunch!
Recipe Variations
Now that you know the classic recipe, let’s explore some creative twists you can take on this delightful cake:
-
Spicy Chocolate Zucchini Cake: Add a pinch of cayenne pepper or cinnamon to the batter for a warm spice note.
-
Zucchini Orange Bundt Cake: Incorporate orange zest for a refreshing citrus twist that brightens the chocolate flavor.
-
Vegan Chocolate Zucchini Cake: Swap out the eggs for flax eggs and use a plant-based oil to make it vegan-friendly.
-
Mint Chocolate Zucchini Cake: Add a few drops of mint extract to the batter for a refreshing minty flavor that pairs beautifully with chocolate.
-
Nutty Chocolate Zucchini Cake: Fold in some chopped nuts like walnuts or pecans for added texture.
Get creative and burst out of the mold—literally!
Chef’s Notes
This recipe has evolved over the years along with my love for baking and flavors. I started out with a traditional chocolate cake recipe but began incorporating zucchini when I discovered its magical moisture-adding abilities. Plus, it’s a sneaky way to boost your vegetable intake—it’s our little secret!
One time, in an attempt to impress my friends at a gathering, I miscalculated the baking powder and ended up with a cake that resembled a delicious pancake (whoops!). But even that mishap led to hearty laughs and memorable moments around the kitchen table. And that’s what baking is all about—embracing the imperfections and enjoying deliciousness!
FAQs and Troubleshooting
Q: The cake didn’t rise as expected! What went wrong?
A: Check that your baking soda and powder are fresh; expired leaveners can lead to a dense cake. Also, make sure you mixed enough air into the batter during the creaming stage.
Q: Can I use frozen zucchini?
A: Absolutely! Just be sure to thaw it, drain excess liquid, and use it as you would fresh zucchini.
Q: My cake is too dry. What can I do to keep it moist in the future?
A: Overbaking can dry out your cake. Make sure to check for doneness a few minutes before the recommended baking time.
Q: Can I make this recipe as cupcakes instead?
A: Definitely! Just adjust the baking time to around 20-25 minutes. Keep an eye on them to avoid overbaking.
Nutritional Info
While I won’t delve too deeply into numbers, it’s worth noting that the zucchini adds fiber and nutrients to your homemade cake, making it a slightly healthier indulgence. Share it, savor it, and feel a little less guilty!
So, there you have it—the perfect recipe for a Chocolate Zucchini Bundt Cake that is not just delicious but packed with memories and joy. Baking is a love language, and I can’t wait for you to share your creations with your loved ones! As always, feel free to reach out if you have any questions or stories to share—let’s keep the conversation delicious! Happy baking, friends!
Print
The Best Chocolate Zucchini Bundt Cake
- Total Time: 75 minutes
- Yield: 12 servings 1x
- Diet: Vegetarian
Description
A delightful cake that combines rich chocolate goodness with the moistness of fresh zucchini, perfect for gatherings or a cozy weekend treat.
Ingredients
- 2 cups grated zucchini
- 1 ½ cups all-purpose flour
- 1 cup unsweetened cocoa powder
- 1 tsp baking soda
- 1 tsp baking powder
- ½ tsp salt
- 1 cup granulated sugar
- ½ cup brown sugar
- ¾ cup vegetable oil
- 3 large eggs
- 1 tsp vanilla extract
- 1 cup chocolate chips (semi-sweet or dark)
Instructions
- Preheat your oven to 350°F (175°C) and grease your bundt pan.
- Gather all of your ingredients.
- Grate the zucchini and squeeze out excess moisture.
- Mix the dry ingredients together in a bowl.
- Cream the sugars and oil until blended.
- Add the eggs and vanilla one by one.
- Combine the dry ingredients with the wet mixture and fold in the zucchini and chocolate chips.
- Bake for 50-60 minutes or until a toothpick comes out clean.
- Cool the cake for 10-15 minutes in the pan before inverting onto a wire rack.
- Glaze (optional) with powdered sugar and milk if desired.
Notes
This cake is great served with whipped cream or ice cream. You can also add nuts for extra texture.
- Prep Time: 15 minutes
- Cook Time: 60 minutes
- Category: Dessert
- Method: Baking
- Cuisine: American
Nutrition
- Serving Size: 1 slice
- Calories: 350
- Sugar: 28g
- Sodium: 400mg
- Fat: 18g
- Saturated Fat: 3g
- Unsaturated Fat: 12g
- Trans Fat: 0g
- Carbohydrates: 50g
- Fiber: 4g
- Protein: 6g
- Cholesterol: 40mg
Keywords: chocolate cake, zucchini cake, bundt cake, dessert recipes, baking
One-Bowl Chocolate Zucchini Cake: Easy Weeknight Treat
Chocolate Lover’s Zucchini Cake: A Slice of Heaven
Welcome to my kitchen, fellow food lover! Today, we’re diving into a delightful creation that mixes a little sweetness with a hint of nostalgia — Chocolate Lover’s Zucchini Cake. If you’ve ever tried to sneak some veggies into your desserts (or just found yourself with an abundance of zucchini during summer), this cake is your answer. It’s rich, moist, and utterly chocolatey, making it the perfect treat for kids and adults alike.
Now, you might be wondering why on earth one would add zucchini to a cake — it sounds a bit strange, doesn’t it? But trust me, this magical green vegetable adds moisture, which results in a cake that’s incredibly soft and tender. Plus, the chocolate! Oh, my goodness, the chocolate! It completely masks any veggie flavor and elevates the dish to a level that even the pickiest of eaters will adore.
So, grab a bowl, preheat your oven, and let’s embark on this delightful baking journey together! Just know that baking can be messy, but every speck of flour on your counter tells a story of love and joy in the kitchen. By the end of our time together, you’ll have a decadent chocolate cake that’s not only delicious but also a great conversation starter at your next gathering.
A Taste of Nostalgia: My Zucchini Cake Adventure
Let me take you back to sunny afternoons in my grandmother’s kitchen. On those warm days, her garden was bursting with zucchini, and she was always looking for inventive ways to use her bounty. One afternoon, she pulled out a handwritten recipe from a tattered old notebook — it was for a chocolate zucchini cake. Intrigued, I watched as she transformed a mountain of green squashes into a beautifully rich batter.
I can still picture the way her eyes twinkled when I took the first bite. “You’d never guess there’s zucchini in there!” I exclaimed. And I was right! The chocolate flavor was front and center, leaving no room for the zucchini to make its presence known. That warm, fudgy goodness topped with a sprinkle of powdered sugar changed the way I viewed vegetables forever.
Fast forward to today, and I’m here to pass on that culinary magic. This Chocolate Lover’s Zucchini Cake recipe has morphed into one of my family’s favorites, too. It’s perfect for birthday parties, cozy luncheons, or a sweet end to any meal. So, let’s gather our ingredients and get started!
Ingredients
Here’s what you’ll need for our Chocolate Lover’s Zucchini Cake:
-
2 cups grated zucchini
Fresh zucchini is ideal, but if you’re short on time, pre-packaged grated zucchini can work. Just be sure to remove excess moisture by squeezing it in a clean kitchen towel before adding it to the batter. -
1¾ cups all-purpose flour
This is your base for the cake! If you want a gluten-free version, swap out the flour for a 1:1 gluten-free mix. Just keep in mind that the texture may vary slightly. -
¾ cup unsweetened cocoa powder
Go for high-quality natural cocoa to get that deep chocolate flavor. You can use Dutch-processed cocoa too, but remember it will alter the color and richness slightly. -
1 tsp baking soda
This will help your cake rise! If you only have baking powder on hand, use three times as much and reduce the salt by half. -
1 tsp baking powder
A must! This complements the baking soda for a perfectly fluffy cake. Make sure to check the expiration date for the best results. -
½ tsp salt
A little salt balances out the sweetness beautifully. Don’t skip it! -
1 tsp vanilla extract
Homemade vanilla extract adds depth to your cake. If you’re in a pinch, pure flavored extracts will do too. -
¾ cup vegetable oil
Oil keeps the cake moist and is essential for texture. For a healthier option, you can substitute unsweetened applesauce or Greek yogurt (just use about ½ cup). -
1 cup granulated sugar
Feel free to reduce the sugar slightly if you are going for healthier ingredients—this cake can handle it! -
2 large eggs
These add moisture and help the cake rise beautifully. If you need to go egg-free, try flax eggs (1 tablespoon of flaxseed meal + 2.5 tablespoons water = 1 egg). -
1 cup semi-sweet chocolate chips
Because you can never have enough chocolate! Feel free to swap these for dark chocolate or even white chocolate chips for a unique twist.
With these ingredients at the ready, we’re one step closer to creating a cake that will leave everyone wanting more!
Step-by-Step Instructions
-
Preheat Your Oven: Preheat your oven to 350°F (175°C). This step is crucial, as a hot oven ensures even baking for our cake.
-
Prep the Pan: Grease and flour a 9×13 inch baking pan or line it with parchment paper for easy removal. Your future self will thank you for this when it’s time to serve!
-
Grate the Zucchini: Using a box grater, grate the zucchini into fine shreds. If you’re short on time, you can pulse it in a food processor for a few seconds. Just remember to squeeze out any excess moisture.
-
Mix Dry Ingredients: In a large mixing bowl, combine the flour, cocoa powder, baking soda, baking powder, and salt. Whisk them together until they’re well mixed — this helps distribute the leavening agents evenly throughout the batter.
-
Whisk Wet Ingredients: In a separate bowl, mix together the eggs, sugar, vegetable oil, and vanilla extract. Beat them lightly until they’re combined. The mixture should be slightly frothy, indicating that it’s well-mixed.
-
Combine: Gradually add the wet mixture to the dry mixture, stirring until just combined. Be careful not to overmix — a few lumps are perfectly okay.
-
Fold in Zucchini and Chocolate Chips: Gently fold in the grated zucchini and chocolate chips. You want these ingredients evenly distributed without overworking the batter.
-
Pour into the Pan: Pour the batter into your prepared baking pan, smoothing the top with a spatula.
-
Bake: Bake in your preheated oven for about 30-35 minutes, or until a toothpick inserted into the center comes out clean. Keep an eye on it toward the end to avoid overbaking!
-
Cool and Serve: Once baked, let the cake cool in the pan for about 10-15 minutes, then transfer it to a wire rack to cool completely.
And there you have it, a rich chocolate zucchini cake ready to be enjoyed with friends and family—yum!
Serving Suggestions
For the ultimate serving experience, cut a generous slice and transfer it to a plate. Dust it lightly with powdered sugar for a bit of elegance, or add a dollop of whipped cream on top for a touch of indulgence. You could even pair it with a scoop of vanilla ice cream for a nostalgic sundae spin!
Recipe Variations
-
Spicy Chocolate: Add a pinch of cayenne pepper or ground cinnamon to the batter for a warm, spicy kick.
-
Nutty Delight: Mix in a handful of chopped walnuts or pecans for added crunch.
-
Coconut Bliss: Stir in shredded coconut for a tropical twist that complements the chocolate perfectly.
-
Fruit Fusion: Add ½ cup of mini chocolate chips and ripe bananas into the mix for an extra layer of flavor.
-
Vegan Version: Substitute the eggs with flaxseed eggs and replace the oil with applesauce for a guilt-free treat.
Chef’s Notes
Over the years, this Chocolate Lover’s Zucchini Cake has become a staple in my kitchen, evolving into so many delightful variations. One time, I accidentally added a bit too much cocoa powder and was worried it would taste bitter. It turned out to be the most chocolate-laden cake I’d ever made! The guests couldn’t get enough of its rich flavor, and now I occasionally push the cocoa boundaries just to keep things exciting.
And let’s not even talk about the kitchen disasters — from flour clouds to spilled ingredients, each one is a funny memory! So embrace those little “oops” moments; they’re part of the fun!
FAQs and Troubleshooting
-
Why is my cake dense?
If your cake turns out dense, it could be due to overmixing the batter. Mixing too much develops the gluten in the flour, leading to a heavy texture. Mix until just combined! -
Can I use frozen zucchini?
Absolutely! Just remember to thaw it and drain any excess liquid. Frozen zucchini works great, especially when it’s off-season. -
How do I store leftovers?
Store leftover cake in an airtight container at room temperature for up to 3 days, or in the fridge for about a week. You can also freeze slices for later enjoyment! -
Can I add other flavors?
Of course! You can play around by adding orange zest or almond extract to give the cake a unique twist!
Nutritional Info
While I won’t bore you with numbers, I believe that homemade treats can be enjoyed in moderation. This cake is a delightful balance of ingredients, and when paired with a fresh salad or fruit, it makes a lovely meal!
So, there you have it, my lovely foodies! With every slice of this Chocolate Lover’s Zucchini Cake, you’re embracing flavors, memories, and the pure joy of baking. I hope you find as much happiness making this cake as I do sharing it! Happy Baking!
Print
Chocolate Lover’s Zucchini Cake
- Total Time: 50 minutes
- Yield: 12 servings 1x
- Diet: Vegetarian
Description
A rich, moist, and utterly chocolatey zucchini cake that masks any veggie flavor, perfect for kids and adults alike.
Ingredients
- 2 cups grated zucchini
- 1¾ cups all-purpose flour
- ¾ cup unsweetened cocoa powder
- 1 tsp baking soda
- 1 tsp baking powder
- ½ tsp salt
- 1 tsp vanilla extract
- ¾ cup vegetable oil
- 1 cup granulated sugar
- 2 large eggs
- 1 cup semi-sweet chocolate chips
Instructions
- Preheat your oven to 350°F (175°C).
- Prep the baking pan by greasing and flouring it or lining it with parchment paper.
- Grate the zucchini using a box grater or food processor, then squeeze out excess moisture.
- Mix the dry ingredients: flour, cocoa powder, baking soda, baking powder, and salt in a large bowl.
- Whisk the wet ingredients: eggs, sugar, vegetable oil, and vanilla extract in a separate bowl.
- Combine the wet mixture to the dry mixture, stirring until just combined.
- Fold in the grated zucchini and chocolate chips gently.
- Pour the batter into the prepared baking pan.
- Bake for about 30-35 minutes or until a toothpick inserted in the center comes out clean.
- Cool the cake in the pan for 10-15 minutes, then transfer to a wire rack to cool completely.
Notes
For extra indulgence, dust the cake with powdered sugar or serve with whipped cream or vanilla ice cream.
- Prep Time: 15 minutes
- Cook Time: 35 minutes
- Category: Dessert
- Method: Baking
- Cuisine: American
Nutrition
- Serving Size: 1 slice
- Calories: 350
- Sugar: 20g
- Sodium: 200mg
- Fat: 14g
- Saturated Fat: 2g
- Unsaturated Fat: 10g
- Trans Fat: 0g
- Carbohydrates: 45g
- Fiber: 3g
- Protein: 5g
- Cholesterol: 30mg
Keywords: zucchini cake, chocolate cake, dessert, baking, easy recipes

One-Bowl Chocolate Zucchini Cake in 30 Minutes: Moist & Easy
The Joy of Chocolate Zucchini Cake
Welcome back to my cozy corner of the kitchen! Today, we’re diving into a delightful recipe that showcases the magic of unexpected ingredients — Chocolate Zucchini Cake! Yes, you read that right. This cake is moist, rich, and oh-so-decadent, yet it has a secret ingredient that elevates it to a new level of yumminess: zucchini! If you’re skeptical about how the humble green vegetable can contribute to a dessert, fear not! I promise this cake will make you a believer.
A Slice of Nostalgia
As a child, summer meant more than just sunny days and long afternoons spent outside. It meant my grandmother’s garden, overflowing with vibrant vegetables — especially zucchinis! I remember the first time she inspired me to bake with what she called "the garden’s hidden treasure." She handed me a freshly picked zucchini, saying, "You’ll never know it’s in there!" And just like that, my journey with chocolate zucchini cake began. We spent the afternoon sifting flour, adding cocoa, and excitedly waiting for the sweet aroma to fill the kitchen. The cake that emerged was dark, rich, and oh-so-delicious! It quickly became a family favorite, and I cherish those memories every time I whip up a batch.
Ingredients
Let’s gather everything you’ll need to create this dreamy Chocolate Zucchini Cake. And don’t worry if you don’t have a few of these ingredients — I’ve got substitutions tips right here for you!
-
Zucchini: About 2 cups shredded. This veggie adds moisture without overpowering the flavor. If you’re out of zucchini, you can swap in grated carrots for a fun twist.
-
All-Purpose Flour: 1 ¾ cups. This forms the base of the cake. For a gluten-free version, try almond flour or a 1:1 gluten-free flour blend.
-
Unsweetened Cocoa Powder: ¾ cup. This gives our cake its rich chocolate flavor. If you want a milder flavor, you can use Dutch-processed cocoa powder.
-
Granulated Sugar: 2 cups. This sweetens the cake and balances the cocoa’s bitterness. If you’re looking for a healthier alternative, coconut sugar works nicely.
-
Baking Soda: 1 tsp. It helps the cake rise beautifully. Make sure it’s fresh! For a gluten-free version, use baking powder instead.
-
Baking Powder: 1 tsp. Works in tandem with baking soda for a fluffy texture.
-
Salt: ½ tsp. A touch of salt enhances all the flavors. A pinch of sea salt on top before baking can also add a wonderful contrast.
-
Eggs: 2 large. They act as binding agents. If you want an egg-free cake, try using flax eggs (1 tablespoon of ground flaxseed mixed with 2.5 tablespoons of water).
-
Vegetable Oil: ½ cup. Keeps the cake moist. You could also use applesauce for a lighter option or melted coconut oil for added flavor.
-
Vanilla Extract: 2 tsp. A must-have for any great dessert!
You know you’ll create something delicious when you start with great ingredients!
Step-by-Step Instructions
Now, let’s roll up our sleeves and get cooking! Follow these simple steps, and in no time, you’ll have a delectable cake ready to enjoy.
-
Preheat the Oven: Heat your oven to 350°F (175°C). Grease and flour a 9×13 inch baking pan. Prepping your pan is key to ensuring your cake comes out easily.
-
Prepare the Zucchini: Wash and shred your zucchini using a box grater or a food processor. You want your zucchini to be finely shredded to blend seamlessly into the batter. No need to peel it—just grate and go!
-
Combine Dry Ingredients: In a large mixing bowl, whisk together the flour, cocoa powder, baking soda, baking powder, and salt. Make sure there are no flour clumps; a smooth mix means a smoother cake!
-
Cream the Sugar and Wet Ingredients: In a separate bowl, mix your granulated sugar and vegetable oil until well combined. Add in the eggs and vanilla extract, whisking until the mixture is light and fluffy. This step not only combines the ingredients well but also helps with creating a light texture.
-
Mix in the Zucchini: Fold in your shredded zucchini. This may sound odd, but it’s about to get tasty! The zucchini adds moisture and richness, making your cake incredibly soft.
-
Combine the Mixtures: Gradually add the dry ingredients to the wet ingredients, stirring gently until just combined. Be careful not to overmix; a few lumps are perfectly fine. That’s how you’ll achieve that tender crumb we all love!
-
Bake: Pour the batter into your prepared pan and smooth the top with a spatula. Bake in your preheated oven for 25 to 30 minutes or until a toothpick inserted in the center comes out clean.
-
Cool and Serve: Let the cake cool in the pan for about 10 minutes before transferring it to a wire rack. Allow it to cool completely. This would be a great time to make a cup of tea or coffee to enjoy with your cake later!
Serving Suggestions
Once your cake is cooled and ready to go, you can serve it up in style. A light dusting of powdered sugar or a drizzle of chocolate ganache adds that extra touch of elegance. For those who are a bit more indulgent, serve slices with a dollop of whipped cream or a scoop of vanilla ice cream — it’s pure heaven!
Recipe Variations
Here are some creative twists to make this Chocolate Zucchini Cake your own:
-
Chocolate Chip Surprise: Add a cup of semi-sweet chocolate chips to the batter for gooey chocolate pockets throughout.
-
Nutty Delight: Fold in chopped walnuts or pecans for added crunch and flavor.
-
Spiced Up: Add a teaspoon of cinnamon or a pinch of nutmeg for a warm spice kick.
-
Frosting Fun: Try a cream cheese frosting for a tangy contrast that pairs wonderfully with the chocolate.
-
Healthier Swap: Use whole wheat flour instead of all-purpose and reduce the sugar slightly for a healthier version.
Chef’s Notes
This Chocolate Zucchini Cake has evolved over the years in my kitchen. Initially, I followed traditional recipes but soon realized how adaptable this cake could be. From adding extra spices to swapping out sugars, each iteration helped me discover new depths of flavor. Sometimes it’s the imperfections—from a lopsided cake to accidentally burning the edges—that inspire the best stories and lessons in cooking. My last batch didn’t rise quite as much, but it transformed into decadently fudgy chocolate goodness. Remember, the kitchen is about experimenting and having fun!
FAQs and Troubleshooting
-
Why did my cake turn out dense?
Make sure to gently fold the wet and dry mixtures together. Overmixing can create a gummy texture. -
What should I do if I don’t have enough zucchini?
If you find yourself short, grated apples or even mashed bananas can substitute well in moisture and sweetness. -
Can I make this cake ahead of time?
Absolutely! This cake stores wonderfully in an airtight container at room temperature for 2-3 days or in the fridge for up to a week. Just make sure it’s cooled completely before storing. -
Can I freeze it?
Yes! Slice the cake and wrap each piece in plastic wrap, then foil. Freeze for up to 3 months. Just let them thaw at room temperature when you’re ready for a slice!
Nutritional Info
If you’re curious about the nutritional aspects, here’s a quick breakdown (per slice, assuming 12 slices):
- Calories: 210
- Protein: 3g
- Total Fat: 9g
- Saturated Fat: 1g
- Total Carbohydrates: 31g
- Dietary Fiber: 2g
- Sugars: 18g
This Chocolate Zucchini Cake is proof that cooking can be fun, satisfying, and full of surprises. Give this recipe a try and let me know how it goes! Happy baking, and let’s keep the joy of cooking alive!
Print
Chocolate Zucchini Cake
- Total Time: 45 minutes
- Yield: 12 servings 1x
- Diet: Vegetarian
Description
A moist and rich chocolate cake made with shredded zucchini, providing a delightful twist to a classic dessert.
Ingredients
- 2 cups shredded zucchini
- 1 ¾ cups all-purpose flour
- ¾ cup unsweetened cocoa powder
- 2 cups granulated sugar
- 1 tsp baking soda
- 1 tsp baking powder
- ½ tsp salt
- 2 large eggs
- ½ cup vegetable oil
- 2 tsp vanilla extract
Instructions
- Preheat the oven to 350°F (175°C). Grease and flour a 9×13 inch baking pan.
- Prepare the zucchini by washing and shredding it using a box grater or food processor.
- Combine dry ingredients: whisk together flour, cocoa powder, baking soda, baking powder, and salt in a large mixing bowl.
- Cream the sugar and wet ingredients in a separate bowl, mixing granulated sugar and vegetable oil, then whisk in eggs and vanilla.
- Mix in the zucchini until combined.
- Combine the dry and wet mixtures, stirring gently until just combined.
- Bake for 25 to 30 minutes or until a toothpick inserted in the center comes out clean.
- Cool the cake in the pan for about 10 minutes before transferring to a wire rack to cool completely.
Notes
For variations, try adding chocolate chips or nuts to the batter for added texture.
- Prep Time: 15 minutes
- Cook Time: 30 minutes
- Category: Dessert
- Method: Baking
- Cuisine: American
Nutrition
- Serving Size: 1 slice
- Calories: 210
- Sugar: 18g
- Sodium: 200mg
- Fat: 9g
- Saturated Fat: 1g
- Unsaturated Fat: 8g
- Trans Fat: 0g
- Carbohydrates: 31g
- Fiber: 2g
- Protein: 3g
- Cholesterol: 30mg
Keywords: chocolate cake, zucchini cake, dessert, baking
Ingredient Grilled Nectarines with Burrata and Honey
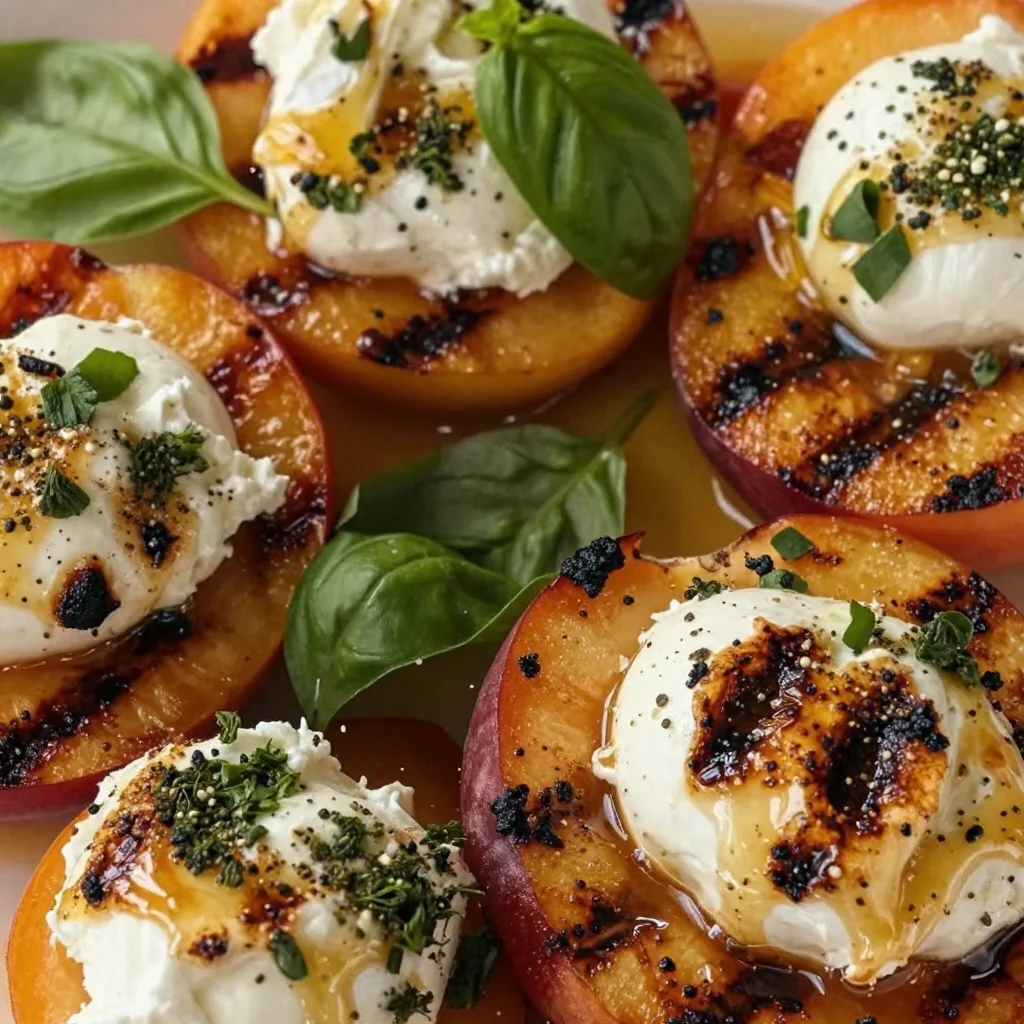
Grilled Nectarines with Burrata and Honey: A Sweet and Savory Delight
Welcome back to my cozy corner of the culinary world! If you’re here, you’re probably like me—someone who believes that every meal can tell a story, and every gathering deserves a sprinkle of magic. Today, I want to share a scrumptious dish that’s perfect for warm summer evenings or any time you want to impress your friends and family without spending hours in the kitchen: Grilled Nectarines with Burrata and Honey. Trust me; this delightful combination of sweet, creamy, and smoky is going to become your new favorite recipe.
Grilled nectarines, with their caramelized edges, are a perfect blend of natural sweetness and tang, especially when paired with the creamy, luscious burrata cheese. Add a drizzle of honey, and you have a dish that’s elegant yet effortlessly simple. This recipe is close to my heart and has a special place in my entertaining repertoire. Think of it as a celebration of summer—a vibrant escape right on your plate.
So, let me take you through the journey of creating this beautiful dish, filled with stories and tips that will not only help you make it perfectly but also inspire you to explore your own culinary creativity. By the end of this post, you’ll be ready to fire up that grill and wow your loved ones!
Personal Story
I can still remember the first time I came across this divine pairing of nectarines and burrata. It was a summer picnic with my best friends in the park. The sun was shining, balloons were floating, and the laughter filled the air as we laid out our colorful blanket. I had just begun to dip my toes into the culinary world, armed with a trusty grill and an adventurous spirit. I decided to toss some stone fruits on the grill, hoping to impress everyone with an easy yet delicious appetizer.
As the nectarines sizzled and caramelized, their sweet aroma wafted up, tempting us all. I paired them with burrata from the local farmer’s market and drizzled it with some golden honey. Watching my friends’ eyes widen with delight as they took their first bites is a memory that still brings a smile to my face.
That moment taught me that food has a profound impact on our emotions and experiences. It’s not just about filling our stomachs but about creating connections and memories that last a lifetime. This dish embodies that spirit of warmth, joy, and love. Now, let’s dive into the details of creating this unforgettable dish together!
Ingredients
Here’s what you’ll need to create this beautiful dish:
-
2 ripe nectarines
Look for ones that are firm yet slightly soft to the touch. If you can’t find nectarines, peaches work beautifully too! -
1 ball of burrata cheese
This creamy delight adds an incredible texture and flavor. If burrata is hard to find, you can substitute with fresh mozzarella, but it won’t have that luscious, creamy interior. -
1-2 tablespoons of honey
Choose a good quality honey for the best flavor. You can also explore flavored honey varieties, like orange blossom or lavender, for a unique twist. -
Fresh basil leaves
These add a fresh, fragrant finish. If you’re not a basil fan, mint could be a refreshing alternative. -
Olive oil (for grilling)
A good drizzle of extra virgin olive oil is essential for grilling. You could also use avocado oil for a neutral flavor. -
Salt and pepper
Just a pinch enhances the flavors of all the ingredients.
This simple yet elegant list proves that beautiful dishes can originate from just a few quality ingredients.
Step-by-Step Instructions
Now that you have everything prepped, let’s get cooking! Follow these easy steps, and you’ll be enjoying this grilled masterpiece in no time.
-
Preheat your grill:
Start by preheating your grill to medium-high heat. If you’re using a charcoal grill, wait for the coals to become ashy. For gas grills, allow it to reach the right temperature for at least 10 minutes. This will ensure a beautiful char on your nectarines. -
Prep the nectarines:
While the grill is heating, wash the nectarines and slice them in half, removing the pit. You want the halves to hold their shape, so a careful slice is key. Drizzle a bit of olive oil over the cut sides and sprinkle with salt and pepper. This will help enhance their natural sweetness while adding flavor. -
Grill the nectarines:
Place the nectarines cut-side down on the hot grill. Let them sit without moving them for about 4-5 minutes or until they get nice grill marks and start to soften. If you’re feeling adventurous, you can give them a little twist halfway through for extra grill marks. Once done, remove them from the grill and let them rest for a couple of minutes—this helps them set. -
Prepare the burrata:
While the nectarines are resting, it’s time to prepare the burrata. Place the burrata cheese on a serving platter and carefully tear it open to expose its creamy center. This makes it easier for your guests to scoop onto their grilled nectarines. -
Plate the dish:
Arrange the grilled nectarines around the burrata, then drizzle with honey, allowing it to cascade over the cheese and fruit. Tear fresh basil leaves and scatter them on top for a pop of color and flavor. The final touch could be another light drizzle of olive oil, which adds a lovely shine to your dish. -
Serve and enjoy:
This dish is best enjoyed fresh off the grill! Present it beautifully at your dining table and watch the smiles and delight unfold when your guests dig in.
Serving Suggestions
Grilled Nectarines with Burrata and Honey can be served on its own as a stunning appetizer, or you can make it a part of a light meal. Consider serving it alongside a fresh arugula salad dressed with lemon vinaigrette or some crusty bread for dipping into the creamy burrata. Use a vibrant platter to elevate the presentation. Adding elements like sliced prosciutto or toasted nuts can also bring interesting textures and flavors to the experience!
Recipe Variations
- Grilled Stone Fruit Medley: Mix it up by adding peaches, apricots, or plums to the grill for a flavor explosion.
- Savory Twist: Replace honey with balsamic glaze for a tangier, more savory spin, which pairs wonderfully with the burrata.
- Herb Infusion: Use fresh thyme or rosemary in place of basil for an earthy note that complements the sweetness of the fruit.
- Nuts for Crunch: Sprinkle toasted pistachios or walnuts on top for extra crunch and a nutty flavor contrast.
- Sweet Heat: Add a pinch of chili flakes to the honey for a delightful spicy kick that balances the sweetness beautifully.
Chef’s Notes
This recipe has evolved alongside my culinary journey. I initially started with simple grilled peaches and burrata, but as my love for seasonal ingredients grew, I discovered nectarines as a stunning alternative that adds unique flavors and textures. Over the years, I’ve had the pleasure of sharing this dish at potlucks, family gatherings, and intimate dinners with friends. Every time someone takes a bite, I can see both surprise and joy; it’s a little culinary magic that keeps me going.
FAQs and Troubleshooting
Can I use canned nectarines instead of fresh?
I wouldn’t recommend it, as canned fruit can become too soft when grilled and won’t develop the same caramelization and flavor. Fresh is best!
What if my nectarines are too firm?
If your nectarines are really firm, you can toss them in a little olive oil and let them sit at room temperature for a day or two to soften. Alternatively, give the grilling a few extra minutes, being careful not to burn them.
How do I store leftovers?
If you have any leftovers (which is rare, but it happens!), store them in an airtight container in the fridge for up to two days. Just know that the burrata will lose some of its creamy texture.
Could I make this dish in advance?
While it’s best enjoyed fresh, you can grill the nectarines ahead of time and assemble just before serving. Store the grilled fruit separately, and then put it together with the burrata and honey just before serving for the best flavor experience.
Nutritional Info
This dish is not only flavorful but also packed with nutrients! Just keep in mind the addition of honey and the serving size of burrata for calorie considerations. It’s a fresh option that works great for those looking to indulge a little while still enjoying a largely plant-based dish.
So there you have it! A simple yet stunning recipe that will leave you and your guests in awe. Try this Grilled Nectarines with Burrata and Honey at your next gathering, and watch as the compliments roll in! Happy cooking, my friends! 🍑🥂
Print
Grilled Nectarines with Burrata and Honey
- Total Time: 20 minutes
- Yield: 4 servings 1x
- Diet: Vegetarian
Description
A delightful combination of grilled nectarines, creamy burrata cheese, and a touch of honey, creating a sweet and savory dish perfect for summer gatherings.
Ingredients
- 2 ripe nectarines
- 1 ball of burrata cheese
- 1–2 tablespoons of honey
- Fresh basil leaves
- Olive oil (for grilling)
- Salt and pepper
Instructions
- Preheat your grill: Start by preheating your grill to medium-high heat.
- Prep the nectarines: Wash the nectarines and slice them in half, removing the pit.
- Grill the nectarines: Place nectarines cut-side down on the hot grill for 4-5 minutes.
- Prepare the burrata: Place the burrata cheese on a serving platter and tear it open.
- Plate the dish: Arrange grilled nectarines around the burrata, drizzle with honey, and scatter fresh basil leaves.
- Serve and enjoy: Best enjoyed fresh off the grill!
Notes
Serve with a fresh arugula salad or crusty bread. This dish is versatile and can have added elements like prosciutto or nuts for extra flavor.
- Prep Time: 10 minutes
- Cook Time: 10 minutes
- Category: Appetizer
- Method: Grilling
- Cuisine: American
Nutrition
- Serving Size: 1 serving
- Calories: 250
- Sugar: 12g
- Sodium: 100mg
- Fat: 15g
- Saturated Fat: 6g
- Unsaturated Fat: 8g
- Trans Fat: 0g
- Carbohydrates: 30g
- Fiber: 2g
- Protein: 7g
- Cholesterol: 25mg
Keywords: Grilled Nectarines, Burrata, Summer Appetizer, Fresh Fruit, Easy Recipe
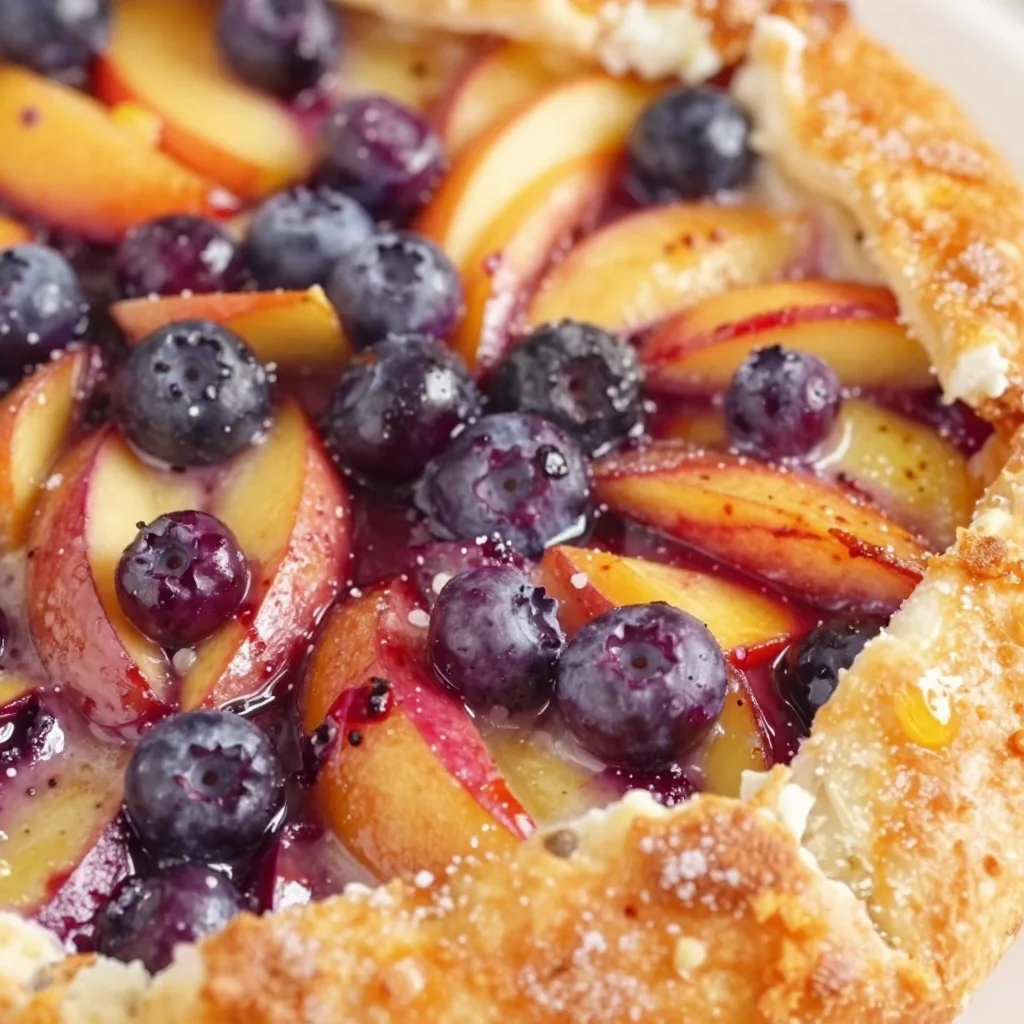
French Nectarine-Blueberry Galette: 30-Minute Summer Recipe
The Sweet Symphony of Summer: French Nectarine Blueberry Galette
Welcome to my kitchen, friend! If there’s one dish that perfectly captures the essence of summer, it’s a French Galette. I’m Olivia Bennett, and today, I’m thrilled to whip up a delightful Nectarine Blueberry Galette with you. Picture this: the sun is shining, the fruits are ripe, and the kitchen is filled with a sweet aroma that promises joy. That’s exactly what we’ll create together — a rustic, flaky pastry enveloping juicy nectarines and plump blueberries.
Let’s be honest; summer desserts are a magical experience. They bring us together, tug at our heartstrings, and create memorable moments around the table. This galette is not just delicious; it’s a celebration of the bounty of the season. It evokes lazy afternoons and laughter shared over slices of something homemade.
In this post, I’ll walk you through the process of making your very own galette from scratch. Trust me; you don’t need to be a pastry chef to achieve stunning results. With just a few simple steps, you’ll create a dessert that shines with flavors and textures. Are you ready? Roll up those sleeves, and let’s dive into this culinary adventure!
A Slice of Nostalgia
Growing up, summer holidays meant time spent at my grandma’s cozy farmhouse. One of my fondest memories is of her in the kitchen, bustling about as she prepared her famous fruit galette. The air was filled with laughter, her favorite tunes playing in the background, and the intoxicating scent of baking wafting through the house. I remember standing on a stool, watching her knead dough, sprinkle sugar, and arrange fruits with such care and love.
The galettes were always an adventure! Each time, she’d clutch a basket of freshly picked fruits from her garden — peaches, apricots, whatever was ripe for picking. But it was the nectarines and blueberries that stole my heart. Grandma would let me drizzle honey over the fruits, and my little fingers would scatter the sugar like confetti. That simple process, combined with her gentle guidance, made cooking feel magical.
Years later, I find myself recreating this cherished tradition, putting my own twist into the recipe. Today’s Nectarine Blueberry Galette is a delicious tribute to my grandma’s love, and I hope it becomes a beloved family recipe for you too.
Ingredients
Let’s gather our ingredients, shall we? Here’s what you’ll need:
-
1 ½ cups all-purpose flour
This is the backbone of our galette crust. For gluten-free options, you can use a 1:1 gluten-free flour blend. -
½ teaspoon salt
A pinch of salt enhances the flavors of the dough. If you want to experiment, try using sea salt for a different taste. -
1 tablespoon granulated sugar
Just enough to add a touch of sweetness to the crust! If you prefer a more natural alternative, coconut sugar works well too. -
½ cup unsalted butter (cold, cubed)
Cold butter is key for a flaky crust. You can substitute with coconut oil for a dairy-free version, but be mindful of the texture. -
4-6 tablespoons ice water
The magic ingredient! This keeps the dough cool and manageable. You can infuse it with a little lemon juice for a subtle zing! -
2-3 ripe nectarines (sliced)
Sweet, juicy nectarines are our star ingredients. If they’re not in season, peaches are a fabulous substitute! -
1 cup fresh blueberries
These little jewels are packed with flavor; frozen blueberries can work in a pinch, but be sure to drain them well after thawing. -
¼ cup brown sugar
For that rich, caramel-like flavor! You can use white sugar if that’s all you have on hand. -
1 tablespoon cornstarch
This helps thicken the filling; if you’re looking for a gluten-free option, arrowroot powder is a great substitution. -
1 teaspoon vanilla extract
A splash of vanilla adds warmth and depth! Feel free to use almond extract for a delightful twist. -
1 egg (for egg wash)
A beautifully golden crust, thanks to this little egg! For a vegan option, use a bit of plant-based milk.
Step-by-Step Instructions
Alright, let’s put on our aprons and get cooking! Follow these steps for galette perfection:
-
Prepare the Crust
In a large mixing bowl, combine the flour, salt, and sugar. Whisk them together to incorporate air. Now, add the cold, cubed butter. Using a pastry cutter (or your fingertips), work the butter into the flour until it resembles coarse crumbs. Keep it as cool as possible; you want those butter bits to stay intact for a flaky crust. -
Add the Ice Water
Gradually stir in the ice water, one tablespoon at a time, just until the dough starts to come together. You might not need the full amount, so go slow! Once it clumps up, form it into a disc, wrap it in plastic, and refrigerate for at least 30 minutes. -
Preheat the Oven
Preheat your oven to 400°F (200°C) while the dough chills. -
Make the Filling
In a bowl, toss your sliced nectarines and blueberries with brown sugar, cornstarch, vanilla extract, and a pinch of salt. This filling smells divine already! Allow it to sit for a bit to let the flavors meld while you roll out your dough. -
Roll Out the Dough
On a lightly floured surface, roll out your chilled dough into a rough circle about 12 inches in diameter. Don’t stress about perfection; the rustic look is part of the charm! -
Assemble the Galette
Transfer the rolled-out dough onto a parchment-lined baking sheet. Spoon the fruit filling onto the center, leaving at least a 2-inch border. Carefully fold the edges of the dough over the filling, pleating it as you go to create a beautiful edge. -
Apply the Egg Wash
Beat an egg and brush it over the exposed dough. This will give it that gorgeous golden hue. If you’re using milk, brush that on for similar results. -
Bake
Pop your galette into the preheated oven and bake for about 35-40 minutes, or until the crust is golden and the filling is bubbling. The aroma will be irresistible, trust me! -
Cool and Serve
Once golden, let your galette cool on the baking sheet for about 10 minutes before transferring it to a wire rack. This cooling time allows the filling to set up a bit more.
Serving Suggestions
Now, for the best part — serving your beautiful galette! Slice it into wedges and serve warm or at room temperature. It’s delightful on its own, but pairing it with a scoop of vanilla ice cream or a dollop of whipped cream takes it to another level of indulgence! A sprinkle of fresh mint or a dusting of powdered sugar can make for that extra touch of elegance. Your guests will be swooning!
Recipe Variations
Feeling creative? Here are some fun ways to twist up this galette recipe:
- Mixed Berry Galette: Substitute the nectarines and blueberries with strawberries and raspberries for a berry bonanza.
- Peach and Apricot Galette: Embrace the summer stone fruit season by using a combination of peaches and apricots.
- Spiced-Up Galette: Add a dash of cinnamon or cardamom to the fruit filling for a warm, spiced flavor.
- Nutty Crust: Swap out some of the all-purpose flour for almond flour for a nutty twist.
- Savory Option: Go savory by replacing the fruit with sautéed vegetables, cheese, and herbs!
Chef’s Notes
This Nectarine Blueberry Galette has a special place in my heart, and it has evolved over the years. Every summer brings its unique twist; sometimes I add a splash of bourbon or a hint of citrus zest for an unexpected flavor boost. The beauty of a galette lies in its versatility! I also love to bake two at once — one for sharing and one to savor all by myself (shh, don’t tell!). It’s the kind of recipe that invites creativity, and it feels like a celebration each time it comes out of the oven.
FAQs and Troubleshooting
1. My crust is tough; what happened?
It’s likely that the dough was overworked or the butter wasn’t kept cold enough. Remember, less is more when mixing!
2. How do I prevent a soggy bottom?
Pre-bake the crust for 5-10 minutes before adding your filling, or sprinkle a layer of brown sugar or crushed almonds on the base to absorb moisture.
3. Can I make this galette ahead of time?
Absolutely! You can prepare the dough ahead of time and keep it in the fridge for up to 3 days. You can also assemble the galette and freeze it before baking. Just add a few minutes to the baking time if baking from frozen.
4. What’s the best way to store leftovers?
Cover any leftovers tightly in plastic wrap or store in an airtight container at room temperature for a couple of days. Reheat gently in the oven to keep the crust crispy.
Nutritional Info
While I believe in enjoying dessert, a slice of this galette does carry some calories! (But hey, happiness is worth it!). This recipe makes about 8 servings. Each serving has approximately:
- Calories: 250
- Carbohydrates: 36g
- Protein: 3g
- Fat: 12g
Remember, these numbers can vary based on specific ingredient choices and portion sizes.
And there you have it! A delightful French Nectarine Blueberry Galette that’s bound to become a favorite in your home. Whether you’re hosting a gathering, surprising your loved ones, or treating yourself, this galette is a slice of summer bliss. So gather the ingredients, let your creativity flow, and enjoy this heartfelt dish. Happy baking!
Print
Nectarine Blueberry Galette
- Total Time: 70 minutes
- Yield: 8 servings 1x
- Diet: Vegetarian
Description
A delightful French dessert featuring a rustic, flaky pastry filled with juicy nectarines and blueberries, perfect for summer gatherings.
Ingredients
- 1 ½ cups all-purpose flour
- ½ teaspoon salt
- 1 tablespoon granulated sugar
- ½ cup unsalted butter (cold, cubed)
- 4–6 tablespoons ice water
- 2–3 ripe nectarines (sliced)
- 1 cup fresh blueberries
- ¼ cup brown sugar
- 1 tablespoon cornstarch
- 1 teaspoon vanilla extract
- 1 egg (for egg wash)
Instructions
- Prepare the crust: In a large mixing bowl, combine the flour, salt, and sugar. Whisk them together to incorporate air. Now, add the cold, cubed butter. Using a pastry cutter (or your fingertips), work the butter into the flour until it resembles coarse crumbs.
- Add the ice water: Gradually stir in the ice water, one tablespoon at a time, just until the dough starts to come together. Form it into a disc, wrap it in plastic, and refrigerate for at least 30 minutes.
- Preheat the oven to 400°F (200°C) while the dough chills.
- Make the filling: In a bowl, toss your sliced nectarines and blueberries with brown sugar, cornstarch, vanilla extract, and a pinch of salt. Allow it to sit to let the flavors meld.
- Roll out the dough: On a lightly floured surface, roll out your chilled dough into a rough circle about 12 inches in diameter.
- Assemble the galette: Transfer the rolled-out dough onto a parchment-lined baking sheet. Spoon the fruit filling onto the center, leaving at least a 2-inch border. Fold the edges of the dough over the filling, pleating it as you go.
- Apply the egg wash: Beat an egg and brush it over the exposed dough.
- Bake: Pop your galette into the preheated oven and bake for about 35-40 minutes, or until the crust is golden and the filling is bubbling.
- Cool and serve: Let your galette cool on the baking sheet for about 10 minutes before transferring it to a wire rack.
Notes
Serve warm or at room temperature with a scoop of vanilla ice cream or whipped cream for a delightful treat.
- Prep Time: 30 minutes
- Cook Time: 40 minutes
- Category: Dessert
- Method: Baking
- Cuisine: French
Nutrition
- Serving Size: 1 slice
- Calories: 250
- Sugar: 15g
- Sodium: 150mg
- Fat: 12g
- Saturated Fat: 7g
- Unsaturated Fat: 5g
- Trans Fat: 0g
- Carbohydrates: 36g
- Fiber: 1g
- Protein: 3g
- Cholesterol: 70mg
Keywords: galette, dessert, summer, nectarines, blueberries, French pastry

Summer Nectarine Blueberry Galette: 30-Minute Recipe
Deliciously Simple: French Nectarine Blueberry Galette Recipe
Hello, fellow food lovers! Welcome back to my cozy kitchen! Today, I’m excited to whisk you away to a rustic French bistro table with a heavenly dessert that’s as delightful to eat as it is to make. So, grab your apron and get ready to dive into the scrumptious world of this French Nectarine Blueberry Galette!
Introduction
Ah, the galette! This baked wonder captures the essence of rustic French baking, bringing together the sweet juiciness of nectarines and the vibrant burst of blueberries nestled within a flaky crust. Picture this: a golden, slightly rustic pastry enveloping a tender filling, straight from the oven, lightly dusted with sugar. Sounds heavenly, right?
You don’t need to be a master chef to create this masterpiece! Galettes are all about celebrating the simplicity of fresh ingredients. They don’t require the precision of a traditional pie and allow for a little artistic flair in the folding of that lovely crust. Whether you’re hosting a dinner party, having a cozy family night, or looking for a sweet treat to impress your guests, this galette is here to shine.
What I love most about this recipe is its versatility. Grab some local nectarines and blueberries from your farmer’s market—trust me, those summer flavors are unbeatable—and let’s create something beautiful! But first, let me take you down memory lane, sharing a little personal story behind my love for this delightful dessert.
Personal Story
When I was a little girl, summers were synonymous with sweet fruit and family gatherings. One of my fondest memories is of my grandmother bustling around her kitchen, her apron dusted with flour, while we picked fresh fruit from the garden. I can still hear her laugh, the smell of sweet nectarines and blueberries wafting through the air as she prepared her famous galette.
Every time she pulled that glorious, golden pastry from the oven, my heart would skip a beat. The crispy crust paired with the sweet, juicy filling was pure bliss! It wasn’t just dessert; it was a celebration of family, tastes, and stories shared over the kitchen table. As I grew older, I realized that this wasn’t just about baking—it was about bringing people together. It’s this very spirit that inspired me to recreate her recipe and share it with all of you. Now let’s get into the nitty-gritty of making this scrumptious galette!
Ingredients
Let’s take a close look at what you’ll need for this delicious treat:
-
All-Purpose Flour (1 ¼ cups)
- This is the backbone of your crust. You can substitute it with a 1:1 gluten-free blend if you need a gluten-free option.
-
Unsalted Butter (½ cup, chilled and cubed)
- Chilling the butter ensures that we get a flaky crust. For a dairy-free option, try coconut oil or vegan butter.
-
Powdered Sugar (2 tablespoons)
- This adds a subtle sweetness without the graininess of granulated sugar. Feel free to use granulated sugar if that’s what you have!
-
Ice Water (3-4 tablespoons)
- This helps bring the dough together. You can use cold mineral water for an extra crisp crust!
-
Nectarines (3 medium, sliced)
- The stars of this recipe! Summer nectarines are juicy and flavorful. You can interchange them with peaches or other stone fruits!
-
Blueberries (1 cup, fresh or frozen)
- These little bursts of sweetness add a vibrant color and flavor. If using frozen, don’t thaw; just add them straight to the filling.
-
Granulated Sugar (¼ cup, plus extra for sprinkling)
- This elevates the sweetness of the fruit. Adjust according to your taste!
-
Cornstarch (1 tablespoon)
- This is essential for thickening the filling and absorbing excess juices. You can use arrowroot powder as an alternative.
-
Ground Cinnamon (¼ teaspoon)
- A hint of warmth and spice! If you like a little more zing, feel free to add a pinch of nutmeg.
Now that we have our ingredients, let’s move on to the fun part—putting everything together!
Step-by-Step Instructions
-
Prepare the Dough:
- In a large mixing bowl, whisk together the all-purpose flour and powdered sugar. Add the cubed, chilled butter. Use a pastry cutter or simply your fingertips to mix until the mixture resembles coarse crumbs. The key is to keep some chunks of butter; these will give us that flaky crust.
-
Bring it Together:
- Gradually add ice water, one tablespoon at a time, mixing until the dough just comes together. Don’t overmix! Once it forms a cohesive ball, wrap it in plastic wrap and pop it into the fridge for about 30 minutes.
-
Make the Filling:
- While the dough chills, prepare the fruit filling. In a mixing bowl, toss together the sliced nectarines, blueberries, granulated sugar, cornstarch, and ground cinnamon. Let this mixture sit for about 10 minutes to allow the flavors to meld together.
-
Preheat Your Oven:
- Preheat your oven to 400°F (200°C). This is perfect for getting that crust golden and crisp!
-
Roll Out the Dough:
- Lightly flour your surface and roll out the chilled dough into a circle about 12 inches in diameter. It doesn’t have to be perfect! Transfer it to a parchment-lined baking sheet.
-
Add the Filling:
- Spoon the fruit mixture into the center of the dough, leaving about a 2-inch border around the edges. Don’t worry if some juice spills over; it’ll caramelize and taste amazing!
-
Fold the Edges:
- Carefully fold the edges of the dough over the filling, pleating it as you go. This rustic look is what makes galettes so charming!
-
Egg Wash and Sugar Sprinkle:
- Beat an egg with a bit of water to create an egg wash, then brush it over the crust. Sprinkle a little granulated sugar on top for that extra sweet touch.
-
Bake to Perfection:
- Bake for about 30-35 minutes, or until the crust is golden brown and the filling is bubbling. Your kitchen will smell heavenly, and your friends and family will wonder what’s cooking!
-
Cool and Serve:
- Let the galette cool on the baking sheet for a few minutes before transferring it to a wire rack. This cooling time lets the filling set, making it easier to slice.
Serving Suggestions
To serve this galette, cut it into wedges and place them on beautiful plates. A scoop of vanilla ice cream or a dollop of freshly whipped cream on top takes it to the next level! For an elegant touch, garnish with a sprig of fresh mint. Trust me; your guests will be impressed!
Recipe Variations
Want to switch things up a bit? Here are a few creative ideas:
- Summer Berry Galette: Swap out nectarines for peaches or toss in some strawberries along with blueberries.
- Spiced Galette: Add some ginger or cardamom to the fruit filling for an exotic twist.
- Nutty Addition: Sprinkle some chopped almonds or walnuts over the filling before folding the dough for an added crunch.
- Vegan Option: Use coconut oil rather than butter and substitute the egg wash with almond milk.
Chef’s Notes
This French Nectarine Blueberry Galette is not just a recipe to me; it’s a reminder of family traditions and summertime joy. Over the years, I’ve played with different fruits and spices, turning it into an ever-evolving dish that matches the season. I once made an apricot and raspberry version at a friend’s wedding, and it was a total hit! Whatever the variations, the core idea remains the same: to bring people together through the love of food. Don’t worry if it doesn’t look perfect; those little rustic edges are what make it unique!
FAQs and Troubleshooting
1. My dough is too dry. What do I do?
If your dough seems crumbly, add a teaspoon of cold water at a time until it comes together. Remember, the key is to handle it minimally!
2. How can I prevent the galette from getting soggy?
Make sure to use well-drained fruits and avoid overmixing them with sugar and cornstarch. Letting the filling sit for a few minutes allows the juices to combine beautifully without making the crust soggy.
3. What if my galette crust cracks?
It’s okay! Just gently pinch or fold it back together while assembling. Remember, the rustic look is part of its charm!
4. Can I make the dough ahead of time?
Absolutely! You can prepare the dough a day in advance and keep it wrapped in the refrigerator. Just allow it to sit at room temperature for a few minutes before rolling it out.
Nutritional Info
(If applicable, please add here)
Now that you’ve got all the details, it’s time to roll up your sleeves and get to baking! This French Nectarine Blueberry Galette is bound to be a showstopper at your next gathering. I can’t wait to hear how it turns out for you. Remember, cooking is all about joy, experimentation, and creating memories. Happy baking! 🍑✨
Print
French Nectarine Blueberry Galette
- Total Time: 50 minutes
- Yield: 8 servings 1x
- Diet: Vegetarian
Description
A rustic French galette filled with juicy nectarines and sweet blueberries, perfect for summer gatherings.
Ingredients
- 1 ¼ cups All-Purpose Flour
- ½ cup Unsalted Butter, chilled and cubed
- 2 tablespoons Powdered Sugar
- 3–4 tablespoons Ice Water
- 3 medium Nectarines, sliced
- 1 cup Blueberries, fresh or frozen
- ¼ cup Granulated Sugar, plus extra for sprinkling
- 1 tablespoon Cornstarch
- ¼ teaspoon Ground Cinnamon
Instructions
- Prepare the Dough: In a large mixing bowl, whisk together the all-purpose flour and powdered sugar. Add the cubed, chilled butter. Use a pastry cutter or your fingertips to mix until the mixture resembles coarse crumbs.
- Bring it Together: Gradually add ice water, one tablespoon at a time, mixing until the dough just comes together. Wrap it in plastic wrap and refrigerate for about 30 minutes.
- Make the Filling: While the dough chills, prepare the fruit filling. Toss together the sliced nectarines, blueberries, granulated sugar, cornstarch, and ground cinnamon. Let sit for about 10 minutes.
- Preheat Your Oven: Preheat your oven to 400°F (200°C).
- Roll Out the Dough: Lightly flour your surface and roll out the chilled dough into a circle about 12 inches in diameter. Transfer it to a parchment-lined baking sheet.
- Add the Filling: Spoon the fruit mixture into the center of the dough, leaving about a 2-inch border around the edges.
- Fold the Edges: Carefully fold the edges of the dough over the filling, pleating it as you go.
- Egg Wash and Sugar Sprinkle: Beat an egg with a bit of water, brush it over the crust, and sprinkle a little granulated sugar on top.
- Bake to Perfection: Bake for about 30-35 minutes, or until the crust is golden brown and the filling is bubbling.
- Cool and Serve: Let the galette cool on the baking sheet for a few minutes before transferring it to a wire rack.
Notes
Serve with vanilla ice cream or whipped cream for an elevated touch.
- Prep Time: 15 minutes
- Cook Time: 35 minutes
- Category: Dessert
- Method: Baking
- Cuisine: French
Nutrition
- Serving Size: 1 slice
- Calories: 280
- Sugar: 15g
- Sodium: 300mg
- Fat: 12g
- Saturated Fat: 7g
- Unsaturated Fat: 4g
- Trans Fat: 0g
- Carbohydrates: 36g
- Fiber: 2g
- Protein: 3g
- Cholesterol: 30mg
Keywords: galette, dessert, summer fruits, baking, rustic dessert, French dessert


