
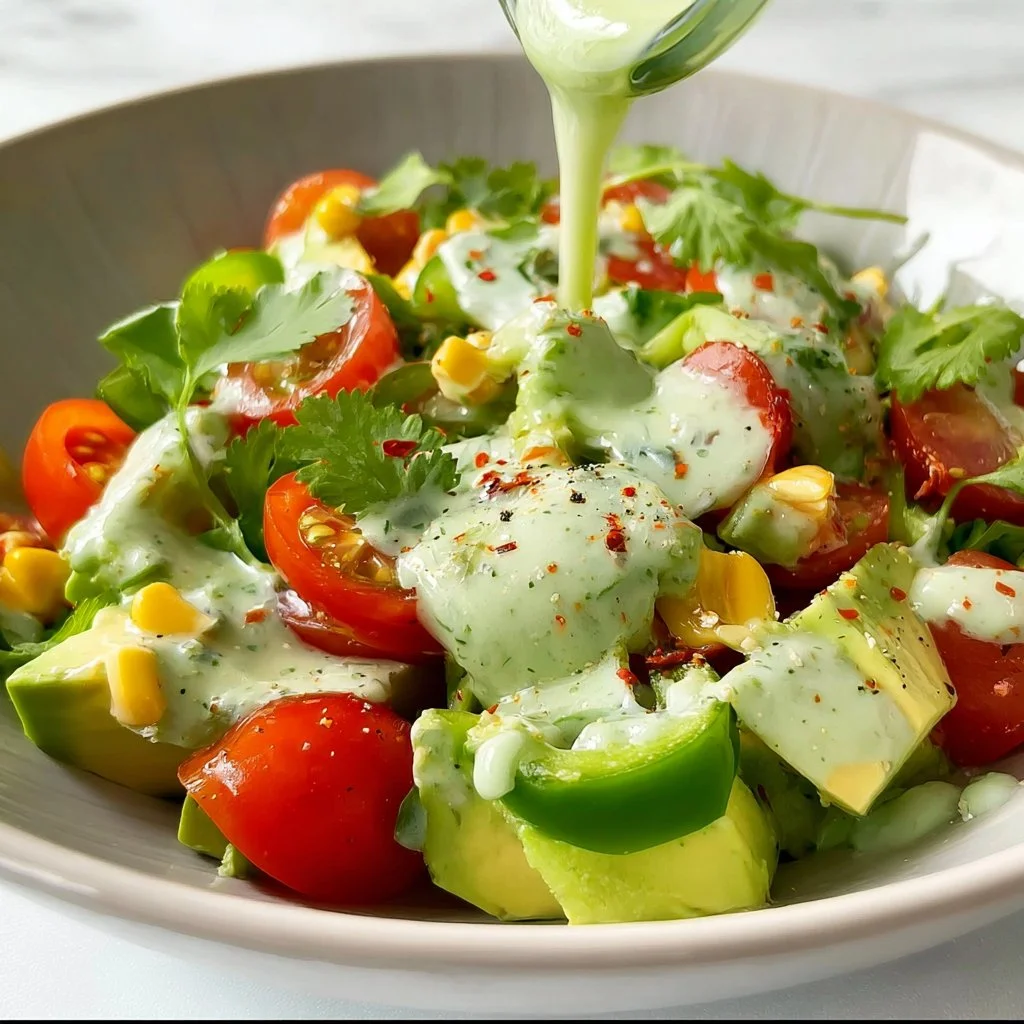
Avocado Salad with Lime Cilantro Dressing
The Creamy, zesty Delight: Avocado Salad with Lime Cilantro Dressing
Welcome, fellow food lovers! Today, I’m thrilled to take you on a culinary adventure that highlights one of my all-time favorite ingredients: the avocado! Known for its creamy texture and incredible health benefits, the avocado is not just your go-to for toast but is the star of a delightful salad that will brighten up any meal. Yes, you guessed it—I’m talking about Avocado Salad with Lime Cilantro Dressing!
Imagine this: you’re hosting a sunny backyard barbecue, laughter bubbling in the air, and the smell of grilled meats tantalizing your senses. Now, add to that scene a vibrant bowl of this avocado salad, glistening under the sunlight. It’s not just a side dish; it’s a centerpiece that invites everyone to dig in and share their memories over lunch. This salad is simple yet phenomenal, combining the creamy richness of ripe avocados with the zesty, aromatic notes of lime and cilantro. It’s fresh, it’s colorful, and most importantly, it’s irresistibly tasty!
This salad is perfect for any occasion: whether you’re spicing up a weekday dinner or preparing for a big feast. Plus, it’s an excellent way to eat your greens while indulging your taste buds—a win-win, if you ask me! By the time we’re done here, you’ll be able to whip this up with more confidence than ever. So grab your apron, and let’s dive into the deliciousness that is Avocado Salad with Lime Cilantro Dressing!
Personal Story
I can’t think of avocado salad without being transported back to my grandmother’s kitchen. Every summer, my family would gather at her house for a backyard cookout. The sun would be shining, kids would be running around, and the air was filled with the mouth-watering aroma of grilled burgers. But the real star of the table was always that gorgeous bowl of avocado salad with the best lime cilantro dressing.
I remember the first time I snuck a taste of that salad. My grandma had just perfected her dressing recipe, and as I dipped my spoon into that creamy green goodness, I felt like I was making a secret culinary discovery. The balance of the tart lime paired with the buttery avocados created a flavor explosion that danced on my taste buds. From then on, every family gathering became synonymous with that salad, sparking endless conversations about flavors, laughter, and our love for food.
Now, every time I make this salad, I feel my grandma’s spirit in the kitchen. It’s as if I’m almost summoned back to those warm summer afternoons, sharing laughs and memories with my loved ones. And today, I invite you to keep that tradition alive as we create this beautiful dish together!
Ingredients
Here’s what you’ll need to whip up your Avocado Salad with Lime Cilantro Dressing:
-
2 ripe avocados
Look for avocados that yield slightly to gentle pressure—these are the perfect ones for a creamy salad. If you can’t find ripe avocados, you can use slightly underripe ones and just add a few minutes to your mashing time when making the dressing! -
1 cup cherry tomatoes, halved
These little gems add a pop of color and sweetness! You can also swap them out for diced red bell pepper for a crisp crunch if you prefer. -
1 small red onion, diced
Red onion brings a mild, sweet flavor that balances the richness of avocados. If you’re looking for a milder taste, soak the diced onions in cold water for about 10 minutes before adding them to the salad. -
1 cup corn (fresh, frozen, or canned)
Corn lends a lovely sweetness and an extra layer of texture. If you’re using frozen corn, just give it a quick boil to soften it up. Canned corn works great too; just make sure to drain it well first! -
½ cup fresh cilantro, chopped
Cilantro adds that zesty herbaceous flavor that really elevates this salad! Fresh parsley can work if you’re not a fan of cilantro. -
Juice of 2 limes
Fresh lime juice is key to bringing all the flavors together. Don’t substitute with bottled lime juice if you can help it; the fresh stuff makes all the difference! -
Salt and pepper to taste
Seasoning is important to balance all those delicious flavors—don’t be shy! -
Optional add-ins:
Feta cheese or cotija cheese for a creamy savory note or jalapeños for an extra kick!
Step-by-Step Instructions
Are you ready to dive in? Let’s get cooking!
Step 1: Prep Your Ingredients
Start by gathering and washing all your fresh veggies. It’s always a good idea to have everything prepped before you dive into the actual cooking! Chop your cherry tomatoes in half, dice your red onion, and chop the cilantro. If you’re using fresh corn, steam or boil it until tender. If you’re using frozen corn, a quick boil works wonders.
Step 2: Cutting the Avocados
Now for the star of the show—your avocados! Cut them in half and carefully remove the pit (you can use a knife for this, but be cautious!). Scoop out the flesh with a spoon and place them in a mixing bowl. Give them a rough chop or slice them into cubes—whatever you fancy!
A little chef hack: To prevent browning, sprinkle some lime juice over your chopped avocado right away. This keeps its vibrant green color!
Step 3: Make the Dressing
In a separate small bowl, mix together the fresh lime juice, chopped cilantro, salt, and pepper. Whisk this until it’s combined. This dressing is the zingy, zesty flavor bomb that will coat your salad beautifully!
Tip: If you like a creamier dressing, feel free to add a dollop of Greek yogurt or some extra virgin olive oil. They both add a subtle richness!
Step 4: Combine
In your large mixing bowl with the avocado, gently fold in the cherry tomatoes, corn, and red onion. Pour the dressing over the top and carefully toss everything together. Be gentle, as you don’t want to mash your lovely avocados too much.
A little caution here: use a soft touch! You want the avocado to be nicely coated without turning into mush. Sidestep any urge to go all-in with mixing; we’re not making guacamole!
Step 5: Season
Now, give your salad a taste. Does it need a bit more salt, a sprinkle of pepper, or maybe another splash of lime juice? Taste buds are your best friend here! Adjust the seasoning to suit your palate.
Step 6: Serve and Enjoy!
Transfer your Avocado Salad to a beautiful serving bowl. You can garnish it with additional cilantro on top or a sprinkle of feta cheese for that creamy crumbliness. Ready to dig in?
Serving Suggestions
This Avocado Salad pairs beautifully with grilled meats or fish! Serve alongside a piece of grilled chicken or fish tacos for a flavor-packed meal. Alternatively, you can plate it on a bed of mixed greens for a wholesome lunch. If you’re feeling adventurous, toss in some tortilla chips for a crunchy twist!
Recipe Variations
Feeling creative? Here are some fun twists you can try:
- Tropical Avocado Salad: Add pineapple or mango chunks for an island-flavored twist.
- Mediterranean Delight: Toss in some olives and chopped cucumbers, plus a drizzle of olive oil for a Mediterranean flair.
- Spicy Kick: Add diced jalapeños or a pinch of cayenne pepper for a zesty heat.
- Protein Boost: For a heartier salad, throw in some cooked quinoa or black beans.
- Dairy-Free Option: Swap feta for nutritional yeast to keep things dairy-free while adding a cheesy flavor!
Chef’s Notes
This recipe has become a staple at my family gatherings, much like it was for my grandmother. Over the years, I’ve played with the recipe, incorporating seasonal ingredients based on what’s fresh and available. One time, I added fresh peaches, and the sweetness was absolutely divine!
Whenever I whip up this salad, I can’t help but smile and think of those sunny days spent with my family. Cooking is all about love, memories, and a sprinkle of creativity, and I hope this recipe brings a bit of joy to your kitchen as well!
FAQs and Troubleshooting
1. My avocados are mushy! How do I avoid that?
- Choose avocados that are ripe but slightly firm. If they yield too much when pressed, they might be overripe.
2. Can I make this salad ahead of time?
- Yes, but it’s best to add the dressing just before serving to keep the avocados looking fresh! If you must make it in advance, store it in an airtight container and drizzle with lime juice to help prevent browning.
3. What if I don’t like cilantro?
- No worries; fresh parsley or even mint can be a refreshing alternative. Feel free to substitute with an herb that you enjoy!
4. How do I store leftovers?
- Store any leftover salad in an airtight container in the refrigerator. Consume within a day for optimal freshness, as avocados can brown quickly.
Nutritional Info (Optional)
- Calories: Approximately 180 per serving (based on 4 servings)
- Protein: 4g
- Carbs: 12g
- Fat: 14g
- Fiber: 7g
Now you’re all set to impress your friends and family with this Avocado Salad with Lime Cilantro Dressing! Each bite is a reminder that cooking should be fun, delicious, and full of love. Enjoy your kitchen adventures, and don’t forget to sprinkle a little laughter in there while you cook! Happy munching!
Print
Avocado Salad with Lime Cilantro Dressing
- Total Time: 15 minutes
- Yield: 4 servings 1x
- Diet: Vegetarian
Description
A vibrant avocado salad with a zesty lime cilantro dressing, perfect for any occasion.
Ingredients
- 2 ripe avocados
- 1 cup cherry tomatoes, halved
- 1 small red onion, diced
- 1 cup corn (fresh, frozen, or canned)
- ½ cup fresh cilantro, chopped
- Juice of 2 limes
- Salt and pepper to taste
- Optional: Feta cheese or cotija cheese, jalapeños
Instructions
- Prep Your Ingredients by gathering and washing all your fresh veggies.
- Cutting the Avocados in half and carefully remove the pit.
- Make the Dressing by mixing lime juice, cilantro, salt, and pepper.
- Combine the avocado with cherry tomatoes, corn, and red onion; pour dressing over.
- Season to taste with additional salt, pepper, or lime juice.
- Serve and Enjoy in a beautiful bowl with garnishes.
Notes
For a creamier dressing, add Greek yogurt or olive oil. Can be easily modified with different ingredients.
- Prep Time: 15 minutes
- Cook Time: 0 minutes
- Category: Salad
- Method: Mixing
- Cuisine: Mexican
Nutrition
- Serving Size: 1 serving
- Calories: 180
- Sugar: 2g
- Sodium: 150mg
- Fat: 14g
- Saturated Fat: 2g
- Unsaturated Fat: 8g
- Trans Fat: 0g
- Carbohydrates: 12g
- Fiber: 7g
- Protein: 4g
- Cholesterol: 0mg
Keywords: avocado salad, lime dressing, cilantro recipe, summer salad, healthy recipe
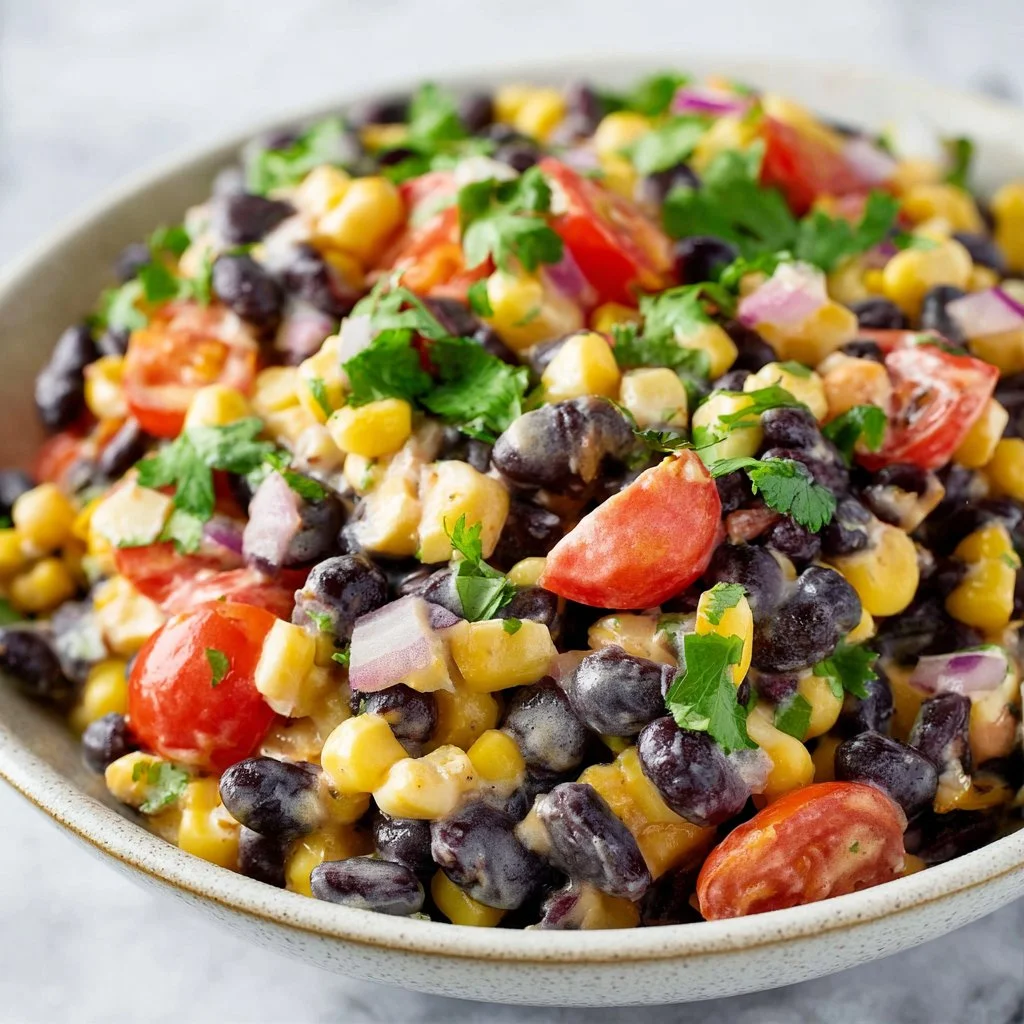
Southwest Black Bean Corn Salad
Southwest Black Bean Corn Salad: A Flavorful Fiesta in a Bowl!
Hey there, fellow food lovers! Welcome back to my kitchen, where every recipe is an invitation to spice things up and create delightful memories around the table. Today, we’re diving into a colorful and zesty dish that’s perfect for any occasion: Southwest Black Bean Corn Salad! 🌽
This salad is packed with vibrant flavors and fresh ingredients, bringing a taste of the Southwest right to your kitchen. Imagine biting into juicy corn perfectly complemented by the robust flavor of black beans, all tossed together with a zingy dressing that will make your taste buds dance! Whether you’re preparing a light lunch, a side for your next BBQ, or just looking for a healthy dish that’s absolutely bursting with flavor, this salad has got you covered.
Now, let’s take a moment to visualize this lovely creation. The tropical yellow hues of fresh corn, the deep black of the beans, and the bright greens of cilantro create a colorful palette that would make any artist envious. And trust me, once you take a few bites, you’ll find yourself wanting to dive in for more!
When I first discovered this salad, I was at a friend’s summer barbecue. As the sun was setting, we gathered around the grill, sipping cool drinks and sharing laughter. One friend brought a massive bowl of Southwest Black Bean Corn Salad, and I was instantly drawn to it. The aroma of lime, cilantro, and spices wafted through the air, igniting my curiosity. I vividly remember talking with my friends about what was in this vibrant creation as I savored each bite. From that moment on, this colorful dish became a staple in my home. Through trials and numerous recipe variations, I perfected a version that I’m excited to share with you today!
So roll up those sleeves and put on your favorite apron; it’s time to whip up something delicious in the kitchen!
Personal Story
Let me take you back to my childhood for a moment. I grew up in a small town where family gatherings were a big deal, especially during the summer months. My Aunt Maria was the queen of summer barbecues, and nothing brought our family together quite like her infamous black bean corn salad. Every time she made it, she would whisk us into the kitchen, allowing us to help with the chopping and mixing. I remember the laughter and the playful banter as we diced tomatoes and squeezed fresh lime juice.
One magical afternoon stands out in my memory. It was my cousin Jake’s birthday, and Aunt Maria decided to surprise him with a giant batch of this salad. The kitchen was filled with the aroma of sizzling fajitas, but my heart was already set on that colorful bowl. As we sat around the table, my aunt shared stories about how she had discovered this recipe while traveling through New Mexico, and the way her eyes twinkled made the salad taste even better!
From that day onwards, black bean corn salad became more than just a dish for me; it became a symbol of family, warmth, and joyous summer moments. Now, as I prepare this dish in my own kitchen, I can’t help but feel grateful for those times and the love that food has always brought to our lives. I’m excited to share this recipe with you, a dish I hope will bring as much joy to your kitchen as it has to mine.
Ingredients
Here’s what you’ll need to whip up our Southwest Black Bean Corn Salad. Get ready to gather those fresh and vibrant ingredients!
-
1 can (15 oz) black beans: Rinse and drain to get rid of excess sodium. If you’re feeling adventurous, try kidney beans or chickpeas for a twist!
-
2 cups corn (fresh, frozen, or canned): Sweet corn is the star here! If you’re using fresh corn, grill it first for a smoky flavor; if canned, make sure it’s sweet corn for that perfect sweetness.
-
1 bell pepper (red, yellow, or orange): Adds a sweet crunch and a rainbow of colors. Substitute with diced jalapeño for a spicy kick!
-
1 small red onion: The sharper taste brings depth. You can use green onions for a milder option or even some shallots!
-
1 cup diced tomatoes (cherry or regular): Freshness is key! Swap with diced avocado if you’re in the mood for some creaminess.
-
1/4 cup fresh cilantro: This herb adds a bright, fresh note. If you’re not a fan, try replacing it with parsley or basil.
-
1 lime (juiced): The zest brings all those flavors together. Swap this with lemon juice if you want a different tang!
-
2 tablespoons olive oil: A must for a rich mouthfeel. Try avocado oil for a unique flavor twist!
-
1 teaspoon cumin: This warm spice really enhances the earthy flavors. For a different depth, consider using smoked paprika.
-
Salt and pepper to taste: Essential for balancing flavors. Don’t forget to taste as you go!
Step-by-Step Instructions
Now that you have all your ingredients, let’s dive into the cooking process! 🎉 And don’t worry; I’ll sprinkle in some of my favorite tips along the way to keep things fun and flavorful.
-
Prep Your Ingredients: Start by rinsing and draining the black beans in a colander. Give them a little shake to get rid of the excess moisture. Next, if you’re using fresh corn, cut the kernels off the cob. If you have frozen corn, just let it thaw. As for the bell pepper and onion, chop them into bite-sized pieces for that perfect crunch. Get your tomatoes sliced, and don’t forget to chop up that fresh cilantro!
-
Mix the Base: Take a large mixing bowl (the bigger, the better!) and add your black beans, corn, bell pepper, diced onion, tomatoes, and cilantro. I always love a bowl that can hold a party! Toss everything gently with a spatula; you don’t want to squish those beautiful tomatoes!
-
Prepare the Dressing: In a small bowl, whisk together the lime juice, olive oil, cumin, salt, and pepper until combined. This is where the magic happens! The acidity from the lime will brighten everything up, while the cumin adds warm, earthy notes.
-
Toss & Taste: Pour the dressing over your colorful mixture and toss everything together until all the veggies are well-coated. This step is crucial for creating that harmonious flavor, so don’t be shy! Give it a taste; feel free to adjust seasoning if needed. You might like it a little saltier or zippier!
-
Let It Marinate: Here’s a little chef hack: let the salad sit for at least 20-30 minutes in the fridge before serving. This allows the flavors to meld beautifully. If you’re in a rush, just dive right in, but trust me—the wait is worth it!
-
Serve It Up: Once marinated, give your salad another gentle toss and adjust the seasoning one last time—if the salad needs a little more zing, squeeze in a bit more lime juice. Now it’s time to plate up!
Serving Suggestions
For serving, you can take a relaxed approach. Grab a big bowl, spoon in generous amounts of the salad, and allow everyone to dig in family style! For a more refined touch, serve it in individual bowls topped with a sprinkle of feta cheese or sliced avocado. If you want it to shine as a side dish, pair it with grilled chicken or shrimp, and don’t forget some crispy tortilla chips for that extra crunch!
Recipe Variations
💡 Feeling adventurous? Here are some fun twists to keep this salad fresh:
-
Spicy Southwest Kick: Add diced jalapeños for heat, or sprinkle in some chili powder for an extra flavor boost!
-
Southwestern Quinoa Bowl: Incorporate cooked quinoa for a heartier option. Quinoa adds protein and makes it even more filling!
-
Tropical Flair: Toss in some diced mango or pineapple to give a sweet and refreshing taste. They’ll add a nice contrast to the savory beans.
-
Creamy Avocado Spin: For a creamier texture, add diced avocado directly into the salad for an extra dose of healthy fats.
-
Vegan Tacos: Use this salad as a filling for tacos! Just load it up on a corn tortilla, garnish with extra lime, and enjoy!
Chef’s Notes
As with any recipe, I’ve had my fair share of kitchen misadventures while making this salad. I once made the unfortunate mistake of using expired beans (yikes!). Let’s just say that was an unforgettable evening, and pre-cooked beans became my new best friend from then on!
This recipe has evolved from Aunt Maria’s version through my culinary journey. I took her base and added my own spin with the pairing of lime and cumin, which has become the signature touch in my kitchen. Each time I make this salad, I’m reminded of family and those laughter-filled summers, which adds an extra layer of love to every bite.
FAQs and Troubleshooting
1. Can I make this salad ahead of time?
Absolutely! This salad is perfect for meal prep. Just store the salad in an airtight container in the fridge and enjoy it within 3-4 days. Allowing it to sit overnight will only deepen the flavors!
2. How can I keep the avocado from browning?
If you’re adding avocado, try to add it just before serving to avoid oxidation. If you must prepare it in advance, sprinkle some lime juice on top to slow down the browning process.
3. My salad seems too bland. What can I do?
Don’t panic! Add a pinch more salt, a squeeze of lime, or a dash of hot sauce. Seasoning layers will elevate the overall flavor. Tasting as you go will give you the best results.
4. Why is my black bean corn salad watery?
If you’re using fresh corn, be sure to pat it dry before adding it to the mix. Also, too much lime juice can create an unwanted puddle, so adjust your dressing to fit your taste preference.
Nutritional Info (optional)
While I love to focus on flavor, I also appreciate a healthy balance. This salad is rich in fiber and protein from black beans and is loaded with vitamins from the colorful veggies. Pairing it with some grilled chicken or fish, it can make a balanced, wholesome meal that is satisfying and delicious!
And there you have it! A beautiful, hearty Southwest Black Bean Corn Salad that embraces the spirit of cooking and community. I hope you find as much joy in making and sharing it as I do. Get ready to enjoy a fiesta of flavors straight from your kitchen! Happy cooking, and don’t forget to pass this recipe along to your friends! 💚🥗
Print
Southwest Black Bean Corn Salad
- Total Time: 30 minutes
- Yield: 4 servings 1x
- Diet: Vegan
Description
A colorful and zesty salad packed with black beans, corn, and a zingy dressing, perfect for any occasion.
Ingredients
- 1 can (15 oz) black beans, rinsed and drained
- 2 cups corn (fresh, frozen, or canned)
- 1 bell pepper (red, yellow, or orange), chopped
- 1 small red onion, chopped
- 1 cup diced tomatoes (cherry or regular)
- 1/4 cup fresh cilantro, chopped
- 1 lime, juiced
- 2 tablespoons olive oil
- 1 teaspoon cumin
- Salt and pepper to taste
Instructions
- Prep your ingredients by rinsing and draining the black beans and chopping the vegetables.
- Mix the black beans, corn, bell pepper, onion, tomatoes, and cilantro in a large bowl.
- Prepare the dressing by whisking together lime juice, olive oil, cumin, salt, and pepper.
- Toss the dressing with the salad mixture until well-coated.
- Let the salad marinate in the fridge for 20-30 minutes.
- Serve and enjoy!
Notes
This salad is great for meal prep and can be stored in the fridge for 3-4 days. Customize with extra ingredients like diced avocado or jalapeños for added flavor.
- Prep Time: 15 minutes
- Cook Time: 0 minutes
- Category: Salad
- Method: Mixing
- Cuisine: American
Nutrition
- Serving Size: 1 serving
- Calories: 250
- Sugar: 5g
- Sodium: 250mg
- Fat: 10g
- Saturated Fat: 1g
- Unsaturated Fat: 7g
- Trans Fat: 0g
- Carbohydrates: 32g
- Fiber: 10g
- Protein: 8g
- Cholesterol: 0mg
Keywords: black bean, corn salad, vegan salad, healthy salad, summer dish
Santa Fe Salad
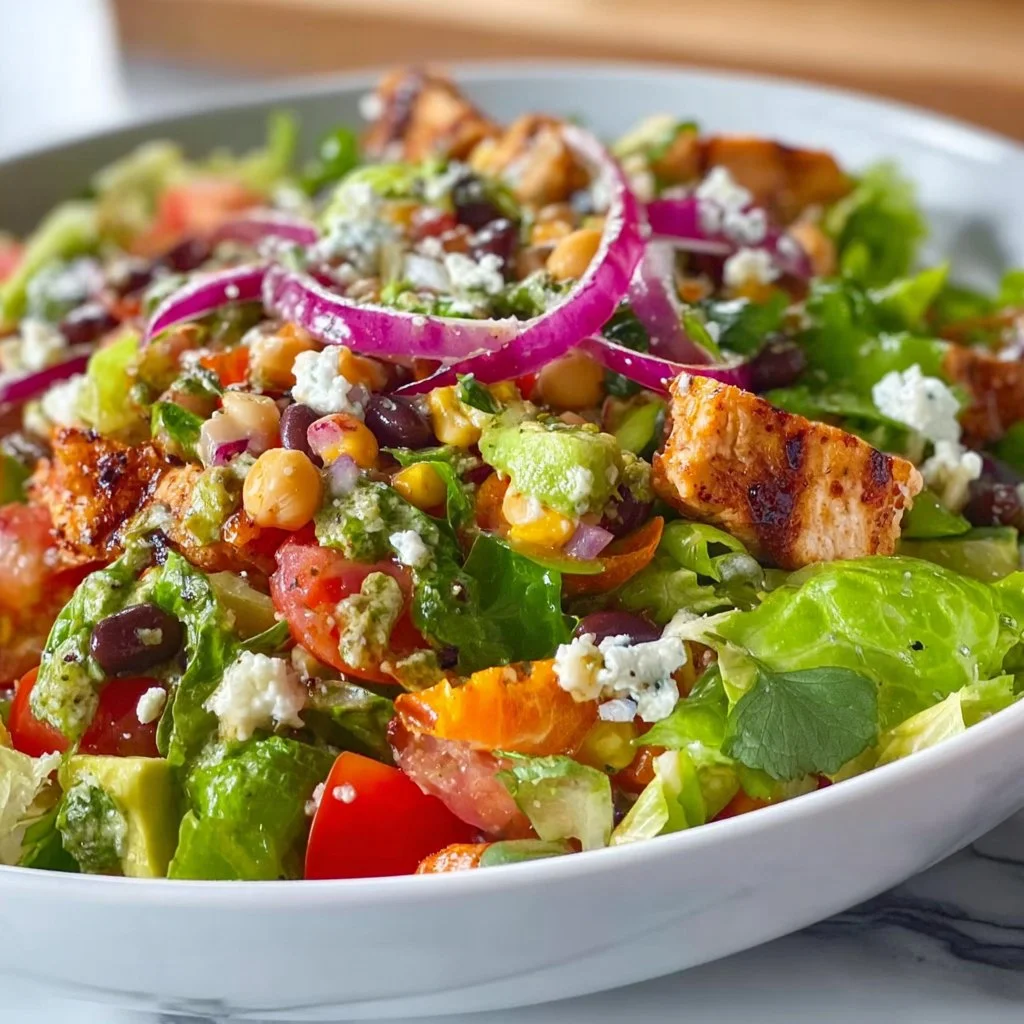
# Santa Fe Salad: A Flavorful Fiesta in Every Bite!

## Introduction

Welcome to my kitchen, food lovers! Today, we’re diving into a dish that’s as bright and vivacious as the sun-soaked vistas of New Mexico — the Santa Fe Salad. Picture this: the tantalizing aroma of spices wafting through the air, the vibrant colors of fresh veggies adorning your plate, and the undeniable joy of sharing a dish that embodies flavor and freshness.

Now, you might wonder, “What’s so special about a salad?” Well, let me tell you, this isn’t just any ordinary salad. The Santa Fe Salad encapsulates the spirit of community and celebration, where every bite bursts with the warmth of Southwest flavors and the crispness of garden-fresh ingredients. It’s all about that perfect mix of textures and tastes—crunchy, creamy, spicy, and zesty. Whether it’s a sunlit picnic, a cozy family dinner, or a festive gathering with friends, this salad shines as a star attraction on any table.

I’ve always believed that the best meals don’t just fill the belly; they nourish the soul and create connections. I remember the first time I encountered a Santa Fe Salad at a local eatery during my travels in New Mexico. I was immediately drawn in by the colors and aroma that danced in the air. With its lively ingredients, it wasn't just a dish—it was an experience! I knew then that I had to recreate that magic at home, and now, I’m thrilled to share it with you. Join me as we journey through the layers of flavors and memories that make this salad truly special!

## Personal Story

Let me take you back to a summer day in Santa Fe, where the sun is shining brightly, and the air is filled with the scent of roasting green chilies. I was visiting a quaint little café, eager to try something new. When the Santa Fe Salad arrived at my table, I was mesmerized by the burst of colors – bright reds, greens, yellows, and creamy whites all piled high, making it look like an edible work of art.

What caught my attention was not just the beautiful presentation, but the sensation of flavors when I took my first bite. The crispness of the lettuce met the sweetness of ripe corn, complemented by the smoky, spicy notes of black beans and avocados. It was a flavor explosion! I quickly learned that each ingredient played a vital role in crafting the experience. Instantly, I felt inspired. I wanted to recreate this vibrant plate at home, not just for myself, but for everyone I loved and wanted to share the joy of cooking with.

Ever since that day, my Santa Fe Salad has become a favorite dish in my own repertoire. It invites friends around my table, sparks laughter, and creates new memories — making it more than just a salad; it has evolved into a symbol of togetherness and the vibrant spirit of the Southwest.

## Ingredients

Here’s what you’ll need to whip up your very own Santa Fe Salad:

- **Mixed Greens** (e.g., Romaine, spinach, or arugula)
   - *Insight*: This is the base of your salad. Feel free to mix and match greens for flavor and texture. For a heartier option, use kale.

- **Black Beans** (canned or cooked)
   - *Substitution Tip*: If you’re looking for a different flavor, chickpeas or kidney beans work well too!

- **Corn** (fresh, frozen, or canned)
   - *Chef Insight*: Sweet corn adds a lovely crunch and sweetness; if you can, grill it for a smoky twist!

- **Cherry Tomatoes** (halved)
   - *Substitution Tip*: Grape tomatoes or heirloom varieties add a personalized touch!

- **Avocado** (diced)
   - *Chef Insight*: Always buy avocados that are slightly soft to the touch for a creamy addition. Use lime juice to keep them from browning.

- **Red Onion** (thinly sliced)
   - *Suggestion*: If you prefer a milder flavor, soak the slices in cold water for 10 minutes before adding.

- **Cilantro** (fresh, chopped)
   - *Substitution Tip*: If cilantro isn’t your thing, try fresh parsley for a different herbaceous flavor.

- **Lime Juice** (freshly squeezed)
   - *Chef Insight*: Fresh lime juice brightens everything! It’s worth skipping the bottled stuff for this one.

- **Olive Oil** (extra virgin)
   - *Insight*: A high-quality olive oil elevates the salad. Experiment with flavored oils, like garlic or chili-infused.

- **Feta Cheese** (crumbled)
   - *Substitution Tip*: For a vegan option, omit cheese or substitute with nutritional yeast for a cheesy flavor.

- **Chili Powder** or **Cumin**
   - *Chef Insight*: These spices will link your salad to the essence of Southwest cuisine—don’t hold back!

## Step-by-Step Instructions

### 1. Prepare Your Ingredients
Start by washing and prepping your mixed greens. Tear them into bite-sized pieces (no need to get fancy here; rustic is the name of the game!). Next, rinse the canned black beans and drain the corn. For fresh corn, you’ll want to cook it briefly if you prefer it warm or grill it for a tasty char.

### 2. Dice and Chop
Now it’s time to dice the avocado, chop the cilantro, slice the red onion, and halve those cherry tomatoes. Take your time here. This step is therapeutic, and it’s where the magic starts to come together.

### 3. Assemble the Salad
Grab a large bowl and toss in all your greens first, then layer on the black beans, corn, tomatoes, and avocado—feeling free to toss a little as you go to evenly distribute. Trust me, layering adds that special touch!

### 4. Make the Dressing
In a small bowl, whisk together the lime juice, olive oil, chili powder (or cumin), and a pinch of salt. If you want an added kick, throw in a dash of pepper or some finely minced jalapeño! Once combined, pour it over the salad and mix gently to coat everything evenly.

### 5. Add the Finishing Touches
Sprinkle the crumbled feta cheese and chopped cilantro on top. If you want to impress, save a few sprigs of cilantro for garnish. Presentation matters!

### 6. Serve Immediately
Salads are best enjoyed fresh, so dive in right away. If you’re making this for later, keep the dressing separate until serving to retain that crispness!

## Serving Suggestions

When serving your Santa Fe Salad, consider using large, vibrant bowls to showcase the colorful ingredients. You can also serve it alongside tortilla chips for added crunch or grilled chicken for a more filling option. Drizzling additional lime juice right before serving can brighten it up even more—fabulous!

## Recipe Variations

1. **Spicy Santa Fe Salad**: Add sliced jalapeños or a jalapeño-infused olive oil to bring the heat!
2. **Protein-Packed**: Toss in rotisserie chicken or grilled shrimp for a more hearty option.
3. **Vegan Delight**: Skip the cheese and replace it with marinated tofu or tempeh for a lovely plant-based protein boost.
4. **Seasonal Twist**: Bring in seasonal fruits, like sliced peaches or pomegranate seeds, to keep things fresh and exciting.
5. **Quinoa Addition**: For a tahini twist, mix in cooked quinoa for added texture and health benefits.

## Chef’s Notes

I can’t tell you how many times this recipe has evolved in my kitchen. At first, it was all about gathering random vegetables from my fridge and tossing them together. Over the years, I honed it into something that not only looks great but feels like a warm hug on a plate.

A funny kitchen story: I once mistakenly added a whole cup of chili powder instead of a teaspoon! Let me tell you, that salad was a fiery adventure that left me gasping for milk instead of enjoying the flavors. Remember, always taste as you go, and don’t be afraid to adjust seasonings to your liking!

## FAQs and Troubleshooting

**Q: How do I keep avocado from browning?**
A: The best trick is to toss diced avocado with lime juice. This natural acid helps prevent oxidation.

**Q: My salad isn’t flavorful. What should I do?**
A: Make sure to season properly! A pinch of salt and a squeeze of fresh lime can really elevate and bring out the flavors.

**Q: Can I prepare this salad ahead of time?**
A: You can prep all the ingredients ahead of time, but I recommend storing the dressing separately until right before serving for maximum freshness.

**Q: I don’t like cilantro. What can I use instead?**
A: No problem! Try using parsley or even fresh basil for a completely different flavor profile.

## Nutritional Info

This salad is not only flavorful but also nutritious! Packed with healthy fats, fiber, and a plethora of vitamins, it’s a great addition to any meal.

Calories: ~300 per serving (this will vary based on added ingredients)
Protein: ~10g
Carbohydrates: ~40g
Fat: ~15g

---

And there you have it — the Santa Fe Salad, a celebration of colors and flavors that’s perfect for any occasion! Don’t just take my word for it; roll up those sleeves and get cooking! Be sure to share your creations and let the kitchen adventures begin. Happy cooking!
Santa Fe Salad
- Total Time: 25 minutes
- Yield: 4 servings
- Diet: Vegetarian
Description
A vibrant and flavorful salad packed with fresh vegetables, black beans, and a zesty dressing that embodies the spirit of the Southwest.
Ingredients
- Mixed Greens (e.g., Romaine, spinach, or arugula)
- Black Beans (canned or cooked)
- Corn (fresh, frozen, or canned)
- Cherry Tomatoes (halved)
- Avocado (diced)
- Red Onion (thinly sliced)
- Cilantro (fresh, chopped)
- Lime Juice (freshly squeezed)
- Olive Oil (extra virgin)
- Feta Cheese (crumbled)
- Chili Powder or Cumin
Instructions
- Prepare your ingredients by washing and prepping your mixed greens. Tear them into bite-sized pieces. Rinse the canned black beans and drain the corn.
- Dice the avocado, chop the cilantro, slice the red onion, and halve the cherry tomatoes.
- Assemble the salad by tossing in all your greens first, then layering on the black beans, corn, tomatoes, and avocado.
- Make the dressing by whisking together lime juice, olive oil, chili powder (or cumin), and a pinch of salt in a small bowl.
- Add the crumbled feta cheese and chopped cilantro on top and garnish with sprigs of cilantro.
- Serve immediately for the best freshness.
Notes
For added flavor, consider using flavored olive oils and serving with tortilla chips or grilled chicken.
- Prep Time: 15 minutes
- Cook Time: 10 minutes
- Category: Salad
- Method: Tossing
- Cuisine: Southwestern
Nutrition
- Serving Size: 1 serving
- Calories: 300
- Sugar: 5g
- Sodium: 250mg
- Fat: 15g
- Saturated Fat: 3g
- Unsaturated Fat: 10g
- Trans Fat: 0g
- Carbohydrates: 40g
- Fiber: 12g
- Protein: 10g
- Cholesterol: 15mg
Keywords: salad, Santa Fe, Southwestern, healthy, fresh, vegetarian
Mexican Bean Salad
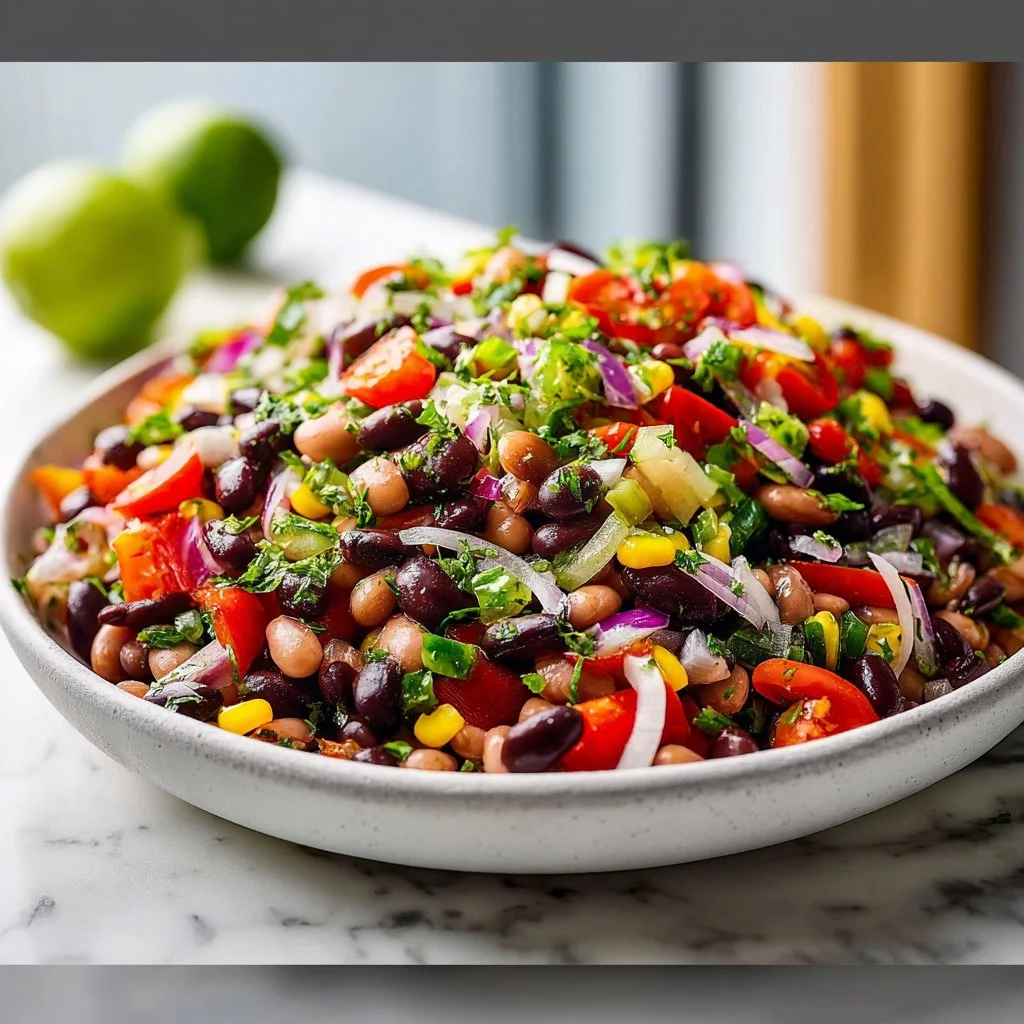
A Flavorful Journey: Mexican Bean Salad You’ll Love
Welcome, culinary adventurers! Today, I’m excited to share a recipe that not only brightens up your table but also speaks volumes of flavor and color — Mexican Bean Salad. This salad is vibrant, packed to the brim with nutrients, and serves as a delightful accompaniment to any meal or a stand-alone dish that’ll make your taste buds dance.
Picture this: it’s a sunny afternoon, and you’re hosting friends for a casual get-together. You want something that’s easy to make yet breathtakingly delicious. Enter the Mexican Bean Salad! With its medley of colorful ingredients and zesty dressing, this salad is sure to steal the show. It’s simple, it’s fresh, and trust me, it’s bursting with flavor, making it the perfect dish for any season.
But wait, before we jump into the recipe, let’s talk about why this salad is more than just a dish; it’s an experience. When I was a kid, one of my favorite summer activities was helping my grandma in her garden. We would pick fresh tomatoes, vibrant bell peppers, and aromatic herbs. Those moments in the sun gave me a deep appreciation for fresh ingredients, and today, I love recreating that joy in my kitchen. This salad is a tribute to those sun-kissed days, a celebration of wholesome cooking, and a canvas for your culinary creativity.
So grab your apron and let’s embrace the vibrant flavors of Mexico right in your kitchen! Together, we’ll chop, mix, and create a salad that’ll become a staple at your dining table. Let’s get started on this flavorful adventure!
Personal Story
I’ll never forget the first time I made Mexican Bean Salad. It was a scorching summer day, and my friends had decided to host a backyard BBQ. I wanted to bring something that would impress while being easy to prepare. As I rummaged through my pantry, I found a can of black beans and some bell peppers lingering in the fridge. I remembered my grandma’s stories of cooking with fresh ingredients, and I felt inspired.
With a little creativity, I tossed together those ingredients and added lime juice, cilantro, and a pinch of spice. The colors were striking, and the aroma was enchanting. My friends were skeptical at first — "A salad, Liv?" they asked. But once they took the first bite, their expressions changed. Eyes widened, smiles emerged, and just like that, my simple creation turned into the star of the BBQ! From that day on, Mexican Bean Salad has become my go-to dish for gatherings, a simple recipe that packs a hearty punch of flavor and memories.
Ingredients
Here’s what you’ll need for this delightful salad:
-
Canned Black Beans: A great source of protein and fiber. Rinse them well to remove excess sodium. If you’d like, replace them with kidney beans or chickpeas for a twist!
-
Canned Red Kidney Beans: Beautifully complement the black beans with a pop of color. You could swap these for pinto beans if they’re your preference.
-
Red Bell Pepper: Adds sweetness and crunch. If you’re not a fan of red bell peppers, try a yellow or orange one for a different flavor profile.
-
Yellow Bell Pepper: A vibrant addition that enhances the salad’s color palette. You can use zucchini or cucumbers as a fresh alternative.
-
Cherry Tomatoes: Sweetness personified! If you don’t have cherry tomatoes, diced regular tomatoes will work just fine.
-
Red Onion: A bit of sharpness that balances the sweetness of the peppers. You can substitute green onions for a milder flavor or even omit them if you prefer.
-
Fresh Cilantro: This aromatic herb brings vibrancy to the dish. If cilantro isn’t your thing, parsley makes a fantastic substitute.
-
Lime Juice: Brightens all the flavors. Fresh lime juice is best, but bottled juice can be used in a pinch.
-
Olive Oil: A staple in my kitchen! It helps bring all the flavors together. Avocado oil or any neutral oil can be used as alternatives.
-
Cumin: Adds a warm, earthy flavor. If you’re looking for something different, try smoked paprika for a smoky kick!
-
Salt & Pepper: Season to taste. Be mindful with salt if you’re using canned beans that might already be salted.
Step-by-Step Instructions
Step 1: Prepare the Ingredients
Start by gathering and washing all your produce. The fresher, the better! Chop your red and yellow bell peppers into small, bite-sized pieces. Slice the cherry tomatoes in half, and finely dice the red onion. Don’t forget to give your cilantro a good rinse and chop that up too — your kitchen should smell like a garden in no time!
Chef Tip: Use a sharp knife when chopping vegetables to keep them looking neat.
Step 2: Rinse the Beans
Open the cans of black beans and kidney beans, and give them a good rinse under cold water. This not only helps with the excess sodium but also improves the overall taste of the salad.
Step 3: Mix Your Base
In a large mixing bowl, combine the rinsed beans, bell peppers, cherry tomatoes, and red onion. Gently toss them together so the beans don’t mash — you want to keep that lovely texture!
Step 4: Prepare the Dressing
In a separate small bowl, whisk together the lime juice, olive oil, cumin, salt, and pepper. Don’t skip this step; a good dressing is essential for tying all those ingredients together.
Chef Hack: Add the dressing just before serving to keep the salad crisp and fresh!
Step 5: Combine & Garnish
Pour the dressing over your bean and vegetable mix. Toss gently but thoroughly until everything is well-coated with the dressing. Finally, sprinkle your freshly chopped cilantro on top. You can even save a few cilantro leaves to garnish the salad when serving.
Step 6: Chill (Optional)
For an even better flavor, let the salad chill in the fridge for about 30 minutes. This allows the flavors to meld beautifully.
Step 7: Serve & Enjoy
Spoon the salad onto a serving plate or bowl, and watch your friends and family dig in! You might want to have some tortilla chips on the side for added crunch.
Serving Suggestions
Serve this Mexican Bean Salad in a vibrant bowl, garnished with a few extra cilantro leaves for flair. Pair it with grilled meats, tacos, or even on its own with some crunchy tortilla chips for dipping. The color, texture, and flavor will make it the highlight of your dining spread!
Recipe Variations
-
Quinoa Mix-In: Boost the nutritional value by adding cooked quinoa. It makes the salad heartier and satisfying.
-
Spicy Kick: Add diced jalapeños or a sprinkle of red pepper flakes for a bit of heat!
-
Creamy Avocado: Dice up some avocado and gently fold it into the salad just before serving to add creaminess.
-
Feta Cheese: A sprinkle of feta adds a delightful tang and creaminess that complements the flavors perfectly.
-
Pineapple Twist: For a fruity variation, toss in some diced pineapple for sweetness and an exotic flair!
Chef’s Notes
Making this salad is like hitting a reset button in my kitchen! Each time I whip it up, I’m reminded of those glorious summer days spent in my grandma’s garden. She always believed that cooking should be joyful and uncomplicated, a philosophy I carry with me.
Over the years, this recipe has evolved with my own touches — sometimes I’ll throw in some corn or substitute ingredients based on what I have. Each variation is like adding a new chapter to a favorite story, and I encourage you to make it your own. Feel free to get creative; after all, the kitchen is a place for exploration!
FAQs and Troubleshooting
Q: Can I make this salad ahead of time?
A: Absolutely! Make it up to a day in advance and store it in the fridge. Just be sure to add the dressing right before serving to keep everything fresh.
Q: What if my black beans are mushy?
A: Rinsing beans is essential to remove the mushy texture. If you’ve cooked them from scratch, ensure you don’t overcook.
Q: Can I use dried beans?
A: Yes, just make sure to soak and cook them properly before using! Dried beans offer a great texture and flavor when cooked right.
Q: Is this salad suitable for meal prep?
A: Definitely! This salad holds up well in the fridge and makes for a fantastic lunch option throughout the week. Just keep the dressing separate until you’re ready to eat!
Nutritional Info (Optional)
While I’m not diving deep into the exact nutritional details, I can promise you this salad is nutritious! Packed with protein from the beans, fiber, and a variety of vitamins from the colorful veggies, it’s a wholesome boost to any meal.
There you have it, my friends! A vibrant, flavorful journey through the world of Mexican Bean Salad. I hope this recipe brings as much joy and warmth to your kitchen as it has in mine. Remember, cooking is all about having fun and making memories, so don your apron, grab those ingredients, and let’s create something delicious together! Happy cooking! 🍽️
Print
Mexican Bean Salad
- Total Time: 15 minutes
- Yield: 4 servings
- Diet: Vegetarian
Description
A vibrant and flavorful Mexican Bean Salad, packed with nutrients and perfect as a side dish or stand-alone meal.
Ingredients
- Canned Black Beans, rinsed
- Canned Red Kidney Beans, rinsed
- Red Bell Pepper, chopped
- Yellow Bell Pepper, chopped
- Cherry Tomatoes, halved
- Red Onion, finely diced
- Fresh Cilantro, chopped
- Lime Juice
- Olive Oil
- Cumin
- Salt & Pepper, to taste
Instructions
- Prepare the Ingredients: Gather and wash all your produce, chop bell peppers, slice cherry tomatoes, and dice red onion. Chop cilantro.
- Rinse the Beans: Open the black and kidney bean cans and rinse them under cold water.
- Mix Your Base: In a large bowl, combine beans, bell peppers, cherry tomatoes, and red onion. Toss gently.
- Prepare the Dressing: In a small bowl, whisk together lime juice, olive oil, cumin, salt, and pepper.
- Combine & Garnish: Pour dressing over the salad, tossing gently. Top with cilantro.
- Chill (Optional): Let the salad chill in the fridge for 30 minutes to meld flavors.
- Serve & Enjoy: Spoon into a bowl and serve, optionally with tortilla chips.
Notes
For variations, consider adding quinoa, jalapeños, avocado, feta, or pineapple for extra flavor.
- Prep Time: 15 minutes
- Cook Time: 0 minutes
- Category: Salad
- Method: Mixing
- Cuisine: Mexican
Nutrition
- Serving Size: 1 serving
- Calories: 250
- Sugar: 6g
- Sodium: 300mg
- Fat: 9g
- Saturated Fat: 1g
- Unsaturated Fat: 8g
- Trans Fat: 0g
- Carbohydrates: 36g
- Fiber: 10g
- Protein: 11g
- Cholesterol: 0mg
Keywords: salad, Mexican, vegetarian, beans, healthy
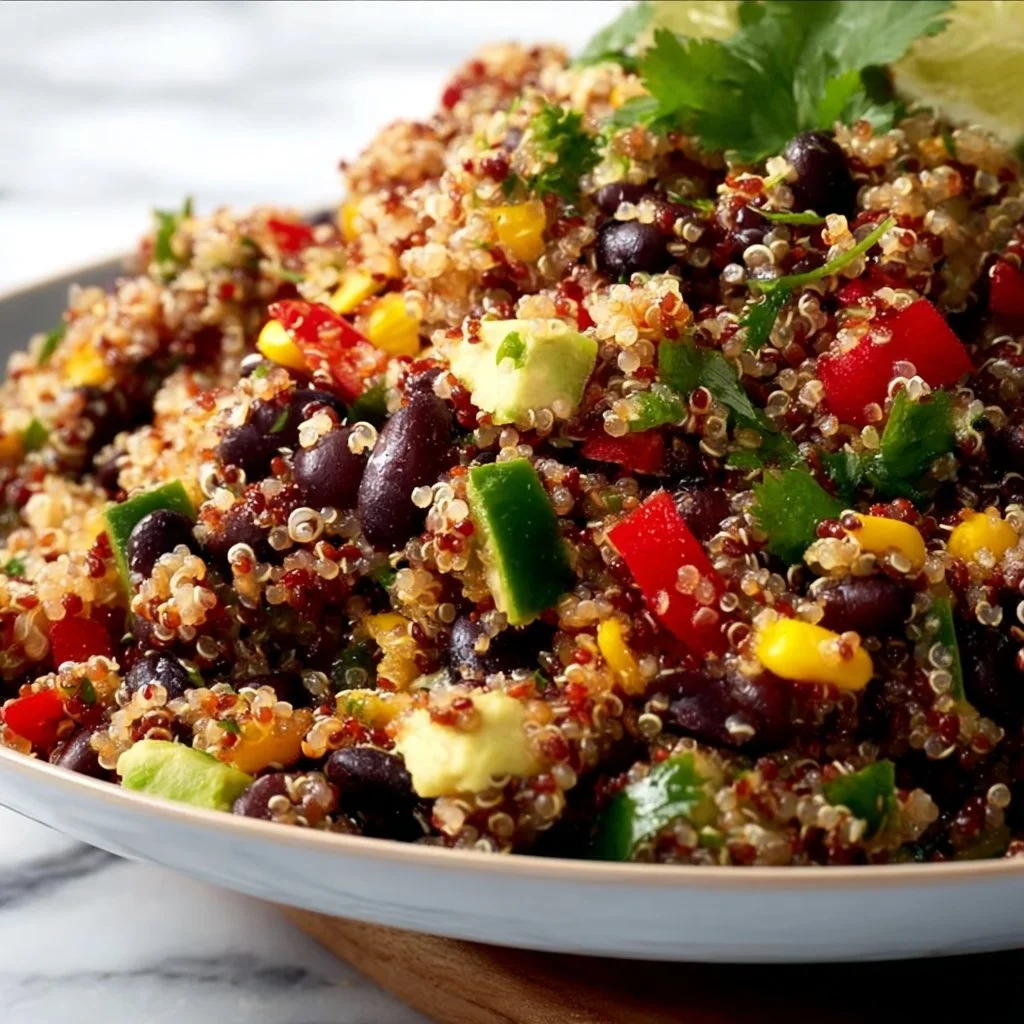
Black Bean Quinoa Salad
A Vibrant Journey Through Flavor: Black Bean Quinoa Salad
Hey there, kitchen enthusiasts! Welcome back to my cozy little corner where we turn simple ingredients into magical meals! Today, I’m really excited to share one of my all-time favorite recipes: Black Bean Quinoa Salad. Now, I know what you might be thinking—the words "salad" and "exciting" don’t usually go hand in hand. But trust me, this dish will change your mind! Bursting with color, flavor, and nourishment, this salad is a celebration of wholesome ingredients that come together to create something spectacular.
What I love most about this dish is its versatility. It’s perfect as a light lunch, a side dish for dinner, or even a vibrant centerpiece for gatherings. Picture this: A sunny afternoon, friends gathered around, sharing stories and laughs, while this delightful salad takes center stage. With its hearty black beans, fluffy quinoa, and a medley of fresh veggies, it’s not just a salad; it’s an experience!
The best part? This dish is super easy to whip up, making it perfect for everyone—from the kitchen novice to the seasoned chef. I’ll guide you through each step, sprinkle in some tips along the way, and maybe even share a few laughs as we go. You will not only impress your taste buds but also anyone you share it with. So grab your apron, and let’s dive into the goodness of Black Bean Quinoa Salad!
Personal Story
Ah, the memories! I can still recall the first time I made this Black Bean Quinoa Salad. It was a warm summer afternoon, and I was hosting a little get-together in my backyard. The sun was shining bright, and I had invited a few friends over to enjoy the warmth and, of course, good food. I remember rummaging through my pantry and fridge, looking for something fresh and vibrant to serve alongside the grilled chicken my husband had so lovingly prepared.
As I pulled out a can of black beans, a bag of quinoa, and a rainbow of fresh chopped veggies, the aromas of summer began to fill the kitchen. I envisioned that burst of flavors dancing together in a beautiful bowl, uniting my friends as we lounged outside. The blender whirred to life as I mixed up the zesty dressing. Let me tell you, that first bite was pure magic! The combination of flavors and textures was perfect—crunchy fresh veggies, creamy avocado, and the satisfying, nutty quinoa blended like a dream.
That day, laughter echoed all around, and my Black Bean Quinoa Salad became the hit of the party. It’s more than just a recipe to me; it’s a reminder of those sunny days filled with laughter, love, and the joy of cooking for the people who matter most. And now, I can’t wait for you to create your own memories with this delightful dish!
Ingredients
Let’s gather our ingredients and set the stage for culinary magic! Here’s what you’ll need:
-
1 cup quinoa
Quinoa is a nutritional powerhouse! It’s gluten-free, packed with protein, and provides a lovely nutty flavor. A great substitute is couscous or rice; just adjust cooking times accordingly. -
1 can (15 oz) black beans, rinsed and drained
Rich in protein and fiber, black beans offer a satisfying texture. If you’re looking for an alternative, pinto beans or chickpeas work well too. Just make sure to rinse them to reduce sodium! -
1 bell pepper, diced (any color)
Bell peppers add a crunchy freshness. Feel free to mix colors for a more vibrant salad. For a spicier kick, you can substitute with diced jalapeños. -
1 cup corn (fresh, frozen, or canned)
Corn adds a sweet crunch. Fresh corn off the cob is fantastic in summer, while frozen corn is my go-to in cooler months. -
1 avocado, diced
Creamy avocado gives richness and healthy fats. Not a fan? Try substituting it with diced cucumber or some crumbled feta for a different flavor profile. -
1 small red onion, finely chopped
A touch of onion adds a great bite. If raw onion isn’t your thing, try using green onions or chives for a milder flavor. -
1 cup cherry tomatoes, halved
Sweet, juicy cherry tomatoes enhance the salad’s freshness. If they’re out of season, canned diced tomatoes will work in a pinch; just drain them! -
1/4 cup fresh cilantro, chopped
Cilantro brings a burst of freshness. If you’re not a fan, feel free to swap it with parsley or omit it altogether. -
Juice of 1 lime
Fresh lime juice adds zesty brightness. Lemon juice can serve as a good substitute, giving a slightly different taste. -
2 tablespoons olive oil
A drizzle of olive oil enhances flavors and provides healthy fats. Avocado oil or any light oil works too! -
Salt and pepper to taste
Basic, but essential! Seasoning is key to bringing all the flavors together.
Step-by-Step Instructions
Now, let’s roll up our sleeves and get cooking! Follow these simple steps, and you’ll have a stunning Black Bean Quinoa Salad that’ll steal the show!
Step 1: Cook the Quinoa
-
Rinse the quinoa under cold water in a fine-mesh sieve to remove its natural coating, called saponin, which can make it taste bitter. This step is often overlooked, but trust me, it’s crucial for great flavor!
-
In a medium saucepan, combine 1 cup of quinoa with 2 cups of water or broth (for added flavor). Bring to a boil over medium-high heat.
-
Once boiling, reduce the heat to low, cover, and simmer for about 15 minutes, or until all the liquid has absorbed.
-
Fluff the cooked quinoa with a fork to separate the grains — this fluffy texture will be the heart of our salad!
Step 2: Prepare the Dressing
-
In a small bowl, whisk together the lime juice, olive oil, salt, and pepper until well combined.
-
For a little zing, consider adding a pinch of cayenne pepper or some minced garlic into the dressing. This will elevate the flavors and give your salad a bit of a kick!
Step 3: Combine the Ingredients
-
In a large mixing bowl, combine the cooked quinoa with your rinsed black beans, diced bell pepper, corn, avocado, red onion, cherry tomatoes, and cilantro. Look at those colors! I mean, can you resist the urge to dive in already?
-
Pour the dressing over the medley of ingredients, and gently toss until everything is well coated. A light toss is key; we want to keep the delicate avocado intact!
Step 4: Chill and Serve
-
For the best flavor, let your salad chill in the fridge for about 30 minutes before serving. This allows all those vibrant flavors to meld together beautifully.
-
When you’re ready to serve, give the salad another gentle toss, then plate it up in a big beautiful bowl or arrange it on individual plates. Either way, it’s a dish that’s eye-catching!
Serving Suggestions
To create a beautiful presentation, you might enjoy garnishing the top of your salad with a few extra slices of avocado and sprigs of cilantro. You could even add a sprinkle of feta cheese or a handful of tortilla chips for extra crunch. If you’re feeling festive, a few additional lime wedges on the side make a lovely touch!
Recipe Variations
Now, if you’re ready to get adventurous, here are a few variations to switch things up:
-
Southwestern Twist: Add diced jalapeños and a sprinkle of chili powder for a spicy version.
-
Mediterranean Style: Swap the black beans for chickpeas, and toss in some diced cucumber and feta cheese for a fresh take.
-
Grilled Version: Toss in grilled chicken or shrimp to make it a complete meal.
-
Vegan Delight: Keep it 100% plant-based by using nutritional yeast in place of cheese for a cheesy flavor boost.
-
Fruit Infusion: Add diced mango or pineapple for a sweet and tropical twist!
Chef’s Notes
You know, this Black Bean Quinoa Salad didn’t always have such a luscious dressing! In my early cooking days, I would just toss everything together and call it a day. But one day while experimenting in the kitchen, I whipped up a quick dressing, and let me tell you, the transformation was remarkable! It elevated the dish from good to absolutely phenomenal. So don’t skip the dressing—it’s where the love happens!
This salad has also grown with me over the years. At first, it was a simple lunch idea, but as I started hosting more gatherings, it became a staple. It’s simple, adaptable, and a reminder that cooking can be both modest and magnificent. So, every time I whip up a batch, it brings a smile to my face, thinking about how it has connected me with friends and family!
FAQs and Troubleshooting
1. My quinoa turned mushy. What happened?
Don’t worry—it happens to the best of us! Overcooking quinoa is a common mistake. Keep an eye on the cooking time—15 minutes usually does the trick, but if you’re unsure, just check for any water remaining and the texture should be fluffy, not mushy.
2. What if I don’t have lime juice?
No lime? No problem! Just replace it with lemon juice, apple cider vinegar, or even a splash of rice vinegar for that tangy zing!
3. Can I make this ahead of time?
Absolutely! This salad actually gets better as it sits, allowing the flavors to develop. Just remember to add avocado right before serving to keep it fresh and vibrant.
4. What should I do if my salad seems dry?
If your salad is lacking moisture, a little drizzle of olive oil or a splash of extra lime juice can do wonders! Just a little more of either can bring all those flavors back together.
Nutritional Info (if applicable)
While this salad is not just nutritious, it’s also accommodating! Each serving offers a great balance of protein, fiber, and healthy fats. It’s a fantastic source of iron, magnesium, and antioxidants, which means you’re doing a great thing for your body while indulging in deliciousness!
And there you have it! Your very own Black Bean Quinoa Salad, ready to shine! I hope you’re just as excited about trying this recipe as I am to share it with you! Always remember: cooking is all about enjoying the process and sharing love with those around you. Now, let’s gather some friends, get those forks ready, and dig in! Happy cooking, my foodie friends!
Print
Black Bean Quinoa Salad
- Total Time: 30 minutes
- Yield: 4 servings 1x
- Diet: Vegan
Description
A vibrant and nourishing salad featuring black beans, quinoa, and fresh veggies, perfect for any gathering.
Ingredients
- 1 cup quinoa
- 1 can (15 oz) black beans, rinsed and drained
- 1 bell pepper, diced (any color)
- 1 cup corn (fresh, frozen, or canned)
- 1 avocado, diced
- 1 small red onion, finely chopped
- 1 cup cherry tomatoes, halved
- 1/4 cup fresh cilantro, chopped
- Juice of 1 lime
- 2 tablespoons olive oil
- Salt and pepper to taste
Instructions
- Rinse the quinoa under cold water in a fine-mesh sieve. In a medium saucepan, combine quinoa with 2 cups of water or broth and bring to a boil. Reduce heat, cover, and simmer for about 15 minutes or until liquid is absorbed. Fluff cooked quinoa with a fork.
- Whisk together lime juice, olive oil, salt, and pepper in a small bowl.
- Combine cooked quinoa with black beans, diced bell pepper, corn, avocado, red onion, cherry tomatoes, and cilantro in a large mixing bowl. Pour the dressing over and gently toss until well coated.
- Chill in the fridge for about 30 minutes before serving.
Notes
For a spicy twist, add jalapeños. To make it a complete meal, toss in grilled chicken or shrimp.
- Prep Time: 15 minutes
- Cook Time: 15 minutes
- Category: Salad
- Method: Mixing
- Cuisine: Mexican
Nutrition
- Serving Size: 1 serving
- Calories: 350
- Sugar: 5g
- Sodium: 400mg
- Fat: 12g
- Saturated Fat: 1.5g
- Unsaturated Fat: 10g
- Trans Fat: 0g
- Carbohydrates: 45g
- Fiber: 12g
- Protein: 15g
- Cholesterol: 0mg
Keywords: salad, black beans, quinoa, vegan, healthy
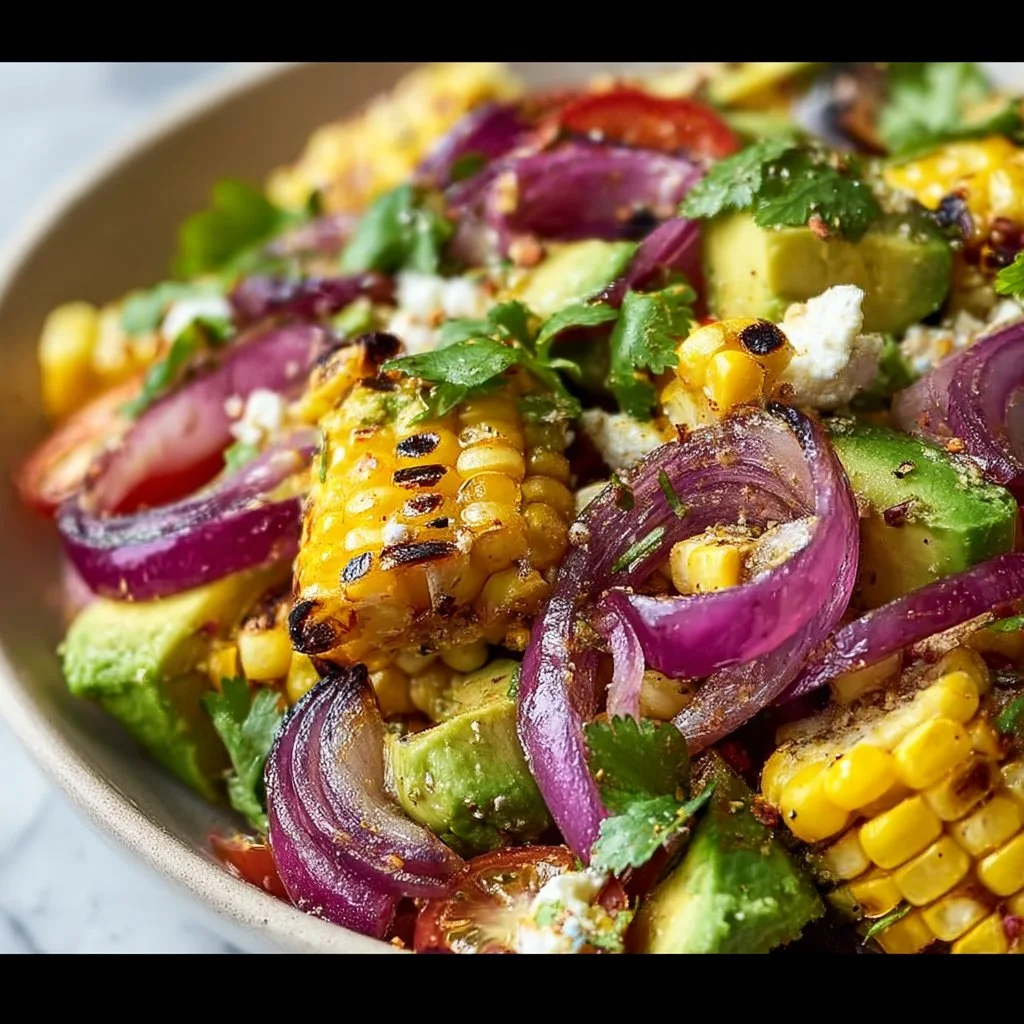
Charred Corn Avocado Salad with Roasted Red Onions
Charred Corn Avocado Salad with Roasted Red Onions: A Fresh Fiesta in Your Bowl!
Hello, fellow food lovers! Welcome back to my cozy little corner of the internet. I’m Olivia Bennett, your friendly home cook who’s always on the hunt for flavors that make your heart happy and your taste buds dance. Today, I’m thrilled to share a delightful recipe that celebrates summer produce and bright, satisfying flavors: Charred Corn Avocado Salad with Roasted Red Onions!
We all have those dishes that take us back in time, creating a tapestry of memories steeped in laughter, good company, and perhaps a few kitchen mishaps along the way. This salad is one of those treasures for me. Picture this: sun-kissed afternoons, friends gathering for a backyard barbecue, and the enticing aroma of corn grilling on the barbecue. This dish isn’t just a salad; it’s a symphony of textures and tastes that has the power to bring everyone together.
Imagine the crispy sweetness of charred corn mingling with the creamy richness of ripe avocados, all brought to life with a zesty dressing that sings of summer! It’s a dish so vibrant and fresh, you could easily serve it at a casual picnic or fancy dinner party. Plus, it’s quick to whip up, making it perfect for those busy weekdays when you want to keep things light and refreshing.
So, grab your apron and let’s dive into this colorful bowl of goodness. I promise you’ll want to make this salad over and over again—not just for its deliciousness but also for the wonderful memories you’ll create around it!
Personal Story
Let me take you back to one of my fondest summer memories. I vividly remember the first time I made this charred corn avocado salad; I was hosting a gathering for some of my closest friends. The sun was shining, and there was a slight breeze, perfect for keeping the summer heat at bay.
As I stood by the grill, my heart raced with excitement. I’d had this vision of bright, flavorful food dancing around in my head, and I was determined to bring it to life. Each bite of that grilled corn had magic in it—smoky, sweet, and a touch of nostalgia all rolled into one. Friends were gravitating towards the kitchen, drawn in by the scents that wafted in the air. As they took their first bites, their faces lit up with joy! We laughed, we toasted, and we relished every mouthful.
That day, I learned that food is not just about sustenance; it’s about connection, joy, and those cherished moments that become the fabric of our lives. Ever since, this corn and avocado salad has become a staple at my gatherings, a recipe I’m proud to pass down through my kitchen adventures. So let’s recreate that spirit of togetherness with this vibrant salad that’s sure to bring smiles all around!
Ingredients
To prepare your Charred Corn Avocado Salad, gather the following ingredients:
-
Fresh Corn on the Cob (2-3 cobs): Sweet, juicy corn is what lends this salad its magical flavor. If fresh corn isn’t available, you can use frozen corn. Just sauté it until it’s heated through and slightly charred.
-
Ripe Avocados (2): Choose avocados that feel slightly soft to the touch for the creamiest texture. Alternatively, if you’re avoiding avocados, consider using diced cucumber for crunch.
-
Roasted Red Onions (1 large): Roasting the onions provides a sweet, caramelized flavor. You can substitute with shallots or red bell peppers for a sweeter kick if you’re in a pinch!
-
Cherry Tomatoes (1 cup): These juicy gems add a pop of color and sweetness. Feel free to swap them with diced bell peppers or even fresh mango for a tropical twist.
-
Fresh Cilantro (1/3 cup, chopped): This herb lifts the entire dish with its fresh, zesty flavor. If you’re not a fan, try using parsley or basil instead.
-
Lime Juice (2 limes): Fresh citrus juice adds brightness! If you don’t have limes, lemon juice works well too.
-
Olive Oil (3 tablespoons): A good quality extra virgin olive oil enhances the flavor. For a different profile, you could use avocado oil.
-
Salt and Pepper (to taste): The basic seasoning that elevates all the flavors! Always go for kosher salt for better control when seasoning.
This ingredient lineup may look simple, but together, they create a bowl of magic filled with fresh, vibrant flavors and delightful textures.
Step-by-Step Instructions
Now, let’s get our hands dirty and cook this beauty together!
-
Char the Corn: Start by preheating your grill or skillet over high heat. If you’re using the grill, your grill grates should be clean and oiled to prevent sticking. The corn will take about 8-10 minutes to char. Place the corn on the grill, turning occasionally until you get those beautiful char marks. Pro tip: Use a pair of tongs to turn the corn to ensure even charring. Remove from heat and let it cool a bit before cutting the kernels off the cob.
-
Roast the Red Onions: Cut your red onion into thick slices. Toss them with a drizzle of olive oil, salt, and pepper. Spread them out on a baking sheet and roast in a preheated oven at 400°F (200°C) for 20-25 minutes or until golden brown and caramelized. If roasted onions aren’t your gig, you can quickly sauté them in the skillet with a splash of olive oil until they soften.
-
Prepare the Avocados: While the corn and onions are doing their thing, cut your avocados in half, remove the pit, and scoop the flesh into a bowl. Chop them into bite-sized pieces, and squeeze a bit of lime juice over them to keep them from browning. This simple trick can be a game-changer!
-
Toss It All Together: In a large mixing bowl, combine the charred corn kernels, roasted onions, cherry tomatoes (halved), chopped cilantro, and avocado. Drizzle in the olive oil and lime juice, and season generously with salt and pepper. Give it a gentle toss to combine. Remember, we want to be gentle with the avocado to keep the pieces looking lovely!
-
Taste and Adjust: Here’s where you get to taste test! Give it a little taste and adjust the seasoning if needed. More lime? Go for it! A bit more salt? Absolutely!
-
Plate It Up: Scoop the salad into a beautiful serving bowl. It looks gorgeous when served immediately, but it can also chill in the fridge for about 30 minutes to let the flavors meld together, which is a fantastic option if you’re prepping ahead for a gathering.
Easy peasy, right? This salad is not only a feast for the eyes but also a joy to make and share with loved ones!
Serving Suggestions
To serve this Charred Corn Avocado Salad, plate it in a large, rustic bowl to capture that inviting vibe. A sprinkle of extra cilantro on top gives it a fresh finish. Pair it alongside grilled shrimp or chicken for a hearty meal, or simply enjoy it with tortilla chips or on a bed of greens as a delightful light meal. The colors alone will make your table a masterpiece!
Recipe Variations
- Spicy Kick: Add a diced jalapeño or a sprinkle of your favorite hot sauce to give this salad a delightful kick!
- Cheesy Goodness: Crumble some queso fresco or feta cheese on top for a salty, creamy finish that complements the salad beautifully.
- Grain Boost: Mix in some cooked quinoa or farro for added texture and nutritional value.
- Nutty Crunch: Toss some toasted pumpkin seeds or sliced almonds into the salad for a lovely crunch.
- Vegan Option: To keep it entirely plant-based, ensure that your optional cheese toppings are dairy-free, and you’re golden!
Chef’s Notes
The beauty of this salad is its versatility. Over the years, I’ve twisted and turned this recipe to accommodate different preferences and seasonal ingredients. One time, I had an abundance of mangoes and threw them in for a tropical vibe—oh my goodness, it was like my taste buds were on a vacation!
Cooking is all about experimenting, playing with flavors, and following your cravings. This salad has become a canvas for my culinary adventures, and I truly hope it inspires you to make it your own in the kitchen!
FAQs and Troubleshooting
-
What if my corn doesn’t char well?
Make sure your grill or skillet is hot enough before you add the corn. If it’s not sizzling, you won’t get that lovely char. You can also try using a broiler if your oven has one—just keep an eye on it! -
Can I make this salad ahead of time?
Absolutely! Just keep in mind that the avocado may brown. To delay this, mix all ingredients except for the avocado, and toss it right before serving. -
How do I store leftovers?
Keep any leftover salad in an airtight container in the fridge. It’s best eaten within a day, but if you must store it longer, separate the avocado from the rest to keep it fresh! -
Can I use canned corn?
You can certainly use canned corn in a pinch! Just make sure to drain and rinse it well, then sauté it in a pan for a few minutes to bring out a bit of flavor.
Nutritional Info
If you’d like, I can help you with the nutritional breakdown of this salad, but I always encourage checking your individual ingredients based on the brands you use.
Altogether, this Charred Corn Avocado Salad with Roasted Red Onions is a celebration of fresh ingredients and great company. So next time you gather with loved ones, whip up this wonderful dish and let the flavors and memories unfold. Happy cooking, friends! 🍽️
Print
Charred Corn Avocado Salad with Roasted Red Onions
- Total Time: 50 minutes
- Yield: 4 servings
- Diet: Vegetarian
Description
A vibrant salad that combines charred corn, creamy avocado, and roasted red onions, perfect for summer gatherings.
Ingredients
- Fresh Corn on the Cob (2-3 cobs)
- Ripe Avocados (2)
- Roasted Red Onions (1 large)
- Cherry Tomatoes (1 cup)
- Fresh Cilantro (1/3 cup, chopped)
- Lime Juice (2 limes)
- Olive Oil (3 tablespoons)
- Salt and Pepper (to taste)
Instructions
- Char the corn: Preheat your grill or skillet over high heat. Place the corn on the grill, turning occasionally until you get char marks (about 8-10 minutes). Let it cool before cutting off the kernels.
- Roast the red onions: Cut into thick slices, toss with olive oil, salt, and pepper. Roast in a preheated oven at 400°F (200°C) for 20-25 minutes until golden brown.
- Prepare the avocados: Cut them in half, remove the pit, scoop into a bowl, and chop. Squeeze lime juice over them to prevent browning.
- Toss it all together: In a large bowl, combine corn kernels, roasted onions, halved cherry tomatoes, chopped cilantro, and avocado. Add olive oil, lime juice, salt, and pepper, and gently mix.
- Taste and adjust: Sample the salad and adjust seasoning as desired.
- Plate it up: Serve immediately or chill for 30 minutes to meld flavors.
Notes
This salad can be easily customized with additional ingredients like jalapeños for spice or feta cheese for a creamy finish.
- Prep Time: 15 minutes
- Cook Time: 35 minutes
- Category: Salad
- Method: Grilling
- Cuisine: Mexican
Nutrition
- Serving Size: 1 serving
- Calories: 320
- Sugar: 4g
- Sodium: 300mg
- Fat: 22g
- Saturated Fat: 3g
- Unsaturated Fat: 18g
- Trans Fat: 0g
- Carbohydrates: 34g
- Fiber: 7g
- Protein: 5g
- Cholesterol: 0mg
Keywords: salad, corn, avocado, summer, vegetarian
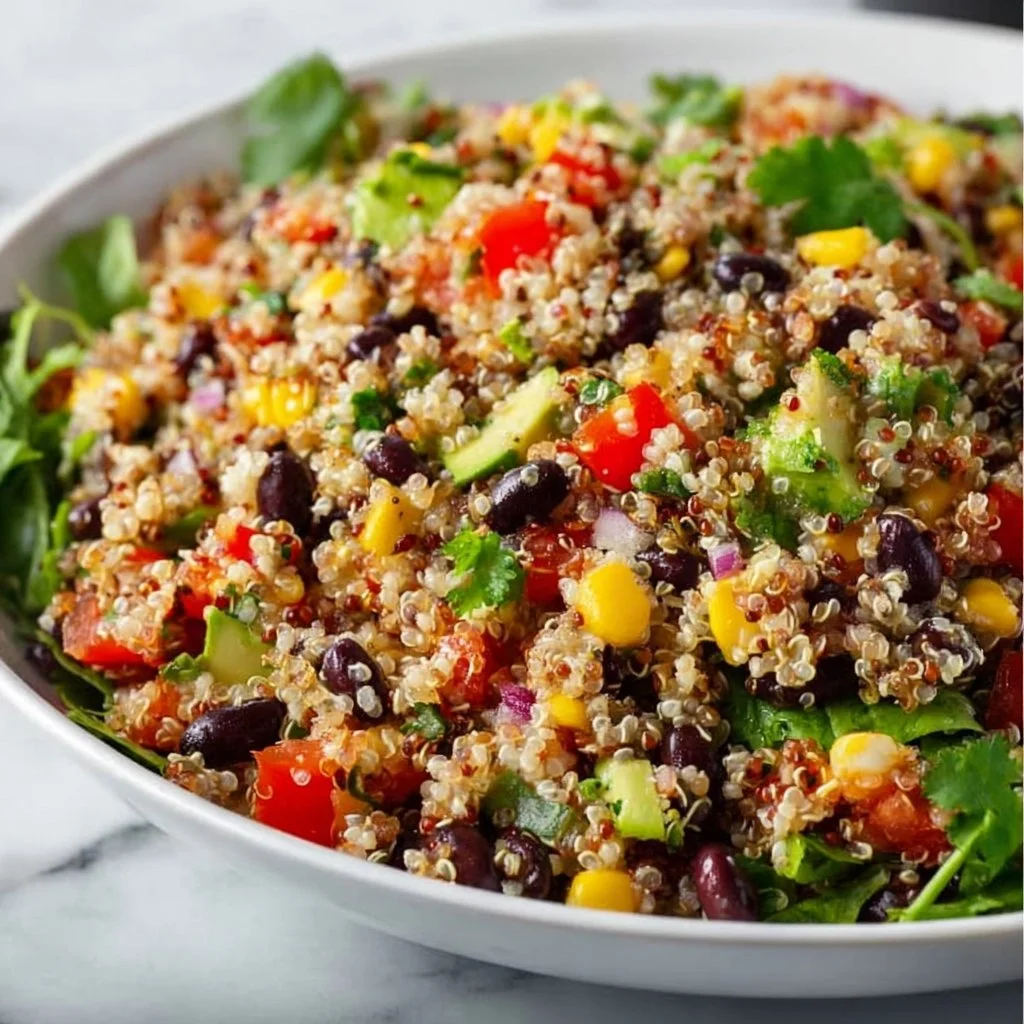
Southwest Quinoa Salad with Chili Lime Dressing
Southwest Quinoa Salad with Chili Lime Dressing: A Flavorful Fiesta in a Bowl
Hey there, fellow food lovers! Welcome back to my cozy kitchen, where the aromas are delightful, the chatter is lively, and the cooking adventures never end. Today, we’re diving into a dish that embodies everything I adore about cooking: fresh, vibrant flavors that can turn an ordinary day into a special occasion. Say hello to my Southwest Quinoa Salad with Chili Lime Dressing!
Now, I don’t know about you, but for me, quinoa salads are like a hug in a bowl. They’re light yet filling, packed with protein, and can be tailored to suit any palate. This colorful salad brightens any table and is perfect for a quick weeknight dinner, a potluck gathering, or even a leisurely brunch with friends.
This Southwest quinoa salad is loaded with an abundance of seasonal vegetables, aromatic herbs, and a zesty dressing that dances on your taste buds. Picture this: fluffy quinoa mingling with juicy black beans, crunchy bell peppers, sweet corn, and creamy avocado, all tossed together with a chili-lime dressing that will make you want to lick the bowl clean. Trust me; it’s a bowl of happiness.
Not only is this salad a feast for the eyes with its vibrant colors, but it’s also a celebration of flavors. You’ll find a delightful combination of earthy, smoky, and zesty notes that make every bite a delightful journey. Plus, it’s incredibly easy to whip up, and you can customize it to fit your cravings or dietary needs.
So grab your apron, because we’re about to embark on a culinary adventure that promises warmth, joy, and the magic of homemade goodness!
Personal Story
A few years ago, I went on a road trip across the Southwest with my closest friends. We stopped at a charming little farmers’ market in Santa Fe, where the air was filled with the enticing aromas of fresh produce and spices. I remember stumbling upon a booth featuring all kinds of vibrant vegetables, homegrown herbs, and even some spicy peppers that I couldn’t resist.
Just as we were getting carried away with goodies, one of my friends suggested we make a giant salad to enjoy at our campsite that evening. Inspired by the abundance around us, we gathered colorful bell peppers, juicy tomatoes, and, of course, some robust avocados. After tossing everything together with a simple lime dressing, we sat under the stars with bowls in hand, giggling and savoring the flavors of our impromptu creation. That night, under the endless sky, I realized how a simple salad could bring friends together and how food can be the centerpiece of unforgettable memories.
With that in mind, I created this Southwest Quinoa Salad — a perfect homage to that magical night. So grab your favorite people, blend in some laughter, and let’s create something wonderful together!
Ingredients
Here’s what you’ll need to create this delicious Southwest Quinoa Salad, along with some chef insights and substitution tips to help you on your way:
-
1 cup quinoa
- This nutty grain is the base of our salad and is gluten-free! If you’re in a pinch, you can substitute it with couscous or bulgur wheat—but know that cooking times may vary.
-
1 can (15 oz) black beans, drained and rinsed
- These little legumes pack a protein punch! You can swap them for pinto beans or chickpeas if you’d like to mix things up.
-
1 cup corn (fresh, frozen, or canned)
- Corn adds a sweet crunch. Fresh corn on the cob is divine, but if that’s not accessible, frozen is just fine! Pro tip: When using frozen corn, simply thaw it beforehand.
-
1 red bell pepper, diced
- Sweet and crunchy! Feel free to use any color of bell pepper for a fun twist. Yellow and orange bring an extra pop of color!
-
1 cup cherry tomatoes, halved
- These bite-sized beauties add juiciness and a burst of flavor. You can substitute them with chopped Roma tomatoes or any fresh tomato varieties.
-
1 avocado, diced
- Creamy avocado elevates this salad and offers healthy fats. If you want a lighter option or are avoiding avocado, try adding some diced cucumber for a refreshing taste instead.
-
¼ cup red onion, diced
- Red onion brings a bit of bite but can be a bit strong. Soak them in cold water for 5-10 minutes to mellow their flavor. Yellow onion can work too if that’s what you have.
-
1/3 cup fresh cilantro, chopped
- Fresh herbs make everything better! If you’re not a cilantro fan, try parsley or basil for a different flavor profile.
-
Juice of 2 limes
- The zesty kick in our dressing! If you’re out of lime, a splash of lemon juice can do the trick.
-
3 tablespoons olive oil
- A must-have pantry staple for dressings! You can swap it for avocado oil or a flavored oil for a twist.
-
1 teaspoon chili powder
- This spice adds warmth and a bit of smokiness. If you’d like more heat, feel free to throw in some cayenne pepper!
-
Salt and pepper to taste
- Essential for bringing all the flavors together. Remember, season gradually and taste as you go!
Step-by-Step Instructions
Ready to bring this deliciousness to life? Let’s get started!
Step 1: Cook the Quinoa
Start by rinsing 1 cup of quinoa in cold water. This removes any bitterness. In a medium saucepan, combine the rinsed quinoa with 2 cups of water. Bring to a boil over medium-high heat. Once it’s boiling, reduce the heat to low, cover, and simmer for about 15 minutes, or until the quinoa has absorbed all the water and becomes fluffy.
Chef Tips: Fluff the cooked quinoa with a fork to separate the grains! This little trick keeps the texture light and airy.
Step 2: Prep the Veggies
While your quinoa is cooking, chop the vegetables. Dice up the red bell pepper, halve the cherry tomatoes, and slice the red onion. After chopping, set them aside in a large mixing bowl.
Chef Hacks: To make chopping onions less tearful, consider chilling them in the fridge for a while first. Moreover, don’t forget to taste as you go – it’s a great way to balance flavors!
Step 3: Mix in the Beans and Corn
Add the drained black beans and corn to the mixing bowl with the chopped vegetables. The color and texture will begin to come alive!
Step 4: Prepare the Dressing
In a small mixing bowl, whisk together the lime juice, olive oil, chili powder, salt, and pepper. Taste the dressing and adjust the seasoning as necessary. Maybe more lime for zing or a pinch more chili for heat?
Chef Note: If you want to make the dressing ahead of time, it can be stored in the fridge for up to a week. Just shake it well before using!
Step 5: Combine the Ingredients
Once the quinoa has cooled a bit, add it to the large bowl with the veggies, beans, and corn. Pour the dressing over the top, and gently toss everything together until well combined.
Chef Tips: Don’t toss too vigorously! You want to keep those lovely avocado chunks intact.
Step 6: Finishing Touches
Fold in the diced avocado and chopped cilantro last to prevent them from getting mushy. Taste and adjust seasoning one last time.
Step 7: Chill and Serve
For the best flavor, let the salad chill in the fridge for at least 30 minutes before serving. This allows all the flavors to meld beautifully.
Chef Tip: If you can wait a few hours or even overnight, the flavors will deepen even more. This salad is a perfect make-ahead dish!
Serving Suggestions
To serve, scoop generous portions of this colorful salad into bowls or on a platter. A sprinkle of additional cilantro on top adds a fresh touch. Pair it with tortilla chips on the side for a delightful crunch or serve it alongside grilled chicken or fish for a heartier meal.
Recipe Variations
- Spicy Southwest Version: Add diced jalapeños for a fiery kick.
- Grain-Free Alternative: Use cauliflower rice instead of quinoa for a low-carb option.
- Creamy Twist: Toss in a dollop of Greek yogurt or sour cream for a rich finish.
- Extra Crunch: Add pumpkin seeds or sunflower seeds for an added crunch factor.
- Fruit Infusion: Try adding diced mango or pineapple for a sweet contrast to the savory flavors.
Chef’s Notes
This recipe has evolved over time, and I find new ways to enjoy it with each season. Sometimes I’ll add roasted sweet potatoes or swap out the black beans for kidney beans. There’s something magical about food; it can grow and change just like we do. And every time I share this salad, it sparks those wonderful conversations about favorite dishes and memories — just like that camping trip in Santa Fe!
FAQs and Troubleshooting
1. Can I make this salad ahead of time?
Absolutely! It keeps well in the fridge for up to 4 days, but make sure to add the avocado right before serving to keep it fresh.
2. What if my quinoa is soggy?
This usually happens when too much water is used. Decrease the water slightly next time, and remember to let it rest after cooking, allowing it to absorb any extra moisture.
3. How do I make it vegan?
This recipe is already vegan-friendly! Just ensure your dressing ingredients are plant-based.
4. Can I use a different dressing?
Definitely! A zesty vinaigrette or even a simple balsamic dressing could work beautifully. Feel free to personalize to your taste!
Nutritional Info
While I won’t get too bogged down in numbers, each serving of this Southwest Quinoa Salad provides a hearty dose of protein, fiber, healthy fats, and plenty of vitamins and minerals, making it a real powerhouse of nutrition!
There you have it—a cheerful and flavor-packed Southwest Quinoa Salad with Chili Lime Dressing that will brighten your day! Whether you recreate it for a gathering or enjoy it solo, I hope this recipe brings you as much joy as it has brought me. Happy cooking!
Print
Southwest Quinoa Salad with Chili Lime Dressing
- Total Time: 30 minutes
- Yield: 4 servings 1x
- Diet: Vegetarian
Description
A vibrant and flavorful quinoa salad packed with seasonal vegetables, black beans, and a zesty chili lime dressing.
Ingredients
- 1 cup quinoa
- 1 can (15 oz) black beans, drained and rinsed
- 1 cup corn (fresh, frozen, or canned)
- 1 red bell pepper, diced
- 1 cup cherry tomatoes, halved
- 1 avocado, diced
- ¼ cup red onion, diced
- ⅓ cup fresh cilantro, chopped
- Juice of 2 limes
- 3 tablespoons olive oil
- 1 teaspoon chili powder
- Salt and pepper to taste
Instructions
- Cook the quinoa by rinsing 1 cup of quinoa in cold water. Combine with 2 cups of water in a medium saucepan, bring to a boil, then reduce heat and simmer for about 15 minutes.
- Prep the veggies by dicing the red bell pepper, halving the cherry tomatoes, and slicing the red onion, setting them aside in a large mixing bowl.
- Mix in the black beans and corn into the mixing bowl with the vegetables.
- Prepare the dressing by whisking together lime juice, olive oil, chili powder, salt, and pepper in a small bowl.
- Combine all ingredients by adding the cooled quinoa to the vegetable mix and pouring the dressing over the top, gently tossing everything together.
- Finish by folding in diced avocado and chopped cilantro, tasting and adjusting seasoning as necessary.
- Chill in the fridge for at least 30 minutes before serving to meld the flavors.
Notes
For best flavors, let the salad chill for a few hours or overnight. Avoid adding avocado until just before serving to maintain freshness.
- Prep Time: 15 minutes
- Cook Time: 15 minutes
- Category: Salad
- Method: Mixing
- Cuisine: Mexican
Nutrition
- Serving Size: 1 serving
- Calories: 320
- Sugar: 5g
- Sodium: 300mg
- Fat: 14g
- Saturated Fat: 2g
- Unsaturated Fat: 10g
- Trans Fat: 0g
- Carbohydrates: 46g
- Fiber: 10g
- Protein: 12g
- Cholesterol: 0mg
Keywords: quinoa salad, healthy recipe, vegetarian meal
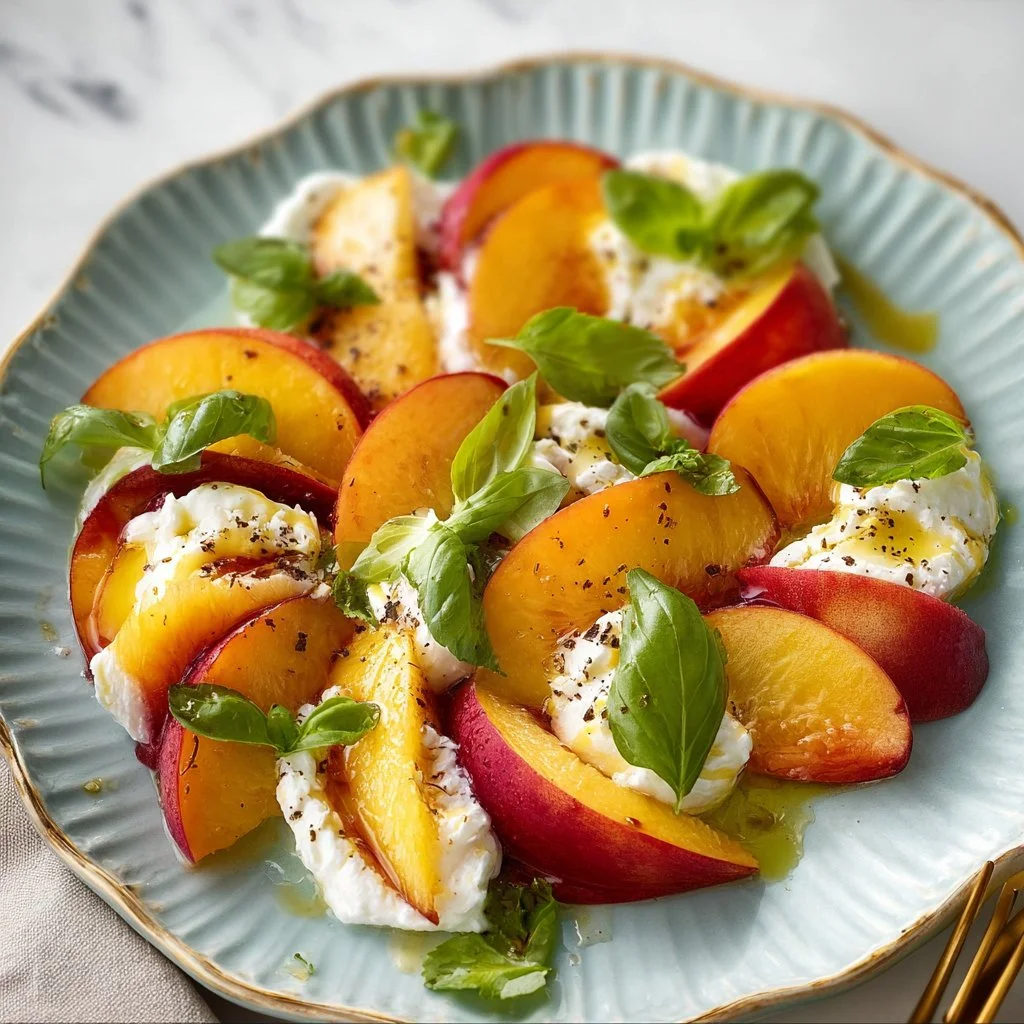
Peach Caprese Salad with Burrata
Peach Caprese Salad with Burrata: A Summer Delight
Welcome to my kitchen, fellow food lovers! Today, I have a deliciously sunny recipe to share with you that embodies everything I love about summer: freshness, color, and that perfect blend of sweet and savory. We’re diving into the world of Peach Caprese Salad with Burrata — a vibrant dish that not only celebrates the juicy goodness of ripe peaches but also brings a touch of elegance to any gathering.
Imagine the first warm days of summer, when fresh peaches are just coming into season. You stroll through the farmer’s market, and you can practically smell the sweetness in the air. That moment was the spark that inspired this salad. The creamy burrata mingles perfectly with the luscious fruit, all drizzled with the best olive oil you can find. It’s a dish that’s brilliant for brunch, light dinners, or even as a show-stopping appetizer at your next barbecue.
In addition to being a feast for the eyes, this salad is incredibly simple to whip up! You’ll be spending more time enjoying the flavors than actually cooking. Whether you’re a seasoned chef or a novice in the kitchen, I’m here to guide you every step of the way. So, grab your apron and let’s create something magical together!
Personal Story
I still remember the first time I made a Caprese salad. I was a wide-eyed teenager, attempting to impress my family with my newfound cooking skills. Armed with a few tomatoes, some fresh basil, and—yes!—the tastiest mozzarella I could find, I thought I was on my way to culinary stardom. Little did I know that simplicity often leads to the most extraordinary flavors.
Fast forward to a sunny afternoon last summer when I decided to revisit that classic dish but with a twist. I had just picked up a batch of sweet, sun-ripened peaches from a local orchard, and it hit me: why not introduce these juicy gems into the mix? The combination of the creamy burrata and fragrant basil brought back that nostalgic cooking experience, reminding me how delightful it is to put love and attention into every bite we share at the table with our loved ones.
That summer day, with friends gathered around, laughing and enjoying this new salad, felt perfect — just like a warm embrace. And let me tell you, this Peach Caprese Salad was the star of the show! I can’t wait for you to recreate this memory in your own kitchen!
Ingredients
Here’s a rundown of what you’ll need for this gorgeous salad:
-
Fresh Peaches (2-3 medium-sized): Look for ripe, fragrant peaches for the best flavor. If peaches are out of season, nectarines can also work wonderfully.
-
Burrata Cheese (1 ball, about 8 oz): This creamy cheese is the heart of the salad. If burrata is hard to find, fresh mozzarella works as a great substitute, though it won’t be as creamy.
-
Fresh Basil Leaves (1 cup, loosely packed): The aromatic touch that brightens the salad! If you’re feeling adventurous, try using mint for a unique twist.
-
Extra Virgin Olive Oil (2-3 tablespoons): A high-quality olive oil will elevate the entire dish. Opt for a fruity, first-pressed version for an extra layer of flavor.
-
Balsamic Glaze (to taste): The sweet and tangy drizzle that brings everything together. You can find balsamic glaze at the grocery store or make your own by reducing balsamic vinegar.
-
Sea Salt & Freshly Ground Black Pepper (to taste): These humble seasonings will enhance the flavors of the dish.
Chef Insights:
- Choosing Peaches: Look for peaches that yield slightly to pressure but aren’t overly soft. These will have the best texture and freshness.
- Burrata Tip: When you slice into the burrata, the creamy center should ooze out — that’s the magic!
Step-by-Step Instructions
-
Prepare your Ingredients: Start with washing all your produce. Rinse the peaches under cool water and pat them dry. Trim the basil leaves from their stems, and tear the larger leaves into smaller pieces. Remember, tearing helps release those beautiful aromatic oils.
Chef Tip: Always use fresh ingredients, as this will make a world of difference in flavor.
-
Slice the Peaches: Halve the peaches and remove the pit. Then, slice them into thin wedges or bite-sized pieces. Feel free to experiment with different shapes; they all taste fabulous!
Pro Tip: If you’re using nectarines, the process is the same—no peeling required!
-
Prep the Burrata: Carefully place the burrata in the center of your serving plate or a large shallow bowl. Use a sharp knife to cut into the burrata slightly, allowing the creamy interior to peek out.
Little Hack: Take a moment to let the burrata come to room temperature before serving. This enhances its creamy texture and flavor!
-
Assemble the Salad: Gently arrange the peach slices around the burrata, weaving in the fresh basil leaves. Remember, you’re creating a feast for the eyes, so have fun with the presentation!
-
Drizzle and Season: Now, it’s time for the good stuff! Drizzle a generous amount of extra virgin olive oil over the salad, followed by a balsamic glaze drizzle. Finish with a pinch of sea salt and a few cracks of fresh pepper.
-
Enjoy Immediately: Serve this salad fresh, ideally right after you prepare it. But don’t worry if some delicious juice starts pooling at the bottom—it’s a tasty bonus!
Chef’s Note: The flavors really mingle beautifully if you let it sit for a few minutes. It’s a simple yet stunning salad that suits any occasion!
Serving Suggestions
When serving your Peach Caprese Salad, I recommend pairing it with crispy crostini or toasted bread drizzled with olive oil. This adds that extra crunch and is perfect for sweeping up all the creamy goodness.
If you’re entertaining, consider serving it alongside a lightweight white or rosé wine, as the fruity notes will complement the salad beautifully. And remember, don’t be shy with the cheese!
Recipe Variations
Here are a few fun twists on this classic recipe to keep your taste buds excited:
-
Grilled Peaches: Fire up the grill and add a smoky flavor by grilling the peach halves for a few minutes until they are caramelized.
-
Add Nuts: Sprinkle some toasted pine nuts or sliced almonds for a delightful crunchy texture.
-
Spice It Up: Add a hint of heat with some crushed red pepper flakes sprinkled on top. It adds a fun surprise!
-
Vegan Version: Swap the burrata for avocado or a vegan cream cheese, allowing for a dairy-free option with the same creaminess.
-
Fruity Twist: Instead of just peaches, consider adding strawberries or cherries for a mixed fruit salad that bursts with flavors.
Chef’s Notes
This recipe has been a staple of mine for years, evolving along with my taste preferences and the seasons. There’s something so comforting about using ingredients sourced locally that it truly nourishes my soul as much as my stomach.
The best part? Every summer, I try different variations based on what I find at the farmer’s market. One year, I was lucky enough to find different varieties of heirloom tomatoes, which paired surprisingly well with the burrata! What I love about cooking is that it’s all about experimenting, making mistakes, and having fun along the way!
FAQs and Troubleshooting
1. Can I make this salad ahead of time?
While it’s best to serve it fresh to enjoy the textures, if you’re prepping ahead, you can slice the peaches and burrata and keep them separate until serving. Just remember to drizzle that olive oil and balsamic glaze right before plating to maintain freshness!
2. My peaches are hard! What should I do?
If you happen to have under-ripe peaches, place them in a brown paper bag at room temperature for a day or two. They should ripen beautifully. Alternatively, you could roast them slightly to bring out the flavor.
3. How do I store leftovers?
If there are any leftovers, store the salad in an airtight container in the fridge. However, eat it within a day to maintain the quality and flavor!
4. What if I can’t find burrata?
No stress! Fresh mozzarella or even ricotta can work in a pinch. Just remember to select high-quality cheese to keep the dish special.
Nutritional Info (Optional)
This Peach Caprese Salad is not only a feast for the senses, but it also packs nutritional benefits:
- Calories: Approximately 250 per serving
- Protein: 8g (from the burrata)
- Fat: 20g (primarily healthy fats from olive oil and burrata)
- Carbohydrates: 14g
- Fiber: 2g
- Vitamins: Rich in Vitamin C and Vitamin A from the peaches.
I hope you enjoy making this luscious Peach Caprese Salad as much as I do! As you prepare it, remember that cooking is an adventure, and every meal shared is a memory in the making. Happy cooking, friends!
Print
Peach Caprese Salad with Burrata
- Total Time: 15 minutes
- Yield: 4 servings 1x
- Diet: Vegetarian
Description
A vibrant salad celebrating ripe peaches, creamy burrata, and fresh basil, perfect for summer gatherings.
Ingredients
- 2–3 medium-sized Fresh Peaches, sliced
- 1 ball (about 8 oz) Burrata Cheese
- 1 cup Fresh Basil Leaves, loosely packed
- 2–3 tablespoons Extra Virgin Olive Oil
- Balsamic Glaze, to taste
- Sea Salt, to taste
- Freshly Ground Black Pepper, to taste
Instructions
- Prepare your Ingredients: Wash all produce, rinse peaches and pat dry, trim basil leaves from stems, and tear larger leaves.
- Slice the Peaches: Halve peaches, remove pits, and slice into wedges or bite-sized pieces.
- Prep the Burrata: Place it in the center of a serving plate and cut slightly to allow creamy interior to show.
- Assemble the Salad: Arrange peach slices around the burrata and weave in fresh basil leaves.
- Drizzle and Season: Drizzle olive oil and balsamic glaze over the salad, then add sea salt and black pepper.
- Enjoy Immediately: Serve fresh after preparation, allowing flavors to develop for a few minutes before enjoying.
Notes
Pair with crispy crostini or toasted bread for extra crunch. A lightweight white or rosé wine complements the salad well.
- Prep Time: 15 minutes
- Cook Time: 0 minutes
- Category: Salad
- Method: No Cooking Required
- Cuisine: Italian
Nutrition
- Serving Size: 1 serving
- Calories: 250
- Sugar: 10g
- Sodium: 200mg
- Fat: 20g
- Saturated Fat: 10g
- Unsaturated Fat: 8g
- Trans Fat: 0g
- Carbohydrates: 14g
- Fiber: 2g
- Protein: 8g
- Cholesterol: 30mg
Keywords: Peach Salad, Caprese, Burrata, Summer Salad, Healthy Recipes
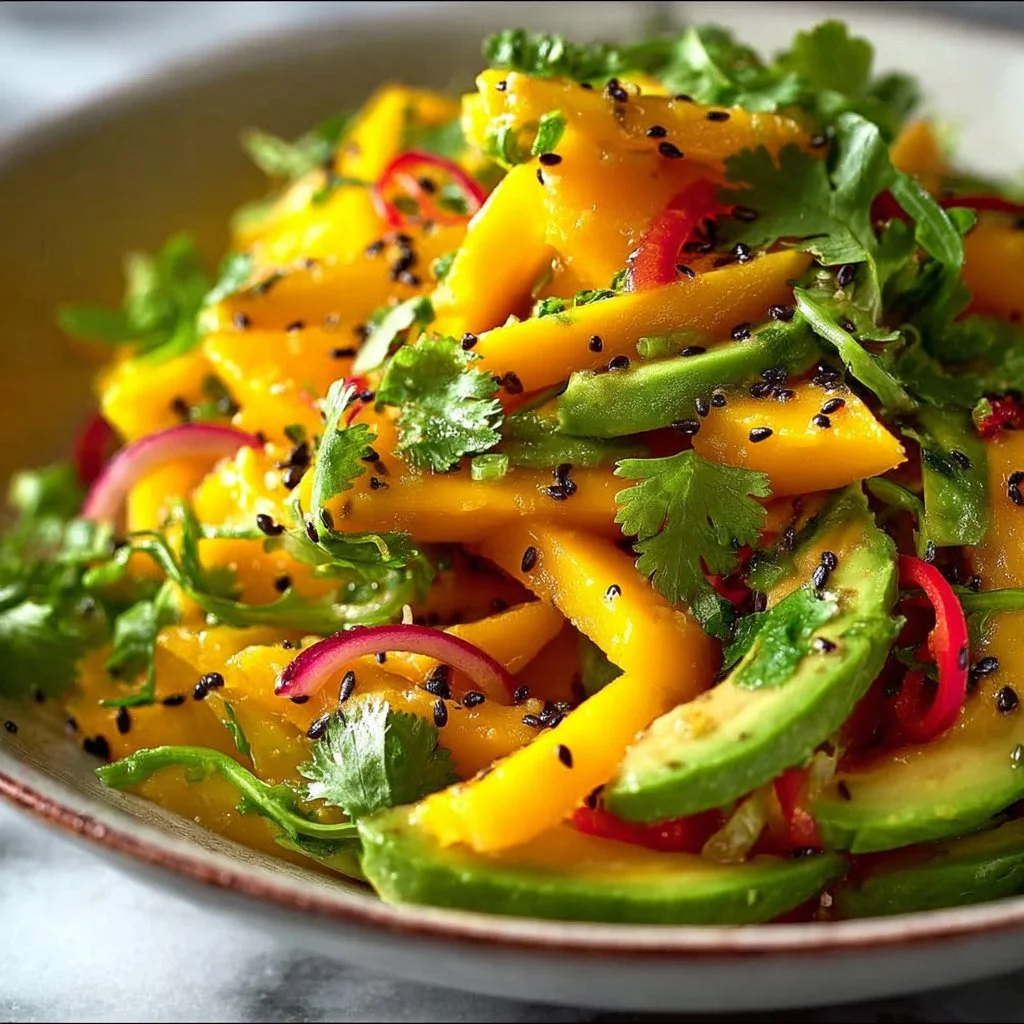
Avocado Mango Salad
Avocado Mango Salad: A Fresh Take on Flavorful Pairings
Welcome to my kitchen! I’m so excited to have you here as we dive into one of my absolute favorite recipes: the Avocado Mango Salad. This dish perfectly captures the spirit of vibrant, fresh ingredients and is bursting with flavor—ideal for any occasion, be it a casual lunch or a festive gathering.
Imagine stepping into a sun-kissed kitchen where the scent of ripe mangoes fills the air, and the sound of laughter mingles with the rustling of salad greens. That’s the essence of this salad! It’s not just about the ingredients; it’s about the memories and stories they carry. So grab your favorite apron, and let’s whip up something delicious together!
A Taste of Nostalgia
Growing up, summer meant family picnics in the backyard, where the sun shone bright, and the laughter of loved ones floated through the air. One dish that always made an appearance was a simple avocado salad, often enhanced all the more by any fruit that was in season. However, when my cousin Jess introduced mango slices to our traditional avocado salad, it was like the clouds parted and sunshine burst through! Instantly, the creamy texture of the avocado combined with the juicy sweetness of ripe mango made my taste buds dance.
That moment changed everything for me. The balance of flavors brought back fond memories of summer—sweltering days spent chasing fireflies and evening barbecues filled with chatter and stories. Now, whenever I make this Avocado Mango Salad, I can’t help but reminisce about those carefree days. Plus, every time I assemble it, I feel a rush of inspiration to create something fresh, colorful, and, of course, delicious.
Let’s get started on making this stunning salad that’s as enjoyable to eat as it is to prepare!
Ingredients
Here’s what you’ll need to make your own Avocado Mango Salad:
-
2 ripe avocados
- Chef Insight: Make sure to choose avocados that yield slightly to gentle pressure; this indicates they’re ripe and creamy but not overripe. If you’re in a pinch, you can substitute with ripe pear or even cooked sweet potatoes for creaminess.
-
2 ripe mangoes
- Substitution Tip: If you can’t find mangoes, diced peaches or ripe nectarines make for a delightful alternative. You want that sweetness and slight tang!
-
1 small red onion
- Quick Insight: Thinly sliced red onions add a zesty bite. If you prefer a milder flavor, soak them in cold water for 10 minutes—this reduces their sharpness.
-
1 bell pepper (red or yellow)
- Chef Hack: The colors not only look beautiful but also amplify flavors. Feel free to use any bell pepper variety or even diced cucumber for crunch.
-
1 cup cherry tomatoes, halved
- Flavor Boost: These add freshness. Using assorted varieties of heirloom tomatoes can elevate the salad to new heights!
-
1 lime (juice and zest)
- Substitution Advice: If you’re out of limes, lemon juice works beautifully for that zesty kick.
-
Fresh cilantro (or parsley for a milder taste)
- Chef’s Tip: Herbs bring life to the dish! A handful of fresh mint can also add a unique twist.
-
Salt and pepper
- Chef Insight: Simple seasonings can drastically elevate flavors, so don’t skip this step!
-
Optional: Olive oil
- Insider’s Tip: A drizzle of extra virgin olive oil can enhance the creamy texture, but feel free to skip it for a lighter take.
With these vibrant ingredients, we’re about to create a salad that’s as visually stunning as it is delicious!
Step-by-Step Instructions
Now that we have our ingredients ready, let’s get cooking! Follow these steps for a beautifully assembled Avocado Mango Salad.
-
Prep the Ingredients: Start by washing all your veggies and fruits. This signals the beginning of our flavorful journey. Don’t forget to give them a good rinse!
-
Chop the Vegetables: Slice the avocados in half, remove the pit, and scoop out the flesh with a spoon. Cut into bite-sized pieces. Remember, the goal here is a salad, not guacamole—so keep those chunks bouncy!
-
Mango Magic: With the mango, slice off the sides from the pit and cut those sections into cubes. If you’re unsure how to slice a mango, run your knife along both sides of the pit and then simply score the flesh into squares before scooping.
-
Onion Bliss: Thinly slice your red onion. If the bite is too strong for you, give them a quick soak in salted water! This little trick mellows their flavor.
-
Color and Texture: Dice the bell pepper into cohesive pieces, then halve your cherry tomatoes. The varieties work well together, creating a riot of color in your bowl.
-
The Assembly: In a large salad bowl, gently combine the avocado, mango, red onion, bell pepper, and cherry tomatoes. Handle the avocados carefully so they hold their shape.
-
Zesty Finish: In a separate small bowl, mix lime juice and zest with salt and pepper to taste. Pour it over the salad, and be sure to toss gently—just enough to coat everything without mashing the lovely avocados.
-
Herb Boost: Finally, sprinkle your chopped cilantro (or parsley) over the salad and give it one last gentle toss for an herbal embrace.
And there you have it! A beautiful, vibrant Avocado Mango Salad ready to be enjoyed! As you plate this dish, take a moment to appreciate the colors and aromas. It’s time to eat!
Serving Suggestions
There’s something undeniably exciting about plating a dish that looks as good as it tastes! Serve your Avocado Mango Salad in a beautiful, wide bowl to showcase its stunning colors. You can garnish with an extra sprig of cilantro or a lime wedge for an inviting touch. This salad pairs wonderfully with grilled chicken, fish, or even your favorite vegetarian option. It also serves well as a refreshing side at barbecues or potlucks!
Recipe Variations
To keep things interesting, try these creative twists on this delicious Avocado Mango Salad:
-
Add Grains: Throw in some cooked quinoa or farro for a hearty touch. This not only makes the salad filling but adds a lovely nutty flavor.
-
Spicy Kick: Add diced jalapeños or a sprinkle of crushed red pepper for a spicy kick that contrasts beautifully with the sweetness of the mango.
-
Nutty Crunch: Toss in some toasted nuts or seeds, such as cashews or pumpkin seeds. This adds a delightful crunch and extra nutrients.
-
Tropical Vibes: Incorporate diced pineapple or kiwi for a tropical flair that’s perfect for summer barbecues.
-
Vegan Feta: If you’re looking for a bit of saltiness, crumbled feta cheese (or a vegan alternative) pairs beautifully, adding depth and creaminess to each bite.
Chef’s Notes
Over the years, this Avocado Mango Salad has evolved into a cherished staple in my kitchen. It started as a summer delight, but I’ve enjoyed it in all seasons, keeping it fresh and exciting. One particularly funny moment was when I added too much lime on a whim, thinking I could enhance the flavor. Spoiler: it turned into a zesty disaster! But those kitchen missteps taught me a valuable lesson in balance. Embrace the journey, enjoy the process, and don’t shy away from making mistakes—it’s all part of the fun!
FAQs and Troubleshooting
1. My avocado is brown! What went wrong?
- Browning happens when avocados are exposed to air. To slow this down, drizzle lemon or lime juice on the cut sides immediately after slicing. If it’s too far gone for your liking, just remove the brown parts.
2. How can I make this dish ahead of time?
- While it’s best to serve this salad fresh, if you must prepare it in advance, store the ingredients separately to prevent browning. Assemble just before serving!
3. What if my mango isn’t sweet enough?
- If your mango lacks sweetness, sprinkle a bit of sugar or drizzle a hint of honey over the salad. It’s a quick fix and balances the flavors nicely.
4. Can I make this salad dairy-free?
- Absolutely! This salad is naturally dairy-free. Stick to the fresh ingredients, herbs, and the wonderful flavors of avocado and mango for a refreshing dish.
And there you have it—everything you need to know to make a scrumptious Avocado Mango Salad! I hope you enjoy cooking this dish as much as I do and that it becomes a staple in your kitchen memories. Happy cooking!
Print
Avocado Mango Salad
- Total Time: 15 minutes
- Yield: 4 servings 1x
- Diet: Vegetarian
Description
A vibrant and fresh salad combining creamy avocados and juicy mangoes, perfect for any occasion.
Ingredients
- 2 ripe avocados
- 2 ripe mangoes
- 1 small red onion
- 1 bell pepper (red or yellow)
- 1 cup cherry tomatoes, halved
- 1 lime (juice and zest)
- Fresh cilantro (or parsley for a milder taste)
- Salt and pepper
- Optional: Olive oil
Instructions
- Prep the ingredients: Start by washing all your veggies and fruits.
- Chop the vegetables: Slice the avocados in half, remove the pit, and scoop out the flesh with a spoon. Cut into bite-sized pieces.
- Mango magic: With the mango, slice off the sides from the pit and cut those sections into cubes.
- Onion bliss: Thinly slice your red onion.
- Color and texture: Dice the bell pepper into cohesive pieces and halve your cherry tomatoes.
- The assembly: In a large salad bowl, gently combine the avocado, mango, red onion, bell pepper, and cherry tomatoes.
- Zesty finish: In a separate small bowl, mix lime juice and zest with salt and pepper to taste.
- Herb boost: Finally, sprinkle your chopped cilantro (or parsley) over the salad and give it one last gentle toss.
Notes
Embrace the journey of cooking and don’t shy away from experimenting with flavors.
- Prep Time: 15 minutes
- Cook Time: 0 minutes
- Category: Salad
- Method: No Cooking Required
- Cuisine: International
Nutrition
- Serving Size: 1 serving
- Calories: 200
- Sugar: 8g
- Sodium: 10mg
- Fat: 12g
- Saturated Fat: 2g
- Unsaturated Fat: 10g
- Trans Fat: 0g
- Carbohydrates: 24g
- Fiber: 6g
- Protein: 3g
- Cholesterol: 0mg
Keywords: salad, avocado, mango, fresh, vegetarian
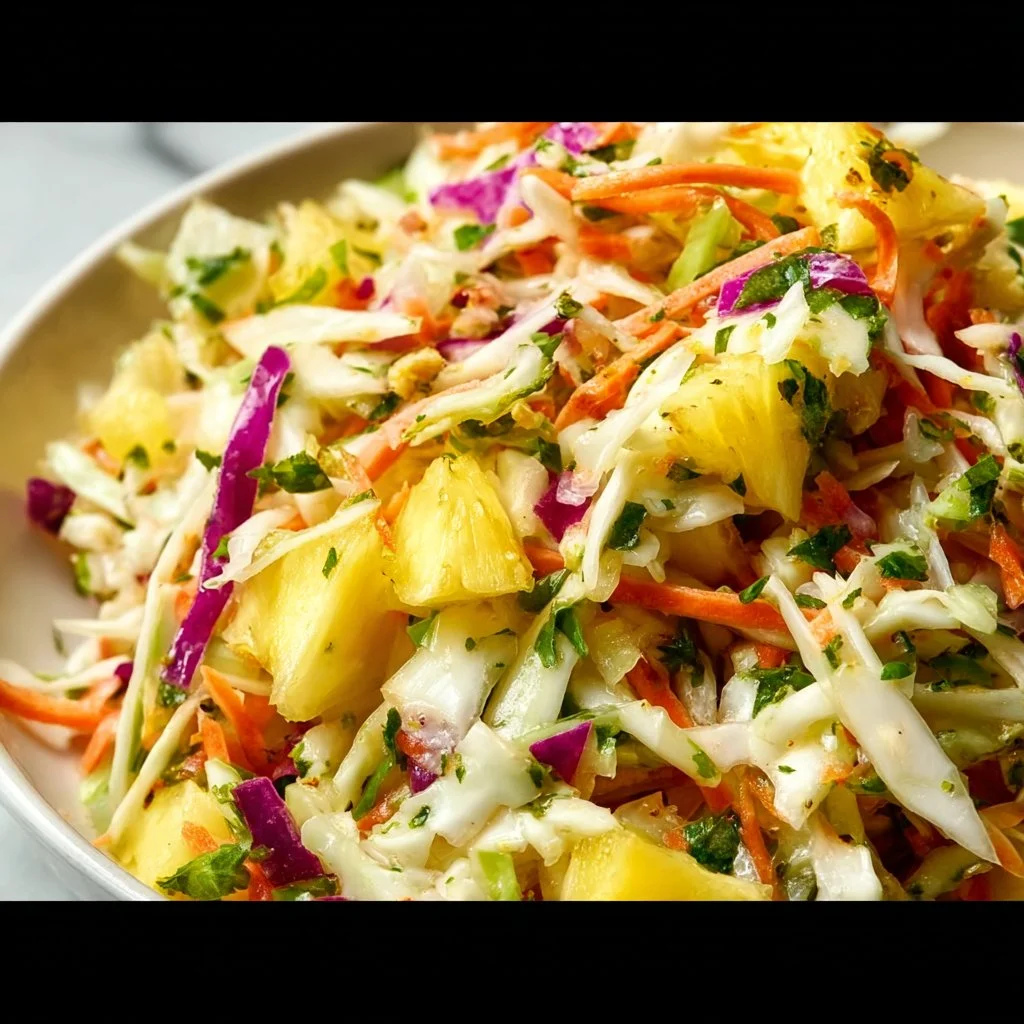
Pineapple Coleslaw
Pineapple Coleslaw: A Tropical Twist on a Classic Delight
Welcome to my kitchen, friends! I’m so thrilled you chose to join me today to explore a dish that perfectly embodies summer’s sunny vibes and the joy of gathering around the table—Pineapple Coleslaw. Picture this: it’s a warm day, the grill is sizzling, and the air is fragrant with tantalizing aromas. What completes that scene, you ask? A light, refreshing coleslaw bursting with the sweetness of fresh pineapple and the creamy, tangy goodness that brings it all together.
Coleslaw might seem like a simple side dish, but this version transforms everyday ingredients into something spectacular. The crunchy cabbage and bright pineapple mingle together to create an explosion of flavor that will have your taste buds dancing. This coleslaw is not just about taste; it’s about the experience of sharing it with friends, family, and those you cherish most. Plus, it’s super easy to whip up!
So roll up those sleeves, grab an apron (and maybe a friend), and let’s dive into a culinary journey that combines the comforting familiarity of slaw with a tantalizing tropical twist. Whether you’re gearing up for a summer BBQ, a picnic in the park, or just want to elevate a weeknight meal, this Pineapple Coleslaw is the perfect companion.
A Personal Touch: Memories of Grandma’s Kitchen
Every time I whip up a batch of Pineapple Coleslaw, I’m whisked back to my childhood summers spent at my grandmother’s house. She had the biggest garden, brimming with vegetables and fruits, but her pineapple wasn’t from the garden—oh no! It came from her favorite little exotic fruit stall down by the coast. That vibrant yellow fruit, so juicy and sweet, was a summer staple on our table.
In her kitchen, she had this beautiful, well-loved mixing bowl. It was slightly chipped but held so many memories within its ceramic walls. We’d spend afternoons together, her carefully showing me how to shred the cabbage just right, while I eagerly chopped up fresh pineapple, giggling as the juices splashed onto my hands. We’d mix it all together with her secret sauce—a tangy mayo dressing that always included a hint of something special, which she’d never reveal. Those days were filled with laughter, shared stories, and the comforting smells of good food cooking.
This Pineapple Coleslaw is a tribute to those summer days in Grandma’s kitchen. It’s all about taking simple, fresh ingredients and creating something that warms the heart and feeds the soul. Let’s create some of those wonderful kitchen memories of your own!
Ingredients
Here’s what you’ll need to make this delicious Pineapple Coleslaw:
-
1 small green cabbage (or about 1/2 of a medium-sized one)
- Chef Insight: The cabbage adds that fantastic crunch! You can also mix in purple cabbage for added color.
-
1 large carrot, grated
- Substitution Tip: If you’re short on carrots, you can use shredded zucchini for a different texture and flavor.
-
1 cup fresh pineapple, diced
- Quick Tip: Fresh pineapple really packs a flavor punch! Canned pineapple works too but drain it well before use.
-
1/2 cup mayonnaise
- Chef Insight: For a lighter version, Greek yogurt makes an excellent substitute without compromising on creaminess.
-
2 tablespoons apple cider vinegar
- Flavor Swap: Experiment with lime juice for a zesty kick or rice vinegar for a milder taste.
-
1 tablespoon honey (or to taste)
- Substitution Tip: Maple syrup can work too if you’re looking for a vegan option!
-
Salt & pepper to taste
- Quick Tip: A pinch of smoked paprika can also elevate the flavor profile if you’re feeling adventurous!
Step-by-Step Instructions
Making Pineapple Coleslaw is a breeze! Just follow these steps, and I promise you’ll have a bowl full of magical flavor in no time.
-
Prepare the Veggies:
- Start by taking your green cabbage. Remove any tough outer leaves, rinse it under cold water, and dry it lightly. Now, cut it in half and remove the core. Slice the cabbage as finely as you can; you want those beautiful, delicate shreds! Grab a sharp knife or a mandoline slicer for ease.
-
Grate the Carrot:
- Take that large carrot and peel it. Use a box grater or food processor to grate it until you have about one cup. Gently combine the grated carrot with the shredded cabbage in a large mixing bowl. Trust me; the vibrant color of the carrot will make your coleslaw pop!
-
Tackle the Pineapple:
- If you’re using fresh pineapple, peel, core, and chop this bad boy into bite-sized pieces. It’s okay to channel your inner fruit ninja here! If using canned pineapple, chop it after draining. Add your pineapple to the cabbage and carrot mix, and watch the magic happen. The juices from the pineapple will add a lovely sweetness.
-
Make the Dressing:
- In a separate bowl, whisk together the mayonnaise, apple cider vinegar, and honey until smooth. This is where Grandma’s secret sauce would come into play! Taste and adjust the seasoning as necessary. If you like it tangier, add a little more vinegar, or if you crave sweetness, drizzle in more honey.
-
Combine Everything:
- Pour your delicious dressing over the veggie mix and toss gently yet thoroughly until everything is equally coated. This is a great time to channel your inner chef and give it a little taste test. Does it need more salt? Maybe a touch more honey? Adjust as needed!
-
Let It Chill:
- For best results, cover and refrigerate the coleslaw for at least 30 minutes before serving. This allows all that delicious flavor to meld together. It’s worth the wait, I promise!
-
Enjoy:
- Grab a plate, scoop up a generous serving, and dig in. You’ve just created a beautiful dish that celebrates summer in every bite. Soak up all those sweet and tangy flavors!
Serving Suggestions
Serving your Pineapple Coleslaw is easy peasy! You can present it in a large bowl for self-serve style or, for a bit of flair, plate individual portions in charming bowls or mason jars. Garnish with a sprinkle of chopped cilantro or a few extra pineapple pieces on top for that delightful tropical touch. Pair it with grilled chicken, BBQ ribs, or even tacos for a casual summer feast!
Recipe Variations
- Spicy Kick: Add diced jalapeños or a dash of hot sauce for some heat.
- Tropical Fusion: Toss in chunks of mango or mandarin oranges for an added fruit element.
- Nutty Delight: Sprinkle some toasted almonds or sunflower seeds for a satisfying crunch.
- Herb-Infused: Mix in fresh herbs like mint or cilantro for an unexpected flavor twist.
- Vegan Option: Substitute mayonnaise with a vegan mayo or homemade cashew cream for a dairy-free delight.
Chef’s Notes
I can’t tell you how many times this Pineapple Coleslaw has saved me at summer gatherings! There was that backyard BBQ last year where the main dish was a total flop, but this coleslaw turned out to be the star of the show. Everyone kept asking for the recipe, and I loved seeing their eyes light up as they took that first bite.
Coleslaw is one of those incredible dishes that can evolve. I started with my grandmother’s recipe that called for just cabbage and mayo, but since then, I’ve played with different flavors and textures. So, don’t be afraid to experiment! Cooking is about joy, and every kitchen disaster is just another story to tell.
FAQs and Troubleshooting
Q1: How long can I store coleslaw in the fridge?
A: Pineapple coleslaw will keep well in the fridge for about 3 days. Just remember that the cabbage will soften over time.
Q2: Can I make this ahead of time?
A: Absolutely! It’s perfect for meal prep. Just mix everything except for the dressing and store it in an airtight container. Add the dressing the day you plan to serve it to keep things crisp.
Q3: What if my coleslaw is too watery?
A: This can happen if you use overripe pineapple or if the cabbage releases too much water. If you find it watery, simply strain the mixture through a fine sieve or add a bit more cabbage to absorb the excess liquid.
Q4: Can I customize this recipe further?
A: Definitely! This coleslaw is so versatile. Feel free to swap in different veggies or fruits based on your preferences.
Nutritional Info
While every ingredient brings something to the table, here’s a rough estimate of the nutritional info per serving (based on 6 servings):
- Calories: 150
- Protein: 2g
- Carbohydrates: 20g
- Fat: 7g
- Fiber: 2g
This Pineapple Coleslaw is more than just a salad; it’s a celebration! I hope you let the tropical flavors inspire you as you create memories in your kitchen—whether it’s with family, friends, or even solo. Remember, cooking should be fun and inventive, so get in there, get messy, and enjoy every delicious bite. Happy cooking, everyone! 🍍🥗
Print
Pineapple Coleslaw
- Total Time: 45 minutes
- Yield: 6 servings 1x
- Diet: Vegetarian
Description
A refreshing coleslaw bursting with the sweetness of fresh pineapple and a creamy dressing, perfect for summer gatherings.
Ingredients
- 1 small green cabbage (or about 1/2 of a medium-sized one)
- 1 large carrot, grated
- 1 cup fresh pineapple, diced
- 1/2 cup mayonnaise
- 2 tablespoons apple cider vinegar
- 1 tablespoon honey (or to taste)
- Salt & pepper to taste
Instructions
- Prepare the Veggies: Start by taking your green cabbage. Remove any tough outer leaves, rinse it under cold water, and dry it lightly. Cut it in half and remove the core. Slice the cabbage as finely as you can.
- Grate the Carrot: Peel the large carrot and grate it until you have about one cup. Combine the grated carrot with the shredded cabbage in a large mixing bowl.
- Tackle the Pineapple: Peel, core, and chop fresh pineapple into bite-sized pieces. Add your pineapple to the cabbage and carrot mix.
- Make the Dressing: In a separate bowl, whisk together the mayonnaise, apple cider vinegar, and honey until smooth. Adjust seasoning as necessary.
- Combine Everything: Pour your dressing over the veggie mix and toss gently until everything is equally coated.
- Let It Chill: Cover and refrigerate the coleslaw for at least 30 minutes before serving.
- Enjoy: Grab a plate, scoop up a generous serving, and dig in.
Notes
For best results, let the coleslaw sit for a bit in the fridge to meld the flavors together. Customize with your favorite veggies or fruits!
- Prep Time: 15 minutes
- Cook Time: 0 minutes
- Category: Side Dish
- Method: Mixing
- Cuisine: American
Nutrition
- Serving Size: 1 serving
- Calories: 150
- Sugar: 8g
- Sodium: 300mg
- Fat: 7g
- Saturated Fat: 1g
- Unsaturated Fat: 5g
- Trans Fat: 0g
- Carbohydrates: 20g
- Fiber: 2g
- Protein: 2g
- Cholesterol: 5mg
Keywords: coleslaw, pineapple, summer salad, refreshing side dish, BBQ




