
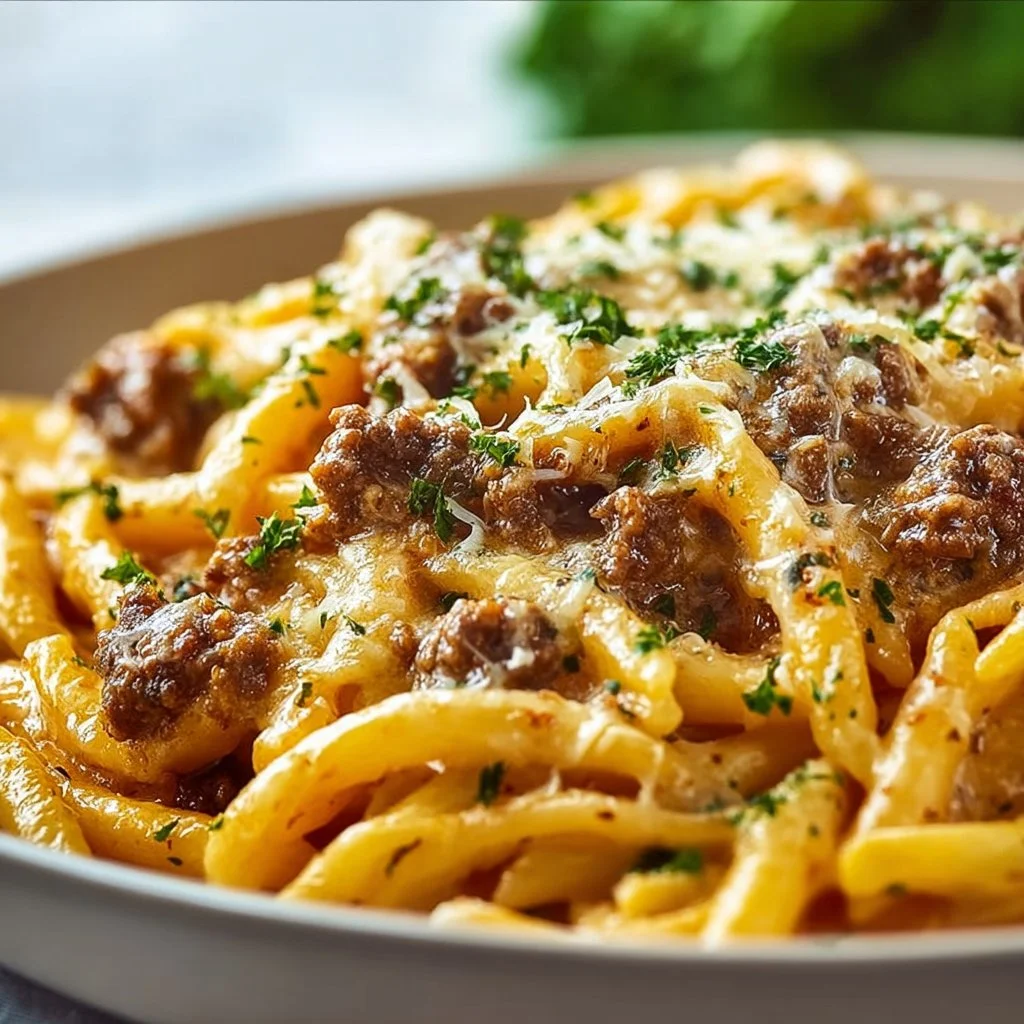
Creamy High Protein Beef Pasta
Creamy High Protein Beef Pasta: Your New Favorite Comfort Dish
Welcome to my cozy corner of the culinary world! I’m thrilled to share with you a dish that’s not only scrumptious but also packed with protein. Get ready to embark on a culinary journey with my Creamy High Protein Beef Pasta! Whether you’re cooking for family or just for yourself, this recipe is so comforting and delicious that it will become a staple in your kitchen.
Imagine this: it’s a chilly evening, you’ve had a long day, and the last thing you want to do is prepare an elaborate meal. But wait! You have a package of ground beef in the fridge, some creamy goodness waiting to be whipped up, and a whirlwind of pasta dreams rolling around in your head! Sounds like the perfect evening to dive into the world of creamy beef pasta. With the rich flavors and comforting texture, this dish is sure to warm your heart and fill your belly.
Now, let’s talk ingredients. Don’t worry if you’re not a culinary genius; I promise this dish is super approachable! We’ll keep it straightforward because cooking should be fun, not stressful. Just a few simple ingredients simmered together thoughtfully, and you’re in for a treat! So roll up your sleeves, put on your favorite apron (messy recommended), and let’s make some pasta magic together!
Personal Story
I vividly remember when I first learned to make pasta from scratch with my grandma when I was about 8 years old. Oh, the flour dust everywhere! She had this incredible wooden board that we used for rolling out the dough while laughing and sharing stories about our family. One particular Saturday, we decided to experiment by adding ground beef to a creamy sauce, inspired by a dish her mother used to make. We didn’t have a recipe; we just threw things together with love and the spirit of adventure.
That day, as the aromas filled the kitchen, I discovered how powerful food could be in bringing people together. The laughter, the stories, and that delicious first bite remain etched in my memory. This Creamy High Protein Beef Pasta is my way of honoring that moment, making it simple yet brimming with flavor, just like my grandma taught me. It’s about sharing joy through food, sparking conversations, and crafting new memories in the kitchen.
Ingredients
For the Beef Pasta
- 8 ounces whole wheat pasta: The star of our show! Whole wheat adds a nice nutty flavor and extra fiber—try substituting with gluten-free pasta if needed.
- 1 pound ground beef: Rich in protein! You can use lean ground beef to cut back on fat, or even swap with ground turkey for a lighter version.
- 1 medium onion, diced: Adds a sweet yet savory base. Feel free to substitute with shallots for a milder taste.
- 2 cloves garlic, minced: The aromatic foundation! Fresh garlic is best, but also consider garlic powder in a pinch.
- 1 cup beef broth: Brings depth to our dish! If you don’t have it, use vegetable broth or even water.
- 1 cup heavy cream: Makes the sauce creamy and luscious! You can use milk or a plant-based alternative (like coconut milk) for a lighter dish.
- 1 tablespoon Worcestershire sauce: Adds umami! You can skip this if you don’t have it, but it adds a delicious depth.
- 1 teaspoon Italian seasoning: A blend that brings out a wonderful flavor! Substitute with dried basil or oregano if that’s what you have.
- Salt and pepper to taste: Essential for seasoning! Always taste as you go.
- Fresh parsley, chopped, for garnish: Optional but pretty! A sprinkle of fresh herbs brightens the dish.
Step-by-Step Instructions
-
Cook the Pasta:
Start by boiling a large pot of salted water. Once it’s bubbling, add in your whole wheat pasta. Cook according to package instructions until al dente—generally about 8-10 minutes. Quick tip: reserve about ½ cup of pasta water before draining! It’s liquid gold for your sauce. -
Brown the Beef:
In a large skillet over medium heat, add a splash of olive oil and the diced onion. Sauté until they become translucent (about 5 minutes). Then, increase the heat slightly, add in the ground beef, and cook until browned. Use a wooden spoon to break up the meat; we want nicely browned bits for extra flavor. -
Add the Garlic:
Toss in the minced garlic and cook for another minute until fragrant. Be cautious not to burn it! A little trick: if your garlic starts to brown too quickly, lower the heat a bit. -
Season and Create the Sauce:
Pour the beef broth into the skillet, scraping any browned bits off the bottom (these bits are packed with flavor!). Mix in the Worcestershire sauce and then the heavy cream. Let it simmer on low heat for about 5-7 minutes, allowing the flavors to meld together. Keep stirring regularly—it should be silky smooth and luxurious! -
Combine the Pasta and Sauce:
Gently toss the cooked pasta into the sauce. If it seems too thick, add a splash of that reserved pasta water. This will help everything stick together and create that creamy consistency we love. -
Final Seasoning:
Add the Italian seasoning, and season with salt and pepper to taste. Give everything one last good stir, and voila!
Serving Suggestions
Plate your creamy high protein beef pasta in hearty bowls. I love to add a little sprinkle of freshly chopped parsley on top for a pop of color. Serving with crusty garlic bread or a vibrant side salad elevates this dish to a whole new level. And don’t forget a glass of red wine—it just pairs beautifully!
Recipe Variations
- Spicy Kick: Add red pepper flakes while cooking the beef for a spicy twist.
- Veggie Packed: Incorporate diced bell peppers, mushrooms, or spinach into the mix for extra nutrition.
- Cheesy Goodness: Stir in shredded mozzarella or parmesan cheese right before serving for a cheesy variation!
- One-Pan Wonder: Replace beef with shredded chicken or cooked chickpeas for a lighter vegetarian version.
- Herb Infusion: Add fresh herbs like basil or thyme in place of Italian seasoning for a fresh herbal note.
Chef’s Notes
This creamy beef pasta is pretty forgiving, and I’ve had my fair share of kitchen adventures (or misadventures!) while perfecting it. Early on, I tried making it with too much cream—whoops! It was delicious, but… a bit too rich for my taste. After some experimenting, I learned to balance the creaminess with the meat and broth for the perfect blend. Every time I make this dish, I can’t help but smile, reminiscing about my grandma in that flour-dusted kitchen, creating something special out of nothing.
FAQs and Troubleshooting
What if my sauce is too thick?
No problem! Just add a bit of the reserved pasta water, a splash at a time, until you reach the desired consistency.
Can I use a different type of pasta?
Absolutely! Feel free to experiment with any pasta shape you love—penne, fusilli, or even spaghetti bring different fun textures to this dish.
What if there are leftovers?
Lucky you! Store them in an airtight container in the fridge for up to 3 days. This dish reheats beautifully in the microwave or on the stove with a splash of broth or cream to keep it saucy!
Can I make this dish ahead of time?
Of course! You can prepare the sauce in advance and simply reheat it when ready to serve. Cook the pasta fresh for the best texture.
Nutritional Info
While the specific nutritional content can vary based on ingredients and serving sizes, this creamy high protein beef pasta is typically high in protein thanks to the beef and dairy, while being lower in fat when you choose lean meats and whole grains. Each serving offers a comforting balance of proteins, carbs, and healthy fats.
And there you have it! A delightful, creamy high protein beef pasta that’s sure to brighten your kitchen and warm your heart. I’m so excited for you to make this at home! Let me know about your pasta adventures, and remember—cooking is as much about the journey as it is about the destination. Happy cooking!
Print
Creamy High Protein Beef Pasta
- Total Time: 30 minutes
- Yield: 4 servings 1x
- Diet: None
Description
A comforting and delicious creamy beef pasta packed with protein, perfect for a chilly evening.
Ingredients
- 8 ounces whole wheat pasta
- 1 pound ground beef
- 1 medium onion, diced
- 2 cloves garlic, minced
- 1 cup beef broth
- 1 cup heavy cream
- 1 tablespoon Worcestershire sauce
- 1 teaspoon Italian seasoning
- Salt and pepper to taste
- Fresh parsley, chopped, for garnish
Instructions
- Cook the pasta: Start by boiling a large pot of salted water. Once it’s bubbling, add in your whole wheat pasta. Cook according to package instructions until al dente—generally about 8-10 minutes. Quick tip: reserve about ½ cup of pasta water before draining!
- Brown the beef: In a large skillet over medium heat, add a splash of olive oil and the diced onion. Sauté until they become translucent (about 5 minutes). Then, increase the heat slightly, add in the ground beef, and cook until browned.
- Add the garlic: Toss in the minced garlic and cook for another minute until fragrant. Be cautious not to burn it!
- Season and create the sauce: Pour the beef broth into the skillet, scraping any browned bits off the bottom. Mix in the Worcestershire sauce and then the heavy cream. Let it simmer on low heat for about 5-7 minutes.
- Combine the pasta and sauce: Gently toss the cooked pasta into the sauce. If it seems too thick, add a splash of that reserved pasta water.
- Final seasoning: Add the Italian seasoning, and season with salt and pepper to taste. Give everything one last good stir, and voila!
Notes
Serve with crusty garlic bread or a vibrant side salad and a glass of red wine.
- Prep Time: 10 minutes
- Cook Time: 20 minutes
- Category: Main Course
- Method: Stovetop
- Cuisine: Italian
Nutrition
- Serving Size: 1 serving
- Calories: 550
- Sugar: 3g
- Sodium: 450mg
- Fat: 28g
- Saturated Fat: 14g
- Unsaturated Fat: 9g
- Trans Fat: 0g
- Carbohydrates: 45g
- Fiber: 5g
- Protein: 30g
- Cholesterol: 75mg
Keywords: creamy pasta, beef pasta, high protein pasta, comfort food, easy recipe
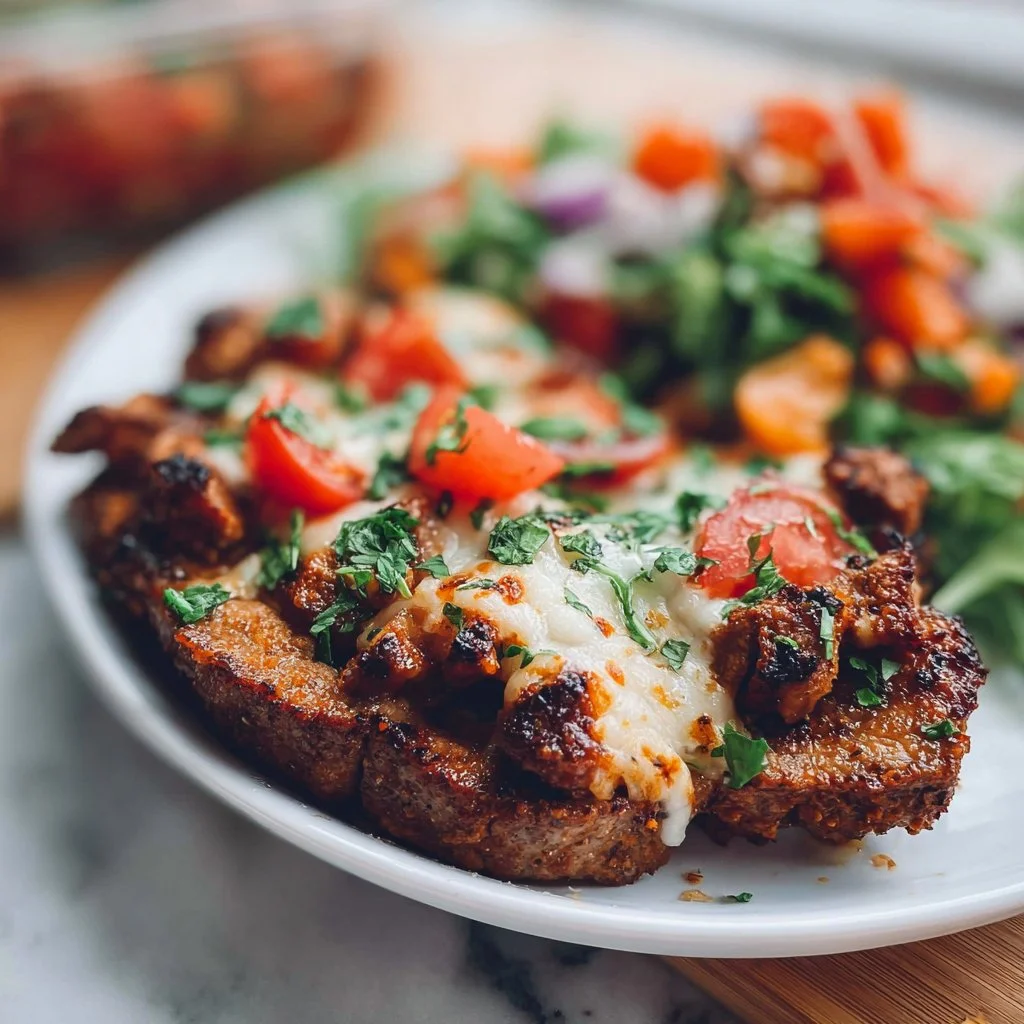
Protein Meal Prep
Ultimate Guide to Protein Meal Prep: Delicious Recipes and Tips to Fuel Your Week
Welcome to my kitchen! I’m so thrilled you’ve decided to join me on this culinary adventure. Today, we’re diving into the world of protein meal prep—a wonderful way to set yourself up for a week of tasty, nourishing meals. Let’s be real, life gets busy, and it’s all too easy to lose sight of healthy eating when you’re juggling work, family, and everything in between. But fear not. With a little planning and some fun recipes, we can keep those cravings at bay and ensure your meals are packed with flavor.
Imagine this: it’s Monday morning, and instead of rushing out the door with only a granola bar in hand, you open your fridge to find beautiful containers filled with mouthwatering, protein-rich meals. Each bite is an explosion of flavor and the simple knowledge that you’ve nourished yourself well. Meal prep is a total game-changer!
In this guide, we’ll explore delicious recipes that are perfect for meal prepping, along with tips, tricks, and personal stories to make this experience enjoyable and stress-free. So grab your apron, and let’s create some magic in the kitchen!
A Personal Story of Meal Prep
I vividly remember my college days when I was juggling classes, part-time jobs, and the relentless quest for a balanced diet. My diet consisted mostly of instant noodles and late-night snacks. One day, out of sheer desperation for something wholesome, I stumbled upon meal prepping. I spent an entire Sunday afternoon in my tiny kitchen, chopping veggies, marinating chicken, and cooking grains. The first week I followed this meal prep plan, I felt like a superhero! No more 3 PM slumps or overpriced takeout!
One recipe in particular stood out: my zesty lemon garlic chicken with quinoa. It was so simple yet packed with flavor, and it felt like a real win. I started sharing my meal prep secrets with friends, and we would often swap containers for lunch. That little ritual created a bond over good food and turned into a cherished part of my weekly routine. Fast forward to today, and I’m here, excited to share these tips and recipes with you!
Ingredients You’ll Need for Protein Meal Prep
For Zesty Lemon Garlic Chicken with Quinoa
-
Chicken Breasts: A lean source of protein that’s incredibly versatile. You can also substitute with turkey, tofu, or chickpeas for a vegetarian option.
-
Quinoa: A gluten-free grain packed with protein and fiber. Feel free to swap it with brown rice, farro, or even cauliflower rice if you’re looking to cut carbs.
-
Olive Oil: Adds richness and aids in cooking. Avocado oil or coconut oil work great here too.
-
Garlic: Fresh garlic provides an aromatic punch. If you’re in a pinch, garlic powder is an acceptable substitute (1/8 tsp = 1 clove).
-
Lemon Juice: Freshly squeezed lemon juice brightens the dish. Lime juice or vinegar can provide the necessary acidity, but nothing beats the freshness of lemon.
-
Spices (Paprika, Oregano, Salt, Pepper): These enhance the flavor profile. Don’t be afraid to get creative—try adding cumin or chili powder for a kick!
For the Veggie Medley
-
Bell Peppers: They come in various colors and add a sweet, crunchy texture. Feel free to swap these for zucchini, asparagus, or broccoli.
-
Red Onion: Adds sweetness and depth. Yellow or white onions can also work well.
-
Spinach: Nutrient-dense and cooks down quickly. If spinach isn’t your thing, try kale or Swiss chard!
Optional Toppings
-
Feta Cheese: For added creaminess and flavor—omit for a dairy-free dish or use nutritional yeast for a cheesy flavor.
-
Chopped Fresh Herbs (Parsley, Cilantro): Brightens up the dish beautifully. Basil or thyme would also be delightful.
Step-by-Step Instructions
Step 1: Marinate the Chicken
-
In a bowl, combine olive oil, minced garlic, lemon juice, paprika, oregano, salt, and pepper. Mix well until combined.
-
Place your chicken breasts in a zip-top bag and add the marinade. Seal it tightly and massage the chicken to fully coat. Allow to marinate for at least 30 minutes (or up to overnight in the fridge for maximum flavor).
Chef’s Tip: The longer the chicken marinates, the juicier and more flavorful it will be. If you’re tight on time, a quick 30 minutes works too!
Step 2: Prepare the Quinoa
-
Rinse 1 cup of quinoa under cold water, then combine with 2 cups of water in a pot.
-
Bring it to a boil, then reduce the heat to low, cover, and simmer for about 15 minutes, or until the water is absorbed and quinoa is fluffy.
Chef’s Insight: To amp up the flavor, cook quinoa in vegetable or chicken broth instead of water!
Step 3: Cook the Chicken
-
Preheat your grill or skillet to medium-high heat. Remove chicken from marinate (discard excess).
-
Grill or cook on each side for about 6-7 minutes until cooked through and juices run clear. The internal temperature should reach 165°F (75°C).
Chef’s Hack: If you’re grilling, don’t flip your chicken too soon! Aim for golden grill marks before turning for that perfect sear.
Step 4: Sauté the Veggie Medley
-
In another pan, heat a little olive oil over medium heat.
-
Add diced bell peppers and red onion, sauté for about 5-7 minutes until they’re tender.
-
Toss in fresh spinach at the end and cook until wilted.
Chef’s Tip: Don’t overcrowd the pan—it can cause your veggies to steam rather than sauté properly. Work in batches if necessary!
Step 5: Assemble Your Meal Prep Containers
-
Start with a scoop of quinoa on the bottom of each container.
-
Next, add sliced chicken on top followed by the sautéed veggies.
-
If you’re adding feta or herbs, sprinkle them on top before sealing containers.
Serving Suggestion: Pack your meal prep within clear containers, so you can see those vibrant colors—it makes everything feel more enticing!
Recipe Variations
-
Mediterranean Twist: Add olives and cherry tomatoes to the veggie medley; swap feta for goat cheese.
-
Asian-Inspired: Use sesame oil instead of olive oil, replace quinoa with brown rice, and add soy sauce, ginger, and sesame seeds for an umami-packed dish.
-
Spicy Mexican Vibe: Season the chicken with chili powder and cumin, and top with avocado and pico de gallo once plated.
-
Vegetarian Option: Replace chicken with marinated tofu or tempeh, follow the same seasoning process, and add kidney beans or black beans for protein.
Chef’s Notes
When I first started meal prepping, I quickly realized that it’s not just about saving time; it’s also a creative outlet! Playing around with flavors, colors, and textures has led to some of my fondest kitchen memories, like hosting friends for a weekly meal prep session. We’d mix and match our container contents and have a blast doing it. Meal prep has grown from just a means to eat well into a social experience that I treasure.
As I’ve expanded my recipe repertoire over the years, I’ve noticed that some of my go-to meals evolve. Ingredients vary with the seasons, and that’s part of the beauty of cooking—it keeps things fresh and exciting!
FAQs and Troubleshooting
1. How long can I store my meal prep in the fridge?
You can store your meal prep in airtight containers for up to 4-5 days in the fridge. After that, it’s time for a freezer detour!
2. Can I freeze these meals?
Absolutely! You can freeze these meals for up to 2-3 months. Just make sure to use freezer-safe containers or bags to prevent freezer burn.
3. Why is my chicken dry?
Overcooking is usually the culprit! Always recommend using a meat thermometer to ensure it’s just cooked through. Also, marinating cuts down on the dryness by keeping the chicken juicy.
4. Can I switch out the proteins?
Totally! Feel free to swap chicken for any protein you prefer—most cook similarly as long as you adjust cooking times. For vegetarian options, keep an eye on your cooking times!
Nutritional Info
While I generally encourage you to focus on enjoying your food, here’s a rough breakdown of what you’re getting with each serving of this meal prep:
- Calories: 400-450 (varies based on portions)
- Protein: 30-35g
- Carbohydrates: 40g
- Fat: 15g
- Fiber: 7-8g
If you follow these steps, not only will you set yourself up for success this week, but you’ll also enjoy every delicious bite along the way. Remember, cooking should be fun, fulfilling, and a bit messy (apron stains are a badge of honor!). So roll up your sleeves, unleash your inner chef, and make this meal prep your best decision yet, right here in your cozy kitchen. Happy cooking, my friends!
Print
Zesty Lemon Garlic Chicken with Quinoa
- Total Time: 55 minutes
- Yield: 4 servings 1x
- Diet: High Protein
Description
A flavorful and protein-packed meal prep recipe featuring marinated chicken breasts served with quinoa and sautéed vegetables.
Ingredients
- 2 Chicken Breasts
- 1 cup Quinoa
- 2 tbsp Olive Oil
- 3 cloves Garlic, minced
- 3 tbsp Lemon Juice
- 1 tsp Paprika
- 1 tsp Oregano
- Salt and Pepper to taste
- 1 Bell Pepper, diced
- 1 Red Onion, diced
- 2 cups Spinach
- Feta Cheese, optional
- Chopped Fresh Herbs, optional
Instructions
- Marinate the Chicken: In a bowl, combine olive oil, minced garlic, lemon juice, paprika, oregano, salt, and pepper. Mix well until combined. Place your chicken breasts in a zip-top bag and add the marinade. Seal it tightly and massage the chicken to fully coat. Allow to marinate for at least 30 minutes (or up to overnight in the fridge for maximum flavor).
- Prepare the Quinoa: Rinse 1 cup of quinoa under cold water, then combine with 2 cups of water in a pot. Bring it to a boil, then reduce the heat to low, cover, and simmer for about 15 minutes, or until the water is absorbed and quinoa is fluffy.
- Cook the Chicken: Preheat your grill or skillet to medium-high heat. Remove chicken from marinade (discard excess). Grill or cook on each side for about 6-7 minutes until cooked through and juices run clear. The internal temperature should reach 165°F (75°C).
- Sauté the Veggie Medley: In another pan, heat a little olive oil over medium heat. Add diced bell peppers and red onion, sauté for about 5-7 minutes until they’re tender. Toss in fresh spinach at the end and cook until wilted.
- Assemble Your Meal Prep Containers: Start with a scoop of quinoa on the bottom of each container. Next, add sliced chicken on top followed by the sautéed veggies. If you’re adding feta or herbs, sprinkle them on top before sealing containers.
Notes
You can store your meal prep in airtight containers for up to 4-5 days in the fridge. Feel free to freeze these meals for up to 2-3 months.
- Prep Time: 30 minutes
- Cook Time: 25 minutes
- Category: Main Course
- Method: Grilling
- Cuisine: Mediterranean
Nutrition
- Serving Size: 1 serving
- Calories: 425
- Sugar: 3g
- Sodium: 300mg
- Fat: 15g
- Saturated Fat: 3g
- Unsaturated Fat: 9g
- Trans Fat: 0g
- Carbohydrates: 45g
- Fiber: 7g
- Protein: 35g
- Cholesterol: 80mg
Keywords: meal prep, chicken, quinoa, healthy, Mediterranean
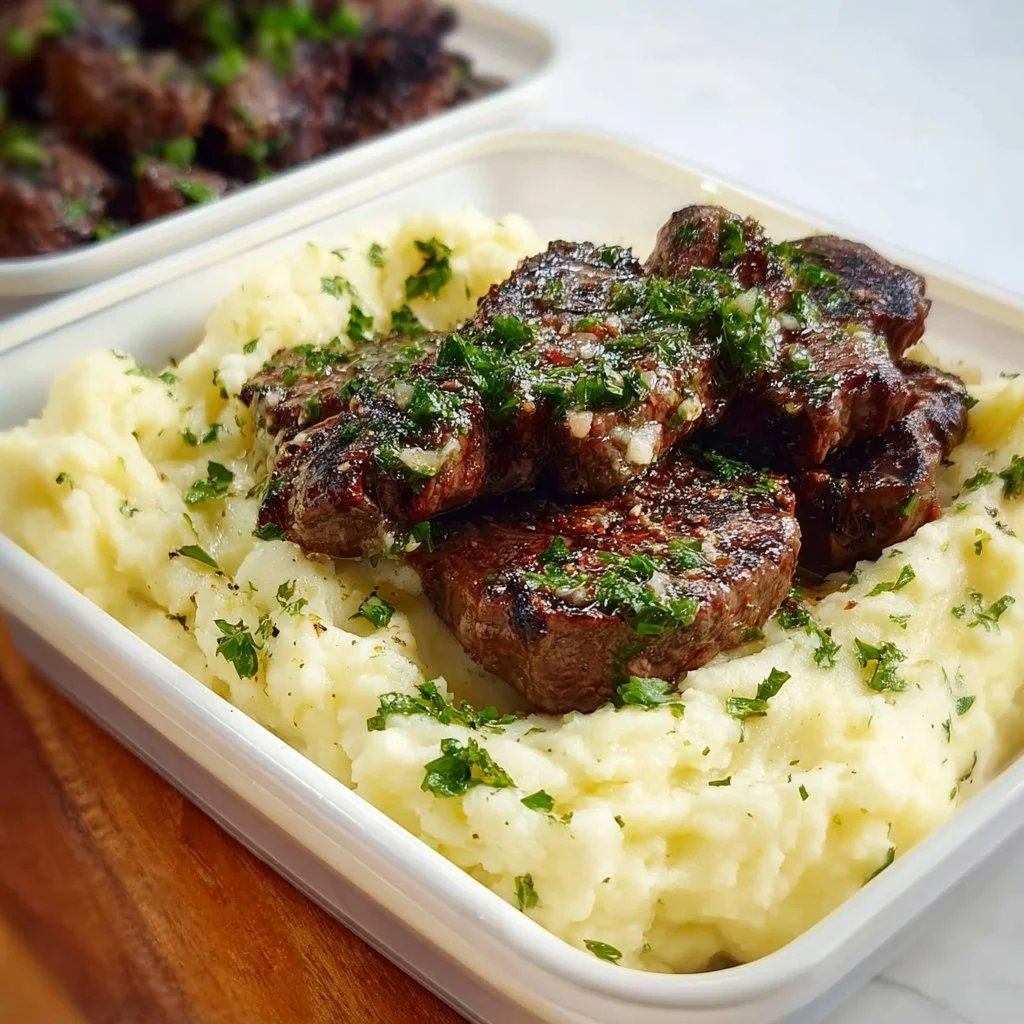
High Protein Low Calorie Garlic Butter Steak & Creamy Mashed Potato Meal Prep
High Protein Low-Calorie Garlic Butter Steak & Creamy Mashed Potato Meal Prep
Welcome back, foodies! I’m so glad you’re here. I can just smell the savory aroma wafting through my kitchen as we dive into today’s delightful meal prep recipe: a high-protein, low-calorie garlic butter steak accompanied by a side of creamy mashed potatoes. Who says you can’t indulge while being mindful of your nutritional goals?
Cooking has always been my love language, and there’s something immensely satisfying about transforming simple ingredients into a meal that not only fuels our bodies but nourishes our souls. Whether you’re prepping for a busy week ahead or looking to impress friends at a dinner party, this dish is bursting with flavors that tell a story. Picture this: juicy, tender steak, bathed in rich garlic butter, with fluffy mashed potatoes so creamy they make you feel like you’re indulging in comfort food heaven!
But wait, we’re not just whipping up a meal; we’re creating an experience. I remember when I first tackled steak and mashed potatoes—my family gathered around the table, and the joy of feeding them was just as fulfilling as the flavors bursting in my mouth. This isn’t just about dinner; it’s about sharing moments, laughter, and love. And trust me, if I can master this dish, so can you!
So roll up those sleeves and grab your apron! We’re embarking on a culinary adventure that will leave your taste buds dancing and your friends begging for seconds. Let’s get started!
Personal Story
I’ll never forget the first time I made steak and mashed potatoes for my family. I was just a teenager, trying to impress my parents while they were out on a Saturday night. I knew I wanted to serve something that screamed “real meal,” so I decided on the classic combo. My dad was a steak lover, and my mom loved anything creamy.
I can picture myself in the kitchen, apron on, a curious mix of confidence and anxiety coursing through me. The sizzle of the steak on the hot skillet was music to my ears, and the smell of garlic wafting up filled my heart with joy. I still remember that moment—my parents came home and were greeted by a feast that filled the whole house with warmth. They were so impressed that they declared me the “Queen of Dinner,” a title I still cherish.
That night wasn’t just about the food; it was about the love shown through a home-cooked meal. It sparked my passion for cooking, and whenever I whip up this garlic butter steak and creamy mashed potatoes, it takes me back to that beautifully chaotic night in the kitchen. It reminds me that cooking is about connection, and that’s what I want to share with you today.
Ingredients
Here’s what you’ll need for our high-protein, low-calorie garlic butter steak and creamy mashed potatoes. Each ingredient contributes to this dish’s flavor profile and nutritional integrity.
For the Steak:
- Steak (Sirloin or Flank): Opt for lean cuts to keep the calories down while still packing in the protein. Sirloin is flavorful and tender, while flank can be marinated for extra zest.
- Garlic: Freshly minced garlic gives that punch of flavor. You can use garlic powder in a pinch but trust me—the fresh stuff is worth it!
- Butter: A tablespoon of unsalted butter adds richness. For a lower calorie option, you can substitute with olive oil.
- Salt & Pepper: Essential for enhancing all the flavors. Feel free to play with spices like paprika or cayenne for an extra kick.
- Fresh Herbs (optional): Rosemary or thyme can elevate the steak’s flavor profile. Use fresh herbs if you have them; dried will also work in a pinch!
For the Mashed Potatoes:
- Potatoes (Yukon Gold or Russet): Yukon Golds provide a creamy texture, while Russets are fluffy. Use whichever you prefer!
- Low-Calorie Cream Cheese: This gives the mashed potatoes that creamy texture without loading up on calories.
- Chicken or Vegetable Broth: Instead of cream, use broth to keep it light but flavorful. You can use homemade or store-bought.
- Salt & Pepper: Again, these basics are key for seasoning your dish right.
- Chives or Green Onions (for garnish): Sprinkle some on top for color and a mild onion flavor!
Substitution Tips:
If you’re looking for some swaps, here are a few ideas:
- For the steak, use chicken breast for a different high-protein approach.
- Swap out the potatoes for cauliflower if you’re looking for a low-carb option; it’ll give you a similar creamy consistency in your mash!
- Instead of butter, try using ghee for a rich flavor with lactose-free benefits.
Step-by-Step Instructions
Alright, let’s get this culinary adventure started with some clear, easy-to-follow steps!
Step 1: Prep the Steak
- Choose Your Cut: Select your steak (sirloin or flank) and allow it to come to room temperature for about 30 minutes.
- Season Generously: Sprinkle both sides of the steak with salt and pepper, along with minced garlic. The idea is to coat it evenly for balanced flavor. Don’t hold back; this is essential for a tasty steak!
Step 2: Make Garlic Butter
- Melt the Butter: In a small skillet over medium heat, melt the unsalted butter. Once it’s just melted, add a clove or two of minced garlic.
- Let it Sizzle: Stir it for about a minute until fragrant, but keep an eye on it; we don’t want it to brown. Once it’s ready, set aside.
Step 3: Cook the Steak
- Heat the Skillet: Use a cast-iron skillet if you have one—it’s perfect for searing! Add a drizzle of olive oil and get it hot.
- Sear the Steak: Once the oil is shimmering, add the steak. For a medium-rare steak, cook for about 4-5 minutes on each side. Remember, don’t move it around too much; we want that beautiful crust to form!
- Baste with Garlic Butter: In the last minute of cooking, spoon the garlic butter over the steak as it finishes cooking. This infuses it with rich flavor and keeps it moist.
Step 4: Prepare the Mashed Potatoes
- Boil the Potatoes: While the steak is cooking, peel and chop your potatoes into equally sized chunks. Toss them in a pot of salted water and bring to a boil. Cook until tender (about 15-20 minutes).
- Mash it Up: Drain the potatoes and return them to the pot. Add in the low-calorie cream cheese and broth, mashing until smooth and creamy. Season with salt and pepper to taste. If you want extra flavor, mix in some minced garlic from the steak for a garlic mashed potato twist!
Step 5: Assemble the Dish
- Slice, Plate, and Garnish: Once the steak is done, let it rest for a few minutes before slicing. This keeps the juices intact. Serve with a generous scoop of creamy mashed potatoes and sprinkle chives or green onions for that fresh finish.
Serving Suggestions
Now that everything is beautifully plated, here’s a lovely way to present your dish: Slice the steak against the grain for maximum tenderness, and serve it atop a generous mound of creamy mashed potatoes. Drizzle any remaining garlic butter from the skillet over the top for that lingering flavor. A sprig of fresh rosemary or thyme on the plate adds a lovely touch!
Recipe Variations
Here are a few fun twists you can try:
- Steak Marinade: Before cooking, marinate your steak in a mixture of soy sauce, honey, and crushed garlic for an Asian-inspired flavor.
- Herbed Mashed Potatoes: Stir in some fresh herbs like dill or parsley for a fresh spin on the classic mashed potatoes.
- Spicy Garlic Butter: Add crushed red pepper flakes to the garlic butter for a spicy kick that pairs beautifully with the steak.
- Cauliflower Mash: Swap those potatoes for steamed cauliflower and blend it with garlic and broth for a lower-carb version that’s just as satisfying.
Chef’s Notes
This recipe is one of those beautiful dishes that keeps evolving in my kitchen. I remember experimenting with different flavors and accompaniments; sometimes I’d toss in sautéed mushrooms or pan-fried asparagus alongside the steak to brighten things up. And let’s not forget the time I mistakenly used too much garlic—it turned into a delightful accident that my friends still talk about!
Cooking is all about experimenting and finding what works for you. So don’t hesitate to play with flavors and ingredients until you create your version of this dish!
FAQs and Troubleshooting
1. What’s the best way to ensure my steak is tender?
Always let your steak rest for 5-10 minutes after cooking. This allows the juices to redistribute, making for a more tender bite.
2. Can I make the mashed potatoes ahead of time?
Absolutely! You can prepare the mashed potatoes in advance. Just keep them in an airtight container in the fridge, and before serving, reheat gently in a pot, adding a splash of broth to restore creaminess.
3. How do I know when my steak is done?
Using a meat thermometer is the most reliable way! For medium-rare, you want an internal temperature of about 135°F (57°C).
4. My mashed potatoes are lumpy; what should I do?
If your potatoes are lumpy, be sure to mash them long enough. If they stubbornly remain lumpy, you can always use a potato ricer or a food mill for a super-smooth consistency.
Nutritional Info (Optional)
While I won’t dive too deep into numbers, this meal packs a protein punch with lean steak and creamy mashed potatoes, all while keeping it low-calorie with smart ingredient choices. Each serving is roughly 300-400 calories based on portion sizes, making it a satisfying yet wholesome option for meal prep!
And there you have it! An inviting high-protein low-calorie garlic butter steak and creamy mashed potato meal prep that will not only fill your belly but also warm your heart. Thank you for being part of this journey in my cozy kitchen! Remember, cooking is about joy, exploration, and sharing love. So go ahead, get your hands messy, and create some delicious memories! Happy cooking!
Print
High Protein Low-Calorie Garlic Butter Steak & Creamy Mashed Potatoes
- Total Time: 55 minutes
- Yield: 4 servings 1x
- Diet: Protein-rich, Low-calorie
Description
A delicious high-protein, low-calorie garlic butter steak served with creamy mashed potatoes, perfect for meal prep.
Ingredients
- Steak (Sirloin or Flank)
- 2 cloves of Garlic, minced
- 1 tbsp Unsalted Butter (or Olive Oil for lighter option)
- Salt & Pepper, to taste
- Fresh Herbs (optional, such as Rosemary or Thyme)
- Potatoes (Yukon Gold or Russet)
- 2 oz Low-Calorie Cream Cheese
- 1 cup Chicken or Vegetable Broth
- Chives or Green Onions, for garnish
Instructions
- Choose your cut: Select your steak and allow it to come to room temperature for about 30 minutes.
- Season generously: Sprinkle both sides of the steak with salt and pepper, along with minced garlic.
- Melt the butter: In a small skillet, melt the unsalted butter and add minced garlic.
- Stir it for about a minute until fragrant.
- Heat the skillet: Use a cast-iron skillet and add a drizzle of olive oil.
- Sear the steak: Cook for about 4-5 minutes on each side for medium-rare.
- Baste with garlic butter: Spoon the garlic butter over the steak in the last minute of cooking.
- Boil the potatoes: Peel and chop your potatoes, then cook until tender.
- Mash it up: Drain the potatoes and mash with cream cheese and broth until smooth.
- Slice the steak: Let it rest before slicing, then serve with mashed potatoes and garnish with chives.
Notes
You can substitute chicken breast for steak or use cauliflower for a low-carb version.
- Prep Time: 30 minutes
- Cook Time: 25 minutes
- Category: Main Course
- Method: Pan-searing and Boiling
- Cuisine: American
Nutrition
- Serving Size: 1 serving
- Calories: 350
- Sugar: 3g
- Sodium: 450mg
- Fat: 15g
- Saturated Fat: 5g
- Unsaturated Fat: 8g
- Trans Fat: 0g
- Carbohydrates: 40g
- Fiber: 4g
- Protein: 28g
- Cholesterol: 80mg
Keywords: steak, mashed potatoes, meal prep, high protein, low calorie
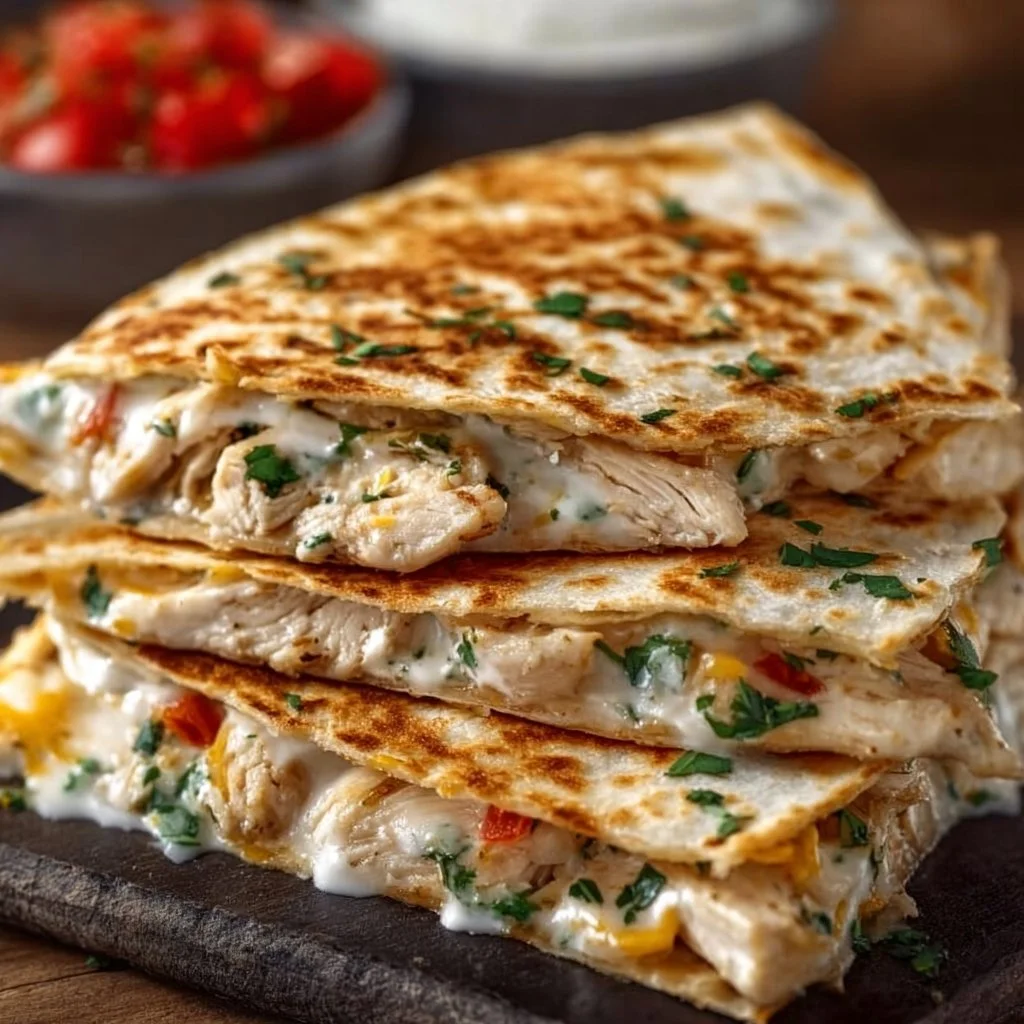
High-Protein Chicken Ranch Quesadilla
High-Protein Chicken Ranch Quesadilla: A Cozy Culinary Adventure
Welcome back to my cozy kitchen! Today, we’re diving into a dish that’s not just a favorite in my household but also a wonderful way to savor the goodness of high protein, all wrapped up in a crispy, cheesy delight — the High-Protein Chicken Ranch Quesadilla. If you’re anything like me, you know how special it feels to whip up something that feels indulgent yet wholesome, all while being super easy to make.
When it comes to food, I believe in the power of simplicity mixed with a sprinkle of love. This quesadilla embodies that philosophy perfectly. It’s bursting with flavor, takes mere minutes to prepare, and can adapt effortlessly to whatever ingredient you have on hand. Plus, who can resist that satisfying crunch when you take a bite? Whether you’re feeding a hungry family, hosting a game day gathering, or simply indulging in a cozy night at home, this quesadilla hits all the right spots.
Now, let’s talk about the inspiration behind this recipe. Picture this: It’s Sunday evening, and my kitchen is filled with the enticing aroma of grilled chicken. I can already hear the chatter of my family settling in around the table, eagerly anticipating a delicious dinner. Inspired by these moments, I wanted to create something that brings that warmth and joy to your table as well. So grab your apron and let’s transform your pantry staples into something truly special!
Personal Story
One of my fondest kitchen memories involves a bustling summertime barbeque at my grandmother’s house. She had this special knack for turning humble ingredients into a feast, always bringing everyone together. During those warm evenings, the smell of grilled chicken wafted through the air, mixing with laughter and the clinking of glasses.
On that day, she created these incredible chicken quesadillas drizzled with ranch dressing, serving them up hot off the grill. I remember everyone gathered around her kitchen island, eagerly waiting for that first crispy bite. It was more than just food; it was the comfort of family and sharing stories. Even now, every bite of a quesadilla takes me back to those cherished moments, reminding me why I love to cook and bring people together.
And now, as I recreate this dish with a high-protein twist, I hope to inspire you to share your own kitchen experiences and create memories around the table.
Ingredients
To make your own High-Protein Chicken Ranch Quesadilla, gather these simple yet flavorful ingredients:
-
Cooked Chicken Breast (2 cups, shredded)
A lean protein powerhouse. You can use leftover rotisserie chicken or grill a fresh breast. If you prefer a vegetarian option, consider using shredded jackfruit or tempeh for a satisfying substitute. -
Whole Wheat Tortillas (4 large)
These add extra fiber and nutrients. You can also use low-carb tortillas or corn tortillas if desired. Just keep in mind that the texture may vary slightly. -
Ranch Dressing (½ cup)
Store-bought is convenient, but homemade ranch is a game-changer! You can easily make a healthier version using Greek yogurt mixed with herbs and spices. -
Cheddar Cheese (1 cup, shredded)
The gooey goodness that holds everything together. Swap for pepper jack for a spicy kick, or use a dairy-free cheese if you want a vegan option. -
Spinach (1 cup, fresh)
Adds a lovely pop of color and nutrients. Kale or arugula can make for great alternatives, providing a different flavor profile. -
Green Onions (½ cup, chopped)
For added crunch and flavor. If you don’t have green onions, regular onions or shallots sautéed until soft also work beautifully. -
Olive Oil (2 tablespoons)
To keep things from sticking on the skillet. You can substitute with avocado oil or even a butter/oil blend for a rich flavor. -
Spices: Garlic Powder, Onion Powder, Paprika, and Salt (to taste)
These elevate your chicken seasoning. Feel free to tweak based on your preferences—cumin or chili powder can add a fun twist!
Step-by-Step Instructions
Get ready to roll up your sleeves and create something delicious. Follow these steps, and soon enough, your kitchen will be filled with mouthwatering aromas!
1. Prepare the Chicken
Start by shredding your cooked chicken breast if you haven’t done so already. Toss it in a mixing bowl with garlic powder, onion powder, paprika, and a pinch of salt. This simple seasoning gives your chicken a burst of flavor. If you’re using leftover chicken, it’s a great way to breathe new life into it!
2. Mix in the Goodness
In the same bowl, add the ranch dressing and mix it until all the chicken is well coated. The ranch not only adds flavor but also keeps the chicken moist, which is key for a satisfying quesadilla.
3. Assemble the Quesadilla
Lay one tortilla flat on a clean surface. On half of the tortilla, sprinkle a generous layer of shredded cheddar cheese, followed by a quarter of the chicken mixture. Top with fresh spinach and a few green onions for that lovely crunch. Finally, sprinkle a little more cheese on top before folding the tortilla over, creating a half-moon shape.
4. Heat the Skillet
Place a skillet over medium heat and add a drizzle of olive oil. Once it’s hot, place your quesadilla in the skillet. You may need to work with one quesadilla at a time unless you have a comrades-in-arms in the kitchen!
5. Cook to Perfection
Cook for about 3-4 minutes on one side, until it’s golden brown and crispy. Carefully flip it over using a spatula and cook the other side for another 2-3 minutes until the cheese is melted. You can press it gently with the spatula to help the cheese cling to the other ingredients.
6. Slice and Serve
Once both sides are crispy and golden, transfer the quesadilla to a cutting board and let it cool for a minute. Use a pizza cutter or a sharp knife to slice it into wedges. That first bite through that crispy exterior? Absolute perfection!
7. Garnish with Extra Love
If you’re feeling adventurous, drizzle some more ranch dressing and sprinkle on extra green onions or even some chopped cilantro for an added burst of freshness!
Serving Suggestions
These High-Protein Chicken Ranch Quesadillas pair perfectly with a side of fresh salsa or guacamole, adding a zesty flavor contrast that enhances each bite. Serve them up on a colorful plate with a vibrant salad for a complete meal that not only looks great but also feels refreshing. Feeling indulgent? A dollop of sour cream or yogurt on the side takes it to the next level of rich creaminess—yum!
Recipe Variations
- Spicy Twist: Add sliced jalapeños or swap out the regular cheddar for spicy pepper jack cheese.
- Veggie Delight: Replace chicken with black beans or grilled veggies like bell peppers and zucchini for a scrumptious vegetarian option.
- Southwestern Style: Mix in some corn and diced tomatoes for a fresh take. Don’t forget the fresh cilantro!
- Breakfast Option: Use scrambled eggs in place of the chicken and toss in some shredded potatoes for a hearty brunch quesadilla.
- Pesto Chicken: Swap out ranch dressing for homemade or store-bought pesto. Pair it with goat cheese for a tangy kick!
Chef’s Notes
It’s funny how recipes evolve over time. Just a few years ago, I started making variations of quesadillas as a way to clean out my fridge on busy nights. This recipe is a culmination of those experimental times, with high-protein ingredients that fuel my family and friends. Remember, you have total control over what goes inside. Don’t stress if you don’t have every ingredient; instead, use this recipe as a canvas and paint it with your favorite flavors!
FAQs and Troubleshooting
Q: Can I make these quesadillas ahead of time?
Absolutely! You can assemble the quesadillas up to a day in advance. Just keep them layered between parchment paper to prevent sticking, and store them in the refrigerator. When you’re ready, cook them fresh on the skillet!
Q: What’s the best way to reheat leftover quesadillas?
Pop them in the oven at 350°F (180°C) for about 10-15 minutes, or on the skillet for a few minutes on each side until heated through. This helps keep them crispy!
Q: My quesadillas are turning out soggy. Any tips?
Make sure to drain any excess liquid from your chicken and avoid overloading them with filling. Less is more when it comes to quesadillas!
Q: Can I freeze these quesadillas?
Yes! Assemble them, wrap them tightly in plastic wrap or parchment paper, and place them in a freezer-safe bag. They can last for up to three months. Just thaw and cook as needed!
Nutritional Info (Optional)
- Calories per serving (1 quesadilla): Approximately 350-400 calories
- Protein: 30g
- Carbohydrates: 30g
- Fat: 15g
There you have it! The High-Protein Chicken Ranch Quesadillas bring cozy vibes, hearty flavors, and moments that feed not just your stomach but your heart as well. I hope you get as much joy out of making this dish as I do—and, of course, don’t forget to share your kitchen stories and photos with me! Happy cooking!
Print
High-Protein Chicken Ranch Quesadilla
- Total Time: 25 minutes
- Yield: 4 servings 1x
- Diet: High Protein
Description
A delightful High-Protein Chicken Ranch Quesadilla that combines health and indulgence in a crispy, cheesy package.
Ingredients
- 2 cups Cooked Chicken Breast, shredded
- 4 large Whole Wheat Tortillas
- ½ cup Ranch Dressing
- 1 cup Cheddar Cheese, shredded
- 1 cup fresh Spinach
- ½ cup Green Onions, chopped
- 2 tablespoons Olive Oil
- Spices: Garlic Powder, Onion Powder, Paprika, and Salt (to taste)
Instructions
- Prepare the Chicken: Shred your cooked chicken breast and toss it with garlic powder, onion powder, paprika, and a pinch of salt.
- Mix in the Goodness: Add ranch dressing to the chicken and mix until well coated.
- Assemble the Quesadilla: Lay one tortilla flat, add cheese, a portion of the chicken mixture, spinach, and green onions, then fold.
- Heat the Skillet: Drizzle olive oil in a skillet over medium heat and place the quesadilla inside.
- Cook to Perfection: Cook for 3-4 minutes on one side until golden, flip, and cook for another 2-3 minutes.
- Slice and Serve: Transfer to a cutting board, slice into wedges, and enjoy!
- Garnish with Extra Love: Optionally drizzle more ranch and sprinkle on green onions or cilantro.
Notes
Feel free to modify the ingredients based on your preference. Great for meal prep and can be assembled ahead of time!
- Prep Time: 15 minutes
- Cook Time: 10 minutes
- Category: Main Course
- Method: Cooking
- Cuisine: Mexican
Nutrition
- Serving Size: 1 quesadilla
- Calories: 375
- Sugar: 2g
- Sodium: 600mg
- Fat: 15g
- Saturated Fat: 6g
- Unsaturated Fat: 8g
- Trans Fat: 0g
- Carbohydrates: 30g
- Fiber: 5g
- Protein: 30g
- Cholesterol: 75mg
Keywords: quesadilla, chicken, ranch, high-protein, comfort food
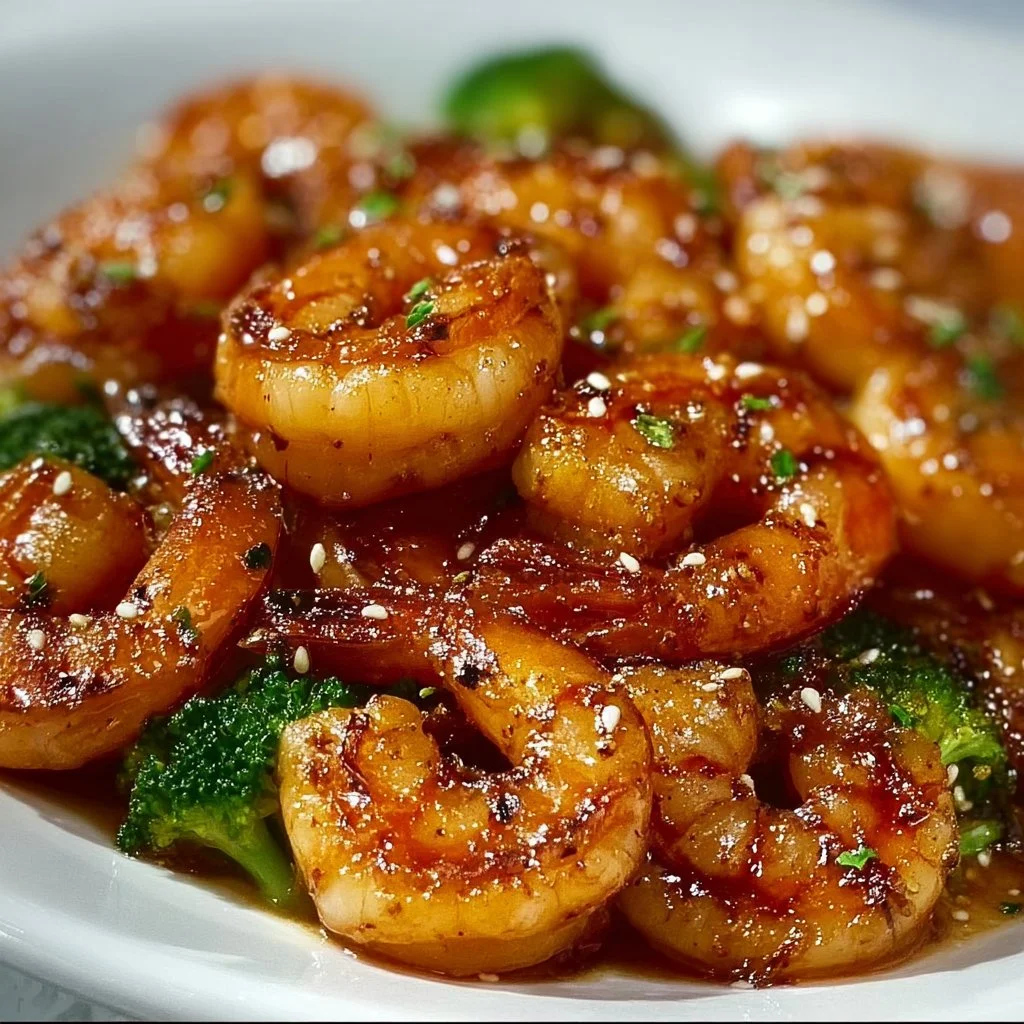
High-Protein Honey Garlic Shrimp
# High-Protein Honey Garlic Shrimp: A Cozy Kitchen Classic

## Introduction

Welcome back to my kitchen, dear friends! Today, we’re diving into a dish that sits right at the heart of my culinary adventures: High-Protein Honey Garlic Shrimp! If you’ve ever been cuddled up at home, waiting for the magical smell of dinner to waft through the air, this recipe is your ticket to that cozy sensation. There’s something about shrimp that makes dinner feel a little bit fancy without all the fuss, and the sweet, savory notes of honey garlic are simply a knockout.

Imagine this: you've just come home from a long day, and as you step into the kitchen, the thought of creating something that tastes divine ignites a spark of joy in your heart. That’s the magic of cooking, isn’t it? In a matter of minutes, you can take fresh, simple ingredients and transform them into something that not only nourishes but also brings loved ones together. Plus, with shrimp’s natural high-protein goodness, you’re fueling those bodies and spirits!

I still recall the first time I tried shrimp cooked with honey garlic sauce. It was a rainy Sunday afternoon, and I was rummaging through the fridge hoping to whip up something quick and delicious for my family. I discovered a bottle of honey hidden in the pantry and some shrimp waiting patiently in the freezer. The moment I poured that sweet honey into the skillet with garlic, the aroma danced through the air, making everyone come running to the kitchen. The symphony of flavors that emerged that day became a treasured staple in our home.

Whether you're meal-prepping for the week or looking to impress a dinner guest, this recipe is versatile, straightforward, and absolutely delish! So, let’s roll up those sleeves, put on that favorite apron (don’t worry if it’s messy; mine is too!), and get ready to cook some honey garlic magic!

## Personal Story

I remember the first time I cooked shrimp for my family. It was a sunny afternoon, and I was determined to impress everyone with my “chef skills.” I thought a fancy dish would do the trick, so I went all out, spicing things up with a homemade honey garlic sauce. As the shrimp sizzled in the pan, the aroma made its way around the house and drew my family to the kitchen like moths to a flame.

After plating everything beautifully, I set it on the table with a flourish, feeling like a culinary superstar. Then, came the moment of truth—the first bite. Everyone fell silent, savoring the flavors, and then erupted into compliments! My heart soared. I remember my little brother immediately asking for seconds, and that sweet memory became the foundation for family dinners filled with laughter and love.

That first experience stuck with me; it’s not just about the food—it’s about the love and connection that comes from gathering around the table. Each time I whip up this dish, it takes me back to that sunny afternoon, reminding me of the joy of cooking and sharing with those we care about most.

## Ingredients

Let’s gather our ingredients for this delicious High-Protein Honey Garlic Shrimp! Here’s what you'll need:

- **Shrimp (1 pound, peeled and deveined)**
  - Look for large shrimp for a satisfying bite! Fresh or frozen work beautifully here. If using frozen, ensure they are fully thawed before cooking.

- **Honey (1/4 cup)**
  - This is the star of our sauce! Honey adds a natural sweetness and gloss that pairs perfectly with shrimp. If you're watching sugar intake, agave syrup can be a good substitute.

- **Garlic (4 cloves, minced)**
  - Fresh garlic is non-negotiable! Minced garlic provides a rich, aromatic flavor. If you’re in a pinch, garlic powder can work, but fresh is always best.

- **Soy Sauce (2 tablespoons)**
  - This adds a savory touch. For a low-sodium option, use low-sodium soy sauce. Tamari works too for a gluten-free twist!

- **Olive Oil (1 tablespoon)**
  - This helps in sautéing and adds richness. You can also use sesame oil for another layer of flavor.

- **Green Onions (for garnish)**
  - These add color and a fresh crunch! If you don’t have green onions, fresh parsley or cilantro can do as a vibrant garnish.

- **Red Pepper Flakes (optional, to taste)**
  - A pinch of heat never hurt anyone! Omit if you prefer a milder flavor or adjust to your spice preference.

Now that we have our ingredients ready, let’s get cooking!

## Step-by-Step Instructions

### Step 1: Prepare the Shrimp
Start by rinsing the shrimp under cold water and pat them dry with paper towels. This step is crucial! A dry surface helps the shrimp sear instead of steam, yielding that desired caramelization.

### Step 2: Create the Honey Garlic Sauce
In a mixing bowl, combine the honey, minced garlic, and soy sauce. Stir gently until blended. Here’s a little chef hack: if you want a smoother sauce, you can microwave it for about 10 seconds; it helps the honey mix in beautifully!

### Step 3: Heat the Pan
Drizzle olive oil into a large skillet over medium-high heat. Once hot, carefully add the shrimp one at a time. It'll take about 2-3 minutes per side. Don’t overcrowd the skillet; you want to give each shrimp the space to sear and develop that gorgeous golden color!

### Step 4: Add the Sauce
Once the shrimp is opaque and perfectly cooked, pour your honey garlic sauce into the skillet. The magic happens right here—bring the sauce to a gentle simmer. Stir consistently for about 2 minutes, allowing the shrimp to soak up all that sweet, garlicky goodness.

### Step 5: Incorporate Heat (Optional)
If you’re feeling adventurous and want a kick, sprinkle in some red pepper flakes while the sauce simmers. It gives the dish a lovely contrast to the sweetness.

### Step 6: Garnish and Serve
Once everything is perfectly combined, remove from heat. Don’t forget to sprinkle those fresh chopped green onions on top!

## Serving Suggestions

This dish shines when served on a bed of fluffy jasmine rice or accompanied by steamed vegetables for a healthy balance. You can even toss it all together with a fresh green salad for a vibrant meal. Pro tip: a sprinkle of sesame seeds on top not only enhances the look but adds a delightful crunch!

## Recipe Variations

1. **Honey Garlic Tofu:** Swap the shrimp for crispy tofu for a plant-based version.
2. **Citrus Zest:** Add zest from a lemon or lime into the sauce for a refreshing twist.
3. **Spicy Sriracha:** Mix Sriracha into the honey garlic sauce for a bold kick of flavor.
4. **Veggie Boost:** Toss in fresh veggies like bell peppers or snap peas for added color and health benefits!
5. **Pineapple Twist:** Add pineapple chunks to the skillet for a sweet and tangy tropical vibe.

## Chef’s Notes

This recipe has been a part of my kitchen arsenal for years and has evolved beautifully. At first, it was just a quick dinner fix, but over time, I’ve played with flavors and grown to love it even more. I remember one time I accidentally had too much garlic—a mistake I thought was disastrous—but it turned out to be a family favorite! They jokingly call it "Olivia's Super Garlic Shrimp" now and demand it every time they visit. Cooking truly is about experimentation, and sometimes, those little mishaps lead to something extraordinary.

## FAQs and Troubleshooting

**1. My shrimp turned out rubbery; what happened?**
This usually happens if shrimp are overcooked. Cook just until they turn opaque. They continue to cook a bit even after removed from the heat.

**2. Can I use frozen shrimp?**
Absolutely! Just make sure to thaw them completely and pat them dry before cooking.

**3. How do I store leftovers?**
Store any leftovers in an airtight container in the fridge for up to 2 days. Reheat gently to avoid overcooking!

**4. What can I serve with this dish?**
It pairs beautifully with rice, quinoa, or on top of a fresh salad. Get creative!

## Nutritional Info (optional)

This High-Protein Honey Garlic Shrimp dish is both delicious and nutritious! In a typical serving, you can expect around 230 calories, with 25g of protein and 10g of carbohydrates, making it a great option for a meal filled with flavor and health!

---

So there you have it—a cozy, high-protein dish that not only feeds the belly but fuels the heart. I hope you enjoyed this journey through my kitchen, and I can't wait for you to try this High-Protein Honey Garlic Shrimp at home. Cooking is all about creating memories and experiences, and I believe every meal is a chance to share a little love with the ones we treasure. Until next time, happy cooking!
High-Protein Honey Garlic Shrimp
- Total Time: 20 minutes
- Yield: 4 servings
- Diet: Paleo
Description
A cozy and flavorful high-protein dish featuring shrimp cooked in a sweet and savory honey garlic sauce.
Ingredients
- Shrimp (1 pound, peeled and deveined)
- Honey (1/4 cup)
- Garlic (4 cloves, minced)
- Soy Sauce (2 tablespoons)
- Olive Oil (1 tablespoon)
- Green Onions (for garnish)
- Red Pepper Flakes (optional, to taste)
Instructions
- Prepare the shrimp by rinsing them under cold water and patting them dry.
- Create the honey garlic sauce by combining honey, minced garlic, and soy sauce in a mixing bowl.
- Heat a large skillet over medium-high heat and drizzle in olive oil.
- Add the shrimp one at a time and cook for about 2-3 minutes per side.
- Pour the honey garlic sauce into the skillet once shrimp are opaque.
- Incorporate red pepper flakes for a spicy kick, if desired.
- Garnish with chopped green onions before serving.
Notes
For a plant-based alternative, swap shrimp for crispy tofu. Leftovers can be stored in an airtight container in the fridge for up to 2 days.
- Prep Time: 10 minutes
- Cook Time: 10 minutes
- Category: Main Course
- Method: Sautéing
- Cuisine: Asian
Nutrition
- Serving Size: 1 serving
- Calories: 230
- Sugar: 20g
- Sodium: 500mg
- Fat: 7g
- Saturated Fat: 1g
- Unsaturated Fat: 6g
- Trans Fat: 0g
- Carbohydrates: 10g
- Fiber: 0g
- Protein: 25g
- Cholesterol: 170mg
Keywords: shrimp, honey garlic, high protein, quick meal, easy recipe




