
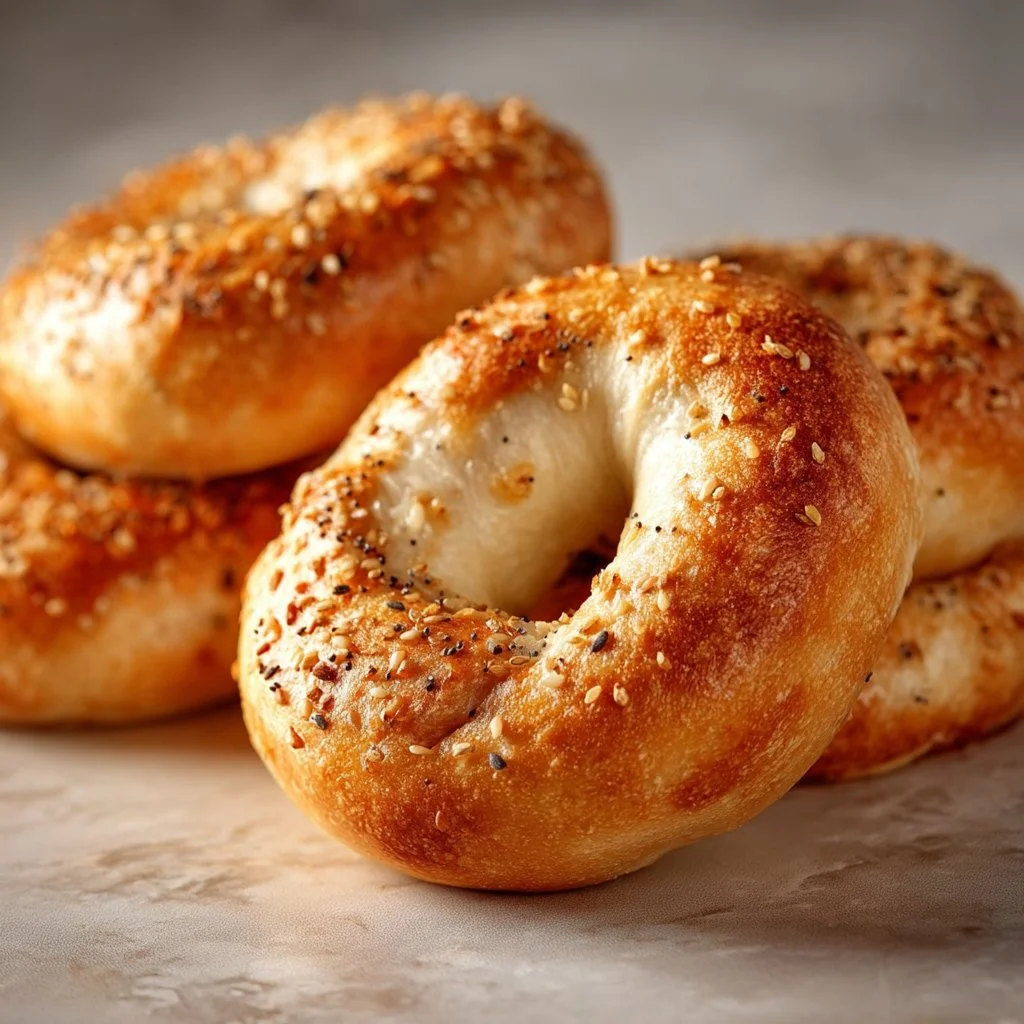
Greek Yogurt Bagels
The Delight of Homemade Greek Yogurt Bagels
Welcome to my cozy kitchen, friends! Today, I’m utterly thrilled to share with you a recipe that’s not only incredibly simple but also downright delightful—Greek Yogurt Bagels! If you’ve ever been tempted by the idea of freshly baked bagels wafting through your home, but felt intimidated by the process, fear not! These bagels come together in a breeze, using just a handful of ingredients.
Picture this: the aroma of warm bread filling your kitchen, the satisfaction of creating something from scratch, and then indulging in those golden, chewy bagels slathered with cream cheese or your favorite toppings. It’s like having a little bakery right in your home! Plus, these bagels have a unique twist: they’re made with Greek yogurt, which gives them a wonderfully fluffy texture and a subtle tang. They’re perfect for breakfast, brunch, or a cozy snack any time of the day.
Now, you may be wondering, “Why Greek yogurt?” Well, my friends, not only does it enhance the flavor, but it also means you can skip the long proofing times traditionally associated with bagel-making. So tuck in your apron and roll up your sleeves—let’s whip up a batch of these delicious homemade Greek Yogurt Bagels! Trust me; once you get the hang of it, your friends and family will be hounding you for more.
Personal Story
Ah, bagels. When I think back to my childhood, I vividly recall Saturday mornings spent at my grandmother’s house in the bustling heart of our little neighborhood. The delightful smell of freshly baked bagels mingled with the aroma of her secret-recipe coffee, creating a warm, inviting blanket that wrapped around everyone who visited. My grandma was known for her homemade bagels, and she would often have a gathering of family to nibble on her creations while sharing stories and laughter.
One sunny morning, I stood beside her, eager to learn the bagel-making secrets she had perfected over the years. She guided me patiently, measuring flour with a lighthearted approach that filled the kitchen with joy. It was more than just the act of cooking; it was about togetherness and the love that comes from sharing good food. As we shaped dough together, she would tell tales from her childhood, weaving together memories and flavors. Those bagels were more than just food; they represented family stories, connections, and a legacy of love that I carry with me today.
With these Greek Yogurt Bagels, I hope to evoke those same feelings of warmth and connection in your kitchen. So let’s get baking, shall we?
Ingredients
Here’s what you’ll need to whip up your own batch of Greek Yogurt Bagels:
-
2 cups all-purpose flour
For the best results, use a good-quality all-purpose flour. If you’re looking for a healthier option, you can substitute half with whole wheat flour for a nutty flavor. -
1 cup Greek yogurt
Choose plain, unsweetened Greek yogurt. This is the star of our show, giving our bagels a fluffy texture that’s also rich in protein! For a dairy-free alternative, look for coconut or almond-based Greek yogurt. -
1 tablespoon baking powder
This is our leavening agent! Baking powder creates those lovely air pockets that make our bagels light and fluffy. -
1 teaspoon salt
A pinch of salt goes a long way, enhancing the flavors of our bagels. Feel free to experiment with flavored salts for a unique twist! -
Optional toppings (such as sesame seeds, everything bagel seasoning, or poppy seeds)
Add your personal flair by sprinkling these toppings on the bagels before baking. This is where you can really let your creativity shine!
Step-by-Step Instructions
Step 1: Preheat the Oven
First things first, let’s get that oven preheated to 375°F (190°C). This will ensure our bagels bake evenly.
Step 2: Combine Ingredients
In a mixing bowl, combine the flour, baking powder, and salt. Give it a quick whisk to incorporate everything. In another bowl, add the Greek yogurt. Now for the fun part! Gradually add the dry ingredients to the yogurt, mixing until it starts to come together into a shaggy dough.
Step 3: Knead the Dough
Once it’s mixed, dust your countertop with a little flour and transfer the dough onto the surface. Knead it gently for about 2-3 minutes until it’s just smooth. Since this dough is relatively low in gluten, don’t overdo it. You want it to be tender, not tough!
Step 4: Shape the Bagels
Now comes the exciting part—shaping your bagels! Divide the dough into 6-8 equal pieces (depending on how large you want your bagels to be). Roll each piece into a ball, then poke a hole in the center with your finger and gently stretch to form a ring. Remember, the hole will expand a bit while baking, so don’t worry if it looks small initially.
Step 5: Prepare for Baking
Line a baking sheet with parchment paper. If you’re using toppings, now’s your chance! Brush each bagel lightly with water and sprinkle your desired toppings on top.
Step 6: Bake
Pop those beauties into your preheated oven and let them bake for 25-30 minutes or until they’re golden brown. You’ll want to rotate your baking sheet halfway through so they cook evenly—trust me; you won’t want to pull burnt bagels out of the oven!
Step 7: Cool and Enjoy!
Once they’re perfectly baked, remove them from the oven and let them cool on a wire rack. I recommend letting them cool slightly before diving in because the steam will help to develop that chewy texture we all adore.
Serving Suggestions
These Greek Yogurt Bagels are best enjoyed warm! Slice them open and add your favorite spreads—cream cheese, avocado, or even a dollop of homemade jam. For an extra special treat, try making a breakfast sandwich with eggs and your favorite cheese. The toppings are endless, but remember, the best additions are the ones you love most!
Recipe Variations
-
Herb-Infused Bagels: Add herbs like rosemary, thyme, or dill to the dough for a fragrant twist.
-
Sweet Touch: Mix in a tablespoon of honey or maple syrup for a hint of sweetness; perfect for a breakfast bagel.
-
Cheese Lover’s Delight: Incorporate shredded cheese into the dough or sprinkle it on top before baking for a cheesy crust.
-
Spicy Bagels: Add a pinch of cayenne pepper or red pepper flakes to the dough for a kick of heat.
-
Seasonal Favorites: Incorporate seasonal ingredients like pumpkin puree in the fall or blueberries in the summer for a refreshing change.
Chef’s Notes
Making bagels has always been a joyous occasion for me; it’s not just about the food but also the memories. Since my grandmother’s days, I’ve played with this recipe, tweaking it for simplicity while keeping that nostalgic warmth. You can even make a batch ahead of time and freeze them. Seriously! Just thaw them and pop them in the toaster when you’re ready to indulge. I like to make double batches so I always have some on hand—trust, it saves me from those last-minute breakfast dashes!
FAQs and Troubleshooting
Q: My bagels came out too dense. What happened?
A: If your bagels turned out dense, it might be because the dough was over-kneaded or the flour was packed tightly. Remember to knead gently!
Q: Can I make the dough ahead of time?
A: Absolutely! You can prepare the dough, shape the bagels, and store them in the fridge for a few hours or overnight before baking. Just let them come to room temperature for about 30 minutes before popping them in the oven.
Q: What if I don’t have Greek yogurt?
A: No worries! You can substitute with regular yogurt, but the texture might be a little different. Alternatively, you can try sour cream for a similar tanginess.
Q: How do I store leftover bagels?
A: Keep any leftover bagels in an airtight container at room temperature for up to three days, or wrap them in plastic wrap and freeze for up to two months.
Nutritional Info (Optional)
While I usually focus more on flavor than numbers, it’s good to be aware! Each bagel roughly contains:
- Calories: ~180
- Protein: 8g
- Carbohydrates: 32g
- Fat: 1g
Feel free to adjust based on the toppings you choose!
So there you have it, my friend! A delicious, guilt-free recipe for Greek Yogurt Bagels that’s bound to spark joy in your kitchen and tantalize your taste buds. Happy baking, and may your kitchen be forever filled with warmth, love, and deliciousness!
Print
Greek Yogurt Bagels
- Total Time: 40 minutes
- Yield: 6-8 servings 1x
- Diet: Vegetarian
Description
Delightfully fluffy bagels made with Greek yogurt, perfect for breakfast or anytime snacking.
Ingredients
- 2 cups all-purpose flour
- 1 cup Greek yogurt
- 1 tablespoon baking powder
- 1 teaspoon salt
- Optional toppings (such as sesame seeds, everything bagel seasoning, or poppy seeds)
Instructions
- Preheat the oven to 375°F (190°C).
- Combine the flour, baking powder, and salt in one bowl; in another bowl, add the Greek yogurt. Gradually mix dry ingredients into the yogurt until shaggy dough forms.
- Knead the dough on a floured surface for 2-3 minutes until smooth.
- Shape the dough into 6-8 balls, poke holes in the center, and stretch to form bagel shapes.
- Prepare a baking sheet with parchment paper, brush bagels with water, and add toppings if desired.
- Bake for 25-30 minutes until golden brown, rotating the sheet halfway.
- Cool on a wire rack before enjoying!
Notes
These bagels are best enjoyed warm with your favorite spreads. Feel free to add herbs or cheese to the dough for variations.
- Prep Time: 10 minutes
- Cook Time: 30 minutes
- Category: Breakfast
- Method: Baking
- Cuisine: American
Nutrition
- Serving Size: 1 bagel
- Calories: 180
- Sugar: 1g
- Sodium: 250mg
- Fat: 1g
- Saturated Fat: 0g
- Unsaturated Fat: 1g
- Trans Fat: 0g
- Carbohydrates: 32g
- Fiber: 2g
- Protein: 8g
- Cholesterol: 0mg
Keywords: bagels, Greek yogurt, breakfast, homemade, easy recipe
BLT Chicken Salad Meal Prep
The BLT Chicken Salad That’ll Make You Actually *Excited* for Meal Prep
Hey there, foodie friend! Let’s talk about lunch. You know, that meal we all swear we’ll plan ahead for… until 11:30 AM hits, and we’re eyeing the vending machine like it’s a lifeline. Been there, burned that toast. But what if I told you there’s a meal prep recipe so fresh, so crunchy, and so downright delicious that it’ll make you want to open your fridge? Enter: my BLT Chicken Salad. It’s like your favorite bacon-lettuce-tomato sandwich decided to hit the gym, get shredded (literally), and become the protein-packed hero of your week.
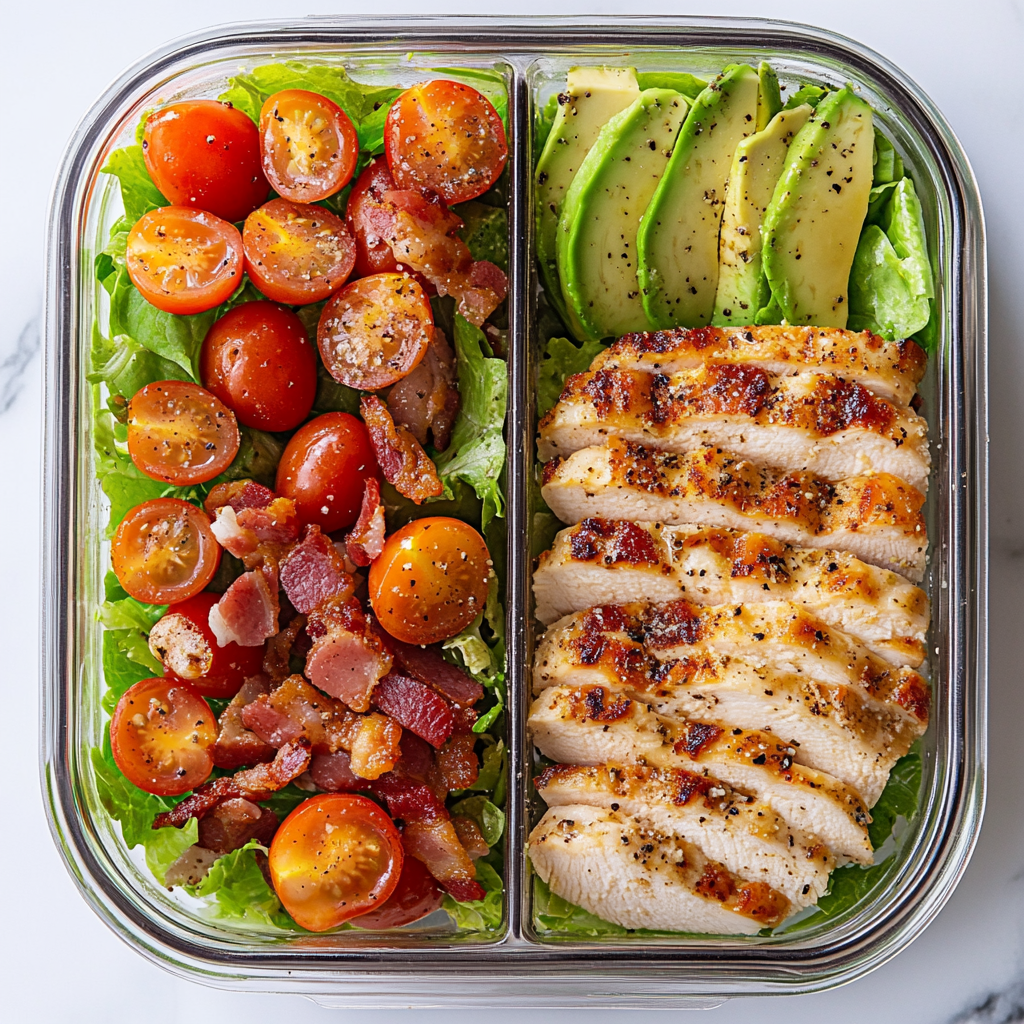
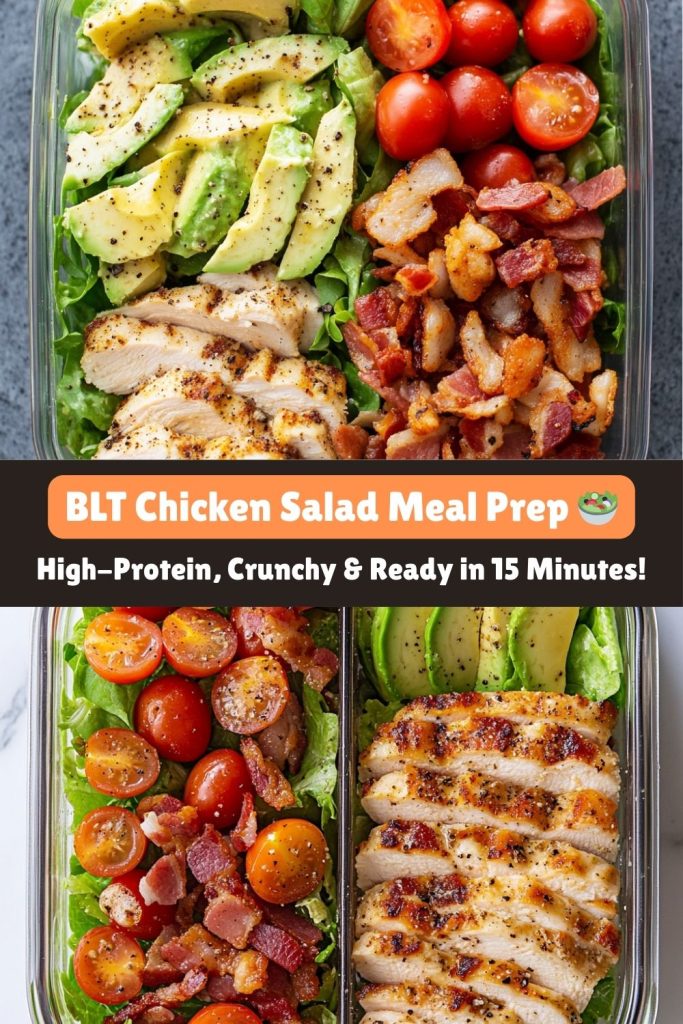
Picture this: crisp romaine, juicy chicken, smoky bacon, and bursts of sweet cherry tomatoes, all tied together with a tangy yogurt-Dijon dressing. And the best part? It takes 15 minutes to throw together. No cooking. No fuss. Just you, a few simple ingredients, and four days of lunches that taste like victory. I’ve been making this for years—for busy restaurant shifts, road trips, even picnics—and it never lets me down. Let’s dive in!
Why This Recipe Feels Like a Hug from My 10-Year-Old Self
Okay, story time. When I was a kid, my grandma would make me BLTs after school. She’d fry the bacon extra crispy, pile it on sourdough with garden tomatoes, and cut the sandwich into four perfect triangles. I remember sitting at the kitchen counter, legs swinging, sun pouring through the windows, and thinking that no food in the world could ever taste better. That combination of crunchy, savory, juicy, and creamy? Pure magic.
Fast-forward to my first kitchen job: 14-hour days, surviving on coffee and whatever I could scarf down between orders. One night, I looked at the leftover roast chicken and bacon bits and thought, “What if I turned Grandma’s sandwich into a salad?”
I threw it together with mayo (hey, it was the 2000s), dumped it in a takeout container, and… it changed my life. Suddenly, lunch wasn’t a chore—it was something I craved. Over the years, I’ve tweaked it (Greek yogurt instead of mayo, avocado because duh), but the soul of that recipe? Still the same. It’s my edible security blanket. And now? It’s yours too.
What You’ll Need to Make Your BLT Chicken Salad Meal Prep
-
2 cups cooked chicken breast – Rotisserie chicken is your BFF here. Short on time? Canned chicken (drained) works in a pinch! Got leftover grilled chicken? Even better—it adds a smoky note.
-
4 cups chopped romaine – Romaine stays crisp for days. Swap with kale (massage it first!) or butter lettuce for a softer vibe. Baby spinach is another solid stand-in if that’s what you’ve got.
-
1 cup cherry tomatoes – Halve ’em for no-slip bites. Grape tomatoes or diced heirlooms work too! The juicier, the better—these are your salad’s “pop factor.”
-
4 strips cooked bacon – Turkey bacon for a lighter twist, or coconut bacon for veg friends. Pro tip: Bake bacon on Sundays—it’s less mess and way more batch-prep friendly.
-
1 avocado (optional) – Add it fresh before eating to prevent browning. No avocado? A handful of almonds or sunflower seeds adds crunch + healthy fats.
-
¼ cup plain Greek yogurt – Mayo works, but yogurt adds protein. Vegan? Use mashed avocado + lemon as dressing!
-
1 tsp Dijon mustard – This is the flavor booster. No Dijon? ½ tsp regular mustard + ½ tsp honey.
-
Lemon juice, salt, pepper – For bright, punchy flavor.
Extra Touches (Totally Optional but Fun!)
-
Croutons or crispy chickpeas for added crunch
-
A sprinkle of paprika or smoked salt
-
Fresh herbs like chives or parsley
-
A drizzle of balsamic glaze if you’re feeling fancy
Let’s Build Your Future Favorite Lunch (No Chef Skills Required!)
1. Make the Dressing
In a small bowl, whisk together your Greek yogurt, Dijon mustard, a big pinch of salt and pepper, and a generous squeeze of lemon juice. Taste it! Want it tangier? Add more lemon. Too thick? A splash of water or olive oil will thin it out perfectly. You want something creamy but pourable.
2. Prep Your Containers
Grab four airtight containers (I love mason jars for layering!). Divide the chopped romaine evenly among them—press it down a little to fit more greens in without bruising them. A compact salad is a crispy salad.
3. Layer Like a Pro
Start with the lettuce, then go in with the chicken (this keeps the lettuce from getting soggy), then add tomatoes, bacon, and avocado if using. The heavier stuff on top keeps everything from wilting too soon. Keep the dressing in a separate container until you’re ready to eat.
4. Store Smart
Refrigerate for up to 4 days. If you’re using avocado, I recommend slicing it fresh each morning and tucking it into your container with a splash of lemon juice. Or store it in a mini container with a tight seal.
Chef’s Hack: Place a dry paper towel on top of the greens before sealing the container—it absorbs moisture and keeps everything crisper, longer. Yes, that one simple trick actually works.
How to Serve Your BLT Chicken Salad Meal Prep
When lunchtime hits, either pour your dressing over the salad or give the whole container a vigorous shake (lid on, of course!) to mix things up. If your ingredients are layered in a mason jar, shaking distributes the dressing evenly and makes it feel like a fancy café salad.
Want to level up? Try these:
-
Wrap It: Spoon into a whole grain or spinach tortilla, wrap it tight, and enjoy on the go.
-
Pita Style: Stuff the salad into warm pita pockets with a little feta cheese for bonus flavor.
-
Open-Faced: Pile everything onto toasted sourdough for a BLT salad toast moment.
-
Power Bowl: Add a scoop of quinoa or couscous underneath for a full-on grain bowl.
-
Taco Tuesday: Toss in corn and black beans, and serve in taco shells or lettuce cups!
Add a side of pickles, a few strawberries, or a square of dark chocolate—because joy matters too.
Mix It Up! 5 Ways to Keep This Salad Exciting
Don’t let salad fatigue creep in. Here’s how to remix your BLT Chicken Salad all week long:
1. Southwest Style
Swap the bacon for black beans, throw in some corn, and use a lime-cilantro vinaigrette. Bonus: add diced red bell pepper or jalapeño for some heat.
2. Mediterranean Twist
Add crumbled feta, Kalamata olives, red onion, and a sprinkle of oregano. Dress with olive oil and lemon juice for that sunny, Greek-island vibe.
3. Low-Carb Crunch
Skip the lettuce entirely and serve everything in halved bell peppers or hollowed-out cucumbers. It’s like eating a sandwich… but a vegetable.
4. Vegetarian Vibes
Swap out the chicken for chickpeas or roasted tofu cubes. Season with smoked paprika or za’atar for extra depth.
5. Cheesy Comfort
Mix in shredded cheddar or crumbled goat cheese. It makes the salad extra satisfying and indulgent (without going overboard).
Notes from My Kitchen (and One Epic Avocado Fail)
Real talk? I once made 10 of these salads ahead of a camping trip—each with chopped avocado already mixed in. I thought I was being efficient. By Day 3… those avocados were sad, brown, mushy puddles of disappointment. They looked (and smelled) like compost. Lesson learned.
Now I always slice my avocado fresh and either store it separately with a splash of lemon juice or swap it out for crunchy nuts and seeds. Avocado drama: avoided.
Pro Tip: If your cooked chicken is tasting a little bland, toss it with a pinch of garlic powder, smoked paprika, or a quick drizzle of vinaigrette before adding it to the salad. It’ll wake the whole thing up.
And if you’re prepping for kids? Let them build their own “BLT bowls” with ingredients in little compartments. They’ll have more fun—and maybe even eat the vegetables. Miracle!
FAQ: Your Questions, Answered!
Q: Can I freeze this salad?
A: Not as-is. Lettuce and fresh veggies don’t freeze well. But you can freeze cooked chicken and bacon. Just thaw them overnight in the fridge, then assemble the salad fresh.
Q: Help! My dressing is too runny.
A: If you’re using Greek yogurt, strain it through a cheesecloth or paper towel-lined sieve for 10–15 minutes. Still too thin? Add 1 tsp of mayo or more yogurt for body.
Q: How do I keep avocado from browning?
A: Store avocado slices in a separate container with a squeeze of lemon or lime juice. Or mist with avocado oil spray and press plastic wrap over the surface to minimize air exposure.
Q: Can I add grains to bulk it up?
A: Totally. Cooked quinoa, farro, or couscous are great. Just keep them in a separate layer or container so they don’t make the lettuce soggy.
Q: What if I hate yogurt?
A: Use a mix of mayo and lemon juice, or even ranch dressing if that’s more your jam. The goal is flavor + creaminess, however you get there.
Nutrition Per Serving (Because Knowledge is Power!)
-
Calories: ~320
-
Protein: 30g
-
Carbs: 10g
-
Fat: 18g
-
Fiber: 4g
Note: Values include avocado and turkey bacon. Using regular bacon adds ~30 calories per serving. Using mayo instead of Greek yogurt? Expect slightly higher fat and calories—but hey, balance!
And that’s it—your new favorite meal prep superstar, wrapped in bacon and bursting with crunchy freshness. Whether you’re packing it for a long day at work, tossing it together for a last-minute dinner, or flexing your meal-prep muscles for the week ahead, this BLT Chicken Salad Meal Prep’s got your back.
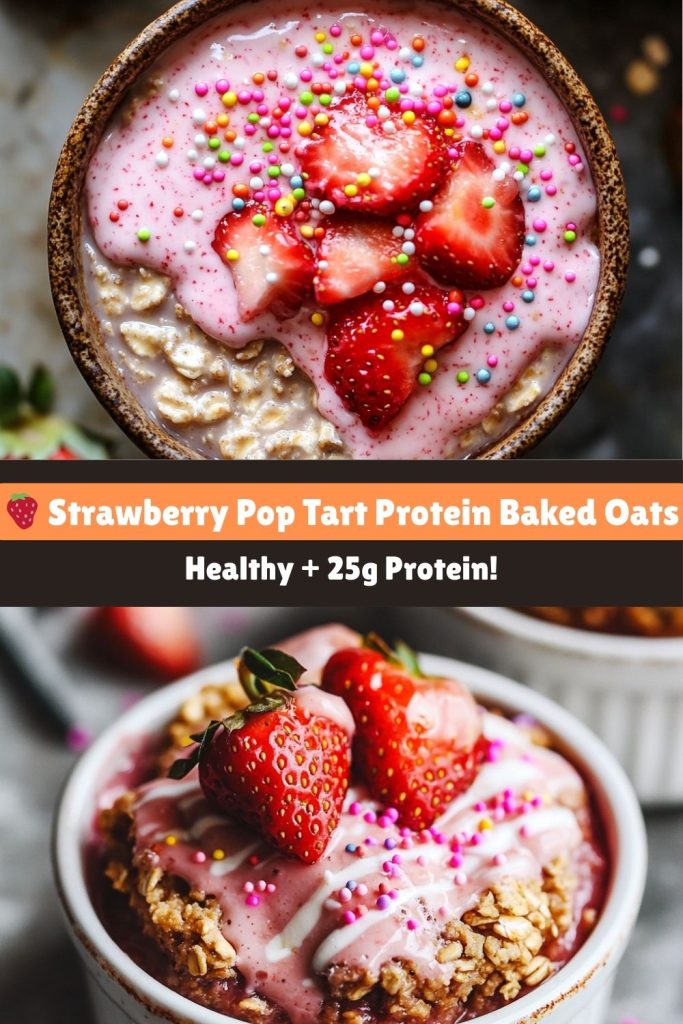
Strawberry Pop Tart Protein Baked Oats
Strawberry Pop Tart Protein Baked Oats: A Breakfast Hug from Your Childhood (But Healthier!)
Hey there, breakfast rebels! I’m ready to spill the oats on how to turn your favorite childhood treat into strawberry pop tart protein baked oats, a protein-packed powerhouse. Picture this: Saturday morning sunlight streaming through the curtains, the ding of the toaster, and that sweet, sticky smell of strawberry Pop-Tarts melting into your soul. Now imagine that exact vibe—but in a warm, gooey, guilt-free baked oat form that’ll keep you fueled ’til lunch.
I’ve always believed breakfast should taste like a celebration, not a chore. But let’s be real—most “healthy” swaps taste like cardboard confetti. That’s why I spent months tweaking this recipe, determined to nail that nostalgic Pop-Tart magic without the sugar crash. The result? A cozy, single-serving bake with 25g of protein, hidden jammy surprises, and a drizzle of yogurt “frosting” that’ll make you feel like a kid with a grown-up palate. Plus, it’s ready in 30 minutes flat. Cartoon marathons optional but highly encouraged.
My Pop-Tart Redemption Arc (And Why This Recipe Matters)
Confession time: I once smuggled a Pop-Tart into a 5-star kitchen. Yep, you read that right. Picture 22-year-old me, staging at a fancy NYC restaurant where everything was plated with tweezers, secretly nibbling my toaster pastry behind the walk-in while the sous chef ranted about the “nuanced crumb structure” of artisanal croissants. I loved the thrill of that sugary rebellion—but hated how it left me hangry by 10 AM.
That sugar rush always felt like a high-stakes gamble. One minute, you’re living the dream—gooey strawberry filling, neon icing, rainbow sprinkles dancing on your tongue. The next, you’re crashing harder than a toddler post-Halloween. It felt unfair that breakfast had to be a choice between indulgent and nutritious.
Years later, during a chaotic breakfast rush at my café, a regular joked: “Make this oatmeal taste like my kid’s Pop-Tart, and I’ll name my firstborn after you.” Challenge accepted. After 17 batches (and one jam volcano incident we don’t discuss), these strawberry pop tart protein baked oats became our top seller. Now, whenever I pull a golden ramekin from the oven, I grin thinking about that grumpy sous chef. Take that, croissant snob.
Your Grocery List (Plus Sneaky Chef Secrets)
Here’s everything you’ll need to make your own Strawberry Pop Tart Protein Baked Oats masterpiece. No need for a culinary degree—just a spoon, a blender, and a rebellious spirit.
Main Ingredients:
-
½ cup rolled oats – The MVP. Old-fashioned oats give the best texture—chewy, tender, and satisfying. If you’re in a time crunch, quick oats work too. (GF friends: Bob’s Red Mill gluten-free oats are a safe and tasty choice.)
-
1 scoop vanilla protein powder – Choose your weapon wisely. My personal favorite is PEScience Snickerdoodle for its rich flavor and blend texture. Plant-based option? Vega Sport Vanilla is a rockstar. Pro tip: If your protein powder is ultra-sweet, reduce the jam slightly to keep balance.
-
½ tsp baking powder – Tiny but mighty. This gives the oats their fluffy rise. Double-check your expiration date—this ingredient only performs when fresh.
-
½ cup milk of choice – I love oat milk for its creamy vibe, but almond, cow’s milk, or even (hear me out) coffee creamer can work in a pinch.
-
1 egg or flax egg – Flax egg = 1 tbsp ground flax + 3 tbsp water. Let it sit until thick and gel-like. Vegan-friendly and super satisfying.
-
1 tsp vanilla extract – The real deal. Splurge on high-quality vanilla—it’s the difference between “meh” and magical.
-
2 tbsp strawberry jam – Go classic with Smucker’s low-sugar, or elevate things by smashing fresh berries with a little chia seed for a quick homemade jam.
-
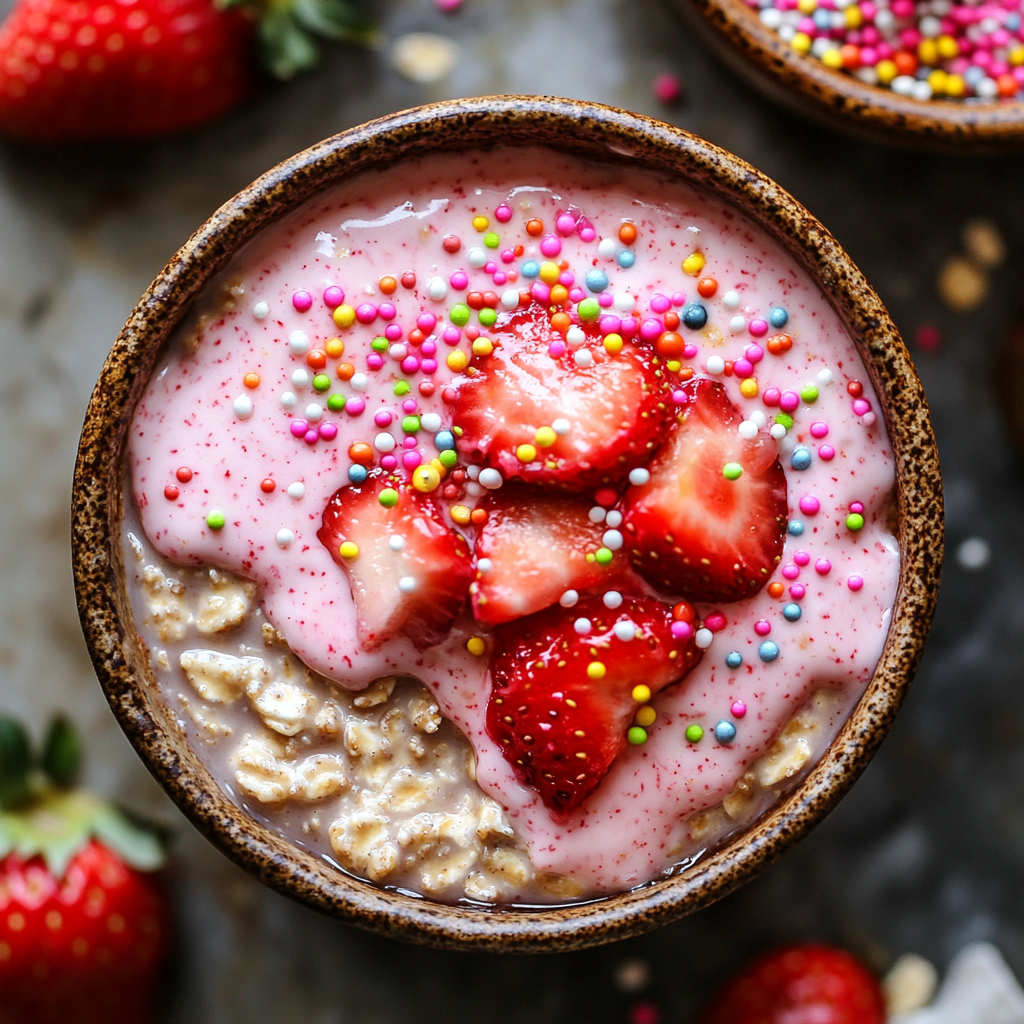
1 tbsp Greek yogurt + 1 tsp honey – This is our “frosting.” Creamy, sweet, and totally Instagrammable. Use coconut yogurt and agave for a dairy-free twist.
-
Sprinkles – Non-negotiable. I will die on this hill. Rainbow jimmies > all. Fight me.
Let’s Get Baking (Without Burning Down the Kitchen)
Don’t let the gourmet vibe fool you—this strawberry pop tart protein baked oats is one of the simplest, coziest things you can make in your oven. Here’s how to channel your inner breakfast magician:
1. Fire up the oven
Preheat to 350°F (175°C). Prep your ramekin like it’s about to host the Oscars. Grease that baby thoroughly with coconut oil spray or a swipe of butter. Nonstick is key—no one wants a jam-stuck disaster.
2. Blend it like Beckham
Toss oats, protein powder, baking powder, milk, egg, and vanilla into a blender. Hit “go” until it’s smoother than a TikTok dance move. If you don’t have a blender, no problem—use oat flour instead and whisk like your life depends on it.
3. Layer the love
Pour half the batter into your ramekin. Now, drop that jam in the center like you’re hiding buried treasure. Keep a little border around the edges to avoid jam explosions (trust me on this one).
4. Top it off
Gently pour in the rest of the batter and smooth the top with a spoon. Make sure all that jammy goodness is sealed inside. It’s like constructing a mini Pop-Tart fortress.
5. Bake the magic
Slide the ramekin into the oven and bake for 20–25 minutes. You’ll know it’s done when the top is springy and golden, like the perfect polite handshake. Don’t overbake! Dry oats = sad breakfast.
6. Cool your jets
Let it cool for 5 minutes while you mix your “frosting.” Combine Greek yogurt and honey until smooth. Drizzle like Jackson Pollock, sprinkle liberally, and snap a photo—this baby’s Instagram gold.
Plate It Pretty (Because We Eat With Our Eyes First)
Sure, you could eat your strawberry pop tart protein baked oats straight from the ramekin. But if you want to feel fancy, here’s the move: run a butter knife around the edges, flip it onto a plate, and admire your work. Add a spoonful of extra jam, a few fresh strawberry slices, maybe even a mint sprig if you’re feeling chef’s kiss extra. Serve with an iced latte in your sassiest mug—because you deserve that.
Mix It Up! (Because Boredom is the Enemy of Delicious)
Once you’ve mastered the basic version, the flavor options are endless. Here are a few remix ideas that have earned standing ovations in my kitchen:
- Brown Sugar Cinnamon Classic
Take a nostalgic trip back to those golden toaster pastries by swapping the strawberry jam for a swirl of cinnamon applesauce and a sprinkle of brown sugar. Want it extra cozy? Add a dash of nutmeg or a splash of maple syrup to the batter. Dust the top with cinnamon after baking for a warm, hug-in-a-bowl finish. - Chocolate Fudge Fantasy
Calling all chocoholics—this one’s your morning dessert (minus the regret). Stir 1 tablespoon of unsweetened cocoa powder into the batter and replace the jam with a center of dark chocolate chips and a spoonful of peanut butter. Want it richer? Add a drizzle of chocolate protein frosting post-bake. - Vegan Vibes
Going plant-based? Easy fix. Swap in a flax egg, use your favorite plant-based protein powder, and top with coconut yogurt instead of Greek. Add a splash of almond extract or some mashed ripe banana to enhance sweetness and moisture. Vegan never tasted so nostalgic. - PB&J Remix
An after-school snack turned breakfast dream. Add 1 tablespoon of powdered peanut butter (or the real stuff, if you’re bold) to the batter, then plop grape or raspberry jelly in the center. After baking, top with a drizzle of warmed peanut butter and a sprinkle of crushed roasted peanuts. Lunchbox feels, grown-up fuel. - Banana Nut Bliss
Mashed ripe banana in the batter brings natural sweetness and extra moisture. Add chopped walnuts or pecans for crunch, and swap the jam for banana slices or banana-chia jam. Top with a drizzle of maple yogurt and a pinch of cinnamon. Bonus points for a caramelized banana garnish.
Kitchen Confessions (Learn From My Mistakes)
Let’s keep it real—recipe development isn’t always glamorous.
The first time I tested this, I used a shallow ramekin. The jam bubbled over like Mount Vesuvius, smoked up my oven, and triggered my apartment’s fire alarm. My cat hasn’t looked at me the same since. Moral of the story? Use a deep enough dish, friend.
Also, this recipe doubles as muffins! Just divide the batter into 2–3 muffin tins and bake for 15 minutes. They’re adorable, portable, and perfect for meal prep. Call them “Pop-Tart Bites” and watch them disappear.
Burning Questions (Answered Before You Ask)
Q: Can I meal prep this?
A: Absolutely. Mix all the dry ingredients in a jar and add the wet stuff when you’re ready to bake. Or prep four ramekins on Sunday night—they reheat like a dream in the microwave (30–45 seconds does the trick).
Q: Why is my center still runny?
A: Oven temps vary, and jam can be tricky. If the center’s too gooey, bake for an extra 5 minutes. Still struggling? Freeze your jam dollop before adding—it helps it hold shape better.
Q: My oats turned out chalky. Help?!
A: It’s probably your protein powder. Whey isolate can get grainy. Try a blend or casein-based powder. Also, adding 1 tbsp mashed banana or a splash of applesauce helps with moisture.
Nutrition Facts (Because Knowledge is Power)
-
Calories: 320
-
Protein: 25g
-
Carbs: 30g
-
Fat: 10g
-
Fiber: 4g
-
Sugar: 8g
All that satisfaction in one warm, jam-filled, protein-boosted ramekin. It’s like a love letter to your inner child—written in oats.
Whether you’re fueling a morning workout, brunching with friends, or simply chasing that sweet pop-tart nostalgia, this strawberry pop tart protein baked oats recipe hits the mark every time. It’s proof that you can eat like a grown-up and still enjoy the flavors that made your childhood magical.


