
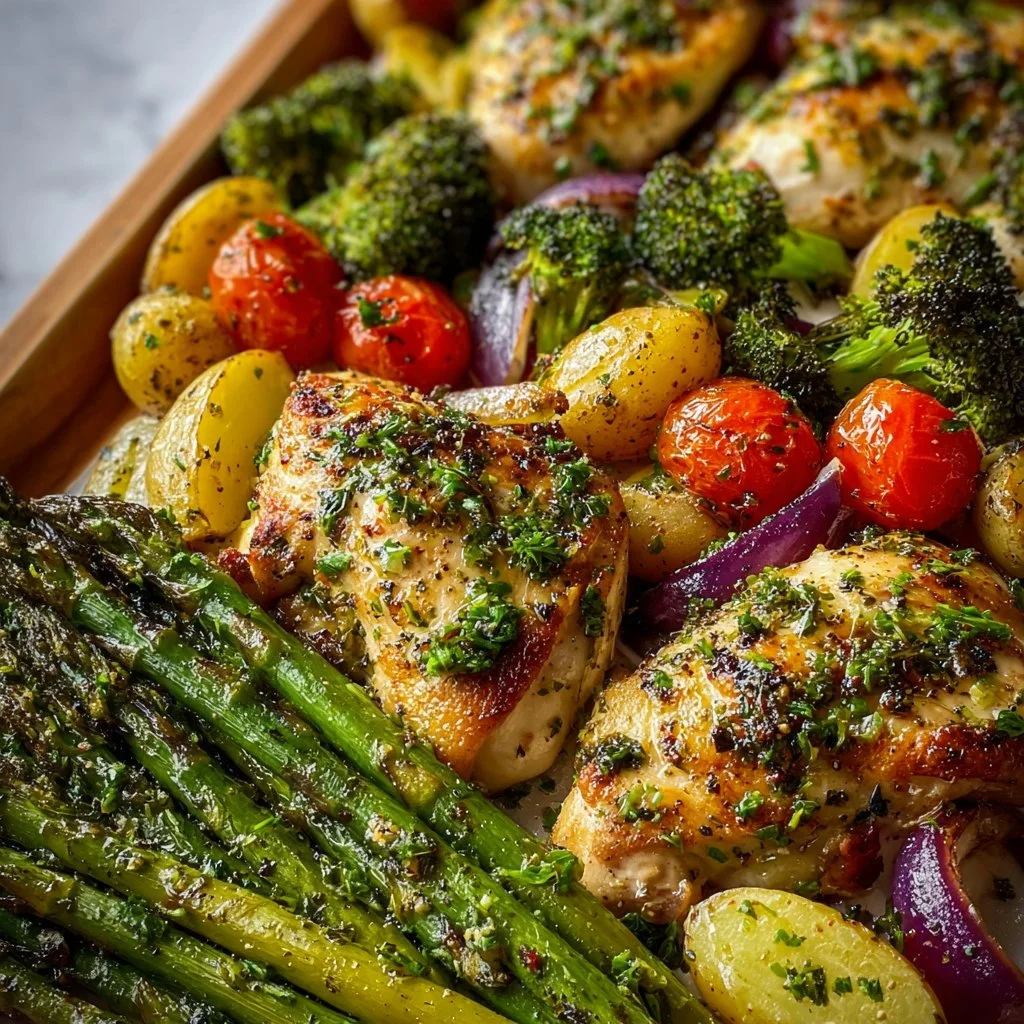
Sheet Pan Garlic Butter Chicken and Veggies
Sheet Pan Garlic Butter Chicken and Veggies: A Simple, Delicious Meal that Brings Joy to Your Table
Welcome back to my cozy kitchen! Today, I’m thrilled to share one of my all-time favorite recipes: Sheet Pan Garlic Butter Chicken and Veggies. If you’re anything like me, you love a meal that’s not only mouthwatering but also simple to prepare and clean up. And let me tell you, this dish checks all those boxes!
What’s not to love about succulent chicken thighs bathed in a rich garlic butter sauce, paired with vibrant seasonal veggies? This meal is perfect for those busy weeknights when you want something delicious without spending hours slaving over the stove. Plus, with everything cooked on a single sheet pan, you’ll have fewer dishes to wash—seriously, a win-win!
Around my kitchen table, food is not just sustenance; it’s love, laughter, and togetherness. I believe that cooking should be fun and approachable! This recipe encapsulates that spirit. You can customize it based on your family’s preferences or whatever you have on hand, making it as versatile as your imagination. So grab your apron and let’s dive into the delightful world of garlic butter chicken!
Personal Story
I still remember the first time I made this dish. It was a chilly autumn evening a few years ago, and I had invited a few friends over for dinner. I wanted to impress them without going too far out of my comfort zone. After scouring my kitchen and rummaging through my pantry, I stumbled upon chicken thighs, a couple of bags of colorful veggies, and a forgotten stick of butter in the fridge.
In that moment, I decided to whip up this Sheet Pan Garlic Butter Chicken. The intoxicating aroma of garlic wafting through my kitchen set the stage for a cozy night filled with warmth and laughter. I’ll never forget the smiles on my friends’ faces as they dug into their plates and savored the first bite. It wasn’t just a meal; it was a shared experience that brought us closer together. Ever since that night, this recipe has become a staple in my household, reminding me that the best memories are often created around the dinner table—no matter how simple the meal.
Ingredients
Here’s what you’ll need to whip up this flavorful dish:
For the Chicken:
- Chicken Thighs: Juicy and flavorful, chicken thighs are ideal for roasting because they stay moist and tender. You can substitute with chicken breasts or drumsticks if preferred, but keep in mind that cooking times may vary.
- Butter: A rich base that provides depth of flavor. For a healthier option, you can use olive oil or ghee for a dairy-free version.
For the Garlic Butter:
- Garlic: Fresh garlic is a must! It gives that delicious, aromatic flavor. If you’re in a pinch, you can use garlic powder, but the fresh stuff packs so much more punch!
- Parsley: Fresh parsley adds a pop of color and freshness. You could substitute with thyme or rosemary for a different herbal note.
For the Veggies:
- Carrots: Sweet and colorful, they add a nice crunch. You can also swap them for sweet potatoes or parsnips for a twist.
- Bell Peppers: These add vibrant color and a hint of sweetness. Feel free to use any color you prefer (red, green, or yellow!).
- Zucchini: Tender and mild, zucchini cooks quickly and absorbs flavors beautifully. You could replace this with asparagus or broccoli, depending on your preference.
Seasoning:
- Salt and Black Pepper: The essentials! Adjust to your taste.
- Paprika: Adds a warm, smoky flavor. You could also try smoked paprika for an extra kick.
Bonus:
- Lemon Juice (optional): A squeeze of lemon at the end brightens the dish and takes it to the next level.
Step-by-Step Instructions
Now that we’ve gathered all our ingredients, let’s get cooking! Follow these simple steps, and you’ll have a delicious dinner on the table in no time.
-
Preheat Your Oven:
Preheat your oven to 425°F (220°C). A hot oven is key for achieving that beautiful, crispy skin on the chicken and caramelization on the veggies. -
Prepare the Veggies:
Chop your veggies into bite-sized pieces for even cooking. This is also a great chance to involve your kids or friends in the prep! When everyone pitches in, it’s not just cooking; it becomes a fun activity. -
Make the Garlic Butter:
In a small saucepan over low heat, melt the butter. Add the minced garlic and cook for about 1-2 minutes until fragrant, making sure not to burn it. The smell will be heavenly! Once fragrant, remove from heat and mix in the chopped parsley, salt, pepper, and paprika. Set aside. -
Season the Chicken:
Pat the chicken thighs dry with paper towels—this helps achieve that lovely crispy skin. Season both sides generously with salt, pepper, and a sprinkle of paprika for that extra oomph. -
Assemble the Sheet Pan:
Line a large baking sheet with parchment paper for easy cleanup (trust me, you’ll thank me later!). Arrange the chicken thighs in the center of the sheet pan and scatter your prepared veggies around them. Drizzle everything with that melt-in-your-mouth garlic butter sauce. Use a brush or spoon to coat the chicken and veggies evenly. -
Roast:
Pop the sheet pan into the preheated oven and roast for 25-30 minutes, or until the chicken is cooked through and reaches an internal temperature of 165°F (75°C) and the veggies are tender and slightly caramelized. You might want to flip the veggies halfway through for even roasting, but it’s not strictly necessary! -
Finishing Touches:
Once cooked, remove the sheet pan from the oven and give everything a good toss. For a burst of freshness, squeeze a bit of lemon juice over the top before serving. Isn’t it amazing how such a simple touch can elevate a dish?
Serving Suggestions
When it comes to serving, the beauty of this dish lies in its rustic, hearty presentation. You can serve it family-style right from the sheet pan—let everyone dig in! For a more refined plate, you could arrange the chicken and veggies on a platter, garnish with fresh parsley, and maybe even add a lemon wedge for that extra touch of elegance. Pair it with some crusty bread or a simple green salad to round out the meal.
Recipe Variations
Feeling adventurous? Here are a few creative twists to make this dish even more exciting:
- Herb Variations: Swap out the fresh parsley for fresh dill or basil for a fresh twist.
- Add Heat: If you love spice, consider adding red pepper flakes to the garlic butter for some heat.
- Different Proteins: Switch the chicken for shrimp or fish. They will cook faster, so keep an eye on them!
- Veggie Medley: Use whatever veggies you have on hand—broccoli, cauliflower, or Brussels sprouts work wonderfully, too!
- Citrus Kick: Try adding orange zest and juice for a bright, citrusy flavor.
Chef’s Notes
One of the things I love most about this recipe is its adaptability. I’ve made it countless times, and every time it comes out delicious—sometimes by design, and other times, purely by accident! One time, I completely forgot to add the garlic butter. Can you believe it? I was in a frenzy trying to get dinner ready and it slipped my mind. Surprisingly, my friends loved the plain roasted chicken and veggies so much that they suggested I offer it as a “light option” in the future. Cooking, after all, is as much about experimenting and having fun as it is about following a recipe!
FAQs and Troubleshooting
1. My chicken skin didn’t crisp up! What happened?
Make sure your oven is fully preheated before putting in the chicken. Pat the chicken dry to remove excess moisture and ensure that the skin crisps up nicely.
2. Can I use frozen chicken?
While you can use frozen chicken, it’s best to thaw it first to ensure even cooking. Planning ahead will yield the best results!
3. What if my veggies are cooking too quickly?
If your veggies are cooking faster than the chicken, you can remove them from the oven earlier and just let the chicken finish roasting.
4. How do I store leftovers?
Store any leftovers in an airtight container in the refrigerator for up to 3 days. Reheat them in the oven for the best results or in the microwave for a quick meal.
Nutritional Info
(If you would like, I can provide an estimated nutritional breakdown, but it varies based on your specific ingredients and serving sizes!)
And there you have it! A delightful and approachable recipe for Sheet Pan Garlic Butter Chicken and Veggies that will surely bring joy to your table. Remember, cooking is not just about the food—it’s about the moments you create and the love you share. Happy cooking, friends! ✨
Print
Sheet Pan Garlic Butter Chicken and Veggies
- Total Time: 45 minutes
- Yield: 4 servings 1x
- Diet: Gluten-Free
Description
A simple and delicious meal featuring succulent chicken thighs bathed in garlic butter sauce, paired with vibrant seasonal vegetables.
Ingredients
- 1.5 lbs Chicken Thighs
- 1 stick Butter
- 4 cloves Garlic, minced
- 1/4 cup Fresh Parsley, chopped
- 2 Carrots, chopped
- 2 Bell Peppers, chopped
- 1 Zucchini, chopped
- 1 tsp Salt
- 1 tsp Black Pepper
- 1 tsp Paprika
- 1 tbsp Lemon Juice (optional)
Instructions
- Preheat your oven to 425°F (220°C).
- Chop your veggies into bite-sized pieces for even cooking.
- In a small saucepan over low heat, melt the butter. Add the minced garlic and cook for about 1-2 minutes until fragrant.
- Pat the chicken thighs dry with paper towels and season both sides with salt, pepper, and paprika.
- Line a large baking sheet with parchment paper and arrange the chicken thighs in the center, scattering the veggies around them.
- Drizzle everything with the garlic butter sauce and coat evenly.
- Pop the sheet pan into the oven and roast for 25-30 minutes, until the chicken is cooked through and the veggies are tender.
- Once cooked, remove from the oven and toss everything. Squeeze lemon juice over before serving.
Notes
You can customize the recipe with your favorite vegetables or protein. Always ensure to pat the chicken dry for crispier skin.
- Prep Time: 15 minutes
- Cook Time: 30 minutes
- Category: Main Course
- Method: Baking
- Cuisine: American
Nutrition
- Serving Size: 1 serving
- Calories: 450
- Sugar: 6g
- Sodium: 420mg
- Fat: 22g
- Saturated Fat: 10g
- Unsaturated Fat: 10g
- Trans Fat: 0g
- Carbohydrates: 30g
- Fiber: 4g
- Protein: 25g
- Cholesterol: 80mg
Keywords: garlic butter chicken, sheet pan dinner, easy chicken recipe, one pan meal, quick dinner

Low Carb Cheesy Garlic Chicken Wraps
Low Carb Cheesy Garlic Chicken Wraps: A Hearty, Flavorful Delight
Hey there, food lovers! Welcome back to my cozy kitchen — where the spices are always at hand, and the oven is my trusted partner in culinary crime. Today, I’m thrilled to share a recipe that is near and dear to my heart: Low Carb Cheesy Garlic Chicken Wraps. If you’ve ever found yourself craving something delicious yet guilt-free, this dish is for you! These wraps are not just low on carbs; they’re bursting with flavors that will make your taste buds sing.
Now, I know what you’re thinking: low carb often means sacrificing flavor, but that is so not the case here! Picture tender chicken enveloped in ooey-gooey cheese, harmoniously blended with aromatic garlic and crispy vegetables, all wrapped up in a delightful low-carb tortilla. It’s comfort food at its finest, and trust me, your family and friends won’t even realize they’re indulging in a healthier option.
Cooking has always been a passion for me, and I find that sharing recipes sparks joy, brings people together, and creates unforgettable memories around the table. Whether you’re a seasoned home cook or just stepping into the kitchen, I promise that this recipe is easy enough for everyone to tackle, and it’ll make you feel like a culinary superstar!
So grab your apron, clear some space on your counter, and let’s dive into the mouthwatering world of cheesy, garlicky goodness. Here’s everything you need to know!
Personal Story
Growing up, weekends in my family were all about cooking together. My mom would whip up delicious dinners, and my siblings and I would hustle around, trying hard to help. One unforgettable Saturday, we decided to make a family favorite: cheesy chicken wraps. The kitchen was filled with laughter and the savory scent of garlic sautéing in olive oil, and I remember my mom saying that the secret ingredient was love. It’s funny how those moments stick with you, isn’t it?
Fast forward a few years, and the family dinners have become family traditions filled with recipes that keep evolving. When I first started experimenting with low carb recipes, I thought of those wraps. Instead of using traditional wraps, I substituted them with low-carb tortillas, creating a dish that honored my childhood but also aligned with a healthier lifestyle. The smiles around the table remained the same, and that’s what fuels my passion—bringing joy and comfort to others through food.
Ingredients
Here’s what you’ll need to whip up these delightful Low Carb Cheesy Garlic Chicken Wraps:
-
2 cups cooked chicken, shredded or diced
- Tip: You can use rotisserie chicken for convenience or cook your chicken breast with a bit of seasoning for added flavor.
-
1 cup shredded cheese (cheddar or mozzarella)
- Substitution: Feel free to mix and match cheeses; pepper jack adds a nice spicy kick!
-
3 cloves garlic, minced
- Insight: Fresh minced garlic adds a wonderful aroma and flavor that garlic powder just can’t match.
-
1 tablespoon olive oil
- Tip: Use extra virgin olive oil for a more robust flavor.
-
1 bell pepper, sliced (any color)
- Substitution: Zucchini or mushrooms can be a great low-carb alternative if you want something different.
-
1 small onion, sliced
- Chef’s Insight: Caramelizing the onion slightly in the olive oil before adding the garlic gives an amazing depth of flavor.
-
Low-carb tortillas (2-4, depending on how hungry you are!)
- Tip: Check labels for the carb count — be sure to choose one that’s made with almond or coconut flour.
-
Salt and pepper to taste
- Quick Note: Always season your dishes; it’s the difference between bland and oh-my-goodness flavor explosion!
-
Optional: Fresh herbs (basil or cilantro) for garnish
- Serving Tip: Fresh herbs brighten up the dish and add visual appeal, making it even more irresistible.
Step-by-Step Instructions
Now that we’ve gathered our ingredients, let’s get cooking! Follow these steps for a cozy, delicious wrap experience:
-
Heat Things Up!
In a large skillet, heat the olive oil over medium heat. Once shimmering, add the sliced onions. Sauté them for about 3–4 minutes until they’re translucent. The aroma? Simply divine. -
Garlic Goodness
Add the minced garlic to the pan with the onions. Sauté for an additional minute until fragrant. Keep your eyes on it; burnt garlic can turn bitter quickly! -
Veggie Time
Toss in the bell peppers and cook for another 3-4 minutes until they soften yet retain a bit of crunch. This balance of textures is key to your wraps! -
Chicken Love
Now, add your shredded chicken to the skillet. Stir everything together and let it heat through, about 2-3 minutes. Season with salt and pepper to taste. -
Cheesy Delight
Sprinkle the shredded cheese over the chicken mixture in the skillet, allowing it to melt slowly. Mix gently to incorporate all those gooey cheese pockets. Oh man, you’re going to want to jump right in! -
Wrap It Up
Lay your low-carb tortilla flat and spoon a generous portion of the cheesy chicken mixture in the center. Fold it over, tucking in the sides, and rolling it up tight. Repeat with the remaining tortillas. -
Final Toast
Wipe down your skillet and return it to the heat, adding a little more olive oil if needed. Place each wrap seam-side down in the skillet, pressing lightly to ensure it sticks together. Cook for 2-3 minutes on each side until golden brown and crispy. -
Slice and Serve
Once they’re perfectly toasted, remove from the skillet and let them cool slightly before slicing in half. This is the moment you’ve been waiting for!
Serving Suggestions
Now that your Low Carb Cheesy Garlic Chicken Wraps are ready, let’s talk presentation! Serve them with a side of fresh salad or slow-simmered gazpacho for a refreshing complement. Drizzle a little extra melted cheese or a dollop of sour cream on the side for dipping. Trust me; the cheesy goodness will take this wrap from good to incredible. Garnish with freshly chopped herbs to add that vibrant pop and impress your guests!
Recipe Variations
Why stop at one delicious version? Here are some fun twists you can try:
- Buffalo Chicken Wraps: Mix in some buffalo sauce for a spicy kick before adding cheese.
- Veggie-Loaded Wraps: Toss in some spinach, zucchini, or even artichokes for a heartier veggie version.
- Italian Flare: Add diced sun-dried tomatoes and Italian seasoning for a twist that screams Mediterranean.
- Creamy Avocado: Spread a layer of mashed avocado on the tortilla before adding the chicken mixture for extra creaminess.
- Tex-Mex Fun: Include taco seasoning and black beans for a south-of-the-border flair.
Chef’s Notes
Cooking is all about experimenting and loving the journey! I initially came up with this recipe as a way to recreate my childhood wraps with a healthier twist. I remember the first time I made them with low-carb tortillas — I was nervous but so eager to impress my family. Watching their faces light up as they bit into those cheesy, flavorful wraps reminded me that cooking is about connection. Plus, I’ve had many laughable kitchen fails along the way — like the time I mistook cinnamon for garlic. Not a great combo! But that’s what makes cooking fun and exciting, right?
FAQs and Troubleshooting
-
Why are my tortillas falling apart?
- Make sure you’re not overstuffing them! And a quick warm-up in the microwave (10-15 seconds) can make them more pliable.
-
Can I freeze these wraps?
- Absolutely! Just wrap them individually in foil and keep in the freezer. When you’re ready to eat, pop them in the oven until heated through.
-
How can I make it dairy-free?
- Use dairy-free cheese alternatives or nutritional yeast for a cheesy flavor without the dairy.
-
What can I do if my chicken turns out dry?
- Try using thighs instead of breasts, as they’re generally juicier. Also, cook them gently and avoid overcooking!
Nutritional Info
(Approximate per wrap)
- Calories: 350
- Protein: 30g
- Fat: 20g
- Carbohydrates: 7g
- Fiber: 4g
And there you have it, my friends! A scrumptious, comforting, and oh-so-delicious recipe that’s bound to impress. Cook from the heart, savor the process, and enjoy every bite! Remember, you’re not just making a meal; you’re creating memories. Happy cooking!
Print
Low Carb Cheesy Garlic Chicken Wraps
- Total Time: 30 minutes
- Yield: 4 servings 1x
- Diet: Low Carb
Description
These Low Carb Cheesy Garlic Chicken Wraps are bursting with flavor, featuring tender chicken, gooey cheese, and aromatic garlic wrapped in a low-carb tortilla.
Ingredients
- 2 cups cooked chicken, shredded or diced
- 1 cup shredded cheese (cheddar or mozzarella)
- 3 cloves garlic, minced
- 1 tablespoon olive oil
- 1 bell pepper, sliced (any color)
- 1 small onion, sliced
- Low-carb tortillas (2-4, depending on how hungry you are!)
- Salt and pepper to taste
- Optional: Fresh herbs (basil or cilantro) for garnish
Instructions
- Heat the olive oil in a large skillet over medium heat. Add the sliced onions and sauté for about 3–4 minutes until they’re translucent.
- Add the minced garlic to the pan and sauté for an additional minute until fragrant.
- Toss in the bell peppers and cook for another 3-4 minutes until they soften yet retain a bit of crunch.
- Add the shredded chicken to the skillet, stir everything together and let it heat through for about 2-3 minutes. Season with salt and pepper to taste.
- Sprinkle the shredded cheese over the chicken mixture, allowing it to melt slowly, and mix gently.
- Lay a low-carb tortilla flat, spoon a generous portion of the cheesy chicken mixture in the center, and fold it over tightly.
- Return the skillet to heat, add more olive oil if needed, and place each wrap seam-side down. Cook for 2-3 minutes on each side until golden brown and crispy.
- Remove the wraps from the skillet, let them cool slightly, and then slice in half.
Notes
Serve with a side of fresh salad or slow-simmered gazpacho. Drizzle melted cheese or a dollop of sour cream for dipping.
- Prep Time: 15 minutes
- Cook Time: 15 minutes
- Category: Main Course
- Method: Skillet
- Cuisine: American
Nutrition
- Serving Size: 1 wrap
- Calories: 350
- Sugar: 2g
- Sodium: 400mg
- Fat: 20g
- Saturated Fat: 8g
- Unsaturated Fat: 12g
- Trans Fat: 0g
- Carbohydrates: 7g
- Fiber: 4g
- Protein: 30g
- Cholesterol: 70mg
Keywords: low carb, chicken wraps, cheesy garlic, healthy recipe, quick meal
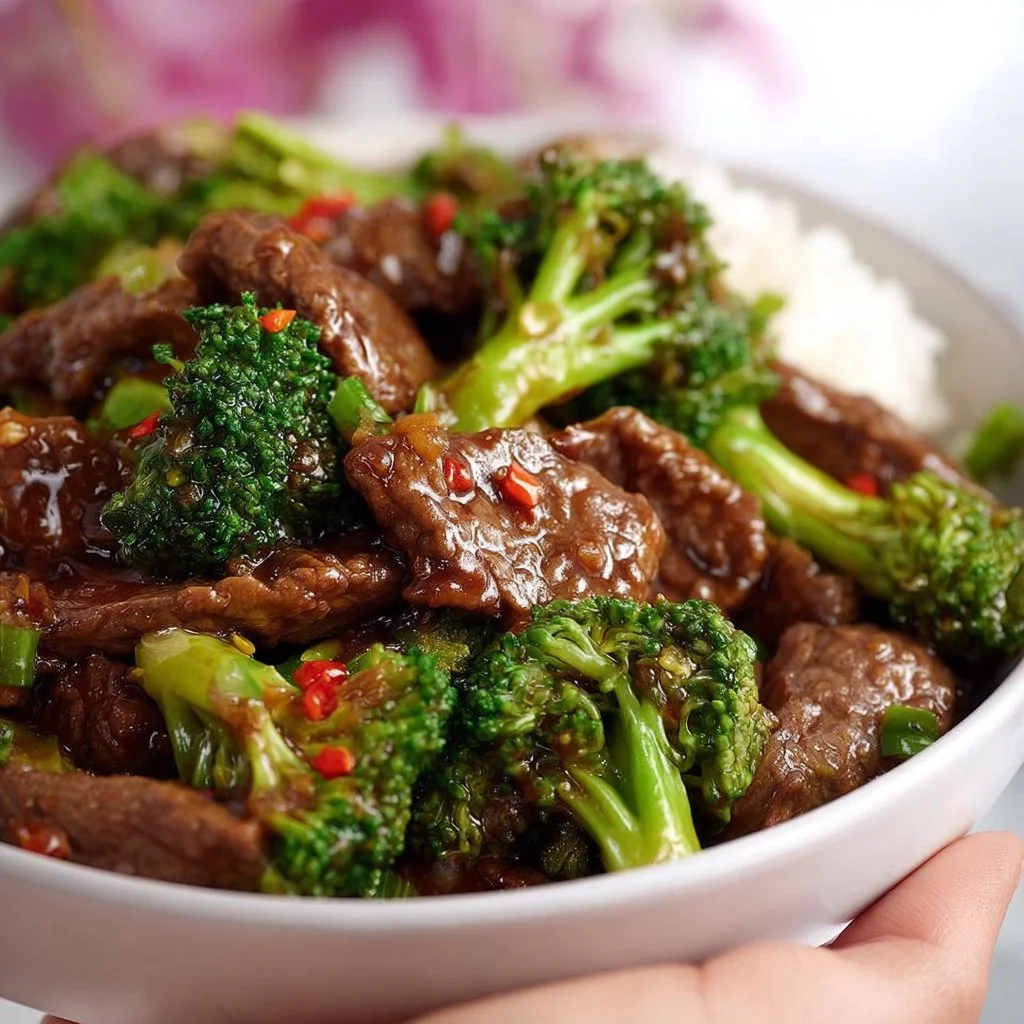
Beef and Broccoli Stir-Fry
Beef and Broccoli Stir-Fry: A Cozy Culinary Adventure
Welcome, fellow kitchen adventurers! Today, I’m absolutely thrilled to take you on a delicious journey as we dive into the world of Beef and Broccoli Stir-Fry. It’s not just any dish; this one holds a special place in my heart, brimming with flavor and nostalgia. As we whisk together tender beef, vibrant broccoli, and a sauce so irresistible, you’ll feel like a culinary rockstar in no time!
Growing up, stir-fry was one of the go-to meals in our household, especially on busy weeknights. My mom, a queen in her own right, always managed to whip up something quick yet satisfying, often relying on fresh vegetables and whatever protein we had on hand. The sizzle of ingredients hitting a hot pan was like music to my ears, the enticing aroma wrapping us in warmth and comfort. It was a dish that sparked family conversations, filled our bellies, and created memories that still bring a smile to my face.
Now, as a passionate home cook, I realize the beauty of this quick-cooking technique. It’s not just about slapping ingredients together; it’s an art form! Stir-fry celebrates fresh ingredients, bold flavors, and, most importantly, the joy of gathering around the table with your loved ones. Whether you’re cooking for two or hosting a casual get-together, this Beef and Broccoli Stir-Fry is bound to impress.
So, grab your apron, put on some upbeat music, and let’s get started! With a little guidance, you’ll become the stir-fry wizard you were always meant to be. Ready? Let’s do this!
Personal Story
One of my fondest memories of making stir-fries was the first time I tried my hand at cooking solo. I was just fourteen, excited to impress my family with my newfound culinary skills. Armed with a recipe I found in a dusty old cookbook, I decided to tackle Beef and Broccoli. I’ll never forget my dad’s face when he walked in on me using the biggest chopping board I could find, surrounded by broccoli florets and thinly sliced beef that looked more like confetti than dinner.
After fumbling a bit, the stir-fry came together beautifully. The sautéed beef shimmered in the vibrant dark sauce, and the broccoli retained its crunch. What made that dinner even more special was when my mom enthusiastically declared it the best she had ever tasted (though I’m pretty sure she just wanted to spare my teenage feelings). From that day on, stir-fry became my go-to meal for family gatherings, and I’ll always cherish the smiles and compliments that filled our home as we dug into my culinary creation.
Ingredients
Here’s what you’ll need to recreate this delightful dish, along with some handy chef insights and substitution tips:
-
1 lb of beef sirloin
Great for stir-fry due to its tenderness. You can substitute with flank steak or chicken breast if you prefer. -
4 cups of fresh broccoli florets
Packed with nutrients and vibrant color. If broccoli isn’t your thing, you can easily swap in bell peppers, snap peas, or even bok choy. -
3 cloves of garlic, minced
An aromatic powerhouse! Fresh garlic is best, but garlic powder can be a quick substitute if you’re in a pinch. -
1 tablespoon of fresh ginger, minced
Adds a lovely warmth and spice. Ground ginger works well if fresh isn’t available, just lessen the quantity a bit. -
1/4 cup of soy sauce
The base of our flavor profile! Use low-sodium soy sauce if you’re watching your salt intake, or tamari for a gluten-free version. -
2 tablespoons of oyster sauce
This will take your dish to the next level of umami flavor. For a vegetarian option, try mushroom sauce instead. -
1 tablespoon of cornstarch
This helps to thicken our sauce for the perfect glossy finish. You can use arrowroot powder as a gluten-free alternative. -
2 tablespoons of vegetable oil
Ideal for high heat stir-frying. You could also use sesame oil for a distinct flavor, but use less since it’s quite potent! -
Cooked rice or noodles (for serving)
Perfect for soaking up all that delicious sauce! Go for brown rice or whole grain noodles for a healthier twist.
Step-by-Step Instructions
Let’s get cooking! Here’s your detailed guide to crafting the perfect Beef and Broccoli Stir-Fry:
-
Prep Your Ingredients:
- Start by slicing the beef into thin strips against the grain. This ensures that each bite is as tender as can be.
- Chop your broccoli into bite-sized florets and mince the garlic and ginger. Pro tip: If you’re pressed for time, buy pre-cut broccoli from the grocery store.
-
Make the Sauce:
- In a small bowl, mix together the soy sauce, oyster sauce, minced garlic, ginger, and cornstarch.
- Stir until everything is combined and the cornstarch is dissolved. Chef hack: This can be made ahead of time and stored in the fridge for up to a week!
-
Marinate the Beef:
- Toss the beef strips with half of the sauce mixture and let it sit for about 15-20 minutes. This will infuse flavors while tenderizing the meat. If you’re in a rush, even a 5-minute marinade will help!
-
Heat the Pan:
- Add 1 tablespoon of vegetable oil to a large skillet or wok and heat over medium-high heat. Make sure the pan is hot before you add anything to achieve that perfect sizzle.
-
Cook the Beef:
- Once the oil is shimmering, add the marinated beef in a single layer. Don’t overcrowd the pan; you want that nice caramelization! Cook for about 2-3 minutes until browned, stirring occasionally.
- When the beef is just about cooked through, remove it from the pan and set aside. Remember, the beef will continue cooking a bit while resting.
-
Stir-Fry the Broccoli:
- In the same pan, add another tablespoon of oil if needed. Toss in the broccoli and stir-fry for about 3-4 minutes until bright green and tender-crisp. The idea is to keep that vibrant color and crunch!
-
Combine Beef and Broccoli:
- Return the beef to the pan, add the remaining sauce, and stir everything together. Cook for an additional 1-2 minutes, allowing the sauce to thicken and coat every morsel beautifully. You know it’s ready when you see that lovely glossy finish!
-
Serve Immediately:
- Remove from heat and serve hot over a bed of rice or noodles. I like to garnish mine with sesame seeds for a nice crunch and some green onions for freshness!
Serving Suggestions
Plating is an art form in itself! For a beautiful presentation, lay a generous scoop of rice or noodles on your plate, and then top with the sizzling beef and broccoli mixture. Drizzle any extra sauce over the top, sprinkle with sesame seeds and thinly sliced green onions, and voilà! You’ve transformed a simple diner into a vibrant, restaurant-worthy dish.
Recipe Variations
Feel free to get creative with this Beef and Broccoli Stir-Fry! Here are a few ideas to spark your culinary imagination:
- Spicy Kick: Add a splash of sriracha or a pinch of red pepper flakes to the sauce for an extra spice level.
- Vegetarian Delight: Swap the beef for tofu or tempeh for a plant-based version while keeping all the delicious flavors intact.
- Sweet & Savory: Toss in some sliced bell peppers and orange juice for a fresh and vibrant take.
- Noodle Lover’s Paradise: Replace rice with cooked udon or rice noodles for a hearty twist.
- Crispy Additions: Top your dish with crunchy fried onions or nuts for that delightful texture.
Chef’s Notes
This Beef and Broccoli Stir-Fry has evolved beautifully over the years in my kitchen. Originally, I relied on a store-bought sauce, but as my love for cooking deepened, I began crafting my own to play with flavors. It’s become so much more than just a recipe; it’s a canvas for creativity! Whenever I have friends over, this dish often makes an appearance, instantly filling the room with warmth and laughter.
And let me tell you, there was that one time I accidentally grabbed a bottle of vinegar instead of soy sauce. Spoiler alert: it was not delicious! We all had a good laugh, and I learned to keep my glasses handy while cooking—always a wise choice in the kitchen!
FAQs and Troubleshooting
-
Why did my beef turn out tough?
Overcooking or not slicing against the grain can lead to tough beef. Make sure your pan is hot and only cook until just browned! -
Can I use frozen broccoli?
Absolutely! Just ensure to thaw and drain excess water before cooking, and reduce the cooking time, as frozen broccoli cooks faster. -
What can I serve this with besides rice?
Consider serving with quinoa, cauliflower rice for a lighter option, or even adding it to a wrap for a delicious meal on the go. -
Help! My sauce didn’t thicken!
If your sauce is too thin, allow it to simmer a little longer, and it should begin to thicken up beautifully. If in doubt, add a little more cornstarch mixed with water—just make sure to stir continuously!
Nutritional Info
(For 1 serving of Beef and Broccoli Stir-Fry served over rice)
- Calories: Approximately 450
- Protein: 30g
- Carbohydrates: 56g
- Fats: 14g
- Fiber: 4g
And there you have it! A culinary journey that’s not only easy to follow but rich in flavors, stories, and memories. I hope this Beef and Broccoli Stir-Fry becomes a beloved staple in your kitchen, just as it has in mine. Happy cooking, my friends! Let’s spark some joy, one plate at a time!
Print
Beef and Broccoli Stir-Fry
- Total Time: 30 minutes
- Yield: 4 servings 1x
- Diet: None
Description
A quick and delicious Beef and Broccoli Stir-Fry that brings together tender beef and vibrant vegetables in a flavorful sauce.
Ingredients
- 1 lb of beef sirloin
- 4 cups of fresh broccoli florets
- 3 cloves of garlic, minced
- 1 tablespoon of fresh ginger, minced
- 1/4 cup of soy sauce
- 2 tablespoons of oyster sauce
- 1 tablespoon of cornstarch
- 2 tablespoons of vegetable oil
- Cooked rice or noodles (for serving)
Instructions
- Prep your ingredients by slicing the beef into thin strips against the grain and chopping the broccoli into bite-sized florets.
- Make the sauce by mixing soy sauce, oyster sauce, minced garlic, ginger, and cornstarch in a small bowl.
- Marinate the beef with half of the sauce mixture for about 15-20 minutes.
- Heat 1 tablespoon of vegetable oil in a large skillet or wok over medium-high heat.
- Cook the marinated beef in a single layer for about 2-3 minutes until browned, then remove from the pan.
- Stir-fry the broccoli in the same pan for about 3-4 minutes until bright green and tender-crisp.
- Combine the beef and remaining sauce in the pan and cook for an additional 1-2 minutes to thicken the sauce.
- Serve hot over rice or noodles, garnished with sesame seeds and green onions.
Notes
For a vegetarian option, substitute beef with tofu or tempeh and use mushroom sauce instead of oyster sauce.
- Prep Time: 15 minutes
- Cook Time: 15 minutes
- Category: Main Course
- Method: Stir-Frying
- Cuisine: Asian
Nutrition
- Serving Size: 1 serving
- Calories: 450
- Sugar: 3g
- Sodium: 900mg
- Fat: 14g
- Saturated Fat: 3g
- Unsaturated Fat: 8g
- Trans Fat: 0g
- Carbohydrates: 56g
- Fiber: 4g
- Protein: 30g
- Cholesterol: 60mg
Keywords: beef stir-fry, broccoli recipe, quick dinner ideas, Asian cuisine
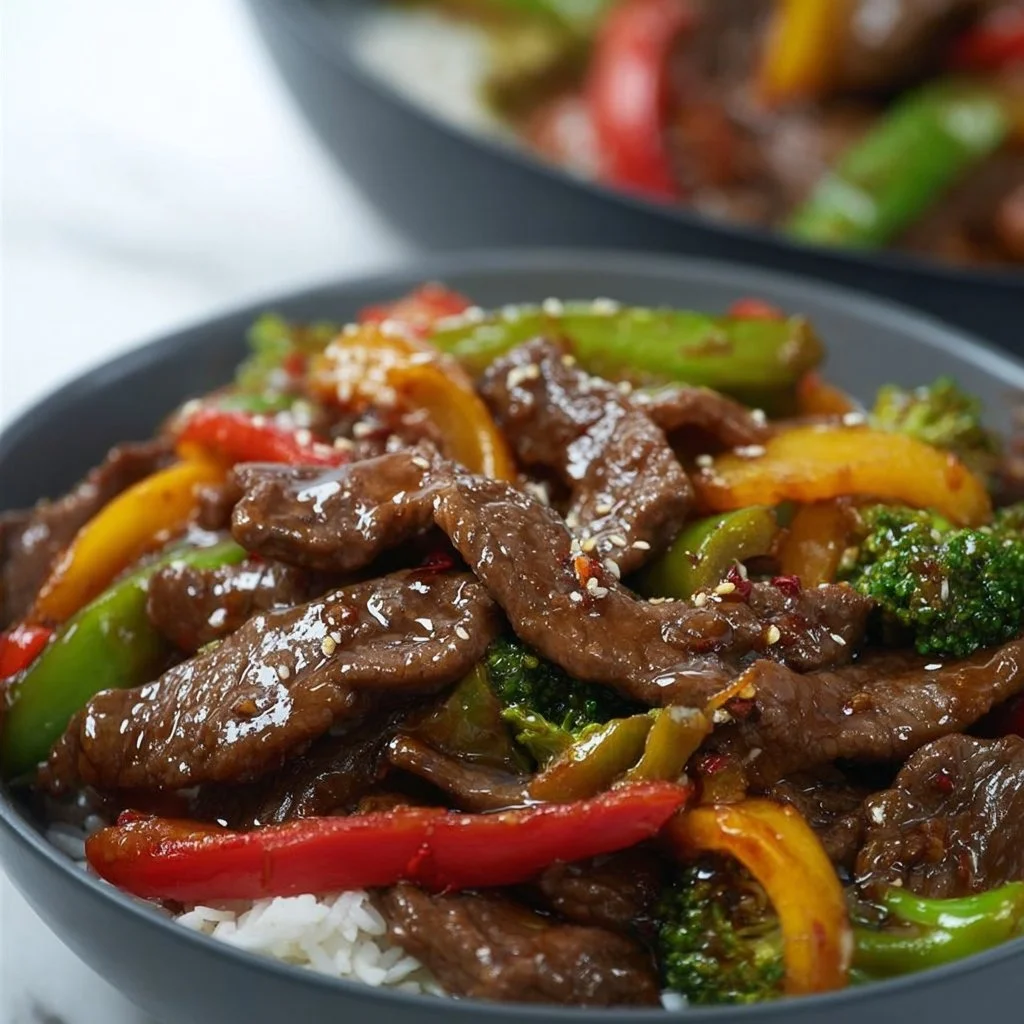
Beef Stir Fry
Beef Stir Fry: A Whirlwind of Flavor and Family
Welcome back to my cozy kitchen, my fellow food enthusiasts! Today, I have a dish that bursts with flavor, color, and a delightful crunch—Beef Stir Fry. This dish is more than just a quick meal; it’s a culinary experience that can whisk you away to far-off markets filled with vibrant vegetables and sizzling sounds.
Picture this: you walk into your kitchen, the promise of a delicious dinner hanging in the air, and your heart starts to race as the tantalizing smell of marinated beef and fresh produce fills the room. Such is the magic of a stir fry! This dish is a treasure trove of flavors and textures. And the best part? It’s quick to whip up, making it perfect for those busy weeknights or laid-back weekend meals with family and friends.
Inspired by my childhood experiences in the kitchen with my mom, who believed that cooking should come from the heart, I’ve crafted a Beef Stir Fry recipe that speaks both to the mind and the taste buds. This recipe is all about throwing in what you love, adding a dash of your personality, and of course, savoring every bite together. So, grab your apron, let’s dive into this colorful journey full of nostalgia, yummy bites, and maybe a mishap or two!
Personal Story
Ah, the memories of my childhood kitchen float back to me every time I make Beef Stir Fry. Picture this: I’m about ten years old, standing on a stool beside my mom, who is effortlessly tossing seasoned beef and vibrant vegetables in a sizzling wok. I could barely contain my excitement as the aroma danced around us, tantalizing my senses.
My mom had this signature dance move while she cooked—a little shimmy here, a quick spin there! She would let me sprinkle the soy sauce, and I always felt like a chef in my own right. The most thrilling part? Watching the beef take on a beautiful brown hue, glistening from the heat, and the veggies turning vibrant as they cooked.
We’d always serve it with fluffy jasmine rice, and as my family gathered around the table, the dishes passed hand to hand, laughter filled the air. It was a simple moment that turned into a cherished tradition. These memories not only shaped my passion for cooking but also instilled a sense of togetherness that I aim to recreate in every meal I prepare.
Ingredients
Gathering fresh, vibrant ingredients is the best part of making a great stir fry! Here’s what you’ll need:
-
Beef (sirloin or flank steak): These cuts are flavorful and tender, perfect for stir-frying. If you’re looking for a leaner option, top round steak works well too. For a budget-friendly swap, try chicken or tofu!
-
Vegetables (bell peppers, broccoli, and snap peas): Colorful veggies not only add nutrients but also brighten up your dish! Feel free to swap in whatever you have on hand, such as zucchini, carrots, or bok choy.
-
Garlic and ginger: These aromatic staples add depth to your stir fry. Fresh is best, but you can also use minced garlic and ginger from a jar if you’re in a pinch!
-
Soy sauce: This savory staple enhances all the flavors. Swap it for tamari if you need a gluten-free option, or coconut aminos for a slightly sweeter taste.
-
Sesame oil: Just a drizzle of this will take your dish to a whole new level of flavor. If you’re avoiding sesame, use olive oil or another neutral oil.
-
Cornstarch: A little bit works wonders as a thickener for your sauce and makes the beef extra tender. If you’re avoiding starches, you can skip this altogether or use arrowroot powder as a substitute.
-
Rice (jasmine or basmati): Fluffy rice is the perfect bed for your stir-fried beef and veggies. Quinoa or cauliflower rice are great alternatives for a lower-carb option!
Step-by-Step Instructions
Alright, let’s get cooking! Follow these steps for a Beef Stir Fry that’ll wow your taste buds:
-
Prep your ingredients: Start by slicing the beef thinly against the grain. This ensures each piece stays tender. If the meat is slightly frozen, it will be easier to cut. While you’re at it, chop your vegetables into bite-sized pieces. This not only makes them easier to eat but also helps them cook evenly.
-
Marinate the beef: In a medium bowl, combine your sliced beef with 2 tablespoons of soy sauce, 1 tablespoon of sesame oil, and a teaspoon of cornstarch. Let this marinate for about 15-20 minutes while you prep the rest of your ingredients. This step is crucial for flavor, so don’t skip it!
-
Heat the wok: Place a large wok or frying pan over medium-high heat and let it get hot. You want the pan sizzling when you add your beef. This helps cook the meat quickly and gives it that beautiful sear!
-
Cook the beef: Add a splash of oil to the hot wok. When it’s shimmering, toss in the marinated beef in a single layer. Sear for just a couple of minutes, stirring occasionally, until browned but not overcooked (it will continue to cook when combined with veggies). Remove the beef and set aside.
Chef’s Tip: Don’t overcrowd the pan! If it gets too crowded, the beef will steam instead of sear. If you’re making a big batch, cook the beef in two rounds.
-
Sauté aromatics: In the same wok, add a bit more oil if needed, then toss in minced garlic and ginger. Stir for about 30 seconds until fragrant—be careful not to let them burn!
-
Add the vegetables: Start with the firmer veggies like broccoli and snap peas, stir-frying for 1-2 minutes. Then, add the bell peppers and whatever other vegetables you’re using. Stir-fry for about 3-4 minutes, just until the veggies are tender-crisp.
-
Combine the beef: Add the beef back to the wok along with the remaining soy sauce (and more cornstarch if you like a thicker sauce). Stir to combine everything, and cook for another minute or two until everything is heated through.
-
Serve: Time to plate! Serve your delicious stir fry over a mound of fluffy rice, drizzle with more sesame oil, and feel free to top it off with some sesame seeds and fresh cilantro for that extra flair.
Chef’s Tip: For a little crunch, add some toasted cashews or peanuts at the end.
Serving Suggestions
For maximum presentation, use a large serving bowl with a bed of your fluffy jasmine rice at the bottom. Heap the colorful stir fry on top, allowing those vibrant veggies to shine. A sprinkle of sesame seeds and a few sprigs of cilantro make for an inviting garnish. Serve it hot, family-style, and watch everyone dig in with excitement!
Recipe Variations
Want to shake things up? Here are a few fun variations you can try:
-
Spicy Beef Stir Fry: Add chili flakes or Szechuan peppercorns for a spicy kick! You could also toss in some sliced jalapeños while sautéing the aromatics.
-
Sweet and Sour Version: Incorporate pineapple or bell peppers with a homemade sweet and sour sauce (mix soy sauce, vinegar, and sugar).
-
Vegetarian Option: Swap beef for tofu or tempeh, using the same marinade for great flavor. Vegetable broth can replace the soy sauce for a lighter taste.
-
Noodle Stir Fry: Add some pre-cooked rice noodles into the mix. Toss them in during the final stages of cooking with a bit more soy sauce.
-
Bonus Ingredients: Throw in fresh herbs like basil or mint at the end for a refreshing punch!
Chef’s Notes
This Beef Stir Fry is a beautiful representation of my cooking ethos—creative, adaptable, and always delicious. Over the years, my recipe has evolved from a simple stir fry to a canvas for flavors and colors. I love experimenting with whatever is fresh in my fridge! One time, I made this dish with a little leftover kimchi, and let me tell you, it was a game-changer.
Cooking is all about having fun, being bold, and letting your kitchen become a playground of flavors. I hope you too create your unique spin on this dish. Remember, the secret ingredient in every meal is love!
FAQs and Troubleshooting
1. Why is my beef tough?
Make sure you’re slicing against the grain of the meat and not overcooking it! Thin slices and quick cooking at high heat keep the beef tender.
2. My stir fry turned out mushy; what happened?
Two things: first, make sure you’re not overcrowding your pan. Also, cooking the veggies at too low a heat can cause them to release too much moisture. Keep that heat high!
3. Can I prep ingredients in advance?
Absolutely! You can slice your vegetables and marinate your beef a few hours ahead of time. Just store everything in airtight containers in the fridge until you’re ready to cook!
4. What can I use if I don’t have soy sauce?
Coconut aminos is a great soy sauce alternative. You could also use Worcestershire sauce or a mix of broth and vinegar, although it will change the flavor slightly.
Nutritional Info
While this dish is rich in flavor, it’s also packed with nutrients. Depending on the specific ingredients used, a typical serving could contain approximately:
- Calories: 400
- Protein: 30g
- Carbohydrates: 50g
- Fiber: 4g
- Fat: 15g
Remember, these are estimates, and the numbers may vary based on substitutions and portion sizes.
Happy cooking, and may your Beef Stir Fry be as delightful as the memories it brings back! Remember to share your creations with your loved ones—there’s nothing better than a meal that brings people together! 🍽️❤️
Print
Beef Stir Fry
- Total Time: 30 minutes
- Yield: 4 servings 1x
- Diet: Gluten-free
Description
A flavorful and colorful Beef Stir Fry that brings together marinated beef and vibrant vegetables for a quick and delicious meal.
Ingredients
- 1 pound beef (sirloin or flank steak), sliced thinly
- 2 cups vegetables (bell peppers, broccoli, snap peas)
- 2 cloves garlic, minced
- 1 tablespoon fresh ginger, minced
- 3 tablespoons soy sauce
- 1 tablespoon sesame oil
- 1 teaspoon cornstarch
- 2 cups jasmine rice, cooked
Instructions
- Prep your ingredients: Slice the beef and chop the vegetables into bite-sized pieces.
- Marinate the beef: Combine sliced beef with soy sauce, sesame oil, and cornstarch, let it marinate for 15-20 minutes.
- Heat the wok: Place a large wok over medium-high heat to get it hot.
- Cook the beef: Add oil to the wok, toss in the marinated beef, and sear until browned. Set aside.
- Sauté aromatics: Add garlic and ginger to the same wok until fragrant.
- Add the vegetables: Stir-fry the broccoli and snap peas first, then add the bell peppers, cooking until tender-crisp.
- Combine the beef back into the wok, adding remaining soy sauce and cooking until heated through.
- Serve: Plate the stir fry over jasmine rice, topped with sesame oil and optional sesame seeds.
Notes
For a crunch, add toasted cashews or peanuts at the end. Customize with your favorite veggies.
- Prep Time: 20 minutes
- Cook Time: 10 minutes
- Category: Main Course
- Method: Stir-frying
- Cuisine: Asian
Nutrition
- Serving Size: 1 serving
- Calories: 400
- Sugar: 4g
- Sodium: 600mg
- Fat: 15g
- Saturated Fat: 3g
- Unsaturated Fat: 10g
- Trans Fat: 0g
- Carbohydrates: 50g
- Fiber: 4g
- Protein: 30g
- Cholesterol: 40mg
Keywords: Beef Stir Fry, Quick Dinner, Stir Fry Recipe, Asian Cuisine, Healthy Meal
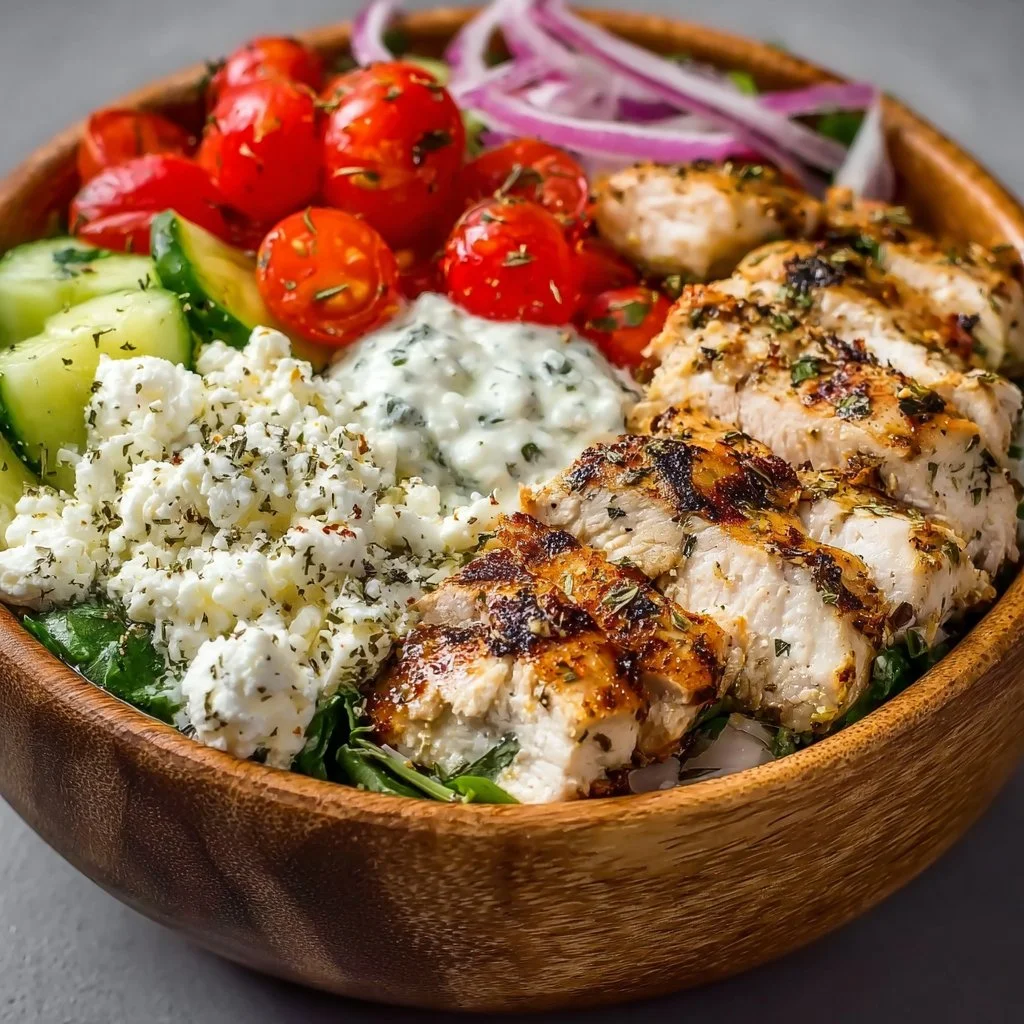
Greek Chicken Bowls
Savoring the Greek Chicken Bowl: A Culinary Adventure
Hey there! Welcome back to my kitchen, where the smell of herbs and spices is like a warm hug, and every dish tells a story. Today, I’m super excited to share one of my favorite recipes with you: Greek Chicken Bowls! This dish is the embodiment of my culinary philosophy—simple ingredients, bursting with flavor, yet perfect for gatherings or cozy dinners at home.
When I think of Greek Chicken Bowls, I’m taken back to my travels in Greece, where the vibrant colors of fresh vegetables, the tang of feta cheese, and the zesty aroma of grilled chicken filled my senses with delight. Imagine strolling through sun-soaked streets, the sound of laughter around you, as you enjoy a meal that feels like a warm embrace from a friend. That blissful experience is what I aim to recreate right here in my own kitchen.
These bowls are more than just a meal; they’re a celebration of fresh ingredients and culinary traditions that have stood the test of time. Whether you’re a seasoned cook or just starting out, this recipe will bring excitement to your dining table while staying accessible and fun. Perfect for a cozy night in or an impressive dish for guests, a Greek Chicken Bowl is sure to spark joy and satisfaction in every bite. Plus, with a few culinary tricks up my sleeve, you’ll feel like a pro chef in no time.
Are you ready to elevate your dinner game and impress your loved ones with these delicious, healthy bowls? Let’s get cooking!
Personal Story
I can’t help but smile when I think about the first time I made Greek Chicken Bowls. It was during my college years, a time filled with late-night study sessions, ramen noodles, and an epic quest to find a meal that wasn’t just pizza or takeout. One sunny afternoon, I invited a few friends over for a “cooking party.” We rummaged through the pantry and made a dash to the local farmers’ market. The vibrant produce and enticing spices beckoned, and we were instantly inspired.
We decided to channel our inner Greek chefs and whip up a feast, complete with marinated chicken, fresh cucumbers, juicy tomatoes, and the pièce de résistance—homemade tzatziki sauce. Laughter filled the air as we chopped, diced, and experimented. Seeing the smiles on everyone’s faces as we devoured those colorful bowls together, I knew I had stumbled upon something truly special: the power of food to unite, inspire, and create cherished memories.
Beyond the flavors, it was about the experience—the joy of cooking together, sharing stories, and savoring every bite. Fast forward a decade, and here I am, still deeply passionate about filling my kitchen with love and flavor. These Greek Chicken Bowls will always remind me that cooking is not just about the food; it’s about the connections we create with those we care about.
Ingredients
For our flavorful Greek Chicken Bowls, we’ll gather the following ingredients:
For the Marinated Chicken:
- Chicken Breasts (1.5 lbs): Lean, protein-packed, and perfect for marinating. You can substitute with chicken thighs for a juicier result, or opt for tofu for a vegetarian version.
- Olive Oil (3 tablespoons): A must-have in Mediterranean cooking. Extra virgin gives a richer flavor, but regular olive oil works well too.
- Lemon Juice (from 2 lemons): It adds brightness to the chicken. Fresh is best, but you can use bottled lemon juice in a pinch (about 4 tablespoons).
- Garlic (4 cloves): Freshly minced for that robust aroma. You can substitute with garlic powder (1 tsp) if you don’t have fresh garlic on hand.
- Dried Oregano (1 tablespoon): An essential herb in Greek cuisine. Fresh oregano can be used, but make sure to double the amount as it’s milder.
For the Bowls:
- Cooked Quinoa or Rice (2 cups): For base; both are packed with nutrients. Swap for cauliflower rice to keep it low-carb.
- Cherry Tomatoes (1 cup, halved): Juicy and flavorful. Use halved Roma tomatoes or even roasted vegetables for a twist.
- Cucumber (1 large, diced): Refreshing and crunchy. Substitute with bell peppers for added sweetness.
- Red Onion (1 small, thinly sliced): Sharp yet sweet flavor. You can use scallions for a milder taste or omit it altogether.
- Feta Cheese (1 cup, crumbled): Irresistibly creamy and salty. Vegan feta is a great plant-based alternative.
- Fresh Parsley or Dill (1/4 cup, chopped): Brightens up the dish. Mix them for added flavor, or use basil if you prefer.
For the Tzatziki Sauce:
- Greek Yogurt (1 cup): Thick and tangy. If you want a dairy-free version, use coconut yogurt; ensure it’s unsweetened.
- Garlic (1 clove, minced): It adds an aromatic kick. Use less if you prefer a milder sauce.
- Cucumber (1 small, grated and drained): Gives tzatziki that signature crunch. Use zucchini in a pinch, but make sure to drain it well.
- Dill (1 tablespoon, chopped): An aromatic herb that makes tzatziki sing. If you’re not a dill fan, fresh mint is a delicious alternative.
- Lemon Juice (1 tablespoon): For a zesty finish. You can also use red wine vinegar for a different flavor profile.
Step-by-Step Instructions
Step 1: Marinate the Chicken
-
Preparing the Marinade: In a medium bowl, whisk together olive oil, lemon juice, minced garlic, oregano, salt, and pepper. The key here is to let those flavors meld together. A tip? Let it sit for a few extra minutes; it makes a world of difference!
-
Marinating the Chicken: Place the chicken breasts in a resealable bag or a shallow dish, and pour the marinade over them. Seal the bag or cover the dish, ensuring the chicken is well-coated. Let it marinade in the fridge for at least 30 minutes (longer if you have time!)—I aim for about 2 hours for maximum flavor.
Step 2: Prepare the Tzatziki Sauce
-
Mixing the Ingredients: In a bowl, combine Greek yogurt, grated cucumber (make sure to squeeze out the excess water), minced garlic, dill, lemon juice, and salt. Stir until well combined.
-
Chill the Sauce: Allow the tzatziki to rest in the fridge while your chicken is marinating. This time gives it a chance to chill and the flavors will develop beautifully!
Step 3: Cook the Chicken
-
Preheat the Grill or Pan: If you’re grilling, preheat your grill to medium-high heat. For stovetop cooking, heat a cast-iron skillet or a non-stick pan over medium heat. A tip for indoor cooking? Splash a drop of water on the skillet; if it sizzles, you’re good to go!
-
Cooking the Chicken: Remove the chicken from the marinade, shaking off any excess. Grill or pan-sear the chicken for about 6-7 minutes on each side or until cooked through and golden brown. The internal temperature should reach 165°F (75°C).
-
Rest the Chicken: Once cooked, transfer the chicken to a cutting board and let it rest for about 5 minutes. This crucial step allows the juices to settle for moist chicken.
Step 4: Assemble Your Greek Bowls
-
Prepare the Base: In serving bowls, divide the cooked quinoa or rice. It’s the heart of your bowl, so make it generous!
-
Slice the Chicken: Thinly slice the rested chicken and place it on top of your grain.
-
Add the Toppings: Top with cherry tomatoes, diced cucumbers, red onion, crumbled feta, and fresh herbs. Feel free to arrange them in a rainbow—because we eat with our eyes first!
-
Dollop of Tzatziki: Drizzle a generous spoonful of tzatziki over the top. It’s like the cherry on top of a sundae—so delicious!
Serving Suggestions
Serve your Greek Chicken Bowls with a side of warm pita bread or crunchy pita chips for extra texture. If you’re feeling festive, a glass of refreshing iced tea or a light white wine pairs beautifully with these vibrant flavors. Want to make it extra special? Set up a "build-your-own-bowl" station for guests. Add variety to your toppings and let everyone customize their dream creation!
Recipe Variations
- Mediterranean Grain Swap: Switch out quinoa for farro or barley for a nutty twist.
- Vegan Delight: Substitute grilled vegetables (like zucchini, bell peppers, and mushrooms) for chicken and use tofu feta for creaminess.
- Spicy Kick: Add diced jalapeños or a sprinkle of red pepper flakes to the marinade for an extra zing.
- Herbaceous Flavor: Swap out the oregano for fresh thyme or rosemary in the marinade for a delightful change.
- Rainbow Bowls: Add roasted beets and carrots to your bowls for extra color and sweetness.
Chef’s Notes
Ah, my love for fish tacos may have inspired me to craft a Greek Chicken Bowl! I thought, ‘How can I take that spirit of freshness and communities coming together and make it even more vibrant?’ Every bite transports me back to those sun-kissed days in Greece, and I think that’s the magic of food—it evolves and grows right along with our tastes and memories.
And hey, if you ever find yourself in a time crunch, you can totally make this chicken in an air fryer! Just marinate and pop those chicken breasts in at 380°F for about 15-18 minutes, flipping halfway through. Trust me—a lifesaver on busy weeknights!
FAQs and Troubleshooting
Q: My chicken is dry; how can I prevent this next time?
A: Keeping an eye on the cooking time is essential! Forgetting to rest the chicken after cooking can also make it dry. Always allow it to rest for a few minutes before slicing to help retain moisture.
Q: Can I meal prep this recipe for the week?
A: Absolutely! Store the components in separate containers in the fridge. Prepare the chicken and tzatziki fresh each time, or you can even freeze the chicken after marinating! Just be mindful of shelf life.
Q: What can I replace the tzatziki with if I dislike yogurt?
A: If yogurt isn’t your thing, try tahini sauce, hummus, or even a drizzle of olive oil with lemon zest and garlic for that flavorful punch.
Q: What happened to my tzatziki sauce; it turned watery?
A: If your tzatziki is watery, be sure to strain the grated cucumber a little more to eliminate excess moisture! Fresh herbs also release liquid when chopped, so use less if it seems to be getting too liquidy.
Nutritional Info
(Per Serving)
- Calories: 550
- Protein: 30g
- Carbohydrates: 40g
- Fat: 25g
- Fiber: 6g
And there you have it—a deliciously vibrant recipe for Greek Chicken Bowls that’s perfect for any day of the week. Remember, cooking is supposed to be fun! So, don’t stress the small things and let your creativity shine. After all, the best ingredient in any dish is the love you put into it! Happy cooking, and can’t wait to see how your bowls turn out!
Print
Greek Chicken Bowls
- Total Time: 45 minutes
- Yield: 4 servings 1x
- Diet: Gluten-Free, Paleo
Description
A vibrant and flavorful dish featuring marinated chicken, fresh vegetables, and creamy tzatziki sauce, perfect for gatherings or cozy dinners.
Ingredients
- 1.5 lbs Chicken Breasts
- 3 tablespoons Olive Oil
- Juice of 2 Lemons
- 4 cloves Garlic, minced
- 1 tablespoon Dried Oregano
- 2 cups Cooked Quinoa or Rice
- 1 cup Cherry Tomatoes, halved
- 1 large Cucumber, diced
- 1 small Red Onion, thinly sliced
- 1 cup Feta Cheese, crumbled
- 1/4 cup Fresh Parsley or Dill, chopped
- 1 cup Greek Yogurt
- 1 small Cucumber, grated and drained
- 1 tablespoon Dill, chopped
- 1 tablespoon Lemon Juice
Instructions
- Marinate the Chicken: In a medium bowl, whisk together olive oil, lemon juice, minced garlic, oregano, salt, and pepper. Let it sit for a few extra minutes to meld flavors.
- Place the chicken in a resealable bag or shallow dish, pour the marinade over them, and seal. Let it marinate in the fridge for at least 30 minutes.
- Prepare the Tzatziki Sauce: In a bowl, combine Greek yogurt, grated cucumber, minced garlic, dill, lemon juice, and salt. Stir until well combined.
- Chill the sauce while the chicken marinates.
- Preheat the grill or pan to medium-high heat.
- Cook the Chicken: Grill or pan-sear the chicken for about 6-7 minutes on each side until cooked through.
- Rest the chicken for about 5 minutes before slicing.
- Assemble the Bowls: In serving bowls, divide the cooked quinoa or rice, slice the chicken, and top with cherry tomatoes, cucumber, red onion, feta, and herbs.
- Add a generous spoonful of tzatziki over the top.
Notes
Feel free to customize the toppings and swap ingredients based on your preference. Great for meal prep!
- Prep Time: 30 minutes
- Cook Time: 15 minutes
- Category: Main Course
- Method: Grilling
- Cuisine: Greek
Nutrition
- Serving Size: 1 serving
- Calories: 550
- Sugar: 6g
- Sodium: 800mg
- Fat: 25g
- Saturated Fat: 8g
- Unsaturated Fat: 17g
- Trans Fat: 0g
- Carbohydrates: 40g
- Fiber: 6g
- Protein: 30g
- Cholesterol: 100mg
Keywords: Greek, Chicken, Bowls, Tzatziki, Healthy, Dinner

High-Protein Chicken Ranch Quesadilla
High-Protein Chicken Ranch Quesadilla: A Cozy Culinary Adventure
Welcome back to my cozy kitchen! Today, we’re diving into a dish that’s not just a favorite in my household but also a wonderful way to savor the goodness of high protein, all wrapped up in a crispy, cheesy delight — the High-Protein Chicken Ranch Quesadilla. If you’re anything like me, you know how special it feels to whip up something that feels indulgent yet wholesome, all while being super easy to make.
When it comes to food, I believe in the power of simplicity mixed with a sprinkle of love. This quesadilla embodies that philosophy perfectly. It’s bursting with flavor, takes mere minutes to prepare, and can adapt effortlessly to whatever ingredient you have on hand. Plus, who can resist that satisfying crunch when you take a bite? Whether you’re feeding a hungry family, hosting a game day gathering, or simply indulging in a cozy night at home, this quesadilla hits all the right spots.
Now, let’s talk about the inspiration behind this recipe. Picture this: It’s Sunday evening, and my kitchen is filled with the enticing aroma of grilled chicken. I can already hear the chatter of my family settling in around the table, eagerly anticipating a delicious dinner. Inspired by these moments, I wanted to create something that brings that warmth and joy to your table as well. So grab your apron and let’s transform your pantry staples into something truly special!
Personal Story
One of my fondest kitchen memories involves a bustling summertime barbeque at my grandmother’s house. She had this special knack for turning humble ingredients into a feast, always bringing everyone together. During those warm evenings, the smell of grilled chicken wafted through the air, mixing with laughter and the clinking of glasses.
On that day, she created these incredible chicken quesadillas drizzled with ranch dressing, serving them up hot off the grill. I remember everyone gathered around her kitchen island, eagerly waiting for that first crispy bite. It was more than just food; it was the comfort of family and sharing stories. Even now, every bite of a quesadilla takes me back to those cherished moments, reminding me why I love to cook and bring people together.
And now, as I recreate this dish with a high-protein twist, I hope to inspire you to share your own kitchen experiences and create memories around the table.
Ingredients
To make your own High-Protein Chicken Ranch Quesadilla, gather these simple yet flavorful ingredients:
-
Cooked Chicken Breast (2 cups, shredded)
A lean protein powerhouse. You can use leftover rotisserie chicken or grill a fresh breast. If you prefer a vegetarian option, consider using shredded jackfruit or tempeh for a satisfying substitute. -
Whole Wheat Tortillas (4 large)
These add extra fiber and nutrients. You can also use low-carb tortillas or corn tortillas if desired. Just keep in mind that the texture may vary slightly. -
Ranch Dressing (½ cup)
Store-bought is convenient, but homemade ranch is a game-changer! You can easily make a healthier version using Greek yogurt mixed with herbs and spices. -
Cheddar Cheese (1 cup, shredded)
The gooey goodness that holds everything together. Swap for pepper jack for a spicy kick, or use a dairy-free cheese if you want a vegan option. -
Spinach (1 cup, fresh)
Adds a lovely pop of color and nutrients. Kale or arugula can make for great alternatives, providing a different flavor profile. -
Green Onions (½ cup, chopped)
For added crunch and flavor. If you don’t have green onions, regular onions or shallots sautéed until soft also work beautifully. -
Olive Oil (2 tablespoons)
To keep things from sticking on the skillet. You can substitute with avocado oil or even a butter/oil blend for a rich flavor. -
Spices: Garlic Powder, Onion Powder, Paprika, and Salt (to taste)
These elevate your chicken seasoning. Feel free to tweak based on your preferences—cumin or chili powder can add a fun twist!
Step-by-Step Instructions
Get ready to roll up your sleeves and create something delicious. Follow these steps, and soon enough, your kitchen will be filled with mouthwatering aromas!
1. Prepare the Chicken
Start by shredding your cooked chicken breast if you haven’t done so already. Toss it in a mixing bowl with garlic powder, onion powder, paprika, and a pinch of salt. This simple seasoning gives your chicken a burst of flavor. If you’re using leftover chicken, it’s a great way to breathe new life into it!
2. Mix in the Goodness
In the same bowl, add the ranch dressing and mix it until all the chicken is well coated. The ranch not only adds flavor but also keeps the chicken moist, which is key for a satisfying quesadilla.
3. Assemble the Quesadilla
Lay one tortilla flat on a clean surface. On half of the tortilla, sprinkle a generous layer of shredded cheddar cheese, followed by a quarter of the chicken mixture. Top with fresh spinach and a few green onions for that lovely crunch. Finally, sprinkle a little more cheese on top before folding the tortilla over, creating a half-moon shape.
4. Heat the Skillet
Place a skillet over medium heat and add a drizzle of olive oil. Once it’s hot, place your quesadilla in the skillet. You may need to work with one quesadilla at a time unless you have a comrades-in-arms in the kitchen!
5. Cook to Perfection
Cook for about 3-4 minutes on one side, until it’s golden brown and crispy. Carefully flip it over using a spatula and cook the other side for another 2-3 minutes until the cheese is melted. You can press it gently with the spatula to help the cheese cling to the other ingredients.
6. Slice and Serve
Once both sides are crispy and golden, transfer the quesadilla to a cutting board and let it cool for a minute. Use a pizza cutter or a sharp knife to slice it into wedges. That first bite through that crispy exterior? Absolute perfection!
7. Garnish with Extra Love
If you’re feeling adventurous, drizzle some more ranch dressing and sprinkle on extra green onions or even some chopped cilantro for an added burst of freshness!
Serving Suggestions
These High-Protein Chicken Ranch Quesadillas pair perfectly with a side of fresh salsa or guacamole, adding a zesty flavor contrast that enhances each bite. Serve them up on a colorful plate with a vibrant salad for a complete meal that not only looks great but also feels refreshing. Feeling indulgent? A dollop of sour cream or yogurt on the side takes it to the next level of rich creaminess—yum!
Recipe Variations
- Spicy Twist: Add sliced jalapeños or swap out the regular cheddar for spicy pepper jack cheese.
- Veggie Delight: Replace chicken with black beans or grilled veggies like bell peppers and zucchini for a scrumptious vegetarian option.
- Southwestern Style: Mix in some corn and diced tomatoes for a fresh take. Don’t forget the fresh cilantro!
- Breakfast Option: Use scrambled eggs in place of the chicken and toss in some shredded potatoes for a hearty brunch quesadilla.
- Pesto Chicken: Swap out ranch dressing for homemade or store-bought pesto. Pair it with goat cheese for a tangy kick!
Chef’s Notes
It’s funny how recipes evolve over time. Just a few years ago, I started making variations of quesadillas as a way to clean out my fridge on busy nights. This recipe is a culmination of those experimental times, with high-protein ingredients that fuel my family and friends. Remember, you have total control over what goes inside. Don’t stress if you don’t have every ingredient; instead, use this recipe as a canvas and paint it with your favorite flavors!
FAQs and Troubleshooting
Q: Can I make these quesadillas ahead of time?
Absolutely! You can assemble the quesadillas up to a day in advance. Just keep them layered between parchment paper to prevent sticking, and store them in the refrigerator. When you’re ready, cook them fresh on the skillet!
Q: What’s the best way to reheat leftover quesadillas?
Pop them in the oven at 350°F (180°C) for about 10-15 minutes, or on the skillet for a few minutes on each side until heated through. This helps keep them crispy!
Q: My quesadillas are turning out soggy. Any tips?
Make sure to drain any excess liquid from your chicken and avoid overloading them with filling. Less is more when it comes to quesadillas!
Q: Can I freeze these quesadillas?
Yes! Assemble them, wrap them tightly in plastic wrap or parchment paper, and place them in a freezer-safe bag. They can last for up to three months. Just thaw and cook as needed!
Nutritional Info (Optional)
- Calories per serving (1 quesadilla): Approximately 350-400 calories
- Protein: 30g
- Carbohydrates: 30g
- Fat: 15g
There you have it! The High-Protein Chicken Ranch Quesadillas bring cozy vibes, hearty flavors, and moments that feed not just your stomach but your heart as well. I hope you get as much joy out of making this dish as I do—and, of course, don’t forget to share your kitchen stories and photos with me! Happy cooking!
Print
High-Protein Chicken Ranch Quesadilla
- Total Time: 25 minutes
- Yield: 4 servings 1x
- Diet: High Protein
Description
A delightful High-Protein Chicken Ranch Quesadilla that combines health and indulgence in a crispy, cheesy package.
Ingredients
- 2 cups Cooked Chicken Breast, shredded
- 4 large Whole Wheat Tortillas
- ½ cup Ranch Dressing
- 1 cup Cheddar Cheese, shredded
- 1 cup fresh Spinach
- ½ cup Green Onions, chopped
- 2 tablespoons Olive Oil
- Spices: Garlic Powder, Onion Powder, Paprika, and Salt (to taste)
Instructions
- Prepare the Chicken: Shred your cooked chicken breast and toss it with garlic powder, onion powder, paprika, and a pinch of salt.
- Mix in the Goodness: Add ranch dressing to the chicken and mix until well coated.
- Assemble the Quesadilla: Lay one tortilla flat, add cheese, a portion of the chicken mixture, spinach, and green onions, then fold.
- Heat the Skillet: Drizzle olive oil in a skillet over medium heat and place the quesadilla inside.
- Cook to Perfection: Cook for 3-4 minutes on one side until golden, flip, and cook for another 2-3 minutes.
- Slice and Serve: Transfer to a cutting board, slice into wedges, and enjoy!
- Garnish with Extra Love: Optionally drizzle more ranch and sprinkle on green onions or cilantro.
Notes
Feel free to modify the ingredients based on your preference. Great for meal prep and can be assembled ahead of time!
- Prep Time: 15 minutes
- Cook Time: 10 minutes
- Category: Main Course
- Method: Cooking
- Cuisine: Mexican
Nutrition
- Serving Size: 1 quesadilla
- Calories: 375
- Sugar: 2g
- Sodium: 600mg
- Fat: 15g
- Saturated Fat: 6g
- Unsaturated Fat: 8g
- Trans Fat: 0g
- Carbohydrates: 30g
- Fiber: 5g
- Protein: 30g
- Cholesterol: 75mg
Keywords: quesadilla, chicken, ranch, high-protein, comfort food
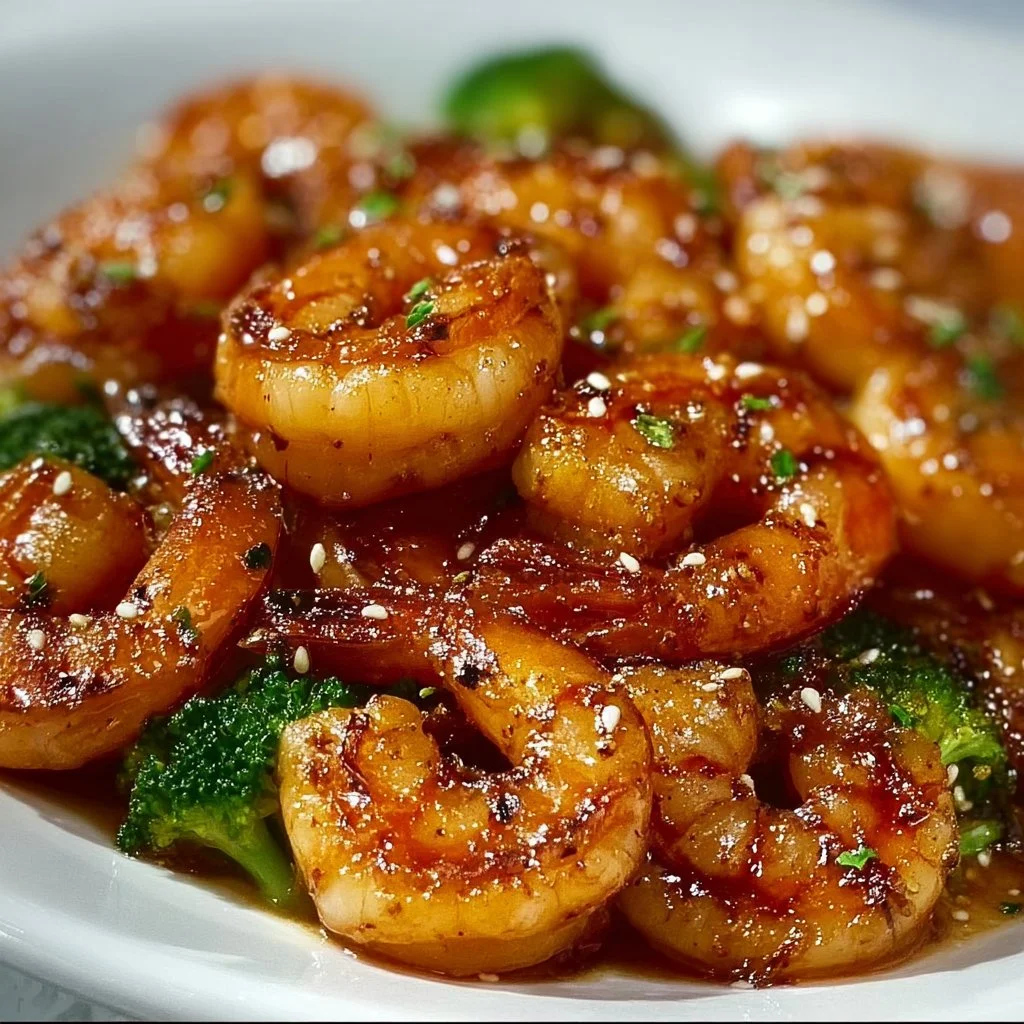
High-Protein Honey Garlic Shrimp
# High-Protein Honey Garlic Shrimp: A Cozy Kitchen Classic

## Introduction

Welcome back to my kitchen, dear friends! Today, we’re diving into a dish that sits right at the heart of my culinary adventures: High-Protein Honey Garlic Shrimp! If you’ve ever been cuddled up at home, waiting for the magical smell of dinner to waft through the air, this recipe is your ticket to that cozy sensation. There’s something about shrimp that makes dinner feel a little bit fancy without all the fuss, and the sweet, savory notes of honey garlic are simply a knockout.

Imagine this: you've just come home from a long day, and as you step into the kitchen, the thought of creating something that tastes divine ignites a spark of joy in your heart. That’s the magic of cooking, isn’t it? In a matter of minutes, you can take fresh, simple ingredients and transform them into something that not only nourishes but also brings loved ones together. Plus, with shrimp’s natural high-protein goodness, you’re fueling those bodies and spirits!

I still recall the first time I tried shrimp cooked with honey garlic sauce. It was a rainy Sunday afternoon, and I was rummaging through the fridge hoping to whip up something quick and delicious for my family. I discovered a bottle of honey hidden in the pantry and some shrimp waiting patiently in the freezer. The moment I poured that sweet honey into the skillet with garlic, the aroma danced through the air, making everyone come running to the kitchen. The symphony of flavors that emerged that day became a treasured staple in our home.

Whether you're meal-prepping for the week or looking to impress a dinner guest, this recipe is versatile, straightforward, and absolutely delish! So, let’s roll up those sleeves, put on that favorite apron (don’t worry if it’s messy; mine is too!), and get ready to cook some honey garlic magic!

## Personal Story

I remember the first time I cooked shrimp for my family. It was a sunny afternoon, and I was determined to impress everyone with my “chef skills.” I thought a fancy dish would do the trick, so I went all out, spicing things up with a homemade honey garlic sauce. As the shrimp sizzled in the pan, the aroma made its way around the house and drew my family to the kitchen like moths to a flame.

After plating everything beautifully, I set it on the table with a flourish, feeling like a culinary superstar. Then, came the moment of truth—the first bite. Everyone fell silent, savoring the flavors, and then erupted into compliments! My heart soared. I remember my little brother immediately asking for seconds, and that sweet memory became the foundation for family dinners filled with laughter and love.

That first experience stuck with me; it’s not just about the food—it’s about the love and connection that comes from gathering around the table. Each time I whip up this dish, it takes me back to that sunny afternoon, reminding me of the joy of cooking and sharing with those we care about most.

## Ingredients

Let’s gather our ingredients for this delicious High-Protein Honey Garlic Shrimp! Here’s what you'll need:

- **Shrimp (1 pound, peeled and deveined)**
  - Look for large shrimp for a satisfying bite! Fresh or frozen work beautifully here. If using frozen, ensure they are fully thawed before cooking.

- **Honey (1/4 cup)**
  - This is the star of our sauce! Honey adds a natural sweetness and gloss that pairs perfectly with shrimp. If you're watching sugar intake, agave syrup can be a good substitute.

- **Garlic (4 cloves, minced)**
  - Fresh garlic is non-negotiable! Minced garlic provides a rich, aromatic flavor. If you’re in a pinch, garlic powder can work, but fresh is always best.

- **Soy Sauce (2 tablespoons)**
  - This adds a savory touch. For a low-sodium option, use low-sodium soy sauce. Tamari works too for a gluten-free twist!

- **Olive Oil (1 tablespoon)**
  - This helps in sautéing and adds richness. You can also use sesame oil for another layer of flavor.

- **Green Onions (for garnish)**
  - These add color and a fresh crunch! If you don’t have green onions, fresh parsley or cilantro can do as a vibrant garnish.

- **Red Pepper Flakes (optional, to taste)**
  - A pinch of heat never hurt anyone! Omit if you prefer a milder flavor or adjust to your spice preference.

Now that we have our ingredients ready, let’s get cooking!

## Step-by-Step Instructions

### Step 1: Prepare the Shrimp
Start by rinsing the shrimp under cold water and pat them dry with paper towels. This step is crucial! A dry surface helps the shrimp sear instead of steam, yielding that desired caramelization.

### Step 2: Create the Honey Garlic Sauce
In a mixing bowl, combine the honey, minced garlic, and soy sauce. Stir gently until blended. Here’s a little chef hack: if you want a smoother sauce, you can microwave it for about 10 seconds; it helps the honey mix in beautifully!

### Step 3: Heat the Pan
Drizzle olive oil into a large skillet over medium-high heat. Once hot, carefully add the shrimp one at a time. It'll take about 2-3 minutes per side. Don’t overcrowd the skillet; you want to give each shrimp the space to sear and develop that gorgeous golden color!

### Step 4: Add the Sauce
Once the shrimp is opaque and perfectly cooked, pour your honey garlic sauce into the skillet. The magic happens right here—bring the sauce to a gentle simmer. Stir consistently for about 2 minutes, allowing the shrimp to soak up all that sweet, garlicky goodness.

### Step 5: Incorporate Heat (Optional)
If you’re feeling adventurous and want a kick, sprinkle in some red pepper flakes while the sauce simmers. It gives the dish a lovely contrast to the sweetness.

### Step 6: Garnish and Serve
Once everything is perfectly combined, remove from heat. Don’t forget to sprinkle those fresh chopped green onions on top!

## Serving Suggestions

This dish shines when served on a bed of fluffy jasmine rice or accompanied by steamed vegetables for a healthy balance. You can even toss it all together with a fresh green salad for a vibrant meal. Pro tip: a sprinkle of sesame seeds on top not only enhances the look but adds a delightful crunch!

## Recipe Variations

1. **Honey Garlic Tofu:** Swap the shrimp for crispy tofu for a plant-based version.
2. **Citrus Zest:** Add zest from a lemon or lime into the sauce for a refreshing twist.
3. **Spicy Sriracha:** Mix Sriracha into the honey garlic sauce for a bold kick of flavor.
4. **Veggie Boost:** Toss in fresh veggies like bell peppers or snap peas for added color and health benefits!
5. **Pineapple Twist:** Add pineapple chunks to the skillet for a sweet and tangy tropical vibe.

## Chef’s Notes

This recipe has been a part of my kitchen arsenal for years and has evolved beautifully. At first, it was just a quick dinner fix, but over time, I’ve played with flavors and grown to love it even more. I remember one time I accidentally had too much garlic—a mistake I thought was disastrous—but it turned out to be a family favorite! They jokingly call it "Olivia's Super Garlic Shrimp" now and demand it every time they visit. Cooking truly is about experimentation, and sometimes, those little mishaps lead to something extraordinary.

## FAQs and Troubleshooting

**1. My shrimp turned out rubbery; what happened?**
This usually happens if shrimp are overcooked. Cook just until they turn opaque. They continue to cook a bit even after removed from the heat.

**2. Can I use frozen shrimp?**
Absolutely! Just make sure to thaw them completely and pat them dry before cooking.

**3. How do I store leftovers?**
Store any leftovers in an airtight container in the fridge for up to 2 days. Reheat gently to avoid overcooking!

**4. What can I serve with this dish?**
It pairs beautifully with rice, quinoa, or on top of a fresh salad. Get creative!

## Nutritional Info (optional)

This High-Protein Honey Garlic Shrimp dish is both delicious and nutritious! In a typical serving, you can expect around 230 calories, with 25g of protein and 10g of carbohydrates, making it a great option for a meal filled with flavor and health!

---

So there you have it—a cozy, high-protein dish that not only feeds the belly but fuels the heart. I hope you enjoyed this journey through my kitchen, and I can't wait for you to try this High-Protein Honey Garlic Shrimp at home. Cooking is all about creating memories and experiences, and I believe every meal is a chance to share a little love with the ones we treasure. Until next time, happy cooking!
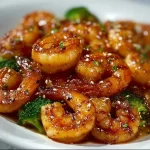
High-Protein Honey Garlic Shrimp
- Total Time: 20 minutes
- Yield: 4 servings
- Diet: Paleo
Description
A cozy and flavorful high-protein dish featuring shrimp cooked in a sweet and savory honey garlic sauce.
Ingredients
- Shrimp (1 pound, peeled and deveined)
- Honey (1/4 cup)
- Garlic (4 cloves, minced)
- Soy Sauce (2 tablespoons)
- Olive Oil (1 tablespoon)
- Green Onions (for garnish)
- Red Pepper Flakes (optional, to taste)
Instructions
- Prepare the shrimp by rinsing them under cold water and patting them dry.
- Create the honey garlic sauce by combining honey, minced garlic, and soy sauce in a mixing bowl.
- Heat a large skillet over medium-high heat and drizzle in olive oil.
- Add the shrimp one at a time and cook for about 2-3 minutes per side.
- Pour the honey garlic sauce into the skillet once shrimp are opaque.
- Incorporate red pepper flakes for a spicy kick, if desired.
- Garnish with chopped green onions before serving.
Notes
For a plant-based alternative, swap shrimp for crispy tofu. Leftovers can be stored in an airtight container in the fridge for up to 2 days.
- Prep Time: 10 minutes
- Cook Time: 10 minutes
- Category: Main Course
- Method: Sautéing
- Cuisine: Asian
Nutrition
- Serving Size: 1 serving
- Calories: 230
- Sugar: 20g
- Sodium: 500mg
- Fat: 7g
- Saturated Fat: 1g
- Unsaturated Fat: 6g
- Trans Fat: 0g
- Carbohydrates: 10g
- Fiber: 0g
- Protein: 25g
- Cholesterol: 170mg
Keywords: shrimp, honey garlic, high protein, quick meal, easy recipe




