
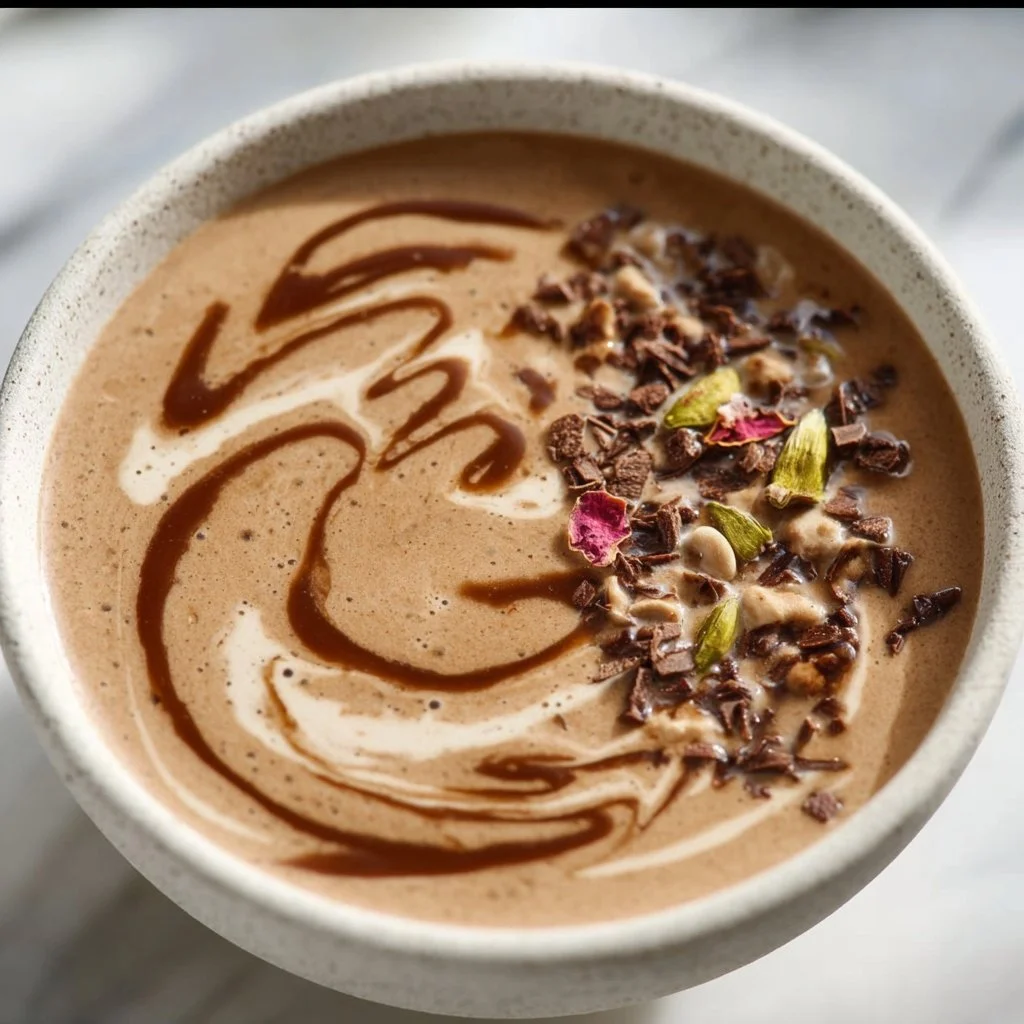
Coffee Protein Smoothie Bowl Recipe
Coffee Protein Smoothie Bowl Recipe: Energize Your Day with Flavor!
Hey there, fellow food lovers! Welcome back to my cozy kitchen where deliciousness and warmth collide! Today, we’re diving into a whimsical, oh-so-energizing treat: the Coffee Protein Smoothie Bowl. This delight is not only a feast for your taste buds but also a roaring success when it comes to fueling your day. Whether you’re aiming to power through a busy morning or seeking a vibrant pick-me-up for the afternoon, this bowl will do just that—and it’s totally Instagram-worthy too!
Now, let’s talk about mornings. For me, the ritual of brewing coffee is more than just a wake-up call; it’s a cherished moment. The smell that wafts through the air, mingling with the sound of a bubbling pot, instantly sets the tone for a beautiful day. This protein-packed smoothie bowl harnesses all that cozy coffee goodness, combining it with nourishing ingredients to create a deliciously energizing breakfast.
You’ll easily fall in love with this creation. It’s fun, customizable, and oh-so-delicious! Trust me, once you take that first spoonful, you’ll be transported to a joy-filled café, where the sun dances through the windows and every bite bursts with flavor. So let’s grab our aprons, rinse off those hands, and dive into this delicious journey together!
A Nostalgic Coffee Moment
I’ll never forget my first experience with a smoothie bowl. It was a sunny Saturday, and I had just returned from a morning yoga class with my friends. Feeling energized but in need of a breakfast that reflected that vibrant feeling, we strolled into a quaint café that promised breakfast happiness. The moment the smoothie bowl arrived, my heart skipped a beat. The vibrant colors, the artistic toppings, and the uniqueness of the dish made it feel like a celebration on a plate.
Inspired by that day, I started creating my version at home. Adding coffee to my smoothie routine was a game-changer! It transformed my morning from mundane to magnificent. I experimented with different flavors, textures, and toppings, but it was that initial rush of creativity that set the stage for my love of smoothie bowls. Now, I’m thrilled to share my love of the Coffee Protein Smoothie Bowl with all of you!
Ingredients
Here’s the lineup for your Coffee Protein Smoothie Bowl:
-
1 ripe banana
- Why? Bananas are not just sweet and delicious; they add creaminess to your smoothie. If you don’t have one, avocados make a great substitute for that creamy texture.
-
½ cup brewed coffee (cooled)
- Why? This is the star of the show! Use your favorite brew for the best flavor. Cold brew is fantastic here too—super smooth!
-
1 cup unsweetened almond milk (or any milk of choice)
- Why? Almond milk keeps things light and dairy-free. If you prefer cow’s milk, go for it! Oat milk is also a wonderful substitute.
-
1 scoop vanilla protein powder
- Why? To give your smoothie bowl a nice boost of protein! If you’re vegan, look for a plant-based protein powder.
-
1 tablespoon peanut butter (or your favorite nut butter)
- Why? It adds healthy fats and a delicious nutty flavor. Almond butter or sunflower seed butter also work beautifully.
-
1 tablespoon chia seeds
- Why? These little powerhouses are packed with omega-3 fatty acids and fiber. You can swap them for flax seeds if you’re out!
-
Toppings (like granola, fresh fruits, nuts, or seeds)
- Why? They add crunch and a burst of flavor. Get creative here—anything you love works!
Step-by-Step Instructions
Ready to whip this smoothie bowl together? Here’s how to make your Coffee Protein Smoothie Bowl in a few simple steps!
-
Prepare Your Ingredients
- Make sure your coffee is brewed and cooled down. I like to prepare mine the night before and let it chill in the fridge. A chilled brew blends beautifully for this bowl!
-
Blend the Base
- In a high-speed blender, combine the ripe banana, cooled coffee, almond milk, and protein powder. Blend on high until smooth and creamy. Chef tip: If you’re looking for a thicker consistency, reduce almond milk by a couple of tablespoons or add more ice!
-
Add the Goodies
- Toss in the peanut butter and chia seeds. Blend again until everything is well incorporated. Note: Chia seeds will absorb some of the liquid as they sit, helping to thicken the smoothie. If it feels too thick, you can always add a splash more almond milk!
-
Taste Test Time!
- Give your smoothie a quick taste. Want it sweeter? Add a drizzle of honey or maple syrup. Want more coffee flavor? Toss in a tiny bit of instant espresso. Blend for a few seconds to mix.
-
Get Your Bowl Ready
- Once it’s perfectly blended, pour your smoothie into your favorite bowl. Personal note: I love using colorful bowls; they just make everything feel more delightful!
-
Create a Topping Masterpiece
- Now comes the fun part! Top your smoothie with granola, sliced bananas, nuts, seeds—the sky’s the limit! Arrange them in rows, circles, or however you feel inspired. Favorite hack: Instead of just pouring the granola, sprinkle it with love—a little goes a long way for that gorgeous aesthetic!
-
Enjoy!
- Grab a spoon and dig in! Remember, it’s not just about eating; it’s about savoring every single bite. Enjoy the moment!
Serving Suggestions
Serve your Coffee Protein Smoothie Bowl immediately to maintain its vibrant texture and vibrant flavors. I love to pair it with a side of warm toast or a square of dark chocolate for that extra indulgence. Hot coffee or a herbal tea complements this bowl impeccably too—hello, cozy mornings!
Recipe Variations
- Mocha Madness: Add a tablespoon of cocoa powder to get that rich chocolate flavor combined with coffee.
- Tropical Twist: Use coconut milk and top with shredded coconut and pineapple for a fun tropical flair!
- Nutty Banana Bliss: Swap peanut butter for almond butter or sunbutter for a different nutty kick, and add a sprinkle of cinnamon.
- Berry Bonanza: Toss in a handful of your favorite berries like blueberries or strawberries into the mix for a fruity burst.
Chef’s Notes
This recipe has been a staple in my morning routine for years now! It started as a simple way to combine my love for coffee and smoothies, but over time, it has evolved into a canvas for creativity. I love to experiment with seasonal fruits and flavors—like using pumpkin puree in the fall for a cozy harvest vibe.
And of course, my kitchen has seen plenty of smoothie bowl disasters along the way—like the time I forgot to close the blender lid properly. Let’s just say, my kitchen looked like a coffee-flavored hurricane! Sharing those moments reminds me that cooking should be fun and light-hearted.
FAQs and Troubleshooting
-
Can I make this smoothie bowl ahead of time?
- Absolutely! You can blend everything and store it in the fridge for up to 24 hours. Just give it a good stir before serving, as it may thicken up.
-
Why is my smoothie bowl too thick?
- If it’s too thick, simply add a splash of milk or water and blend again until desired consistency is reached.
-
Can I use instant coffee instead of brewed coffee?
- Yes, just mix a tablespoon of instant coffee with a little hot water to dissolve before adding it to your blender!
-
How can I add more protein to my smoothie bowl?
- Besides protein powder, consider adding Greek yogurt or cottage cheese for an extra protein punch.
Nutritional Info
For a serving of this Coffee Protein Smoothie Bowl (without toppings):
- Calories: ~300
- Protein: ~15g
- Fat: ~10g
- Carbohydrates: ~40g
- Fiber: ~7g
Enjoy this delightful Coffee Protein Smoothie Bowl that’s both invigorating and comforting! I hope it brings joy to your mornings and inspires you to get creative in the kitchen. Don’t forget to share your smoothie creations with me—I can’t wait to see how you personalize it! Happy cooking!
Print
Coffee Protein Smoothie Bowl
- Total Time: 10 minutes
- Yield: 1 serving 1x
- Diet: Vegetarian
Description
A delightful and energizing smoothie bowl combining coffee, banana, and protein for a perfect breakfast treat.
Ingredients
- 1 ripe banana
- ½ cup brewed coffee (cooled)
- 1 cup unsweetened almond milk (or any milk of choice)
- 1 scoop vanilla protein powder
- 1 tablespoon peanut butter (or your favorite nut butter)
- 1 tablespoon chia seeds
- Toppings (like granola, fresh fruits, nuts, or seeds)
Instructions
- Prepare your ingredients: Make sure your coffee is brewed and cooled down.
- Blend the base: Combine the ripe banana, cooled coffee, almond milk, and protein powder in a blender. Blend until smooth and creamy.
- Add the goodies: Toss in the peanut butter and chia seeds, and blend again.
- Taste test: Give your smoothie a taste, add sweetness if desired, then blend again.
- Get your bowl ready: Pour the smoothie into your favorite bowl.
- Create a topping masterpiece: Add your favorite toppings in a creative arrangement.
- Enjoy: Grab a spoon and savor every spoonful!
Notes
Can be made ahead of time and stored in the fridge for up to 24 hours. Adjust ingredients to achieve desired thickness.
- Prep Time: 10 minutes
- Cook Time: 0 minutes
- Category: Breakfast
- Method: Blending
- Cuisine: American
Nutrition
- Serving Size: 1 bowl
- Calories: 300
- Sugar: 15g
- Sodium: 150mg
- Fat: 10g
- Saturated Fat: 2g
- Unsaturated Fat: 8g
- Trans Fat: 0g
- Carbohydrates: 40g
- Fiber: 7g
- Protein: 15g
- Cholesterol: 0mg
Keywords: smoothie bowl, protein, coffee, healthy breakfast, energizing

Healthy Sweet Potato Hash Browns
Healthy Sweet Potato Hash Browns
Welcome back to my cozy kitchen, food lovers! Today, we’re diving into one of the most comforting and satisfying dishes that I can think of: sweet potato hash browns! If you’ve ever found yourself wanting to recreate that crisp, golden perfection you get at your favorite brunch spot, but in a healthier way, you’re in for a real treat. These hash browns are bursting with flavor, easy to whip up, and packed with nutrients. Plus, they’ll make your home smell absolutely divine!
Sweet potatoes are not just great for savory dishes; they are an exceptionally versatile ingredient that can elevate a simple breakfast to a gourmet experience. Here’s why I’m obsessed with them: they’re not only rich in vitamins A and C, but they also have natural sweetness that pairs beautifully with spices and savory toppings. Whether you’re feeding a crowd on a lazy weekend morning, or simply want a quick yet wholesome side for dinner, these hash browns are ready to take center stage!
Now, let me tell you, making sweet potato hash browns is not just about cooking; it’s about creating a delightful experience. You’ll love hearing the sizzle in the pan, and trust me, the crispy edges will have everyone in the house gathering around the kitchen in no time. As we embark on this culinary adventure together, I promise you’ll feel empowered and excited to cook. So grab your apron, and let’s get started on making these healthy sweet potato hash browns!
Personal Story
Ah, sweet potato hash browns hold a special place in my heart. It all started during those cozy Sunday mornings at my grandmother’s house. You see, every weekend, she would treat us to a hearty breakfast spread featuring her famous hash browns. I can still remember the way her kitchen would fill up with laughter and the aroma of sizzling potatoes blending with the scent of freshly brewed coffee.
Those moments were not just about the food; they were about family, warmth, and connection. As a child, I was always captivated by how she transformed simple ingredients into something magical. Once I learned how to make them myself, I made it a point to tweak her classic recipe over the years, swapping out traditional potatoes for sweet potatoes to give it a healthier twist—even adding kale or spinach on occasion for an extra veggie boost! The feel and flavors of those memories are what inspire each batch of these hash browns in my kitchen today.
Growing up, feeding loved ones has always been a way to show care and create lasting memories. Now, every time I prepare these sweet potato hash browns, I’m reminded of my grandmother and those precious mornings. It’s that nostalgia and love that I hope you’ll also feel as you make this dish.
Ingredients
Here’s what you’ll need to whip up your own batch of heavenly sweet potato hash browns:
-
Sweet Potatoes (2 large)
- The star of the show! Sweet potatoes are packed with vitamins, minerals, and fiber. They add a lovely sweetness and a gorgeous color to your dish. Swap for Yukon gold or mashed potatoes if you’re in a pinch, but trust me, the sweet potatoes really shine here!
-
Onion (1 medium)
- Adds a savory depth to the flavor. Use yellow, white, or even red onions for a sweeter taste. If you’re not an onion fan, try a small amount of garlic powder instead.
-
Garlic (2 cloves, minced)
- For that lovely aromatic kick. You can also use garlic powder, but fresh garlic brings an extra pop!
-
Egg (1 large, optional)
- For binding the mixture and adding protein. If you’re looking for a vegan alternative, a flax egg (1 tablespoon flaxseed meal mixed with 2.5 tablespoons water) or even some mashed banana could work to hold everything together!
-
Olive Oil (2-3 tbsp)
- Perfect for frying to create that crispy exterior. You can substitute with avocado oil for a high smoke point or coconut oil for a subtle sweetness.
-
Salt and Pepper (to taste)
- Essential for seasoning! Feel free to add additional spices like paprika, cumin, or cayenne pepper for a kick.
-
Fresh Herbs (like parsley or cilantro, optional)
- These add a fresh note and brighten up the dish. Dried herbs can work too if fresh isn’t available.
Step-by-Step Instructions
Are you ready to get your hands dirty? Let’s create some crispy, golden, and utterly delicious sweet potato hash browns! Follow these simple steps for the best results:
-
Prep the Sweet Potatoes:
- Start by peeling the sweet potatoes and then grating them using a box grater or a food processor. You want them finely grated, almost like you’d prepare for a slaw. Trust me, the finer the grate, the crispier the hash browns will be!
-
Remove Excess Moisture:
- After grating, place the sweet potatoes in a clean kitchen towel or cheesecloth, twist it up, and wring out as much moisture as you can. This is a crucial step! The more moisture you remove, the crispier the hash browns will turn out.
-
Sauté the Onion and Garlic:
- In a large skillet, heat 1 tablespoon of olive oil over medium heat. Add the chopped onion and sauté until translucent (about 5 minutes). Stir in the minced garlic and sauté for another minute, until fragrant—oh, the smells are heavenly!
-
Mix Ingredients:
- After sautéing, transfer the onion and garlic to a mixing bowl. Add the grated sweet potatoes, beaten egg (if using), salt, and pepper. Mix it all together until it’s well combined. This is where you can also add any spices and herbs you wish. Mix, mix, mix!
-
Cook the Hash Browns:
- In the same skillet, add another tablespoon of olive oil and turn the heat up to medium-high. Once the oil is hot, scoop about a quarter cup of the sweet potato mixture into the skillet, flattening it down with a spatula into a patty shape. Repeat this with the remaining mixture, ensuring not to overcrowd the skillet.
-
Let it Sizzle:
- Allow the hash browns to cook undisturbed for about 4-5 minutes on one side until golden brown and crispy. Resist the urge to flip them too soon; the crust needs time to form!
-
Flip and Finish Cooking:
- Gently flip each hash brown using a spatula, adding a little more oil if necessary. Cook for another 4-5 minutes until that beautiful golden color is achieved.
-
Drain on a Paper Towel:
- Once they’re cooked, transfer the hash browns onto a plate lined with paper towels to absorb any excess oil.
-
Repeat:
- Cook the remaining batter, adding more oil to the skillet as needed. This is a great time to touch-up on other breakfast items—maybe scramble some eggs or prepare some avocado!
-
Serve and Enjoy:
- These delicious hash browns are best served immediately! Act fast, as they tend to lose their crispiness over time.
Serving Suggestions
When it comes time to serve, think about adding a pop of color and flavor to your plate! You can serve these sweet potato hash browns with a fresh dollop of sour cream or Greek yogurt on the side, topped with green onions or chopped herbs. For even more color and nutrition, add sliced avocado or a vibrant homemade salsa. If you’re feeling extra indulgent, a drizzle of sriracha or a sprinkle of feta cheese can take these hash browns over the top!
Recipe Variations
Here are some creative twists to keep your sweet potato hash browns exciting:
-
Add Spinach or Kale: Toss in a handful of chopped greens to amp up the nutrition and flavor.
-
Spicy Sweet Potato Hash: Add diced jalapeños or red pepper flakes for a kick!
-
Herb-Infused: Mix in fresh herbs like thyme or rosemary for an aromatic touch.
-
Cheesy Delight: Fold in some shredded cheese like cheddar or feta before cooking for a cheesy hash brown experience!
-
Breakfast Bowls: Use them as a base for a breakfast bowl, topped with an egg any style, sautéed veggies, or your favorite proteins.
Chef’s Notes
As I reflect on this recipe, I love how it has evolved over time in my kitchen. Initially, it started as a simple comfort food option for my family. But as I began experimenting, I found ways to incorporate healthy ingredients and bold flavors, turning it into a wholesome dish. I remember one time hosting a brunch and accidentally running out of sweet potatoes. In a rush, I mixed in some grated zucchini, and folks, it was a game changer! The variation was a hit and drew attention for its unique texture and flavor.
It’s these happy kitchen accidents that keep me excited as a home cook. Remember, cooking is about having fun and making it your own, so don’t be afraid to let your creativity shine through!
FAQs and Troubleshooting
1. Why are my hash browns soggy?
- If they come out soggy, it’s likely due to excess moisture. Be sure to squeeze out as much liquid as possible after grating the sweet potatoes.
2. Can I make these ahead of time?
- Absolutely! You can prep the mixture ahead and store it in the fridge for up to a day. Just remember to cook them before serving!
3. Are they freezer-friendly?
- Yes! You can freeze the uncooked hash brown patties between layers of parchment paper, then store them in a freezer-safe bag. Just cook them from frozen—add a few extra minutes to the cooking time.
4. What should I do if they fall apart while cooking?
- If your hash browns crumble, try adding an extra egg for binding or lightly pressing them with a spatula while cooking to help them hold together.
Nutritional Info
Note: Nutritional values may vary based on specific ingredients and portion sizes.
- Calories: 200
- Protein: 3g
- Fat: 7g
- Carbohydrates: 34g
- Fiber: 4g
- Sugars: 6g
And there you have it, my dear foodies! This recipe for healthy sweet potato hash browns is sure to brighten up your breakfast table—or any meal for that matter! I hope you feel inspired to get cooking and create amazing memories in your kitchen, just as I did in my grandmother’s. Remember, food is love, and every bite tells a story. Happy cooking!
Print
Healthy Sweet Potato Hash Browns
- Total Time: 35 minutes
- Yield: 4 servings 1x
- Diet: Vegetarian
Description
Delicious and nutritious sweet potato hash browns that are crispy on the outside and soft on the inside. Perfect for breakfast or as a side dish.
Ingredients
- 2 large Sweet Potatoes
- 1 medium Onion
- 2 cloves Garlic, minced
- 1 large Egg (optional)
- 2–3 tbsp Olive Oil
- Salt and Pepper, to taste
- Fresh Herbs (optional)
Instructions
- Prep the sweet potatoes by peeling and grating them.
- Remove excess moisture by wringing them in a towel.
- Sauté the onion in olive oil until translucent, then add garlic.
- Mix the sautéed onion and garlic with grated sweet potatoes, egg, salt, and pepper.
- Cook mixture in the skillet, forming patties and frying until golden brown.
- Flip the patties and cook until the other side is crispy.
- Drain on paper towels before serving.
- Serve immediately with your choice of toppings.
Notes
These hash browns are best served fresh. Consider adding toppings like sour cream, salsa, or avocado for extra flavor.
- Prep Time: 15 minutes
- Cook Time: 20 minutes
- Category: Breakfast
- Method: Frying
- Cuisine: American
Nutrition
- Serving Size: 1 serving
- Calories: 200
- Sugar: 6g
- Sodium: 400mg
- Fat: 7g
- Saturated Fat: 1g
- Unsaturated Fat: 5g
- Trans Fat: 0g
- Carbohydrates: 34g
- Fiber: 4g
- Protein: 3g
- Cholesterol: 70mg
Keywords: sweet potato, hash browns, breakfast, vegetarian, healthy recipes
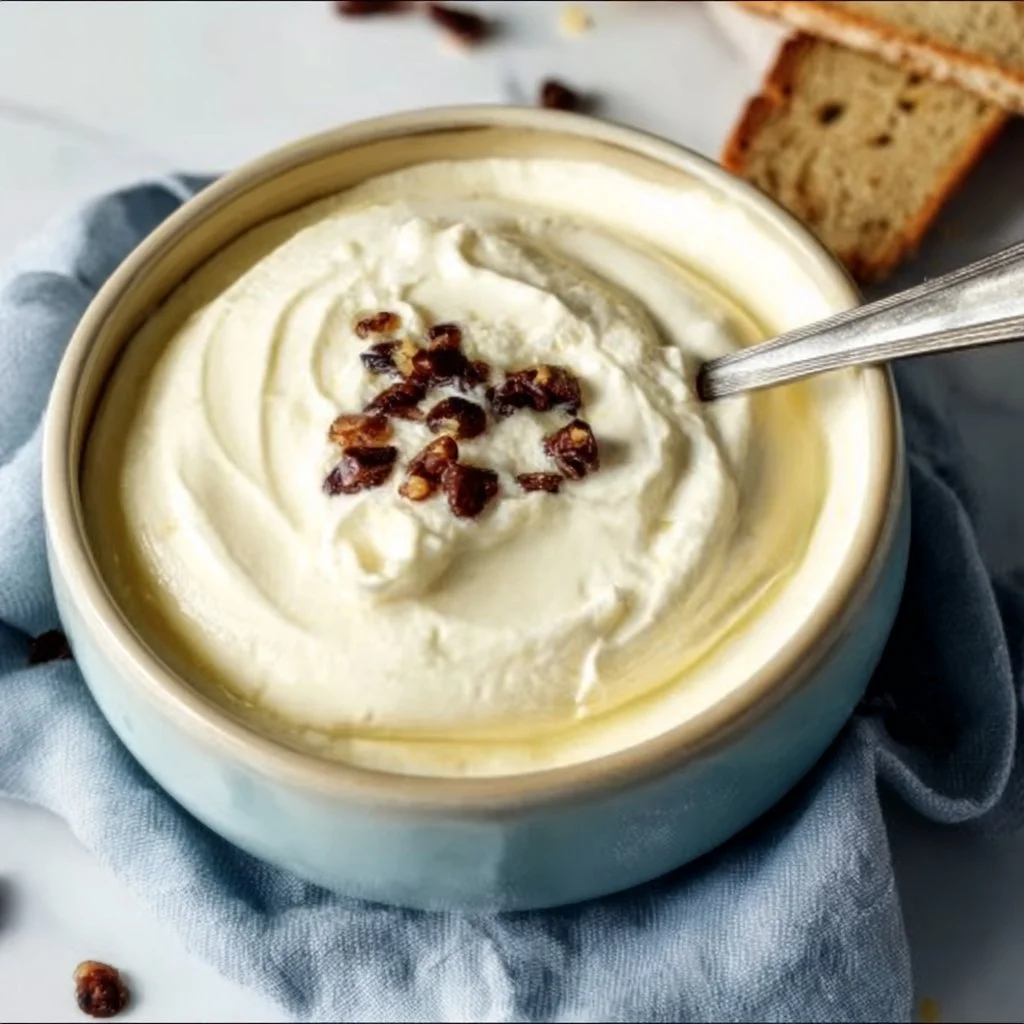
Baked Greek Yogurt: Quick, Healthy Protein Packed Breakfast
# Baked Greek Yogurt: Quick, Healthy, Protein-Packed Breakfast

## Introduction

Welcome to my cozy kitchen, friends! Today, we're diving into a delightful breakfast that will change the way you think about starting your day. Say goodbye to the mundane bowl of cereal and hello to Baked Greek Yogurt. Yes, you heard me right! This recipe not only packs a punch of protein but also offers a warm, comforting twist that will make you want to leap out of bed.

Baked Greek yogurt is a simple yet satisfying dish that brings joy to your morning routine. Picture this: you open your oven to reveal a golden-brown, fluffy delight topped with your favorite fruits and a drizzle of honey. It’s like a hug in breakfast form! And the best part? You can personalize it to match your mood or the season.

Let’s not forget the health benefits – Greek yogurt is a powerhouse of protein and probiotics, perfect for getting your digestion in check while also keeping you full and energized. Whether you’re rushing to work or enjoying a lazy weekend brunch with family, this dish effortlessly fits into any scenario. Plus, it’s quick to whip up on busy mornings, making breakfast a breeze!

So, grab your favorite apron and let’s get baking! This recipe is about to become your new breakfast superstar. It’s time to transform a simple ingredient into something that feels like a special treat. Ready? Let’s jump in!

## Personal Story

Growing up, breakfast was a big deal in our house. My mom had a knack for turning simple ingredients into unforgettable meals, and one of my absolute favorites was her baked yogurt. I can still remember waking up to the sweet aroma wafting through the house; it was always a delightful surprise to discover what flavor she had whipped up that morning.

I fondly remember one winter morning when it was snowing outside, and the warmth of the kitchen was heavenly. My mom made baked Greek yogurt topped with warm cinnamon apples, and we all gathered around the table, cozy in our pajamas. Our laughter filled the space as we enjoyed every spoonful while listening to soft music in the background. Those moments ignited my passion for cooking and my deep love for sharing food with friends and family.

Today, I’m excited to recreate that experience and share it with you. A little nostalgia goes a long way in our kitchens, and I hope this recipe brings as much joy to your mornings as it did to mine.

## Ingredients

Here’s what you’ll need to create this mouthwatering Baked Greek Yogurt:

- **2 cups Greek yogurt**
  - **Insight**: Opt for plain unsweetened to control the sweetness. It’s creamy, rich, and full of protein.

- **2 large eggs**
  - **Substitution Tip**: To make this recipe vegan, use flaxseed meal (1 tablespoon mixed with 2.5 tablespoons of water) for each egg.

- **1/4 cup honey or maple syrup**
  - **Insight**: Adjust sweetness according to your taste! You could also try agave nectar or coconut sugar for a different flavor.

- **1 teaspoon vanilla extract**
  - **Chef Tip**: Using pure vanilla extract elevates the flavor. Homemade vanilla extract is even better!

- **1/2 teaspoon baking powder**
  - **Insight**: This helps your yogurt bake up light and fluffy. Don’t skip it!

- **Toppings**: Your choice! Fruits, nuts, granola, or a sprinkle of cinnamon.
  - **Insight**: Fresh berries are fantastic in the summer, while roasted apples or pears work wonders in the fall.

## Step-by-Step Instructions

### Step 1: Preheat Your Oven
First things first, preheat your oven to 350°F (175°C). This step sets the stage for a perfectly baked yogurt.

### Step 2: Mix the Ingredients
In a large mixing bowl, combine the Greek yogurt, eggs, honey (or maple syrup), vanilla extract, and baking powder. Mix with a whisk until all ingredients are thoroughly blended. Don’t worry if it looks a little lumpy at this stage; it will smooth out beautifully as it bakes!

### Step 3: Prepare a Baking Dish
Lightly grease an 8x8-inch baking dish or a medium-sized cast-iron skillet with cooking spray or a little olive oil. This prevents any sticking and helps achieve a gorgeous color on the edges.

### Step 4: Pour and Spread
Pour the yogurt mixture into the greased baking dish. Use a spatula to spread it evenly, smoothing the top for a lovely finish.

### Step 5: Get Creative with Toppings
Here’s where you can have some fun! Sprinkle your choice of toppings over the yogurt mixture. I love using a mix of fresh sliced strawberries and a handful of crunchy granola. But feel free to experiment with what’s in season or what you have on hand.

### Step 6: Bake it Up
Place your dish in the preheated oven and bake for 25-30 minutes. Keep an eye on it as it bakes – you’re looking for a light golden top and a slight jiggle in the center. The edges should be puffed and set, while the middle might still be a touch soft.

### Step 7: Cool & Serve
Once it’s done baking, remove it from the oven and let it cool for about 5-10 minutes. This allows it to firm up just enough for easy serving. You can cut it into squares or serve it right from the dish.

## Serving Suggestions

Serve your baked Greek yogurt warm, straight from the oven, or let it cool slightly and plate it up with a drizzle of honey or a dollop of yogurt on top. It’s delightful with a side of fresh fruit or a sprinkle of nuts for crunch – perfect for elevating your breakfast experience!

## Recipe Variations

- **Berry Blast**: Add a blend of fresh or frozen berries mixed into the yogurt for a fruity twist.
- **Tropical Escape**: Mix in crushed pineapple and coconut flakes for a summery vibe.
- **Chocolate Delight**: Stir in some cocoa powder or chocolate chips for a rich, indulgent breakfast treat.
- **Nutty Banana**: Top with sliced banana and a drizzle of peanut butter for an extra protein boost.
- **Savory Twist**: Consider adding herbs like rosemary or thyme and topping with sautéed mushrooms or spinach for a savory breakfast version.

## Chef's Notes

This recipe has been a staple in my kitchen for years! I love how easy it is to tweak depending on what’s in the fridge or the season. Plus, I have to confess, I've had my share of “kitchen disasters” – like the time I forgot to add the eggs and ended up with a yogurt pudding instead. But hey, they say every great chef has their stories, right? Embrace the mess, enjoy the journey, and remember that every mishap is just a delicious learning experience!

## FAQs and Troubleshooting

**1. Can I make this ahead of time?**
Yes! You can prepare the mixture the night before and refrigerate it. Just bake it in the morning when you're ready to enjoy.

**2. It turned out too runny — what happened?**
If your yogurt mixture ends up too runny, it might be due to underbaking. Make sure it’s set and not too jiggly in the center before removing it from the oven.

**3. Can I add protein powder to this recipe?**
Absolutely! Just replace a portion of the Greek yogurt with protein powder, but you may need to add a bit more liquid to maintain the right consistency.

**4. How do I store leftovers?**
Store any leftovers in an airtight container in the refrigerator for up to 3 days. You can reheat it in the microwave for a quick breakfast!

## Nutritional Info

- **Calories**: Approximately 150 per serving (based on 8 servings)
- **Protein**: 10g
- **Carbohydrates**: 15g
- **Fat**: 6g

With this Baked Greek Yogurt recipe, you’re not just making breakfast; you’re creating memories, sharing joy, and enjoying all the goodness that comes from cooking. Each bite brings warmth and smiles, making every morning a little brighter. Happy baking, foodies! 🍽️

Baked Greek Yogurt
- Total Time: 40 minutes
- Yield: 4 servings 1x
- Diet: Vegetarian
Description
A warm, protein-packed baked yogurt delight, perfect for breakfast.
Ingredients
- 2 cups Greek yogurt (plain, unsweetened)
- 2 large eggs
- 1/4 cup honey or maple syrup
- 1 teaspoon vanilla extract
- 1/2 teaspoon baking powder
- Toppings: fruits, nuts, or granola of your choice
Instructions
- Preheat your oven to 350°F (175°C).
- Mix the Greek yogurt, eggs, honey (or maple syrup), vanilla extract, and baking powder in a large bowl.
- Prepare an 8×8-inch baking dish or cast-iron skillet by greasing it lightly.
- Pour the yogurt mixture into the greased dish and smooth the top with a spatula.
- Get creative by adding your favorite toppings on top.
- Bake for 25-30 minutes until lightly golden and set around the edges.
- Cool for 5-10 minutes, then serve warm.
Notes
Feel free to personalize with seasonal fruits or favorite toppings.
- Prep Time: 10 minutes
- Cook Time: 30 minutes
- Category: Breakfast
- Method: Baking
- Cuisine: Mediterranean
Nutrition
- Serving Size: 1 serving
- Calories: 150
- Sugar: 10g
- Sodium: 80mg
- Fat: 6g
- Saturated Fat: 2g
- Unsaturated Fat: 2g
- Trans Fat: 0g
- Carbohydrates: 15g
- Fiber: 1g
- Protein: 10g
- Cholesterol: 50mg
Keywords: baked yogurt, healthy breakfast, quick breakfast, protein-packed breakfast




