Oreo Milkshake
Oreo Milkshake Recipe: A Decadent Delight for Everyone
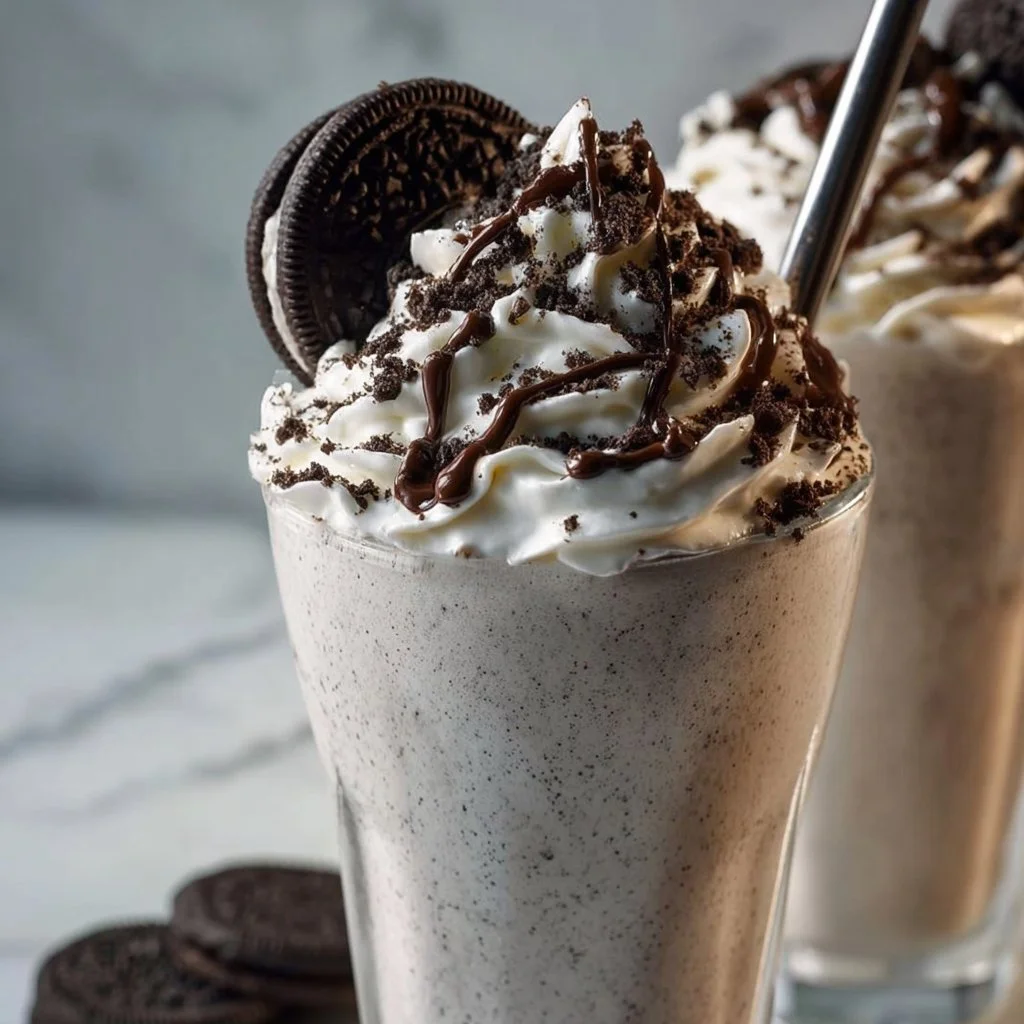
Welcome to my kitchen! I’m so excited to share one of my absolute favorite sweet treats with you today: the Oreo milkshake. If you’re anything like me, you know there’s something incredibly special about the combination of creamy ice cream and crunchy cookies. Picture this: a frosty glass filled with a luscious, thick, and creamy milkshake that perfectly balances chocolatey and vanilla flavors, topped with whipped cream and maybe even a drizzle of chocolate syrup. It’s the indulgence we didn’t know we needed!
Oreo milkshakes remind me of those carefree summer afternoons when my siblings and I would race to the kitchen after dinner, eager to whip up a batch while we still had daylight. We’d rummage through the pantry for our favorite ingredients, our giggles filling the room. My parents could always hear us stirring up mischief! But the best part? As we blended those cookies into ice-cold milk, the anticipation built until we could finally savor that first sip. Each sip was a sweet memory, a moment that transported us to a blissful, cookie-laden paradise.
Today, I want to channel that pure joy of childhood into your kitchen. Whether you’re treating yourself during a cozy night in, celebrating a special occasion, or just trying to impress friends, an Oreo milkshake never fails to delight. Plus, it’s super easy—it only takes a few minutes, and you probably already have the ingredients hanging out in your pantry and fridge! So, grab your blender and let’s get started on creating a mouthwatering Oreo milkshake that’s bound to be a hit.
Personal Story
I still fondly remember the summer my family transformed our small kitchen into a makeshift ice cream parlor. One evening, after a particularly long day of swimming in the pool, we decided to recreate our favorite movie scene where the characters enjoyed huge milkshakes at an old diner. We quickly gathered hand-churned vanilla ice cream, stacks of Oreos, and the creamiest milk we could find.
As we whipped everything up, my older brother decided to go wild with the toppings, adding everything from sprinkles to chocolate syrup (yes, we were a little overzealous!). I can still hear our laughter as we tried to take our first sips—those straws were working overtime! But the real victory of that evening? The moment we sat on the back porch, milkshakes in hand, stars twinkling overhead, as we shared the best of stories and dreams. It was one of those moments that makes you appreciate the simple joys in life.
Now, whenever I blend up an Oreo milkshake, it’s like catching a nostalgic whiff of childhood—a reminder that good food and laughter are the ultimate experiences to savor, especially when shared with loved ones.
Ingredients
Before we dive into the deliciousness that is the Oreo milkshake, let’s briefly review the ingredients you’ll need. Each one adds its unique touch to the shake, making it a delightful treat!
-
Oreo Cookies (6–8):
- Why it’s essential: The classic base for our milkshake. Their crunchy chocolate cookies and creamy filling create the ultimate flavor.
- Substitution tips: If you’re feeling adventurous, try chocolate sandwich cookies or even gluten-free versions!
-
Vanilla Ice Cream (2 cups):
- Why it’s essential: Creaminess is key! Vanilla ice cream provides a smooth texture and the perfect neutral backdrop for those Oreos.
- Substitution tips: Try using plant-based ice creams or frozen yogurt for a lighter version.
-
Milk (1 cup):
- Why it’s essential: Milk helps blend everything into that luxuriously thick consistency we all crave.
- Substitution tips: Almond milk, oat milk, or even chocolate milk can add exciting flavors!
-
Whipped Cream (for topping):
- Why it’s essential: A fluffy crown for your milkshake! It’s a glorious finish that elevates every sip.
- Substitution tips: Try coconut whipped cream for a dairy-free treat!
-
Chocolate Syrup (optional):
- Why it’s essential: You can drizzle it on top for an extra sweet moment or swirl it throughout the shake!
- Substitution tips: Experiment with caramel or strawberry sauce for a fruity twist.
-
Extra Oreo Crumbles (for garnish):
- Why it’s essential: More Oreos? Yes, please! It adds crunch and that wow factor when serving.
- Substitution tips: Crushed nuts or cereal can offer a different texture!
Step-by-Step Instructions
Now, let’s get into the fun part—making your Oreo milkshake! Grab your blender, and let’s whip up a monster of a shake!
Step 1: Prepare Your Ingredients
Before blending, we want to have everything ready. Measure out your ice cream, milk, and Oreos. You want to use a sturdy blender for this recipe; it’ll make everything so much easier!
Step 2: Blend in the Goodness
Add all your ingredients into the blender: the ice cream, milk, and Oreos. Start with 6 Oreos, and you can always add more if you want a stronger flavor. Trust me; it’s hard to go wrong!
Blend on high until everything is smooth and creamy. Don’t be concerned if the Oreos break up unevenly—they should give that perfect speckled look. It’s like each sip is a surprise!
Step 3: Check the Consistency
After blending, take a moment to taste-test! If it’s a bit too thick for your liking, add a splash more of milk and give it another quick blend. If you want a thicker shake, add a bit more ice cream.
Step 4: Pour and Plate
Grab your favorite tall glass and pour the milkshake in. You’ll want to let it fill all the way to the top; nobody likes a half-filled milkshake! At this point, you can drizzle chocolate syrup inside the glass before pouring for an extra-special touch.
Step 5: Top It Off
Here comes the magic! Add a generous swirl of whipped cream on top, then sprinkle extra crumbled Oreos for that fancy finishing touch. Drizzle more chocolate syrup if you’re feeling adventurous.
Step 6: Serve Immediately
Grab a straw (or a spoon if you’re like me and just can’t wait!), and find a cozy spot to enjoy your creation. Trust me, you’re going to want to savor that first sip!
Serving Suggestions
For the ultimate presentation, serve your Oreo milkshake with a side of extra cookies or snack-sized treats, like chocolate bars or brownies. You can also pair it with fresh fruit—strawberries or bananas make excellent companions. And if you want to turn it into a full-fledged dessert experience, pair it with a slice of chocolate cake or gooey brownies to complete the party!
Recipe Variations
Looking to switch it up? Here are a few fun variations you can try:
- Mint Oreo Milkshake: Swap regular Oreos for mint-flavored ones for a refreshing twist.
- Peanut Butter Oreo: Add a couple of tablespoons of peanut butter to the blender for a nutty, delicious flavor combo.
- Mocha Oreo Shake: Use coffee ice cream and add a shot of espresso or cold brew for an energizing twist.
- Cookie Dough Delight: Toss in some edible cookie dough chunks for an extra treat in your shake.
- Vegan Oreo Shake: Use dairy-free ice cream, almond milk, and vegan Oreo cookies to cater to vegan friends!
Chef’s Notes
This recipe is one that’s evolved over the years in my kitchen. I initially started with just milk and Oreos, but like any avid cook knows, discovering new flavors is where the fun happens! I’ve experimented with different ice creams—mint chocolate chip is a favorite (and so good for summer!)—and have learned to embrace toppings.
I’ll never forget the time I tried to create an “Oreo milkshake bar” for a get-together with friends, allowing everyone to customize their shakes. Let’s just say we had a few too many “experiments,” including a strange peanut butter-bacon combination (which was hilariously a disaster). Sometimes, the best kitchen memories come from the fails!
FAQs and Troubleshooting
-
Q: My milkshake is too thick! What can I do?
- A: Just add a splash of milk and blend again. Start with small amounts until you reach the desired consistency!
-
Q: Can I make this ahead of time?
- A: I recommend enjoying these fresh, but if you must make it ahead, blend and store it in the freezer. Just remember to re-blend right before serving for the best texture.
-
Q: How can I make this into a non-dairy version?
- A: Simply use dairy-free ice cream and almond or oat milk. Most store-bought Oreos are also dairy-free!
-
Q: Can I customize the level of sweetness?
- A: Absolutely! Adjust the amount of milk and ice cream depending on your preference. If you love it sweeter, drizzle some extra syrup into the blender.
Nutritional Info
While a delicious indulgence, an Oreo milkshake isn’t exactly low-calorie. Here’s a quick nutritional breakdown per serving (approximately):
- Calories: 800-900 calories
- Fat: 30-40g
- Carbohydrates: 100-110g
- Sugars: 70-75g
- Protein: 10g
Note: Nutritional values will vary based on specific ingredient choices.
I hope you’re now feeling inspired to create your very own Oreo milkshake! Armed with this recipe, you’re all set to sweeten up your day and make some delightful memories. So, gather your loved ones, blend up those ingredients, and let the happiness flow—one delicious sip at a time! Enjoy, and happy cooking!
Print
Oreo Milkshake
- Total Time: 5 minutes
- Yield: 2 servings
- Diet: Vegetarian
Description
A decadent Oreo milkshake with a perfect balance of chocolatey and vanilla flavors, topped with whipped cream and drizzled with chocolate syrup.
Ingredients
- Oreo Cookies (6–8)
- Vanilla Ice Cream (2 cups)
- Milk (1 cup)
- Whipped Cream (for topping)
- Chocolate Syrup (optional)
- Extra Oreo Crumbles (for garnish)
Instructions
- Prepare your ingredients by measuring out the ice cream, milk, and Oreos.
- Blend all ingredients into the blender: ice cream, milk, and Oreos. Start with 6 Oreos for a nice flavor.
- Check the consistency after blending. Add more milk for a thinner shake or more ice cream for a thicker shake.
- Pour the milkshake into a tall glass, filling it to the top.
- Top it off with whipped cream and extra Oreo crumbles.
- Serve immediately with a straw or spoon!
Notes
For variations, try using mint Oreos or adding peanut butter for a nutty twist. Enjoy with extra cookies or brownies on the side.
- Prep Time: 5 minutes
- Cook Time: 0 minutes
- Category: Dessert
- Method: Blending
- Cuisine: American
Nutrition
- Serving Size: 1 serving
- Calories: 800
- Sugar: 75g
- Sodium: 300mg
- Fat: 35g
- Saturated Fat: 20g
- Unsaturated Fat: 10g
- Trans Fat: 0g
- Carbohydrates: 110g
- Fiber: 3g
- Protein: 10g
- Cholesterol: 60mg
Keywords: Oreo, milkshake, dessert, sweet treat, ice cream
Healthy Apple Pie Oatmeal Cookies
Healthy Apple Pie Oatmeal Cookies: A Cozy Treat with a Twist!
Introduction
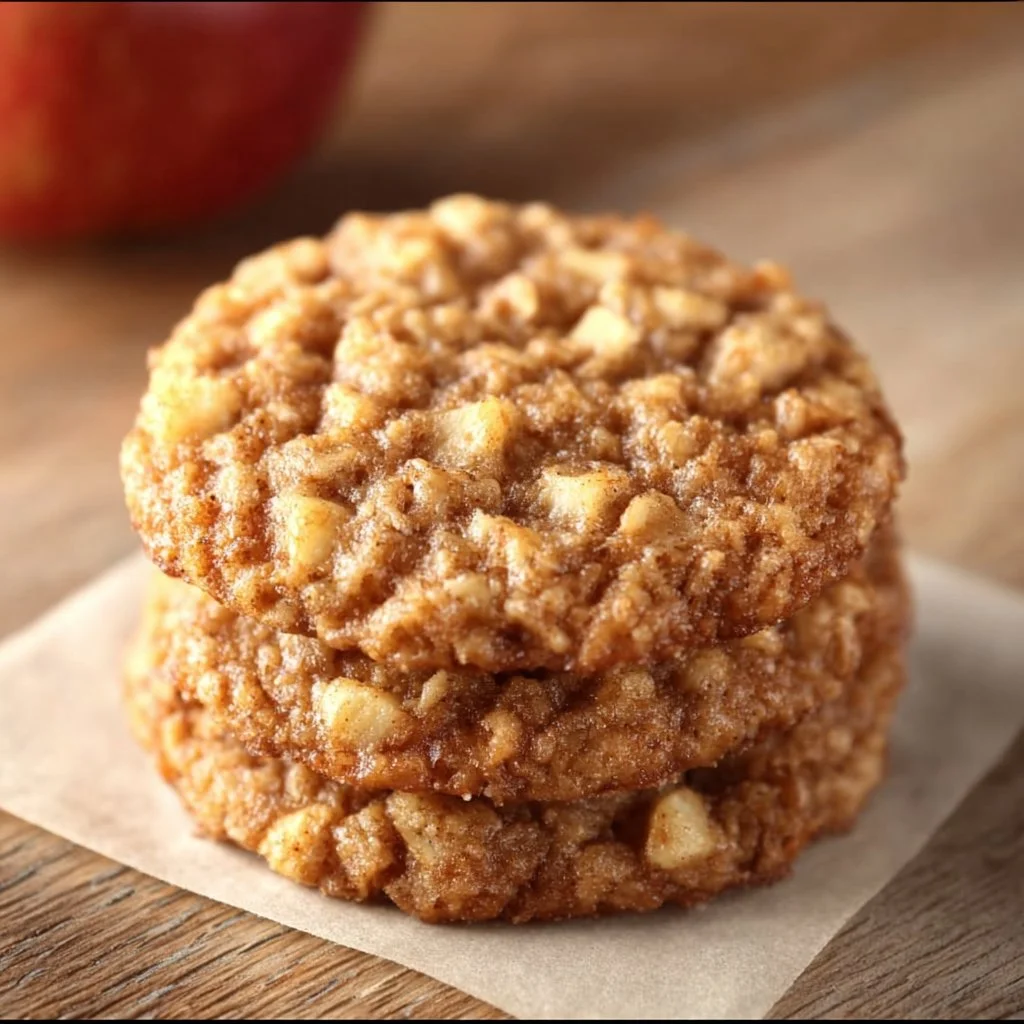
Welcome back to my kitchen, my fellow culinary adventurers! Today, I’m thrilled to share a recipe that promises to sprinkle a little cozy magic into your day—Healthy Apple Pie Oatmeal Cookies. Picture this: warm spices wafting through your home, a hint of sweet, cinnamon-laden apples dancing in the air, and the comforting crunch of oats that just begs to be dunked into a cup of tea or coffee.
These are not your average cookies. They’re a wholesome twist on the traditional apple pie, packaged in a chewy oatmeal cookie form. I mean, who doesn’t want to indulge in dessert while still feeling good about their choices, right? This recipe offers all the cozy fall flavors we love while being packed with nutrients. And the best part? They’re incredibly easy to whip up!
Whether you’re gearing up for a Saturday baking session or looking for a quick after-school snack, these cookies will hold a special place in your heart—and, of course, your cookie jar. So, grab your apron, preheat that oven, and let’s dive into the delightful world of Healthy Apple Pie Oatmeal Cookies. You might even want to make a double batch; trust me, they won’t last long!
Personal Story
When I think of apple pie, my mind always drifts back to chilly autumn afternoons spent in my grandmother’s kitchen. The scent of cinnamon and nutmeg filled the air as she expertly rolled pie crusts and sliced apples, her laughter ringing through the house like a warm hug. It was one of those magical spaces where time seemed to slow down, and our family gathered around the table, stories flowing as easily as the delicious apple pie that was just out of the oven.
One particular memory stands out. I was tasked with peeling apples, a job that felt so important to my young self. I was determined to impress Grandma with my “professional” peeling skills, though I often ended up with more apple bits on the counter than in the bowl. But to her, it didn’t matter; it was the experience we shared that counted. Those afternoons taught me that cooking is not just about the food; it’s about memories, connections, and the love we put into every dish.
Fast-forward to today, and I find myself inspired to re-create that warmth and joy in my own kitchen, hence these Healthy Apple Pie Oatmeal Cookies. They might not be a pie, but they capture those cherished flavors—and bring a smile to my face every bite of the way!
Ingredients
Before we get cooking, let’s gather our star ingredients! Here’s what you’ll need:
-
Rolled Oats
These chewy delights are the heart of our cookies. They provide fiber, keep you full, and add that lovely texture we crave. Feel free to use gluten-free oats if needed! -
Whole Wheat Flour
A wholesome touch that adds nutrients and a hearty flavor. If you prefer a gluten-free option, almond flour or gluten-free all-purpose flour works wonderfully. -
Baking Powder
The little leavening agent that helps our cookies rise and become soft and fluffy. -
Cinnamon
Ah, the quintessential spice that screams “apple pie”! If you want a twist, try adding nutmeg or allspice for a deeper flavor. -
Salt
Just a pinch to balance the sweetness. Trust me, it makes a world of difference! -
Apple Sauce
This acts as a natural sweetener and moisture enhancer. You can substitute with mashed bananas or an equal amount of honey/maple syrup if you’re feeling adventurous. -
Honey or Maple Syrup
For that touch of sweetness that brings all the flavors together. Choose maple syrup if you’d like a vegan option. -
Diced Apples
Of course, the star of our recipe! Choose your favorite variety for this—Honeycrisp or Granny Smith work beautifully. -
Chopped Walnuts or Pecans (optional)
Adds a delightful crunch and a dose of healthy fats. If nuts aren’t your thing, feel free to skip them or swap them with seeds! -
Chocolate Chips or Raisins (optional)
For those who like a little extra sweetness in their cookies, these can be a fun add-in!
Step-by-Step Instructions
Alright, let’s get down to business! Follow these steps to bake up some delicious Healthy Apple Pie Oatmeal Cookies.
-
Preheat the Oven
Preheat your oven to 350°F (175°C). This will ensure that your cookies bake evenly and come out perfectly chewy! -
Mix Dry Ingredients
In a large mixing bowl, combine 1 cup of rolled oats, ¾ cup of whole wheat flour, 1 teaspoon of baking powder, 1 teaspoon of cinnamon, and a pinch of salt. Mix well! This will be the dry base of our cookie dough, and mixing it first helps distribute all the dry ingredients evenly. -
Prepare the Wet Ingredients
In another bowl, whisk together ½ cup of applesauce and ¼ cup of honey or maple syrup until smooth. Add in 1 cup of diced apples. If you’re feeling a little adventurous, you can mash some of the apples into the mixture for added apple flavor! -
Combine Wet and Dry
Gradually add your wet mixture to the bowl of dry ingredients. Stir until just combined; this is where the magic happens. Don’t be afraid to get your hands in there—it’s totally encouraged! -
Add Optional Ingredients
If you’re including nuts or chocolate chips, fold them in gently. This is purely a personal choice, but I highly recommend it for that extra texture and richness! -
Scoop and Bake
Use a tablespoon or cookie scoop to drop dough onto a parchment-lined baking sheet, spacing them about 2 inches apart. These cookies won’t spread much, so shape them as you wish. Bake for 12–15 minutes, or until the edges are golden brown and the centers look set. -
Cool and Enjoy
Once baked, remove the cookies from the oven and allow them to cool on a wire rack for about 5 minutes before transferring them. This step is essential as they will continue to firm up as they cool!
Serving Suggestions
Now you have a delightful batch of cookies to enjoy! Serve them warm with a sprinkle of cinnamon on top or perhaps a drizzle of honey for extra sweetness. These cookies are perfect on their own, but they can also shine alongside a cozy cup of tea or coffee. If you’re feeling generous, package a few up to share; they make a wonderful gift for friends, neighbors, or to brighten someone’s day!
Recipe Variations
Looking to shake things up? Here are a few fun variations you can try with these cookies:
-
Spiced Pumpkin Apple Cookies: Substitute half of the applesauce for pumpkin puree and add ½ teaspoon of pumpkin spice for a delicious fall twist!
-
Cranberry-Apple Oatmeal Cookies: Mix in some dried cranberries for a tart contrast that perfectly complements the sweetness of the apples.
-
Breakfast Cookies: Add in a scoop of protein powder and some chia seeds for a breakfast version that’s perfect on-the-go!
-
Vegan Cookies: Use maple syrup instead of honey and ensure your oats are gluten-free. You can also substitute the applesauce for mashed bananas for a delightful flavor change.
Chef’s Notes
These Healthy Apple Pie Oatmeal Cookies have been a labor of love in my kitchen for quite some time now. Originally born out of a need for a healthier dessert option, they’ve evolved over the years to become a staple in my household. I remember the first time I served them to my friends at a gathering; they disappeared faster than I could keep up with!
Baking these cookies always brings back those warm memories of my grandmother, and they’ve become my own little way of carrying that legacy forward. I like to think she’d be proud of this healthier alternative while still celebrating those cozy apple pie flavors we adore.
FAQs and Troubleshooting
-
Why are my cookies flat?
Overmixing your dough or not incorporating enough dry ingredients can lead to flat cookies. Make sure to mix until just combined. -
Can I freeze these cookies?
Absolutely! You can freeze the dough or fully baked cookies. Just make sure to store them in an airtight container. When you’re ready, bake from frozen or let the cookies thaw at room temperature. -
What should I do if my dough is too dry?
If your dough feels crumbly, add a splash of milk or a bit more apple sauce to bring it together. Slight adjustments can make a world of difference! -
How do I know when they’re done?
Look for golden edges and a slightly soft center; remember, they will continue to firm up as they cool.
Nutritional Info
(Under preparation)
These cookies are a great source of fiber and nutrients from oats and apples. They provide a balance of healthy fats (if you include nuts) and natural sweetness, making them a guilt-free treat!
I hope you love these Healthy Apple Pie Oatmeal Cookies as much as I do! Remember, cooking is all about having fun and making memories. So enjoy the process; that’s where the real magic happens. Happy baking, my friends!
Print
Healthy Apple Pie Oatmeal Cookies
- Total Time: 30 minutes
- Yield: 12 cookies 1x
- Diet: Vegetarian
Description
Delicious oatmeal cookies infused with warm spices and sweet apples, offering a wholesome twist on classic apple pie.
Ingredients
- 1 cup rolled oats
- ¾ cup whole wheat flour
- 1 teaspoon baking powder
- 1 teaspoon cinnamon
- Pinch of salt
- ½ cup applesauce
- ¼ cup honey or maple syrup
- 1 cup diced apples
- Chopped walnuts or pecans (optional)
- Chocolate chips or raisins (optional)
Instructions
- Preheat your oven to 350°F (175°C).
- Mix together the rolled oats, whole wheat flour, baking powder, cinnamon, and salt in a large bowl.
- Whisk together the applesauce and honey or maple syrup in another bowl. Stir in the diced apples.
- Combine the wet ingredients with the dry ingredients until just mixed.
- Add optional nuts or chocolate chips and fold them in gently.
- Scoop the dough onto a parchment-lined baking sheet, spacing them apart.
- Bake for 12–15 minutes or until the edges are golden brown.
- Cool on a wire rack for about 5 minutes before transferring.
Notes
These cookies can be served warm or at room temperature. They can also be frozen for later enjoyment.
- Prep Time: 15 minutes
- Cook Time: 15 minutes
- Category: Dessert
- Method: Baking
- Cuisine: American
Nutrition
- Serving Size: 1 cookie
- Calories: 150
- Sugar: 8g
- Sodium: 100mg
- Fat: 6g
- Saturated Fat: 1g
- Unsaturated Fat: 5g
- Trans Fat: 0g
- Carbohydrates: 20g
- Fiber: 2g
- Protein: 3g
- Cholesterol: 0mg
Keywords: apple pie, oatmeal cookies, healthy cookies, dessert, fall flavors
Mango Strawberry Sorbet
Sweet and Tangy Mango Strawberry Sorbet: A Refreshing Treat for Any Day
Welcome back to my cozy corner of the kitchen! Today, I’m super excited to share one of my all-time favorite recipes that’s just bursting with tropical sunshine and fruity goodness: Mango Strawberry Sorbet! Picture this: you’ve just come in from a long day, and the sun is setting, casting a golden glow over everything. The air is warm, and all you want is a refreshing treat that not only chills you out but also tickles your taste buds. This sorbet is the perfect solution!
Not only is it a delightful way to indulge in the rich flavors of summer, but it’s also surprisingly simple to whip up. Best of all, you don’t need any fancy equipment—just a blender and a freezer! Whether you’re throwing a last-minute gathering or simply craving something cool for yourself, this sorbet will do the trick. It’s an excellent way to impress your friends and family—it seems fancy, but I promise it’s incredibly easy!
Plus, it’s versatile! Swap ingredients or adjust the sweetness to your heart’s content. I’m all about making cooking enjoyable and accessible, so let’s dive into this fruity adventure together. Grab your aprons, and let’s get ready to bring the vibrant world of flavors into your kitchen. Are you ready to transform fresh fruits into a dreamy dessert? Let’s go!
Personal Story
I’ll never forget the first time I tasted a sorbet. It was at my grandmother’s garden picnic, surrounded by wildflowers and laughter. She made the most incredible strawberry sorbet using berries freshly picked from her backyard. I can still picture the sun sparkling in the sky as I held that little cup of vibrant pink delight in my hand. The moment I took that first bite, it was as though summer itself danced on my taste buds. I was hooked!
That memory has stuck with me through the years, inspiring me to recreate and innovate my own versions of sorbet. Fast forward to today, and I often find myself experimenting with different fruit combinations at home, but the mango-strawberry combo remains a cherished favorite. It encapsulates the perfect balance between sweet and tangy, and every scoop takes me right back to that carefree afternoon in my grandmother’s garden. So, let’s carry on that joyful tradition and make some tropical magic in our kitchens!
Ingredients
Here’s what you’ll need to create this delightful Mango Strawberry Sorbet. Each ingredient plays a crucial role in achieving that magical flavor and texture:
-
2 cups ripe mango, diced
- Chef Insight: Make sure your mangoes are sweet and fragrant! If you can’t find ripe mangoes, frozen mango works great. Just let them thaw slightly before blending.
-
2 cups fresh strawberries, hulled
- Substitution Tip: If strawberries aren’t in season, feel free to use frozen ones—just ensure they’re unsweetened for the best flavor.
-
1/2 cup sugar (adjust to taste)
- Sweetness Note: Use more sugar if your fruits are slightly tart. You can replace granulated sugar with honey or agave syrup for a healthier option.
-
1 tablespoon lemon juice
- Quick Chef Insight: This little splash brightens the flavors and helps balance the sweetness. You can also use lime juice for a fun twist!
-
1/2 cup water
- Substitution Tip: If you’re feeling adventurous, sparkle things up with coconut water for a tropical twist!
Once you’ve gathered all your ingredients, you’re just a blender away from crafting a refreshing treat. Let’s get started!
Step-by-Step Instructions
-
Prep the Fruits
- Begin by peeling and dicing the mango. It’s best to select mangoes that yield slightly to pressure—this means they’re fresh and ripe! The strawberries should also be hulled and rinsed under cold water to ensure they’re clean and ready to blend.
-
Blend Your Base
- Toss the mango pieces, hulled strawberries, sugar, lemon juice, and water into your blender. Tip: If you’re using frozen fruit, you may need to add an extra splash of water to get things moving. Blend until smooth, pulsing to scrape down the sides as needed.
-
Taste Test
- Give your mixture a little taste. This is where you can adjust the sweetness! If it’s too tart, add a little more sugar or honey, and blend again for a few seconds. It should be fruity with a hint of tang—delicious!
-
Chill Out
- Pour the sorbet mixture into a shallow dish or a loaf pan. This allows it to freeze evenly. Cover with plastic wrap and pop it in the freezer for about an hour.
-
Fluff It Up
- After an hour, take it out and use a fork to stir it up—this helps create that light, fluffy texture that’s oh-so-important in sorbet. Pop it back in the freezer for another 2-3 hours, or until firm.
-
Final Touches
- Once it’s frozen to your desired consistency, use an ice cream scoop or a spoon to serve it up! If it’s too hard, let it sit at room temperature for a few minutes before scooping.
Chef Hack: For an elegant presentation, freeze your sorbet mixture in an ice cube tray for bite-sized bits of frozen fruity goodness!
Serving Suggestions
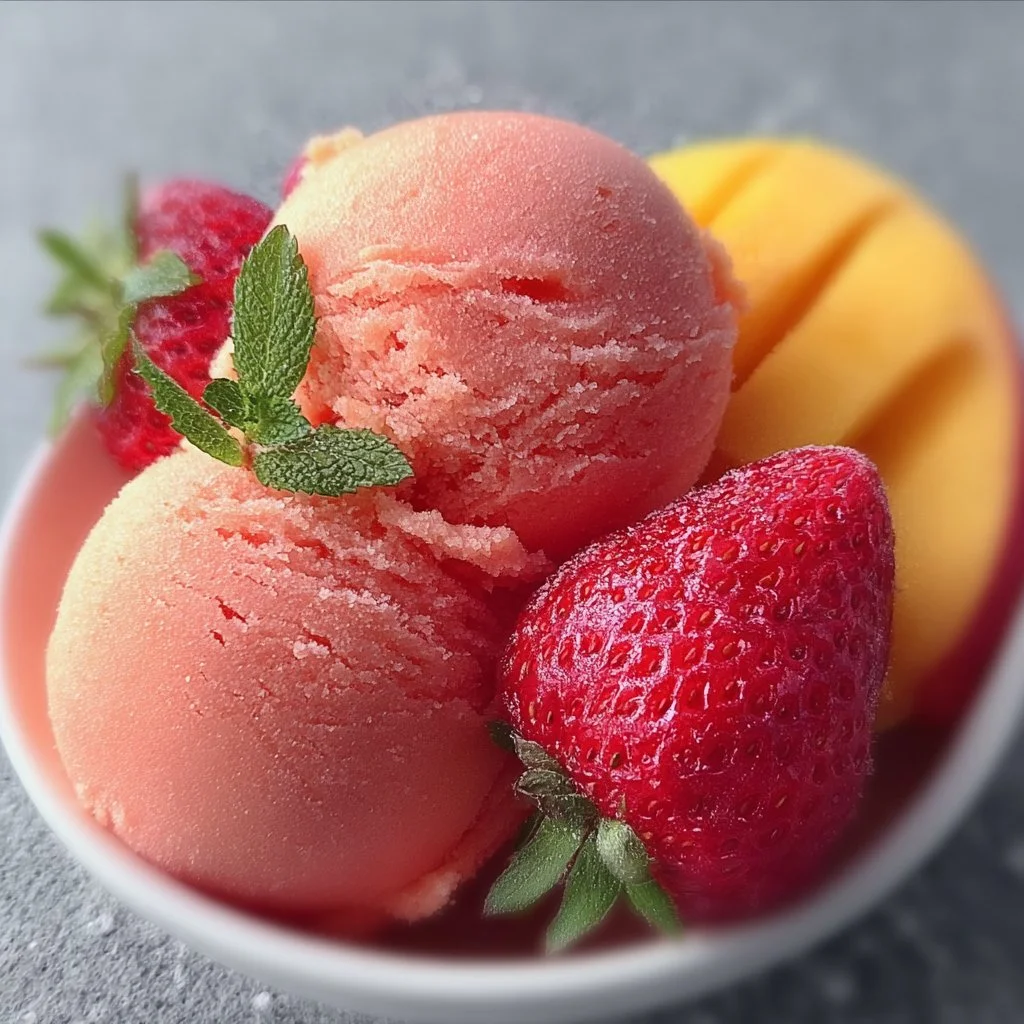
To serve your Mango Strawberry Sorbet, consider placing a generous scoop into a cocktail glass or a pretty dessert bowl. Garnish it with a few fresh mint leaves or a sprinkle of lime zest for a pop of color and freshness. You could even pair it with a homemade fruit salsa or drizzle a little melted dark chocolate over the top for a delicious contrast.
Serve it on a warm summer evening while watching the sunset, and you’ll create a moment that’s nearly magical. Your guests will be raving about it long after the last scoop is gone!
Recipe Variations
-
Tropical Twist: Substitute half the mango with pineapple for a different flavor profile that’s equally refreshing!
-
Berry Blast: Replace strawberries with blueberries or raspberries for a colorful spin.
-
Creamy Delight: Add a splash of coconut milk to the mixture before blending for a creamier texture and a tropical vibe.
-
Herb Infusion: Incorporate a few fresh basil leaves into the blend for a unique flavor twist that enhances the fruity notes.
-
Zesty Sorbet: Add zest from a lime or lemon to deepen the flavor and enhance the freshness!
Chef’s Notes
Creating this Mango Strawberry Sorbet has become more than just a summer treat for me; it’s a celebration of family, laughter, and sunny days. I’ve played around with various flavor combinations and techniques over the years, but there’s something about the classic mango-strawberry duet that resonates.
If you find yourself with leftover sorbet (which is rare in my house!), simply store it in an airtight container for a few weeks. You can also repurpose it into smoothies or use it as a fruity topping for your yogurt or pancakes.
Remember, cooking should be fun, so don’t hesitate to make this recipe your own!
FAQs and Troubleshooting
1. My sorbet is too hard; what can I do?
If you’ve frozen your sorbet for longer than specified, it might be a little icy. Just let it sit out for a few minutes before scooping. You can also blend it again if you’re looking for a creamier texture.
2. How long does the sorbet last in the freezer?
Typically, it’ll last up to 2 weeks in the freezer. Just make sure it’s stored in an airtight container to prevent freezer burn.
3. Can I use other fruits?
Absolutely! This recipe is versatile. Feel free to swap out the mango or strawberries for whatever fruits are in season or what you have on hand!
4. Can I make it without sugar?
Yes! You can substitute the sugar with natural sweeteners like agave syrup, honey, or even just skip it if your fruits are sweet enough.
Nutritional Info
While I won’t bore you with a full nutritional breakdown, I can tell you that this sorbet is dairy-free, gluten-free, and packed with vitamins from the mango and strawberries! It’s a guilt-free treat that you can feel great about indulging in!
And there you have it—a simple, flavorful, and utterly refreshing Mango Strawberry Sorbet that’s bound to bring smiles to your kitchen! Whether you’re serving it at a summer gathering or treating yourself on a quiet evening, this sorbet encapsulates the warmth of sunny days and the joy of home cooking. So, grab those mangoes and strawberries, and let’s get blending! Happy cooking!
Print
Sweet and Tangy Mango Strawberry Sorbet
- Total Time: 75 minutes
- Yield: 4 servings 1x
- Diet: Vegan
Description
A refreshing and simple sorbet bursting with tropical flavors, perfect for warm days.
Ingredients
- 2 cups ripe mango, diced
- 2 cups fresh strawberries, hulled
- 1/2 cup sugar (adjust to taste)
- 1 tablespoon lemon juice
- 1/2 cup water
Instructions
- Prep the fruits by peeling and dicing the mango and hulling the strawberries.
- Blend the mango, strawberries, sugar, lemon juice, and water in a blender until smooth.
- Taste the mixture and adjust sweetness if needed.
- Chill the sorbet mixture in a shallow dish or a loaf pan, covered, in the freezer for about 60 minutes.
- Fluff the sorbet with a fork after an hour, then return to the freezer for another 120-180 minutes until firm.
- Serve the sorbet using an ice cream scoop or spoon after letting it sit at room temperature briefly if too hard.
Notes
For an elegant presentation, freeze the mixture in an ice cube tray for bite-sized pieces.
- Prep Time: 15 minutes
- Cook Time: 0 minutes
- Category: Dessert
- Method: Blending and Freezing
- Cuisine: International
Nutrition
- Serving Size: 1 serving
- Calories: 120
- Sugar: 25g
- Sodium: 5mg
- Fat: 0g
- Saturated Fat: 0g
- Unsaturated Fat: 0g
- Trans Fat: 0g
- Carbohydrates: 31g
- Fiber: 2g
- Protein: 1g
- Cholesterol: 0mg
Keywords: sorbet, mango, strawberry, dessert, refreshing, summer treats
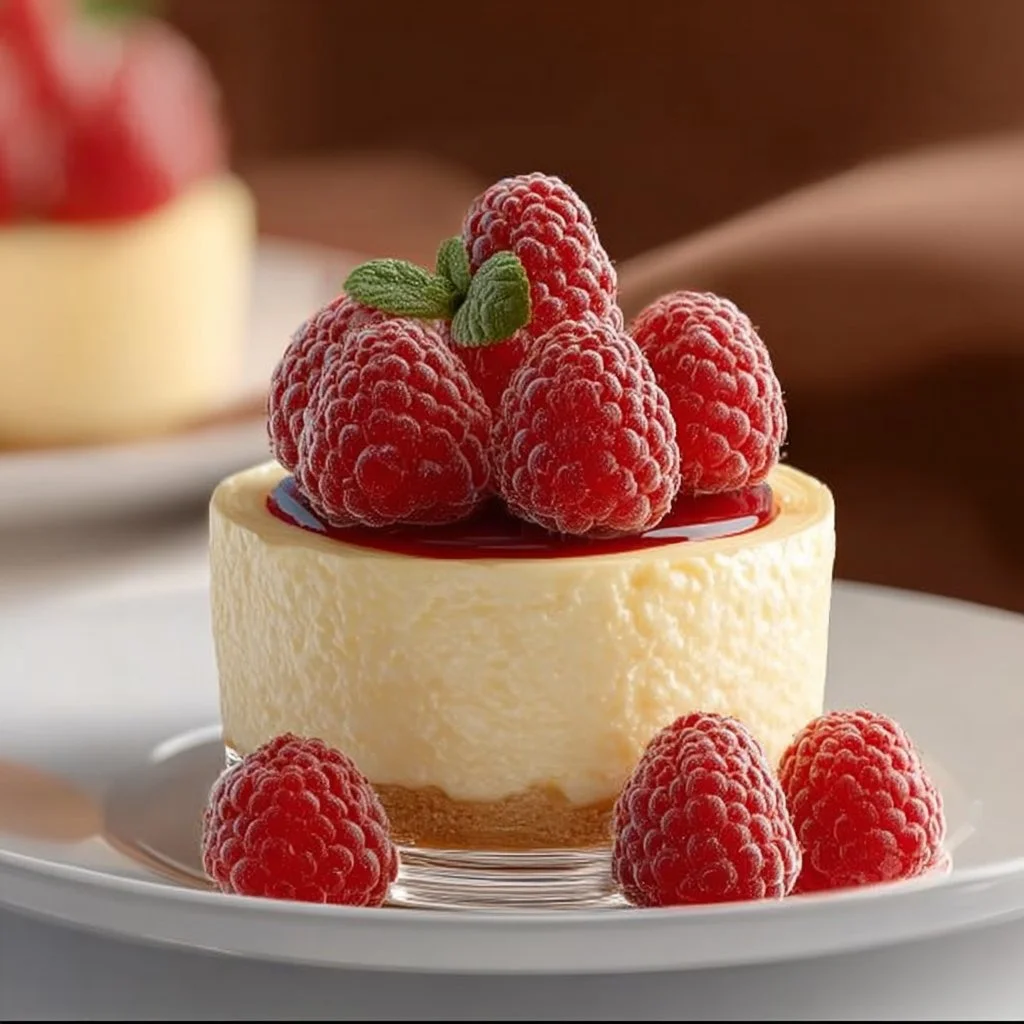
Cheesecake
The Ultimate Cheesecake Recipe: A Slice of Pure Heaven
Welcome to my kitchen! I’m so excited to share one of my all-time favorite desserts with you today — a delectable, creamy cheesecake that will have you swooning at the first bite. Cheesecake holds a special place in my heart, not just because of its rich flavor and velvety texture, but also due to the memories wrapped around it. Whether you’re celebrating a special occasion or simply treating yourself (because, why not?), this cheesecake is the perfect canvas for your creativity. Get ready to unleash your inner pastry chef!
A Slice of Nostalgia
Growing up, my family had a tradition where every birthday was marked with a homemade cheesecake, courtesy of my beloved grandmother. She had this special recipe that she perfected over the years, each layer telling a story of family love and culinary adventure. I still remember standing on a little stool beside her, trying to measure ingredients while she mixed them with effortless grace. The kitchen would fill with sweet scents, and I could hardly wait to dig in.
I’ll never forget one birthday when my grandma experimented by adding a swirl of blueberry compote on top. I watched in amazement as she transformed the classic cheesecake into something spectacular. That day, I learned that with a little creativity, you can make magic happen in the kitchen. Although she may have passed on her physical presence, her recipes and the feelings they evoke will always live on in my heart and in my kitchen.
Now, I want to share this magic with you through my own version of a classic cheesecake. With a few tips and tricks up my sleeve, you’ll be ready to impress your family and friends or just indulge all by yourself. Let’s get started!
Ingredients
Here’s what you’ll need to create this irresistible cheesecake:
-
Graham Cracker Crumbs:
- About 1.5 cups make for a crunchy, sweet base.
- Tip: You can substitute with digestive biscuits or even crushed Oreo cookies for a chocolatey twist.
-
Unsalted Butter:
- One third of a cup, melted.
- Chef Insight: Always use unsalted butter when baking; it allows you to control the salt content in your dish.
-
Cream Cheese:
- Two (8-ounce) packages, softened to room temperature.
- Tip: For a lighter version, you can use reduced-fat cream cheese, but it won’t be quite as creamy.
-
Granulated Sugar:
- One cup adds sweetness and balances the flavors.
- Substitution: Coconut sugar can be used for a unique flavor profile that’s less refined.
-
Sour Cream:
- ½ cup brings in a tangy edge that counteracts the sweetness.
- Tip: Greek yogurt can be a nice substitute here for a healthier option.
-
Vanilla Extract:
- Two teaspoons for that comforting aroma.
- Pro Tip: For an extra boost of flavor, use vanilla bean paste or the seeds from a real vanilla bean.
-
Eggs:
- Three large, room temperature, to help set the cheesecake.
- Note: You can use flax eggs for a vegan version, but texture might differ.
-
Zest of One Lemon:
- This is optional, but it brightens the flavors beautifully!
- Substitute: Orange zest can also provide a wonderful citrus twist.
Step-by-Step Instructions
-
Prepare the Crust:
- Begin by preheating your oven to 325°F (163°C).
- In a medium bowl, mix together the graham cracker crumbs and melted butter until the crumbs are well coated and hold together when pressed.
- Tip: If you’re feeling ambitious, toast the crumbs in the oven for about 5 minutes before adding the butter for an extra depth of flavor.
-
Form the Base:
- Press the crumb mixture firmly into the bottom of a 9-inch springform pan. Make sure it’s even and well packed. You can use a measuring cup or your fingers for this.
- Chef Hack: Use a flat-bottomed glass to compress the crust nicely for a smooth finish.
-
Make the Filling:
- In a large bowl, beat the softened cream cheese with a hand mixer until smooth and creamy.
- Gradually add the sugar, mixing well. Then, add the sour cream and vanilla extract, mixing until fully incorporated.
- Next, add the eggs one at a time, mixing on low speed just until combined after each addition.
- Important: Be careful not to overbeat. Too much air in your batter can lead to cracks!
-
Add Lemon Zest:
- Fold in the lemon zest if using, and ensure everything is mixed evenly.
-
Pour and Spread:
- Pour the filling over the crust, smoothing the top with a spatula to create an even layer.
- Tip: If you’re adding any toppings or swirls of flavor, gently fold them in at this stage for a marbled effect.
-
Bake:
- Bake in the preheated oven for about 50-60 minutes, or until the edges are set and the center has a slight jiggle.
- Chef Insight: To avoid cracks on top, place a shallow pan of water in the oven while it bakes; this helps to create steam.
-
Cool Down:
- Once done, turn off the oven and crack the door open, allowing the cheesecake to cool slowly for about an hour. This helps minimize cracking.
-
Chill in Fridge:
- After that, refrigerate it for at least four hours, although overnight is best for setting the flavors!
Serving Suggestions
When it’s time to serve your beautifully chilled cheesecake, try removing the sides of the springform pan carefully. A clean slice can be achieved by running a warm knife around the edges before cutting. Serve each slice on a plate, adorned with fresh berries, a dollop of whipped cream, or a drizzle of your favorite chocolate sauce. For crunch, consider sprinkling some crushed nuts or even more graham cracker crumbs.
Recipe Variations
-
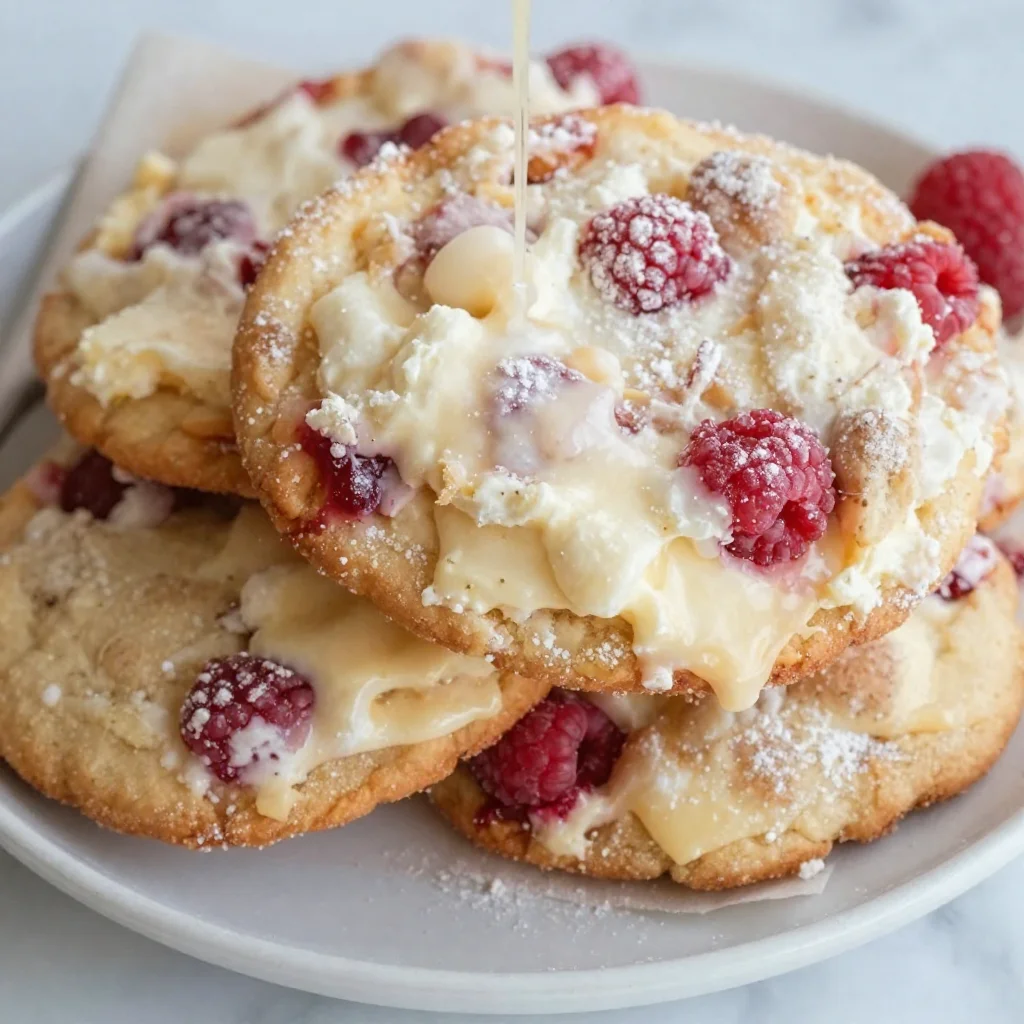
Fruit Swirls: Incorporate strawberry, blueberry, or raspberry coulis for a fruity explosion.
-
Chocolate Lovers: Add melted chocolate to the filling or the crust for a chocolate cheesecake.
-
Nutty Delight: Instead of a graham cracker crust, use crushed nuts like almonds or pecans for an extra crunch and flavor.
-
Vegan Cheesecake: Use cashew cream, coconut cream, and flax eggs for an entirely plant-based version.
-
Flavored Cheesecakes: Experiment with matcha, pumpkin, or caramel cake flavored spin-offs to make seasonal cheesecakes.
Chef’s Notes
This recipe has evolved from my grandmother’s classic, but I’ve added my personal touches over the years. Sometimes, when I’m feeling bold, I throw in a splash of amaretto or Frangelico for a nutty flavor. Also, learn from my past mishaps! The first time I made this, I proudly served it only to realize I forgot to add the sugar. A sweet disaster, you could say! Now, I always double-check my ingredients.
FAQs and Troubleshooting
-
Why did my cheesecake crack?
- Cracking often occurs due to temperature changes. Make sure to cool it gradually in the oven, and avoid overmixing your batter.
-
Can I make it a day in advance?
- Yes! In fact, cheesecakes often taste better the next day as the flavors meld together in the fridge.
-
How do I store leftover cheesecake?
- Store in an airtight container in the fridge for up to a week. You can also freeze it; wrap it tightly in plastic wrap and then foil for extended freshness.
-
What if my cheesecake is too runny?
- If the filling doesn’t set properly, it may need more baking time. Always check if the edges are firm and the center jiggles slightly.
Nutritional Info (Optional)
- Serving Size: 1 slice (1/12 of the recipe)
- Calories: Approximately 320
- Fat: 22g
- Carbohydrates: 29g
- Protein: 6g
And there you have it, your very own cheesecake masterpiece! So grab that mixing bowl and enjoy the process. Remember, cooking should be fun, messy, and filled with love. I’d love to hear how yours turns out; feel free to share your cheesecake stories or variations with me! Happy baking!
Print
The Ultimate Cheesecake Recipe
- Total Time: 75 minutes
- Yield: 12 servings 1x
- Diet: Vegetarian
Description
A delectable, creamy cheesecake that combines rich flavor and velvety texture, perfect for celebrations or personal indulgence.
Ingredients
- 1.5 cups Graham Cracker Crumbs
- 1/3 cup Unsalted Butter, melted
- 2 (8-ounce) packages Cream Cheese, softened to room temperature
- 1 cup Granulated Sugar
- 1/2 cup Sour Cream
- 2 teaspoons Vanilla Extract
- 3 large Eggs, room temperature
- Zest of 1 Lemon (optional)
Instructions
- Preheat your oven to 325°F (163°C).
- Mix together the graham cracker crumbs and melted butter in a medium bowl until well coated.
- Press the crumb mixture into the bottom of a 9-inch springform pan, ensuring it’s evenly packed.
- Beat the cream cheese with a hand mixer in a large bowl until smooth and creamy.
- Gradually add the sugar, mixing well, then add the sour cream and vanilla extract.
- Add the eggs one at a time, mixing on low speed just until combined.
- Fold in the lemon zest if using.
- Pour the filling over the crust, smoothing the top with a spatula.
- Bake for 50-60 minutes, until the edges are set and the center has a slight jiggle.
- Cool in the oven with the door cracked for about an hour.
- Refrigerate for at least four hours before serving, preferably overnight.
Notes
Serve with fresh berries, whipped cream, or a drizzle of chocolate sauce. You can also create fruit swirls or chocolate variations.
- Prep Time: 15 minutes
- Cook Time: 60 minutes
- Category: Dessert
- Method: Baking
- Cuisine: American
Nutrition
- Serving Size: 1 slice
- Calories: 320
- Sugar: 20g
- Sodium: 250mg
- Fat: 22g
- Saturated Fat: 12g
- Unsaturated Fat: 10g
- Trans Fat: 0g
- Carbohydrates: 29g
- Fiber: 1g
- Protein: 6g
- Cholesterol: 90mg
Keywords: cheesecake, dessert, baking, creamy dessert, holiday treats