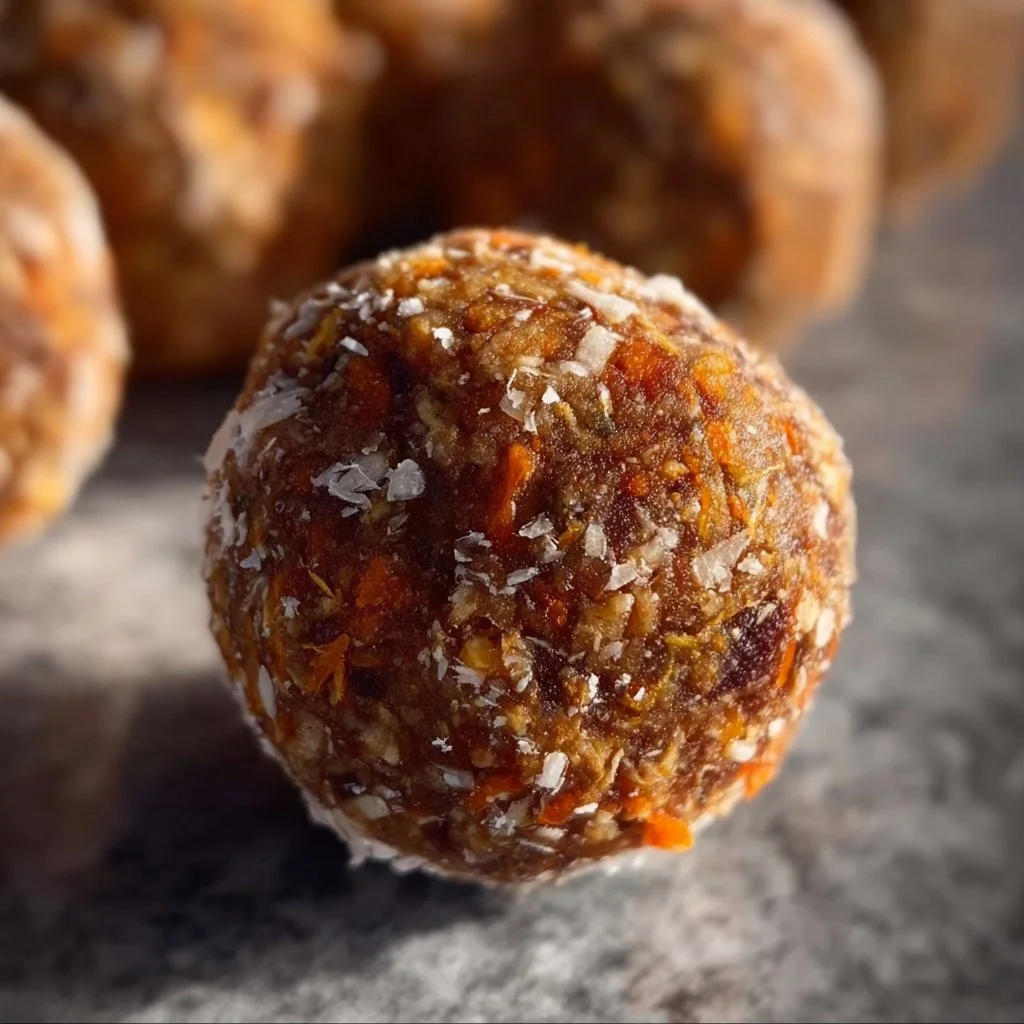
Carrot Cake Energy Balls
Carrot Cake Energy Balls: A Fun and Nourishing Snack
Hey there, fellow foodies! It’s Beau Collier here, and today I have a treat that’s not just scrumptious but also packed with wholesome goodness—Carrot Cake Energy Balls! If you’re like me and have a sweet tooth that sometimes feels like a runaway train, you’ll want to keep a stash of these little gems on hand. They’re perfect for an afternoon snack, a pre-workout boost, or just when you need a little pick-me-up.
These no-bake delights capture all the comforting flavors of classic carrot cake—think cinnamon, nutmeg, and the earthy sweetness of carrots—while keeping things healthy and easy to whip up. Trust me, these energy balls are not only delicious but also fuel your body with nutritious ingredients. Plus, they’re a fun way to sneak in some vegetables without even trying!
Now, I should mention that the best part about these energy balls isn’t just how they taste; it’s the stories behind them. When I was a kid, my grandmother would whip up carrot cake for every family gathering. The scent of warm spices filled the air, and we’d gather around the table, eagerly waiting for our slices topped with cream cheese frosting. I’ve taken that nostalgia and distilled it into these energy balls—a healthy twist on a beloved classic that connects us all.
So, grab your bowl, throw on your favorite playlist, and let’s get ready to create something mouthwatering together!
Personal Story
My love for carrot cake goes way back to my childhood. I vividly remember the anticipation that built up in my stomach every time Grandma announced she’d be baking her famous carrot cake. We kids would race around the kitchen, dodging steamy pots and slightly too-delicious smells wafting from the oven.
One Sunday afternoon, she decided to involve us in the baking process, and I can still picture the bright orange shreds of carrots mixing with eggs, sugar, and warm spices. My brother, attempting to be the “taste-tester,” sneaked in spoonfuls of the cake batter when Grandma turned her back. We ended up with a floury mess, laughter filling the kitchen—not to mention a few too many carrot-flavored finger smudges on our shirts!
Now, while I love a traditional carrot cake, as a busy adult (and as a food lover), I wanted a simpler, healthier version that I could enjoy every day. That’s how I came up with these Carrot Cake Energy Balls, bringing that same flavor while skipping the oven. Every time I make them, I am reminded of those joyful moments spent in the kitchen with family. So let’s keep that spirit alive and create some magic!
Ingredients
Here’s what you’ll need to make these delightful Carrot Cake Energy Balls:
-
1 cup Medjool dates (pits removed)
These sweet, chewy dates are the base of our energy balls and serve as a natural sweetener. If you don’t have Medjool dates, feel free to substitute with other dates, like Deglet Noor, though you may want to soak them in warm water for a few minutes to soften them up! -
1/3 cup shredded carrots
Freshly shredded carrots bring that classic carrot cake flavor and sweetness. You can use pre-packaged shredded carrots for convenience, or you can also swap with finely grated zucchini if you want to mix things up! -
1 cup walnuts
Chopped walnuts deliver a nice crunch and healthy fats. You can use any nuts you love, such as pecans, almonds, or even sunflower seeds for a nut-free option. -
1 tbsp chia seeds
These tiny seeds are packed with nutrition, adding fiber and a slight crunch. You can replace them with flax seeds if you prefer. Just make sure to grind them to get the most benefits! -
1/3 cup shredded unsweetened coconut
Coconut adds a lovely texture and a hint of tropical flavor. If you’re not a coconut fan, feel free to remove it, but they won’t have quite that same “cake” essence without this ingredient! -
1/2 tsp cinnamon
A warm, comforting spice essential to any carrot cake recipe. You could also try pumpkin pie spice for a different flavor profile. -
1/4 tsp nutmeg
This spice complements cinnamon beautifully for that signature carrot cake flavor. If nutmeg isn’t your thing, you can sneak in a little extra cinnamon instead. -
Pinch of salt
Just a touch of salt balances the sweetness and enhances all the other flavors. -
1 tsp vanilla extract
This adds depth and warmth to the energy balls. You can use almond extract instead for a unique twist! -
Extra 1/2 cup shredded coconut for rolling
This is a fun and tasty way to coat your energy balls. If you want something different, consider rolling them in crushed nuts or even cocoa powder for a chocolate kick!
Step-by-Step Instructions
Ready to create some magic in the kitchen? Let’s get rolling with these Carrot Cake Energy Balls!
-
Gather Your Ingredients
Make sure all your ingredients are ready to go. Put on some lively music; it makes the process way more fun! -
Blend the Dates
In a food processor, throw in your Medjool dates. Pulse them a few times until they break down into a sticky paste. This will be the glue that holds our energy balls together! Chef tip: If your dates are too firm, soak them in warm water for about 10 minutes to soften them up. -
Add in the Carrots and Walnuts
Toss in the shredded carrots and walnuts. Blend again, stopping occasionally to scrape down the sides to ensure even mixing. You want a nice, chunky texture, so don’t overdo it. Pro tip: Reserve a few walnut pieces to sprinkle on top of the rolled balls later for added crunch! -
Incorporate the Dry Ingredients
Now, add in chia seeds, shredded coconut, cinnamon, nutmeg, salt, and vanilla extract. Pulse until everything is well combined and it starts to form a batter-like consistency. Important: Take a moment here to taste the mixture! Add a little more cinnamon or vanilla if you’re feeling adventurous! -
Form the Energy Balls
Using your hands or a small scoop, grab a tablespoon-sized amount of the mixture and roll it into a ball. Repeat until you’ve formed all the mixture into balls.Chef’s hint: Wet your hands slightly to avoid stickiness while rolling! -
Coat the Balls
Place the extra shredded coconut in a shallow bowl. Roll each energy ball in the coconut until fully coated. This will not only add an amazing look but also a pop of flavor! You can also use crushed nuts or even cocoa powder for a twist! -
Chill
Place your finished energy balls on a parchment-lined tray. Once they’re all rolled, pop them in the fridge for about 30 minutes to firm them up. Chef’s note: I often double the batch since they disappear fast!
Serving Suggestions
When it comes to serving these Carrot Cake Energy Balls, there are plenty of fun options! You can arrange them on a beautiful platter for an energizing snack table or pop them in small mason jars for a cute gift idea. If you’re feeling fancy, pair them with a warm cup of herbal tea or whipped coconut cream for an extra treat.
Feeling extra festive? Use colorful muffin liners to serve them at your next gathering or just for yourself at home. Either way, these energy balls are perfect bite-sized snacks that bring a smile to every face!
Recipe Variations
Feeling creative? Here are some variations you can try to spice up your Carrot Cake Energy Balls:
-
Spiced Coconut-Lemon
Add a tablespoon of fresh lemon zest to the mix for a citrusy twist, brightening those warm spices in a fresh way! -
Nut Butter Boost
Just a tablespoon of almond or peanut butter can intensify the flavor and creaminess while making the energy balls even more filling! -
Chocolate Carrot Bliss
Mix in a couple of tablespoons of cocoa powder to create a chocolate version of these energy balls. Now you’re really talking! -
Dried Fruit Add-ins
Toss in some raisins or cranberries for an extra burst of sweetness and chewiness! Just chop them up a bit to keep the texture nice. -
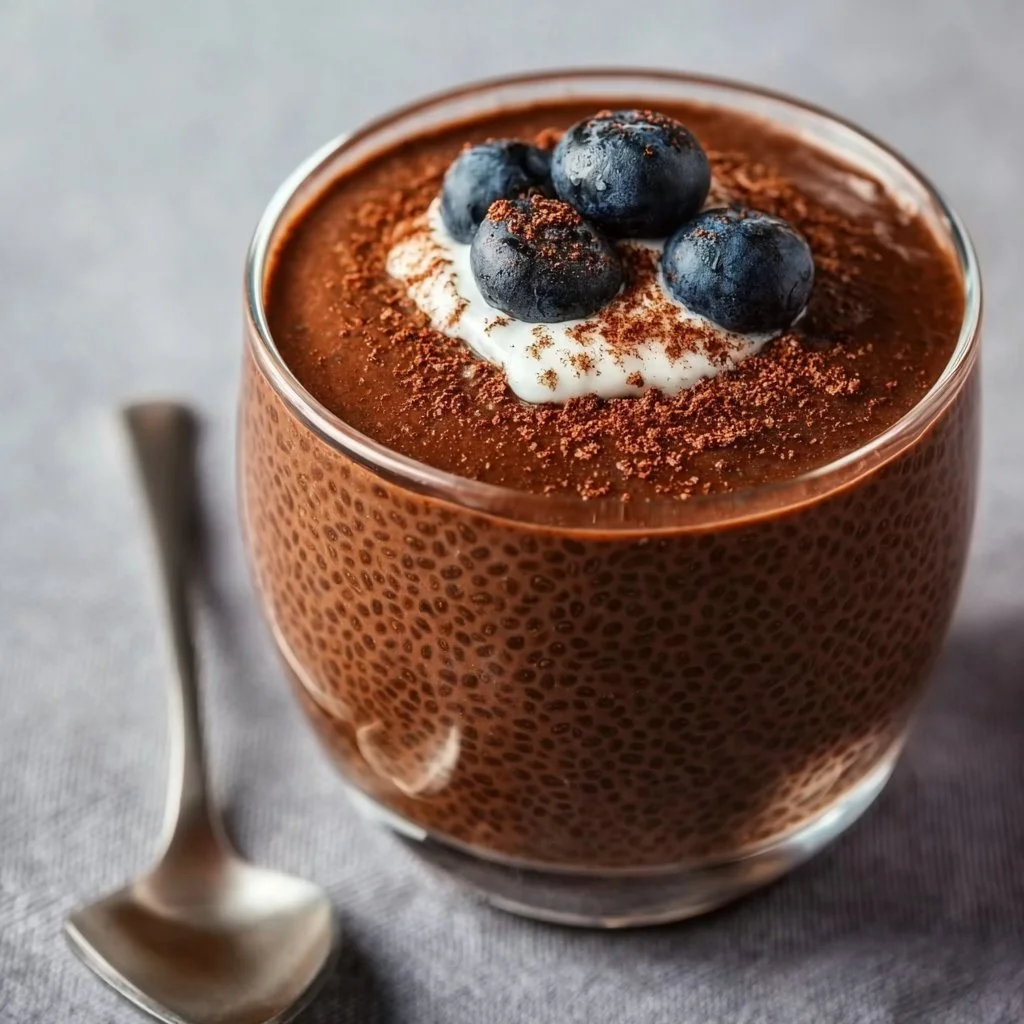
Chia Pudding Version
If you love desserts, add an extra coconut milk splash to make chia pudding and let it thicken overnight. Then, form small balls and roll in coconut!
Chef’s Notes
I have to say, the evolution of this recipe has been a blast! What started as a nostalgic craving for Grandma’s carrot cake has transformed into this energizing little snack. I often find myself modifying the ingredients based on what I have available. If I’m low on walnuts, pecans work just as well! If I want a little more sweetness, I’ll add a drizzle of honey or maple syrup. Remember, this is a forgiving recipe, so experiment and make it your own!
And let’s not forget, every time I bite into one of these energy balls, I’m right back in my grandma’s kitchen, creating memories full of love and laughter over a delicious slice of carrot cake!
FAQs and Troubleshooting
Q: Can I make these energy balls vegan?
A: Absolutely! Medjool dates are naturally sweet and sticky, making them a perfect binder for vegan recipes. Just keep those ingredients plant-based!
Q: How long do these energy balls last?
A: Store them in an airtight container in the fridge for up to a week. If you want to keep them longer, pop them in the freezer for up to a month and enjoy them on the go!
Q: What if my mixture is too crumbly?
A: If your mixture feels dry, you can add a splash of water or a tiny bit of nut butter until it reaches a rollable consistency. No one likes a crumbling energy ball!
Q: Can I use different nuts or seeds?
A: Yes, feel free to swap out the walnuts for your favorites—almonds, pecans, or even sunflower seeds! Each will give a slightly different flavor but will still be delicious!
Nutritional Info
You may be wondering just how nutritious these Carrot Cake Energy Balls really are. Here’s a quick breakdown of the goodness packed inside each ball (approximation based on 12 servings):
- Calories: About 100 calories per ball
- Protein: 2-3 grams
- Fiber: 3-4 grams
- Natural Sugars: 5-6 grams from dates
- Healthy Fats: 5-6 grams mainly from walnuts and coconut
They’re a guilt-free treat that fuels your body and satisfies those sweet cravings!
Final Thoughts
And there you have it, my dear foodie friends! These Carrot Cake Energy Balls will keep you energized and smiling, reminiscent of joyful kitchen memories filled with warm spices and sweet treats. I hope you enjoy making these as much as I do because every bite is packed with love and nostalgia.
Remember, cooking doesn’t have to be complicated. It’s all about bringing people together over delicious food and creating lasting memories. So don’t forget to share your finished energy balls on social media and tag us. Let’s spread the joy of cooking far and wide!
Get ready to dig in and indulge—your taste buds will thank you! Happy cooking, friends! 🍽️✨
Print
Carrot Cake Energy Balls
- Total Time: 45 minutes
- Yield: 12 servings 1x
- Diet: Vegan
Description
A fun and nourishing snack that captures the flavors of classic carrot cake in a healthy, no-bake form.
Ingredients
- 1 cup Medjool dates (pits removed)
- 1/3 cup shredded carrots
- 1 cup walnuts, chopped
- 1 tbsp chia seeds
- 1/3 cup shredded unsweetened coconut
- 1/2 tsp cinnamon
- 1/4 tsp nutmeg
- Pinch of salt
- 1 tsp vanilla extract
- 1/2 cup shredded coconut for rolling
Instructions
- Gather your ingredients.
- Blend the dates in a food processor until a sticky paste forms.
- Add the carrots and walnuts, blending until a chunky texture is achieved.
- Incorporate the chia seeds, shredded coconut, cinnamon, nutmeg, salt, and vanilla, pulsing until well combined.
- Form the mixture into tablespoon-sized balls.
- Coat the balls in shredded coconut.
- Chill the balls in the fridge for about 30 minutes to firm them up.
Notes
Feel free to experiment with different nuts or add-ins! Make them your own by incorporating ingredients like nut butters or dried fruits.
- Prep Time: 15 minutes
- Cook Time: 0 minutes
- Category: Snack
- Method: No-Bake
- Cuisine: American
Nutrition
- Serving Size: 1 serving
- Calories: 100
- Sugar: 5g
- Sodium: 5mg
- Fat: 5g
- Saturated Fat: 2g
- Unsaturated Fat: 3g
- Trans Fat: 0g
- Carbohydrates: 15g
- Fiber: 3g
- Protein: 3g
- Cholesterol: 0mg
Keywords: carrot cake, energy balls, healthy snacks, vegan recipe, no-bake dessert

Gourmet Brownie Cookies
The Ultimate Guide to Gourmet Brownie Cookies
Hey there, fellow food enthusiasts! Welcome back to Feastical, where we’re all about creating kitchen magic and sharing good vibes through delicious recipes. If you’re ready to tickle your taste buds and dive into something absolutely scrumptious, buckle up because today we’re whipping up Gourmet Brownie Cookies!
Imagine the best of both worlds: the rich, fudgy texture of classic brownies melded beautifully with the delightful bite of a cookie. Sounds dreamy, right? Well, I can hardly hear my taste buds file their complaint letters because they’re just so excited about these cookies! They are soft, chewy, and packed to the brim with chocolatey goodness, guaranteed to make you swoon.
Now, let me just say this: making these cookies is not just about satisfying your sweet tooth; it’s about the experience. From mixing the batter to the intoxicating aroma wafting through your kitchen, baking is a beautiful adventure. Whether you’re baking for a crowd, surprising a friend, or indulging in a cozy night in, these brownies turned cookies are sure to elevate your mood. Trust me, once you sink your teeth into one, you’ll find it hard to eat just one!
So, grab your apron, roll up those sleeves, and let’s get ready to unleash your inner baker with these delectable Gourmet Brownie Cookies!
Personal Story
Let me take you back to a sunny Saturday afternoon—oh, how nostalgic this memory is! It was my mom’s day off, and the kitchen was like a playground. She had a way of turning any day into a special occasion, especially if it involved baking. With classic rock tunes on the radio, we’d whip up everything from cakes to cookies, but there was one treat that always stood out: her ultimate brownie cookies.
I vividly remember her explaining how to achieve the perfect balance between chewy and fudgy, while I eagerly cracked eggs (probably a bit carelessly) and stirred the bowl just a bit too vigorously. The kitchen transformed into a flutter of laughter, flour, and chocolate as we experimented with different toppings—think nuts, sprinkles, and all the chocolate chips we could find!
Today, whenever I make these Gourmet Brownie Cookies, I’m instantly transported back to that warm kitchen filled with love and laughter. It’s an experience I love to recreate and share with you! Let’s carry on that tradition together, shall we?
Ingredients
Let’s start gathering what you’ll need for your Gourmet Brownie Cookies. Here’s the list:
-
1/2 cup unsalted butter
Butter is a must for that rich, indulgent flavor. If you’re out of unsalted butter, you can use salted butter and omit the added salt. -
1 cup granulated sugar
This sweet agent helps to create that perfect chewy texture. You could swap half for brown sugar for a hint of molasses flavor! -
2 large eggs
Eggs bind everything together and provide moisture. You can use flax eggs if you’re looking for a vegan alternative—just mix 1 tablespoon of ground flaxseed with 2.5 tablespoons of water and let it sit until gelatinous. -
1 teaspoon vanilla extract
Vanilla adds a lovely depth to the flavor. If you’re feeling adventurous, try almond extract instead for a nutty twist! -
1/2 cup all-purpose flour
This is the base for our cookies. For gluten-free options, you can use a 1:1 gluten-free flour blend, ensuring it contains xanthan gum. -
1/3 cup unsweetened cocoa powder
The star of the show! Cocoa powder gives that deep chocolate flavor. If you’re out, you might sub in some chocolate protein powder, but the texture will change slightly. -
1/4 teaspoon baking powder
This gives our cookies a bit of lift and a lovely chewy texture. If you don’t have baking powder, baking soda works too—just use half the amount. -
1/4 teaspoon salt
Salt enhances the sweetness of the cookies. You could even use a flaky sea salt for topping if you fancy! -
1 cup chocolate chips
Chocolate chips, the ultimate flavor boost! Go for dark, semi-sweet, or even white chocolate chips for a fun twist.
Step-by-Step Instructions
Now that we’ve rounded up all the delicious ingredients, it’s time to get down to baking! Here’s how you’ll make these luscious Gourmet Brownie Cookies:
-
Preheat the Oven
Preheat your oven to 350°F (175°C). This is crucial because a properly preheated oven helps your cookies rise beautifully and cook evenly. -
Melt the Butter
In a small saucepan over low heat, melt the butter gently—don’t let it boil! If you’re feeling reckless, you can microwave it in 30-second intervals until melted. Just be careful not to cook it. -
Mix Sugar and Eggs
In a mixing bowl, combine the melted butter and granulated sugar. Mix until well combined. I like to switch to a hand whisk here—the more muscle, the better! Next, add in the eggs, one at a time, and whisk until the mixture is smooth. This is where you’ll start to see everything blend together beautifully! -
Add Vanilla
Pour in that heavenly vanilla extract (or almond extract if you’re swapping). Stir it in, and trust me, the aroma will make you giddy! -
Sift the Dry Ingredients
In a separate bowl, sift together the flour, cocoa powder, baking powder, and salt. Sifting helps create a lighter cookie, making them chewy and delicious. -
Combine Wet and Dry Ingredients
Gradually add the dry mixture into the egg mixture, stirring gently with your spatula. Be careful not to over-mix—just until the flour disappears! -
Fold in Chocolate Chips
Now, for the pièce de résistance! Fold in those luscious chocolate chips until evenly distributed. Feel free to add more if you’re feeling bold—nobody’s judging! -
Scoop the Dough
Using a cookie scoop (or two spoons if you don’t have one), drop generous amounts of dough onto a lined baking sheet, spacing them about 2 inches apart. They will spread, trust me! -
Bake ‘Em Up
Pop your baking sheet into the preheated oven and bake for about 10-12 minutes. You want the edges to be set while the center remains soft and slightly underbaked. They’ll continue to cook a bit as they cool, delivering that perfect chewy texture. -
Let Them Cool
Once out of the oven, let them cool on the baking sheet for about 5 minutes before transferring them to a wire rack. This is the hardest part! Just breathe in that chocolatey goodness during the wait.
Serving Suggestions
Now, let’s talk about how to serve these delightful Gourmet Brownie Cookies. For an Instagram-worthy presentation, you can stack them up on a colorful plate and dust the tops with powdered sugar or a sprinkle of sea salt. Pair them with a big glass of cold milk or a scoop of vanilla ice cream for an epic dessert experience.
Feeling a bit fancy? You can serve them warm, topped with a scoop of your favorite ice cream and drizzled with chocolate or caramel sauce. The warmth of the cookie melting onto the ice cream creates a delectable combo that will leave everyone reaching for seconds!
Recipe Variations
Want to mix things up? Here are some creative twists you can try out:
-
Nutty Brownie Cookies
Add in 1/2 cup of chopped walnuts or pecans for an added crunch and a touch of nuttiness. -
Peppermint Crunch
During the holiday season, toss in some crushed peppermint candies for a festive flair! -
Spicy Chili Chocolate
Add 1/2 teaspoon of cayenne pepper to the dry ingredients for a spicy kick that pairs surprisingly well with chocolate. -
Nut-Free Version
If you need these to be nut-free, stick with chocolate chips and avoid any nut toppings, but consider adding shredded coconut for texture! -
Vegan Brownie Cookies
Swap eggs for flax eggs, use coconut oil instead of butter, and enjoy a delightful plant-based treat!
Chef’s Notes
I have to confess, these Gourmet Brownie Cookies have evolved over the years. Originally, I experimented on family and friends with different flavors and add-ins, and after much trial and error (and many taste tests), I landed on this perfect recipe!
Some kitchen disasters happened along the way, including a batch that mysteriously turned into brownie soup. But those mistakes taught me so much about texture and blending flavors—it’s all part of the culinary journey, right?
Every time I make these cookies, I’m reminded that cooking is about more than just following a recipe; it’s about sharing delicious moments and memories with the people we love. So feel free to experiment until you find your favorite version!
FAQs and Troubleshooting
-
Why are my cookies flat?
A common issue can often be attributed to not chilling the dough before scooping or incorrect measurements (too little flour can also cause spreading). -
How can I make sure my cookies are fudgy?
Slightly underbaking them will help retain that chewy, fudgy center. Trust your instincts and take them out while still soft! -
Can I store these cookies?
Certainly! Keep them in an airtight container at room temperature for up to a week—or freeze them for longer storage, up to three months! -
What if I don’t have chocolate chips?
You can always chop up your favorite chocolate bar into chunks or even use cocoa nibs for a different texture.
Nutritional Info
While we love indulging in treats like these Gourmet Brownie Cookies, it’s always good to know what we’re munching on! Each cookie contains approximately:
- Calories: 180 per cookie
- Total Fat: 9g
- Saturated Fat: 5g
- Cholesterol: 40mg
- Sodium: 50mg
- Total Carbohydrates: 22g
- Dietary Fiber: 1g
- Sugars: 12g
- Protein: 2g
Of course, these numbers can vary based on specific brands and ingredient swaps. Remember, everything in moderation is key, especially with goodies like this!
Final Thoughts
And there you have it, folks! Your guide to whipping up the delightful and sophisticated Gourmet Brownie Cookies. Whether you’re pouring your heart into baking for loved ones or just indulging in a little self-care with a cozy night in, these cookies truly embody the love of cooking.
The kitchen can be a sanctuary, filled with the aromas of baked wonders and sweet memories. So next time you’re looking for a sweet treat, remember this recipe, savor every bite, and maybe pass it on to your own loves. After all, the joy of cooking and sharing food is what life is all about.
Now go forth and bake, my friends! You’ve got this, and I can’t wait to hear about your own kitchen adventures. Happy baking!
Print
Gourmet Brownie Cookies
- Total Time: 27 minutes
- Yield: 12 servings 1x
- Diet: Vegetarian
Description
Indulge in the rich, fudgy texture of classic brownies melded beautifully with the delightful bite of a cookie.
Ingredients
- 1/2 cup unsalted butter
- 1 cup granulated sugar
- 2 large eggs
- 1 teaspoon vanilla extract
- 1/2 cup all-purpose flour
- 1/3 cup unsweetened cocoa powder
- 1/4 teaspoon baking powder
- 1/4 teaspoon salt
- 1 cup chocolate chips
Instructions
- Preheat your oven to 350°F (175°C).
- Melt the butter gently in a saucepan over low heat.
- Mix the melted butter and granulated sugar until well combined, then add the eggs one at a time.
- Add the vanilla extract and stir it in.
- Sift the flour, cocoa powder, baking powder, and salt into a separate bowl.
- Combine the dry mixture with the wet mixture, stirring gently.
- Fold in the chocolate chips until evenly distributed.
- Scoop the dough onto a lined baking sheet, spacing them about 2 inches apart.
- Bake for about 10-12 minutes until the edges are set.
- Let them cool on the baking sheet for about 5 minutes.
Notes
For a chewy texture, underbake slightly and let cool on a wire rack for the best results.
- Prep Time: 15 minutes
- Cook Time: 12 minutes
- Category: Dessert
- Method: Baking
- Cuisine: American
Nutrition
- Serving Size: 1 cookie
- Calories: 180
- Sugar: 12g
- Sodium: 50mg
- Fat: 9g
- Saturated Fat: 5g
- Unsaturated Fat: 4g
- Trans Fat: 0g
- Carbohydrates: 22g
- Fiber: 1g
- Protein: 2g
- Cholesterol: 40mg
Keywords: brownie cookies, dessert, chocolate, baking
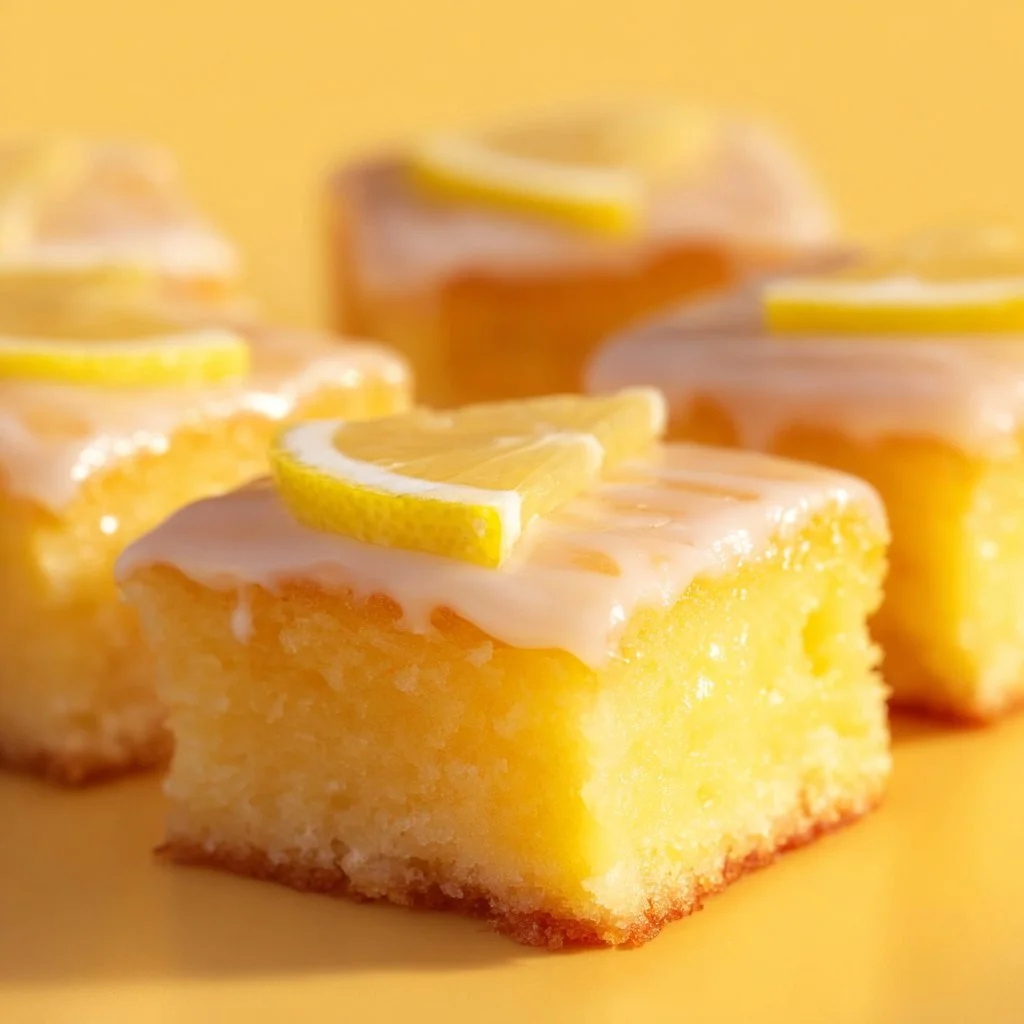
Lemon Brownies (Lemonies)
The Zesty Delight of Lemon Brownies (Lemonies)
Hey there, fellow food lover! I’m so excited you’re here because today we’re diving into a dessert that will make your taste buds dance with joy: Lemon Brownies, affectionately known as Lemonies! Sweet, tangy, and zesty, these delightful treats bring sunshine to any occasion, whether it’s a cozy family gathering, a picnic in the park, or just a well-deserved night in with a good book.
Lemonies are like the love child of a brownie and a lemon bar — they’re rich and dense with that vibrant citrus note that has the power to brighten even the cloudiest of days. What I adore about this recipe is not just the flavor but how easy it is to whip up. There’s something so therapeutic about baking a batch of these soft, chewy squares while listening to your favorite playlist. Each bite offers that perfect balance of sweetness and tartness, making them utterly irresistible. Trust me, you’ll be thankful you decided to take a lemony detour on your baking journey!
But first, let me share a little story about how these delightful treats won a special place in my heart. You see, every spring, my grandmother would host a big family gathering at her house. She was known for her incredible baking, and one year she decided to treat us all to her latest creation: Lemon Brownies. I remember walking into her bright, sunlit kitchen, the scent of fresh lemons wafting through the air, instantly lifting my spirits! My family couldn’t stop raving about them, and neither could I. There was just something about the tartness complemented by the sweetness of the glaze that made them unforgettable.
Let’s get our hands a little messy and recreate that sunny kitchen vibe in your home. You’re going to love making (and devouring) these scrumptious Lemonies — so grab your apron and let’s get started!
Personal Story
Growing up, my family was big on tradition, especially when it came to food. My grandmother, who we affectionately called "Nana," had a knack for baking that made her kitchen feel like the heart of our family gatherings. My fondest memories typically involved me standing on a stool, watching her whip up magic with flour and sugar.
One spring afternoon, I remember her unveiling her lemon brownies for the first time. I was skeptical at first. Brownies were chocolate — how could anything else compare? But as soon as that first tangy bite hit my tongue, everything changed. It was like a flavorful explosion! The soft, chewy texture combined with that punch of lemon made my taste buds go wild. We devoured the entire batch before dinner, all while laughing and reminiscing.
To this day, the thought of those Lemon Brownies brings a smile to my face. It serves as a reminder of family, laughter, and the sweet nostalgia that delicious food can bring. Now, it’s my turn to share this bright little piece of my heart with you. Let’s take that cherished memory and create some delightful Lemonies together!
Ingredients
To make these heavenly Lemon Brownies, you’ll need the following ingredients:
-
1 cup butter: This gives the brownies a rich, moist texture. You can use unsalted butter for a more controlled flavor. If you’re in a pinch, coconut oil works great as a substitute!
-
2 cups sugar: Sweetens the mix and balances the tartness of the lemons. Brown sugar is an excellent alternative if you want to add a hint of caramel flavor.
-
4 large eggs: Provides structure and richness. If you’re looking for an egg-free recipe, try using 1/4 cup of applesauce for each egg!
-
1 tablespoon vanilla extract: Adds warmth to the brownies. Always use pure vanilla for the best flavor, but imitation vanilla works in a pinch.
-
2 cups all-purpose flour: This is the backbone of your brownies. We want that chewy texture! For a gluten-free version, you could substitute with almond flour or a gluten-free flour blend.
-
1 teaspoon baking powder: Helps the brownies rise and gives them a light texture. Make sure to check the expiration date for best results!
-
1/2 teaspoon salt: Enhances flavor and balances out the sweetness. If you’re watching your sodium intake, feel free to omit this!
-
1/2 cup lemon juice: The star of the show! Freshly squeezed is best for that vibrant flavor, but bottled juice will do if it’s all you have.
-
Zest of 2 lemons: This part intensifies the lemon flavor! Remember to use organic lemons if you can since they’re less likely to have wax on the skin.
-
Powdered sugar for glaze: This adds that sweet, delightful finishing touch. If you’re feeling adventurous, try adding a splash of lemon juice to the glaze for an extra tang!
Step-by-Step Instructions
Alright, are you ready to bake? Let’s roll up our sleeves and get mixing:
Step 1: Preheat the Oven
Preheat your oven to 350°F (175°C). It’s crucial to get that oven nice and toasty before you pop your brownies in. This ensures even baking and helps achieve that perfect crackle on top.
Step 2: Prepare Your Pan
While the oven heats up, grab a 9×13 inch baking dish. Grease it lightly with butter or line it with parchment paper. This will ensure your brownies slide out smoothly once they’re baked.
Step 3: Melt the Butter
In a medium saucepan over low heat, melt the butter. This should take about 5 minutes. I love doing this step on the stovetop because it fills the kitchen with a delicious buttery aroma. Just be careful not to let it brown too much!
Step 4: Mix the Sugar and Eggs
Once your butter is melted, transfer it to a mixing bowl. Add in the sugar and whisk until combined. Then, crack in the eggs, one by one, whisking thoroughly after each addition. This fosters air into the mixture and helps with that perfect texture. Add the vanilla extract here — just waft that yummy scent!
Step 5: Combine Dry Ingredients
In a separate bowl, mix the flour, baking powder, and salt. Gradually add the dry mixture to the wet ingredients, mixing just until combined. Be careful not to overmix; we want those sensational Lemonies to stay tender!
Step 6: Add the Zest and Juice
Time to bring in the star ingredients! Fold in the freshly squeezed lemon juice and lemon zest. I like to use a rubber spatula for this because it makes scraping the sides of the bowl easy.
Step 7: Pour and Bake
Pour the batter into your prepared baking pan, spreading it evenly with your spatula. Bake in the preheated oven for 25-30 minutes or until a toothpick inserted in the center comes out clean (a few moist crumbs are okay!). Keep an eye on them toward the end because every oven is a little different. You might want to rotate the pan halfway through baking for consistent results.
Step 8: Glaze It Up
Allow the brownies to cool in the pan for about 10 minutes after baking. Then, transfer them to a wire rack to cool completely. Once cool, it’s time to whip up that glaze. In a bowl, mix the powdered sugar with a few tablespoons of lemon juice until smooth. Drizzle it generously over the cooled brownies, letting it set for a few minutes before slicing into squares.
Serving Suggestions
Ready to indulge in your Lemonies? Here are some fun serving suggestions to elevate your dessert game:
-
Dust with Powdered Sugar: For a classic touch, dust a little extra powdered sugar over the top just before serving. It makes them look elegant and adds a little extra sweetness.
-
Serve with Fresh Berries: Pairing these Lemonies with fresh raspberries, blueberries, or strawberries adds a delightful burst of flavor and color on the plate. Plus, the tartness of the berries harmonizes beautifully with the lemon!
-
Ice Cream Sidekick: Let’s be real—ice cream makes everything better! A scoop of vanilla or lemon sorbet on the side is a splendid way to enjoy the brownies, especially during warmer months.
-
Garnish with Lemon Slices: For a decorative flair, consider garnishing your Lemonies with thin slices of fresh lemon. Just be sure to use organic lemons to avoid pesticide residue!
-
Drizzle with White Chocolate: If you’re feeling a little indulgent, drizzle some melted white chocolate over the top before slicing. This adds an extra layer of richness that pairs wonderfully with the tartness.
Recipe Variations
Feeling creative? Here are some fun twists and variations for your Lemon Brownies:
-
Lavender Lemonies: Add a tablespoon of culinary lavender for a floral twist. Just be gentle on the lavender — a little goes a long way!
-
Blueberry Lemon Brownies: Mix in a cup of fresh or frozen blueberries for a sweet and tangy explosion.
-
Poppy Seed Lemonies: Add 2 tablespoons of poppy seeds to the batter for a little crunch and that classic lemon-poppy flavor.
-
Cream Cheese Swirl: For a richer brownie, introduce a simple cream cheese swirl. Mix 8 oz of cream cheese with 1/3 cup of sugar and 1 egg, then swirl it into the brownie batter before baking.
-
Lemon Coconut Brownies: Fold in shredded coconut for a tropical feel. You can replace some of the flour with coconut flour if you’re looking for a gluten-free option.
Chef’s Notes
One thing I love about these Lemonies is how they evoke memories of spring and sunshine. I often find myself making a batch when I need a little pick-me-up or when life calls for a small celebration. Over the years, I’ve played around with this recipe, adding different flavors and twists, but the original is always a family favorite.
Oh, and here’s a little kitchen tip from personal experience: don’t forget to zest your lemons before juicing them! It’s an easy way to ensure you don’t end up with a zested lemon that’s tricky to handle later.
FAQs and Troubleshooting
Here are some common questions to keep you on track with your Lemonies:
1. Why are my Lemonies too dense?
If your Lemonies turned out dense, it could be due to overmixing the batter or too much flour. When combining the wet and dry ingredients, mix just until incorporated.
2. Can I use bottled lemon juice?
Absolutely! While fresh lemon juice tastes best, bottled juice is a suitable substitute for convenience. Just make sure it’s 100% lemon juice without added sugars.
3. What if the top of my brownies is too dark?
If you notice your brownies getting too dark, you might want to cover the top loosely with aluminum foil halfway through the baking process. This ensures they cook through without burning on top.
4. How do I store leftovers?
Store any leftover Lemonies in an airtight container at room temperature for up to 3 days. If you don’t mind a chilled treat, they keep well in the fridge for up to a week!
Nutritional Info
If you’re wondering about the nutritional side of your Lemonies, here’s a quick breakdown for a standard serving (1 square):
- Calories: 220
- Fat: 10g
- Saturated Fat: 6g
- Carbohydrates: 34g
- Fiber: 1g
- Sugar: 19g
- Protein: 2g
Keep in mind that these values are approximate and can vary based on substitutions and portion sizes. Enjoying these delightful treats in moderation is key!
Final Thoughts
And there you have it! The scrumptious, delightful, and zesty journey of creating Lemon Brownies, or as I like to call them, Lemonies! I hope this recipe brings a little sunshine into your day, just like it did into my childhood. Baking can often feel intimidating, but it’s all about having fun and creative expression. Plus, I promise that the alluring aroma and delicious flavor will make it all worth it.
So gather your loved ones, whip up a batch of these citrusy delights, and let the good times roll. Don’t forget to share your Lemonie creations with me! I’d love to hear your stories and see your amazing photos. Keep shining, keep baking, and until next time, happy cooking! 🍋✨
Print
Lemon Brownies (Lemonies)
- Total Time: 45 minutes
- Yield: 16 servings 1x
- Diet: Vegetarian
Description
Zesty and sweet Lemon Brownies, soft and chewy, perfect for any occasion.
Ingredients
- 1 cup butter
- 2 cups sugar
- 4 large eggs
- 1 tablespoon vanilla extract
- 2 cups all-purpose flour
- 1 teaspoon baking powder
- 1/2 teaspoon salt
- 1/2 cup lemon juice
- Zest of 2 lemons
- Powdered sugar for glaze
Instructions
- Preheat your oven to 350°F (175°C).
- Prepare a 9×13 inch baking dish by greasing it lightly with butter or lining it with parchment paper.
- Melt the butter in a medium saucepan over low heat for about 5 minutes.
- Mix the melted butter, sugar, and eggs together until combined, then add the vanilla extract.
- Combine the flour, baking powder, and salt in a separate bowl, then gradually add to the wet ingredients.
- Add the lemon zest and juice into the batter and fold until just combined.
- Pour the batter into the prepared pan and bake for 25-30 minutes.
- Glaze the cooled brownies with a mixture of powdered sugar and lemon juice.
Notes
Dust with powdered sugar before serving and serve with fresh berries or ice cream for a delightful treat.
- Prep Time: 15 minutes
- Cook Time: 30 minutes
- Category: Dessert
- Method: Baking
- Cuisine: American
Nutrition
- Serving Size: 1 square
- Calories: 220
- Sugar: 19g
- Sodium: 200mg
- Fat: 10g
- Saturated Fat: 6g
- Unsaturated Fat: 2g
- Trans Fat: 0g
- Carbohydrates: 34g
- Fiber: 1g
- Protein: 2g
- Cholesterol: 25mg
Keywords: Lemon Brownies, Dessert, Baking, Lemonies, Sweet Treats