
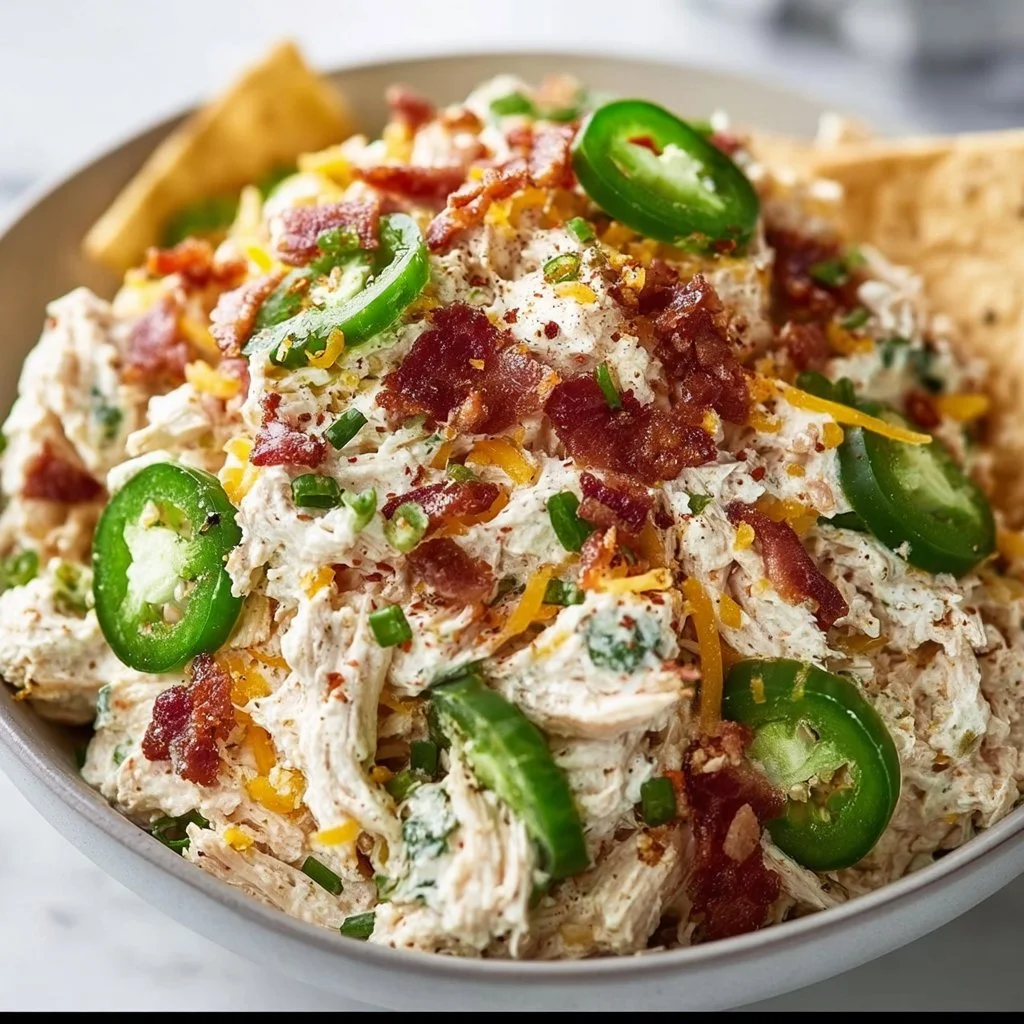
Jalapeno Popper Keto Chicken Salad
Jalapeno Popper Keto Chicken Salad: A Flavorful Twist on a Classic
Welcome to my kitchen! I’m so glad you’ve stopped by to explore a delightful dish that’s bursting with flavor — my Jalapeno Popper Keto Chicken Salad. If you’re like me, you know that food isn’t just about sustenance; it’s about joy, memories, and creating experiences with those you love. Today, we’re combining the spicy, creamy goodness of jalapeno poppers with the freshness of a chicken salad, all while keeping it low-carb and keto-friendly.
When I first dreamed up this dish, I was sitting in my cozy kitchen, reminiscing about the countless gatherings filled with laughter and the smell of jalapeno poppers wafting through the air. Those cheesy bites were always a centerpiece, and I wanted to find a way to incorporate those beloved flavors into a dish that fit my current culinary goals. Spoiler alert: It worked! Now, this salad not only satisfies my cravings for the original but also packs in a protein punch, making it the perfect lunch or light dinner.
A Taste of Nostalgia
You know those moments when you can almost smell the food before you even take a bite? That’s how I feel about jalapeno poppers. They remind me of summer barbecues at my Aunt Clara’s house, where she’d whip up a batch to serve as appetizers amid the chatter and laughter of family and friends. Her secret? A mix of cream cheese, crispy bacon, and just the right amount of heat from fresh jalapenos.
I’ll never forget one summer afternoon spent huddled around the grill, sharing stories while trying to sneak a few extra poppers from the serving tray. It was a deliciously competitive atmosphere, and you could feel the camaraderie. Fast forward to today, I often recreate that joyous spirit in my own home by preparing this Jalapeno Popper Keto Chicken Salad. It’s not just a dish; it’s a way to bring people together, just like those unforgettable gatherings of my childhood.
Ingredients
Now, let’s gather our ingredients! Here’s what you’ll need for this spicy, satisfying dish:
-
Cooked Chicken Breast (2 cups, shredded)
A lean protein base that’s perfect for salads. You can use rotisserie chicken to save time or even grilled chicken thighs for a richer flavor. -
Cream Cheese (4 oz, softened)
Adds that creamy goodness reminiscent of jalapeno poppers. For a lighter option, you can swap it with Greek yogurt, but it won’t have the same richness. -
Diced Jalapenos (1/2 cup, fresh or pickled)
The star of the show! They bring heat and flavor. If you’re sensitive to heat, you can reduce the amount or use milder peppers. -
Bacon Bits (1/2 cup, cooked and crumbled)
Provides that smoky, savory crunch we all love. Feel free to use turkey bacon for a healthier version! -
Shredded Cheddar Cheese (1 cup)
Adds a layer of tangy flavor. Substitute with pepper jack if you want an extra kick! -
Mayo (1/2 cup)
Ties everything together with creaminess. Try avocado oil-based mayo for a healthier alternative. -
Lime Juice (2 tablespoons)
Brings a refreshing zing! Fresh lime juice is best, but bottled lime juice works in a pinch. -
Garlic Powder (1 tsp)
Enhances the overall flavor. You can also use minced fresh garlic for a stronger punch. -
Salt and Pepper (to taste)
Always adjust seasoning to your preference, of course!
Step-by-Step Instructions
Ready to whip this up? Let’s dive into the steps and bring your kitchen to life with the aroma of spicy goodness.
-
Cook the Chicken: If you haven’t got cooked chicken ready, you can poach, grill, or bake it. To poach, simply boil in water or broth until cooked through, typically about 15-20 minutes. Shred the chicken with two forks once it’s cool enough to handle. Chef tip: Use a stand mixer on low speed to shred the chicken effortlessly!
-
Prepare the Cream Cheese: In a large mixing bowl, combine the softened cream cheese with the mayonnaise. Whip it together until creamy and smooth. This is our delicious base. Chef insight: Letting the cream cheese soften at room temperature for about 30 minutes makes it easier to blend.
-
Mix in the Jalapenos: Fold in the diced jalapenos, making sure they’re evenly distributed. If you’re using fresh jalapenos, remember to wear gloves when chopping to avoid irritation. Side note: If you want a milder salad, taste every now and then during your prep!
-
Add the Spices and Chicken: Sprinkle in the garlic powder, salt, and pepper, then add the shredded chicken to the mix. Stir until all the ingredients are perfectly coated. Tip: Don’t be afraid to get your hands in there and mix thoroughly! It’s more fun that way.
-
Toss in Bacon and Cheese: Now comes the fun part! Fold in the cooked, crumbled bacon bits and shredded cheddar cheese. This is where the magic happens as each bite becomes a combination of all those wonderful flavors. Pro tip: Save a little cheese and bacon to sprinkle on top for a nice presentation!
-
Taste and Adjust Seasoning: Take a spoonful and taste your creation. If you want more heat, add more jalapenos or a dash of hot sauce! Need more acidity? A squeeze of lime juice can elevate the flavor profile. Chef’s secret: Don’t be afraid to make it your own!
-
Chill: Cover the salad with plastic wrap and let it chill in the refrigerator for at least 30 minutes before serving—this allows the flavors to meld beautifully. Trust me, it’s worth the wait!
Serving Suggestions
When it’s finally time to serve this delightful salad, pair it with crisp lettuce leaves for a refreshing crunch. I love serving it in hollowed-out bell peppers or on a bed of mixed greens for an aesthetically pleasing platter. Add a sprinkle of chives or fresh cilantro for a pop of color, and don’t forget those reserved bits of bacon and cheese on top for that wow factor!
Recipe Variations
- Buffalo Version: Stir in some buffalo sauce instead of jalapenos for a spicy twist that fans of buffalo wings will love.
- Veggie Delight: Mix in chopped celery, red onion, or bell peppers for extra crunch and color—you can never have too many veggies!
- Herby Twist: Add fresh herbs like cilantro or parsley to brighten the dish and add refreshing flavors.
- Dairy-Free Option: Swap out cream cheese and mayo for cashew cream and use a dairy-free cheese blend to make this salad vegan.
- Crunch Factor: Toss in some sunflower seeds or walnuts for added texture and healthy fats!
Chef’s Notes
I’ve made this Jalapeno Popper Keto Chicken Salad countless times, and it always brings a smile to my face and stomach! The recipe has evolved over the years, and I love experimenting with new ingredients. One time, I added a bit of ranch seasoning, and let me tell you, it was a game changer! Always remember that cooking is all about joy and creativity. Don’t hesitate to tweak things according to your taste. Your kitchen is your canvas!
FAQs and Troubleshooting
1. Can I use canned chicken for this recipe?
Absolutely! Canned chicken is a fantastic shortcut, just be sure to drain and rinse it well before adding it to the mix.
2. What if I don’t like spicy food?
No problem! You can reduce or omit the jalapenos, and substitute them with sweet bell peppers for added crunch without the heat.
3. How long will the chicken salad keep?
Stored in an airtight container in the fridge, this salad should last about 3-5 days. Just be aware that as time goes by, the flavors may intensify!
4. What if it’s too dry?
If you find your salad is lacking moisture after chilling, simply add a touch more mayo or a splash of lime juice to loosen it up.
And there you have it! This Jalapeno Popper Keto Chicken Salad is a delightful twist on a classic dish, perfect for any occasion. Whether you’re enjoying it for lunch, dinner, or as an appetizer for a gathering, you’re bound to make memories just like I did in Aunt Clara’s kitchen. So grab your ingredients, put on your favorite tunes, and let’s get cooking! Enjoy every bite!
Print
Jalapeno Popper Keto Chicken Salad
- Total Time: 40 minutes
- Yield: 4 servings 1x
- Diet: Keto
Description
A flavorful, low-carb twist on classic jalapeno poppers combined with a satisfying chicken salad.
Ingredients
- 2 cups Cooked Chicken Breast, shredded
- 4 oz Cream Cheese, softened
- 1/2 cup Diced Jalapenos, fresh or pickled
- 1/2 cup Bacon Bits, cooked and crumbled
- 1 cup Shredded Cheddar Cheese
- 1/2 cup Mayo
- 2 tablespoons Lime Juice
- 1 tsp Garlic Powder
- Salt and Pepper to taste
Instructions
- Cook the chicken: If you haven’t got cooked chicken ready, poach, grill, or bake it until cooked through, about 15-20 minutes. Shred the chicken once cool.
- Prepare the cream cheese: In a bowl, combine softened cream cheese with mayonnaise and whip until creamy.
- Mix in the jalapenos: Fold in the diced jalapenos, ensuring even distribution.
- Add the spices and chicken: Sprinkle in garlic powder, salt, and pepper, then stir in shredded chicken.
- Toss in bacon and cheese: Fold crumbled bacon and shredded cheddar into the mix.
- Taste and adjust seasoning: Sample the salad and adjust jalapenos or lime juice as needed.
- Chill: Cover the salad and let it chill in the refrigerator for at least 30 minutes.
Notes
Serve in lettuce leaves, bell peppers, or over mixed greens. Adjust ingredients based on personal preference.
- Prep Time: 20 minutes
- Cook Time: 20 minutes
- Category: Salad
- Method: Mixing
- Cuisine: American
Nutrition
- Serving Size: 1 serving
- Calories: 400
- Sugar: 3g
- Sodium: 650mg
- Fat: 28g
- Saturated Fat: 12g
- Unsaturated Fat: 14g
- Trans Fat: 0g
- Carbohydrates: 6g
- Fiber: 1g
- Protein: 30g
- Cholesterol: 80mg
Keywords: jalapeno popper, keto, chicken salad, low-carb, spicy
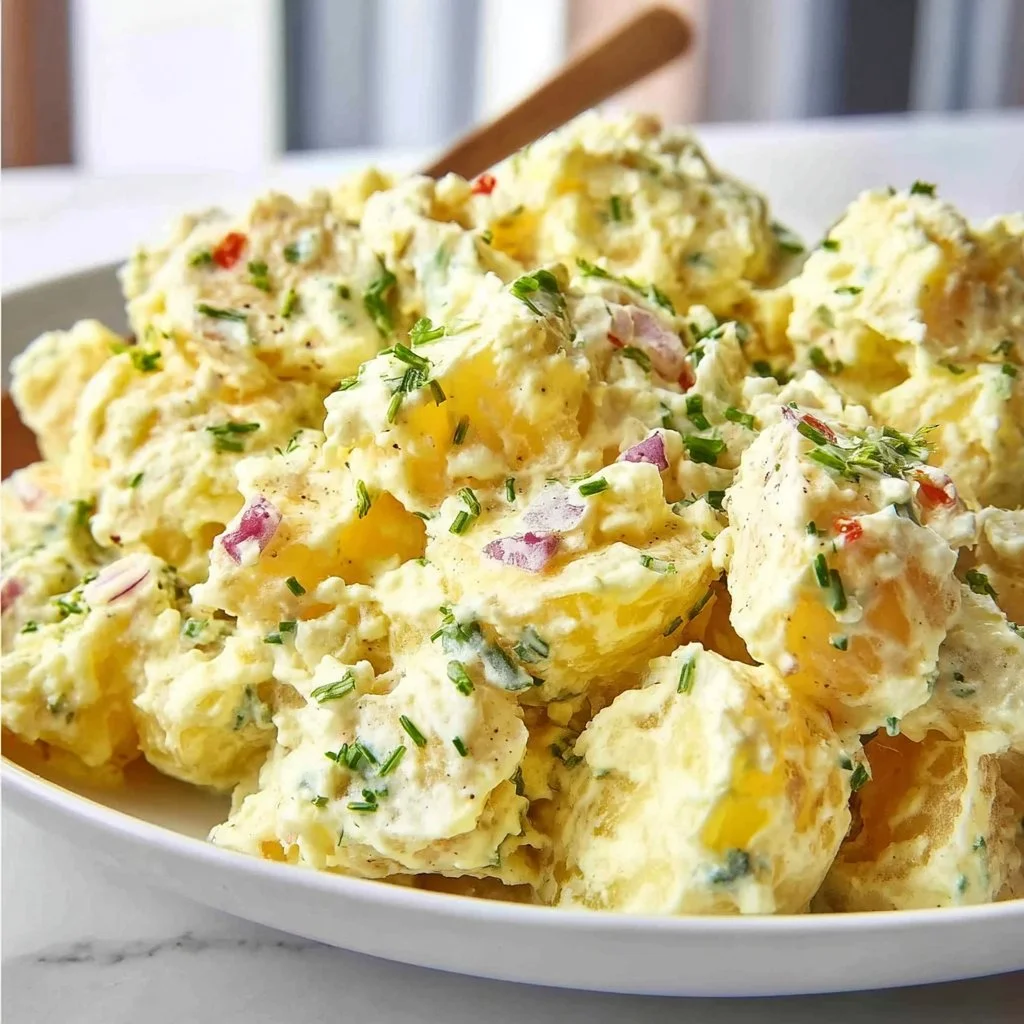
Potato Salad
The Ultimate Potato Salad: A Crowd-Pleasing Recipe
Welcome to my kitchen! Today, we’re diving into a classic dish that brings comfort to gatherings and joy to our taste buds: potato salad! There’s something about this creamy concoction of flavors that turns any summer barbecue, picnic, or family gathering into a feast of happiness. My love for potato salad isn’t just about the flavors; it’s also about the memories it stirs up—like the warm sun on my skin during family cookouts or the laughter shared over long tables laden with food.
Potato salad is the dish that transcends the ordinary. It serves as a blank canvas to showcase your creativity, and it can be as simple or as extravagant as you want it to be. If that sounds empowering, it’s because it is! You don’t need to wield fancy kitchen gadgets to prepare a memorable potato salad. Instead, all you need are some hearty ingredients, a dash of love, and a sprinkle of creativity to transform ordinary potatoes into a delightful side dish that your friends and family will talk about long after the last bite.
In this blog post, I am excited to share my ultimate potato salad recipe with you—a dish that’s creamy, zesty, and full of flavor. Along the way, I’ll sprinkle in tips, tricks, and stories that will help you make the perfect potato salad every time. So, grab your apron, roll up your sleeves, and let’s get cooking!
My Potato Salad Memory
One of my fondest memories tied to potato salad happened during my childhood summers at my grandmother’s house. Each year, our small family would gather for a backyard BBQ, filling the air with the mouth-watering aroma of grilled meats and freshly baked pies. My grandma, with her cute floral apron and infectious grin, was the soul of the party.
As I watched her whip up her famous potato salad, I was mesmerized by the way she effortlessly combined colors and textures. She’d toss in freshly chopped chives, diced celery, and a secret ingredient that I later discovered was dill pickles! The key moment was the mixing. She would place all her ingredients in a large bowl and stir, blending flavors while making sure none of the potatoes were mashed. It was always a day of joy, laughter, and perhaps a bit of friendly sibling competition over who could finish their serving first! This simple yet divine potato salad became a family staple, lovingly shared in every gathering and celebrated in every memory.
Now that you know where my love for potato salad blooms from, let me share the secret to recreating that same magic in your kitchen!
Ingredients
You’ll want to gather the following ingredients to make the ultimate potato salad:
-
2 pounds of Yukon Gold potatoes
These beauties have a creamy texture and a natural buttery flavor that make them ideal for potato salad. You can substitute with red potatoes or even sweet potatoes for a twist! -
1 cup of mayonnaise
The crème de la crème of creaminess! You can use Greek yogurt for a lighter version or vegan mayo for a plant-based option. -
2 tablespoons of Dijon mustard
A perfect balance of tang and flavor! Yellow mustard works too, but Dijon brings a more sophisticated taste. -
1 tablespoon of apple cider vinegar
This adds a pop of acidity that really brightens up the flavor. Substitute with white vinegar or lemon juice if necessary. -
1 cup of celery, finely chopped
For crunch! You could throw in some radishes for a peppery kick or cucumber for added freshness. -
1/2 cup of red onion, finely diced
Adds a lovely crunch and pop of color. Green onions or shallots can act as a great substitute for a milder flavor. -
1/2 cup of dill pickles, chopped
The secret ingredient! It gives that classic potato salad zing. You can swap this for sweet pickles or omit if you’re not a fan. -
3 hard-boiled eggs, chopped
Rounding out the protein and creaminess. They also make the salad more filling! Omit for a vegan version, or use silken tofu as a protein substitute. -
Salt and black pepper, to taste
Essential seasonings. Don’t be shy with the salt—taste as you go! -
Fresh dill or parsley, for garnish
A sprinkle of fresh herbs adds beauty and brightness to your dish.
Step-by-Step Instructions
Now let’s get into the fun of cooking! Here’s how to make this potato salad step by step:
Step 1: Cook the Potatoes
-
Prep Your Potatoes
Start by washing the Yukon Gold potatoes under cold water. No need to peel them unless that’s how you roll. The skins add texture and nutrients. -
Boil
Cut the potatoes into roughly 1-inch chunks for even cooking. Place them in a large pot and cover them with cold water. Add a generous pinch of salt to the water. -
Time to Boil
Bring the water to a boil and cook the potatoes for about 12-15 minutes, or until they’re fork-tender. Aim for “just right”—you want them soft enough to mash but firm enough to hold their shape. -
Cool Down
Drain the potatoes and let them cool in a colander for about 20 minutes, or until they’re no longer steaming. This step helps the salad stay fluffy instead of gooey when they mix with the dressing.
Step 2: Assemble the Dressing
-
Mix Mayo and Mustard
While the potatoes cool, grab a large mixing bowl. Add the mayonnaise, Dijon mustard, and apple cider vinegar. Stir until creamy and combined. -
Add Seasonings
Toss in a pinch of salt and pepper, tasting as you go. If you like more tang, add a dash more vinegar or mustard!
Step 3: Combine All the Ingredients
-
Add the Chopped Veggies
Fold in the celery, red onion, and dill pickles into the dressing. The crunchiness of the celery and the zing from the pickles bring such flavor harmony! -
The Star of the Show
Once the potatoes have cooled, add them to the bowl with the dressing mixture. The key here is to be gentle to avoid mashing them. Use a spatula or a wooden spoon to fold everything together until the potatoes are well-coated. -
In with the Eggs
Finally, add the chopped hard-boiled eggs to the salad. Again, be careful not to break them up too much! You want nice, chunky pieces.
Step 4: Chill and Serve
-
Let It Rest
After your salad is all mixed, cover the bowl with plastic wrap and refrigerate it for at least an hour—if you can wait that long! The flavors will meld beautifully during this time. -
Garnish
Before serving, give it a quick taste check and sprinkle a little more salt and pepper if you need. Garnish with fresh dill or parsley for a vibrant finish.
Now it’s ready to serve—see, that wasn’t so hard!
Serving Suggestions
To plate your potato salad, scoop it generously into a large serving bowl, and sprinkle with fresh dill or parsley for that extra touch of beauty. Serve it beside juicy grilled meats, crispy veggies, or even alongside a fresh garden salad. This dish pairs beautifully with all sorts of mains.
Recipe Variations
-
Mediterranean Twist: Swap the mayo for Greek yogurt and add diced olives, sun-dried tomatoes, and a squeeze of lemon juice for a vibrant take.
-
Spicy Chipotle: Combine the mayo with chipotle peppers in adobo for a smoky kick. Toss in some avocado for creaminess!
-
Herbed Pesto Potato Salad: Stir in a few tablespoons of pesto to give your salad a fresh herbal note and add pine nuts for crunch.
-
Southern Style: Add crumbled bacon and a dash of smoked paprika for a southern flair that takes it to a whole new level.
Chef’s Notes
Through the years, I’ve made plenty of potato salad variations, but there’s something so comforting about the classic version. The willingness to experiment fuels my cooking—my kitchen is my playground! I remember once attempting a spicy version with jalapeños, but it didn’t go down too well with the kiddos. Lesson learned: always taste-test and consider your audience! This dish truly evolves every time you prepare it, and I’m here for it!
FAQs and Troubleshooting
Q: Can I make potato salad a day in advance?
A: Absolutely! In fact, it tastes even better the next day once the flavors have had time to meld. Just be sure to keep it refrigerated.
Q: My potato salad feels too dry. What can I do?
A: Add a little more mayonnaise or a splash of pickle juice to loosen it up. A splash of warm water can help as well if you’re looking for a quick fix.
Q: How do I store leftover potato salad?
A: Store your potato salad in an airtight container in the fridge, and it should stay fresh for up to 3 days. Just give it a good stir before serving again!
Q: Why did my potatoes turn mushy?
A: This usually happens when they overcook! Keep an eye on those potatoes, and remember that they’ll continue to cook a bit even after you’ve drained them!
Nutritional Info (Optional)
Calories per serving: 240
Total Fat: 12g
Carbohydrates: 30g
Protein: 4g
Fiber: 3g
And there you have it—your guide to creating the ultimate potato salad! I hope you’ll treasure the flavor, the joy it brings, and the memories you’ll create while making it. Happy cooking, and may your kitchen always be filled with love and laughter! 🍽️
Print
The Ultimate Potato Salad
- Total Time: 35 minutes
- Yield: 8 servings 1x
- Diet: Vegetarian
Description
A creamy and zesty potato salad that brings comfort to gatherings, perfect for summer barbecues and family picnics.
Ingredients
- 2 pounds of Yukon Gold potatoes
- 1 cup of mayonnaise
- 2 tablespoons of Dijon mustard
- 1 tablespoon of apple cider vinegar
- 1 cup of celery, finely chopped
- 1/2 cup of red onion, finely diced
- 1/2 cup of dill pickles, chopped
- 3 hard-boiled eggs, chopped
- Salt and black pepper, to taste
- Fresh dill or parsley, for garnish
Instructions
- Cook the Potatoes: Wash the Yukon Gold potatoes under cold water and cut them into roughly 1-inch chunks. Place in a large pot, cover with cold water, and add a pinch of salt. Bring to a boil and cook for 12-15 minutes, until fork-tender. Drain and let cool for 20 minutes.
- Assemble the Dressing: In a large mixing bowl, combine mayonnaise, Dijon mustard, and apple cider vinegar. Stir until creamy and season with salt and pepper.
- Combine All Ingredients: Fold in the celery, red onion, and dill pickles into the dressing. Add cooled potatoes gently to avoid mashing. Finally, fold in chopped hard-boiled eggs.
- Chill and Serve: Cover with plastic wrap and refrigerate for at least an hour. Before serving, taste and adjust seasoning, then garnish with fresh dill or parsley.
Notes
Potato salad can be made a day in advance, as it tastes better the next day. Store in an airtight container and stir before serving.
- Prep Time: 20 minutes
- Cook Time: 15 minutes
- Category: Side Dish
- Method: Boiling and Chilling
- Cuisine: American
Nutrition
- Serving Size: 1 serving
- Calories: 240
- Sugar: 4g
- Sodium: 400mg
- Fat: 12g
- Saturated Fat: 2g
- Unsaturated Fat: 8g
- Trans Fat: 0g
- Carbohydrates: 30g
- Fiber: 3g
- Protein: 4g
- Cholesterol: 70mg
Keywords: potato salad, summer recipe, barbecue, picnic, side dish
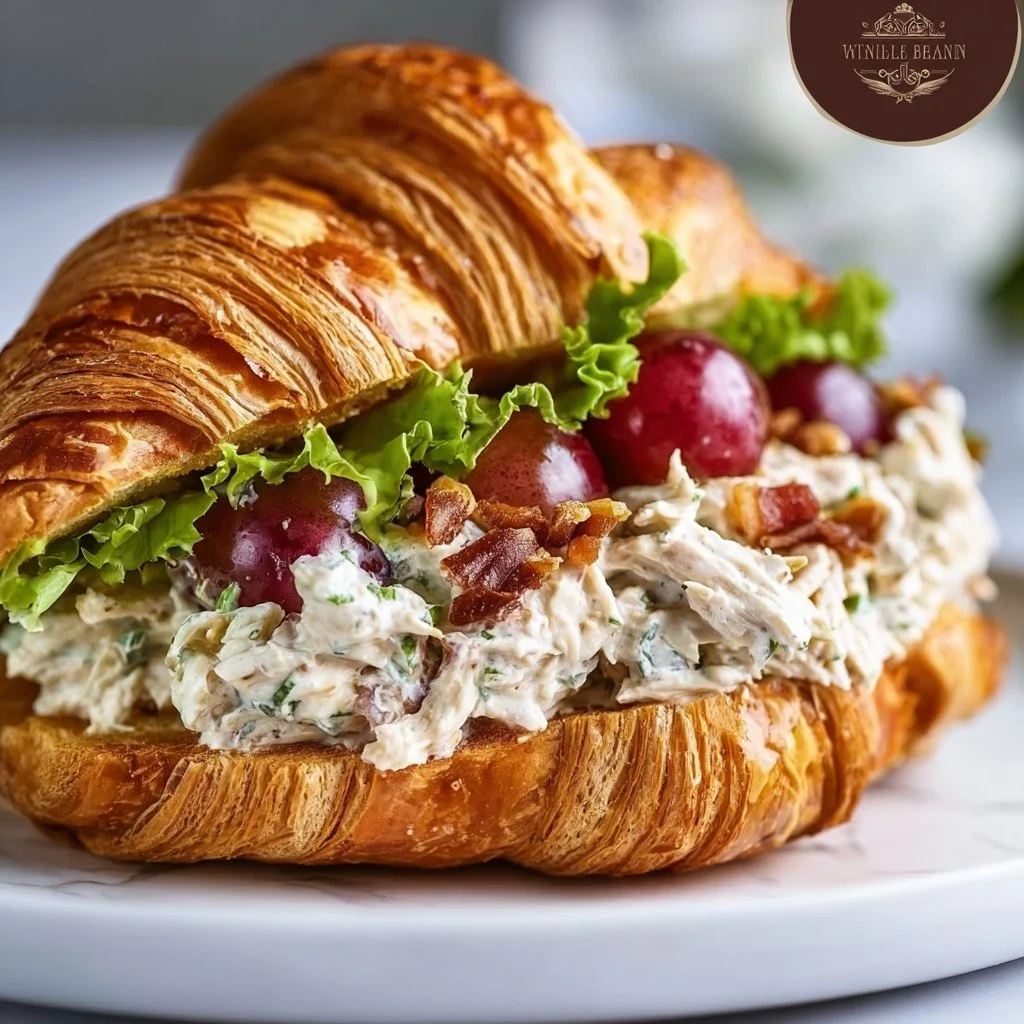
Chicken Salad Croissant Sandwich
The Ultimate Chicken Salad Croissant Sandwich: A Cozy Classic!
Welcome back to my kitchen, dear friends! Today, we’re diving into the delightful world of sandwiches. But not just any sandwich — we’re talking about the heavenly Chicken Salad Croissant Sandwich that brings comfort and joy with every bite. Picture this: a flaky, buttery croissant filled with a creamy, flavorful chicken salad jazzed up with a medley of crunchy veggies and tangy spices. Whether you’re hosting a brunch, having a cozy picnic, or just craving something delicious for lunch, this charming little creation is sure to steal the spotlight!
In my kitchen, sandwiches are not just food; they’re a celebration of flavors, textures, and memories. Growing up, lunch meant gathering around the table, where each plate was filled with love and laughter. My grandma had a signature chicken salad recipe that took center stage during family gatherings. The aroma of her freshly baked croissants wafted through the air, mingling with the voices of my loved ones. Each bite of the chicken salad croissant was a harmony of nostalgia wrapped in buttery goodness.
This recipe blends that cherished memory with my penchant for convenience and flavor. Chicken salad has endless possibilities, and I’m here to show you how to create a sensational version that’s quick and easy to whip up right at home. Beyond the ingredients, what matters is the love you pour into each step. So grab your apron, roll up your sleeves, and let’s create something magical together!
Personal Story
One of my fondest memories of chicken salad croissants happened during summer vacations at my grandma’s house. She would host weekly picnics in her expansive backyard, complete with colorful blankets spread out on the grass. Me and my cousins would race to the table, our hearts set on her infamous chicken salad croissant sandwiches. They were always served, of course, along with fresh lemonade and her homemade cookies — pure bliss!
I remember the thrill of diving into that buttery croissant, the creamy chicken salad spilling slightly with the first bite, bursting with flavor and crunch. Each mouthful seemed like a warm hug, filled with nostalgia and love. Little did I know that my childhood comfort food would evolve into a cooking passion of my own, inspiring me to recreate those joyous meals and share the magic of home-cooked goodness with others. Now, as I make these sandwiches in my own kitchen, I always smile thinking of sweet summer afternoons with that family, knowing that these simple recipes tie us all together no matter where we are.
Ingredients
Here’s what you’ll need to whip up this mouthwatering chicken salad croissant sandwich:
-
Cooked Chicken Breasts
- About 2 cups, shredded or cubed. You can use rotisserie chicken for a quick hack or poach chicken breasts for a fresher taste.
-
Mayonnaise
- 1/2 cup. This is the creamy base! Greek yogurt can be a lighter substitute if you’re looking to reduce calories.
-
Dijon Mustard
- 1 tablespoon. This adds a nice zing! If you’re not a fan of mustard, a dash of lemon juice can brighten up the flavors.
-
Celery
- 1/2 cup, finely chopped. The crunch is a must! You can swap this for diced apples for a sweeter kick or use cucumber for freshness.
-
Red Onion
- 1/4 cup, finely chopped. This gives a sharp flavor. If raw onion’s too strong for you, give it a quick soak in cold water to mellow it out.
-
Grapes (optional)
- 1/2 cup, halved. They add a sweet touch that elevates the sandwich. If you’re not a grape fan, dried cranberries are a fantastic alternative.
-
Walnuts or Almonds (optional)
- 1/4 cup, chopped. For an added crunch! If you prefer a nut-free option, sunflower seeds work wonderfully.
-
Salt and Pepper
- To taste. Always trust your palate! Start with a pinch and adjust as needed.
-
Croissants
- 4-6, depending on how generous you want to be with the filling! You can use whole wheat or gluten-free options if you have dietary preferences.
Step-by-Step Instructions
Now let’s get cooking! Follow these steps, and I promise that you’ll have yourself some lovely chicken salad croissant sandwiches in no time.
Step 1: Preparing the Chicken
Start by shredding or cubing your cooked chicken breasts into bite-sized pieces. If you’re using rotisserie chicken, ensure to separate it from the skin and bones. If you’re cooking your chicken, boil or poach it for about 15-20 minutes until fully cooked. Allow the chicken to cool before shredding — we don’t want any burnt fingers here!
Chef Tip: For added flavor, feel free to season your chicken while it cooks with some garlic powder, onion powder, or even a splash of chicken broth.
Step 2: Making the Chicken Salad Mixture
In a large bowl, combine the shredded chicken, mayonnaise, Dijon mustard, chopped celery, red onion, and the fruit and nuts if you’re using them. Gently fold the ingredients together until everything is well-coated in that creamy goodness.
Chef Hack: If you like a creamier chicken salad, don’t hesitate to add a bit more mayonnaise or a splash of lemon juice to brighten things up.
Step 3: Seasoning to Perfection
Taste your chicken salad mixture and season with salt and pepper. Adjust based on your personal preference — remember, you’re the boss in your kitchen!
Step 4: Toasting the Croissants
Next, slice the croissants in half and toast them lightly in the oven or on a skillet until they’re golden brown. This step is magic; it adds an extra layer of texture and warmth.
Chef Insight: Optionally, you can spread a little butter on the insides of the croissants before toasting them for an extra indulgent flavor!
Step 5: Assembling the Sandwich
Now for the fun part! Lay out the toasted croissants, and generously fill them with the chicken salad mixture. Don’t be shy; let that filling spill over a little! Top it off with the other half of the croissant.
Step 6: Serving with Love
Serve your chicken salad croissant sandwiches immediately as they’re best enjoyed fresh! You could pair them with a light salad, chips, or even fresh fruit for a delightful meal.
Serving Suggestions
To plate your sandwich, consider cutting it in half for a lovely presentation. Serve with a side of crisp greens or board with colorful fruits for a beautiful contrast. A sprinkle of fresh herbs like parsley or dill on top adds an appealing touch. Gather your loved ones around, crack open a refreshing beverage, and enjoy this culinary gem together!
Recipe Variations
Here are a few creative twists to keep things exciting:
- Curried Chicken Salad: Add curry powder for a warm, exotic flavor. Toss in some raisins or chopped mango for sweetness.
- Mediterranean Style: Swap the mayonnaise for Greek yogurt, and add olives, sun-dried tomatoes, and feta cheese for a Mediterranean flair.
- Spicy Kick: Mix in a dash of sriracha or chopped jalapeños for an extra heat that will take your taste buds on a thrilling ride.
- Herbal Bliss: Experiment with fresh herbs such as dill, parsley, or tarragon for a burst of freshness.
Chef’s Notes
Thinking back on my early cooking days, I can chuckle at a little disaster. Once, I decided to impress my friends with homemade croissants — oh boy, what a fiasco! The dough didn’t rise properly, and instead of flaky, buttery pastries, we ended up with something reminiscent of bricks! Yet, every misstep is a learning opportunity. Now, using store-bought croissants is my go-to, as it leaves more time for enjoying the cooking process and sharing my creations with others.
Over time, this chicken salad recipe has seen many adaptations in my kitchen, from adding spices to experimenting with crunchy elements. The joy of cooking lies in creativity, and I encourage you to make it your own!
FAQs and Troubleshooting
1. Can I make this chicken salad ahead of time?
Absolutely! This chicken salad can be prepared ahead of time and stored in the refrigerator for two to three days. Just hold off on toasting the croissants until you’re ready to serve.
2. My chicken salad is too dry. What can I do?
If your chicken salad feels dry, add more mayonnaise or a drizzle of olive oil to moisten it up. You could also stir in a bit of chicken broth for added flavor and moisture.
3. Is this recipe suitable for meal prep?
Yes! The chicken salad filling itself is great for meal prep. You can package it separately from croissants to keep them fresh until you’re ready to enjoy.
4. How do I store leftover sandwiches?
If you have leftovers, it’s best to separate the filling from the croissants to avoid sogginess. Store the chicken salad in an airtight container in the fridge and enjoy it within two days.
Nutritional Info (Optional)
While I don’t typically focus on numbers, a chicken salad croissant provides protein from chicken, healthy fats from mayonnaise or yogurt, and the necessary crunch from vegetables, making it a delightful choice for lunch. Of course, moderation is key if you’re more health-conscious!
There you have it, my foodie friends! The ultimate Chicken Salad Croissant Sandwich is not just a meal; it’s a manifestation of warmth, love, and creativity that brings people together. So gather your ingredients, relive some memory-making moments in your own kitchen, and enjoy sharing it all with those you love. Happy cooking, and until next time, keep those aprons messy and your hearts full! 🎉🥐
Print
The Ultimate Chicken Salad Croissant Sandwich
- Total Time: 40 minutes
- Yield: 4 servings 1x
- Diet: None
Description
A delightful chicken salad croissant sandwich filled with creamy chicken salad, crunchy veggies, and tangy spices, perfect for lunch or brunch.
Ingredients
- 2 cups cooked chicken breasts, shredded or cubed
- 1/2 cup mayonnaise (or Greek yogurt for a lighter option)
- 1 tablespoon Dijon mustard
- 1/2 cup celery, finely chopped
- 1/4 cup red onion, finely chopped
- 1/2 cup grapes, halved (optional)
- 1/4 cup walnuts or almonds, chopped (optional)
- Salt and pepper, to taste
- 4–6 croissants
Instructions
- Prepare the chicken by shredding or cubing it into bite-sized pieces. If using rotisserie chicken, separate it from the skin and bones.
- Combine the shredded chicken, mayonnaise, Dijon mustard, chopped celery, red onion, and optional fruits and nuts in a large bowl.
- Taste the mixture and season it with salt and pepper to your liking.
- Slice the croissants in half and toast them until golden brown.
- Fill the toasted croissants generously with the chicken salad mixture.
- Serve immediately for the best flavor and freshness.
Notes
For added flavor, season the chicken during cooking. Feel free to get creative with the filling by adding herbs or spices.
- Prep Time: 20 minutes
- Cook Time: 20 minutes
- Category: Lunch
- Method: Mixing, Toasting
- Cuisine: American
Nutrition
- Serving Size: 1 sandwich
- Calories: 400
- Sugar: 6g
- Sodium: 450mg
- Fat: 22g
- Saturated Fat: 4g
- Unsaturated Fat: 15g
- Trans Fat: 0g
- Carbohydrates: 30g
- Fiber: 2g
- Protein: 22g
- Cholesterol: 90mg
Keywords: chicken salad, croissant sandwich, lunch, brunch, easy recipe
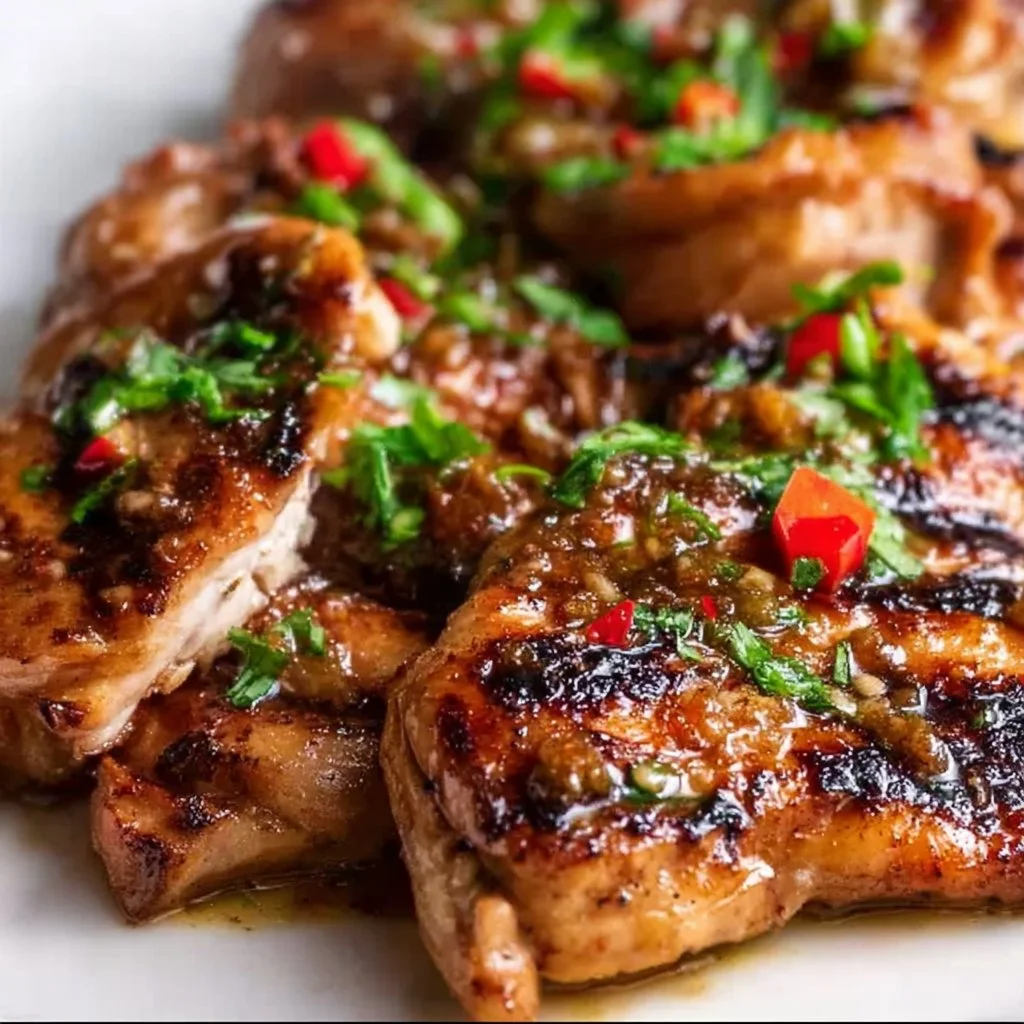
Thai Grilled Chicken
Thai Grilled Chicken: A Flavorful Journey from My Kitchen to Yours
Welcome back to my cozy corner of the culinary world! Today, I’m thrilled to share one of my all-time favorite recipes: Thai Grilled Chicken. The moment you take a bite of this dish, you’re in for a flavor explosion! Marinated to perfection and kissed by the flames of the grill, this chicken is tender, juicy, and infused with all the wonderful notes of Thai cuisine. Trust me; you’re going to want this recipe in your arsenal for those warm summer nights, casual get-togethers, or even just a simple weeknight dinner.
Now, I know what you might be thinking: “Thai cooking sounds complicated, right?” Well, I’m here to tell you that it can be incredibly easy and fun! And what’s even better? This dish is incredibly adaptable, meaning you can tweak it to your taste or whatever you have on hand. Plus, the marinade is so simple that you can whip it up in no time. Just think vivid herbs and spices blending beautifully with savory, sweet, and tangy flavors – there’s nothing quite like it!
But let’s rewind a bit. This recipe isn’t just about cooking chicken. It’s about creating memories, bringing people together, and savoring life’s little moments. Whether cooking for your family or having friends over, this Thai Grilled Chicken will have everyone gathering around the table, eager for another bite. So grab your apron, turn on that grill, and let’s get cooking!
Personal Story
Let me take you back to a particularly sunny summer afternoon in my childhood. I must have been ten or eleven years old, and my family decided to host a barbecue in our backyard. My dad was the grill master, flipping burgers and hot dogs with flair, but it was my mom’s Thai chicken skewers that stole the show. She would marinate the chicken overnight in a delightful concoction of coconut milk, garlic, and plenty of fresh herbs, and then skewer them for easy grilling.
I remember running around with my siblings, the smell of grilled meat wafting through the air as we played games and chased each other around the garden. The anticipation built as we watched my mom pull the chicken from the grill, its golden-brown skin glistening. When we finally dug in, it was pure bliss – the mingling of sweet, salty, and spicy flavors transported me to another world. That meal was a celebration of family, laughter, and the sheer joy of sharing food.
Fast forward years later, and here I am, still reveling in the magic of that Thai grilled chicken, one that brings all those beautiful memories rushing back. It’s a recipe I’ve tweaked over the years but kept the essence of my mom’s original creation intact. I can’t wait for you to experience it too!
Ingredients
For the Chicken Marinade:
-
Chicken Thighs (bone-in or boneless):
- Chicken thighs are incredibly juicy and tender, making them perfect for grilling. You can use chicken breasts for a leaner option, but thighs bring that rich flavor that’s hard to beat.
-
Coconut Milk (1 cup):
- Creamy and rich, coconut milk lends a delightful sweetness to the marinade. If you’re looking for a dairy-free alternative, this is perfect! For a lighter option, you can substitute with yogurt or buttermilk, although the flavor will differ.
-
Soy Sauce (¼ cup):
- Soy sauce offers umami and depth. If gluten-free, use tamari instead, or opt for coconut aminos – they’ll do the trick!
-
Brown Sugar (2 tablespoons):
- The sweetness of brown sugar balances the savory flavors. For a more caramelly flavor, try using coconut sugar, or if you’re aiming for lower sugar, you can use honey or maple syrup in moderation.
-
Lime Juice (2 tablespoons):
- Fresh lime juice brightens the flavor and adds zing. No limes? Lemon juice works as a substitute, though it has a different profile.
-
Garlic (3 cloves, minced):
- Garlic adds aromatic depth. Fresh cloves are best, but if you’re in a pinch, garlic powder can work too; just use about ¼ teaspoon for each clove.
-
Fresh Ginger (1 tablespoon, grated):
- Ginger provides a warm spiciness and is quintessential in Thai cooking. If you’re out of fresh ginger, ground ginger can be used – about half the amount should suffice.
-
Chili Flakes or Sriracha (to taste):
- Adding a little heat is essential! Adjust based on your spice tolerance. You can also use fresh chilies if you prefer – just chop finely.
For Grilling:
- Vegetable Oil (for grilling):
- A neutral oil like canola or grapeseed is great to prevent sticking. For that added flavor, you can use sesame oil if you’d like, just keep in mind its strong flavor.
Garnish:
- Fresh Cilantro and Lime Wedges:
- Fresh herbs always elevate a dish. If you’re not a cilantro fan, Thai basil or mint can be wonderful alternatives!
Step-by-Step Instructions
Step 1: Whisk Together the Marinade
In a large mixing bowl, combine the coconut milk, soy sauce, brown sugar, lime juice, minced garlic, grated ginger, and chili flakes. Whisk until everything is well combined and the sugar mostly dissolves.
Step 2: Marinate the Chicken
Add the chicken thighs into the marinade, ensuring they’re well-coated. Cover the bowl with plastic wrap and let it marinate in the fridge for at least two hours. If time allows, marinate it overnight—your future self will thank you! Pro tip: The longer the marination, the more intense the flavors will be.
Step 3: Prep Your Grill
When you’re ready to cook, preheat your grill to medium-high heat (about 375-400°F). If you’re using a charcoal grill, let the coals burn until they’re covered in white ash. Before placing the chicken on, brush the grill grates with a little vegetable oil to help prevent sticking.
Step 4: Grill the Chicken
Take the chicken out of the marinade, shaking off any excess liquid (but don’t rinse!). Place them on the grill, ensuring there’s space between each piece so they cook evenly. Grill for about 6-8 minutes per side, or until the internal temperature reaches 165°F.
Step 5: Rest and Serve
Once cooked, remove the chicken from the grill and let it rest for about 5 minutes. Resting helps keep the juices in, resulting in tender chicken. While resting, squeeze some lime juice over the top!
Step 6: Garnish and Enjoy
Serve your Thai grilled chicken garnished with fresh cilantro and lime wedges. You can pair it with jasmine rice, a refreshing cucumber salad, or my personal favorite – grilled vegetables!
Serving Suggestions
Presentation matters! To plate, start by arranging the chicken on a large serving platter. Scatter fresh cilantro over the top and add lime wedges alongside. For an extra touch, you can sprinkle sesame seeds for a nice crunch and flavor. Serve it family-style; nothing brings more joy than breaking bread together!
Recipe Variations
-
Coconut-Ginger Sauce: Create a drizzling sauce by combining leftover marinade (boil to ensure it’s safe) with toasted sesame oil and lime juice, to add a zesty kick!
-
Spicy Peanut Sauce: Serve with a small bowl of spicy peanut sauce for dipping, made with peanut butter, soy sauce, lime juice, and chili paste.
-
Herb-Infused Grilling: Toss some fresh herbs like basil or mint directly onto the grill alongside the chicken for added flavor.
-
Veggie Skewers: Want to make it vegetarian? Toss veggies like bell peppers, zucchini, and mushrooms in the marinade and grill them alongside the chicken.
-
Tropical Twist: Add pineapple chunks to the marinade for a sweet contrast. Grill them alongside the chicken for delicious kebobs!
Chef’s Notes
One of the beautiful things about cooking is how recipes evolve. This Thai Grilled Chicken started as a simple family recipe, but over the years, it’s turned into a creative outlet where I explore new flavors and techniques. I’ve experimented with various herbs, spices, and even different proteins, and it never disappoints. I still remember that first time experimenting with coconut milk—it was a game changer! Funny enough, my kitchen resembled a tropical paradise with coconut everywhere, and my friends dubbed it “Olivia’s Coconut Chicken Adventure!”
Cooking is not just about following recipes; it’s about joy, laughter, and a bit of chaos in the kitchen. Don’t be afraid to make this recipe your own—you might just create a family tradition of your own!
FAQs and Troubleshooting
1. My chicken is burning on the grill. What should I do?
If your grill is too hot, the chicken will burn on the outside before cooking through. Make sure to preheat the grill on medium-high heat, and always keep an eye on it. If you notice flames flaring up due to fat dripping, move the chicken to a cooler part of the grill or lower the heat.
2. Can I use chicken breasts instead of thighs?
Absolutely! Chicken breasts are a great alternative, but keep in mind they can dry out quicker. Consider marinating them for a longer time and grilling them for a shorter period (4-6 minutes per side) to keep them juicy.
3. What can I do if I don’t have a grill?
No problem! You can either use a grill pan on your stove or bake the marinated chicken in the oven at 400°F for about 25-30 minutes. Finish it under the broiler for a few minutes to achieve that beautiful char!
4. Can I make the marinade ahead of time?
Yes! The marinade can be prepared a day or two ahead. Just be sure to keep it in an airtight container in the fridge until you’re ready to cook. It might actually taste even better after sitting!
Nutritional Info (optional)
- Serving Size: 1 thigh
- Calories: 290
- Protein: 20g
- Carbohydrates: 9g
- Fat: 21g
- Sugar: 3g
- Fiber: 0g
There you have it, my friends! A recipe that’s bound to make your taste buds dance and fill your home with amazing aromas. I hope this Thai Grilled Chicken inspires you to cook and share great food with your loved ones. Happy cooking, and don’t forget to pull up a chair and enjoy the journey!
Print
Thai Grilled Chicken
- Total Time: 150 minutes
- Yield: 4 servings
- Diet: Gluten-Free
Description
A flavorful journey with Thai Grilled Chicken, marinated to perfection and grilled for a tender, juicy finish, perfect for summer nights.
Ingredients
- Chicken Thighs (bone-in or boneless)
- Coconut Milk (1 cup)
- Soy Sauce (¼ cup)
- Brown Sugar (2 tablespoons)
- Lime Juice (2 tablespoons)
- Garlic (3 cloves, minced)
- Fresh Ginger (1 tablespoon, grated)
- Chili Flakes or Sriracha (to taste)
- Vegetable Oil (for grilling)
- Fresh Cilantro and Lime Wedges (for garnish)
Instructions
- Whisk together the coconut milk, soy sauce, brown sugar, lime juice, minced garlic, grated ginger, and chili flakes until well combined.
- Marinate the chicken thighs in the marinade, cover, and let it marinate in the fridge for at least 120 minutes or overnight.
- Prep your grill to medium-high heat (375-400°F) and brush the grill grates with vegetable oil.
- Grill the chicken for about 6-8 minutes per side, or until the internal temperature reaches 165°F.
- Rest the chicken for about 5 minutes before serving.
- Garnish with fresh cilantro and lime wedges before serving.
Notes
You can substitute chicken breasts for thighs for a leaner option, but be cautious as they can dry out quicker. Pair with jasmine rice or a refreshing cucumber salad.
- Prep Time: 10 minutes
- Cook Time: 20 minutes
- Category: Main Course
- Method: Grilling
- Cuisine: Thai
Nutrition
- Serving Size: 1 thigh
- Calories: 290
- Sugar: 3g
- Sodium: 800mg
- Fat: 21g
- Saturated Fat: 12g
- Unsaturated Fat: 9g
- Trans Fat: 0g
- Carbohydrates: 9g
- Fiber: 0g
- Protein: 20g
- Cholesterol: 90mg
Keywords: grilled chicken, Thai chicken, summer recipes, easy dinner
Pineapple Glazed Salmon
Pineapple Glazed Salmon Recipe: A Tropical Delight
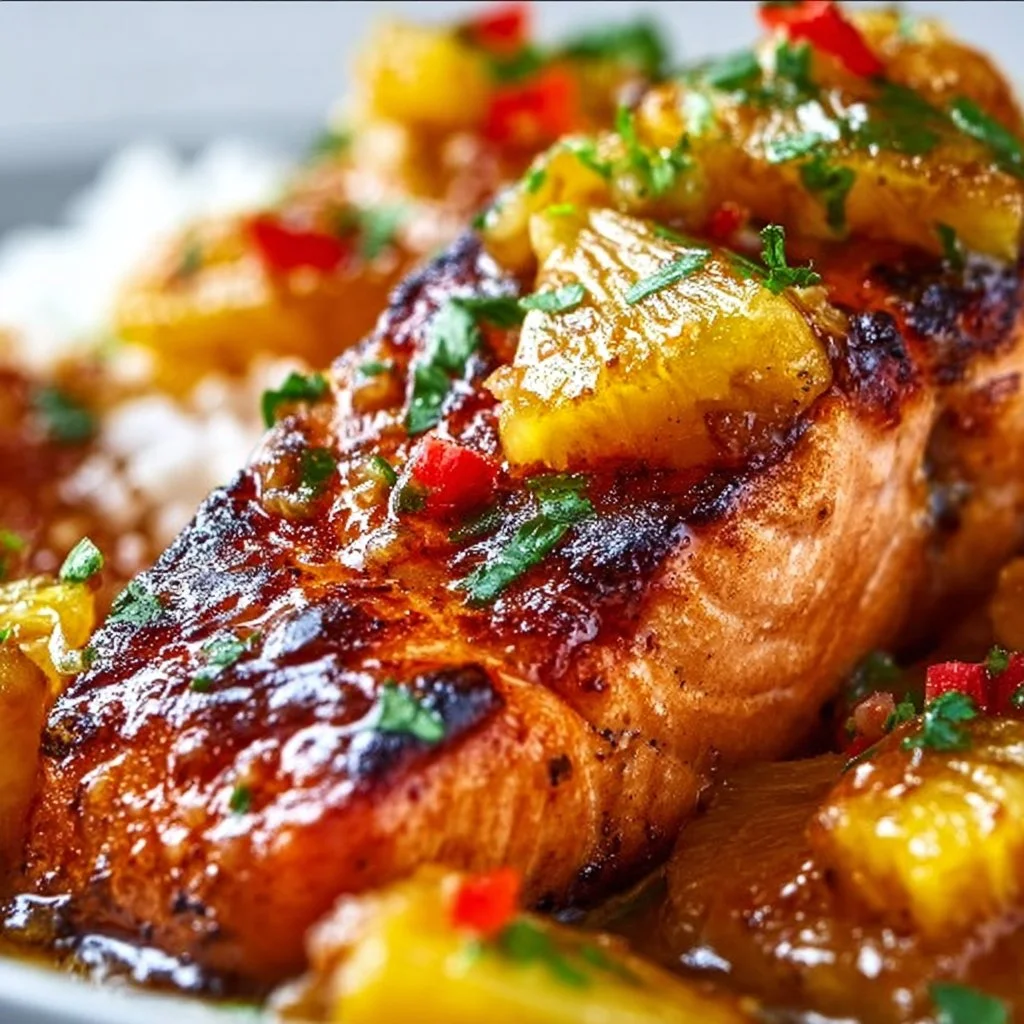
Welcome to my kitchen! I’m Olivia Bennett, and I’m thrilled to have you here for a delicious culinary journey. If you’re anything like me, you probably feel a little thrill when you catch a whiff of something tasty cooking up in the kitchen, especially when it involves that gorgeous combo of sweet and savory. Today, we’re going to whip up a dish that’s not just a feast for the senses, but also has a vibrant, tropical flair: Pineapple Glazed Salmon.
Imagine this: a succulent piece of salmon, perfectly cooked until flaky, and then drizzled with a tangy-sweet pineapple glaze that’s bursting with flavor. The combination of the rich, buttery salmon with the bright notes of pineapple creates a harmony that dances on your taste buds. This meal is not only a crowd-pleaser but also incredibly quick and easy to make—even on a weeknight! Trust me, once you’ve tasted this dish, it’ll become a staple in your home. Let’s dive right in!
A Sweet Memory in the Kitchen
Before we get our hands sticky and start cooking, I’d like to share a little memory that inspired this recipe. Growing up, my family would often have weeknight dinners on our tiny balcony during the summer months. My mom loved experimenting with all kinds of tropical flavors, and one of our favorites was a sweet glaze made from fresh pineapple she would drizzle over grilled fish. I remember sitting cross-legged on the floor, my cheeks stuffed with rice and smiling ear to ear as the smell wafted through our home.
One evening, in a fit of culinary experimentation, my mom tossed a piece of salmon on the grill, adorned it with a chunky, tangy pineapple glaze, and served it up with a side of jasmine rice. We were instantly hooked! The blend of flavors took us straight to a sunny beach far away. Now, as I recreate that vibrant dish, each bite carries me back to those warm summer nights filled with laughter, love, and the never-ending aroma of delicious food.
Ingredients
Let’s gather our ingredients! Here’s what you’ll need to create this delightful Pineapple Glazed Salmon:
-
Fresh Salmon Fillets (4 pieces, 6 oz each): Salmon is rich in omega-3 fatty acids and provides a buttery, flakiness that complements the glaze beautifully. If you’re not a fan of salmon, you can substitute it with trout or even chicken breasts, but keep in mind that cooking times will vary.
-
Fresh Pineapple (1 cup, diced): Sweet, juicy pineapple adds a tropical sweetness that’s hard to resist. If fresh pineapple isn’t available, canned pineapple chunks will work too—just be sure to drain the syrup!
-
Soy Sauce (¼ cup): This savory element balances the sweetness of the pineapple, giving the glaze a depth of flavor. For a gluten-free option, use tamari instead.
-
Honey (2 tablespoons): The natural sugars in honey will enhance the glaze’s sweetness. You can use maple syrup as a vegan alternative.
-
Garlic (4 cloves, minced): Fresh garlic adds a lovely aroma and depth to the glaze. If you’re in a hurry, garlic powder can be a quick substitute—just use half the amount.
-
Fresh Ginger (1 tablespoon, grated): The spicy freshness of ginger will elevate your glaze. You can replace it with ground ginger (1 teaspoon) if needed.
-
Lime Juice (2 tablespoons): A splash of acidity from the lime juice brightens the dish and cuts through the richness of the salmon. You can swap it with lemon juice if that’s what you have on hand.
-
Salt and Pepper (to taste): Simple seasonings that enhance all those fabulous flavors. Be careful with the salt if you’re using soy sauce, as it can be salty on its own!
Step-by-Step Instructions
Alright, let’s get down to business—cooking time! Follow these steps to create your Pineapple Glazed Salmon.
-
Prepare Your Marinade: In a medium bowl, combine the diced pineapple, soy sauce, honey, minced garlic, grated ginger, lime juice, and a pinch of salt and pepper. Stir well until everything is blended and the honey has dissolved. This vibrant mix is going to turn out to be a knockout glaze!
-
Marinate the Salmon: Place your salmon fillets in a shallow dish and pour half of the pineapple glaze over them. Let them marinate for at least 30 minutes. This step is crucial; it allows the salmon to absorb those incredible flavors! If you’re short on time, even a quick 15-minute soak will add flavor.
-
Preheat the Grill or Oven: If you’re grilling, preheat your grill to medium-high heat. For oven cooking, preheat to 400°F (200°C). If you’re feeling fancy, you can use a grill pan! This is perfect for that lovely char and smoky flavor.
-
Cook the Salmon: Remove the salmon from the marinade and place it skin-side down on a device of your choice. Grill for about 5–6 minutes per side, depending on the thickness. If you’re baking, place it on a lined baking sheet and bake for about 12–15 minutes. The salmon should flake easily with a fork when done.
-
Glaze It Up: While the salmon cooks, pour the leftover marinade into a small saucepan. Bring it to a gentle boil over medium heat, then reduce to a simmer for about 5–7 minutes or until it’s thickened slightly. This step will intensify the pineapple flavor and give you a luscious glaze to drizzle over your cooked salmon.
-
Assemble Your Dish: Once the salmon is ready, drizzle it generously with your delicious pineapple glaze. Feel free to garnish with some extra pineapple chunks or lime wedges if you’d like a pretty presentation!
Serving Suggestions
When it comes to serving your Pineapple Glazed Salmon, the presentation can be just as delightful as the taste! Serve it over a fluffy bed of coconut rice or jasmine rice for a hearty pairing. For crunch, toss together a fresh salad with mixed greens, avocado, and a lime vinaigrette. This meal looks gorgeous on a colorful plate and is perfect for impressing guests during a dinner party or simply enjoying a cozy meal at home.
Recipe Variations
Now that you have your base recipe, let’s get creative! Here are a few twists you can try:
-
Spicy Kick: Add a teaspoon of sriracha or red pepper flakes to your marinade for a spicy version that’ll wake up your taste buds.
-
Tropical Fruit Medley: Use mangos or papayas along with the pineapple for a colorful fruit glaze that’s bursting with flavor!
-
Herb Infusion: Fresh cilantro or mint can be added to your garnish for a refreshing herbaceous note.
-
Sweet & Savory Twist: Swap out some of the honey for brown sugar for a deeper caramelized flavor in the glaze.
-
Paleo-friendly Version: Substitute soy sauce with coconut aminos to keep it tasty but in line with paleo restrictions!
Chef’s Notes
Oh, and let me tell you a little story from my own kitchen escapades! I once tried to make this dish for a gathering, but I was so focused on the glaze that I completely overcooked the salmon. When my guests arrived, I frantically whipped up some more salmon while multitasking, only to melt my heart when my friend declared it was the best-salmon he had ever tasted, regardless of my minor blunder! It was chaotic but reminded me how food and love intertwine to create lasting memories.
Over the years, I’ve played with this recipe countless times, tweaking the ingredients to keep it fresh and exciting. I love that it’s versatile enough to fit any occasion!
FAQs and Troubleshooting
-
Can I use frozen salmon?
Yes! Just ensure it’s fully thawed before marinating. If cooked from frozen, adjust the cooking time accordingly. -
What if I don’t have a grill?
No worries! The oven or a stovetop skillet works perfectly fine. Just follow the same cooking times, and it’ll turn out delicious! -
How do I know when the salmon is done?
Salmon should reach an internal temperature of 145°F (63°C). You can check by inserting a fork into the thickest part of the fillet—it should flake easily. -
Can I marinate it overnight?
For sure! Marinating overnight will create even more depth of flavor, just make sure to cover it tightly and keep it in the fridge.
Nutritional Info
While I recommend enjoying this dish without counting calories, the nutritional benefits of salmon are worth noting! Salmon is rich in protein and omega-3 fatty acids, which can reduce inflammation and give your skin a healthy glow. The pineapple is loaded with vitamins that support digestion with its natural enzymes.
I’m so glad you joined me in my kitchen today! I hope you give this Pineapple Glazed Salmon a try and make some unforgettable memories of your own. Cooking is truly a form of love—savor it, enjoy it, and bask in those aromas that fill your home. Happy cooking and see you next time with more flavorful adventures!
Print
Pineapple Glazed Salmon
- Total Time: 35 minutes
- Yield: 4 servings
- Diet: Pescatarian
Description
A vibrant, tropical dish featuring succulent salmon drizzled with a tangy-sweet pineapple glaze, perfect for weeknight meals.
Ingredients
- Fresh Salmon Fillets (4 pieces, 6 oz each)
- Fresh Pineapple (1 cup, diced)
- Soy Sauce (¼ cup)
- Honey (2 tablespoons)
- Garlic (4 cloves, minced)
- Fresh Ginger (1 tablespoon, grated)
- Lime Juice (2 tablespoons)
- Salt and Pepper (to taste)
Instructions
- Prepare Your Marinade: In a medium bowl, combine the diced pineapple, soy sauce, honey, minced garlic, grated ginger, lime juice, and a pinch of salt and pepper. Stir well until everything is blended and the honey has dissolved.
- Marinate the Salmon: Place your salmon fillets in a shallow dish and pour half of the pineapple glaze over them. Let them marinate for at least 30 minutes.
- Preheat the Grill or Oven: If grilling, preheat your grill to medium-high heat. For oven cooking, preheat to 400°F (200°C).
- Cook the Salmon: Remove the salmon from the marinade and place it skin-side down. Grill for about 5–6 minutes per side, or bake for 12–15 minutes.
- Glaze It Up: Pour the leftover marinade into a small saucepan and bring it to a gentle boil, then reduce to a simmer for about 5–7 minutes.
- Assemble Your Dish: Drizzle the cooked salmon with the pineapple glaze and garnish with extra pineapple chunks or lime wedges.
Notes
For a spicy kick, add sriracha or red pepper flakes to the marinade. Can substitute soy sauce with tamari for a gluten-free option.
- Prep Time: 15 minutes
- Cook Time: 20 minutes
- Category: Main Course
- Method: Grilling or Baking
- Cuisine: Tropical
Nutrition
- Serving Size: 1 piece
- Calories: 350
- Sugar: 8g
- Sodium: 600mg
- Fat: 14g
- Saturated Fat: 3g
- Unsaturated Fat: 9g
- Trans Fat: 0g
- Carbohydrates: 28g
- Fiber: 2g
- Protein: 32g
- Cholesterol: 60mg
Keywords: salmon, pineapple, tropical, healthy, weeknight meal
Savory BLT Chicken Salad
Savory BLT Chicken Salad: A Flavorful Twist on a Classic
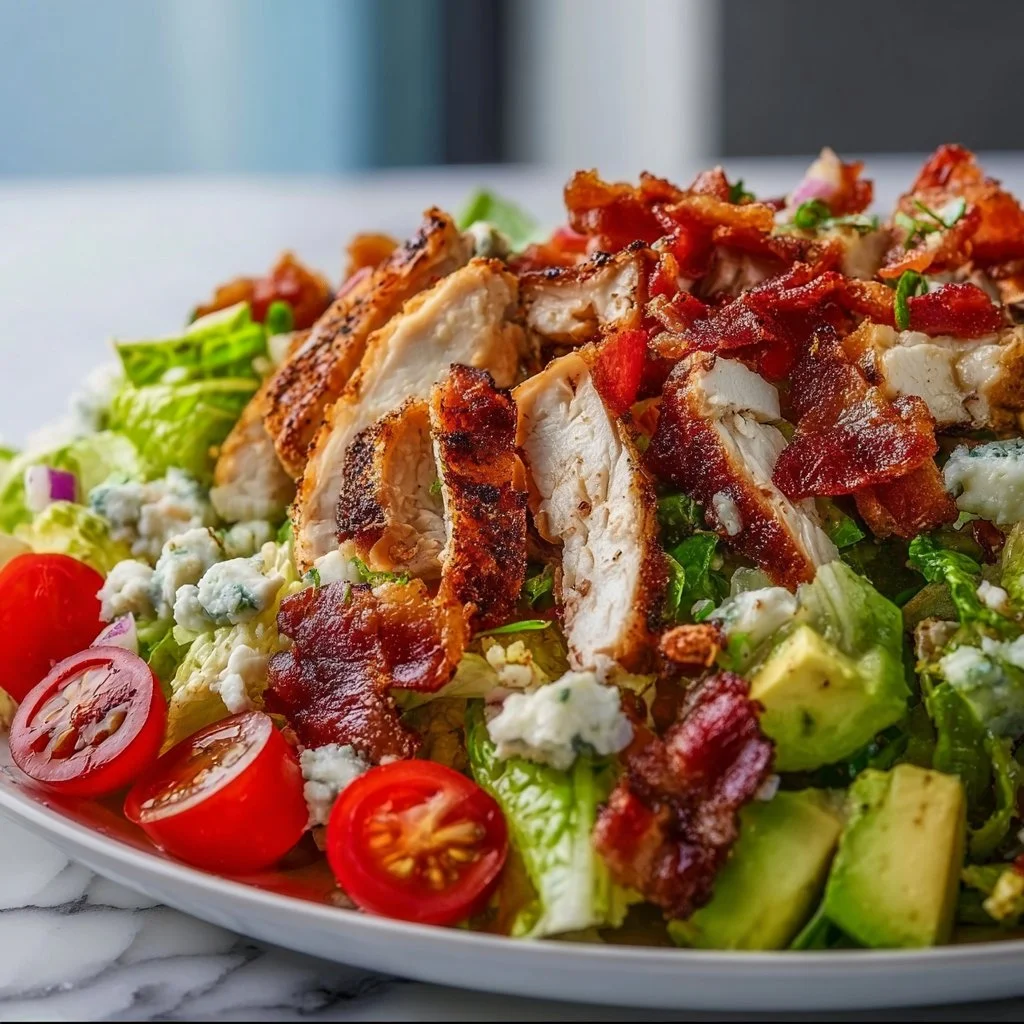
Welcome to my cozy corner of the internet, where the aroma of hearty meals and sweet indulgences fills the air! I’m Olivia Bennett, your friendly guide to all things delicious. Today, we are diving into a dish that beautifully marries classic flavors with a fresh twist: Savory BLT Chicken Salad.
Now, I get it. You might be wondering, “BLT in a salad?” Trust me; this isn’t just any salad! It’s a luscious blend of tender chicken, crispy bacon, juicy tomatoes, and vibrant greens, all drizzled with a creamy dressing that brings everything together in perfect harmony. Perfect for lunch, dinner, or even as a centerpiece for your next brunch gathering—this salad is adaptable, flavorful, and downright delightful!
The best part? You don’t have to be a culinary ninja to pull this off. With some basic ingredients, a dash of love, and just a sprinkle of time, you can create a bowl brimming with flavor and heart. Whether you’re feeding a crowd or just yourself, this BLT Chicken Salad is a showstopper that’s sure to impress. So grab your apron, and let’s sprinkle some magic into our kitchens!
Personal Story
Growing up, family dinners meant the world to me. I remember my mom often whipping up her famous BLTs during lazy summer days. The smell of sizzling bacon would fill our kitchen, while juicy tomatoes and crisp lettuce would wait patiently to bring that classic sandwich to life. It wasn’t just about the food; it was about gathering around the table, sharing stories, and creating memories that linger long after the plates were cleared.
One fateful afternoon, inspired by those cherished moments, I decided to jazz up my mom’s classic recipe and transform it into a wholesome salad. I threw in some grilled chicken for protein and mixed it all together with a zesty dressing. That spontaneous decision became a staple for my family, and it reminded me how a simple dish can evolve into something extraordinary when you bring your heart into the kitchen. Every bite of this Savory BLT Chicken Salad is infused with love and nostalgia—making it more than just a meal; it’s a soulful experience.
Ingredients
Here’s what you’ll need to whip up your very own Savory BLT Chicken Salad. Remember, these ingredients come with a dash of love and lots of room for creativity!
-
2 cups cooked chicken (shredded or diced)
The star of the show! Use grilled chicken for a smoky flavor or rotisserie chicken for a quick and easy option. If you’re looking to substitute, feel free to replace it with grilled tofu or chickpeas for a vegetarian option. -
4 slices of crispy bacon
Because what’s a BLT without bacon? Cook until crispy and crumble it onto your salad. For a healthier alternative, you can use turkey bacon or even a plant-based bacon. -
2 cups cherry tomatoes (halved)
These little bursts of flavor add brightness. If tomatoes aren’t your thing, diced red bell pepper can provide a similar crunch and sweetness! -
3 cups mixed greens (like arugula, spinach, or romaine)
A mix adds depth and texture. Feel free to use whatever leafy greens you have in the fridge, or switch it up with kale for a heartier bite. -
1/2 cup mayonnaise
The creaminess that holds it all together. To lighten it up, Greek yogurt or an avocado-based mayo works wonderfully! -
1 tablespoon Dijon mustard
A hint of tang that lifts the dish. If you want a kick, try some spicy mustard to give it a little zing. -
Salt and pepper to taste
Essential for teasing out the flavors. Remember to taste as you go; it’s all about balance! -
Juice of half a lemon
Freshness alert! This brightens up your salad perfectly. If lemon isn’t on hand, a splash of vinegar will do just fine.
Step-by-Step Instructions
Alright, let’s get cooking! Here’s how to bring this Savory BLT Chicken Salad to life:
Step 1: Cook the Bacon
Begin by cooking the bacon. Place the slices in a skillet over medium heat. Cook until crispy, turning occasionally, about 6-8 minutes. Once it’s done, transfer it to a paper towel-lined plate to drain excess grease. This first step sets the flavor foundation for your salad, bringing that rich, savory aroma to the kitchen!
Step 2: Prepare the Chicken
If you’re using leftover chicken or rotisserie chicken, shred or dice it into bite-sized pieces. If you’re cooking it from scratch, grill or bake chicken breasts seasoned with salt, pepper, and a drizzle of olive oil until cooked through (about 20-25 minutes at 375°F). This method keeps your chicken juicy and flavorful.
Step 3: Toss the Ingredients Together
In a large mixing bowl, combine the cooked chicken, crumbled bacon, halved cherry tomatoes, and mixed greens. This vibrant blend will be the heart of your salad, and I recommend layering the ingredients as you mix them to avoid crushing the greens.
Step 4: Make the Dressing
In a small bowl, whisk together the mayonnaise, Dijon mustard, salt, pepper, and lemon juice. Adjust this dressing to taste; if you love more acidity, squeeze in the entire lemon! This step is your opportunity to customize and make it your own—be the salad artist you were meant to be!
Step 5: Dress the Salad
Pour the dressing over your salad mixture and gently toss until everything is evenly coated. You want the creamy dressing to hug each piece without overwhelming the fresh ingredients. Chef hack: I often use my hands to toss salads—just be gentle, and it’s a great way to get all those flavors intertwined!
Step 6: Plate and Serve
Once mixed, serve immediately—a fresh salad is always best right away! But if you need to prep it in advance, store the dressing separately and add it just before serving. This keeps the greens crisp and vibrant!
Serving Suggestions
For serving, I recommend using a wide, shallow bowl to showcase the colorful ingredients. Feel free to top with extra bacon or even some toasted nuts for added crunch. A sprinkle of freshly cracked black pepper or a few slices of avocado can elevate your dish to a whole new level of yum!
Recipe Variations
Looking to switch things up? Here are a few fun variations you can try:
- Avocado BLT Chicken Salad: Add diced avocado for creaminess—yes, please!
- Spicy BLT Chicken Salad: Add sliced jalapeños or a drizzle of hot sauce for a spicy kick.
- Herbed Dressing: Mix in fresh herbs like dill or parsley for a garden-fresh flavor bomb!
- Quinoa BLT Salad: Toss in some cooked quinoa for an added protein punch and that healthy grain goodness.
- Fruit-Infused: Add some diced apples or a handful of blueberries for unexpected sweetness that complements the savory flavors beautifully.
Chef’s Notes
As I reflect on my culinary journey, this Savory BLT Chicken Salad holds a special place in my heart. It’s amazing how a simple combination of pantry staples can spark happiness and connection. I’ve seen this dish evolve at home, often topped with whatever random ingredients need using up—each creation is a reminder that cooking is about embracing creativity.
A funny kitchen memory: one time, I mistakenly reached for cayenne instead of black pepper while making the dressing. After the initial shock and a flurry of “Oh no!” I tasted it and realized, “Hey, this just made it more interesting!” Sometimes, culinary accidents bring unexpected joy!
FAQs and Troubleshooting
Q1: Can I make this salad ahead of time?
Absolutely! Just prepare the salad ingredients ahead, but keep the dressing separate until you’re ready to serve to keep the greens fresh.
Q2: What if I don’t have chicken?
No chicken? No problem! Try using canned tuna or a hefty serving of chickpeas for a different protein kick.
Q3: How do I make it gluten-free?
All ingredients in this recipe are naturally gluten-free! Just double-check any packaged items like bacon or mayonnaise for hidden gluten.
Q4: Why is my dressing too thick?
If your dressing seems thick, simply add a tablespoon of water or extra lemon juice and whisk again for the right consistency!
Nutritional Info (Optional)
(Note: Nutritional information may vary based on specific brands and measurements used.)
- Serving Size: 1 cup
- Calories: Approximately 350
- Protein: 25g
- Carbohydrates: 10g
- Fats: 20g
- Fiber: 3g
There you have it, my lovely foodies! Grab a fork and dig into this delectable Savory BLT Chicken Salad—relish the flavors, cozy up with loved ones, and create lasting memories. Until next time, keep cooking with love! 🍽️✨
Print
Savory BLT Chicken Salad
- Total Time: 45 minutes
- Yield: 4 servings 1x
- Diet: Gluten-Free
Description
A flavorful twist on the classic BLT, this Savory Chicken Salad combines grilled chicken, crispy bacon, juicy tomatoes, and mixed greens drizzled with a creamy dressing.
Ingredients
- 2 cups cooked chicken (shredded or diced)
- 4 slices of crispy bacon
- 2 cups cherry tomatoes (halved)
- 3 cups mixed greens (like arugula, spinach, or romaine)
- 1/2 cup mayonnaise
- 1 tablespoon Dijon mustard
- Salt and pepper to taste
- Juice of half a lemon
Instructions
- Cook the bacon by placing the slices in a skillet over medium heat. Cook until crispy, about 6-8 minutes, then transfer to a paper towel to drain.
- Prepare the chicken by shredding or dicing if using leftovers; otherwise, grill or bake chicken breasts until cooked through, about 20-25 minutes at 375°F.
- Toss the cooked chicken, crumbled bacon, halved cherry tomatoes, and mixed greens in a large bowl.
- Make the dressing by whisking together mayonnaise, Dijon mustard, salt, pepper, and lemon juice to taste.
- Dress the salad by pouring the dressing over the mixture and gently tossing to coat.
- Serve immediately or store the dressing separately until ready to serve.
Notes
For a healthier alternative, you can use turkey bacon or a plant-based bacon. Customize the dressing by adding more lemon juice or spices to your taste.
- Prep Time: 15 minutes
- Cook Time: 30 minutes
- Category: Main Course
- Method: Mixing
- Cuisine: American
Nutrition
- Serving Size: 1 cup
- Calories: 350
- Sugar: 4g
- Sodium: 600mg
- Fat: 20g
- Saturated Fat: 5g
- Unsaturated Fat: 10g
- Trans Fat: 0g
- Carbohydrates: 10g
- Fiber: 3g
- Protein: 25g
- Cholesterol: 50mg
Keywords: BLT, chicken salad, healthy salad, quick recipe, summer meals, comfort food
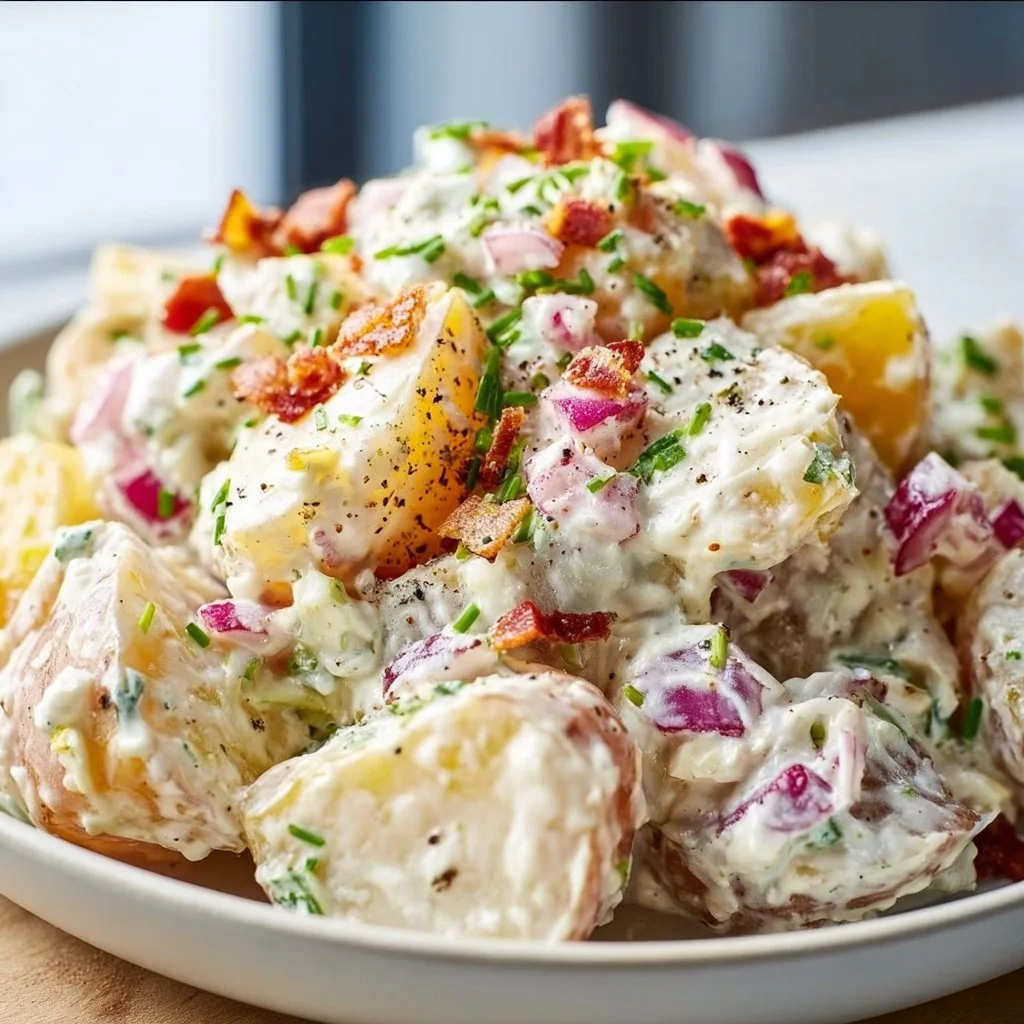
Steakhouse Potato Salad: A Creamy, Flavor-Packed Side Dish
Steakhouse Potato Salad: A Creamy, Flavor-Packed Side Dish
Welcome back to my kitchen, friends! Today, I’m thrilled to share a recipe that holds a special place in my heart — Steakhouse Potato Salad! This dish is the perfect blend of creamy, tangy, and savory flavors, making it an ideal sidekick for your grilled steaks, burgers, or even a cozy dinner when you want that steakhouse vibe at home.
Now, I know what you’re thinking: “Potato salad? Really?” But trust me, this isn’t your average picnic potato salad that gets kicked to the side of the table. Oh no, this recipe is packed with flavor and character. Picture this: tender potatoes mixed with a luscious, creamy dressing, smoky bacon, crunchy veggies, and a hint of tang from pickles. It’s a celebration of flavors that will keep everyone coming back for seconds!
What I love most about this potato salad is its nostalgia. It’s the kind of dish that takes me back to summer BBQs with my family. I remember my dad manning the grill while my mom tossed together this glorious potato salad in the kitchen — the scent of sizzling steak wafting through the air. There’s something magical about food that evokes memories, and I’m here to guide you through making your own memories with every bite of this delightful dish.
So, if you’re ready to elevate your side dish game and impress your friends and family, roll up those sleeves, put on that apron (trust me, it might get a little messy!), and let’s jump into this flavor-packed recipe together!
Personal Story
Growing up, summer meant family BBQs in the backyard. I still remember the vibrant green of the grass, the warm sun on my shoulders, and the aroma of grilled meats wafting through the air. My parents were the dream team; my dad flipped burgers while my mom elegantly whisked together her famous potato salad in a large mixing bowl.
I was always tasked with the important job of taste-testing, of course! For me, the pièce de résistance was the crispy bacon bits hidden among the creamy potatoes. With each taste, I could actually feel the joy radiating through our little gatherings as my family laughed, told stories, and savored every bite. That potato salad was more than just food; it was a symbol of love and togetherness. Fast forward to today, and I can’t help but recreate that same warmth in my own kitchen. With my version of Steakhouse Potato Salad, I aim to create those same joyful moments and delicious memories. Get ready to bring a slice of nostalgia and a whole lot of flavor to your table!
Ingredients
To whip up this delicious Steakhouse Potato Salad, you’ll need the following ingredients:
-
2 lbs of Baby Potatoes
- Look for small, waxy potatoes (such as Yukon Gold or red potatoes) for the best texture. Feel free to use larger potatoes; just remember to cut them into smaller cubes for even cooking!
-
4 slices of Bacon
- Because who doesn’t love bacon? It adds an irresistible smoky flavor. If you want a vegetarian option, try using smoked paprika or liquid smoke in the dressing instead.
-
1 cup of Mayonnaise
- The base of our creamy dressing! For a lighter version, swap half of the mayo with Greek yogurt; it gives a creamy consistency while cutting calories.
-
2 tablespoons of Dijon Mustard
- Adds that tangy kick! If you prefer a milder flavor, regular yellow mustard works just fine.
-
1 tablespoon of Apple Cider Vinegar
- A splash of acidity brightens the dish. Substituting with lemon juice also works wonderfully, lending a fresh citrusy note.
-
1 cup of Celery, diced
- For that crunchy texture! If you’re not a fan of celery, feel free to swap it with diced bell peppers or even chopped green onions.
-
1/2 cup of Green Onions, chopped
- These add freshness and color. You can replace them with chives or shallots for a different twist.
-
1/2 cup of Pickles, diced
- They add depth and tanginess; sweet, dill, or bread-and-butter pickles work well. For a healthier option, try using pickle relish for the same flavor without the chunks!
-
Salt and Pepper to taste
- Essential for enhancing the flavors. Spice it up with some paprika or cayenne if you like a little kick!
Step-by-Step Instructions
1. Prepare the Potatoes
Start by washing those baby potatoes well to remove any dirt. Put them into a large pot, cover with cold water, add a generous pinch of salt, and bring it to a boil. Chef’s Tip: Cooking potatoes in cold water ensures they cook evenly, giving you the perfect tenderness!
2. Boil the Potatoes
Once your water reaches a rolling boil, reduce the heat to medium and let the potatoes simmer for about 15-20 minutes or until they’re fork-tender. Take care not to overcook them; we want them soft but not mushy! Hack Alert: Test doneness with a fork or the tip of a knife; you should feel a little resistance!
3. Meanwhile, Cook the Bacon
While the potatoes are boiling, grab a skillet and cook your bacon over medium heat until crispy. After it cools, chop it into small bits. If you’d like to save time, feel free to use pre-cooked bacon or even bacon bits.
4. Make the Dressing
In a large mixing bowl, combine the mayonnaise, Dijon mustard, apple cider vinegar, salt, and pepper. Whisk it together until smooth. Chef’s Insight: A good dressing can make or break your potato salad, so don’t be afraid to taste it and tweak it to your liking!
5. Chop the Veggies
While the potatoes are boiling and the bacon is sizzling, dice your celery, green onions, and pickles. It’s all about those textures, plus they add flavor pop when you bite into this salad!
6. Combine Everything
Once the potatoes are tender, drain them and let them cool slightly before cutting them into bite-sized pieces. This is crucial because if they’re too hot, they’ll make the dressing warm, and nobody wants a warm potato salad! Gently fold the warm potatoes into the dressing and mix until they’re coated.
7. Add the Mix-ins
Now, fold in the crispy bacon pieces, diced celery, green onions, and pickles. Make sure everything is combined evenly. Pro Tip: A spatula works great here for gentle folding without mashing your precious potatoes.
8. Chill and Serve
Cover the salad and place it in the refrigerator for at least one hour. This allows all those flavors to meld beautifully. Before serving, give it a taste and adjust seasoning if needed. You might even want to drizzle in a little more vinegar for that zing!
Serving Suggestions
Plate this beauty in a large serving bowl and garnish with a sprinkle of chopped parsley or extra green onions for a pop of color. Serve alongside your favorite grilled meats, and don’t forget that inviting aroma filling the air!
Recipe Variations
- Herbed Potato Salad: Mix in fresh herbs like dill, parsley, or chives for an aromatic twist.
- Spicy Potato Salad: Add diced jalapeños or a splash of hot sauce for a kick.
- BBQ Bacon Potato Salad: Incorporate a bit of BBQ sauce into the dressing for a smoky flavorburst.
- Mediterranean Twist: Go for a Greek vibe using feta cheese, Kalamata olives, and a drizzle of olive oil.
- Vegan Version: Substitute the mayonnaise with vegan mayo and use coconut bacon or smoked tempeh for a delicious plant-based salad.
Chef’s Notes
This Steakhouse Potato Salad has had its fair share of evolution in my kitchen over the years. I’ve tried countless variations, from adding different herbs to experimenting with different dressings. But one thing remains constant: this recipe brings people together. I’ve had moments where friends have pulled up a chair and just dove into the bowl, laughing over the flavors and sharing stories. Food has a magical way of connecting us, and every time I make this potato salad, it brings me right back to those backyard BBQs. One time, I even had a ‘potato salad-off’ with friends, where we all brought our unique versions to the table — endless fun and a lot of laughter ensued!
FAQs and Troubleshooting
1. How can I make my potato salad less creamy?
If you want to tone down the creaminess, reduce the amount of mayonnaise or swap in Greek yogurt. Adding extra vinegar or lemon juice can also help balance the flavors.
2. Can I make this salad ahead of time?
Absolutely! In fact, making it a day ahead allows the flavors to meld beautifully. Just keep it tightly covered in the refrigerator.
3. What should I do if I overcooked my potatoes?
If they’re mushy, there’s no saving them for a salad, but you could transform them into a delicious mashed potato dish instead! Adding butter, cheese, and herbs can elevate them beautifully.
4. How do I store leftovers?
Keep any leftover potato salad in an airtight container in the refrigerator. It should stay fresh for about 3-4 days. Just give it a stir before serving again!
Nutritional Info
(Per 1 serving, ½ cup)
- Calories: 250
- Protein: 5g
- Carbohydrates: 26g
- Fat: 15g
- Fiber: 2g
And there you have it, my friends! A wonderfully creamy, flavorful Steakhouse Potato Salad that will steal the spotlight at any gathering or cozy dinner at home. Happy cooking, and may your kitchen be filled with love, laughter, and spectacular flavors! 🍽️
Print
Steakhouse Potato Salad
- Total Time: 45 minutes
- Yield: 4 servings 1x
- Diet: None
Description
A creamy, flavor-packed side dish perfect for complementing grilled meats and summer BBQs.
Ingredients
- 2 lbs of Baby Potatoes
- 4 slices of Bacon
- 1 cup of Mayonnaise
- 2 tablespoons of Dijon Mustard
- 1 tablespoon of Apple Cider Vinegar
- 1 cup of Celery, diced
- 1/2 cup of Green Onions, chopped
- 1/2 cup of Pickles, diced
- Salt and Pepper to taste
Instructions
- Prepare the potatoes by washing them well, placing them in a large pot, covering with cold water, and adding salt.
- Boil the potatoes for about 15-20 minutes or until fork-tender.
- Meanwhile, cook the bacon in a skillet over medium heat until crispy, then chop into small bits.
- Make the dressing by whisking together mayonnaise, Dijon mustard, apple cider vinegar, salt, and pepper in a large mixing bowl.
- Chop the celery, green onions, and pickles while the potatoes are boiling and bacon is cooking.
- Combine the warm potatoes with the dressing, folding gently to coat.
- Add the crispy bacon, diced celery, green onions, and pickles, mixing until evenly combined.
- Chill in the refrigerator for at least one hour before serving.
Notes
For a lighter version, you can swap half of the mayonnaise with Greek yogurt. Make the potato salad a day ahead for better flavor melding.
- Prep Time: 15 minutes
- Cook Time: 30 minutes
- Category: Side Dish
- Method: Boiling
- Cuisine: American
Nutrition
- Serving Size: 1/2 cup
- Calories: 250
- Sugar: 2g
- Sodium: 600mg
- Fat: 15g
- Saturated Fat: 4g
- Unsaturated Fat: 8g
- Trans Fat: 0g
- Carbohydrates: 26g
- Fiber: 2g
- Protein: 5g
- Cholesterol: 15mg
Keywords: potato salad, side dish, BBQ, summer, creamy salad
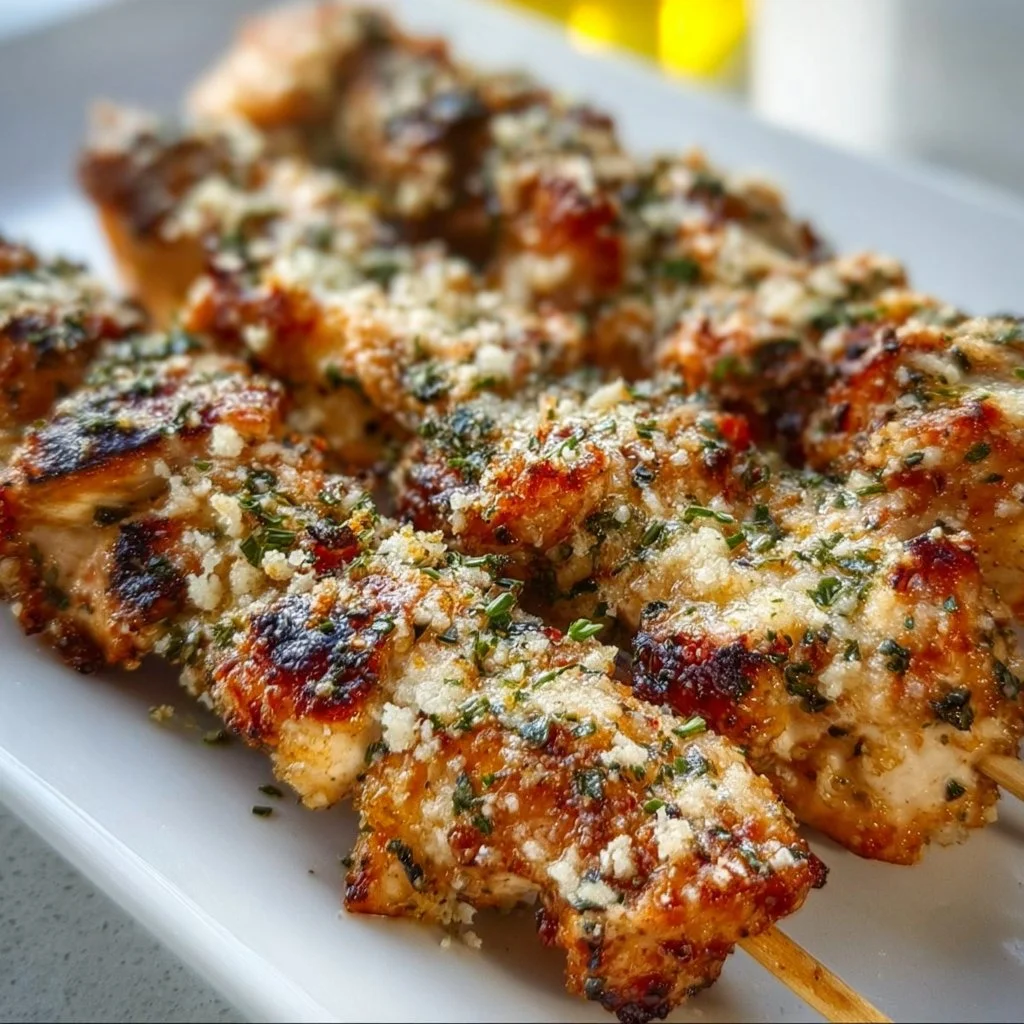
Ranch Garlic Parmesan Chicken Skewers
Delicious Ranch Garlic Parmesan Chicken Skewers: A Cozy Kitchen Adventure
Welcome back to my kitchen, fellow foodies! Today, we’re diving into a dish that’s sure to make your taste buds dance: Ranch Garlic Parmesan Chicken Skewers. These little gems are the perfect combination of juicy chicken, savory garlic, and the creamy delight of parmesan, all brought together with a touch of ranch seasoning. Whether you’re whipping these up for a casual weeknight dinner or impressing friends at your next gathering, these skewers are here to steal the show.
If you’ve ever felt overwhelmed in the kitchen, let me assure you that this dish is as approachable as it is delicious. With simple ingredients and a straightforward process, you’ll feel like a pro in no time. Plus, there’s something incredibly satisfying about grilling (or baking) skewers! The anticipation of that first bite, the sound of everything sizzling away, and the delightful aromas wafting through the kitchen — it’s enough to make anyone’s heart skip a beat!
Before the first skewers hit the grill, let me share a little story about why these Ranch Garlic Parmesan Chicken Skewers are close to my heart. This dish reminds me not only of good flavors but also of kitchen antics with family and friends. So, buckle up as we embark on this flavorful journey together. The best part? You’ll always find easy tips and hacks along the way. Ready to turn your kitchen into a haven of deliciousness? Let’s get cooking!
Personal Story
I’ll never forget the first time I made chicken skewers. It was a sunny afternoon, and my dad decided to host a family BBQ in our backyard. With a wooden picnic table dressed in a cheerful checkered tablecloth, we gathered to celebrate the warm weather and each other’s company. But here’s the twist: my dad wasn’t the one behind the grill that day; I was!
Feeling both excited and a little nervous, I concocted my own marinade (with a little inspiration from my mom’s favorite ranch dip). A mix of garlic, luscious parmesan cheese, and a few other herbs created what I believed to be the ultimate chicken skewer recipe. As I threaded the marinated chunks of chicken onto skewers, I could almost taste the success before they hit the grill!
Fast forward to dinner time, my family gathered around, eager to taste what I had created. With the first bite, I was overwhelmed with pride – not only did my experiment bring smiles, but it also sparked laughter and stories that night, memories that have stuck with us for years! Today, I share this Ranch Garlic Parmesan Chicken Skewers recipe, hoping it brings as much joy to your kitchen as it has to mine.
Ingredients
Before we start cooking, let’s gather our ingredients. Here they are, along with some handy tips and substitutions:
-
Chicken Breast (1 pound)
Use boneless, skinless chicken breast for easy skewering. You can substitute with chicken thighs for a juicier option. -
Ranch Seasoning Mix (2 tablespoons)
Store-bought is great, but if you have time, make your own with dried herbs like dill, parsley, garlic powder, and buttermilk powder. This can elevate the flavor immensely! -
Garlic (3 cloves, minced)
Fresh garlic delivers that robust flavor. In a pinch, garlic powder can work, but fresh is always better! -
Parmesan Cheese (1/2 cup, grated)
Freshly grated is the way to go for a more pronounced flavor. If you’re dairy-free, try nutritional yeast for a cheesy boost! -
Olive Oil (2 tablespoons)
Essential for marinating and ensuring that those flavors stick. Substitute with avocado oil for a higher smoke point. -
Skewers (wooden or metal)
If you opt for wooden skewers, remember to soak them in water for at least 30 minutes prior to grilling to prevent burning. -
Salt and Pepper to taste
Brightens the flavors! Feel free to add any other spices, like paprika or cayenne for a kick!
Step-by-Step Instructions
Now that we have our ingredients ready, let’s get down to the juicy details of cooking these Ranch Garlic Parmesan Chicken Skewers!
-
Marinate the Chicken
In a large bowl, combine the olive oil, ranch seasoning mix, minced garlic, and grated parmesan cheese. Add the cut chicken breast pieces (around 1-inch cubes). Toss everything together until the chicken is well-coated. Feel free to get in there with your hands; we want each piece to soak up all those fabulous flavors! Let it marinate for at least 30 minutes — if you have the luxury of time, let it sit in the fridge for a few hours or even overnight. -
Prepare the Skewers
While our chicken is soaking up that tangy, garlicky goodness, let’s prepare the skewers. If using wooden skewers, remember to soak them first! This step helps prevent them from catching fire. If you’re using metal skewers, you can skip this part — you’re all set and ready to skewer! -
Skewer the Chicken
This is the fun part. Take your marinated chicken and thread it onto your skewers, leaving a little space between each piece for even cooking. Do this with all the chicken pieces, and if you’re feeling adventurous, you can add some veggies like bell peppers or zucchini for color and crunch! -
Preheat the Grill
Get your grill (or oven) ready! If you’re using an outdoor grill, bring it to medium-high heat. If you’re opting for the oven, preheat it to 400°F (200°C). A hot grill leads to those perfect grill marks and that lovely char. -
Cook the Skewers
Place the skewers on the grill. If grilling, cook for about 10-12 minutes, turning occasionally to ensure even cooking. If using the oven, lay the skewers on a baking sheet lined with parchment and bake for about 15-20 minutes, flipping halfway through. This difference in methods brings out different textures, and both are equally tasty! -
Check for Doneness
Chicken is best served cooked to an internal temperature of 165°F (75°C). Use a meat thermometer to check, particularly if you’re new to grilling. -
Let Them Rest
Once cooked, remove the skewers from the grill or oven and let them rest for about 5 minutes. This little break allows the juices to redistribute, keeping your chicken lovely and tender. -
Dig in!
Serve warm and get ready for a delicious chicken experience! These skewers are best enjoyed fresh off the grill (or out of the oven) while still juicy and flavorful.
Serving Suggestions
For an eye-catching presentation, serve these Ranch Garlic Parmesan Chicken Skewers on a vibrant platter with a drizzle of ranch dressing on top and a sprinkle of fresh parsley. Pair with a refreshing side salad or some homemade coleslaw for an extra crunch. Don’t forget to provide a little bowl of extra ranch dressing for dipping — because who doesn’t love that creamy goodness?
Recipe Variations
Feeling inspired? Here are some creative twists to switch things up:
- Vegetable Skewers: Add colorful cherry tomatoes, bell peppers, and zucchini for a fresh veggie twist.
- Spicy Kick: Toss some crushed red pepper flakes into the marinade for an extra heat.
- Herb-Focused: Swap ranch seasoning for fresh herbs like thyme or rosemary for a garden-fresh taste.
- BBQ Flavor: Brush with your favorite BBQ sauce in the last few minutes of cooking for a smoky-sweet twist.
- Carb Option: Pair with naan or pita bread for a fun handheld dinner!
Chef’s Notes
Throughout my cooking journey, I’ve had my fair share of kitchen mishaps (don’t we all?). I remember one time, I accidentally swapped out salt for sugar while prepping the marinade, leading to some confused expressions at the dinner table! It’s these silly moments that add a sprinkle of fun to cooking, and maybe a dash of humility. This Ranch Garlic Parmesan Chicken Skewers recipe has seen a few iterations over the years, but I always circle back to the classic flavors that remind me of sunny family barbecues.
FAQs and Troubleshooting
**1. **What can I use instead of ranch seasoning?
If you’re out of ranch seasoning, a blend of garlic powder, dill, parsley, and a splash of buttermilk can mimic the flavor quite nicely!
**2. **Can I use frozen chicken?
Frozen chicken can work, but be sure to thaw it completely before marinating for even flavor absorption and proper cooking.
**3. **What if my chicken is still pink inside?
Always check with a meat thermometer! If your chicken isn’t cooked through, pop it back on the grill or in the oven until it reaches 165°F (75°C).
**4. **Can I make these skewers ahead of time?
Absolutely! You can marinate the chicken the night before and stored skewers in the fridge until you’re ready to grill.
Nutritional Info (Optional)
If you’re curious about nutritional stats, these juicy skewers are a great source of protein while keeping calories in check and packing in healthy fats from the olive oil. Additionally, with the parmesan and chicken on board, you’re also getting a nice boost of calcium!
Now that you have your guide to crafting these scrumptious Ranch Garlic Parmesan Chicken Skewers, I can’t wait for you to try this recipe! Happy cooking, and remember: the kitchen is your playground. Embrace the mess, savor the flavors, and most importantly, share the joy with those you love!
Print
Ranch Garlic Parmesan Chicken Skewers
- Total Time: 50 minutes
- Yield: 4 servings 1x
- Diet: Gluten-Free
Description
Juicy chicken skewers marinated in garlic, parmesan, and ranch seasoning that are perfect for any gathering.
Ingredients
- 1 pound Chicken Breast, boneless and skinless
- 2 tablespoons Ranch Seasoning Mix
- 3 cloves Garlic, minced
- 1/2 cup Parmesan Cheese, grated
- 2 tablespoons Olive Oil
- Skewers (wooden or metal)
- Salt and Pepper to taste
Instructions
- Marinate the chicken: In a large bowl, combine the olive oil, ranch seasoning mix, minced garlic, and grated parmesan cheese. Add the cut chicken breast pieces (around 1-inch cubes). Toss everything until the chicken is well-coated.
- Prepare the skewers: If using wooden skewers, soak them in water for 30 minutes. For metal skewers, skip this step.
- Skewer the chicken: Thread marinated chicken onto skewers, leaving space for even cooking. Optionally, add veggies.
- Preheat the grill: Get your grill to medium-high heat or preheat the oven to 400°F (200°C).
- Cook the skewers: Grill for 10-12 minutes, turning occasionally, or bake for 15-20 minutes, flipping halfway.
- Check for doneness: Ensure chicken reaches an internal temperature of 165°F (75°C).
- Let them rest: Allow skewers to rest for 5 minutes before serving.
- Dig in!: Serve warm with a drizzle of ranch dressing and fresh parsley.
Notes
These skewers can be marinated the night before for enhanced flavor.
- Prep Time: 30 minutes
- Cook Time: 20 minutes
- Category: Main Course
- Method: Grilling
- Cuisine: American
Nutrition
- Serving Size: 1 skewer
- Calories: 300
- Sugar: 1g
- Sodium: 500mg
- Fat: 15g
- Saturated Fat: 5g
- Unsaturated Fat: 8g
- Trans Fat: 0g
- Carbohydrates: 2g
- Fiber: 0g
- Protein: 35g
- Cholesterol: 80mg
Keywords: chicken skewers, ranch dressing, garlic parmesan
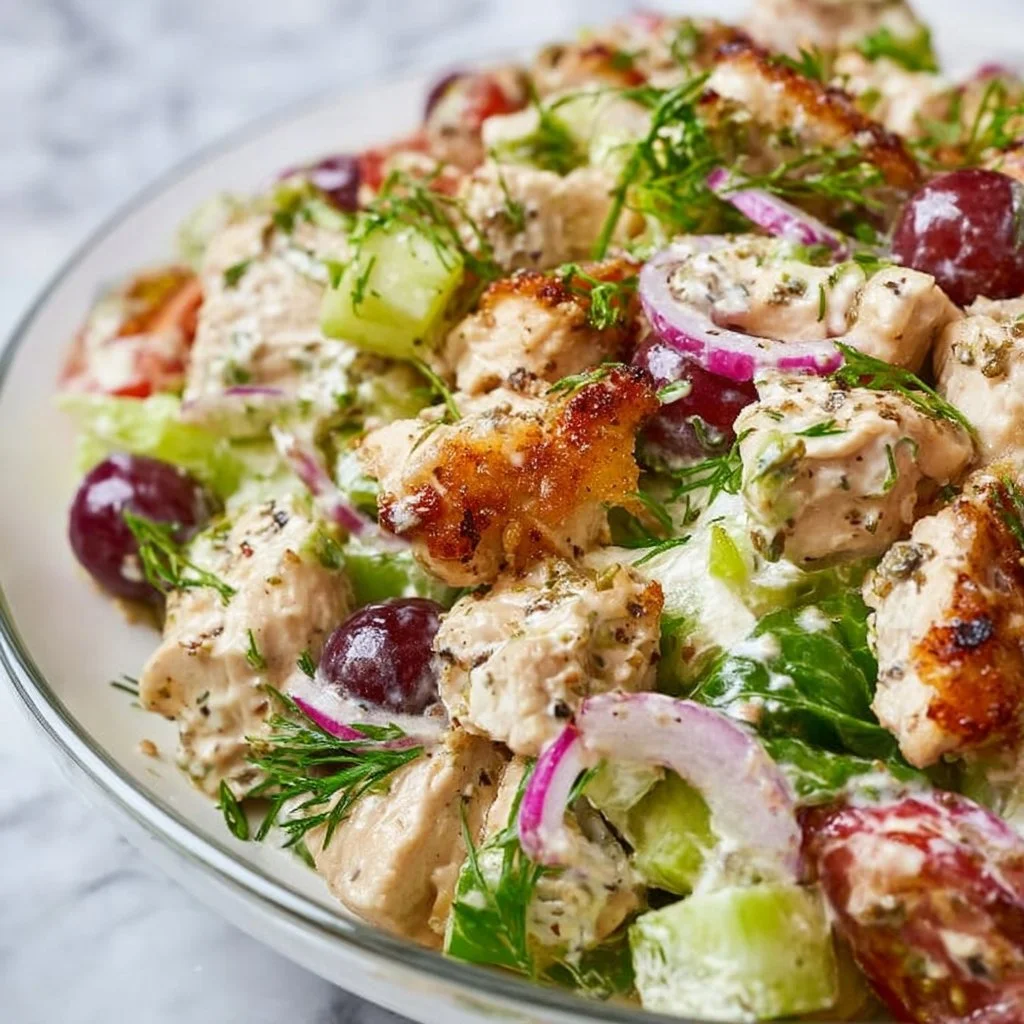
Chicken Salad
The Ultimate Chicken Salad: A Recipe to Bring You Joy
Welcome back to my cozy kitchen! Today, I’m excited to share a recipe that has not only become a staple in my home but has also charmed its way into the hearts of my friends and family: the classic Chicken Salad. This creamy, colorful concoction is so much more than just a dish; it’s a canvas for creativity, a reason to gather, and a mouthwatering reminder of all the delicious moments life has to offer.
Picture this: a warm Saturday afternoon, the sun shining brightly, and the scent of roasted chicken wafting through the air. As I chop, mix, and toss all the ingredients together, I can’t help but feel enveloped in a sense of nostalgia. This is the kind of meal that sparks conversation, laughter, and connection — but most importantly, it brings comfort. Whether served as a light lunch, a picnic treat, or a sophisticated appetizer, my Chicken Salad has truly stood the test of time.
As a self-taught home cook, I’ve had my share of experiments in the kitchen, and I’ve discovered that chicken salad is the ultimate playground for flavors. It’s endlessly customizable and can be dressed up or down depending on the occasion. Today, we’re diving into a straightforward, yet delightful Chicken Salad recipe that will get your taste buds dancing. Grab your apron and let’s embark on a culinary journey filled with scrumptious flavors and heartfelt stories!
Personal Story
Ah, Chicken Salad! It’s not just a recipe; it’s a treasured memory for me. I’ll never forget the summer BBQ gatherings at my grandparents’ house. My grandma would prepare her famous Chicken Salad, whipping it up in a large glass bowl that was older than I was. The sound of her knife slicing through the crunchy celery blended beautifully with the laughter and chatter of family members gathered around.
Every time I took a bite of that salad, I instantly felt wrapped in the warmth of family and love. Grandma’s secret? A splash of lemon juice and just the right amount of seasoning gave the salad a zing that made it unforgettable. From those sunny afternoons spent in the garden to the delightful family dinners that followed, her Chicken Salad became a beloved family tradition. Now, every time I make it, I can’t help but think of her and the love she infused into every dish. I hope this recipe brings you the same joy and connection that it has brought to me!
Ingredients
Here’s what you’ll need to create an incredible Chicken Salad, along with some insider tips:
-
Cooked Chicken (2 cups, shredded or cubed)
- Tip: You can use leftover rotisserie chicken or poach fresh chicken breasts. For quicker cooking, toss the chicken in a slow cooker with your favorite spices.
-
Mayonnaise (1/2 cup)
- Substitution: Greek yogurt works beautifully as a lighter alternative. It adds a creamy texture while boosting the protein!
-
Dijon Mustard (2 tablespoons)
- Chef Insight: This ingredient kicks up the flavor! If you prefer a milder mustard, yellow mustard will do just fine.
-
Celery (1/2 cup, diced)
- Substitution: Crunchy apple or bell pepper can be substituted for added sweetness and color.
-
Red Onion (1/4 cup, finely chopped)
- Tip: Soaking chopped onions in cold water for a few minutes before adding them reduces their pungent flavor.
-
Fresh Herbs (like parsley or dill) (1/4 cup, chopped)
- Variations: Fresh herbs brighten up the dish! Try basil or cilantro for something different or even dried herbs if fresh aren’t available.
-
Salt and Pepper (to taste)
- Chef Insight: Season in layers! Taste as you go to find your perfect balance of flavors.
-
Optional Add-ins: (1/4 cup each)
- Nuts (like almonds or walnuts) – for crunch
- Cranberries or Raisins – for sweetness
- Grapes – for a juicy pop
Step-by-Step Instructions
Alright, let’s jump into the fun part! Here’s how to whip up this fresh Chicken Salad in just a few easy steps:
Step 1: Prep the Chicken
Start by gathering your cooked chicken. If you’re using leftovers or rotisserie chicken, make sure to remove the skin and shred or cube the meat. If you’re starting from scratch, poach your chicken breasts in simmering water seasoned with a bit of salt for about 15-20 minutes until cooked through. Let it cool, then chop it into bite-sized pieces.
Step 2: Chop the Veggies
Next, wash and chop your vegetables! Dice the celery and finely chop the red onion. Remember, chopping is not just about size; it’s also about texture! You want everything to blend seamlessly with the chicken.
Pro tip: Use a sharp knife for cleaner cuts, and always keep your fingers curled under while chopping to avoid any accidents!
Step 3: Mix the Dressing
In a large bowl, combine the mayonnaise and Dijon mustard. Stir until they’re fully blended. This creamy dressing is the heart of your Chicken Salad — it ties everything together! Feel free to adjust the measurements according to your taste; perhaps you prefer it a bit creamier?
Step 4: Combine Everything
Now it’s time to bring everything together! Add the cooked chicken, diced celery, chopped red onion, and fresh herbs to the bowl with the dressing. Gently mix until every piece is coated in that creamy goodness.
Quick Hack: Use a spatula or wooden spoon to fold the mixture instead of stirring vigorously, which can break up the chicken!
Step 5: Season to Perfection
Sprinkle in salt and pepper to taste. The seasoning is where you can really personalize! Taste testers are essential in this step. Adjust the seasoning as needed until you feel that burst of flavor.
Step 6: Chill Out
If you have the patience (and trust me, it’s worth it), cover the bowl with plastic wrap and let it chill in the fridge for at least 30 minutes. This allows the flavors to meld beautifully.
Step 7: Serve and Enjoy!
When you’re ready to serve, give your Chicken Salad a final stir. It can be served as is, on a bed of greens, between fresh bread as a sandwich, or with crackers.
Serving Tip: Garnish with a sprinkle of fresh herbs or a few slices of radishes for that pop of color!
Serving Suggestions
Chicken Salad can be served in a variety of delightful ways! Consider plating a generous scoop on a bed of crisp mixed greens for a light lunch, or heap it into pita pockets or whole wheat wraps for a satisfying and portable meal. For a fun appetizer, scoop the salad into individual cucumber cups or endive leaves. Trust me, your guests will love it!
Recipe Variations
Now, let’s take this Chicken Salad up a notch! Here are a few indulgent variations for you to try:
- Mediterranean Chicken Salad: Toss in Kalamata olives, feta cheese, and sun-dried tomatoes for a flavor-packed twist.
- Curried Chicken Salad: Adding curry powder and diced apples will infuse your salad with an exotic flair.
- Southwestern Chicken Salad: Include black beans, corn, and diced jalapeños for a spicy kick — perfect with tortilla chips!
- Avocado Chicken Salad: Substitute half of the mayonnaise with mashed avocado for a creamy texture that’s bursting with healthy fats.
- Fruit-Infused Chicken Salad: Toss in some pineapple or grapes to balance the savory flavors with sweetness.
Chef’s Notes
Every recipe has its evolution, and the Chicken Salad is no exception. Over the years, I’ve experimented with countless ingredients until I found the perfect balance that reflects my family’s taste. And though it started out simply enough, I love how versatile it is, constantly changing with the seasons and our cravings.
One time, I made a dessert version of Chicken Salad using shredded coconut and a sweet yogurt dressing — let’s just say it never made it to the table! Who knew chicken salad could spark such creativity in the kitchen?
FAQs and Troubleshooting
1. My Chicken Salad is too dry — help!
If your salad turns out too dry, don’t panic! Just add a little more mayo or Greek yogurt to moisten things up. A splash of lemon juice can also help to balance flavors.
2. Can I use leftover grilled chicken?
Absolutely! Grilled chicken adds a wonderful smoky flavor. Just ensure it’s cooked through and shredded or cubed to your liking.
3. How long will my Chicken Salad last in the fridge?
Your Chicken Salad should stay fresh in an airtight container for about 3-4 days. But let’s be honest, it might not last that long because it’s so delicious!
4. What can I do if I don’t have any fresh herbs?
No worries! You can use dried herbs, although I recommend using less since they are more concentrated in flavor. You can also skip them entirely and still have a tasty salad.
Nutritional Info (Optional)
While I believe in enjoying food from the heart, here’s an approximate nutritional breakdown per serving (about 1/2 cup) if you make it traditionally:
- Calories: 250
- Protein: 20g
- Carbohydrates: 4g
- Fat: 18g
- Fiber: 1g
Now that you have this delicious Chicken Salad recipe, it’s time to gather your ingredients and get cooking! I can’t wait to hear how it turns out for you. Remember, cooking is all about having fun and bringing love into everything you do. Happy cooking, friends!
Print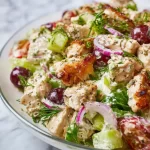
The Ultimate Chicken Salad
- Total Time: 35 minutes
- Yield: 4 servings 1x
- Diet: Gluten-Free
Description
A classic Chicken Salad that’s creamy, colorful, and customizable, perfect for any occasion.
Ingredients
- 2 cups Cooked Chicken, shredded or cubed
- 1/2 cup Mayonnaise
- 2 tablespoons Dijon Mustard
- 1/2 cup Celery, diced
- 1/4 cup Red Onion, finely chopped
- 1/4 cup Fresh Herbs (like parsley or dill), chopped
- Salt and Pepper, to taste
- Optional Add-ins: 1/4 cup each of Nuts (like almonds or walnuts), Cranberries or Raisins, or Grapes
Instructions
- Prep the Chicken: Gather your cooked chicken and either shred or cube it. If starting from scratch, poach chicken breasts in simmering water for 15-20 minutes until cooked. Cool and chop.
- Chop the Veggies: Wash and chop celery and red onion. Aim for cohesive texture in your salad.
- Mix the Dressing: In a large bowl, combine mayonnaise and Dijon mustard until blended.
- Combine Everything: Add the cooked chicken, diced celery, chopped red onion, and fresh herbs to the dressing. Mix gently until coated.
- Season to Perfection: Sprinkle salt and pepper to taste and adjust seasoning as necessary.
- Chill Out: Cover the bowl and refrigerate for at least 30 minutes to meld flavors.
- Serve and Enjoy: Give a final stir before serving. Enjoy on greens, as a sandwich, or with crackers.
Notes
Chilling allows flavors to meld. Optional garnishes include fresh herbs or slices of radishes.
- Prep Time: 15 minutes
- Cook Time: 20 minutes
- Category: Salad
- Method: Mixing
- Cuisine: American
Nutrition
- Serving Size: 1 serving
- Calories: 250
- Sugar: 5g
- Sodium: 400mg
- Fat: 18g
- Saturated Fat: 3g
- Unsaturated Fat: 10g
- Trans Fat: 0g
- Carbohydrates: 4g
- Fiber: 1g
- Protein: 20g
- Cholesterol: 70mg
Keywords: chicken salad, easy recipes, summer recipes, comfort food
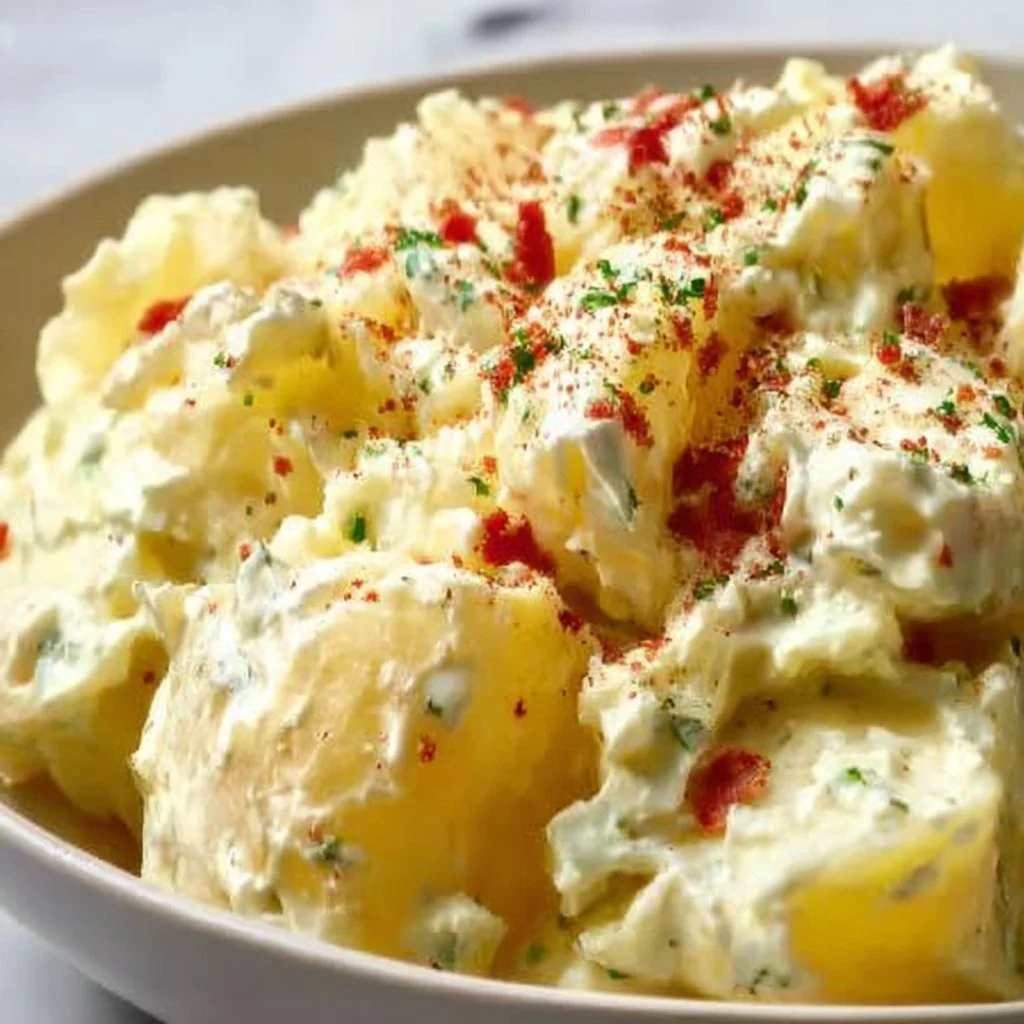
Old Fashioned Potato Salad
Old Fashioned Potato Salad: A Nostalgic Comfort Food
Welcome back to my cozy corner of the kitchen! Today, I’m excitingly diving into a dish that not only fills your belly but also warms your heart: Old Fashioned Potato Salad. There’s something so delightful about this classic dish; it’s rich, creamy, and bursting with flavors that remind me of sunshine-filled picnics, lazy barbecues, and family gatherings that echo with laughter. If you’re anything like me, the familiar smell of a homemade potato salad is enough to transport you back to your childhood kitchen, where all the magic began.
Potato salad is one of those quintessential summer side dishes that seems to appear at every potluck and family reunion. Everyone has their own take—some might load it up with jalapeños for a kick, while others keep it very traditional and simple. But one thing’s for sure: a well-made potato salad can be the life of the party! Today, I’ll share my take on the classic—one that many of you might recognize, but with a few personal touches that make it feel like home.
So whether you’re planning a summer cookout, a picnic in the park, or just looking to elevate your weeknight dinner, let’s embrace the nostalgia and create a potato salad that makes memories! Grab your favorite apron, and let’s get cooking!
Personal Story
Growing up, my grandmother would always make her famous potato salad for our family gatherings. She claimed it was an old family recipe, but really, it was just her “no-recipe recipe.” I remember walking into her kitchen, the delightful scent of boiled potatoes and freshly chopped herbs wafting through the air. On hot summer days, my cousins and I would sneak bites straight from the bowl when she wasn’t looking, our hands dripping with creamy goodness.
One time, she caught us and just chuckled, saying, “Nothing tastes better than a potato salad made with love!” That simple phrase stuck with me and became a guiding principle in my own cooking adventures. Over the years, I’ve played around with her recipe, adding different herbs and spices, but the heart of it remains the same. It’s about sharing love and creating happy memories over delicious food. And today, I’m thrilled to share this meaningful dish with you!
Ingredients
Here are the ingredients you’ll need to make this Old Fashioned Potato Salad:
-
Yukon Gold Potatoes (2 pounds)
- These are my go-to potatoes for salads because of their buttery texture and natural creaminess. You can substitute with red potatoes for a firmer bite, or even sweet potatoes for a healthier twist!
-
Eggs (4 large)
- Boiled until hard, eggs add a creamy texture and richness. If you’re vegan, try avocado or silken tofu as a substitute for that creamy finish.
-
Celery (1 cup, diced)
- Celery gives that perfect crunch! Feel free to swap it with diced bell peppers or pickles if you’re looking to switch things up.
-
Red Onion (½ cup, finely chopped)
- Red onion adds a sharp bite and a splash of color. You can use green onions for a milder flavor or shallots for a sweeter touch.
-
Dijon Mustard (2 tablespoons)
- Mustard adds a lovely tanginess to the salad. Honey mustard can work as a sweet alternative, or omit entirely for a more classic taste.
-
Mayonnaise (1 cup)
- This is what brings the salad together! Try using Greek yogurt for a lighter version or a vegan mayo if needed.
-
Apple Cider Vinegar (2 tablespoons)
- The vinegar brightens the flavors and balances the creaminess. Substitute with lemon juice for a fresh zest!
-
Salt and Pepper (to taste)
- Don’t forget these crucial seasonings! Fresh herbs like dill, parsley, or chives can elevate the overall flavor!
Each ingredient plays a vital role, and with these tips, you’ll always find the perfect substitute based on what you love or what you have on hand.
Step-by-Step Instructions
Step 1: Boil the Potatoes
Start by washing the Yukon Gold potatoes thoroughly to remove any dirt. Then, cut them into bite-sized chunks—about 1 inch is perfect. Place the potatoes into a large pot and cover with cold water, adding a generous pinch of salt. The cold water helps cook the potatoes evenly.
Bring the water to a fierce boil and let the potatoes cook for about 15-20 minutes or until they’re fork-tender. You want that perfect fluffiness inside while still holding shape for the salad. Pro tip: Don’t overboil—they can get mushy and ruin the texture!
Step 2: Prepare the Eggs
While the potatoes are busy boiling, let’s get started on the eggs! Place the eggs in a separate saucepan and cover them with cold water. Bring it to a rolling boil over medium heat, then cover the pot and remove it from the heat. Let them sit for about 12 minutes. It’s the perfect time to clean up the kitchen a bit.
After that, plunge them into an ice bath for five minutes to stop the cooking process. When they’re cool, crack the shells and gently peel—this is science folks! The cold helps with peeling.
Step 3: Mix the Veggies
Once the potatoes are done, drain them and let them cool. In the meantime, chop your celery and red onion. Don’t skimp on this! The crisp crunch of celery and the sharpness of onions are crucial for adding layers of flavor and texture.
Step 4: Combine Everything
In a large mixing bowl, combine your cooled potatoes, diced celery, red onion, and the chopped eggs (be gentle while cutting them into smaller pieces).
Now for the magic—add the Dijon mustard, mayo, and apple cider vinegar. Gently fold everything together with a spatula. Be careful not to mash the potatoes too much; we want them to remain intact!
Step 5: Season to Perfection
Taste your salad and season it with salt and pepper to your preference. If you want that extra pop of freshness, sprinkle in some chopped herbs like dill or parsley. Mix everything one final time and let it sit in the fridge for at least 30 minutes. This resting time allows the flavors to meld beautifully and makes all the difference!
Serving Suggestions
When it’s time to serve, I love to dish up the potato salad in a large, bright bowl. Garnish with a sprinkle of fresh herbs on top for a pop of color, and place some cherry tomatoes around the perimeter for an extra touch of freshness. Serve it cold or at room temperature, and don’t forget to have some extra sprinkle of pepper on the side for those who love a little kick!
Recipe Variations
Ready to mix things up? Here are a few ideas to customize your potato salad:
- Spicy Kick: Add some diced jalapeños or a splash of hot sauce for a spicy version!
- Herb Lovers: Use fresh herbs like dill, tarragon, or chives instead of the customary parsley for a flavor explosion.
- Bacon Bliss: Incorporate crispy, crumbled bacon for a smoky, savory touch that everyone will love.
- Sweet & Tangy: Add chopped pickles or relish and a dash of sugar for that sweet and tangy kick reminiscent of store-bought salads.
- Veggie Delight: Toss in some peas, diced carrots, or even crumbled feta cheese for a twist that adds color and nutrition!
Chef’s Notes
This potato salad has evolved quite a bit in my kitchen over the years. My grandmother’s recipe was rather simple, but I’ve added my own flair to really make it sing. I particularly love dousing it in a touch of apple cider vinegar to cut through the creaminess. Plus, believe it or not, I’ve had the best impromptu parties with friends just around a bowl of this potato salad!
Oh! And if you ever find that you’re left with leftovers, it transforms beautifully. Toss it into a wrap with some grilled chicken for lunch, or enjoy it as a snack straight from the fridge!
FAQs and Troubleshooting
Why is my potato salad watery?
If you’re getting a watery potato salad, it could be due to overcooked potatoes or too much dressing. Make sure to drain the potatoes well and let them cool before mixing them with the mayo.
Can I prepare this ahead of time?
Absolutely! This salad actually tastes better the next day when the flavors have had some time to meld. Make it a day in advance and keep it chilled; just be sure to keep it covered to prevent drying out!
How do I keep my potatoes from turning brown?
If you’re making this salad ahead of time, add the dressing last, right before serving. Potatoes tend to oxidize and turn brown when exposed to air for a long period, so minimizing that exposure will help!
What if I don’t have Dijon mustard?
No problem! You can substitute it with yellow mustard or even omit it entirely. Consider adding a squeeze of lemon juice for an extra zing if you choose to skip the mustard.
Nutritional Info
(Per serving, about 1/2 cup)
- Calories: 200
- Protein: 5g
- Carbohydrates: 27g
- Fat: 8g
- Fiber: 2g
Well, there you have it—my warmhearted take on Old Fashioned Potato Salad! I hope this recipe brings as many smiles to your table as it has to mine. Remember, cooking is about joy and love, so feel free to personalize it as you please. Happy cooking, and may your kitchen be filled with laughter and delightful aromas! 🥔💖
Print
Old Fashioned Potato Salad
- Total Time: 45 minutes
- Yield: 4 servings 1x
- Diet: Vegetarian
Description
A classic, creamy potato salad that brings nostalgia and warmth to any gathering.
Ingredients
- 2 pounds Yukon Gold Potatoes
- 4 large Eggs, boiled
- 1 cup Celery, diced
- ½ cup Red Onion, finely chopped
- 2 tablespoons Dijon Mustard
- 1 cup Mayonnaise
- 2 tablespoons Apple Cider Vinegar
- Salt and Pepper, to taste
Instructions
- Boil the potatoes until fork-tender, about 15-20 minutes.
- Prepare the eggs by boiling them for 12 minutes and then placing in an ice bath.
- Mix the diced celery and chopped red onion together.
- Combine the cooled potatoes, celery, onion, and chopped eggs in a large bowl.
- Add mustard, mayo, and vinegar, then gently fold together.
- Season with salt and pepper, and let sit in the fridge for 30 minutes.
Notes
For variations, try adding jalapeños for heat or crispy bacon for flavor. This salad can be made ahead of time and tastes even better the next day.
- Prep Time: 15 minutes
- Cook Time: 30 minutes
- Category: Side Dish
- Method: Boiling
- Cuisine: American
Nutrition
- Serving Size: 1 serving
- Calories: 200
- Sugar: 2g
- Sodium: 400mg
- Fat: 8g
- Saturated Fat: 1g
- Unsaturated Fat: 5g
- Trans Fat: 0g
- Carbohydrates: 27g
- Fiber: 2g
- Protein: 5g
- Cholesterol: 70mg
Keywords: potato salad, summer side dish, comfort food, picnic recipe, family gathering




