
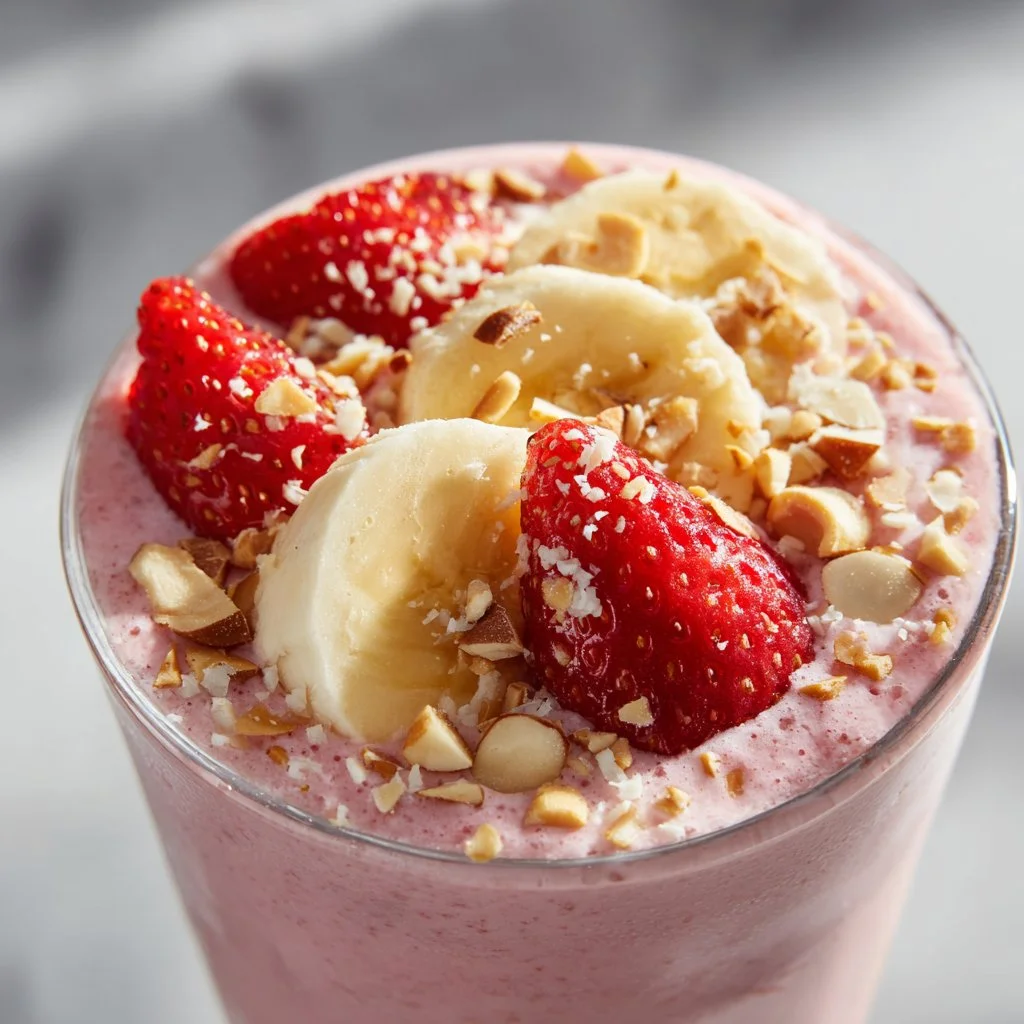
Ultimate Easy Strawberry Banana Smoothie Recipes 3 Ingredients
Ultimate Easy Strawberry Banana Smoothie Recipe: Just 3 Ingredients!
Welcome to my kitchen! If you’ve ever had a bananas-and-strawberries moment, where you just had to combine these sweet, fruity flavors, you’re going to absolutely love what I’m sharing today. I’m Olivia Bennett, and I can’t wait to show you how to make the ultimate easy strawberry banana smoothie using just three simple ingredients. This delectable, refreshing drink is perfect for a quick breakfast, a midday pick-me-up, or a nutritious snack. Plus, the vibrant colors and amazing flavor will have you feeling great too!
Let’s talk about the magic of smoothies. They’re like a canvas for creativity while being incredibly simple. My go-to ingredients for this smoothie are ripe bananas, fresh strawberries, and creamy yogurt (or any dairy alternative). That’s it! Whether you’re running late for work, prepping for a quick workout, or just craving something delicious, this smoothie is a delightful way to sprinkle some goodness into your day.
One of the best parts about this recipe is how easy it is to customize! You can swap ingredients, add extras, or even change up the dairy to suit your dietary preferences. And don’t worry—this smoothie blends up in minutes, so there’s no excuse not to whip one up. So grab your blender and let’s dive into this fabulous fruity adventure!
A Sweet Memory
Smoothies have always held a special place in my heart. I remember making my first smoothie as a teenager in the kitchen of my childhood home. It was a Saturday morning, and my mom had brought home a basket of the juiciest strawberries. With a few bananas sitting on the counter, I decided to throw them together. I’ll never forget the joy of blending those simple ingredients and watching the vibrant red-pink mixture whirl around in the blender. I poured it into a glass, and the taste was pure bliss—sweet, refreshing, and oh-so-decadent. Sharing that smoothie with my family at breakfast sparked conversations, laughter, and the kind of togetherness that comes from sharing good food.
Years later, that same rush of joy fills me every time I make a smoothie. It’s more than just a drink; it’s a reminder of those carefree mornings filled with laughter and love. Now it’s your turn to create your version of what could potentially be another joyful memory with those you love.
Ingredients
Here’s what you’ll need to make this delicious strawberry banana smoothie:
-
Bananas:
- Ripe bananas are key! They should be spotty and slightly soft to yield maximum sweetness and creaminess. If your bananas are too green, they won’t pack that delightful flavor. You can freeze overripe bananas for a thicker smoothie!
-
Fresh Strawberries:
- Pick ripe strawberries that are sweet and fragrant. Frozen strawberries work too if you don’t have fresh on hand. Just toss them in straight from the freezer without thawing for a chilled smoothie.
-
Yogurt (Greek, plain, or dairy-free alternative):
- This adds a wonderful creaminess to your smoothie. If you’re looking to keep it vegan, opt for coconut or almond yogurt. For a protein boost, Greek yogurt is an excellent choice. You can easily substitute with almond milk or oat milk, but just know it will be thinner!
Step-by-Step Instructions
Now that we have our ingredients, let’s create something wonderful!
-
Prep Your Ingredients
Begin by slicing the bananas into smaller pieces. Not only does this make blending easier, but it also helps to ensure a smoother texture. If using fresh strawberries, remove the green tops and slice them in half—they blend better this way! -
Load Up the Blender
Add the sliced bananas and strawberries to your blender. Just layer them nicely! You want to ensure that they get blended evenly. If you’re using frozen strawberries, throw those in now, too. -
Add the Yogurt
Spoon in your yogurt. This is where the creaminess comes from! If you prefer your smoothie a little less thick, you can use less yogurt or add a splash of milk (dairy or non-dairy) at this stage. -
Blend Away
Secure the lid of your blender and start blending on low speed. After about 10 seconds, increase to high speed. Blend until all the ingredients are well combined and the smoothie reaches your desired consistency. If it’s too thick, add a bit more yogurt or milk and blend again. -
Taste and Adjust
Before pouring, give your smoothie a quick taste. If you find it’s not sweet enough for your liking, consider adding a drizzle of honey or maple syrup for extra sweetness. Blend for a few more seconds to mix! -
Serve It Up
Pour your stunning strawberry banana smoothie into your favorite glasses. Feel free to garnish with a slice of banana or a few whole strawberries on top for that splash of color. Get ready to enjoy every sip!
Serving Suggestions
This smoothie is perfect on its own, but why not elevate it just a little more? Try serving it alongside some whole-grain toast with avocado or a sprinkle of cinnamon. If you’re feeling fancy, pair it with a few homemade granola bars or protein balls. You can also top it with some chia seeds for an extra nutritional boost.
Recipe Variations
Here are a few creative twists on the classic strawberry banana smoothie:
- Peanut Butter Delight: Add a tablespoon of peanut butter for a delicious nutty flavor and a protein boost.
- Green Smoothie: Toss in a handful of spinach or kale for a nutrient-packed version without losing the yummy strawberry-banana flavor!
- Chocolate Strawberry Banana: Mix in a tablespoon of cocoa powder for a chocolatey treat. You can even add chocolate chips to the mix.
- Tropical Twist: Swap some banana for mango or add a splash of coconut water for an island vibe.
- Spiced Smoothie: Sprinkle in a touch of cinnamon or nutmeg before blending for a warm, autumn-infused flavor.
Chef’s Notes
This recipe has truly evolved over the years! I remember the first time I tried adding spinach to my smoothie; I was skeptical. To my delight, it didn’t change the flavor—only the color! Now, it’s a go-to for extra greens without sacrificing taste. And honestly, just playing around with ingredients and trying different variations keeps the experience fresh! I once had a fun smoothie mishap when I accidentally grabbed my dad’s chili powder instead of cinnamon—let’s just say that smoothie didn’t make it to the party!
FAQs and Troubleshooting
1. Why is my smoothie too thick?
If your smoothie is thicker than preferred, simply add a little more liquid—a splash of milk or yogurt will do the trick! Blend again until smooth.
2. How can I make my smoothie sweeter?
Depending on your preferences, you can add a bit of honey, maple syrup, or even a few dates for natural sweetness. Just blend well after adding!
3. Can I make the smoothie ahead of time?
Yes! Just blend the ingredients and store in an airtight container in the fridge for up to 24 hours. You may need to stir or blend again before drinking, as it may separate a bit.
4. What can I do with leftover bananas or strawberries?
Freeze any overripe bananas for later smoothies, or make a simple strawberry compote to use as a topping for yogurt or pancakes. They can also be great in baking!
Nutritional Info
For each serving of this strawberry banana smoothie, you can expect approximately:
- Calories: 200
- Protein: 8g
- Carbohydrates: 35g
- Fat: 3g
- Fiber: 3g
Now that you have all the insights to create this delightful smoothie, I challenge you to whip one up soon! Enjoy the process, experiment a little, and most importantly, share it with the loved ones in your life. Happy blending!
Print
Ultimate Easy Strawberry Banana Smoothie
- Total Time: 5 minutes
- Yield: 2 servings 1x
- Diet: Vegetarian
Description
A refreshing and nutritious strawberry banana smoothie made with just three simple ingredients: ripe bananas, fresh strawberries, and creamy yogurt.
Ingredients
- 2 ripe bananas
- 1 cup fresh strawberries
- 1 cup yogurt (Greek, plain, or dairy-free alternative)
Instructions
- Prep your ingredients by slicing the bananas and halving the strawberries.
- Load up the blender with the sliced bananas and strawberries.
- Add the yogurt to the blender.
- Blend on low speed, then increase to high until smooth.
- Taste and adjust sweetness if necessary.
- Serve the smoothie in glasses, garnishing if desired.
Notes
This smoothie is customizable: add peanut butter, greens, or cocoa powder for different flavors.
- Prep Time: 5 minutes
- Cook Time: 0 minutes
- Category: Beverage
- Method: Blending
- Cuisine: American
Nutrition
- Serving Size: 1 serving
- Calories: 200
- Sugar: 15g
- Sodium: 50mg
- Fat: 3g
- Saturated Fat: 1g
- Unsaturated Fat: 2g
- Trans Fat: 0g
- Carbohydrates: 35g
- Fiber: 3g
- Protein: 8g
- Cholesterol: 5mg
Keywords: smoothie, strawberry, banana, healthy drink, breakfast
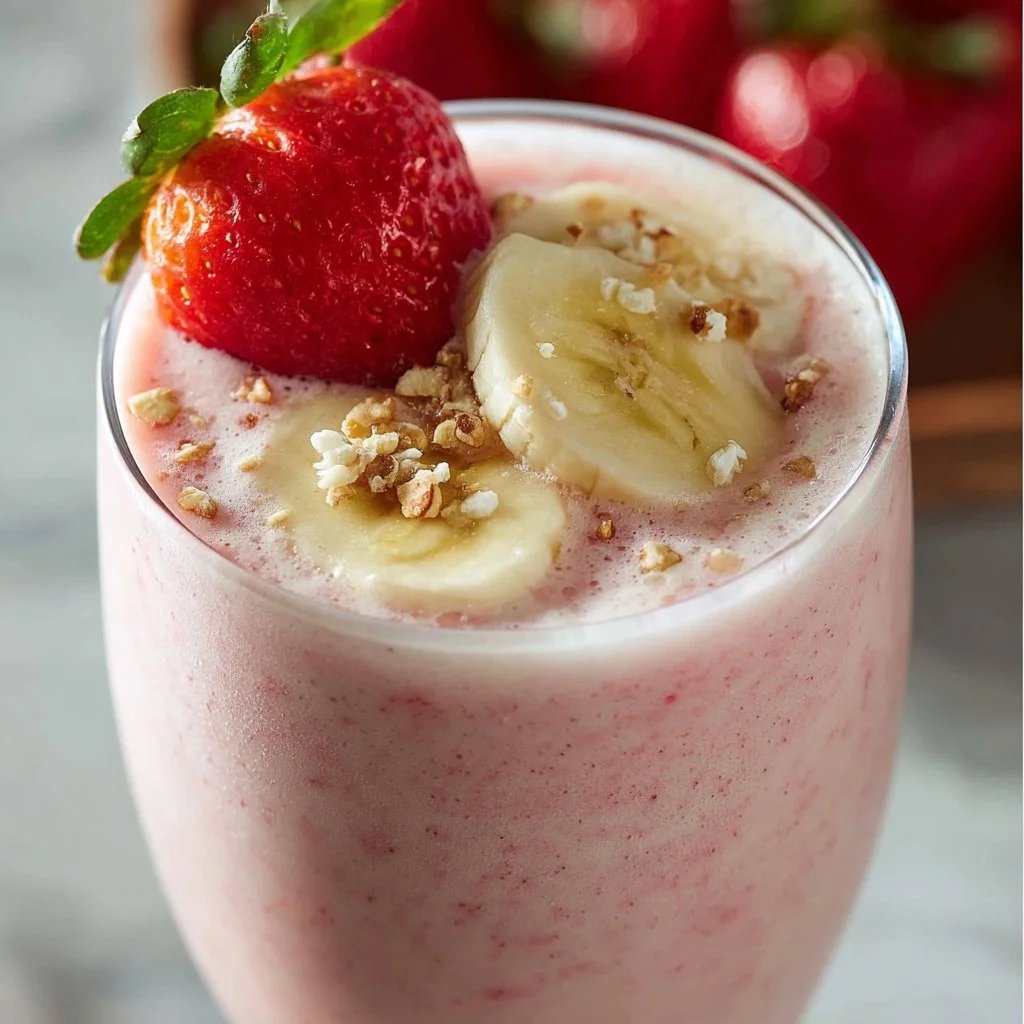
Strawberry Banana Smoothie
Discover the Joy of a Strawberry Banana Smoothie
Welcome back to the cozy confines of my kitchen! Today, we’re diving into a recipe that embodies everything I love about cooking: simplicity, freshness, and joy. That’s right, folks; we’re making a delightful Strawberry Banana Smoothie. This drink is not just a quick and easy treat; it’s a reminder of summer days, family breakfasts, and the countless moments where a delicious blend of flavors brings smiles to faces.
There’s something so invigorating about the vibrant colors of ripe strawberries and bananas. The sweetness of the fruit blends seamlessly with creamy yogurt and a splash of milk or juice, creating a refreshing drink any time of day. Whether you’re kickstarting your morning, seeking a mid-afternoon snack, or winding down after a long day, this smoothie hits just the right spot.
Let’s be real—who among us hasn’t found ourselves standing in front of the refrigerator, puzzled over what to whip up as a healthy, tasty option? This Strawberry Banana Smoothie is here to save the day! Plus, it’s a fantastic way to sneak in some nourishment while enjoying amazing flavors. No fancy equipment or culinary skills are required, just a willingness to enjoy kitchen experimentation!
So, grab your blender, and let’s blend up something delicious together.
A Sweet Strawberry Memory
I’ll never forget the first time I tasted a homemade strawberry banana smoothie. I was around ten years old, and it was a warm summer afternoon. My mom and I had just returned from our weekly trip to the farmer’s market, where we had picked up a basket of the freshest strawberries. The sweet smell of ripe fruit filled our kitchen, mingling with the sunshine filtering through the window.
Mom decided it was the perfect day to whip up a special treat. As she blended the strawberries and bananas, I watched in awe, fascinated by how she transformed simple, humble ingredients into something so beautiful and delicious. When she handed me my first smoothie, I was in love. The cool, creamy texture and the burst of fruit flavor on my tongue instantly delighted me.
That day sparked a vibrant passion for cooking and encouraged me to explore the world of flavors and combinations. Now, every time I make this smoothie, I’m reminded of that sun-soaked afternoon in my childhood kitchen, the laughter, and the warm hugs shared over food. It’s one of those recipes that carries not only flavor but also memories—perfect for sharing with loved ones.
Ingredients You’ll Need
Let’s gather your ingredients so we can whip up this delightful smoothie! Here’s what you’ll need:
-
1 cup fresh strawberries (hulled): Fresh strawberries are the star of our drink! Their natural sweetness and gorgeous color create a vibrant base.
- Substitution tip: You can use frozen strawberries if fresh isn’t available. Just make sure to adjust the milk to achieve your desired consistency.
-
1 ripe banana: Bananas add creaminess and natural sweetness to your smoothie.
- Chef insight: Make sure it’s perfectly ripe (with some brown spots) for maximum sweetness!
-
1 cup yogurt (plain or vanilla): Yogurt adds a creamy texture and packs in some protein.
- Substitution tip: For a dairy-free option, try coconut yogurt or any plant-based yogurt.
-
1/2 cup milk (dairy or plant-based): Milk provides a lovely liquid base to blend everything smoothly.
- Substitution tip: Almond or oat milk works wonderfully if you’re going dairy-free!
-
1 tablespoon honey or maple syrup: A little sweetener to enhance the flavors.
- Substitution tip: You can omit this if your fruit is sweet enough for your taste.
-
Ice cubes (optional): For that extra refreshing chill, especially during hot days.
- Chef hack: Blend in some ice if you’re using fresh fruit to chill it without watering down the flavor.
Step-by-Step Instructions
Alright, let’s get blending! Here’s how to create your scrumptious strawberry banana smoothie in just a few easy steps:
-
Prep the Fruit: Start by hulling the strawberries (removing the green tops) and slicing the banana into smaller pieces. This will make blending a breeze and ensure everything mixes beautifully.
-
Add to Blender: Toss the strawberries and banana into your blender. Follow up with the yogurt, milk, and a drizzle of honey or maple syrup. If you’re using ice cubes, add those as well!
-
Blend it Up: Secure the lid on your blender and blend on high until everything is smooth and creamy. This should take about 30 seconds to 1 minute. Keep an eye on the consistency; you want it thick yet pourable!
-
Taste and Adjust: Give your smoothie a quick taste test! If you find it needs a tad more sweetness, add a little more honey or syrup and blend again for a few seconds. If it’s too thick, add a splash more milk and blend until smooth.
-
Pour and Enjoy: Pour your beautiful smoothie into your favorite glass (I love a classic mason jar), and if you’re feeling fancy, top it off with a slice of strawberry or banana.
Chef Tip: For an extra touch, sprinkle some granola or chia seeds on top for crunch and nutrition.
Serving Suggestions
The beauty of a strawberry banana smoothie is its versatility! You can serve it as a refreshing breakfast, an afternoon snack, or even a healthy dessert. Pour it into fun glasses and enjoy with friends, or create a DIY smoothie bar for a brunch party where guests can add their favorite toppings.
Recipe Variations
Feel like mixing it up? Here are some fun twists you can add to your smoothie:
- Berry Blast: Add a handful of blueberries or raspberries for a mixed berry smoothie.
- Nutty Banana: Toss in a spoonful of almond butter or peanut butter for a nutty twist.
- Greens Galore: Throw in a handful of spinach or kale for an extra nutrient boost—trust me; you won’t taste it.
- Chocolate Indulgence: Add a teaspoon of cocoa powder or a spoonful of chocolate protein powder for a chocolatey treat.
- Tropical Twist: Add mango or pineapple for a tropical vibe.
Chef’s Notes
As I continue to make this strawberry banana smoothie, I can’t help but reflect on how it has changed over the years. What started as a simple recipe made with whatever we had on hand has evolved into a canvas for creativity!
I love how this smoothie embraces seasonal changes. In summer, I go wild with fresh berries, and in winter, I experiment with frozen fruits or add spices like cinnamon or nutmeg. It’s a recipe that can grow with you and your tastes—a true kitchen staple!
FAQs and Troubleshooting
1. My smoothie is too thick. What can I do?
If your smoothie turns out thicker than you’d like, simply add a splash more milk and blend again until it reaches the perfect consistency.
2. What if I don’t have yogurt?
No worries! You can substitute yogurt with additional milk for a lighter version or add in silken tofu for extra creaminess and protein.
3. Can I make this smoothie ahead of time?
I recommend consuming the smoothie fresh for the best flavor and texture. However, if you need to prepare it in advance, store it in an airtight jar in the fridge for up to 24 hours. Just give it a good shake before drinking!
4. Why is my smoothie brownish?
If you’re using overly ripe bananas or blending everything together for too long, the smoothie can take on a brownish hue. It’s not bad; it just means it’s fully blended! For aesthetic purposes, avoid over-mixing.
Nutritional Info
This smoothie provides a nutritious punch with vitamins, minerals, and protein.
- Calories: Approximately 180–220 (varies based on yogurt and milk used)
- Protein: 6–10 grams (depends on yogurt used)
- Fiber: About 3–4 grams, thanks to the fruit!
In conclusion, nothing makes me happier than sharing a bowl (or a glass) of delicious homemade goodness. This strawberry banana smoothie is not just a recipe; it’s a celebration of flavors, memories, and countless cozy kitchen moments.
So, next time you’re looking for something healthy and delicious, remember this smoothie recipe—it’s far more than just a drink; it’s a joyful experience waiting to happen. Happy blending, my foodie friends!
Print
Strawberry Banana Smoothie
- Total Time: 10 minutes
- Yield: 2 servings 1x
- Diet: Vegetarian
Description
A refreshing and creamy strawberry banana smoothie that embodies simplicity and joy, perfect for any time of day.
Ingredients
- 1 cup fresh strawberries (hulled)
- 1 ripe banana
- 1 cup yogurt (plain or vanilla)
- 1/2 cup milk (dairy or plant-based)
- 1 tablespoon honey or maple syrup (optional)
- Ice cubes (optional)
Instructions
- Prep the fruit by hulling the strawberries and slicing the banana.
- Add the strawberries and banana into a blender along with yogurt, milk, and honey or syrup.
- Blend on high until smooth and creamy, about 30 seconds to 1 minute.
- Taste and adjust sweetness or consistency as needed by adding more honey or milk.
- Pour into a glass and top with a slice of strawberry or banana if desired.
Notes
For extra crunch and nutrition, sprinkle granola or chia seeds on top before serving.
- Prep Time: 10 minutes
- Cook Time: 0 minutes
- Category: Beverage
- Method: Blending
- Cuisine: American
Nutrition
- Serving Size: 1 serving
- Calories: 200
- Sugar: 20g
- Sodium: 100mg
- Fat: 2g
- Saturated Fat: 1g
- Unsaturated Fat: 1g
- Trans Fat: 0g
- Carbohydrates: 44g
- Fiber: 4g
- Protein: 8g
- Cholesterol: 5mg
Keywords: smoothie, strawberry, banana, healthy drink, breakfast, snack
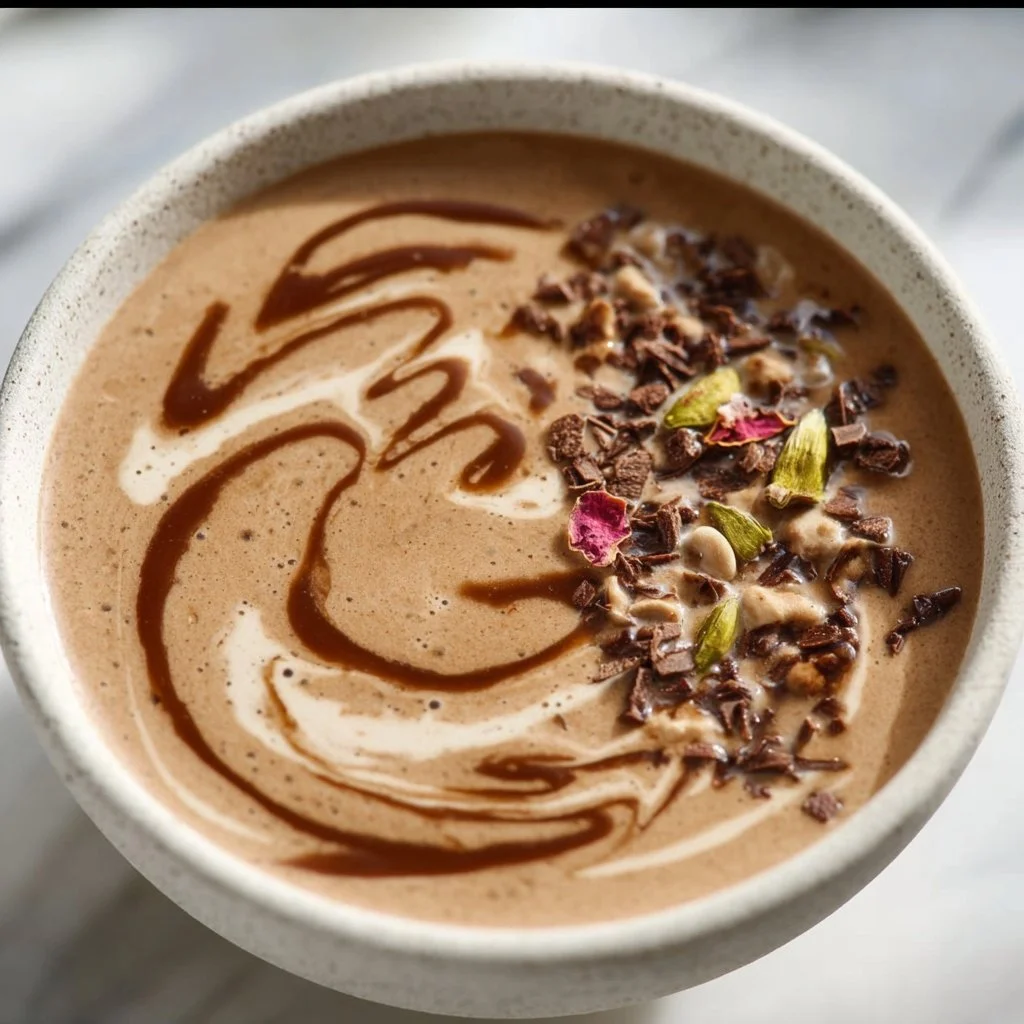
Coffee Protein Smoothie Bowl Recipe
Coffee Protein Smoothie Bowl Recipe: Energize Your Day with Flavor!
Hey there, fellow food lovers! Welcome back to my cozy kitchen where deliciousness and warmth collide! Today, we’re diving into a whimsical, oh-so-energizing treat: the Coffee Protein Smoothie Bowl. This delight is not only a feast for your taste buds but also a roaring success when it comes to fueling your day. Whether you’re aiming to power through a busy morning or seeking a vibrant pick-me-up for the afternoon, this bowl will do just that—and it’s totally Instagram-worthy too!
Now, let’s talk about mornings. For me, the ritual of brewing coffee is more than just a wake-up call; it’s a cherished moment. The smell that wafts through the air, mingling with the sound of a bubbling pot, instantly sets the tone for a beautiful day. This protein-packed smoothie bowl harnesses all that cozy coffee goodness, combining it with nourishing ingredients to create a deliciously energizing breakfast.
You’ll easily fall in love with this creation. It’s fun, customizable, and oh-so-delicious! Trust me, once you take that first spoonful, you’ll be transported to a joy-filled café, where the sun dances through the windows and every bite bursts with flavor. So let’s grab our aprons, rinse off those hands, and dive into this delicious journey together!
A Nostalgic Coffee Moment
I’ll never forget my first experience with a smoothie bowl. It was a sunny Saturday, and I had just returned from a morning yoga class with my friends. Feeling energized but in need of a breakfast that reflected that vibrant feeling, we strolled into a quaint café that promised breakfast happiness. The moment the smoothie bowl arrived, my heart skipped a beat. The vibrant colors, the artistic toppings, and the uniqueness of the dish made it feel like a celebration on a plate.
Inspired by that day, I started creating my version at home. Adding coffee to my smoothie routine was a game-changer! It transformed my morning from mundane to magnificent. I experimented with different flavors, textures, and toppings, but it was that initial rush of creativity that set the stage for my love of smoothie bowls. Now, I’m thrilled to share my love of the Coffee Protein Smoothie Bowl with all of you!
Ingredients
Here’s the lineup for your Coffee Protein Smoothie Bowl:
-
1 ripe banana
- Why? Bananas are not just sweet and delicious; they add creaminess to your smoothie. If you don’t have one, avocados make a great substitute for that creamy texture.
-
½ cup brewed coffee (cooled)
- Why? This is the star of the show! Use your favorite brew for the best flavor. Cold brew is fantastic here too—super smooth!
-
1 cup unsweetened almond milk (or any milk of choice)
- Why? Almond milk keeps things light and dairy-free. If you prefer cow’s milk, go for it! Oat milk is also a wonderful substitute.
-
1 scoop vanilla protein powder
- Why? To give your smoothie bowl a nice boost of protein! If you’re vegan, look for a plant-based protein powder.
-
1 tablespoon peanut butter (or your favorite nut butter)
- Why? It adds healthy fats and a delicious nutty flavor. Almond butter or sunflower seed butter also work beautifully.
-
1 tablespoon chia seeds
- Why? These little powerhouses are packed with omega-3 fatty acids and fiber. You can swap them for flax seeds if you’re out!
-
Toppings (like granola, fresh fruits, nuts, or seeds)
- Why? They add crunch and a burst of flavor. Get creative here—anything you love works!
Step-by-Step Instructions
Ready to whip this smoothie bowl together? Here’s how to make your Coffee Protein Smoothie Bowl in a few simple steps!
-
Prepare Your Ingredients
- Make sure your coffee is brewed and cooled down. I like to prepare mine the night before and let it chill in the fridge. A chilled brew blends beautifully for this bowl!
-
Blend the Base
- In a high-speed blender, combine the ripe banana, cooled coffee, almond milk, and protein powder. Blend on high until smooth and creamy. Chef tip: If you’re looking for a thicker consistency, reduce almond milk by a couple of tablespoons or add more ice!
-
Add the Goodies
- Toss in the peanut butter and chia seeds. Blend again until everything is well incorporated. Note: Chia seeds will absorb some of the liquid as they sit, helping to thicken the smoothie. If it feels too thick, you can always add a splash more almond milk!
-
Taste Test Time!
- Give your smoothie a quick taste. Want it sweeter? Add a drizzle of honey or maple syrup. Want more coffee flavor? Toss in a tiny bit of instant espresso. Blend for a few seconds to mix.
-
Get Your Bowl Ready
- Once it’s perfectly blended, pour your smoothie into your favorite bowl. Personal note: I love using colorful bowls; they just make everything feel more delightful!
-
Create a Topping Masterpiece
- Now comes the fun part! Top your smoothie with granola, sliced bananas, nuts, seeds—the sky’s the limit! Arrange them in rows, circles, or however you feel inspired. Favorite hack: Instead of just pouring the granola, sprinkle it with love—a little goes a long way for that gorgeous aesthetic!
-
Enjoy!
- Grab a spoon and dig in! Remember, it’s not just about eating; it’s about savoring every single bite. Enjoy the moment!
Serving Suggestions
Serve your Coffee Protein Smoothie Bowl immediately to maintain its vibrant texture and vibrant flavors. I love to pair it with a side of warm toast or a square of dark chocolate for that extra indulgence. Hot coffee or a herbal tea complements this bowl impeccably too—hello, cozy mornings!
Recipe Variations
- Mocha Madness: Add a tablespoon of cocoa powder to get that rich chocolate flavor combined with coffee.
- Tropical Twist: Use coconut milk and top with shredded coconut and pineapple for a fun tropical flair!
- Nutty Banana Bliss: Swap peanut butter for almond butter or sunbutter for a different nutty kick, and add a sprinkle of cinnamon.
- Berry Bonanza: Toss in a handful of your favorite berries like blueberries or strawberries into the mix for a fruity burst.
Chef’s Notes
This recipe has been a staple in my morning routine for years now! It started as a simple way to combine my love for coffee and smoothies, but over time, it has evolved into a canvas for creativity. I love to experiment with seasonal fruits and flavors—like using pumpkin puree in the fall for a cozy harvest vibe.
And of course, my kitchen has seen plenty of smoothie bowl disasters along the way—like the time I forgot to close the blender lid properly. Let’s just say, my kitchen looked like a coffee-flavored hurricane! Sharing those moments reminds me that cooking should be fun and light-hearted.
FAQs and Troubleshooting
-
Can I make this smoothie bowl ahead of time?
- Absolutely! You can blend everything and store it in the fridge for up to 24 hours. Just give it a good stir before serving, as it may thicken up.
-
Why is my smoothie bowl too thick?
- If it’s too thick, simply add a splash of milk or water and blend again until desired consistency is reached.
-
Can I use instant coffee instead of brewed coffee?
- Yes, just mix a tablespoon of instant coffee with a little hot water to dissolve before adding it to your blender!
-
How can I add more protein to my smoothie bowl?
- Besides protein powder, consider adding Greek yogurt or cottage cheese for an extra protein punch.
Nutritional Info
For a serving of this Coffee Protein Smoothie Bowl (without toppings):
- Calories: ~300
- Protein: ~15g
- Fat: ~10g
- Carbohydrates: ~40g
- Fiber: ~7g
Enjoy this delightful Coffee Protein Smoothie Bowl that’s both invigorating and comforting! I hope it brings joy to your mornings and inspires you to get creative in the kitchen. Don’t forget to share your smoothie creations with me—I can’t wait to see how you personalize it! Happy cooking!
Print
Coffee Protein Smoothie Bowl
- Total Time: 10 minutes
- Yield: 1 serving 1x
- Diet: Vegetarian
Description
A delightful and energizing smoothie bowl combining coffee, banana, and protein for a perfect breakfast treat.
Ingredients
- 1 ripe banana
- ½ cup brewed coffee (cooled)
- 1 cup unsweetened almond milk (or any milk of choice)
- 1 scoop vanilla protein powder
- 1 tablespoon peanut butter (or your favorite nut butter)
- 1 tablespoon chia seeds
- Toppings (like granola, fresh fruits, nuts, or seeds)
Instructions
- Prepare your ingredients: Make sure your coffee is brewed and cooled down.
- Blend the base: Combine the ripe banana, cooled coffee, almond milk, and protein powder in a blender. Blend until smooth and creamy.
- Add the goodies: Toss in the peanut butter and chia seeds, and blend again.
- Taste test: Give your smoothie a taste, add sweetness if desired, then blend again.
- Get your bowl ready: Pour the smoothie into your favorite bowl.
- Create a topping masterpiece: Add your favorite toppings in a creative arrangement.
- Enjoy: Grab a spoon and savor every spoonful!
Notes
Can be made ahead of time and stored in the fridge for up to 24 hours. Adjust ingredients to achieve desired thickness.
- Prep Time: 10 minutes
- Cook Time: 0 minutes
- Category: Breakfast
- Method: Blending
- Cuisine: American
Nutrition
- Serving Size: 1 bowl
- Calories: 300
- Sugar: 15g
- Sodium: 150mg
- Fat: 10g
- Saturated Fat: 2g
- Unsaturated Fat: 8g
- Trans Fat: 0g
- Carbohydrates: 40g
- Fiber: 7g
- Protein: 15g
- Cholesterol: 0mg
Keywords: smoothie bowl, protein, coffee, healthy breakfast, energizing
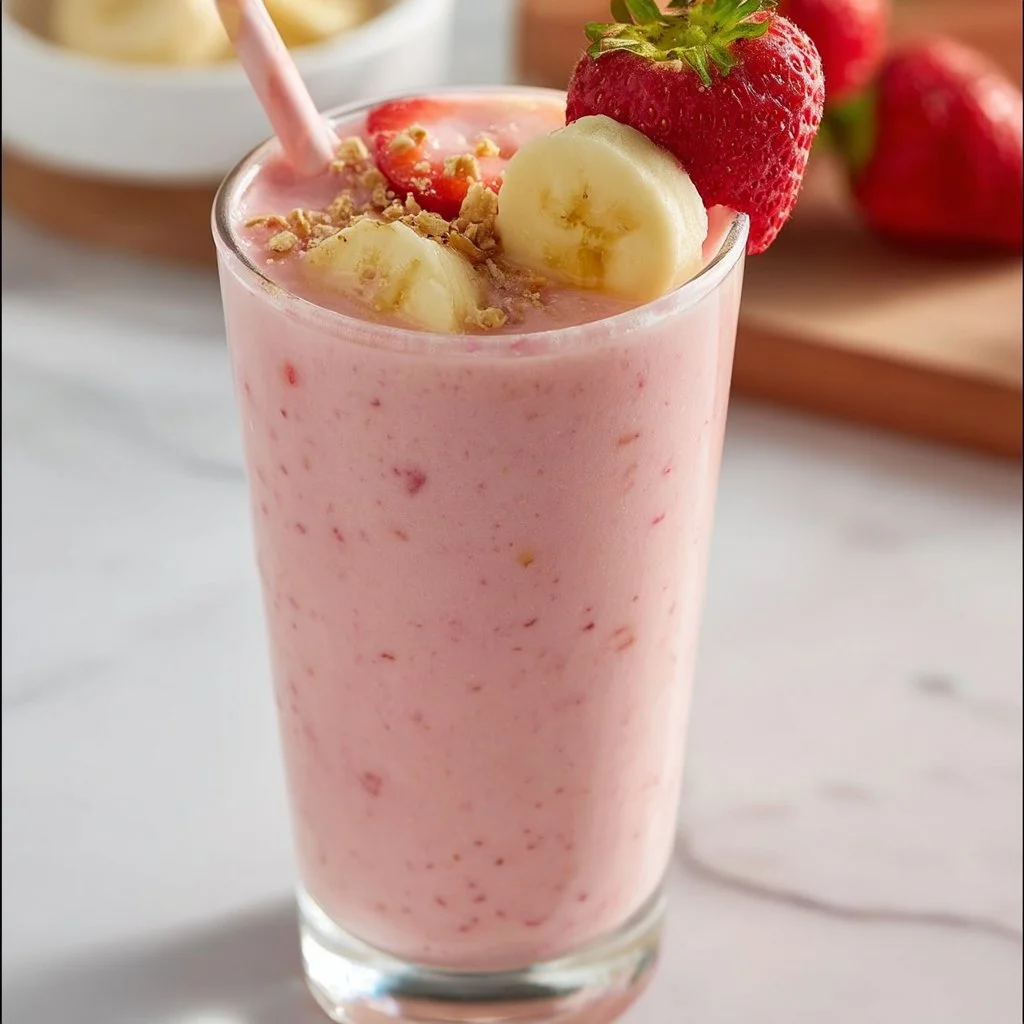
Strawberry Banana Smoothie
The Perfect Strawberry Banana Smoothie: A Tasty Escape
Welcome to my kitchen, friends! I’m Olivia Bennett, your go-to home cook and flavor enthusiast. Today, we’re diving into an irresistible classic: the Strawberry Banana Smoothie. This delicious drink is not just a treat for your taste buds; it’s like a sip of sunshine, perfect for breakfast, a snack, or a quick pick-me-up any time of the day.
Now, I don’t know about you, but I get a thrill from the vibrant colors and fresh fragrance of ripe strawberries and bananas. Whenever I blend these two together, I’m reminded of summer mornings spent in my grandmother’s kitchen, where we would whip up smoothies to cool off after long days of playing outside. Combining the sweetness of strawberries with the creaminess of bananas creates a smoothie that’s simply unforgettable.
In this post, I’ll guide you through the process of making the perfect Strawberry Banana Smoothie, complete with my favorite tips, tricks, and variations. Whether you’re a seasoned pro or a kitchen newbie, I guarantee you’ll feel confident and excited to blend this up in just a few minutes. Are you ready? Let’s get started!
A Tasty Memory from My Childhood
One of my fondest memories involves those lazy summer mornings spent at my grandmother’s house. She would awaken us to the sound of the blender whirring in the kitchen, a magical noise that promised something delicious was on the way. My siblings and I would rush to the kitchen, drawn by the mouthwatering aroma of strawberries that somehow danced through the air.
“Today’s treat is special,” she would say with a wink. It was her famous Strawberry Banana Smoothie. As soon as the bright pink concoction appeared in our glasses, we would gather around the table, eager to sip and savor.
Not only was this smoothie refreshing and delightful, but it also became a sweet ritual that united our family. Each slurp reminded us to appreciate the little moments, plus the tangled conversations shared between us. Even now, when I whip up a batch of this smoothie, I can almost hear her laughter ringing in my ears. It’s a sip of joy, nostalgia, and love.
Ingredients You’ll Need
To create this delightful beverage, gather the following ingredients:
- Fresh Strawberries (1 cup): The stars of the show! Look for plump, red berries. If they’re out of season, frozen strawberries work as an alternative.
- Banana (1 medium): A perfect creamy base for your smoothie. Choose a ripe banana for maximum sweetness. Feeling adventurous? Substitute with frozen banana slices for a thicker texture.
- Greek Yogurt (½ cup): Adds creaminess and a protein boost. If you prefer a non-dairy option, use coconut or almond yogurt.
- Milk (1 cup): Choose your favorite—dairy, almond, oat, or soy. For a tropical touch, try coconut milk!
- Honey or Maple Syrup (1-2 tablespoons): Sweeten to taste. Agave syrup or even a pitted date can also work if you’re looking for a healthier alternative.
- Ice (1 cup): For that refreshing chill and thick texture. Use crushed ice for a smoother blend.
Step-by-Step Instructions
Step 1: First, Gather Your Tools
Before you start blending, assemble your tools! You’ll need a blender, measuring cups, and a spatula for scraping down the sides. Make sure your blender is clean and ready for action.
Step 2: Prepare Your Ingredients
Start by washing the strawberries thoroughly and removing their stems. If you’re using frozen strawberries, you can skip this step; just toss them straight into the blender! Next, peel the banana and break it into chunks for easier blending.
Step 3: Load the Blender
Now it’s time to add all your ingredients to the blender. Layer them in this order:
- Start with the Greek yogurt at the bottom; this helps create a smoother consistency.
- Next, toss in the banana chunks.
- Follow with the fresh strawberries.
- Pour in the milk of your choice.
- Add honey or maple syrup, and finish with the ice.
Step 4: Blend It Up
Cover your blender with the lid, ensuring it’s secure—trust me, you don’t want a smoothie explosion! Start blending on low speed, gradually increasing to high until your mixture is creamy and smooth. If you find it too thick, add a splash more milk to reach your desired consistency.
Step 5: Taste and Adjust
Once blended, give your smoothie a taste! This is the moment to adjust sweetness or thickness. Feel free to add more honey or some extra ice if needed. Blend again briefly to combine any additions.
Step 6: Serve and Enjoy!
Pour your dazzling Strawberry Banana Smoothie into tall glasses. You can garnish with an extra strawberry or a sprinkle of granola on top for added texture. Don’t forget to share it with loved ones; smoothies are best enjoyed together!
Serving Suggestions
To make your smoothie an even more delightful experience, serve it with a colorful straw and a slice of fresh fruit on the glass. You could also pair it with whole-grain toast topped with almond butter or a handful of nuts for a balanced breakfast.
Recipe Variations
Feeling adventurous? Here are a few variations to customize your Strawberry Banana Smoothie:
- Green Power Smoothie: Add a handful of spinach or kale for an extra nutrient boost without altering the flavor much.
- Chocolate Delight Smoothie: Blend in a tablespoon of cocoa powder or a scoop of chocolate protein powder for a chocolatey twist.
- Nutty Banana Bliss: Include a tablespoon of peanut or almond butter for a rich, nutty flavor.
- Berry Blast: Mix in a handful of other berries like blueberries or raspberries for a mixed berry experience.
Chef’s Notes
Over the years, I’ve played around with this recipe, adding different ingredients based on what’s in season or what I have on hand. One of the funniest moments was when I decided to toss in some kale—let’s just say, I wasn’t prepared for the vibrant green smoothie that greeted me! It took some getting used to, but hey, life is all about experimenting, right?
Nutrition Info (Optional)
For those curious about the nutrition, a standard serving of this smoothie provides roughly:
- Calories: 250-300
- Protein: 8-10g
- Fiber: 4-5g
- Calcium: 15% of the daily value
FAQs and Troubleshooting
Here are some common questions and their answers to help you perfect your Strawberry Banana Smoothie:
Q1: Why is my smoothie too thick?
Answer: If your smoothie is too thick, you can easily thin it out by adding more milk, a little at a time, until it reaches your desired consistency.
Q2: Can I use frozen fruit instead of fresh?
Answer: Absolutely! Frozen strawberries and bananas work great and can make your smoothie thicker and colder, perfect for those hot summer days.
Q3: How do I store leftover smoothie?
Answer: For any leftover smoothie, pour it into a jar and refrigerate. However, keep in mind it’s best enjoyed fresh! If it separates, just give it a good shake or blend it again.
Q4: What if I don’t have a blender?
Answer: If you’re missing a blender, a handheld immersion blender (stick blender) can work in a pinch, or you can mash the banana and strawberries together thoroughly before stirring in the other ingredients.
Now that you have your guide to making the most refreshing Strawberry Banana Smoothie, it’s time to gather your ingredients and whip this up! Remember, cooking is all about enjoyment, creativity, and connecting with each other. So, grab someone you love, and let’s make some smoothie magic together! Happy blending!
Print
The Perfect Strawberry Banana Smoothie
- Total Time: 5 minutes
- Yield: 2 servings 1x
- Diet: Vegetarian
Description
A refreshing Strawberry Banana Smoothie that’s perfect for breakfast or a quick pick-me-up, blending the sweetness of strawberries with the creaminess of bananas.
Ingredients
- 1 cup Fresh Strawberries
- 1 medium Banana
- ½ cup Greek Yogurt
- 1 cup Milk
- 1–2 tablespoons Honey or Maple Syrup
- 1 cup Ice
Instructions
- Gather Your Tools: Assemble your blender, measuring cups, and a spatula.
- Prepare Your Ingredients: Wash strawberries and remove the stems; peel and chunk the banana.
- Load the Blender: Layer yogurt, banana, strawberries, milk, sweetener, and ice.
- Blend It Up: Secure the lid and blend from low to high speed until creamy.
- Taste and Adjust: Test the mixture and add sweetener or ice as needed.
- Serve and Enjoy: Pour into glasses and garnish as desired.
Notes
Feel free to customize with spinach for a nutrient boost, add cocoa powder for a chocolate flavor, or mix in other berries.
- Prep Time: 5 minutes
- Cook Time: 0 minutes
- Category: Beverage
- Method: Blending
- Cuisine: American
Nutrition
- Serving Size: 1 serving
- Calories: 275
- Sugar: 20g
- Sodium: 100mg
- Fat: 5g
- Saturated Fat: 2g
- Unsaturated Fat: 2g
- Trans Fat: 0g
- Carbohydrates: 49g
- Fiber: 5g
- Protein: 10g
- Cholesterol: 10mg
Keywords: smoothie, strawberry banana smoothie, healthy drink
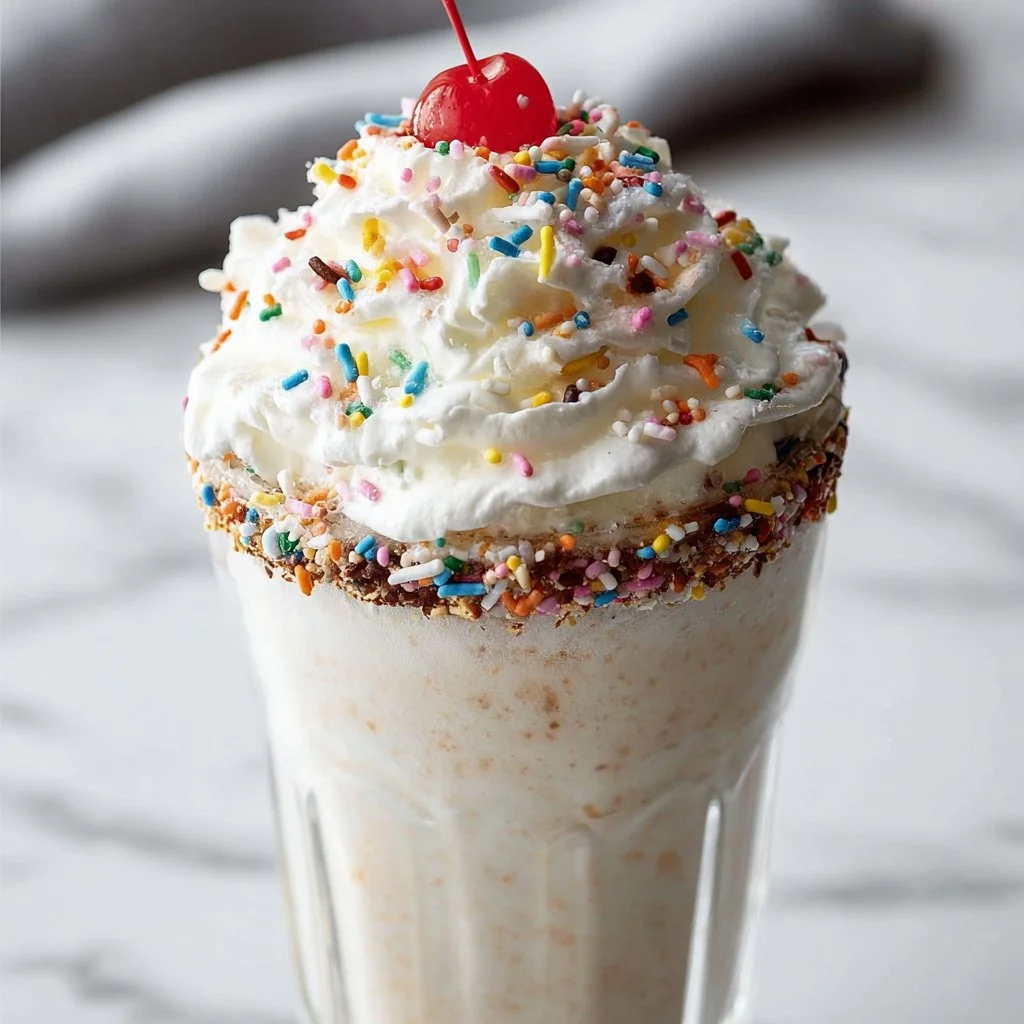
Milkshake
Creamy Dreamy Milkshake: Your Ultimate Guide to Bliss in a Glass
Hey there, fellow food lovers! Welcome back to my cozy kitchen, where today we’re about to embark on a sweet adventure that will take you right back to those carefree summer days when the sun kissed your skin and a thick, creamy milkshake was the ultimate treat. If you’re like me, you know that nothing beats the joy of sipping a chilled milkshake while lounging with friends or family (bonus points if you’re outdoors).
Milkshakes are the quintessential comfort food that span generations. Whether you’re feeling nostalgic about those trips to the local diner in your childhood or looking to recreate that magical moment at home, I’ve got you covered. With just a few simple ingredients, we’ll whip up a shake so delicious, you’ll wonder why you ever settled for anything bottled. Plus, I promise it’ll be a cinch—trust me, if I can make it with flour on one hand and a whisk in the other, you can totally do this!
Today, I will guide you step-by-step to make a classic milkshake with heaps of flavor and inspiration drawn from my fondest memories in the kitchen. So grab your favorite glass and let’s get ready to create a deliciously creamy milkshake that’s perfect any time of year!
Personal Story
Whenever I think of milkshakes, I’m transported back to my childhood summer vacations spent at Grandma’s house. The moment we arrived, there would be the unmistakable sound of her old blender whirring and the sweet aroma of vanilla wafting through the air. Grandma had a knack for creating creamy delights that brought everyone together, and the milkshakes were the highlight. Her secret? A little bit of love and a lot of laughter blended right in!
One particular memory stands out—I remember sitting on her porch with my cousins, big sun hats perched on our heads, giggling and making a mess as we tried to finish those towering milkshakes topped with whipped cream and maraschino cherries. We’d make bets on who could finish first while the ice cream dripped down our arms. It was a chaotic, sticky mess, but in that moment, I felt so alive, so connected. That’s the magic of food; it transcends the plate and creates bonds that last a lifetime.
Now, every time I make a milkshake, I think of those sunny days and the timeless joy they brought. Let’s create some new memories together, shall we?
Ingredients
Here’s what you’ll need to make a classic milkshake:
-
Ice Cream (2 cups): The star of the show! I love using vanilla for a classic shake, but feel free to experiment with rich flavors like chocolate or strawberry. Pro tip: For a sundae-style shake, go for chunks of ice cream!
-
Milk (1 cup): Whole milk gives it a creamy texture, but you can use any milk you prefer (almond, oat, or soy) for a dairy-free option. Just adjust the amount based on your desired thickness.
-
Flavorings (optional): A splash of vanilla extract (1 tsp) or chocolate syrup can elevate your milkshake to another level. Don’t skip this if you want a pop of extra flavor!
-
Toppings: Whipped cream, chocolate shavings, sprinkles, or even a drizzle of caramel are excellent choices! Feel free to go wild—this is your shake!
Each ingredient plays a crucial role in achieving a milkshake that not only satisfies your sweet tooth but also invites creativity from your heart.
Step-by-Step Instructions
Step 1: Gather Your Ingredients
Start by prepping your work area. Measure out your ice cream and milk, and have your toppings ready. Having everything in arms reach makes the process smoother. Trust me, nothing is worse than mid-blend chaos!
Step 2: Blend It Up!
In a blender, combine the ice cream and milk. If you’re adding any flavorings or extras, toss them in now! For a thicker shake, start with about ½ cup of milk, and add more as needed.
Tip: Blend until just mixed; you want to see some chunks of ice cream still visible. It makes for a creamier texture rather than a soupy shake.
Step 3: Taste Test
Here’s a fun chef hack—use a spoon (or a straw!) to taste a little of your creation before pouring it out. This is where you can decide if it needs more chocolate or maybe a touch more milk for a thinner consistency!
Step 4: Serve It Up
Pour the milkshake into your favorite glass. Halfway through, consider adding layers of whipped cream or sprinkles for a fun treat. Such an easy way to impress your guests!
Step 5: Top It Off
Finish your shake with a generous dollop of whipped cream on top, a sprinkle of chocolate shavings, and a cherry. Don’t forget the straw—this is a milkshake, after all!
Step 6: Enjoy!
Savor every sip! There’s nothing like sitting back and enjoying something you’ve created yourself. Let each sip take you back to those sun-soaked memories and savor that sweet nostalgic bliss.
Serving Suggestions
For an added touch of elegance (and fun!), consider serving your milkshake in mason jars or unique glassware. Garnish with whipped cream and a sprinkle of your favorite toppings, and if you’re feeling adventurous, add a homemade cookie on the side. Instant happiness!
Recipe Variations
-
Chocolate Banana Shake: Add half a ripe banana to the blender for a fruity twist. Delicious!
-
Mint Chocolate Chip Shake: Swap the vanilla for mint chocolate chip ice cream and top with crushed mint candies. Perfect for mint lovers!
-
Peanut Butter Cup Shake: Throw in a couple of tablespoons of peanut butter and a handful of crushed chocolate peanut butter candies for a decadent treat.
-
Protein Power Shake: Swap ice cream with a scoop of vanilla/yogurt protein powder and use Greek yogurt for a healthy pick-me-up.
-
Coffee Lover’s Shake: Add a scoop of coffee ice cream and a splash of brewed coffee for a pick-me-up after dinner.
Chef’s Notes
Over the years, my milkshake recipe has transformed as I’ve experimented with different flavor profiles and toppings. I’ve tried everything from crushed cookies to fresh fruit and even savory spices! Each iteration, though different, always reminds me of Grandma’s kitchen—the heart of our family celebrations.
I remember one fateful summer when cousin Beta thought it would be fun to make a “spicy milkshake” and added cinnamon. Surprisingly, it became a hit! It was quirky ideas like that, born out of spontaneity, that added a new twist to my classic recipe. Always remember, the kitchen is a space for creativity and experimentation!
FAQs and Troubleshooting
-
Why is my milkshake too thin?
- You might need more ice cream! A dash more should help thicken it right up. If you’ve added too much milk, don’t panic; simply add a scoop of ice cream to balance it out.
-
Can I make it ahead of time?
- Sure! Blend the ingredients together but store it in the freezer. However, you’ll want to give it a quick blend again before serving, as it can harden quite a bit.
-
What’s the best way to clean my blender?
- Fill your blender with warm water and a drop of dish soap. Blend on high for 30 seconds and rinse. Voila!
-
How can I make my milkshake vegan?
- Simply swap regular milk for almond, soy, or oat milk and use dairy-free ice cream. You won’t lose any deliciousness!
Nutritional Info (if applicable)
Each serving (based on the classic recipe) contains approximately:
- Calories: 350
- Total Fat: 18g
- Saturated Fat: 10g
- Carbohydrates: 45g
- Sugars: 35g
- Protein: 7g
Note: Nutritional values will vary based on ingredient choices.
And there you have it, my deliciously creamy milkshake adventure! I hope the nostalgia inspired you to create your own memories in the kitchen, not to mention enjoying every creamy sip along the way. Remember, cooking isn’t just about the food—it’s about the love, laughter, and memories you share. Happy blending, friends!
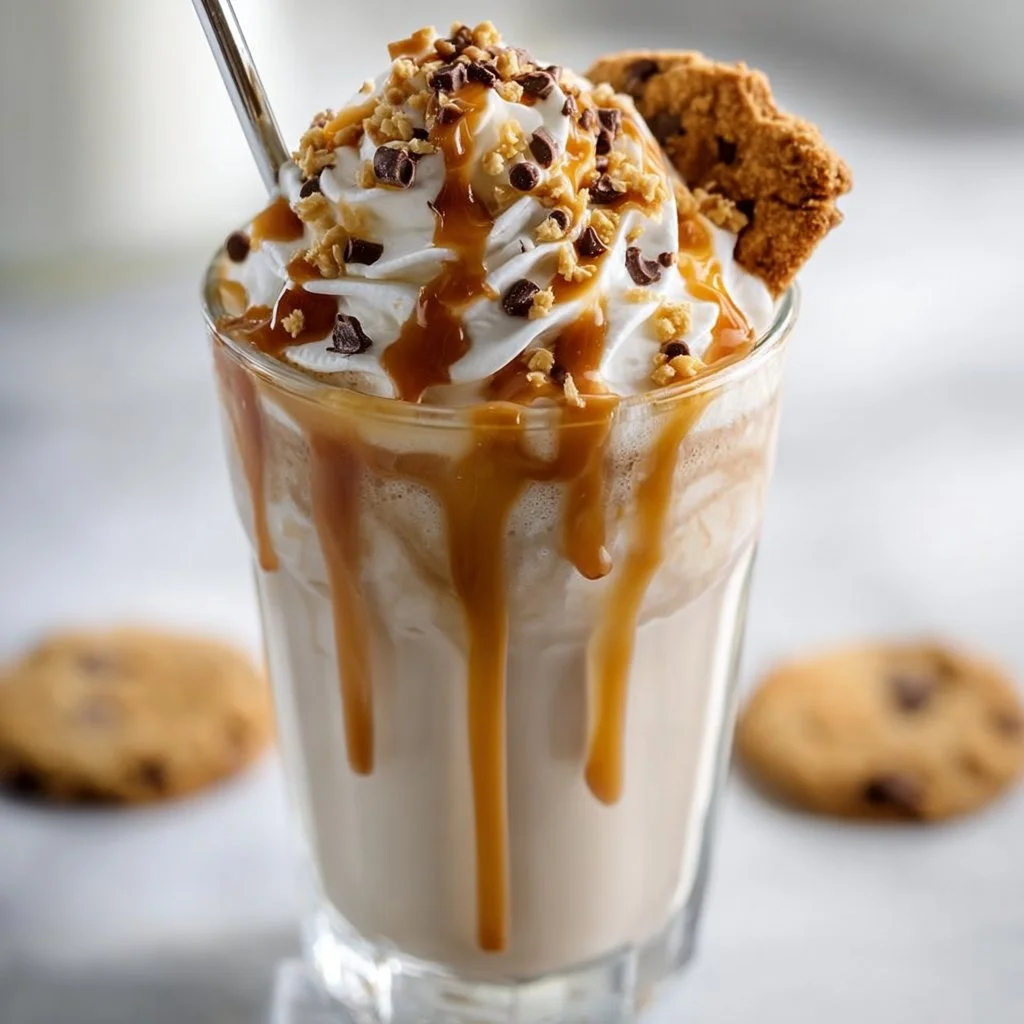
Caramel Cookie Coffee Milkshake Recipes
Velvety Caramel Cookie Coffee Milkshake Recipe
Hey there, fellow food lovers! Welcome back to my cozy corner of the kitchen. It’s Olivia Bennett here, and I’m buzzing with excitement to share a delightful treat that perfectly blends two of life’s greatest pleasures: coffee and milkshakes! Picture this: a creamy, frosty milkshake topped with the rich sweetness of caramel and the crunch of cookies. Can you smell it already? Yes, that’s the smell of happiness wafting through the air!
Now, let me take you on a little journey. Back in college, when I was broke but trying to live my best life, I used to splurge on coffees and milkshakes instead of dinners out. I’d walk into my favorite café and order their decadent caramel cookie milkshake, a treasure trove of flavors that would both wake me up and indulge my sweet tooth. Every sip took me closer to bliss, and I knew I had to recreate it in my own kitchen someday.
And guess what? That “someday” has finally arrived! To celebrate this fabulous fusion of flavors, I’m sharing my tried-and-true recipe for a luscious Caramel Cookie Coffee Milkshake. Whether you’re seeking a pick-me-up on a warm afternoon or simply want a comforting evening treat, this milkshake is your answer. Imagine gathering your loved ones around a table, clinking glasses filled with this delicious concoction, and laughing over stories. It’s cozy, it’s indulgent, and it’s packed with love—just the way I like it.
Ready to dive in? Let’s get our taste buds tingling and our blenders whirring!
Personal Story
One of my fondest memories that revolves around this decadent milkshake happened during a summer road trip with my best friend. We hit the open road, playlists blasting, and a cooler filled with snacks in the back seat. Along the way, we discovered a charming little café nestled in a roadside town that boasted a soft-serve ice cream machine and an irresistible caramel cookie milkshake on their menu.
After an hour of laughter and silly road trip debates, we ordered two of those milkshakes to celebrate the moment. I remember the gleam in my friend’s eyes as we took our first sips—it was sweet, creamy goodness, a curly straw adorned with a perfect swirl of whipped cream and an extra drizzle of caramel. It tasted like summer itself.
That milkshake wasn’t just a treat; it was a catalyst for spontaneous adventures and endless giggles. As I slurped it up, I vowed to recreate that magic at home. Now, every time I whip up this Caramel Cookie Coffee Milkshake, it brings back those carefree days of friendship and adventure. So let’s recreate this joy in our own kitchens!
Ingredients
Here are the ingredients you’ll need to whip up your very own Caramel Cookie Coffee Milkshake. Each one contributes to the delectable flavor that makes this treat oh-so-special.
-
Brewed Coffee (1 cup)
Use your favorite coffee blend! For a smoother flavor, try cold brew. If you’re looking to reduce caffeine, you can swap this with decaf or a weak brew. -
Vanilla Ice Cream (2 cups)
The creaminess of vanilla ice cream is essential for that dreamy texture. You can also use dairy-free ice cream or frozen yogurt for lighter options. -
Caramel Sauce (1/2 cup)
A rich caramel sauce is the star of this milkshake. You can use store-bought or make a homemade version. If you’re feeling adventurous, try salted caramel for an added twist. -
Milk (1/2 cup)
This helps to blend everything together. Whole milk gives a richer taste, but you can substitute with almond, oat, or coconut milk based on your preference. -
Cookies (3-4 pieces, crushed)
Classic chocolate chip cookies work magic here, but you can use any kind you love—Oreos, snickerdoodles, or even gluten-free cookies if that’s your jam! -
Whipped Cream for Topping
This adds a layer of indulgence. For a fun twist, you can make flavored whipped cream by adding a tablespoon of flavored syrup to it. -
Chocolate Syrup (optional, for garnish)
A drizzle for extra decadence! It pairs beautifully with caramel, but feel free to skip it if you want to keep it simple.
Step-by-Step Instructions
Now that we’ve gathered our ingredients, let’s dive into the magical process of making this Caramel Cookie Coffee Milkshake. Get ready to blend, mix, and sip your way to happiness!
Step 1: Brew Your Coffee
Start by brewing your coffee. If you’re using hot coffee, let it cool slightly; we don’t want to melt our ice cream too soon! Depending on your morning routine, you might even want to do this the night before and place it in the fridge for a refreshing cold brew experience.
Chef Hack: If you’re a coffee lover like me, make extra coffee for the week and keep it in the fridge—it’s perfect for this milkshake and iced coffee.
Step 2: Crumble the Cookies
While your coffee is cooling, crumble your cookies into small pieces. You can do this by placing them in a zip-top bag and using a rolling pin, or simply by using your hands. Aim for small chunks; we want that delightful crunch in each sip!
Chef Insight: Don’t be shy about using different types of cookies! I once tried it with crushed ginger cookies, and it was a delightful surprise!
Step 3: Combine in the Blender
In a blender, combine the brewed coffee, vanilla ice cream, caramel sauce, crushed cookies, and milk. Blend them together on medium-high speed until lovely and creamy.
Tip: Start slow and work your way up to avoid any splashes!
Step 4: Check the Consistency
Check the milkshake’s consistency. If it’s too thick for your liking, add more milk a little at a time. If it’s too thin, add more ice cream or crushed cookies to thicken it up.
Fun Fact: The more ice cream you add, the more indulgent the milkshake becomes—there’s no such thing as too much!
Step 5: Pour and Garnish
Once you reach your desired consistency, pour the milkshake into tall glasses. Top with whipped cream, a drizzle of caramel sauce, and if you fancy, a sprinkle of crushed cookies!
Serving Tip: Grab some cute straws or even whipped cream spoons for an adorable touch!
Serving Suggestions
To make your Caramel Cookie Coffee Milkshake extra special, consider setting up a little milkshake bar! You can lay out additional toppings like chocolate chips, nuts, or even sprinkles so each person can customize their own. Serve them with some delightful dessert plates or cozy mugs for a warm, inviting feel.
Recipe Variations
As with any beloved recipe, there’s always room to get a little creative! Here are a few fun variations to try:
- Mocha Madness: Add a tablespoon of cocoa powder or chocolate syrup to your milkshake for a chocolatey twist!
- Peanut Butter Bliss: Toss in a couple of tablespoons of peanut butter for a nutty flavor that pairs beautifully with caramel.
- Vegan Delight: Use non-dairy ice cream and almond milk to whip up a fully vegan version.
- Choco-Cookie Combo: Swap chocolate chip cookies for Oreos for that classic cookies and cream taste.
- Flavor Explosion: Try adding a dash of vanilla extract or a sprinkle of cinnamon for a new depth of flavor.
Chef’s Notes
As I reflect on this recipe, I’m reminded of how my own cooking style has evolved over the years. Each time I whip up this milkshake, I try to perfect it a little more. The joy of trying different cookies and experimenting with flavors never gets old—I often find surprises in my kitchen that elevate simple recipes into something remarkable. Remember—the magic in cooking comes from trying new things and making a mess in the process (trust me, I’ve had my fair share of kitchen disasters)!
Random Kitchen Story
Once, my dog Baxter decided to “help” while I was blending. He jumped up to see what was happening, and let’s just say, the blender went flying, and I ended up with a caramel coffee milkshake splattered everywhere. It was a mess, but we had the biggest laugh cleaning it up together. He still loves to lounge around my feet while I cook, just waiting for any sweet surprises!
FAQs and Troubleshooting
1. What if my milkshake is too thick?
No problem! Just add a splash more milk and blend until smooth.
2. Can I prepare this milkshake ahead of time?
While best enjoyed freshly made, you can blend everything up and store it in the freezer for an hour if you’re preparing for a party! Just give it a quick stir before serving.
3. How can I make this milkshake less sweet?
If you’re sensitive to sweetness, reduce the amount of caramel sauce and ice cream. You can also add a bit of salt to balance it out and cut through the sweetness.
4. I don’t have a blender—what can I do?
If you don’t have a blender, you can hand-whip the ice cream and milk together in a bowl until smooth, then mix in the other ingredients by hand.
Nutritional Info (if applicable)
For those who like to keep track, a serving of this Caramel Cookie Coffee Milkshake (approx. 1.5 cups) can contain around:
- Calories: 400
- Fat: 20g
- Carbohydrates: 60g
- Sugars: 45g
- Protein: 8g
This varies based on your specific ingredients, of course.
And there you have it, my friends! A dreamy, delicious Caramel Cookie Coffee Milkshake that’s just waiting to be sipped and savored. Whether enjoyed on a sunny day, after a long week, or just because—it’s the little joys that make life truly sweet. Now, grab those ingredients, get your blender ready, and let’s bring that café magic into your home. Happy shaking!
Print
Caramel Cookie Coffee Milkshake
- Total Time: 10 minutes
- Yield: 2 servings 1x
- Diet: Vegetarian
Description
A creamy and indulgent milkshake combining the richness of coffee, vanilla ice cream, and a delightful crunch of cookies, topped with caramel.
Ingredients
- 1 cup Brewed Coffee
- 2 cups Vanilla Ice Cream
- 1/2 cup Caramel Sauce
- 1/2 cup Milk
- 3–4 pieces Cookies (crushed)
- Whipped Cream for Topping
- Chocolate Syrup (optional, for garnish)
Instructions
- Brew your coffee and let it cool slightly.
- Crumble your cookies into small pieces.
- Combine in a blender the brewed coffee, vanilla ice cream, caramel sauce, crushed cookies, and milk.
- Check the milkshake’s consistency.
- Pour into tall glasses and garnish with whipped cream and caramel sauce.
Notes
Consider adding different types of cookies for unique twists. Customize with extra toppings for a fun milkshake bar!
- Prep Time: 10 minutes
- Cook Time: 0 minutes
- Category: Dessert
- Method: Blending
- Cuisine: American
Nutrition
- Serving Size: 1 serving
- Calories: 400
- Sugar: 45g
- Sodium: 150mg
- Fat: 20g
- Saturated Fat: 12g
- Unsaturated Fat: 6g
- Trans Fat: 0g
- Carbohydrates: 60g
- Fiber: 2g
- Protein: 8g
- Cholesterol: 80mg
Keywords: milkshake, coffee, caramel, cookies, dessert
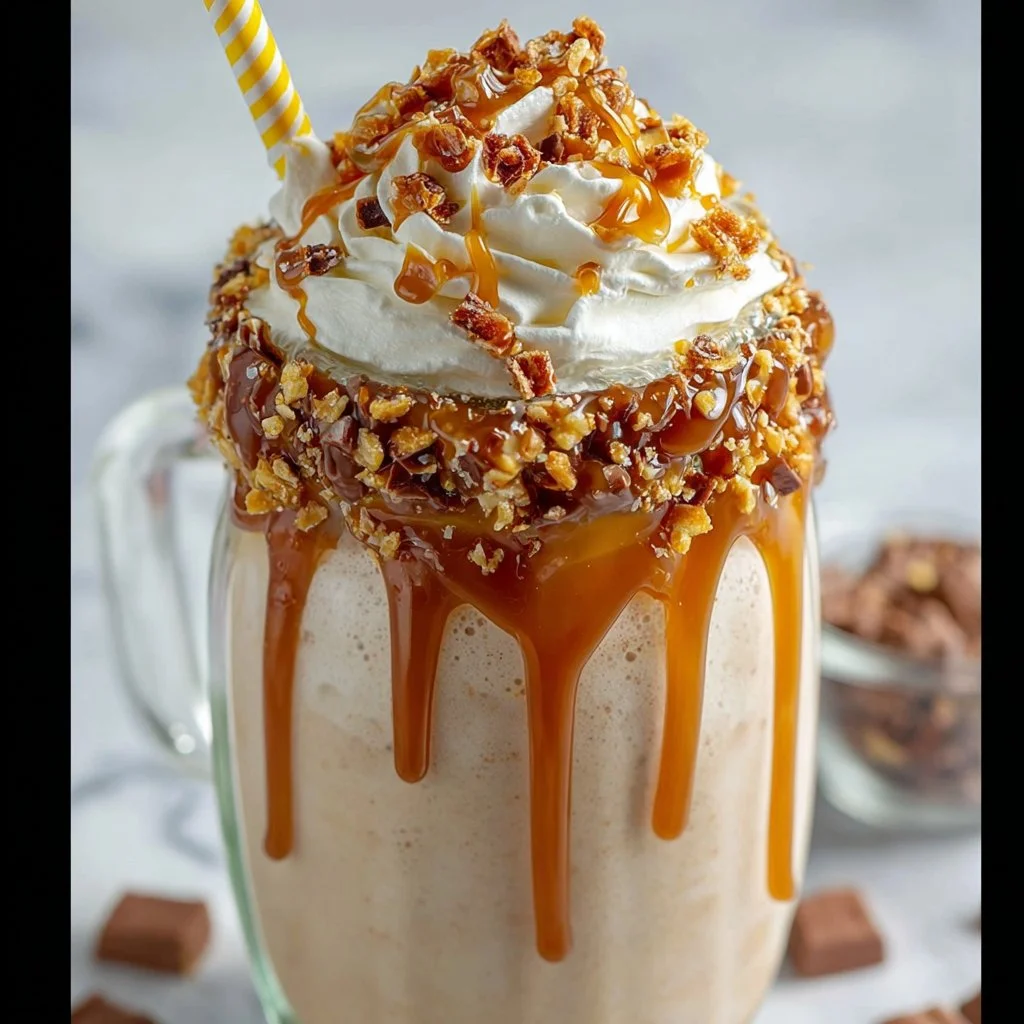
Salted Caramel Milkshake
The Ultimate Salted Caramel Milkshake Recipe: A Sweet Journey Through Flavor
Welcome back to my cozy kitchen, friends! Today, I’m beyond excited to take you on a delicious journey through one of my all-time favorite treats: the salted caramel milkshake. Picture this: a creamy, dreamy concoction that’s rich with the goodness of homemade salted caramel, perfectly blended with ice cream, and finished with whipped cream and a sprinkle of crunchy sea salt. Now tell me that doesn’t make your sweet tooth tingle!
Milkshakes have a special place in my heart. They remind me of lazy summer afternoons spent at the local diner, where the clinking of glasses and joyful chatter filled the air. As an enthusiastic home cook, there’s something magical about creating a dessert that instantly transports you back in time. The salted caramel milkshake, in particular, combines the nostalgia of childhood with the sophisticated touch of salty sweetness, making it perfect for any occasion or just a little treat for yourself!
In this post, I’ll walk you through every step of crafting the ideal salted caramel milkshake, complete with my personal stories, tips, and tricks in the kitchen. Whether you’re looking to impress friends at a summer BBQ or indulge your cravings on a cozy night at home, you’re in for a deliciously smooth ride. So grab your apron and let’s get started on making this dreamy milkshake that will, without a doubt, bring a smile to your face!
Personal Story
Growing up, my family had a weekend tradition of going to this delightful little ice cream shop down the street. Every Saturday, without fail, we’d pile into the car and head there, excitement filling the air as we flipped through the vibrant menu filled with flavors, all promising instant joy in a cup. But there was one flavor that always won me over: the salted caramel. The blend of sweet and salty was something I looked forward to every week, a delicious little ritual that sparked laughter and shared stories.
Fast forward to today, and I can’t help but bring those sunny memories into my kitchen. The first time I attempted to recreate that unforgettable salted caramel milkshake at home, I felt a flutter of nostalgia. I whipped up a batch for my friends, and as we sipped our homemade creations, I was flooded with laughter and stories from yesteryears. That day, I realized that cooking is not just about ingredients but about emotions, memories, and shared experiences. That’s the beauty I want to share with you in this recipe!
Ingredients
Before we dive headfirst into this delightful experience, let’s gather our ingredients. Here’s what you’ll need for the ultimate salted caramel milkshake:
-
Ice Cream (4 cups): The foundation of any milkshake! Vanilla ice cream works beautifully here, but you could swap it with salted caramel ice cream for an extra flavor punch! If you’re looking for a healthier option, try using frozen yogurt or dairy-free ice cream.
-
Milk (1 cup): Any milk will do! Whole milk adds creaminess, while almond or oat milk caters to dairy-free needs without sacrificing the flavor. Adjust the quantity based on how thick you like your shakes.
-
Homemade Salted Caramel Sauce (1/2 cup): This is the star of the show! You can either make it from scratch following my easy recipe below or grab a jar at the store if you’re in a pinch. Just be sure to look for one with high-quality ingredients!
-
Whipped Cream (for topping): Who said you can’t go extra? A generous dollop of whipped cream adds sweetness and beauty. Use store-bought or whip up your own fresh cream for that added homemade touch.
-
Sea Salt (a pinch for garnish): The key to bringing out that sweet caramel flavor! Use flaky sea salt for the best crunch and flavor. A sprinkle on top before serving elevates your milkshake to new heights.
-
Optional Add-Ins: Feel free to throw in chocolate chips, crushed pretzels, or even a shot of espresso to amp up the flavor and texture!
Step-by-Step Instructions
So, let’s jump into making this delightful salted caramel milkshake! Follow these steps, and your taste buds will be thanking you.
-
Make the Salted Caramel Sauce: If you’re going for homemade, in a medium saucepan over medium heat, melt 1 cup of granulated sugar, stirring constantly until it turns golden brown. Soon after reaching the desired color, carefully add 1/2 cup of heavy cream (watch out for splattering!). Stir in a pinch of salt and 2 tablespoons of butter until smooth. Let it cool. (Tip: Make extra to drizzle on other desserts!)
-
Blend the Ingredients: In a blender, combine the vanilla ice cream, milk, and 1/2 cup of the cooled salted caramel sauce. (Hint: Start with less milk if you want a thicker shake.) Blend on high until creamy and well combined, stopping to scrape down the sides if necessary. You should be left with a luscious mixture that makes your heart sing!
-
Taste Test: Here comes the fun part! Grab a spoon and taste. Adjust the caramel sauce to suit your sweetness preference. Want it a little sweeter? Add more caramel. Want more saltiness? A tiny pinch of sea salt goes a long way!
-
Prepare to Serve: Grab your favorite glasses (the more whimsical, the better!). Drizzle some of the leftover salted caramel sauce down the insides of each glass so that it coats the sides. This adds visual flair and a flavor bonus with every sip!
-
Pour & Assemble: Pour the blended milkshake into the prepared glasses, filling them about three-quarters full to make room for the whipped cream. Don’t hold back; you deserve this delicious sweet treat!
-
Top It Off: Finish off that lovely milkshake with a generous mountain of whipped cream. Top it off with an extra drizzle of salted caramel and a sprinkle of sea salt. Because, let’s be honest, you can never have too much caramel!
-
Enjoy Every Sip: Grab a straw or a long spoon and dive in with delight. Don’t forget to share (if you want, that is)!
Serving Suggestions
When it comes to serving, presentation is key! I love to place my salted caramel milkshake in tall, frosty glasses to enhance that nostalgic diner vibe. Drizzle extra salted caramel inside each glass before pouring the shake in for a stunning effect. You can accompany this sweet treat with a plate of chocolate chip cookies or mini brownies for a mini dessert spread that your friends (and yourself!) will adore.
Recipe Variations
Every good recipe has room for creativity, and this salted caramel milkshake is no exception! Here are a few fun variations to consider:
-
Nutty Delight: Add a tablespoon of nut butter—like almond or peanut butter—into the mix for a nutty twist that goes beautifully with the caramel flavor.
-
Chocolate Lovers: Incorporate chocolate ice cream instead of vanilla for a decadent chocolate salted caramel shake. You could even blend in some cocoa powder!
-
Dairy-Free Option: Use coconut milk ice cream and almond milk for a smooth, dairy-free alternative. You won’t miss the dairy one bit!
-
Coffee Caramel: For those who love coffee, add a shot of espresso or cold brew to the shake for a sweet pick-me-up!
-
Pumpkin Spice Bliss: Around fall, mix in some pumpkin puree and pumpkin spice for a seasonal twist that’s perfect for cozy vibes.
Chef’s Notes
The salted caramel milkshake has evolved in my kitchen over the years. There was a time I thought I’d never get the caramel sauce right, often ending up with a burnt mess. After a few attempts, I realized that patience is crucial—and so is the alarm on my timer! Now, it’s a go-to recipe that never fails to impress. Plus, I love how it can adapt to the seasons. It feels so fulfilling to share this with friends, reminiscing about simpler times while creating new memories. So, grab your loved ones, and let’s shake up some fun in the kitchen!
FAQs and Troubleshooting
1. My caramel sauce didn’t turn out right. What did I do wrong?
Common issues include not stirring the sugar constantly or cooking it too long. Keep an eye on the color! When it turns amber, it’s ready. If it’s grainy, you may have cooked it too long or added the cream too quickly. Don’t worry, practice makes perfect!
2. Can I use store-bought salted caramel sauce?
Absolutely! While homemade has its charm, store-bought options can save you a lot of time. Just be sure to choose one made with quality ingredients!
3. How can I make this milkshake thicker?
To achieve a thicker consistency, reduce the amount of milk or add more ice cream. You could also throw in some frozen bananas or extra ice to help shape it up.
4. Can I make this milkshake ahead of time?
While best enjoyed fresh, you can blend the ingredients and store them in the refrigerator for a few hours. Just give it a good stir before serving, as it’ll thicken up in the fridge.
Nutritional Info (Optional)
Calories: Approximately 350-450 calories per serving (depending on specific ingredients used).
Fat: 20g
Carbohydrates: 50g
Protein: 8g
Sodium: 150mg
And there you have it, friends! Your very own salted caramel milkshake recipe that’s bound to add a sprinkle of joy to your day. I hope you enjoy making this indulgent treat as much as I do. I can’t wait to hear about your experiences in the kitchen! Happy blending!
Print
The Ultimate Salted Caramel Milkshake
- Total Time: 30 minutes
- Yield: 4 servings 1x
- Diet: Vegetarian
Description
A creamy, dreamy salted caramel milkshake with homemade salted caramel, rich ice cream, and whipped cream.
Ingredients
- 4 cups vanilla ice cream
- 1 cup milk
- 1/2 cup homemade salted caramel sauce
- Whipped cream (for topping)
- A pinch of sea salt (for garnish)
- Optional add-ins: chocolate chips, crushed pretzels, or a shot of espresso
Instructions
- Make the Salted Caramel Sauce: In a medium saucepan over medium heat, melt 1 cup of granulated sugar, stirring constantly until it turns golden brown. Add 1/2 cup of heavy cream carefully, then stir in a pinch of salt and 2 tablespoons of butter until smooth. Let it cool.
- Blend the Ingredients: In a blender, combine the vanilla ice cream, milk, and 1/2 cup of the cooled salted caramel sauce. Blend on high until creamy.
- Taste Test: Adjust the caramel sauce to suit your sweetness preference.
- Prepare to Serve: Drizzle some of the leftover salted caramel sauce down the insides of each glass.
- Pour & Assemble: Pour the blended milkshake into the prepared glasses.
- Top It Off: Finish with whipped cream, an extra drizzle of salted caramel, and a sprinkle of sea salt.
- Enjoy Every Sip: Dive in with delight.
Notes
Consider adding nut butter or using different ice cream flavors for variations.
- Prep Time: 15 minutes
- Cook Time: 15 minutes
- Category: Dessert
- Method: Blending
- Cuisine: American
Nutrition
- Serving Size: 1 serving
- Calories: 400
- Sugar: 40g
- Sodium: 150mg
- Fat: 20g
- Saturated Fat: 10g
- Unsaturated Fat: 8g
- Trans Fat: 0g
- Carbohydrates: 50g
- Fiber: 0g
- Protein: 8g
- Cholesterol: 50mg
Keywords: salted caramel, milkshake, dessert, sweet treat, nostalgia
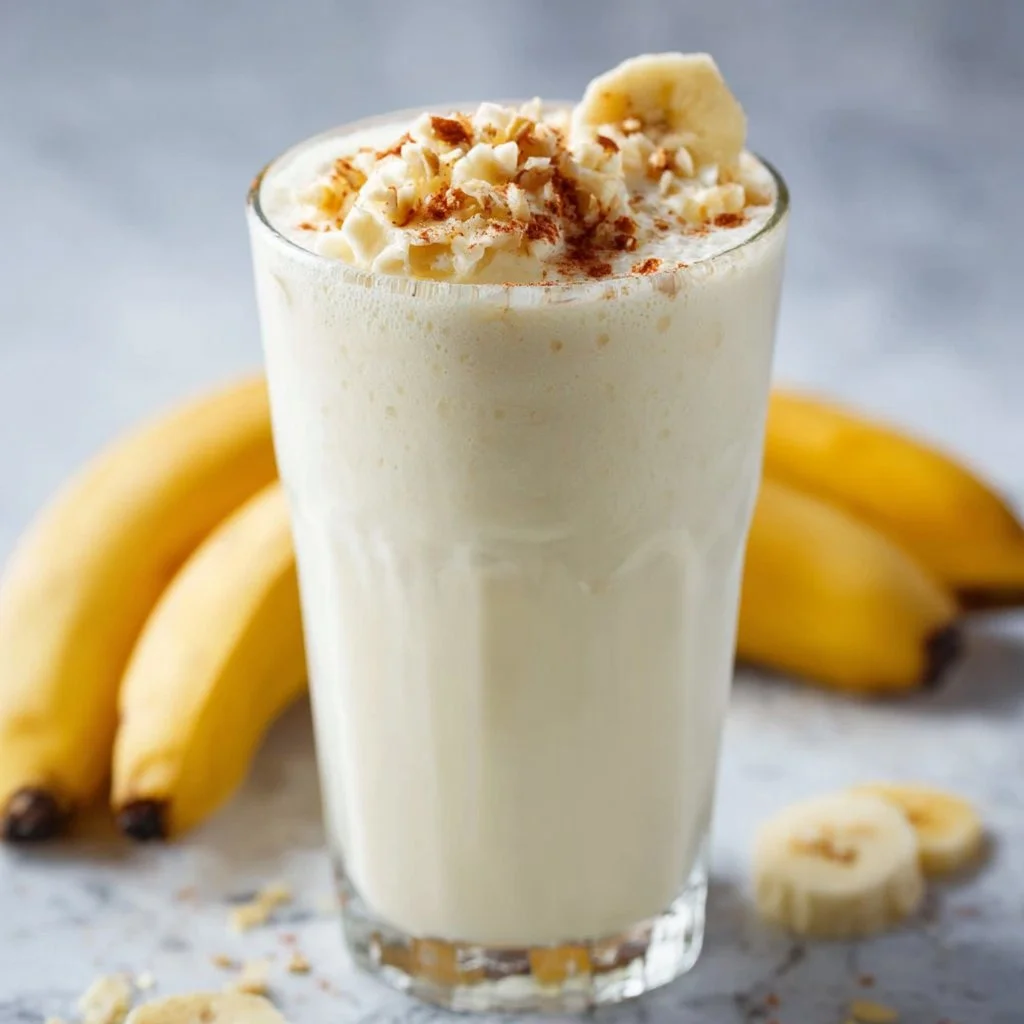
Banana Milkshake Recipe
Creamy Banana Milkshake Recipe That Will Make Your Day
Hey there, fellow food lovers! Welcome back to my cozy kitchen, where I’m always brewing up something delicious. Today, I’m excited to share one of my all-time favorite treats: the classic banana milkshake. There’s just something about that creamy, dreamy blend of fresh bananas and cold milk that takes me straight back to my childhood.
Picture this: it’s a hot summer day, the sun is shining, and you just finished playing outside with friends. Your mom whips up a batch of banana milkshakes to cool you down and put a big smile on your face. There’s a reason this drink has hung on for generations! Banana milkshakes are not only nostalgic but also unbelievably simple to make, and perfect for any occasion—from a comforting afternoon snack to a sweet pick-me-up after a long day.
In this post, I’m going to guide you through crafting your very own banana milkshake that’s creamy, luscious, and bursting with flavor. So grab your favorite blender and let’s get shaking!
Personal Story
I remember the first time my grandma introduced me to banana milkshakes. I was maybe seven years old, peering over the kitchen counter as she pulled a handful of perfectly ripe bananas from her grocery bag. She had this magical touch; everything she made was infused with love. Seeing her blend those bananas with ice cream and milk while the sweet smell danced in the air felt like a real enchantment. I was fascinated!
I watched her pour the milkshake into tall, frosty glasses, and let me tell you, that first sip was pure bliss. The sweetness of the bananas mingled with the rich, creamy texture, and suddenly, it became my favorite drink. Fast forward to today, and I love to make banana milkshakes for my friends and family, sharing that same joy and excitement that my grandma passed down to me. Every time I blend it up, I’m taken back to her kitchen, and I can’t help but feel grateful for those warm memories.
Ingredients
Now let’s dive into what you’ll need to whip up your own banana milkshake! Here’s a list of those essential ingredients:
-
Bananas: The star of the show! Use ripe, spotty bananas for the sweetest flavor. If you’re in a pinch, frozen bananas work great, too, adding a nice chill and thickness.
-
Milk: Whole milk gives the creamiest texture, but feel free to go for 2% or even almond milk if you’d like a dairy-free option. Just keep in mind that the flavor will change slightly.
-
Ice Cream: Vanilla ice cream is traditional and adds a delightful sweetness, but you can use any flavor you love. Neapolitan or even chocolate ice cream creates a fun twist. For a lighter version, consider using frozen yogurt.
-
Honey or Sugar: Depending on your personal taste preferences, a touch of sweetener can elevate the flavors. Use honey for a more natural option or plain sugar.
-
Vanilla Extract (optional): A splash of vanilla extract adds warmth and depth to the shake. Trust me—you won’t regret it!
Quick Chef Insights
- Ripe bananas are key! They’re sweeter and easier to blend for that creamy consistency.
- Don’t skip the ice cream—it’s what makes your milkshake indulgent.
- Taste as you go! If you prefer a sweeter shake, add more honey or sugar, and if it’s too thick, just splash in a little more milk.
Step-by-Step Instructions
Let’s get down to business and blend up this creamy goodness with step-by-step instructions that highlight my little chef secrets along the way:
-
Gather Your Ingredients: Start with a clean kitchen workspace. Measure out your ingredients: about 2 medium ripe bananas, 2 cups milk, 2 cups vanilla ice cream, and 1-2 tablespoons honey or sugar, depending on your taste.
-
Peel the Bananas: Grab those beautiful ripe bananas and peel them. Toss them into your blender. If you’re using frozen bananas, you can throw them in directly without thawing—more texture that way!
-
Add the Ice Cream: Scoop out about 2 cups of vanilla ice cream and add it to the blender. This is where the magic happens, so don’t skip this step!
-
Pour in the Milk: Gently pour in 2 cups of milk. You can add more or less depending on how thick you want your shake to be. A thicker shake is always more fun!
-
Sweeten It Up: Drizzle in 1-2 tablespoons of honey or sugar. Remember, you can always add more later after tasting it!
-
Vanilla Extract (Optional): If you’re feeling adventurous, add a teaspoon of vanilla extract for that extra flavor kick!
-
Blend Away: Secure the lid on the blender and blend everything on high speed until it’s perfectly smooth and creamy. This usually takes about 30 seconds. If it looks too thick, add a splash of milk and blend again.
-
Taste Test: This is my favorite part! Take a quick taste to see if it needs anything. A little more sweetness? Go for it! Need more milk for consistency? Blend it in!
-
Serve It Up: Once you’re happy with your shake, pour it into tall glasses. You can decorate the rim with some whipped cream or a sprinkle of cinnamon if you’re feeling fancy!
-
Enjoy with a Smile: Grab some straws, invite your friends over, and enjoy your creamy banana milkshake together while reminiscing about your own childhood memories!
Serving Suggestions
For an extra touch, you can serve your milkshake with dollops of whipped cream on top, sprinkled with a bit of cinnamon or chocolate shavings for a delightful crunch. Pair it with a couple of freshly baked cookies or a slice of pie, and you’ll have a dessert that truly impresses!
Recipe Variations
Get a little creative with these fun ideas to remix your banana milkshake:
-
Nutty Banana Shake: Stir in a tablespoon of almond butter or peanut butter for a protein-packed twist. It adds a nice nutty flavor!
-
Chocolate Lovers Delight: Add a tablespoon of cocoa powder or some chocolate syrup for a rich chocolate banana milkshake.
-
Fruit Frenzy: Mix in some strawberries or blueberries to the base for a fruity explosion. You’ll have a strawberry-banana milkshake that’s fabulous!
-
Dairy-Free Version: Use almond or coconut milk along with dairy-free ice cream for a delicious treat friendly for lactose intolerant folks.
-
Protein-Packed Shake: Toss in a scoop of your favorite protein powder and blend away—it’s a perfect post-workout treat!
Chef’s Notes
This recipe has evolved a lot over time, and I’ve experimented with countless variations. I’ll never forget the time I decided to throw in a handful of spinach. Surprisingly, it added a lovely green hue and a hint of earthiness. It was like a health boost disguised in a dessert.
I love how versatile a banana milkshake can be—you can change it to fit your cravings or dietary needs. Plus, it’s such a great way to use up those spotty bananas that are too ripe for snacking!
FAQs and Troubleshooting
Here’s a list of common questions I get about making banana milkshakes and their fixes:
-
Why is my milkshake too thin?
- If your milkshake is too thin, you can simply blend in more ice cream, or pop in a few ice cubes to thicken it up.
-
How do I prevent my bananas from browning?
- Make sure to use ripe bananas for the best flavor, but if you’re concerned about browning, you can freeze them right away or toss them in a little lemon juice before using.
-
Can I use non-dairy milk?
- Absolutely! Almond milk, oat milk, and coconut milk all work well—just remember they will change the flavor slightly.
-
What if I don’t have a blender?
- You can mash the bananas really well and stir everything together by hand. It won’t be as smooth, but you’ll still get that banana flavor!
Nutritional Info (Optional)
While banana milkshakes are a treat, they can fit into a balanced diet! Here’s an approximate nutritional breakdown per serving based on traditional ingredients:
- Calories: 380
- Protein: 9g
- Fat: 12g
- Carbohydrates: 65g
- Sugars: 50g
Remember, these numbers will change based on your specific ingredients and portion sizes, especially if you add any extra toppings or variations.
There you have it, friends! A delicious, easy banana milkshake recipe that’s perfect for bringing a smile to your face and nostalgia to your heart. I hope you enjoy every sip as much as I do! Remember, cooking is all about joy and love, so invite your family or friends to join you in the kitchen, make some memories, and indulge. Cheers to sweet adventures ahead!
Print
Creamy Banana Milkshake
- Total Time: 5 minutes
- Yield: 4 servings 1x
- Diet: Vegetarian
Description
A creamy, dreamy banana milkshake that’s easy to make and perfect for any occasion.
Ingredients
- 2 medium ripe bananas
- 2 cups whole milk
- 2 cups vanilla ice cream
- 1–2 tablespoons honey or sugar
- 1 teaspoon vanilla extract (optional)
Instructions
- Gather your ingredients: Start with a clean kitchen workspace. Measure out your ingredients: about 2 medium ripe bananas, 2 cups milk, 2 cups vanilla ice cream, and 1-2 tablespoons honey or sugar, depending on your taste.
- Peel the bananas: Grab those beautiful ripe bananas and peel them. Toss them into your blender. If using frozen bananas, you can throw them in directly without thawing.
- Add the ice cream: Scoop out about 2 cups of vanilla ice cream and add it to the blender.
- Pour in the milk: Gently pour in 2 cups of milk.
- Sweeten it up: Drizzle in 1-2 tablespoons of honey or sugar.
- Vanilla extract (optional): If you’re feeling adventurous, add a teaspoon of vanilla extract.
- Blend away: Secure the lid on the blender and blend everything on high speed until it’s perfectly smooth and creamy.
- Taste test: Take a quick taste to see if it needs anything.
- Serve it up: Once you’re happy with your shake, pour it into tall glasses.
- Enjoy with a smile: Grab some straws, invite your friends over, and enjoy!
Notes
For extra richness, serve with whipped cream and a sprinkle of cinnamon or chocolate shavings.
- Prep Time: 5 minutes
- Cook Time: 0 minutes
- Category: Dessert
- Method: Blending
- Cuisine: American
Nutrition
- Serving Size: 1 serving
- Calories: 380
- Sugar: 50g
- Sodium: 100mg
- Fat: 12g
- Saturated Fat: 8g
- Unsaturated Fat: 4g
- Trans Fat: 0g
- Carbohydrates: 65g
- Fiber: 2g
- Protein: 9g
- Cholesterol: 40mg
Keywords: banana milkshake, dessert, easy recipe, summer treat
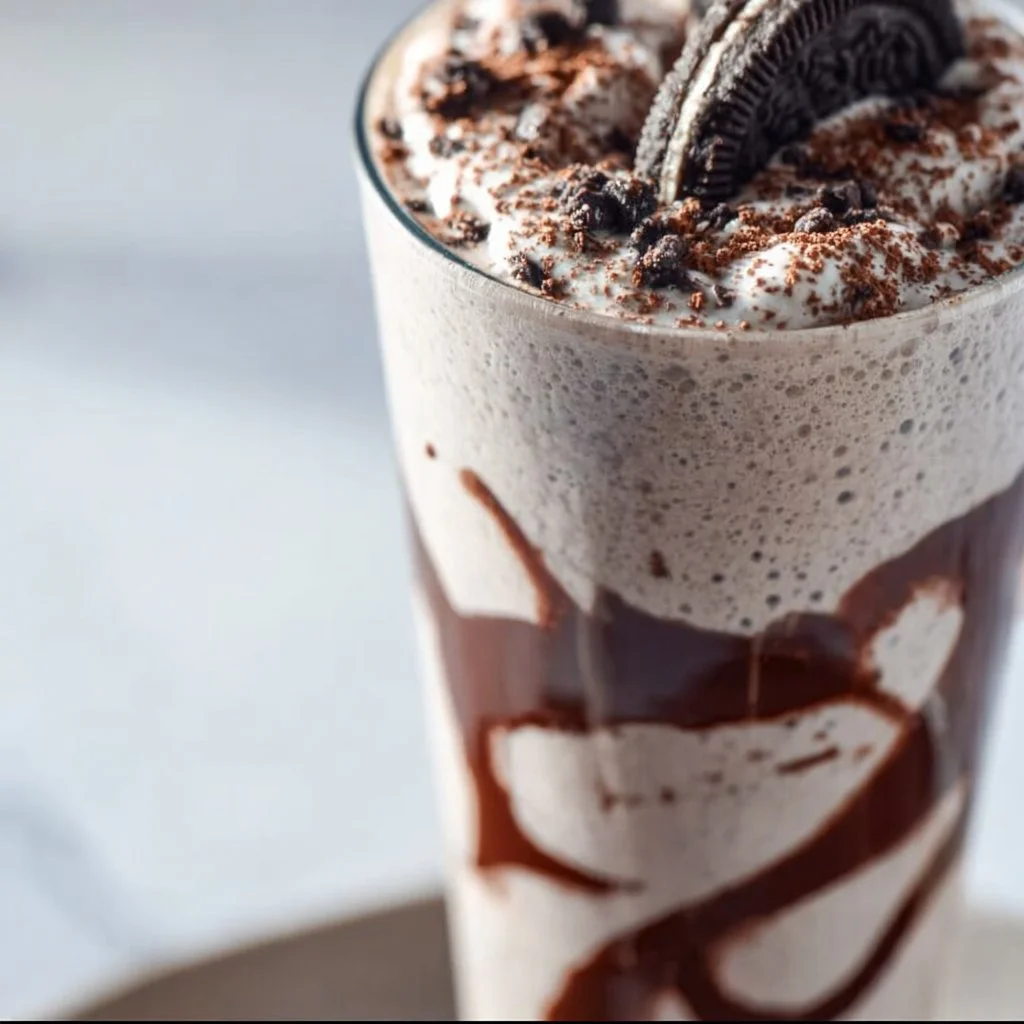
Homemade Oreo Milkshake Recipe
The Ultimate Homemade Oreo Milkshake Recipe
Hey there, fellow food lovers! Welcome back to my cozy little corner of the kitchen. Today, we’re diving into a treat that’s as comforting as a hug and as delightful as a sunny afternoon — the Homemade Oreo Milkshake! If you’ve never tried making this ice cream dream at home, let me tell you, you’re in for a real treat. The rich, creamy texture combined with those iconic chocolatey cookie crumbles is absolute bliss.
I don’t know about you, but I have a bit of a soft spot for milkshakes. They remind me of lazy summer afternoons spent hanging out with friends at the local diner, sharing stories and slurping up ice-cold goodness with those oversized straws. There’s something magical about the way a milkshake can transport you back to those carefree days.
This recipe is not just about creating a delicious milkshake; it’s about bringing back those nostalgic moments while adding your unique flair. Trust me, once you whip up this fabulous homemade Oreo milkshake, you’ll never want to buy one again!
The best part? You don’t need a fancy blender or a kitchen full of gadgets to make this magical concoction. With just a few simple ingredients, you can create a milkshake that’s perfect for any occasion, whether you’re throwing a party, celebrating a special moment, or just treating yourself after a long day. So grab your favorite glass, put on some tunes, and let’s get shaking!
Personal Story
I vividly remember the first time I made an Oreo milkshake. It was a hot summer day, and my sister and I decided we were old enough to tackle the kitchen without any adult supervision (probably not the best idea, but let’s roll with it!). Armed with a pack of Oreo cookies, vanilla ice cream, and a blender my mom swore was "the best thing since sliced bread," we were determined to make the ultimate summer treat.
We tossed the ingredients into the blender, cranked it up too high, and ended up with a chocolate explosion all over the kitchen! It was messy, chaotic, and oh so much fun. After we cleaned up (mostly), we finally poured the milkshake into tall glasses, topped it off with whipped cream and a few extra cookie crumbles for good measure.
That first sip? Pure bliss! The perfect balance of creamy ice cream, rich cookies, and just a hint of milk. Since that day, making Oreo milkshakes has been our little tradition — a way to bond, create memories, and indulge in something truly delicious. So let’s make some new memories together, shall we?
Ingredients
Here’s what you’ll need to create your own Oreo milkshake — simple ingredients that you probably already have at home!
-
Oreo Cookies (10-12 cookies)
The star of the show! These chocolatey sandwich cookies bring that signature flavor to our milkshake. If you’re feeling adventurous, you can swap out traditional Oreos for any flavored varieties — think mint, peanut butter, or even the seasonal pumpkin spice! -
Vanilla Ice Cream (2 cups)
A classic choice for any milkshake, vanilla ice cream provides the creamy base that pairs wonderfully with the cookies. You can substitute this with chocolate ice cream for an even richer treat or a dairy-free option if you prefer a non-dairy milkshake. -
Milk (1 cup)
The secret to achieving that perfect creamy consistency! I typically use whole milk, but feel free to use almond, oat, or soy milk for a lighter version. -
Whipped Cream (for topping)
Now, we don’t ‘have to’ add whipped cream, but trust me, it takes this milkshake over the top! Use store-bought or homemade whipped cream. If you’re dairy-free, coconut whipped cream is a fantastic alternative! -
Additional Oreo Crumbles (for garnish)
A little something extra to make your milkshake look as good as it tastes! You can crush a few Oreos in a zip-top bag or use a food processor to make those delectable shards of chocolate goodness.
Step-by-Step Instructions
Step 1: Gather Your Ingredients
Before you jump into blending, it helps to have all your ingredients within reach. Set everything out on the counter — trust me, it’ll make the process smoother (and less messy!).
Step 2: Crush Your Oreos
Grab a couple of Oreo cookies and throw them into a zip-top bag. Seal it up, and crush them with a rolling pin or even your hands. You want some chunky bits for texture, so don’t overdo it! Keep those cookie crumbles aside for later.
Step 3: Blend It Up
Now, grab your blender and add the vanilla ice cream, milk, and the majority (but not all) of those crushed Oreos. Blend until the mixture is smooth and creamy. Depending on your blender, this may take 30 seconds to a minute. If it’s too thick, add a splash more milk. Too runny? Toss in more ice cream! This is where you can customize the texture to your liking.
Step 4: Taste and Adjust
Once you’ve got your milkshake blended, take a quick taste. Need a little more chocolate flavor? Go ahead and add an extra cookie or two, then blend again. Don’t be shy about making it your own!
Step 5: Serve It Up
Grab your tall glasses or mason jars, and pour in that beautiful milkshake. You want to fill it about three-quarters of the way, leaving room for whipped cream and more Oreo crumbles. If you’re feeling fancy, use a piping bag to dollop the whipped cream on top.
Step 6: Garnish and Enjoy
Now it’s time for the fun part! Sprinkle those crushed Oreos over the whipped cream, and if you really want to impress, you can drizzle some chocolate syrup over the top. Serve with a straw or a spoon — or both! You’re all set to enjoy a delicious homemade Oreo milkshake!
Serving Suggestions
The beauty of milkshakes is the endless creativity! Serve these milkshakes in tall glasses garnished with whipped cream and a sprinkle of crushed Oreos for that perfect indulgent look. You can even add a cherry on top or drizzle some chocolate syrup for an extra touch of sweetness.
For a fun twist, try serving them in mini mason jars for a nostalgic feel. They make adorable individual servings for a party or a cozy afternoon treat. Add a sprinkle of cocoa powder or chocolate shavings for an elevated presentation!
Recipe Variations
If you’re feeling adventurous, here are a few fun variations to mix things up:
-
Mint Oreo Milkshake
Swap regular Oreos for mint-flavored ones for a refreshing twist. You can also add a drop of peppermint extract to enhance that minty flavor. -
Cookies and Cream Milkshake
Use chocolate ice cream instead of vanilla for an extra-rich cookies and cream experience. -
Vegan Oreo Milkshake
For a dairy-free version, use coconut milk and coconut or almond milk ice cream. Throw in some vegan whipped cream on top! -
Peanut Butter Oreo Milkshake
Add a tablespoon of peanut butter to give your milkshake a nutty flavor. It pairs perfectly with the chocolate! -
Chocolate Chip Oreo Milkshake
Toss in some mini chocolate chips for added texture and richness!
Chef’s Notes
I absolutely love creating a fantastic milkshake, and this Oreo version holds a special place in my heart. It’s evolved over the years as I’ve played around with different ice creams and flavors. One time, I accidentally grabbed spicy chai-flavored ice cream. It was an interesting experiment for sure — let’s just say some flavors are better left untouched!
I always keep a stash of Oreos in my pantry because you never know when a milkshake craving will hit! So whenever you feel a bit adventurous, feel free to add your personal touch. Remember, the kitchen is your playground!
FAQs and Troubleshooting
Q: My milkshake is too thick; how do I fix it?
Don’t panic! Just add a little bit of milk at a time and blend again until you’ve achieved your desired consistency.
Q: Can I make this dairy-free?
Absolutely! Just substitute regular ice cream and milk with non-dairy alternatives, like almond milk and coconut ice cream.
Q: What can I use if I don’t have a blender?
No blender? No problem! You can use a whisk to combine the ingredients in a large bowl. Crush the Oreos and mix everything until it’s combined. The texture will be a bit different, but still delicious!
Q: How do I store leftovers?
If you happen to have leftovers (not likely with how yummy these are!), simply cover the glasses with plastic wrap and freeze them. They’ll be a bit firmer once frozen, so allow them to sit out for a few minutes before enjoying again.
Nutritional Info
While milkshakes are a treat best enjoyed in moderation, here’s a rough breakdown of what you can expect per serving (when made with whole ingredients):
- Calories: Approximately 500-600
- Fat: 25g
- Carbohydrates: 65g
- Protein: 10g
And there you have it — the ultimate homemade Oreo milkshake you’ll want to make time and time again! So roll up those sleeves, don your favorite apron, and let’s whip up some joy in the kitchen! Cheers to tasty memories and homemade goodness!
Print
Ultimate Homemade Oreo Milkshake
- Total Time: 10 minutes
- Yield: 2 servings 1x
- Diet: Vegetarian
Description
A rich, creamy homemade Oreo milkshake with chocolatey cookie crumbles that captures the essence of nostalgic summer days.
Ingredients
- 10–12 Oreo Cookies
- 2 cups Vanilla Ice Cream
- 1 cup Milk
- Whipped Cream (for topping)
- Additional Oreo Crumbles (for garnish)
Instructions
- Gather Your Ingredients
- Crush Your Oreos
- Blend It Up
- Taste and Adjust
- Serve It Up
- Garnish and Enjoy
Notes
Feel free to customize the recipe with different ice cream flavors or mix-ins to make it your own.
- Prep Time: 10 minutes
- Cook Time: 0 minutes
- Category: Dessert
- Method: Blending
- Cuisine: American
Nutrition
- Serving Size: 1 serving
- Calories: 550
- Sugar: 40g
- Sodium: 200mg
- Fat: 28g
- Saturated Fat: 16g
- Unsaturated Fat: 10g
- Trans Fat: 0g
- Carbohydrates: 65g
- Fiber: 3g
- Protein: 10g
- Cholesterol: 70mg
Keywords: Oreo milkshake, homemade milkshake, dessert, summer treat
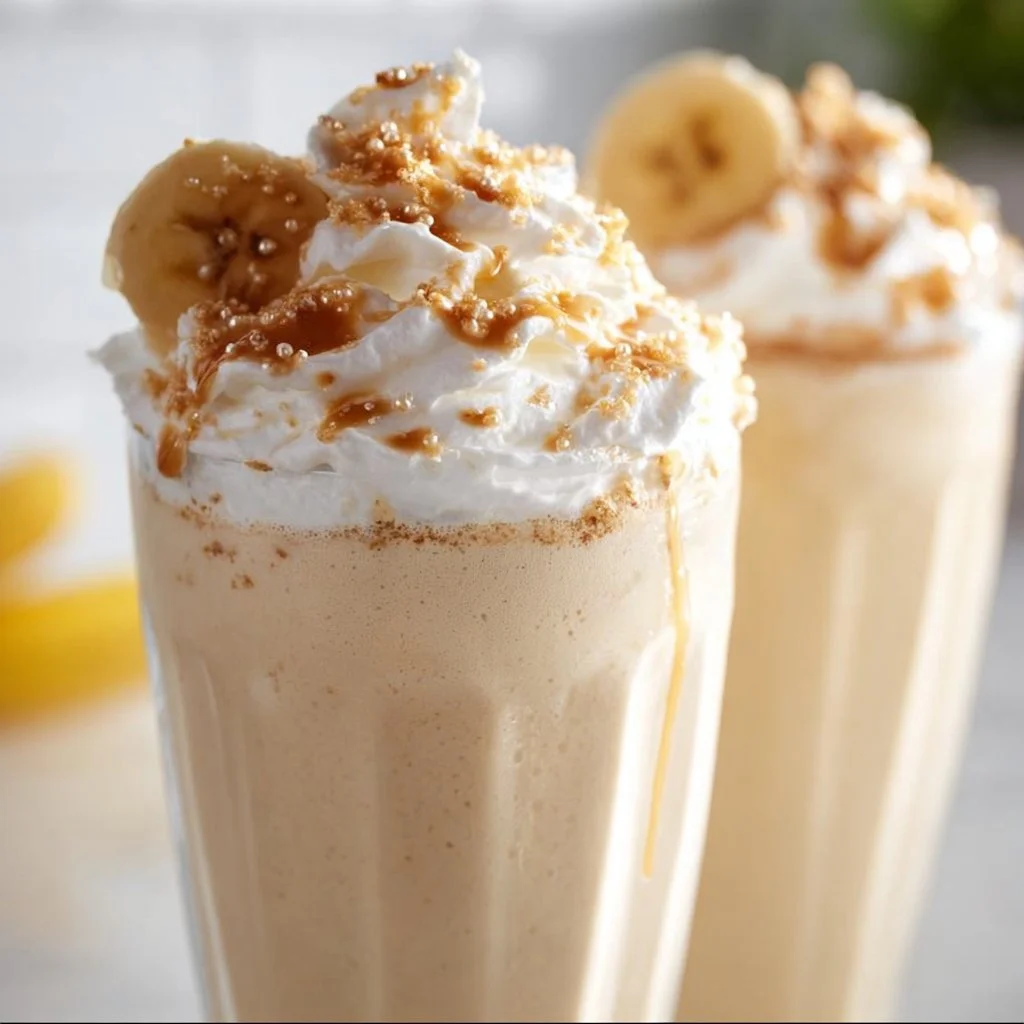
Banana Cream Pie Milkshake
Indulge in Bliss: The Ultimate Banana Cream Pie Milkshake Recipe
Welcome to my kitchen! Today, I’m thrilled to share a recipe that combines my love for desserts and my passion for all things creamy and dreamy. Get ready to blend up some nostalgia with this Banana Cream Pie Milkshake. If you’ve ever found yourself craving a slice of that classic banana cream pie but wanted it in a glass, then my friend, this is the recipe for you! Not only is it delicious, but it’s also a fun way to bring the flavors of a beloved dessert to summer—er, or any time of year, really. Just remember, life is better with a milkshake!
A Taste of Nostalgia
Let me take you back to my childhood. Picture a sunny Saturday afternoon, the smell of fresh banana bread wafting through the house, and laughter echoing from the backyard. My family had a tradition of making banana cream pie during the summer months when ripe bananas were abundant. We would gather in the kitchen, flour dusting our faces, as my mom expertly layered whipped cream over the luscious banana filling. Those moments were full of joy, teamwork, and, of course, a lot of tasting—after all, it’s not really baking if you don’t sneak a few bites along the way!
But one particularly hot day, my brother and I were craving something cold to cool us down. That’s when my creativity kicked in! I grabbed some vanilla ice cream, blended it with bananas and milk, and voilà—a milkshake that tasted just like our favorite pie. This Banana Cream Pie Milkshake became a summer staple, loved by friends and family alike. Now, I want to share this indulgent treat with you, so let’s jump into the flavorful adventure that awaits!
Ingredients
Gather your utensils because we need to round up our ingredients! Here’s what you’ll need for our Banana Cream Pie Milkshake:
-
2 ripe bananas: The star of our show! Look for bananas that are just speckled with brown spots for optimal sweetness. If you don’t have ripe bananas, you can substitute with frozen bananas for a creamier texture.
-
2 cups vanilla ice cream: Creamy and dreamy, vanilla ice cream is the perfect base! You can use a dairy-free option if you want to make it vegan or simply want a lighter version—coconut or almond milk ice creams work great too.
-
1 cup whole milk: This helps create a silky texture. If you’re looking to lighten things up, use skim or almond milk.
-
1 teaspoon vanilla extract: Adds depth and enhances the banana flavor. If you’re feeling adventurous, a splash of almond extract could add a unique twist!
-
Whipped cream (for topping): Because what’s a milkshake without some light, fluffy whipped cream? You can use store-bought or whip your own—it’s easy and satisfying.
-
Graham cracker crumbs (for garnish): These give that essential pie crust vibe. In a pinch, crushed digestive biscuits work just as well!
With these ingredients in hand, you’re halfway to milkshake heaven!
Step-by-Step Instructions
Let’s make this milkshake magic happen! Follow these simple steps, and you’ll be sipping on a delicious Banana Cream Pie Milkshake in no time.
-
Prep your bananas: Peel your ripe bananas and slice them into chunks. Keep one slice aside for garnish if you’d like a cute finishing touch. This little detail shows that you took the time to present your masterpiece!
-
Blend it up: In a blender, combine the sliced bananas, vanilla ice cream, milk, and vanilla extract. Start on a low speed to get everything mixed together without creating a banana explosion. Gradually increase to high speed until everything is smooth and creamy—about 30 to 60 seconds of blending will do it. If you find it too thick, add a little more milk; too thin? You can always toss in more ice cream!
-
Taste test time: Now’s the moment of truth. Grab a spoon and taste your creation. Does it bring back memories of sunny summers, warm pies, and family laughter? Adjust the flavors if you need to. A pinch more vanilla? A splash more milk? This is your milkshake, so make it yours!
-
Serve it up: Pour the creamy mixture into chilled glasses that are just waiting to be filled with goodness. You want that milkshake to stay cold for as long as possible—I aim for at least an hour of coolness!
-
Top it off with whipped cream: Generously dollop whipped cream on top of each milkshake. You want to see it towering above the glass—it should be a showstopper! Sprinkle graham cracker crumbs on top for that pie-like crunch.
-
Garnish and enjoy: Finally, place that slice of banana you saved earlier on the edge of the glass, and maybe also a cute straw! Grab your loved ones, take a moment to appreciate your handiwork, and get ready to indulge!
Serving Suggestions
One of the best things about this milkshake is how versatile it is! You can serve it in tall milkshake glasses for that classic diner feel or in mason jars for a rustic vibe. A side of extra graham cracker crumbs for dipping never hurts, either; trust me, it’s delicious!
Recipe Variations
Feeling inspired? Here are a few creative twists you might want to try:
-
Peanut Butter Banana Cream Pie Milkshake: Add a few tablespoons of peanut butter to the blender for a creamy, nutty flavor that pairs perfectly with bananas.
-
Chocolate Drizzle: Swirl some chocolate syrup into the milkshake mix before serving. This adds a decadent chocolatey twist reminiscent of chocolate cream pie.
-
Banana Nut Crunch: Add a handful of chopped walnuts or pecans to the milkshake for added texture and flavor.
-
Dairy-Free Delight: Use coconut or almond milk and vegan ice cream for a delicious dairy-free treat.
-
Caramel Swirl: Drizzle some caramel sauce inside your glass before pouring in the milkshake for a sweet surprise with every sip!
Chef’s Notes
As with any recipe, there are countless ways to make this Banana Cream Pie Milkshake truly your own. Over the years, I’ve made a few adjustments based on availability and seasonal ingredients. Sometimes I’ve added cinnamon for warmth, or even a touch of nutmeg to evoke that cozy, homey vibe. One time, I decided to make it in a blender with my nephew, and let’s just say it was more a banana “splatter pie” experience than a bake-off! But those moments? They’re what cooking—and life—is all about: creating memories while having a bit of fun along the way!
FAQs and Troubleshooting
-
Why is my milkshake too thin?
- No worries! Simply add a little more ice cream to thicken it up. If it’s too thick, just blend in a splash more milk to get it to your desired consistency.
-
Can I make this ahead of time?
- It’s best enjoyed fresh, but you can prepare the banana and ice cream mixture and keep it in the freezer if you’d like to prep ahead. Just blend it once again before serving.
-
What if I don’t have a blender?
- You can use an immersion blender or even mash the bananas by hand and stir in the other ingredients. Just be prepared for a little more elbow grease!
-
How can I make it healthier?
- Swap the ice cream for Greek yogurt or frozen yogurt to cut back on calories while still enjoying a deliciously creamy treat.
Nutritional Info
While this recipe is all about indulgence, it’s also good to know what you’re enjoying! Here’s an approximate nutritional breakdown for one serving:
- Calories: 450
- Fat: 20g
- Carbohydrates: 63g
- Protein: 7g
Note: Nutritional information may vary based on specific ingredients used.
So there you have it, friends! Your very own Banana Cream Pie Milkshake that’s just bursting with flavor and nostalgia. As we sip and savor, let’s remember that the kitchen is not just about food; it’s about creating joy, sharing love, and making memories. Enjoy this delightful creation, and let it inspire you to whip up more sweet moments in your cooking adventures! Happy blending! 🍌🥛✨
Print
Banana Cream Pie Milkshake
- Total Time: 10 minutes
- Yield: 2 servings 1x
- Diet: Vegetarian
Description
Indulge in this creamy and dreamy Banana Cream Pie Milkshake that captures the flavors of a classic dessert in a glass.
Ingredients
- 2 ripe bananas, sliced
- 2 cups vanilla ice cream
- 1 cup whole milk
- 1 teaspoon vanilla extract
- Whipped cream (for topping)
- Graham cracker crumbs (for garnish)
Instructions
- Prep your bananas: Peel and slice the bananas, saving one slice for garnish.
- Blend it up: In a blender, combine the bananas, vanilla ice cream, milk, and vanilla extract. Blend until smooth.
- Taste test time: Taste and adjust flavors as needed.
- Serve it up: Pour the mixture into chilled glasses.
- Top it off with whipped cream: Add a generous dollop of whipped cream and sprinkle with graham cracker crumbs.
- Garnish and enjoy: Add the reserved banana slice and serve with a straw.
Notes
Feel free to swap ingredients for variations such as peanut butter, chocolate drizzle, or nut toppings.
- Prep Time: 10 minutes
- Cook Time: 0 minutes
- Category: Dessert
- Method: Blending
- Cuisine: American
Nutrition
- Serving Size: 1 serving
- Calories: 450
- Sugar: 35g
- Sodium: 120mg
- Fat: 20g
- Saturated Fat: 12g
- Unsaturated Fat: 7g
- Trans Fat: 0g
- Carbohydrates: 63g
- Fiber: 3g
- Protein: 7g
- Cholesterol: 60mg
Keywords: banana milkshake, dessert, creamy, summer treat, nostalgic dessert




