

Cracked Garlic Steak Tortellini in Creamhouse Sauce Bliss
Cracked Garlic Steak Tortellini in Creamhouse Sauce Bliss
Hey there, fellow food lovers! Welcome back to my cozy little corner of the internet—my kitchen! If you’re looking for a dish that beautifully blends hearty comfort with gourmet flair, you’re in for a treat. Today, we’re diving into the world of Cracked Garlic Steak Tortellini in Creamhouse Sauce Bliss. Yes, you read that right—steak, tortellini, and a creamy sauce that’s turning "bliss" into an understatement!
This isn’t just any pasta dish; it’s a culinary love letter to those perfect moments spent around the dinner table. Picture this: the aroma of garlic sizzling in butter, the tender bite of steak melding with pillowy tortellini, and a velvety cream sauce drenching every delicious surface. It’s the kind of meal that speaks to the soul—warm, inviting, and beautifully simple while being downright impressive. Whether you’re trying to impress your date, wow your friends at a dinner party, or simply indulge yourself on a cozy night in, this dish will make you feel like a rockstar in the kitchen.
Now, this recipe isn’t just about putting food on the table; it’s about creating memories that linger long after the last bite. One of my favorite things about cooking is how it brings us all together, sparking conversations and laughter. Plus, I promise it’s easy enough to whip up on a busy weeknight—no three-hour cooking sessions required! So, grab your apron, let’s get crackin’ on this glorious dish that’ll make you want to do a little happy dance!
Personal Story
Before I dive into the nitty-gritty of the recipe, I want to share a little story that sits close to my heart: the first time I made tortellini from scratch. It was a rainy Saturday afternoon, and I was feeling adventurous, armed with a family recipe that had been passed down through generations. My kitchen was a whirlwind—flour flying everywhere, my apron soaked with both water and laughter.
I remember the feel of the dough in my hands, the joy of rolling it out, and the sheer delight of filling each little piece with cheesy goodness. I had my best friend over for the day, and we ended up making a huge mess but creating a magical bond over pasta! When we finally cooked those tortellini and tossed them in a rich sauce, the flavors were incredible. It was then that I realized how powerful cooking could be—not just about feeding the body but also about nourishing the spirit and fostering relationships.
So today, we’re building on that nostalgic experience, combining that same delightful tortellini with savory cracked garlic steak, which adds a whole new layer of depth to our dish. Are you ready? Let’s make some magic in the kitchen!
Ingredients
To whip up this delicious dish, you’ll need the following ingredients. Don’t worry if you’re missing a few items; I’ve added some substitution tips along the way!
For the Tortellini:
- Cheese Tortellini (fresh or frozen): The star of the show! You can use store-bought for convenience, or if you’re up for a culinary adventure, make your own. If cheese isn’t your vibe, try spinach or mushroom-filled tortellini.
For the Steak:
- Sirloin Steak (about 1 pound): I love using sirloin because it’s flavorful yet tender. For a leaner option, opt for flank steak. Not a beef lover? Chicken or sliced portobello mushrooms work well, too!
For the Creamhouse Sauce:
-
Unsalted Butter (4 tablespoons): Adds richness and helps create a luscious sauce. If you want a dairy-free option, use vegan butter or olive oil.
-
Crushed Garlic (4-6 cloves): Garlic is what takes this dish to the next level! Freshly crushed garlic adds the most flavor, but you can substitute with minced garlic if needed.
-
Heavy Cream (1 cup): This creates that delightful creaminess. Half-and-half can be a good light alternative, or almond milk for a lighter, dairy-free option.
-
Parmesan Cheese (1 cup, grated): Because what’s a creamy sauce without a little cheesy goodness? For a vegan substitute, try nutritional yeast.
-
Fresh Basil (1/4 cup, chopped): A touch of freshness to balance the richness. You can easily swap in parsley or even a bit of arugula if you prefer.
-
Salt and Pepper to taste: Essential for bringing out all the flavors!
Optional Garnish:
- Extra Parmesan and fresh basil leaves for sprinkling on top before serving. They bring a beautiful presentation and additional flavor!
Step-by-Step Instructions
Okay, let’s roll up those sleeves and get to cooking! Follow these step-by-step instructions, and don’t forget to have fun along the way. Cooking is all about creativity and connection!
Step 1: Cook the Tortellini
-
Boil Water: Bring a large pot of salted water to a boil. The salt enhances the tortellini’s flavor beautifully!
-
Add the Tortellini: Once boiling, add in your tortellini. Fresh tortellini will cook in about 3-5 minutes; frozen may take a minute or two longer. Stir occasionally so they don’t stick together. Check the package for the exact cooking time.
-
Drain and Set Aside: Once the tortellini are al dente, drain them well and toss with a splash of olive oil to prevent sticking. Set them aside while we work on the steak and sauce.
Step 2: Prepare the Steak
-
Season Your Steak: Pat your sirloin dry with paper towels (this ensures a great sear), then generously season both sides with salt and pepper. This is where we really build flavor!
-
Cook the Steak: In a large skillet over medium-high heat, melt 2 tablespoons of butter. Once it’s nice and bubbly, add the steak. Let it sear without moving it for about 4-5 minutes, depending on its thickness. This helps form a crust.
-
Flip and Finish: Using tongs, flip the steak and cook for another 3-4 minutes for medium-rare. Adjust the cooking time depending on your desired doneness. Once done, remove the steak from the skillet and let it rest for about 5 minutes before slicing it into bite-sized pieces.
Step 3: Make the Creamhouse Sauce
-
Sauté Garlic: In the same skillet, add the remaining 2 tablespoons of butter. Toss in the crushed garlic and sauté for about 30 seconds until fragrant. Keep an eye on it—garlic goes from perfectly golden to burnt really quickly!
-
Add Cream: Lower the heat and pour in your heavy cream, stirring gently to combine with the garlic and butter. Let it simmer for about 2-3 minutes.
-
Stir in Parmesan: Gradually add in the grated Parmesan cheese, stirring until it melts and creates a smooth sauce. It should be thick and creamy! If it feels too thick, add a splash of pasta water to adjust the consistency.
-
Season: Add chopped basil, and season with salt and pepper to taste. Such a simple step but makes a world of difference!
Step 4: Combine Everything
-
Mix it All Together: Toss the cooked tortellini in the creamhouse sauce, and gently stir to coat every piece. Add in the sliced steak, and let everything mingle over low heat for another minute or two.
-
Taste and Adjust: Give it a final taste. Need a little more salt? A squeeze of lemon juice can brighten things up too!
Serving Suggestions
Now for the fun part—plating! Serve the Cracked Garlic Steak Tortellini in deep bowls for a hearty presentation. Top it with extra grated Parmesan and a sprinkle of fresh basil leaves for that gourmet touch. You can even drizzle a bit of olive oil on top for added richness. This dish pairs beautifully with a side of garlic bread or a simple mixed greens salad dressed with balsamic vinaigrette.
Recipe Variations
Feeling adventurous? Here are some fun twists you can try with this dish:
-
Vegetarian Version: Swap the steak for a hearty mix of sautéed mushrooms and bell peppers. You’ll keep all that flavor while adding some delightful veggies!
-
Spicy Kick: Spice things up by adding a pinch of red pepper flakes to the cream sauce. Just a little heat can elevate the whole dish!
-
Seafood Inspired: Replace the steak with shrimp or scallops for a seafood twist. They cook fast and pair beautifully with cream sauce.
-
Add Veggies: Toss in some spinach or cherry tomatoes during the last few minutes of cooking for added color and nutrition.
-
Herb Variations: Swap out the basil for thyme or rosemary for a different flavor profile, providing a unique twist on the traditional dish.
Chef’s Notes
You know, the beauty of this recipe is that it’s evolved over time. When I first started cooking, I was intimidated by making sauces from scratch—but now I find it so rewarding! This dish was born out of me standing in front of the fridge, wondering how I could make a quick dinner with what I had on hand. It’s a wonderful reminder that cooking is about improvisation and creativity—bringing together flavors and techniques to create something special.
And let me tell you, every time I make this dish, I remember that rainy Saturday with my best friend—it reminds me of the joyous times spent cooking and creating. So, I invite you to make this dish, yes, for its incredible flavors but also to spark your kitchen adventures and treasured memories.
FAQs and Troubleshooting
Why is my sauce too thin?
If your sauce is too thin, try letting it simmer for a bit longer to thicken. Alternatively, you can mix a tablespoon of cornstarch with a bit of cold water to create a slurry, then add that to the sauce to help it thicken.
Can I make this ahead of time?
While this dish is best enjoyed fresh, you can prepare the tortellini and cream sauce ahead of time and store them separately in the fridge. Just reheat the sauce gently before adding the tortellini and steak.
What can I use instead of tortellini?
If you can’t find tortellini, feel free to substitute with other pasta shapes like rotini or farfalle. Just cook according to package instructions, as the cooking times will vary.
How do I know when my steak is done?
A meat thermometer is your best friend! Aim for 130°F for medium-rare. If you prefer a doneness level like medium or well-done, adjust the cooking time accordingly.
Nutritional Info (Optional)
For those keeping track, here’s a rough estimate per serving (assuming four servings):
- Calories: 550
- Protein: 35g
- Fat: 30g
- Carbohydrates: 45g
- Fiber: 2g
And there you have it! Your ultimate guide to making Cracked Garlic Steak Tortellini in Creamhouse Sauce Bliss. I hope this dish brings joy to your kitchen just as it does to mine. Remember, cooking is all about love, laughter, and a touch of creativity. So get cooking, and most importantly—enjoy every moment and every bite!
Print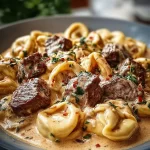
Cracked Garlic Steak Tortellini in Creamhouse Sauce Bliss
- Total Time: 35 minutes
- Yield: 4 servings 1x
- Diet: Carnivore
Description
A delightful blend of tender steak and cheese tortellini in a rich, creamy garlic sauce. Perfect for impressing guests or enjoying a cozy night in.
Ingredients
- 1 pound Sirloin Steak
- 9 ounces Cheese Tortellini (fresh or frozen)
- 4 tablespoons Unsalted Butter
- 4–6 cloves Crushed Garlic
- 1 cup Heavy Cream
- 1 cup grated Parmesan Cheese
- 1/4 cup Fresh Basil, chopped
- Salt and Pepper to taste
- Extra Parmesan and fresh basil leaves for garnish
Instructions
- Boil Water: Bring a large pot of salted water to a boil.
- Add the Tortellini: Once boiling, add in your tortellini. Cook according to package instructions.
- Drain and Set Aside: Drain the tortellini, toss with olive oil, and set aside.
- Season Your Steak: Pat steak dry and season both sides with salt and pepper.
- Cook the Steak: In a skillet over medium-high heat, melt 2 tablespoons of butter and sear the steak for 4-5 minutes.
- Flip and Finish: Flip the steak and cook for another 3-4 minutes. Let rest before slicing.
- Sauté Garlic: In the same skillet, melt the remaining butter and sauté garlic for 30 seconds.
- Add Cream: Pour in the heavy cream, reduce heat, and simmer for 2-3 minutes.
- Stir in Parmesan: Gradually add Parmesan cheese and stir until melted and smooth.
- Season: Add chopped basil, and season with salt and pepper to taste.
- Mix it All Together: Toss the tortellini in the sauce, add sliced steak, and gently combine.
Notes
Feel free to substitute ingredients based on dietary preferences, such as chicken for steak or vegan alternatives for cream and cheese.
- Prep Time: 15 minutes
- Cook Time: 20 minutes
- Category: Main Course
- Method: Stovetop
- Cuisine: Italian
Nutrition
- Serving Size: 1 serving
- Calories: 550
- Sugar: 3g
- Sodium: 750mg
- Fat: 30g
- Saturated Fat: 15g
- Unsaturated Fat: 10g
- Trans Fat: 0g
- Carbohydrates: 45g
- Fiber: 2g
- Protein: 35g
- Cholesterol: 90mg
Keywords: steak, tortellini, creamy pasta, comfort food, Italian recipe
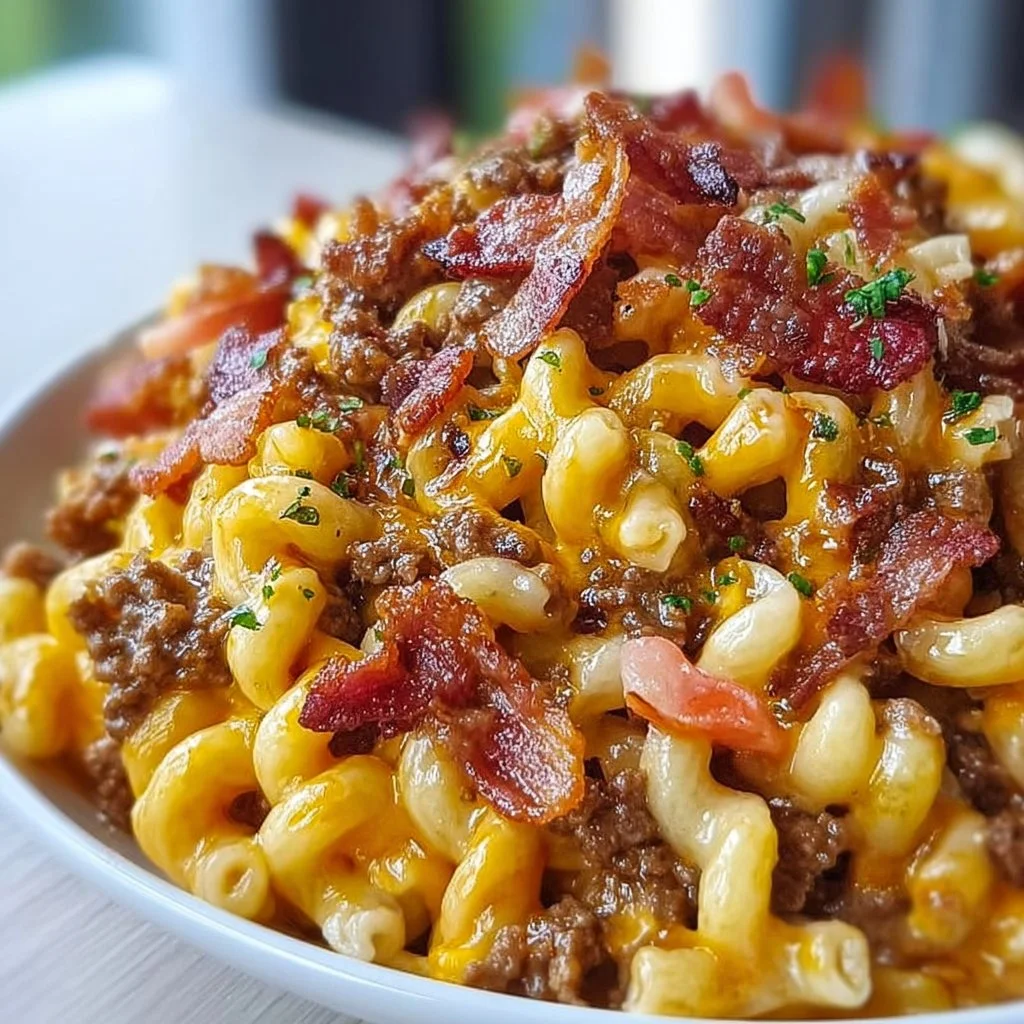
Loaded Bacon Cheeseburger Pasta You’ll Crave Again and Again
Loaded Bacon Cheeseburger Pasta You’ll Crave Again and Again
Hey there, fellow food lovers! Welcome back to my cozy corner of the culinary world, where I get to share not just recipes, but heartfelt memories and the joy that comes from cooking. Today, I’m super excited to unveil a dish that’s a true crowd-pleaser: Loaded Bacon Cheeseburger Pasta! If you’re someone who thrives on the comforting goodness of burgers but craves the convenience of a one-pot meal, this is right up your alley.
Picture this: succulent, savory ground beef, crispy bacon, and gooey cheese all mingling together with al dente pasta in a creamy sauce that brings everything together in glorious harmony. It’s the ultimate comfort food, and I can’t wait for you to try it!
This loaded bacon cheeseburger pasta is perfect for busy weeknights when you want something hearty without spending all your time in the kitchen. My goal is to keep cooking accessible and enjoyable, and this dish checks all the boxes. In this post, I’ll share personal stories, the easiest step-by-step instructions, and even some creative variations to shake things up. So, let’s dive into this mouthwatering recipe and ignite your cooking passion!
Personal Story
Oh, where to start with a dish like this? The inspiration behind my Loaded Bacon Cheeseburger Pasta comes from my childhood, where I was lucky enough to be surrounded by wonderful home cooks in my family. Growing up, Sundays were sacred in our home. After church, my family would gather around the dinner table, and it was one of those times when the dinner conversation flowed as freely as the food.
One particular Sunday, my dad decided to unleash his creativity and combined two of our favorites: cheeseburgers and pasta. He tossed everything together haphazardly, and although it might have looked a little chaotic, that aroma wafting from the kitchen told us we were in for a treat! That meal was such a hit, and even as we grew older, it became a staple in our home.
Now, every time I whip up a batch of Loaded Bacon Cheeseburger Pasta, I’m instantly transported back to that bustling Sunday dinner with laughter ringing through the house like a warm embrace. It’s not just a meal; it’s a memory—a delicious one at that!
Ingredients
Here’s what you’ll need to create this loaded delight, along with a few handy tips for each ingredient to make your cooking experience smooth sailing!
Ingredients List
-
1 lb ground beef
- The star of the show! Choose lean beef (80/20) for a balance of flavor and low grease. For a lighter option, you can swap it with ground turkey or chicken.
-
8 oz elbow macaroni (or your pasta of choice)
- I love traditional elbow macaroni, but any pasta shape you love will work! Shells, penne—get creative! Opt for gluten-free pasta to cater to dietary preferences.
-
4 strips of bacon, chopped
- The crispy, savory magic ingredient! Feel free to use turkey bacon for a healthier version, or even vegan bacon for a plant-based twist.
-
1 medium onion, diced
- Adds sweetness and depth. Substitute with shallots for a milder flavor or garlic for an extra punch.
-
4 cloves garlic, minced
- This one packs a punch! If you’re pressed for time, pre-minced garlic works just as well.
-
2 cups beef broth
- This liquid gold enhances the dish’s flavor. For less sodium, opt for low-sodium broth or homemade broth if you have it on hand.
-
1 cup heavy cream
- Makes the sauce creamy and luscious. For a lighter alternative, use half-and-half or evaporated milk.
-
1 ½ cups shredded cheddar cheese
- The gooey, melty goodness! Try mixing it up with Monterey Jack or pepper jack for a spicy kick.
-
2 tablespoons Worcestershire sauce
- Adds that umami flavor we all love. If you’re keeping it gluten-free, ensure your Worcestershire is certified gluten-free.
-
Salt and pepper to taste
- Essential for seasoning! Always taste as you go!
-
Chopped fresh parsley for garnish (optional)
- Adds a splash of color! Feel free to use other herbs like chives for variation.
Step-by-Step Instructions
Ready to whip up this culinary delight? Here’s how to bring it all together:
Step 1: Cook the Pasta
Start by bringing a large pot of salted water to a rolling boil. Add the elbow macaroni and cook according to package instructions until al dente. It usually takes about 8–10 minutes. Don’t forget to stir occasionally! Once done, drain the pasta and set it aside while you prepare the rest of the dish.
Step 2: Sauté the Bacon
While the pasta is cooking, grab a large skillet over medium heat. Add in the chopped bacon and cook until it crisps up nicely, about 5-7 minutes. Don’t rush this step; you want that beautiful, crispy texture. Once cooked, use a slotted spoon to transfer the bacon to a paper towel-lined plate to drain and reserve the bacon grease in the pan.
Step 3: Cook the Ground Beef
In the same skillet (don’t wash it — we want that flavor!), add the diced onion. Sauté until translucent, about 3-4 minutes. Then, add the minced garlic and cook for another 30 seconds until fragrant. Now, it’s time to incorporate the ground beef. Cook until browned, breaking it apart with a spatula and seasoning with a pinch of salt and pepper. This is where that special cheeseburger flavor begins to develop!
Step 4: Add the Creamy Components
Once the beef is cooked, stir in the Worcestershire sauce, and then pour in the beef broth — this will create a delicious base for your sauce. Let it simmer for a few minutes, allowing the flavors to meld beautifully, about 5-6 minutes.
Next, reduce the heat to low and slowly whisk in the heavy cream. As the mixture warms up, it will start becoming creamy and irresistible.
Step 5: Cheesy Goodness
It’s time to make it cheesy! Gradually add in the shredded cheddar cheese, stirring constantly until it melts into that glorious, creamy sauce. This is my favorite part — just watching it transform into something so rich and inviting. If you find your sauce too thick, feel free to add a splash more beef broth or cream.
Step 6: Combine Pasta with Sauce
Now, toss your drained pasta directly into the skillet with that cheesy sauce. Mix everything gently to ensure that every single piece of pasta is coated in that deliciousness! Finally, fold in the crispy bacon, reserving a little for topping.
Step 7: Taste and Adjust
At this point, give it a quick taste and adjust the seasoning with more salt, pepper, or even a dash of hot sauce if you’re feeling adventurous. After all, cooking is all about making it your own!
Serving Suggestions
When it comes time to serve up this incredible dish, you have a couple of fun options! You can dish it out family-style in a large bowl or plate it up in individual bowls — sprinkle that reserved bacon on top, and add a bit of fresh parsley for color. For an extra touch, serve it with some crusty garlic bread or a simple side salad to balance those rich flavors. Trust me, this meal is just begging to be shared!
Recipe Variations
Let’s shake things up! Here are a few creative twists you can try with this recipe:
-
Spicy Kick: Add chopped jalapeños or a teaspoon of red pepper flakes when sautéing the onions for a spicy twist!
-
Vegetarian Delight: Substitute the ground beef and bacon with a mix of sautéed mushrooms and lentils or chickpeas for a hearty, meatless option.
-
Loaded Veggies: Toss in some diced bell peppers, zucchini, or spinach for extra nutrition and flavor.
-
Mac and Cheese Style: For a fun variation, skip the beef and just make it a bacon cheeseburger mac and cheese that’s ooey-gooey.
-
BBQ Twist: Mix in some barbecue sauce along with the Worcestershire sauce for a smoky flavor that screams summer!
Chef’s Notes
This dish is incredibly adaptable! I’ve been making variations of this loaded bacon cheeseburger pasta for years now, and I still discover new twists that excite my taste buds. It all started as a simple family dinner, but it has continued to evolve in amazing ways. One time, I accidentally added too much cream, and what could’ve been a disaster turned into a creamy dream that my family still requests!
Cooking is all about experimenting, laughing off those little accidents, and finding joy in the process. So remember, the next time you find yourself in a kitchen mishap, just keep stirring and stay positive — delicious things are right around the corner!
FAQs and Troubleshooting
Here are some common questions and potential pitfalls you might encounter while making this delightful dish:
-
My sauce is too thick. What do I do?
If your sauce thickens more than you’d like, simply add a splash of beef broth or cream to reach your desired consistency. Stir until it loosens up. -
What if I don’t have Worcestershire sauce?
A dash of soy sauce mixed with a bit of vinegar can serve as a substitute. It will give you that umami kick! -
Can I make this ahead of time?
You absolutely can! Make the dish up to the point of combining the pasta and sauce, then refrigerate it. When you’re ready to serve, just reheat it gently on the stove, adding a bit of cream or broth if it seems dry. -
How can I store leftovers?
Store any leftovers in an airtight container in the fridge for up to 3-4 days. Reheat gently on the stovetop or microwave, adding a splash of milk or cream for creaminess.
Nutritional Info
While I don’t have specific nutritional information for this dish, here’s what to keep in mind:
- It’s a hearty meal that provides protein from the beef and cheese.
- Crafting it with whole-grain pasta and plenty of veggies can enhance its nutritional profile.
- Remember, it’s all about balance, and this dish certainly makes for a satisfying meal!
Happy cooking, my foodie friends! I hope your kitchen is filled with delightful aromas and laughter as you make this Loaded Bacon Cheeseburger Pasta. Don’t forget to share your own kitchen adventures with me—I can’t wait to hear about your experiences with this recipe! Enjoy every bite! 🍽️❤️
Print
Loaded Bacon Cheeseburger Pasta
- Total Time: 45 minutes
- Yield: 4 servings 1x
- Diet: None
Description
A comforting one-pot meal combining ground beef, crispy bacon, and gooey cheese with pasta in a creamy sauce.
Ingredients
- 1 lb ground beef
- 8 oz elbow macaroni (or your pasta of choice)
- 4 strips of bacon, chopped
- 1 medium onion, diced
- 4 cloves garlic, minced
- 2 cups beef broth
- 1 cup heavy cream
- 1 ½ cups shredded cheddar cheese
- 2 tablespoons Worcestershire sauce
- Salt and pepper to taste
- Chopped fresh parsley for garnish (optional)
Instructions
- Cook the Pasta: Bring a large pot of salted water to a boil, add the macaroni and cook until al dente (8–10 minutes). Drain and set aside.
- Sauté the Bacon: In a skillet, cook chopped bacon over medium heat until crispy (about 5-7 minutes). Transfer to paper towel-lined plate.
- Cook the Ground Beef: In the same skillet, sauté diced onion until translucent (3-4 minutes), then add minced garlic (30 seconds). Add ground beef, cook until browned.
- Add the Creamy Components: Stir in Worcestershire sauce, then beef broth. Simmer for 5-6 minutes. Reduce heat and whisk in heavy cream.
- Cheesy Goodness: Gradually add shredded cheddar, stirring until melted. Adjust sauce consistency with beef broth or cream if needed.
- Combine Pasta with Sauce: Toss drained pasta into skillet, mixing well. Fold in crispy bacon, reserving some for topping.
- Taste and Adjust: Season with more salt, pepper, or hot sauce as desired.
Notes
This dish is adaptable; try different proteins or add veggies for variation. Perfect for leftovers!
- Prep Time: 15 minutes
- Cook Time: 30 minutes
- Category: Main Course
- Method: Stovetop
- Cuisine: American
Nutrition
- Serving Size: 1 serving
- Calories: 550
- Sugar: 4g
- Sodium: 800mg
- Fat: 28g
- Saturated Fat: 12g
- Unsaturated Fat: 7g
- Trans Fat: 0g
- Carbohydrates: 45g
- Fiber: 3g
- Protein: 30g
- Cholesterol: 80mg
Keywords: bacon, pasta, cheeseburger, creamy, one-pot meal
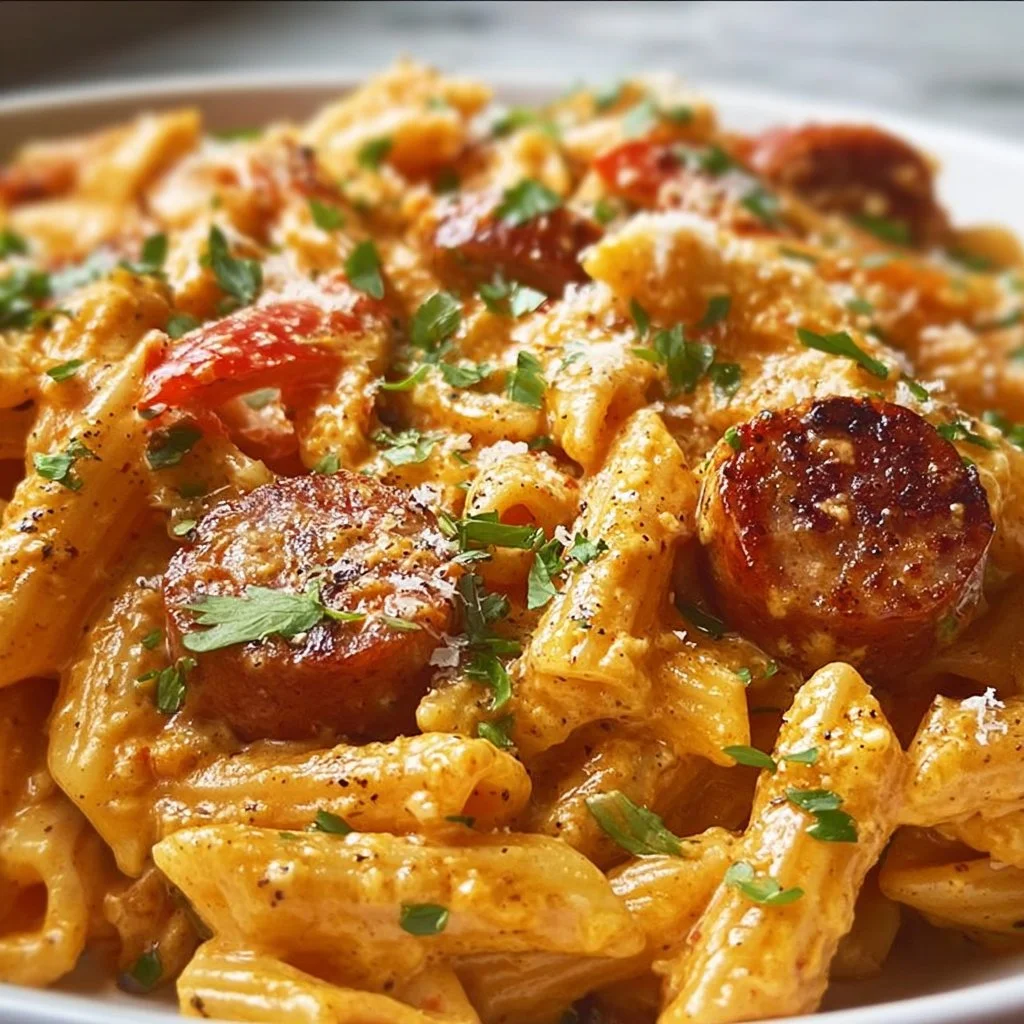
One-Pot Creamy Spicy Cajun Sausage Pasta
One-Pot Creamy Spicy Cajun Sausage Pasta
Hey there, fellow food lovers! Welcome back to my cozy corner of the internet! Today, we’re diving into the delightful world of pasta, where richness meets spice, and comfort collides with excitement. I’m thrilled to share with you my twist on a classic favorite: One-Pot Creamy Spicy Cajun Sausage Pasta!
This dish is an absolute lifesaver for busy weeknights or even a relaxed Sunday dinner when you want something a bit fancy without all the fuss. Not only does it take just around 30 minutes to whip up, but it also requires minimal cleanup because, let’s be honest, ain’t nobody got time for heaps of dishes. You’ll end up with a satisfying bowl of creamy goodness that packs a punch of flavor with a kick of Cajun spice. Oh, yes!
Now, let’s talk about the magic of this dish. Imagine you’re at home, the aroma of spices filling the air while savory sausage sizzles in the pan—just thinking about it makes me smile! This one-pot wonder combines tender pasta with a velvety, spicy sauce that’s just the right amount of creamy. Every bite is packed with flavor, warmth, and a little bit of adventure.
In my kitchen, we believe that every meal should not only feed the body but also the spirit. So gather your ingredients, roll up those sleeves, and join me! We’re not just cooking—we’re creating memories, engaging our senses, and making a meal that will have everyone at the table coming back for seconds. Get ready for some serious yum!
Personal Story
This recipe holds a special place in my heart. I remember the very first time I made it, long ago when I was a still novice in the kitchen. It was a chilly evening, and I wanted to make something cozy for my college roommates who were feeling the stress of exam week.
I had some spicy sausage lying around—thanks to a recent grocery haul—and I suddenly felt inspired! After rummaging through my pantry, I decided to throw together a pasta dish. Without a clue about what I was doing, I started layering flavors: browning the sausage, tossing in some spices, and adding cream. It began to take on a life of its own!
When I finally served it, the look on my roommates’ faces was priceless. We all dug in, and what was meant to be a simple meal turned into a laughter-filled night. The creamy, spicy blend had them all loving life and forgetting about finals, at least for a bit. Since then, this dish has become a staple in my kitchen—a reminder of how food can bring us together, create joy, and transform a regular evening into something memorable.
Ingredients
Here’s what you’ll need to create this delicious One-Pot Creamy Spicy Cajun Sausage Pasta. Each ingredient contributes to the flavorful festivity, and I’ll share some tips along the way!
-
Pasta (Fusilli or Penne):
- I love using fusilli for its ability to catch the sauce in those lovely spirals, but penne works beautifully too! You can also use whole wheat or gluten-free pasta if you’re looking for a healthier option.
-
Smoked Sausage:
- Andouille sausage is traditional and lends a fantastic smoky flavor, but feel free to swap it with your favorite type, like Italian sausage or even plant-based sausage for a vegetarian twist.
-
Olive Oil:
- This bright oil elevates the dish’s flavor. If you’re in a pinch, avocado oil or canola oil will do—just steer clear of extra virgin unless you want that bold taste.
-
Onion:
- A yellow or white onion adds sweetness and depth. Shallots can also be used for a milder flavor.
-
Bell Pepper:
- I usually reach for a red or green bell pepper for color and crunch. You can substitute it with a jalapeño for an extra kick!
-
Garlic:
- Always fresh! When cooking, garlic transforms into a sweet, aromatic wonder. If you’re all out, garlic powder can work in a pinch—just use less than fresh.
-
Cajun Seasoning:
- This spice blend is the star of the show! You can find pre-mixed Cajun seasoning at stores, or make your own with paprika, cayenne pepper, garlic powder, onion powder, thyme, and oregano.
-
Heavy Cream:
- This is what makes our dish so creamy and dreamy! Alternatively, half-and-half or even coconut cream creates a wonderful texture without the heaviness.
-
Parmesan Cheese:
- Freshly grated is best for maximum flavor. Nutritional yeast is a great dairy-free substitute that brings a cheesy essence without the lactose!
-
Green Onions:
- These are for garnish and some brightness. You can replace them with fresh parsley or even cilantro for a different flavor profile.
-
Salt and Pepper:
- Essential for elevating flavors. Always taste as you go to balance them out just right!
Step-by-Step Instructions
Alright, culinary adventurers, let’s roll up those sleeves and get cooking!
Step 1: Sauté the Sausage
Begin by heating up about 1 tablespoon of olive oil in a large pot or Dutch oven over medium heat. Once hot, add your sliced sausage. Let it sizzle! Cook for about 5-7 minutes until it gets all golden and crispy. This browning doesn’t just make the sausage beautiful; it infuses the oil with a delicious flavor bomb! Tip: Avoid overcrowding the pan; sauté in batches if necessary.
Step 2: Build the Flavor Base
Next, toss in the chopped onion and bell pepper. Cooking these veggies will enhance their natural sweetness and create a beautiful contrast to our spicy sausage. Stir them around for about 3-4 minutes until they soften. You’ll start to notice that marvelous aroma filling your kitchen!
Once they’re softened, add minced garlic and your Cajun seasoning. Let the mixture cook for a minute more. The key here is to toast the spices, which will amplify their flavors—don’t let them burn, though!
Step 3: Cook the Pasta
Now it’s time for the main star—pasta! Pour in the uncooked fusilli (or penne) and stir everything together. Immediately add about 3 cups of chicken or vegetable broth (depending on your dietary choice) to the pot. Bring it to a boil! Once boiling, reduce the heat, cover the pot, and let it simmer for about 10-12 minutes, or until the pasta is al dente and has absorbed most of the liquid. Chef Hack: Stir occasionally to prevent sticking!
Step 4: Creamy Goodness
With the pasta cooked to perfection, it’s time to add the heavy cream and half of the grated Parmesan cheese. Stir until everything is beautifully combined and creamy. Give it a taste and season with salt and pepper. If you want it spicier, feel free to sprinkle in a bit more Cajun seasoning or red pepper flakes—bring on the heat!
Step 5: Final Touches
Remove the pot from the heat, and sprinkle the remaining Parmesan on top. Toss in the chopped green onions and mix them in for a fresh pop of flavor. Let it sit for a couple of minutes to thicken up a bit. As a finishing touch, some extra cheese never hurt anyone, so don’t be shy!
Serving Suggestions
Warm weather calls for cozy gatherings! Serve your One-Pot Creamy Spicy Cajun Sausage Pasta directly from the pot into generous bowls. You can add a sprinkle of fresh parsley or more green onions on top for that beautiful presentation. This dish pairs well with crusty bread for mopping up any leftover sauce or with a side salad dressed in zesty vinaigrette for a refreshing contrast.
Recipe Variations
Feeling adventurous? Here are a few creative twists you can try:
-
Seafood Version: Replace sausage with shrimp or a mix of seafood for a delectable seafood Cajun pasta.
-
Vegetarian Delight: Go meatless with sautéed mushrooms, zucchini, or eggplant for a hearty veggie pasta.
-
Extra Veggies: Add spinach or kale for a boost of nutrients and a lovely pop of color.
-
Herby Twist: Swap Cajun seasoning for Italian herb blends for a different flavor profile that’s equally satisfying.
-
Lighter Option: Use half-and-half instead of heavy cream for a lighter sauce without losing the creaminess.
Chef’s Notes
One of the things I love about this recipe is its sheer versatility. Over the years, I’ve played around with ingredients, tweaking things based on what I had in the fridge. It started with just sausage and pasta, but then I got adventurous—adding a splash of wine here, a different veggie there, or experimenting with new spices. What remains consistent is that every time I make this dish, it feels like home.
Oh, and here’s a fun story: One time I decided to bring this dish to a potluck and overestimated how much I needed. Let’s just say my neighbors were extremely well-fed for a week!
FAQs and Troubleshooting
-
What if I don’t have Cajun seasoning?
- You can easily whip up a DIY blend using paprika, cayenne, dried thyme, oregano, and garlic powders—or just use your favorite seasoning blend!
-
My pasta is undercooked! What do I do?
- No worries! Just add a splash more broth or water and return it to heat, cooking for a few extra minutes until tender.
-
Can I make this dish in advance?
- Absolutely! You can prepare it ahead of time and reheat it gently on the stove. It can be slightly drier after refrigeration, so consider adding a splash of cream or broth when reheating.
-
Is it possible to freeze leftovers?
- Yes, you can! Store it in an airtight container in the freezer for up to 2 months. When you’re ready to enjoy, thaw it in the fridge overnight and reheat on the stovetop, adding a little additional cream or broth to revive the sauce.
Nutritional Info
This recipe serves approximately four and contains:
- Calories: 450-500 (per serving, depending on ingredient swaps)
- Protein: 25g
- Carbohydrates: 45g
- Fats: 20g
This nutritional count will vary based on your specific choices of sauces, cheeses, and sausage types used.
And there you have it, folks! A wonderfully creamy, spicy, and utterly comforting one-pot pasta dish that will bring warmth and joy to your dining table. I hope you enjoy cooking this as much as I did! Happy cooking, and don’t forget to share your creations and memories as you gather around the table. Until next time, keep those aprons messy and your hearts full!
Print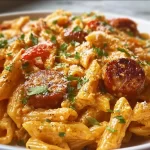
One-Pot Creamy Spicy Cajun Sausage Pasta
- Total Time: 30 minutes
- Yield: 4 servings 1x
- Diet: Meat
Description
A creamy and spicy pasta dish that combines the flavors of Cajun sausage with tender pasta in a one-pot preparation for minimal cleanup.
Ingredients
- 8 oz Fusilli or Penne pasta
- 12 oz smoked sausage (Andouille or Italian)
- 1 tbsp olive oil
- 1 onion, chopped
- 1 bell pepper, chopped
- 3 cloves garlic, minced
- 2 tbsp Cajun seasoning
- 3 cups chicken or vegetable broth
- 1 cup heavy cream
- 1/2 cup Parmesan cheese, grated
- 2 green onions, chopped (for garnish)
- Salt and pepper to taste
Instructions
- Heat the olive oil in a large pot or Dutch oven over medium heat. Add sliced sausage and cook for 5-7 minutes until golden and crispy.
- Add the chopped onion and bell pepper, cooking for 3-4 minutes until softened. Stir in garlic and Cajun seasoning, cooking for 1 minute.
- Pour in the pasta and broth, bringing it to a boil. Reduce heat, cover, and simmer for 10-12 minutes until pasta is al dente.
- Add the heavy cream and half of the Parmesan cheese, stirring until creamy. Season with salt and pepper.
- Remove from heat, top with remaining Parmesan and chopped green onions. Let sit for a few minutes before serving.
Notes
Feel free to make substitutions with different sausages or pasta types to suit your dietary preferences. You can also add additional vegetables for more nutrition.
- Prep Time: 10 minutes
- Cook Time: 20 minutes
- Category: Main Course
- Method: One-Pot Cooking
- Cuisine: Cajun
Nutrition
- Serving Size: 1 serving
- Calories: 500
- Sugar: 5g
- Sodium: 900mg
- Fat: 20g
- Saturated Fat: 8g
- Unsaturated Fat: 8g
- Trans Fat: 0g
- Carbohydrates: 45g
- Fiber: 3g
- Protein: 25g
- Cholesterol: 60mg
Keywords: pasta, one-pot meal, Cajun, creamy pasta, sausage recipe
Spaghetti Garlic Bread Bowls
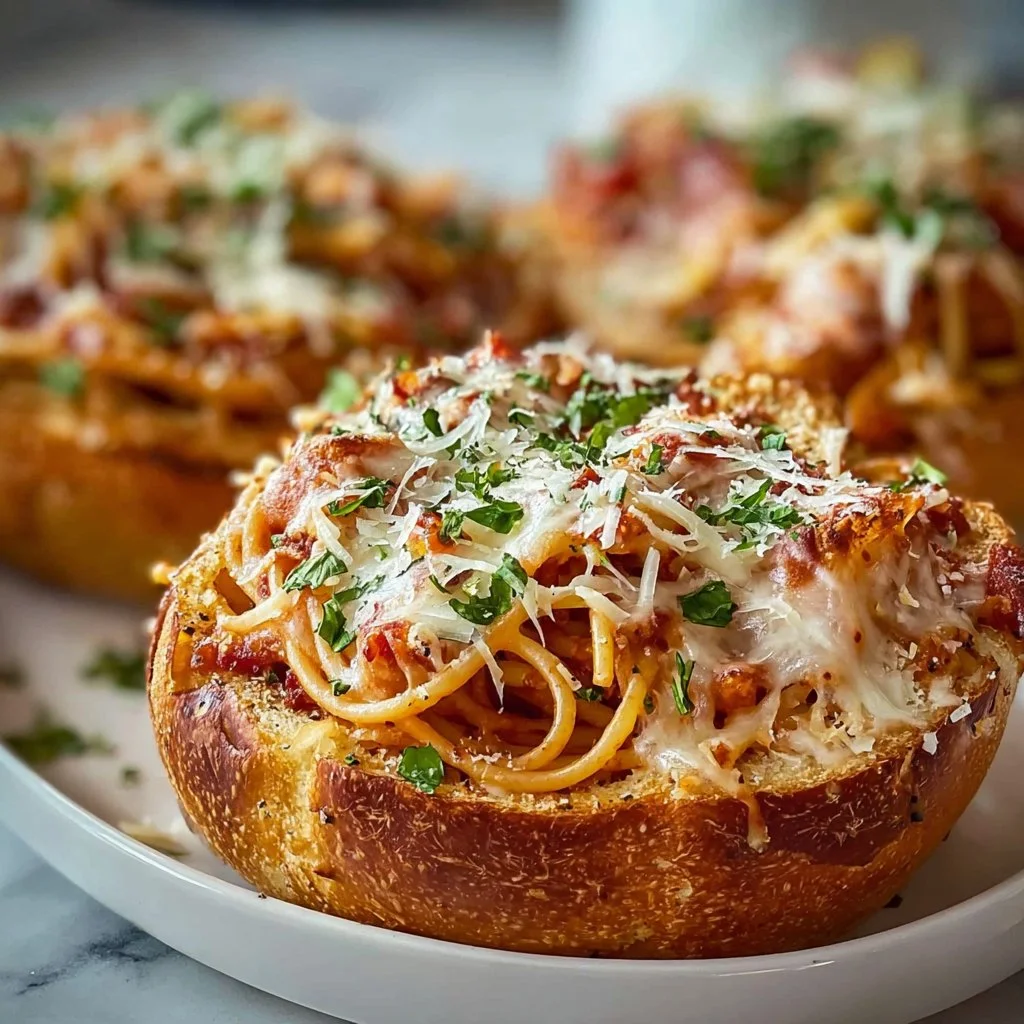
Spaghetti Garlic Bread Bowls: A Cozy Culinary Hug
Welcome back to my kitchen, my fellow foodies! Today, I’m thrilled to share a recipe that marries two of the greatest comfort foods on the planet: pasta and garlic bread. You’re in for a treat with these Spaghetti Garlic Bread Bowls—a delightful innovation that transforms normal spaghetti into a mesmerizing meal experience wrapped in warm, buttery garlic bread.
Picture this: you’re standing in a cozy kitchen, the aroma of toasted bread and roasting garlic filling the air, and a pot of spaghetti bubbling on the stove. Sounds heavenly, right? This dish isn’t just about flavors; it’s about the warmth of home, the joy of cooking, and the memories that come along with it.
This idea sprouted a few autumn evenings ago as I wanted to create a playful and exciting family dinner. My nieces and nephews were over, filled with energy and chaos, so I figured a fun interactive dinner might win me some chef points with them. I envisioned a twirl of spaghetti nestled within a crunchy garlic bread bowl—an edible vessel that would mean fewer dishes. Who doesn’t love that?
As I watched them dive into their creative pasta “bowls,” I realized this dish could easily become a staple in many homes. This recipe is more than just dinner; it’s an invitation to gather around the table, share stories, and savor every delicious bite. So, grab your apron, roll up your sleeves, and let’s get cooking!
Personal Story
Growing up, my Sunday dinners were a time of togetherness, laughter, and, of course, delicious meals. One particularly rainy afternoon, my mom decided to put a twist on our traditional spaghetti and meatballs. With a loaf of slightly stale French bread she had saved, we made garlic bread bowls filled with endless spaghetti and marinara sauce. The kitchen was chaotic: flour flying as I rolled the dough for bread and pots bubbling with sauce everywhere. But amidst all of this, I felt that warm feeling of being together, all of us working in tandem to create something special.
Fast forward to today, and that nostalgic moment has inspired this recipe. It embodies the thrill of creativity, the fun of cooking with loved ones, and the joy of making something new out of the familiar. So, as you attempt this recipe, let every swirl of spaghetti and crunch of garlic bread remind you of those comforting moments shared around the table!
Ingredients
Here’s what you’ll need to create your scrumptious Spaghetti Garlic Bread Bowls:
-
French Bread Loaf: This will form the shell of your garlic bowls. A crusty exterior and fluffy interior work perfectly. If you can’t find French bread, any sturdy loaf can substitute, like ciabatta or sourdough.
-
Spaghetti: Use your favorite spaghetti or substitute with whole wheat or gluten-free options for a healthier twist.
-
Olive Oil: A key flavor component for both the garlic bread and the pasta. You can also use melted butter if you want that classic garlic bread taste.
-
Garlic: Freshly minced garlic infuses the bread with irresistible flavor. If you’re in a pinch, garlic powder can be a quick substitute, but fresh is always best!
-
Parsley: Freshly chopped parsley adds a pop of color and flavor. If you don’t have it, try dried herbs like basil or Italian seasoning.
-
Parmesan Cheese: For that cheesy decadence, freshly grated Parmesan is the way to go! If you’re vegan, nutritional yeast offers a savory alternative.
-
Salt & Pepper: Essential seasonings that bring out the flavors in both the pasta and bread. Feel free to adjust these to your taste!
In this recipe, every ingredient plays its part. Don’t hesitate to get creative with substitutions—we have all been there when that last-minute trip to the store isn’t feasible!
Step-by-Step Instructions
Now that we have our ingredients laid out, let’s dive into the cooking process—your favorite part, right? Here’s how to create these Spaghetti Garlic Bread Bowls step by step:
Step 1: Preheat the Oven
Begin by preheating your oven to 375°F (190°C). This will ensure that our garlic bread is nice and toasty when it’s ready.
Step 2: Prep the Garlic Bread Bowls
- Slice the French bread: Carefully slice your loaf in half lengthwise. Make sure to keep it intact at the bottom—like a little boat!
- Hollow it out: Using your hands or a sharp knife, gently scoop out some of the soft bread from the center to create a little bowl. Don’t take it all out—leave some edges to hold everything in!
Step 3: Make the Garlic Mixture
In a small bowl, mix together:
- 2 tablespoons of olive oil (or melted butter)
- 4 minced garlic cloves
- A pinch of salt and pepper
- Fresh chopped parsley
Stir until combined and fragrant. It’s the moment your kitchen starts smelling divine!
Step 4: Prep the Garlic Bread
Spread the garlic mixture generously onto the cut sides of the bread. Sprinkle a bit of Parmesan cheese on top for added flavor!
Step 5: Bake the Garlic Bread
Place your bread halves on a baking sheet and pop them into your preheated oven for 10-15 minutes, or until the edges are golden and crispy. Keep an eye on them to avoid burning!
Step 6: Cook the Spaghetti
While the garlic bread is baking, bring a pot of salted water to a boil and cook your spaghetti according to package instructions. It’s usually around 8-10 minutes for al dente. Reserve 1/2 cup of pasta water before draining!
Step 7: Create the Sauce
In the same pot you cooked the spaghetti, add a drizzle of olive oil and some more minced garlic. Sauté for about 1 minute before adding in your drained spaghetti.
- Stir in your favorite marinara sauce (I love a homemade version!) and mix well.
- If the sauce seems thick, this is where that reserved pasta water comes in! Add a bit at a time until you reach your desired consistency.
Step 8: Assemble!
Once your garlic bread bowls are out and the spaghetti is perfectly sauced, it’s time for the fun part!
- Fill the bread bowls: Spoon the spaghetti mixture into each garlic bread bowl until it’s overflowing!
- Top with more freshly chopped parsley and a sprinkle of cheese, if you’d like.
Step 9: Serve!
Serve immediately while it’s hot and bubbly! These cheesy, garlicky bowls are perfect for sharing—just don’t forget to grab some napkins!
Serving Suggestions
These Spaghetti Garlic Bread Bowls can easily be the star of your dinner table. I recommend serving them with a fresh garden salad on the side for a nice balance. Pair it with a simple vinaigrette or a classic Caesar dressing to elevate your meal! And of course, a glass of red wine won’t hurt.
Recipe Variations
Want to shake things up? Here are some creative twists to customize your Spaghetti Garlic Bread Bowls:
-
Add Protein: Toss in grilled chicken, shrimp, or meatballs for a heartier meal.
-
Veggie Delight: Incorporate sautéed veggies like bell peppers, spinach, or mushrooms into your sauce for an extra nutrient boost.
-
Cheesy Spin: Experiment with other cheeses! Mozzarella or feta will give it a whole different flavor profile.
-
Herbed Up: Infuse your garlic oil with different herbs like thyme or rosemary for a fragrant lift.
-
Spice it Up: Add a pinch of red pepper flakes to the garlic mixture for a spicy kick.
Chef’s Notes
As I was creating this recipe, I remembered all those antics in the kitchen with my family. One time, my friends and I attempted to stack a mountain of spaghetti in our bread bowls, only to have them collapse spectacularly—what a mess! We laughed until our sides hurt, and it became a running joke every time we made spaghetti.
This dish has evolved from just a fun family recipe into something I love to share with you all. And it keeps evolving! Each time I make it, I think of new creative spins—what will you come up with?
FAQs and Troubleshooting
1. Can I make this dish ahead of time?
Absolutely! You can prepare everything beforehand and simply store your components separately, then bake the bread bowls just before serving.
2. Why is my bread soggy?
A soggy bread bowl can happen if the sauce is too watery or if you let the spaghetti sit in the bowl too long. Ensure your sauce is the right consistency and serve immediately.
3. Can I freeze leftover garlic bread bowls?
While it’s best enjoyed fresh, you can freeze any assembled bowls. Just reheat them in the oven, wrapped in foil, when you’re ready to devour them!
4. How do I prevent the bread from burning?
Keep an eye on your garlic bread bowls while baking. If they start browning too fast, consider lowering the oven temperature slightly!
Nutritional Info
(Per Serving):
- Calories: approx. 400
- Protein: 15g
- Carbohydrates: 60g
- Fiber: 3g
- Total Fat: 12g
Note: Nutritional info may vary based on ingredients used and portion sizes.
I hope you’re as excited as I am to create these Spaghetti Garlic Bread Bowls in your kitchen! Remember, each meal is an opportunity to create memories, so gather your loved ones and prepare for delightful culinary moments. Enjoy every bite, and happy cooking! 🍽️
Print
Spaghetti Garlic Bread Bowls
- Total Time: 45 minutes
- Yield: 4 servings 1x
- Diet: Vegetarian
Description
A delightful innovation that transforms pasta into a mesmerizing meal experience wrapped in warm, buttery garlic bread.
Ingredients
- 1 French Bread Loaf
- 8 oz Spaghetti
- 2 tbsp Olive Oil
- 4 cloves Garlic, minced
- 2 tbsp Fresh Parsley, chopped
- 1/4 cup Parmesan Cheese, grated
- Salt, to taste
- Pepper, to taste
Instructions
- Preheat the oven to 375°F (190°C).
- Slice the French bread in half lengthwise, keeping it intact at the bottom.
- Hollow out some soft bread from the center of each half to create bowls.
- Mix together olive oil, minced garlic, salt, pepper, and parsley in a small bowl until fragrant.
- Spread the garlic mixture onto the cut sides of the bread and sprinkle with Parmesan cheese.
- Bake the bread halves on a baking sheet for 10-15 minutes until golden.
- Cook spaghetti in salted boiling water according to package instructions (about 8-10 minutes).
- Drain spaghetti, reserving 1/2 cup pasta water.
- Sauté more minced garlic in a drizzle of olive oil in the same pot, then add spaghetti and marinara sauce.
- Add reserved pasta water as needed for desired sauce consistency.
- Fill the garlic bread bowls with the spaghetti mixture and top with parsley and cheese.
- Serve immediately while hot and bubbly!
Notes
Feel free to add proteins like chicken or shrimp, or customize with sautéed veggies for a nutritious boost.
- Prep Time: 15 minutes
- Cook Time: 30 minutes
- Category: Main Course
- Method: Baking
- Cuisine: Italian
Nutrition
- Serving Size: 1 serving
- Calories: 400
- Sugar: 4g
- Sodium: 350mg
- Fat: 12g
- Saturated Fat: 4g
- Unsaturated Fat: 6g
- Trans Fat: 0g
- Carbohydrates: 60g
- Fiber: 3g
- Protein: 15g
- Cholesterol: 30mg
Keywords: spaghetti, garlic bread, comfort food, Italian, family dinner
Marry Me Chicken Pasta
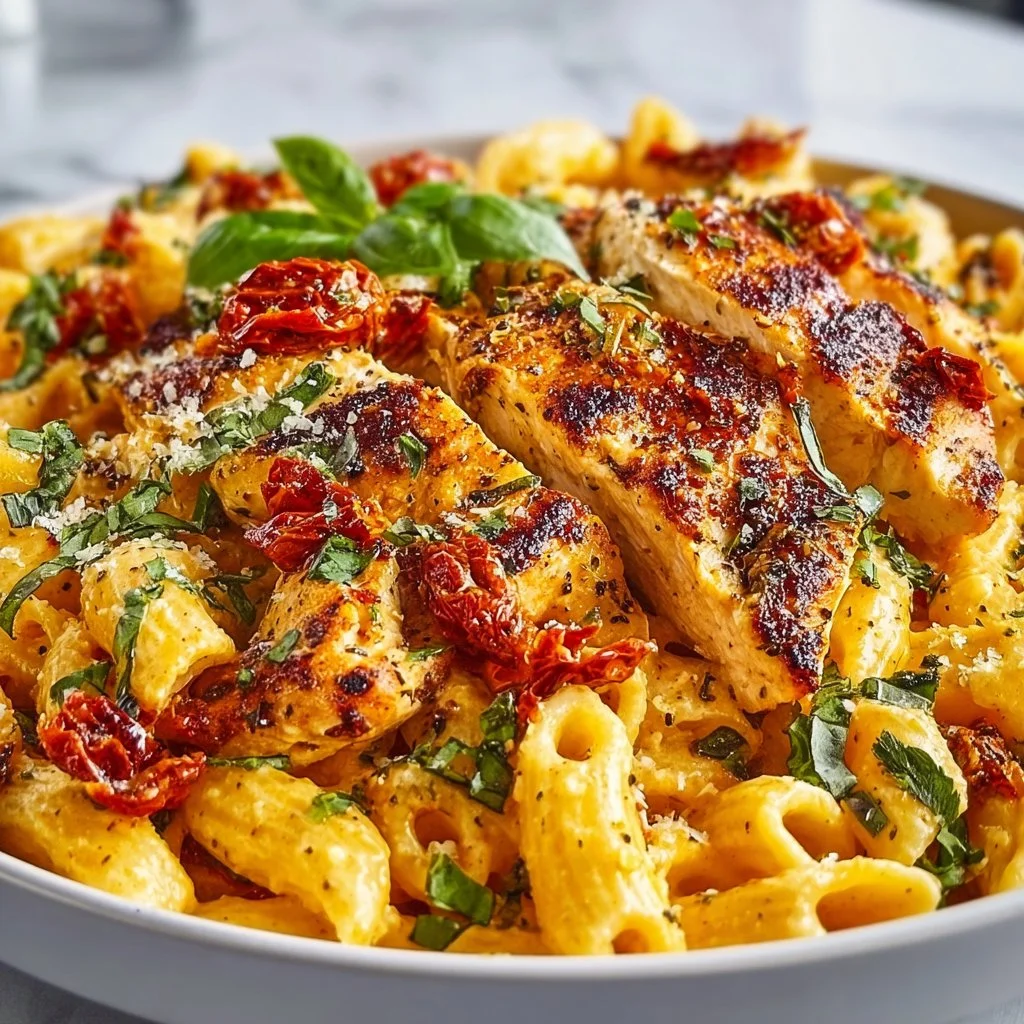
Marry Me Chicken Pasta: The Dish That Steals Hearts
Welcome back to my cozy corner of the kitchen, food friends! Today, I’m excited to share with you a dish that not only tantalizes the taste buds but also has a reputation for sparking romance—Marry Me Chicken Pasta! Yes, you heard that right. This scrumptious entrée is the kind of meal that might just inspire a question that’ll make you blush. It brings together tender chicken bathed in a creamy sun-dried tomato sauce, paired with comforting pasta and fresh herbs that’ll leave everyone at the table wanting more.
I first stumbled upon the idea of Marry Me Chicken during a blissful Sunday brunch with friends. We talked about everything from our favorite movies to the best dishes we’ve cooked up over the years. Someone mentioned this “Marry Me Chicken” dish, and curiosity piqued, I knew I had to give it a whirl! Cue the delightful kitchen chaos that ensued—the sizzling sounds, the fragrant aromas, and the inevitable call for taste testers. Let me tell you, when I presented my version of Marry Me Chicken Pasta, it didn’t just please the palette; it created a moment. There were smiles, giggles, and even a few light-hearted proposals tossed around the table. And that’s what cooking is all about, right? Creating memories and sharing joy with those we love.
My hope is that this dish becomes a staple in your kitchen—it’s a great go-to for cozy weeknight dinners, festive gatherings, or even just to treat yourself on a well-deserved day off. So, grab your apron, and let’s dive into the delightful world of Marry Me Chicken Pasta!
Personal Story
Oh, let me take you back to that delightful Saturday morning when I first conjured up the idea of making my version of Marry Me Chicken. Picture this: I was in my tiny kitchen, a radio playing softly in the background, and the warm golden sunlight streaming through the windows. It was one of those perfect fall days where the air was crisp, and the leaves danced in the breeze.
As I rummaged through my pantry, I found some forgotten sun-dried tomatoes and a melancholy, half-full bottle of heavy cream. Bingo! The beginnings of something wonderful were unfolding. I decided to whip up a creamy pasta dish, combining the sun-dried tomatoes with juicy chicken thighs. As the scents swirled through my kitchen, I was taken back to my childhood—my mom’s chicken alfredo always had a special place in my heart. With each stir of the pot, I felt that same warmth, excitement, and comfort!
Before I knew it, my friends showed up unannounced, drawn in by the delightful smells wafting through the door. I tossed them a glass of wine and invited them to join in the madness of my culinary creation. That night, with laughter and clinking glasses, we relished every bite of Marry Me Chicken Pasta. It was a beautiful reminder that cooking is as much about the love we share as it is about the food itself.
Ingredients
Let’s gather all the ingredients you’ll need for this heartwarming dish!
-
Chicken Thighs (boneless, skinless)
Moist and tender, chicken thighs are perfect for this recipe because they stay juicy even when cooked. If you prefer, you can swap them for chicken breasts, but be cautious not to overcook them! -
Sun-Dried Tomatoes (packed in oil)
These provide a sweet, tangy flavor that elevates the creamy sauce. If you can’t find oil-packed, don’t worry! You can use dried ones—just soak them in hot water for about 30 minutes first. -
Heavy Cream
This adds a luxurious creaminess to the sauce. For a lighter version, you can use half-and-half, but the rich flavor will be dialed down. -
Garlic (minced)
Because garlic is essential, isn’t it? It deepens the flavor profile. Fresh is best, but if you have garlic powder, you could sub in about 1/8 teaspoon for each clove. -
Parmesan Cheese (grated)
This gives that salty, nutty flavor that perfectly complements the cream. If you’re feeling adventurous, try Pecorino Romano for a sharper bite. -
Italian Seasoning
A blend of herbs like oregano, basil, and thyme adds depth to the sauce. You can substitute with fresh herbs if you have them on hand—just chop up about three times as much! -
Olive Oil
A drizzle of extra virgin olive oil adds flavor and helps brown the chicken. You can also use butter for added richness. -
Pasta (any shape you prefer)
Fettuccine, penne, or even spaghetti work great. Just make sure to cook it al dente so that it doesn’t get mushy in the sauce! -
Fresh Basil (for garnish)
A little sprinkle at the end brings freshness and a splash of color to your plate.
Step-by-Step Instructions
Step 1: Preparing the Ingredients
First things first, let’s prep our ingredients. Rinse the chicken thighs under cold water and pat them dry with a paper towel. Season both sides generously with salt and pepper. Chop up those sun-dried tomatoes into smaller pieces so they can meld into the sauce beautifully. And don’t forget to mince the garlic—it’s the backbone of our flavor!
Step 2: Brown the Chicken
In a large skillet, heat about two tablespoons of olive oil over medium heat. Once it’s shimmering, place your chicken thighs in the skillet, skin-side down (or top-side, if using boneless). Let them sear beautifully for about 5-7 minutes without moving them. Trust me on this one; you want that golden crust! Flip them over and cook for another 3-4 minutes until browned. Remove them from the skillet and set them aside on a plate; they’ll finish cooking later.
Step 3: Create the Flavorful Base
In the same skillet, reduce the heat slightly, and toss in your minced garlic and chopped sun-dried tomatoes. Sauté for about a minute or until fragrant, stirring constantly. You’ll know it’s ready when your kitchen smells heavenly! Add in a splash of the leftover oil from the sun-dried tomatoes (don’t waste that good stuff!) and stir to combine.
Step 4: Make It Creamy
Pour in the heavy cream and stir. As it heats up, take a moment to season with the Italian seasoning, and a good pinch of salt and pepper. Reduce the heat to low and stir continuously, letting it bubble away for a couple of minutes. You want it to thicken just slightly, but not so much that it won’t coat the pasta.
Step 5: Combine Chicken and Sauce
Return the chicken thighs to the pan, nestling them into the creamy sauce. Cover the skillet and let it simmer on low heat for about 10-15 minutes, until the chicken is cooked through and the sauce is rich and inviting. Tender and juicy chicken is what we’re after!
Step 6: Cook the Pasta
While the chicken simmers away, cook your pasta according to package directions until it’s al dente. Drain, and remember to save a cup of that pasta water. Trust me; it’s liquid gold!
Step 7: Combine Everything
Once the chicken is finished cooking, remove it from the skillet again (you can slice it up or leave it whole, your call!). Add the drained pasta right into that dreamy sauce, stirring to coat every piece. If it seems too thick, gradually stir in some reserved pasta water until you reach the desired consistency. Toss in the grated Parmesan cheese, and give it a good stir!
Step 8: Finish with Flair
Slice up the chicken (if that’s your style) and lay it atop the creamy pasta. To serve, garnish with fresh basil and an extra sprinkle of Parmesan for good measure. Voilà! Your Marry Me Chicken Pasta is ready to impress!
Serving Suggestions
When plating this dish, think of a beautiful garden party—bright colors, fresh herbs, and a feeling of warmth! Serve the Marry Me Chicken Pasta on a large platter, family-style, or portion it into individual bowls. A side of garlic bread and a simple green salad dressed with lemon vinaigrette makes the perfect complement to this decadent meal. Your dining companions will feel like they’ve stepped into an Italian bistro!
Recipe Variations
-
Spicy Kick: Toss in some red pepper flakes or diced jalapeños for an added layer of warmth.
-
Mushroom Lover: Sauté mushrooms alongside the garlic for an earthy flavor that pairs wonderfully with the sauce.
-
Vegan Version: Substitute the chicken with tofu or chickpeas, use coconut cream instead of heavy cream, and nutritional yeast instead of Parmesan.
-
Leaner Swap: Use skinless chicken breasts to lighten it up entirely and skip the cream for a yogurt-based sauce.
-
Herbal Delight: Swap regular pasta for spinach or whole wheat pasta for an extra nutritional boost and color.
Chef’s Notes
Cooking is all about experimenting! This Marry Me Chicken Pasta recipe has evolved countless times as I’ve played with ingredients and flavors based on what I had on hand. One day, I might add a splash of white wine to the sauce for an extra dimension, and another day, I decide to use leftover roasted vegetables. And let’s not even get started on the many types of cheese I’ve used over time—from cheddar to gouda!
One of my favorite things about this dish? It’s a crowd-pleaser! I once made it for my friends’ engagement party, and I’m pretty sure the couple got a dozen proposals from our playful group all night. Just goes to show, food can be sprinkled with a little magic—and love!
FAQs and Troubleshooting
-
Q: My chicken is tough. What went wrong?
A: Overcooking chicken can lead to it being dry and tough. Make sure to check it early, especially with chicken breasts! -
Q: My sauce is too thick. Help!
A: No worries! This is why we keep a bit of pasta water on hand. Gradually add it into the sauce until you get the perfect creamy consistency. -
Q: Can I make this ahead of time?
A: Absolutely! Just store your cooked pasta and chicken separately, and combine them with the sauce when you’re ready to serve to avoid mushiness. -
Q: Can I freeze Marry Me Chicken Pasta?
While freezing is possible, the cream sauce may separate slightly once thawed. It’s best enjoyed fresh, but if you must freeze, use an airtight container and enjoy within 2-3 months.
Nutritional Info
Estimated per serving (based on 4 servings):
- Calories: 520
- Protein: 30g
- Carbs: 45g
- Fat: 25g
- Fiber: 3g
And there you have it! I hope you give this Marry Me Chicken Pasta a try in your kitchen. Let me know how it goes, and don’t forget to share your delicious moments with me! Here’s to unforgettable meals and the love we share around the table! 🥂🍝❤️
Print
Marry Me Chicken Pasta
- Total Time: 45 minutes
- Yield: 4 servings
- Diet: None
Description
A romantic dish featuring tender chicken in a creamy sun-dried tomato sauce, served with pasta and fresh herbs.
Ingredients
- Chicken Thighs (boneless, skinless)
- Sun-Dried Tomatoes (packed in oil)
- Heavy Cream
- Garlic (minced)
- Parmesan Cheese (grated)
- Italian Seasoning
- Olive Oil
- Pasta (any shape you prefer)
- Fresh Basil (for garnish)
Instructions
- Prepare the ingredients: Rinse the chicken thighs, pat dry, season with salt and pepper, chop sun-dried tomatoes, and mince garlic.
- Brown the chicken: Heat olive oil in a large skillet over medium heat, sear chicken thighs for 5-7 minutes on one side, flip and cook for another 3-4 minutes.
- Create the flavorful base: In the same skillet, sauté garlic and sun-dried tomatoes until fragrant, adding a splash of oil.
- Make it creamy: Pour in heavy cream, season with Italian seasoning, salt, and pepper, letting it thicken slightly.
- Combine chicken and sauce: Return chicken to the pan, cover and simmer on low for 10-15 minutes.
- Cook the pasta: Prepare pasta according to package instructions until al dente, reserving a cup of pasta water.
- Combine everything: Stir drained pasta into the sauce, adding reserved pasta water for consistency, and mix in Parmesan cheese.
- Finish with flair: Slice chicken if desired, serve over pasta, and garnish with fresh basil and more Parmesan.
Notes
Serve with garlic bread and a salad for a complete meal. Feel free to experiment with ingredients for variations.
- Prep Time: 15 minutes
- Cook Time: 30 minutes
- Category: Main Course
- Method: Baking
- Cuisine: Italian
Nutrition
- Serving Size: 1 serving
- Calories: 520
- Sugar: 6g
- Sodium: 800mg
- Fat: 25g
- Saturated Fat: 15g
- Unsaturated Fat: 9g
- Trans Fat: 0g
- Carbohydrates: 45g
- Fiber: 3g
- Protein: 30g
- Cholesterol: 120mg
Keywords: pasta, chicken, creamy sauce, sun-dried tomatoes, romantic dinner


