Healthier Sweet Bites
Healthier Sweet Bites: Indulgence Without the Guilt!
Welcome back to my cozy kitchen, fellow foodies! I’m Olivia Bennett, and today we’re diving into the delightful world of healthier sweet bites. If you’re anything like me, nothing quite compares to the joy of savoring something sweet. Those little moments of indulgence can brighten up your day, but who says sweet treats have to be filled with guilty ingredients? Today, we’re crafting recipes to satisfy our sweet tooth while keeping our health goals in mind.
As I flick through old family recipe books, I often find sugary delights that spark fond memories of laughter-filled kitchen adventures. Treats made with love and shared around the table remind us that food isn’t just sustenance; it’s connection! While I adore those classic recipes, I’ve learned that we can enjoy sweet moments without compromising our health. That’s where these healthier alternatives come in!
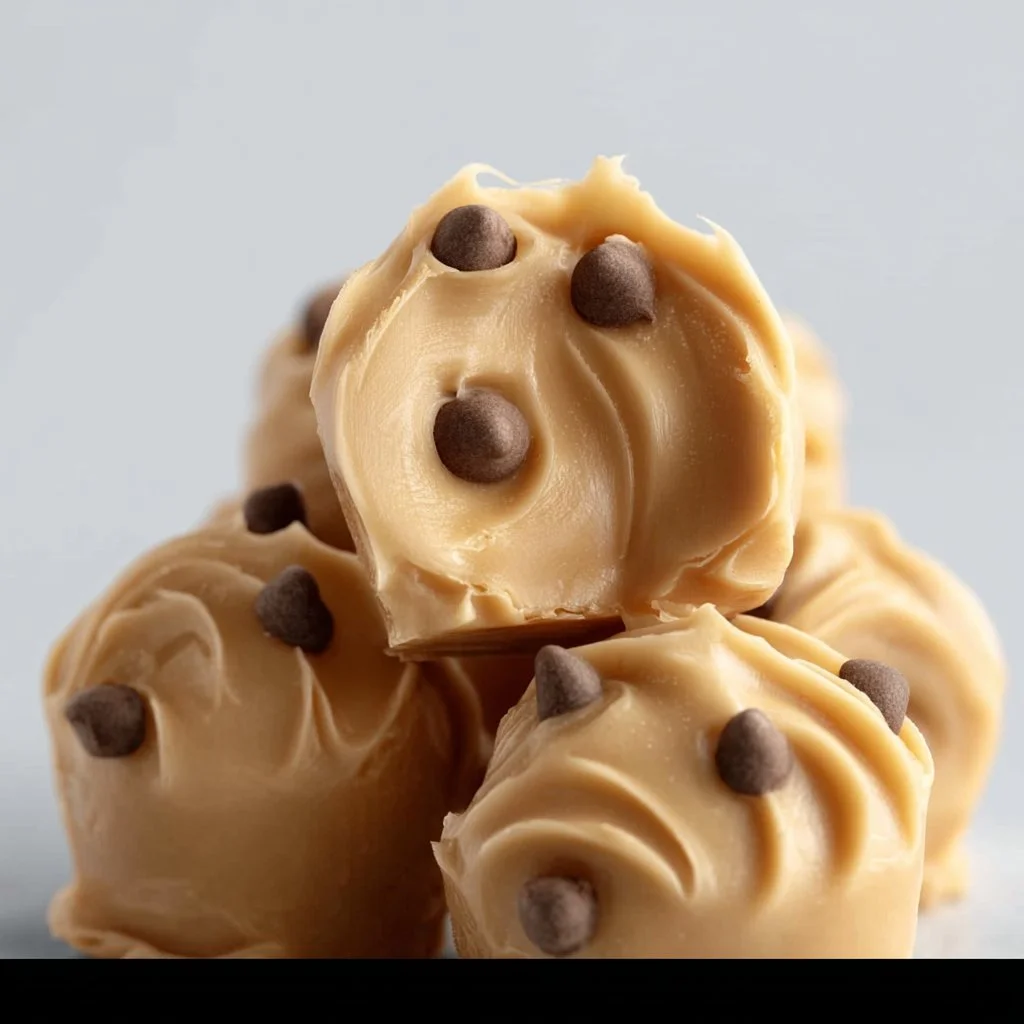
These bites are not only nutritious but also bursting with flavors that will make your taste buds dance! Picture this: rich chocolate chip cookies made with whole grains and natural sweeteners, or scrumptious energy balls packed with nuts, seeds, and dried fruits. Whether you’re prepping for a cozy movie night, hosting a gathering, or simply treating yourself, my healthier sweet bites are designed to satisfy cravings and nourish your body.
So, roll up your sleeves, put on that adorable apron, and let’s get to work. Sweetness awaits, and trust me; after this, you’ll feel like a healthier dessert wizard ready to enchant your family and friends with delightful bites they’ll adore!
Personal Story
Ah, the sweet aroma of freshly baked cookies wafting through the house! One of my fondest memories involves my grandma, who crafted her legendary chocolate chip cookies every Sunday. I would scamper into the kitchen, flour dusting the air like magic as we giggled over spilled sugar and fought over who could sneak the most chocolate chips. The best part? Grandma taught me a little secret—substituting some ingredients to create lighter, yet equally delectable treats.
Fast forward to today, and I still carry that cherished recipe in my heart. However, I’ve put my own twist on it by incorporating healthier options that don’t compromise the tastes and textures. Every time I make these healthier sweet bites, I feel like I’m bridging that beautiful gap between the nostalgia of my childhood and a modern, health-conscious lifestyle. The result is always the same: love and warmth served up in bite-sized portions. Let’s bring that same joy to your kitchen as you create your own sweet memories.
Ingredients
Here’s what you’ll need to whip up these delicious healthier sweet bites, along with some handy chef insights to guide you along the way.
-
Oats:
- A wonderful whole grain that adds fiber and can help to keep you satiated. Consider steel-cut oats or rolled oats for that perfect chewy texture. If you want a gluten-free option, you can easily find certified gluten-free oats!
-
Nut Butter (Almond or Peanut):
- Great for adding healthy fats and protein to your bites. Almond butter has a lovely, delicate flavor, while peanut butter brings a delightful nuttiness. You can substitute with sunflower seed butter for a nut-free version!
-
Honey or Maple Syrup:
- Both natural sweeteners provide sweetness without the processed sugars, and they also add moisture to your sweet bites. Swap in agave nectar if you prefer a lower glycemic index!
-
Dark Chocolate Chips (or Cacao Nibs):
- Dark chocolate is rich in antioxidants and adds a luscious flavor that satisfies your sweet cravings. Choose chocolate with at least 70% cacao for a health boost, or swap with cacao nibs for a more intense chocolate experience.
-
Vanilla Extract:
- A splash of vanilla extract elevates any dessert with its warm aroma. Always opt for pure vanilla extract over imitation for that authentic flavor!
-
Chia Seeds or Flaxseeds:
- Packed with omega-3 fatty acids, fiber, and protein, these little seeds are a powerhouse! When mixed with water, they create a gel-like consistency that can act as a binder or egg substitute in vegan recipes.
-
Nuts (Almonds, Walnuts, or Pecans):
- These provide a delightful crunch and a generous dose of nutrients. Feel free to toast them lightly for an added depth of flavor!
Together, these ingredients combine in such a beautiful way to create sweet bites that feel indulgent yet are indeed good for you. It’s all about finding that balance!
Step-by-Step Instructions
Now that we have our ingredients ready, let’s get cooking! Here’s a simple step-by-step guide to whip up these delicious healthier sweet bites:
-
Preheat Your Oven:
Preheat your oven to 350°F (175°C). This step is essential for achieving that perfect texture. While you wait, take a moment to appreciate the kitchen aromas—nothing beats the warm smell of an impending bake session! -
Combine the Dry Ingredients:
In a large mixing bowl, combine 2 cups of oats, 1/2 cup of chia or flaxseeds, and 1/2 cup of dark chocolate chips. Stir these together to ensure an even distribution of all your dry ingredients. A quick tip: To prevent chocolate chips from sinking during baking, toss them in a little bit of flour. -
Mix the Wet Ingredients:
In a separate bowl, mix together 1/2 cup of nut butter, 1/3 cup of honey (or maple syrup), and a teaspoon of vanilla extract until smooth and creamy. Should you prefer a more decadent texture, microwave the nut butter for about 10-15 seconds—this makes it easier to mix! -
Combine Wet and Dry Ingredients:
Pour the wet mixture into the dry bowl. Stir everything together until fully combined, making sure you reach the bottom of the bowl for that even cohesiveness. If the mix is a little crumbly, don’t worry—trust the process! A few extra splashes of water or almond milk will do the trick. -
Shape Your Bites:
Using clean hands or a spoon, scoop out about a tablespoon of the mixture and roll it into a ball. Place each ball on a parchment-lined baking sheet, leaving about an inch of space between them to allow for slight expansion. -
Bake to Perfection:
Pop them into the preheated oven and let them bake for about 10-12 minutes. Keep an eye on them; they’re done when they’re lightly golden and fragrant! You’ll know it’s time to pull them out of the oven when you can hardly resist their tempting aroma. -
Cool and Enjoy:
Let the sweet bites cool on the baking sheet for about 10 minutes before transferring them to a wire rack. As they cool, they’ll become firmer and retain a delightful chewy quality. Store them in an airtight container for up to a week (if they last that long!).
Enjoy these bites as pre-workout energy boosters, satisfying afternoon snacks, or simply as a delightful dessert after dinner.
Serving Suggestions
When it comes to serving these warmer-than-hugging treats, presentation is key! Stack a few of these boomingly delicious bits on a cute plate or in a glass jar for a rustic touch. Dust with a sprinkle of cocoa powder or drizzle a little extra chocolate over the top for that “wow” factor. Pair them with a cup of herbal tea or a cozy hot chocolate to elevate your experience. These babies are sure to become a household favorite!
Recipe Variations
Let’s get creative! Here are a few fun variations to spark your imagination:
-
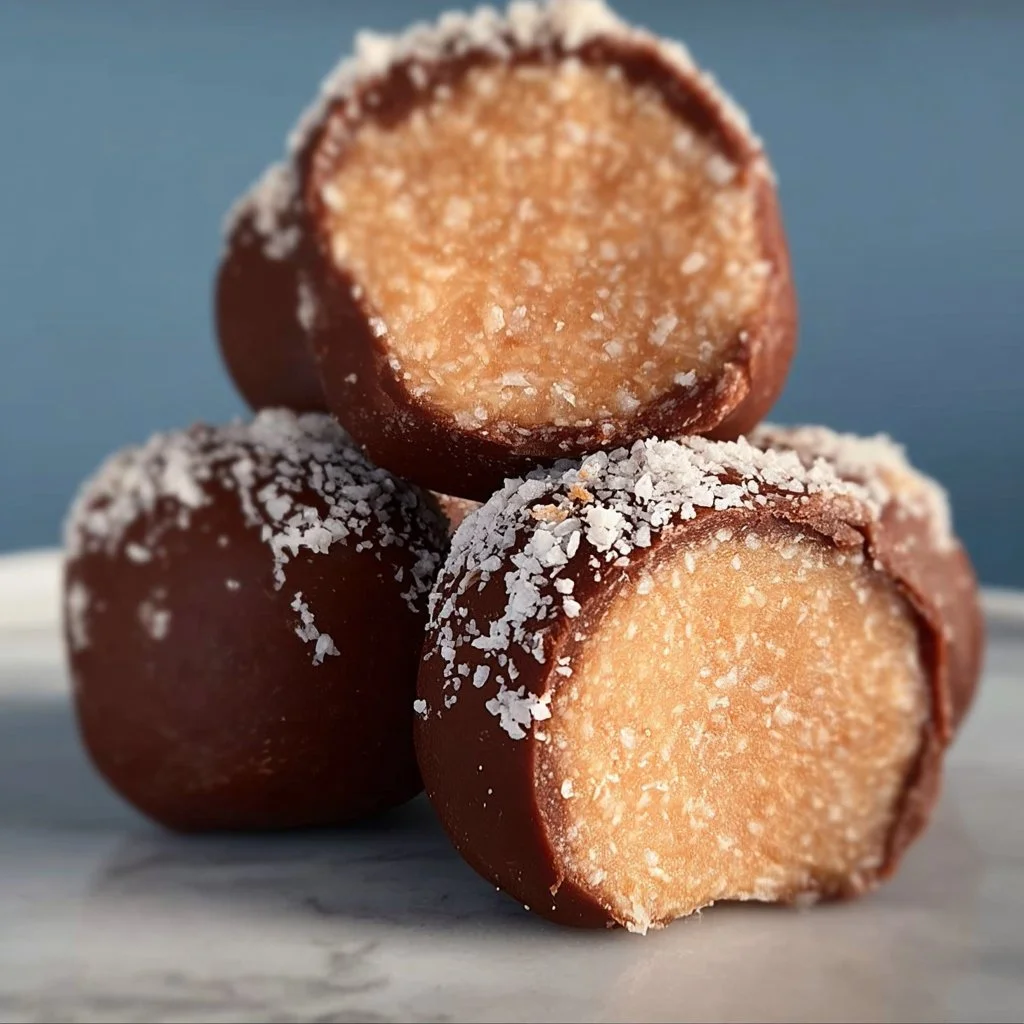
Coconut Macaroon Twist: Add shredded coconut to the mixture for a tropical flavor that transports you to paradise.
-
Nut-Free Energy Bites: Substitute nut butter with sunflower seed butter, swapping chocolate chips for dried cranberries or raisins for a sweet, nut-free treat.
-
Spiced Pumpkin Bites: Add in some pumpkin puree and pumpkin spice seasoning for a fall-inspired treat that’s perfect for cozy gatherings.
-
Protein-Packed Bites: Mix in protein powder for that pre- or post-workout boost without compromising taste.
-
Fruit Fusion: Toss in your favorite fresh fruits like bananas or apple pieces to add an exciting twist to your sweet bites.
Feel free to mix and match these variations according to your taste buds!
Chef’s Notes
Baking is a form of art—sometimes, the best creations come from experimentation! Over the years, I’ve whispered my own stories into these healthier sweet bite recipes, tailoring them to fit my family’s preferences. My kids love adding a pinch of sea salt on top, creating a beautiful sweet-salty contrast.
One time, while trying to sneak in some more vegetables, I added grated zucchini into the mix, and guess what? It turned into a hit! Sometimes, the kitchen can surprise us in the best possible ways when we let our creativity flow. Trust your instincts, embrace the mess, and always remember: cooking is about joy, and that’s what makes every dish special.
FAQs and Troubleshooting
1. My bites didn’t hold together. What went wrong?
Sometimes the mixture might seem dry. If this happens, add a bit more nut butter or a splash of almond milk to bind the ingredients together better.
2. Can I store these sweet bites, and for how long?
Absolutely! They store wonderfully in an airtight container for up to one week at room temperature. Alternatively, they freeze beautifully for up to three months—perfect for busy weeks!
3. I like my treats sweeter. Can I add more sweetener?
Of course! Feel free to adjust the sweetener to your taste. Remember, the type of sweetener you use can influence the final texture, so just add gradually until you reach your desired sweetness.
4. Can I use regular flour instead of oats?
If you decide to use flour instead, make sure you reduce the amount accordingly, as flour is more concentrated than oats. Alternatively, try using almond flour or coconut flour for a lovely spin!
Nutritional Info (optional)
While I generally favor the joy of cooking over strict nutritional guidelines, these bites are relatively low in sugar, high in fiber, and packed with vitamins and healthy fats thanks to the oats and nut butter. For exact values, make sure to calculate based on the ingredients you’re using.
And there you have it! A delightful journey through the world of healthier sweet bites filled with warmth, laughter, and endless possibilities. The best part? You’ve unlocked the magic of creating healthier indulgences that you can share with your loved ones! Happy cooking, everyone! 🍪❤️
Print
Healthier Sweet Bites
- Total Time: 27 minutes
- Yield: 12 servings 1x
- Diet: Vegetarian
Description
Indulgent yet healthy sweet bites crafted to satisfy cravings without guilt.
Ingredients
- 2 cups oats
- 1/2 cup chia seeds or flaxseeds
- 1/2 cup dark chocolate chips
- 1/2 cup nut butter (almond or peanut)
- 1/3 cup honey or maple syrup
- 1 tsp vanilla extract
- 1/2 cup nuts (almonds, walnuts, or pecans)
Instructions
- Preheat your oven to 350°F (175°C).
- Combine the dry ingredients in a large mixing bowl.
- Mix the wet ingredients in a separate bowl until smooth.
- Pour the wet mixture into the dry bowl and stir until combined.
- Using clean hands or a spoon, scoop out a tablespoon of the mixture and roll it into a ball.
- Place the balls on a parchment-lined baking sheet, leaving space between them.
- Pop them into the oven and bake for 10-12 minutes.
- Let the sweet bites cool on the baking sheet for 10 minutes before transferring them to a wire rack.
Notes
Enjoy these bites as snacks, desserts, or energy boosters. Store in an airtight container for up to one week.
- Prep Time: 15 minutes
- Cook Time: 12 minutes
- Category: Snack
- Method: Baking
- Cuisine: American
Nutrition
- Serving Size: 1 bite
- Calories: 120
- Sugar: 5g
- Sodium: 50mg
- Fat: 7g
- Saturated Fat: 1g
- Unsaturated Fat: 5g
- Trans Fat: 0g
- Carbohydrates: 15g
- Fiber: 3g
- Protein: 4g
- Cholesterol: 0mg
Keywords: healthy snacks, sweet bites, guilt-free desserts
Healthy Strawberry Peanut Butter Cups
Healthy Strawberry Peanut Butter Cups: A Delightfully Sweet Indulgence
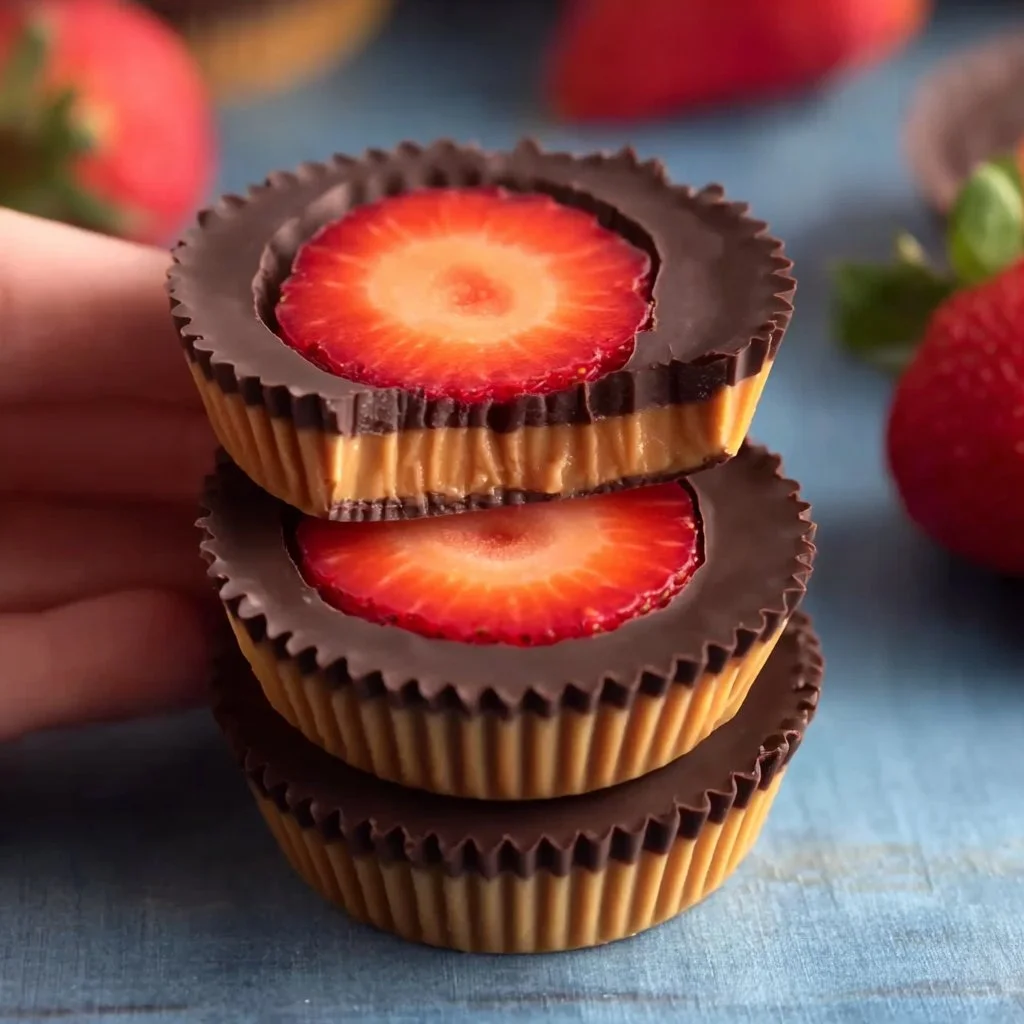
Welcome to my kitchen! This week, I’m thrilled to share a recipe that perfectly marries sweetness with wholesome ingredients: Healthy Strawberry Peanut Butter Cups. Picture this: luscious strawberries sandwiched between creamy peanut butter and a silky chocolate coat. Yes, please! These little gems are not just a treat for your taste buds but also a guilt-free indulgence you can feel great about. Grab your apron and let’s dive into the delicious world of strawberry peanut butter cups — it’s about to get cozy in here!
A Delightful Memory
Let me take you back to a sun-soaked summer afternoon at my grandmother’s house. I was about ten years old, and the kitchen was filled with the aroma of freshly picked strawberries simmering on the stove. My grandmother believed that every fruit deserved a little magic, and her specialty was combining sweet and savory flavors. That day, she decided to make peanut butter and strawberry sandwiches, but not in the traditional way — oh no! She transformed them into delightful little cups, using chocolate that melted my heart (and made my taste buds sing).
We spent the afternoon creating these delicious treats together, carefully layering peanut butter and strawberries in chocolate molds. It was messy, sticky, and absolutely perfect! As we licked our fingers clean, I realized the joyful beauty of cooking and the cherished moments we create in the kitchen. Those blissful peanut butter cups became an emblem of not just a recipe, but a deep, nostalgic love for cooking, family, and a sprinkle of magic in everyday moments.
Ingredients
Now that you’ve got a taste of the story behind this recipe, let’s gather our ingredients. Here’s what you’ll need to whip up your own batch of Healthy Strawberry Peanut Butter Cups:
-
Fresh Strawberries
Fresh strawberries are the star of the show here! Look for bright, red berries with no blemishes. If fresh strawberries aren’t in season, frozen ones can work too; just make sure to thaw them beforehand. -
Natural Peanut Butter
Choose a natural peanut butter without added sugar or oils. It adds rich flavor and creamy texture. If you’re allergic or prefer something different, sunflower seed butter makes an excellent substitute. -
Dark Chocolate Chips (or Cocoa Powder)
For the chocolate coating, go for high-quality dark chocolate chips (70% cocoa or higher). If you want to keep it dairy-free, dark dairy-free chocolate works wonders! Alternatively, you can use cocoa powder mixed with a little coconut oil for a lighter version. -
Honey or Maple Syrup (optional)
A drizzle of honey or maple syrup can add a touch of sweetness. If you’re vegan, maple syrup is the way to go. If you’re looking for a sugar-free option, consider using stevia or monk fruit sweetener. -
Sea Salt
Just a pinch! Sea salt balances the sweetness of the strawberries and chocolate beautifully, elevating the flavors.
Step-by-Step Instructions
Ready to make some magic happen? Here’s how to prepare these heavenly Healthy Strawberry Peanut Butter Cups:
Step 1: Prep Your Strawberries
First things first, wash your fresh strawberries under cool water and gently pat them dry with a clean kitchen towel. Hull the strawberries by removing the green tops and any white parts left behind. If you’re using larger strawberries, you might want to slice them in half for easy layering.
Step 2: Melt the Chocolate
In a microwave-safe bowl, add your dark chocolate chips. Microwave them in 30-second increments, stirring in between until they are fully melted and smooth. If you prefer, you can melt the chocolate using a double boiler — simply fill a pot with water, bring it to a simmer, and place a heatproof bowl on top. Once melted, stir in a sprinkle of sea salt for that chocolatey perfection.
Step 3: Assemble Your Cups
Grab a muffin tin or silicone mold for this part. Spoon a small amount of melted chocolate into each cup, just enough to cover the bottom (about 1 tablespoon). Use a pastry brush or the back of a spoon to spread the chocolate up the sides a bit, creating a little “cup.” Place the muffin tin in the freezer for about 10-15 minutes until the chocolate is set.
Step 4: Layer the Goodness
Once the chocolate has set, it’s time to add your peanut butter. Spoon a generous dollop of peanut butter into each chocolate cup. Add the strawberry slices on top, stacking them if you’d like. Feel free to sprinkle a pinch of salt on top of the strawberries for that sweet-savory balance.
Step 5: Final Chocolate Coating
Now comes the fun part! Pour more melted chocolate on top of the strawberries and peanut butter until they are covered completely. Tap the muffin tin gently on the counter to eliminate any air bubbles and allow the chocolate to settle.
Step 6: Chill and Serve
Pop your cups back into the freezer for another 30 minutes to set the chocolate completely. Once done, carefully peel the chocolate cups out of the muffin tin or mold. They might break apart a bit, but don’t worry — they’ll still be deliciously delightful!
Serving Suggestions
Serve these delectable strawberry peanut butter cups on a beautiful platter. They make a fabulous centerpiece for a brunch spread or a sweet treat at a picnic! Drizzle a bit of melted chocolate or a dusting of cocoa powder on top for a touch of elegance. If you love presentation, feel free to sprinkle some crushed nuts or coconut flakes for added flair!
Recipe Variations
Here are a few fun twists on the classic Healthy Strawberry Peanut Butter Cups:
-
Nuts About It
Mix in some chopped nuts or seeds (like almonds or chia seeds) into the peanut butter for added crunch. -
Extra Fruity
Use diced bananas or raspberries in addition to or instead of strawberries. The flavor combinations are endless! -
Nut-Free Version
Swap out peanut butter for almond butter or tahini for a nut-free alternative. Cream cheese can also be a delightful twist! -
Flavor Infusion
Add a splash of vanilla extract to the peanut butter for extra flavor, or a pinch of cinnamon for warmth. -
Vegan Delight
Make them completely dairy-free by using vegan chocolate and sweetening with maple syrup instead of honey.
Chef’s Notes
These Healthy Strawberry Peanut Butter Cups hold a special place in my heart. They’re not just a nostalgic treat from my childhood; they’ve evolved over time. Initially, I made them for my family, and now they’ve become a go-to recipe for celebrations and special gatherings. My friends often ask me to whip them up for parties, and I always happily oblige — who can resist a little homemade sweetness?
I’ve also found that they’re incredibly forgiving! Want a darker chocolate? No problem! Not a fan of strawberries? Use your favorite fruit instead. This flexibility allows everyone to put their own spin on them while keeping the heart of the recipe intact. Just remember, cooking is about creativity and joy, so feel free to experiment!
FAQs and Troubleshooting
1. What if my chocolate is too thick or chunky?
If your chocolate isn’t melting smoothly, try adding a tiny bit of coconut oil to help it emulsify. Just a teaspoon should do the trick!
2. My cups are breaking apart when I remove them from the molds. Help!
If the chocolate is too cold when you try to remove it, it can become brittle. Let them sit at room temperature for a few minutes for easier removal. Using silicone molds can also help with peeling them out.
3. Can I store these cups, and how long do they last?
Absolutely! Store them in an airtight container in the fridge for up to a week. You can also freeze them for up to three months. Just let them soften for a few minutes at room temperature before enjoying!
4. Can I use white chocolate instead?
You sure can, but keep in mind that white chocolate is sweeter and may alter the flavor balance. Consider adding a pinch of salt to counteract the sweetness!
Now you’re ready to create your own Healthy Strawberry Peanut Butter Cups! Remember, cooking is all about sharing love through food, and these little delights are perfect for sharing with friends, family, or simply indulging in yourself. Happy cooking, and I can’t wait to hear about your kitchen adventures!
Print
Healthy Strawberry Peanut Butter Cups
- Total Time: 30 minutes
- Yield: 12 servings 1x
- Diet: Vegetarian
Description
A delightful blend of strawberries, creamy peanut butter, and silky dark chocolate make these Healthy Strawberry Peanut Butter Cups a guilt-free indulgence.
Ingredients
- 1 cup Fresh Strawberries
- 1/2 cup Natural Peanut Butter
- 1 cup Dark Chocolate Chips (or Cocoa Powder)
- 2 tablespoons Honey or Maple Syrup (optional)
- 1/4 teaspoon Sea Salt
Instructions
- Prep your strawberries: wash and hull them, and slice larger ones in half.
- Melt the chocolate in a microwave-safe bowl in 30-second increments, stirring until smooth.
- Assemble your cups by spooning melted chocolate into muffin tins, and spreading it up the sides.
- Layer the peanut butter and strawberries in the chocolate cups.
- Cover the layers with more melted chocolate until fully sealed.
- Chill the cups in the freezer for 30 minutes to set before serving.
Notes
These cups are versatile and can be made with different fruits or nut butters. They can also be kept in the fridge for up to a week or frozen for three months.
- Prep Time: 15 minutes
- Cook Time: 15 minutes
- Category: Dessert
- Method: No-Cook
- Cuisine: American
Nutrition
- Serving Size: 1 cup
- Calories: 200
- Sugar: 10g
- Sodium: 150mg
- Fat: 12g
- Saturated Fat: 3g
- Unsaturated Fat: 9g
- Trans Fat: 0g
- Carbohydrates: 20g
- Fiber: 3g
- Protein: 4g
- Cholesterol: 0mg
Keywords: strawberry, peanut butter, chocolate, dessert, healthy