
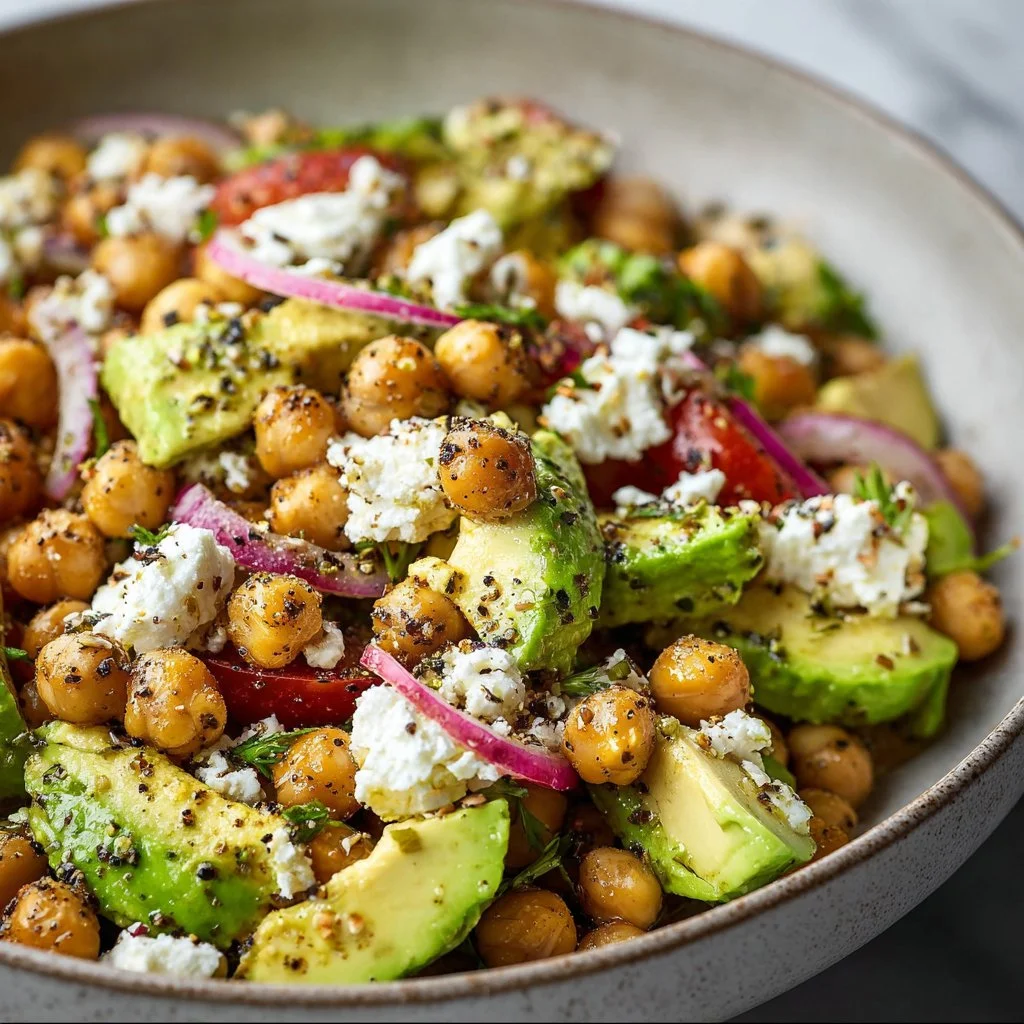
Chickpea Feta Avocado Salad
The Ultimate Chickpea Feta Avocado Salad: A Flavor-Packed Journey
Hey there, fellow food lovers! I’m excited you’ve popped into my cozy kitchen today because we’re about to whip up something absolutely delicious — a Chickpea Feta Avocado Salad that will make your taste buds sing, and your heart warm. This salad is not just an appetizer; it’s a celebration of flavor, texture, and the joy that cooking and sharing food can bring.
Imagine this: a bowl brimming with tender chickpeas, creamy avocado, and tantalizing feta cheese, all tossed together in a light and zesty dressing. Whether you’re tossing together a quick lunch, prepping for a summer picnic, or impressing friends at a dinner party, this salad has you covered! Plus, it’s super easy to make and packed full of nutrients, making it the perfect companion for any season. And don’t worry if you’re a kitchen novice; I’ll guide you step by step. So, grab your apron (I know you have a messy one just like mine!) and let’s dive right in!
But wait—it’s not just about the flavors; it’s about the connections we make over our meals. Cooking is like a love language, and with every chop, stir, and sprinkle, we create stories. Now, let me share a little backstory about why this particular dish holds a special place in my heart!
Personal Story
One sunny afternoon a few summers ago, I found myself in the kitchen with my best friend, Clara. We had just finished a long day of gardening, and our newly grown veggies were calling to be transformed into something fabulous. As we brainstormed recipes, Clara’s eyes lit up at the mention of chickpeas. “What about a salad?” she suggested.
Her enthusiasm was infectious, and before I knew it, we were tossing ideas back and forth like seasoned chefs. We chopped, mixed, and laughed, trying not to spill the cornucopia of ingredients we had laid out before us. It was a joyful mess filled with the aroma of fresh herbs and zesty dressing.
As the sun began to set, we laid our salad out on the porch, accompanied by some homemade bread and chilled lemonade. Those moments—enjoying food under the golden hour, wrapped in laughter and nostalgia—are what led me to create this Chickpea Feta Avocado Salad. It’s a dish that brings me back to those blissful summer days, and I hope it can create lovely memories for you too!
Ingredients
Gather your ingredients for this mouthwatering Chickpea Feta Avocado Salad! Here’s what you’ll need:
-
Chickpeas (2 cans, drained and rinsed)
These little legumes are not only rich in protein and fiber, but they’re also a great base for salads. If you prefer, you can use dried chickpeas — just soak and cook them beforehand! -
Fresh Avocado (1 large, diced)
Creamy and rich, avocado adds the perfect texture to this salad. If you’re not a fan of avocados or can’t find ripe ones, try substituting with diced cucumber or even some roasted sweet potatoes for a twist. -
Feta Cheese (½ cup, crumbled)
Tangy feta brings a burst of flavor. If you’re dairy-free, you can substitute with a plant-based feta or even nutritional yeast for a cheesy flavor. -
Cherry Tomatoes (1 cup, halved)
Juicy tomatoes not only add color but a sweet juiciness that complements the nuttiness of chickpeas. You can choose any variety—grape tomatoes work great too! -
Red Bell Pepper (1, diced)
Crunchy and sweet, this pepper adds a delightful crunch. Feel free to swap with any color bell pepper or even diced cucumbers for added freshness. -
Red Onion (¼ cup, finely chopped)
Onions add a fantastic zing! If raw onion is too strong for you, try soaking the chopped pieces in cold water for 10 minutes to mellow out the flavor. -
Fresh Parsley (¼ cup, chopped)
Bright and herby, parsley adds a lovely finish. If you’re not a fan, mint or cilantro can also bring a fresh twist to the dish. -
Olive Oil (3 tablespoons)
A drizzle of good olive oil ties everything together. You can opt for avocado oil or any light oil if you prefer a different flavor. -
Lemon Juice (from 1 large lemon)
Freshly squeezed lemon juice adds brightness and tang. Lime juice works as an excellent substitute if you’re in a pinch! -
Salt and Pepper (to taste)
Always essential for enhancing flavors! Feel free to experiment with your favorite spices too—paprika or chili flakes can add a delightful kick!
Step-by-Step Instructions
-
Prep Your Veggies:
Start by washing all your fresh produce. Cut the cherry tomatoes in half (or quarters if they’re large) and dice the red bell pepper into bite-sized pieces. -
Get Those Chickpeas Ready:
In a large mixing bowl, add the drained and rinsed chickpeas. If you like a creamier salad, you can lightly mash a portion of the chickpeas with a fork before mixing. This will create a lovely texture. -
Toss In Your Veggies:
Add in the avocado, cherry tomatoes, red bell pepper, and red onion. Be gentle with the avocado to keep it intact; we want those lovely chunks that lend creaminess to the salad. -
Crumbled Feta and Parsley:
Now, sprinkle the crumbled feta cheese and chopped parsley over the heap of fresh ingredients. The feta adds a wonderful salty tang that plays so well with the other flavors! -
Whisk the Dressing:
In a small bowl, whisk together the olive oil, lemon juice, salt, and pepper. You can add a pinch of dried herbs like oregano or basil for an extra flavor kick! -
Combine Everything:
Drizzle the dressing over your salad and gently toss everything together until well combined. Make sure every piece is coated nicely to ensure a burst of flavor with every bite! -
Taste and Adjust:
Here’s where you get to play chef! Taste your salad and adjust the seasoning if needed—maybe a little more salt or a splash more lemon juice—whatever your heart desires! -
Let It Chill:
If you have time, let the salad sit for about 20-30 minutes before serving. This allows the flavors to meld beautifully!
Serving Suggestions
When it comes to serving this Chickpea Feta Avocado Salad, keep it simple yet delightful! Present it in a large, vibrant bowl and let the colors shine. For an elegant touch, garnish with an extra sprig of parsley and a drizzle of olive oil right before serving. You can enjoy it as a refreshing standalone dish or as a side to grilled chicken, fish, or even a hearty grain like quinoa.
Recipe Variations
Here are a few creative twists to keep things exciting:
-
Mediterranean Twist: Add some pitted olives and sun-dried tomatoes for a more Mediterranean vibe.
-
Spicy Kick: Toss in some diced jalapeños or sprinkle some red pepper flakes for added heat.
-
Grain Booster: For a more filling option, mix in cooked quinoa or farro for a hearty salad.
-
Herb Garden: Swap the parsley for fresh dill or basil for a completely different flavor profile.
-
Nutty Crunch: Toss in a handful of toasted nuts or seeds for an extra crunch and healthy fats!
Chef’s Notes
This Chickpea Feta Avocado Salad has become one of my go-to recipes for every occasion. I love how versatile it is—you can adjust the ingredients based on what you have on hand or what’s in season. I remember the first time I attempted to make it for a potluck and accidentally added too much lemon juice. Oh boy, did it turn into a zesty disaster! But with a bit of tossing and a sprinkle of sugar, it transformed into a beloved hit!
Cooking is all about learning and experimenting. So don’t be afraid to make your version of this salad, and remember: things don’t always have to be perfect to be delicious!
FAQs and Troubleshooting
1. Why did my avocado turn brown so quickly?
Avocado browning is completely normal due to oxidation. To slow this process, make sure to toss the avocado with lemon juice immediately after dicing it; this will help preserve its vibrant green color for longer!
2. Can I make this salad ahead of time?
Yes! You can prep your veggies and chickpeas ahead of time, but I suggest adding the avocado and dressing just before serving to keep everything fresh and delicious.
3. It’s too salty—help!
If your salad ends up too salty from the feta, you can balance it by adding extra chickpeas or veggies. A small drizzle of honey can also help counteract excessive saltiness!
4. How long can I store leftovers?
The salad will typically last 2-3 days in an airtight container in the fridge. However, if the avocado begins to brown, it may not look as appealing, so try to eat it fresh!
Nutritional Info
(Per serving, makes approximately four servings)
- Calories: 300
- Protein: 10g
- Carbohydrates: 35g
- Fat: 15g
- Fiber: 9g
There you have it! A delightful Chickpea Feta Avocado Salad that’s not only packed with flavor but also a story to tell. I hope you enjoy making and sharing this recipe as much as I do. Happy cooking, and may your kitchen always be filled with warmth and laughter!
Print
Chickpea Feta Avocado Salad
- Total Time: 15 minutes
- Yield: 4 servings 1x
- Diet: Vegetarian
Description
A flavorful and nutritious Chickpea Feta Avocado Salad packed with fresh ingredients and vibrant tastes, perfect for any occasion.
Ingredients
- 2 cans Chickpeas, drained and rinsed
- 1 large Fresh Avocado, diced
- ½ cup Feta Cheese, crumbled
- 1 cup Cherry Tomatoes, halved
- 1 Red Bell Pepper, diced
- ¼ cup Red Onion, finely chopped
- ¼ cup Fresh Parsley, chopped
- 3 tablespoons Olive Oil
- Juice from 1 large Lemon
- Salt and Pepper, to taste
Instructions
- Prep your veggies: Start by washing all your fresh produce. Cut the cherry tomatoes in half (or quarters if they’re large) and dice the red bell pepper into bite-sized pieces.
- Get those chickpeas ready: In a large mixing bowl, add the drained and rinsed chickpeas. You can lightly mash a portion of the chickpeas with a fork if you like a creamier salad.
- Toss in your veggies: Add in the avocado, cherry tomatoes, red bell pepper, and red onion. Be gentle with the avocado to keep it intact.
- Sprinkle the crumbled feta cheese and chopped parsley over the heap of fresh ingredients.
- Whisk the dressing: In a small bowl, whisk together the olive oil, lemon juice, salt, and pepper.
- Combine everything: Drizzle the dressing over your salad and gently toss until well combined.
- Taste and adjust: Taste your salad and adjust the seasoning if needed.
- Let it chill: If you have time, let the salad sit for about 20-30 minutes before serving.
Notes
Enjoy it as a refreshing standalone dish or as a side to grilled chicken, fish, or hearty grains like quinoa. You can prepare the veggies and chickpeas ahead of time but add the avocado just before serving.
- Prep Time: 15 minutes
- Cook Time: 0 minutes
- Category: Salad
- Method: Mixing
- Cuisine: Mediterranean
Nutrition
- Serving Size: 1 serving
- Calories: 300
- Sugar: 3g
- Sodium: 400mg
- Fat: 15g
- Saturated Fat: 4g
- Unsaturated Fat: 8g
- Trans Fat: 0g
- Carbohydrates: 35g
- Fiber: 9g
- Protein: 10g
- Cholesterol: 20mg
Keywords: chickpea salad, avocado salad, Mediterranean salad, healthy recipe, vegetarian recipe
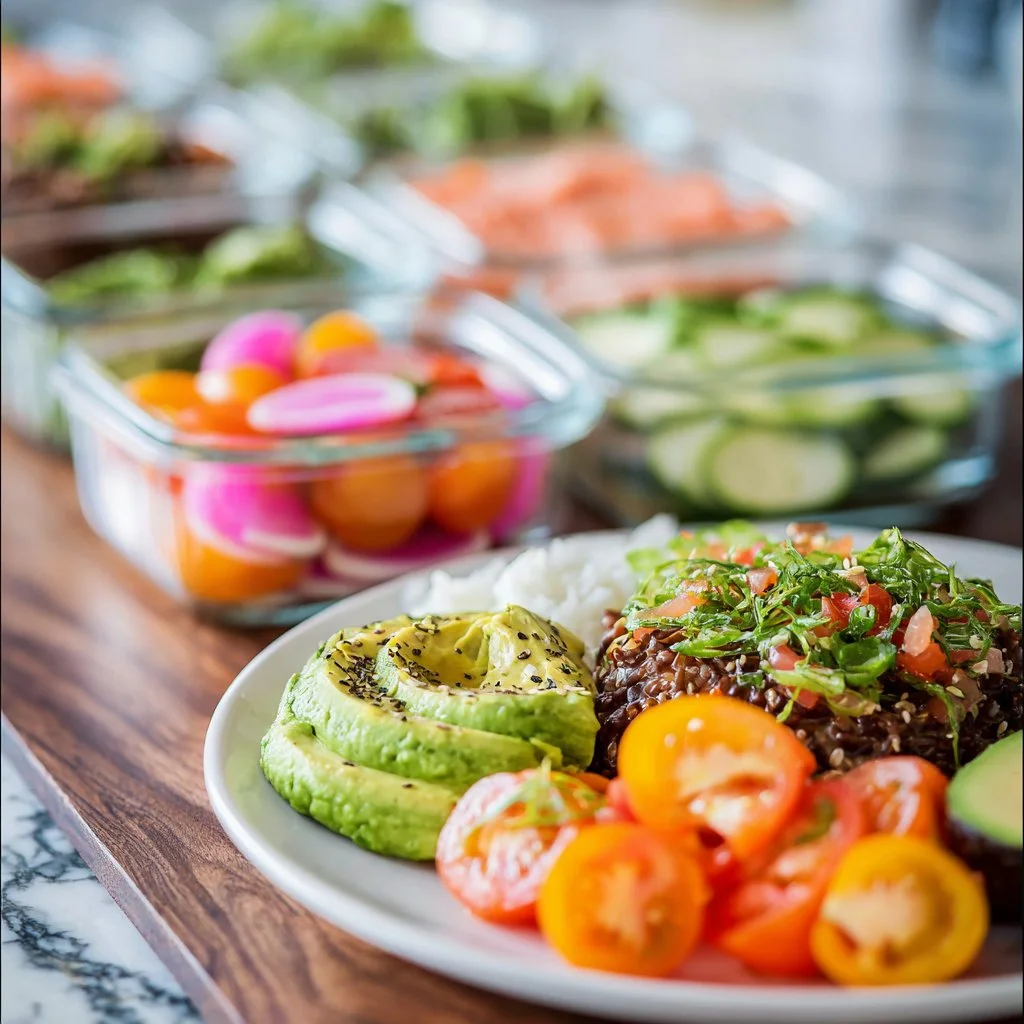
How I Meal Prep for the Week | Get Inspired Everyday!
How I Meal Prep for the Week: Get Inspired Everyday!
Welcome back to my cozy kitchen! Today, we’re diving into a topic I absolutely love: meal prepping! If you’ve ever found yourself scrambling at dinnertime or staring blankly at your fridge, wondering what to whip up, you’re not alone! After countless evenings of “What’s for dinner?” with a side of stress, I decided to take control of my week with meal prep. Not only has it saved my sanity, but it has also transformed the way my family and I enjoy our meals.
Meal prepping can be a game-changer for anyone looking to eat healthily, save time, or simply enjoy a home-cooked meal without the fuss on a busy night. I remember when I first started! I spent an entire Sunday cooking, labeling, and storing everything away, and let me tell you, it felt like running a marathon with a golden ticket at the finish line!
Today, I’ll share with you my step-by-step guide to meal prepping, packed with tips, tricks, and personal stories along the way that hopefully spark your excitement about the whole process. Whether you’re a busy professional, a parent juggling kids and schedules, or just anyone wanting to make life a little easier, meal prepping is for you. So, roll up those sleeves, grab your apron (I have a cute, slightly messy one just for these occasions!), and let’s dive into the world of flavorful meal prep that will inspire your everyday cooking.
Personal Story
Back when I was still navigating the rollercoaster of cooking at home, I made a memorable decision to dedicate my Saturday mornings to meal prepping. One chilly Saturday, I excitedly invited my best friend, Maya, over to embark on this culinary adventure together. We hung out in the kitchen, blasting our favorite playlist and laughing non-stop. The whole house smelled amazing as we roasted veggies, grilled chicken, and whipped up a massive batch of quinoa.
I remember a moment when Maya and I were stirring a bubbling pot of chili together — we had no recipe in front of us! Just a little intuition and a few generous handfuls of spices (more was definitely more that day!). We ended up with an incredible concoction that would become a staple in both our homes.
After our epic cooking session, not only did we stock up our fridges, but we also filled our hearts with joy and laughter. The best part? Each meal turned into a fun reminder of our adventure. Now, meal prepping isn’t just about convenience for me; it’s a way to bond with loved ones, share stories, and enjoy fantastic flavors all week long.
Ingredients
To kick off your meal prep journey, let’s talk about the building blocks you’ll need. Here’s a list of ingredients I recommend, along with some handy tips:
-
Proteins: Chicken Breast, Tofu, or Lentils
- Chicken Breast: Lean, easy to cook, and versatile. If you want to spice things up, try thighs or a whole roast chicken.
- Tofu: A fantastic plant-based protein! Use extra-firm for stir-fries or marinating. Feeling adventurous? Try tempeh as a nutty alternative.
- Lentils: These little legumes cook up quickly and are packed with protein. They can also be easily flavored to match different cuisines.
-
Grains: Quinoa, Brown Rice, or Whole Wheat Pasta
- Quinoa: A protein-rich grain that cooks in about 15 minutes. Plus, it’s gluten-free! For a similar texture, you could swap in couscous.
- Brown Rice: A delightful, nutty flavor and great for hearty meals. Try cauliflower rice as a lower-carb option!
- Whole Wheat Pasta: Great for tossing with veggies and proteins. If you want to up the nutrition, try chickpea or lentil pasta for added flavor and protein.
-
Vegetables: Seasonal Produce (Bell Peppers, Zucchini, Kale)
- Bell Peppers: Colorful, sweet, and great raw or roasted. Swap for any leftover veggies like broccoli or carrots.
- Zucchini: This versatile veggie can be spiralized or simply sautéed. No zucchini? Use eggplant for depth of flavor.
- Kale: A nutritional powerhouse! If it’s too strong for your taste, try baby spinach or arugula as a milder option.
-
Herbs and Spices: Garlic, Cumin, and Fresh Parsley
- Garlic: Adds an aromatic punch that enhances nearly every dish. If you’re out, onion powder can work in a pinch!
- Cumin: This earthy spice is perfect in grains or proteins. Substitutions include coriander or even chili powder for extra heat.
- Fresh Parsley: Brightens up dishes with a fresh finish. Swap in basil or cilantro for different flavor profiles.
Step-by-Step Instructions
Alright, let’s roll up those sleeves and get prepping! Here’s a detailed guide you can follow to create a fantastic meal-prepping experience:
Step 1: Planning Your Menu (30-45 minutes)
First, sit down with a cup of tea, your notepad, and get creative! List out the meals you want to prepare for the week. Aim for variety, but also consider balancing flavors, textures, and cooking times. A warm grain bowl one day, a fresh salad the next, and stir-fried veggies to keep things lively! Write down those ideas, and don’t forget to involve your family; they might inspire a dish you didn’t think of!
Step 2: Grocery Shopping (1-2 hours)
With your menu in hand, it’s time to hit the grocery store! Stick to the perimeter of the store for the freshest produce and proteins. I love getting seasonal veggies because they taste amazing! And don’t forget that cute reusable bag for the planet; it always makes me feel good!
Step 3: Prep Your Space (15-20 minutes)
Get that kitchen ready! Clear the counters, wash your hands, put on an apron, and pull out your utensils. Having a clean, organized space keeps you focused. I love using bowls to classify my prepped ingredients; it makes everything feel tidy!
Step 4: Prepping Your Proteins (30-45 minutes)
Start with proteins, as they often take the longest to cook.
-
Chicken: Season with olive oil, salt, pepper, and your choice of herbs. Bake at 400°F for about 20-25 minutes. Let it cool before cutting into slices for easy storage.
-
Tofu: Press it to get rid of excess moisture and marinade it in soy sauce and ginger. Bake or pan-fry until crispy.
-
Lentils: Rinse and simmer in about 3 cups of water with a bay leaf for 15-20 minutes until tender. Drain any excess water and set aside.
Step 5: Cooking Grains (20-30 minutes)
While proteins are cooking, let’s get those grains going!
- For Quinoa: Rinse and cook with a 2:1 water-to-quinoa ratio; bring to boil and then cover on low for 15 minutes.
–Brown Rice: Use the same water ratio but cook for about 40-45 minutes. - Whole wheat pasta takes about 8-10 minutes; just don’t forget to salt that water!
Step 6: Roasting Those Veggies (20-30 minutes)
While everything is cooking, chop and roast your veggies!
- Preheat your oven to 425°F. Toss your chosen veggies (like bell peppers and zucchini) in olive oil, salt, and pepper, and spread them out on a baking sheet.
- Roast until tender and caramelized, about 20-25 minutes. The smell alone will make you drool!
Step 7: Assembly Time (30 minutes)
With everything ready, it’s time to assemble your meals! Use airtight containers to store your meals, layering your grains on the bottom, followed by protein, and topped with those beautiful roasted veggies. Sprinkle fresh herbs on top for that gorgeous finishing touch!
Step 8: Labels and Storage (10 minutes)
Use labels to mark your meals with dates and meal names. A little organization goes a long way to prevent confusion come mealtime. Store in your fridge for easy access, or freeze any extra portions to keep on hand for later!
Step 9: Enjoy (priceless!)
After all that hard work, enjoy the fruits of your labor! Meal prep is not just about saving time; it’s about celebrating the small victories of cooking and nourishing yourself throughout the week.
Serving Suggestions
When it’s time to eat, simply grab a container, heat it up (or enjoy cold if that’s your jam), and serve it up beautifully. I like to add a sprinkle of nuts, a drizzle of olive oil, or even some avocado for extra creaminess. For a fancy touch, serve on a rustic wooden board or in colorful bowls that brighten your table!
Recipe Variations
-
Flavor Fusion: Change up your proteins — try marinated shrimp for a tropical theme or Moroccan-spiced chickpeas for a plant-based twist.
-
Grain Swap: Substitute quinoa for farro or barley for nutty textures, or go crazy with wild rice.
-
Veggie Adventure: Use seasonal squash in the fall or fresh asparagus in the spring. Adapt based on what’s available!
-
Spiciness Levels: Add some heat with a kick of chili flakes or make it milder with avocado or creamy tahini dressing.
-
Global Inspiration: For an Italian flair, toss grilled veggies and chicken with pesto. For a Mexican vibe, load up with black beans and avocado — the options are endless!
Chef’s Notes
Meal prepping has really blossomed over the years for me! I remember when I first started and made ahem some questionable concoctions — let’s just say that edible doesn’t always mean delicious! But through lots of experimentation, I found my flow. I learned to keep everything flavorful yet simple, and I embraced making mistakes in the kitchen. Each meal now comes with a bit of nostalgia and an ooey-gooey sense of satisfaction. The best part? My family loves it, and that’s what really matters!
FAQs and Troubleshooting
1. What if I don’t have time to meal prep on weekends?
No problem! Start small. Try prepping just your proteins or grains one day during the week.
2. How long can I store my prepped meals?
Most meals last about 4-5 days in the fridge. Anything longer, toss it in the freezer. Just make sure everything cools down before sealing!
3. Can I meal prep breakfast too?
Absolutely! Overnight oats, chia seed puddings, or veggie-packed egg muffins are a fantastic way to get your morning started!
4. I’m stuck in a meal prep rut, any suggestions?
Mix it up! Try new cuisines, ditch what you don’t enjoy, or even switch up your cooking methods (grilling, baking, or stirring for a stir-fry!).
Nutritional Info
While prepping your meals, don’t forget about balance! A well-rounded meal should have proteins, healthy fats, and plenty of veggies. You’ll find that mixing these elements not only fuels your body but also packs flavors that resonate throughout the week.
That’s a wrap, my friends! I hope you feel inspired to tackle your meal prep adventures. Remember, cooking with love and joy is what truly makes a meal special, and I can’t wait to hear how your culinary journey unfolds! Cozy up in your kitchen, savor every moment, and don’t forget to create those memories along the way. Happy cooking! 🍽️✨
Print
Weekly Meal Prep Guide
- Total Time: 165 minutes
- Yield: 6 servings
- Diet: Vegetarian
Description
A comprehensive guide to meal prepping for a week filled with delicious and nutritious meals.
Ingredients
- Chicken Breast
- Tofu
- Lentils
- Quinoa
- Brown Rice
- Whole Wheat Pasta
- Bell Peppers
- Zucchini
- Kale
- Garlic
- Cumin
- Fresh Parsley
Instructions
- Plan your menu by listing meals for the week.
- Shop for ingredients at the grocery store.
- Prep your space by clearing counters and organizing tools.
- Prep your proteins: season and cook chicken, tofu, and lentils.
- Cook your grains like quinoa, brown rice, and whole wheat pasta.
- Roast vegetables until tender and caramelized.
- Assemble meals in containers with grains, protein, and veggies.
- Label meals with dates and names for easy access.
- Enjoy your prepared meals throughout the week.
Notes
Feel free to experiment with different proteins, grains, and vegetables to suit your taste.
- Prep Time: 45 minutes
- Cook Time: 120 minutes
- Category: Meal Prep
- Method: Baking, Roasting, Boiling
- Cuisine: Various
Nutrition
- Serving Size: 1 container
- Calories: 450
- Sugar: 5g
- Sodium: 300mg
- Fat: 10g
- Saturated Fat: 1g
- Unsaturated Fat: 4g
- Trans Fat: 0g
- Carbohydrates: 60g
- Fiber: 8g
- Protein: 25g
- Cholesterol: 60mg
Keywords: meal prep, healthy eating, cooking tips, easy recipes
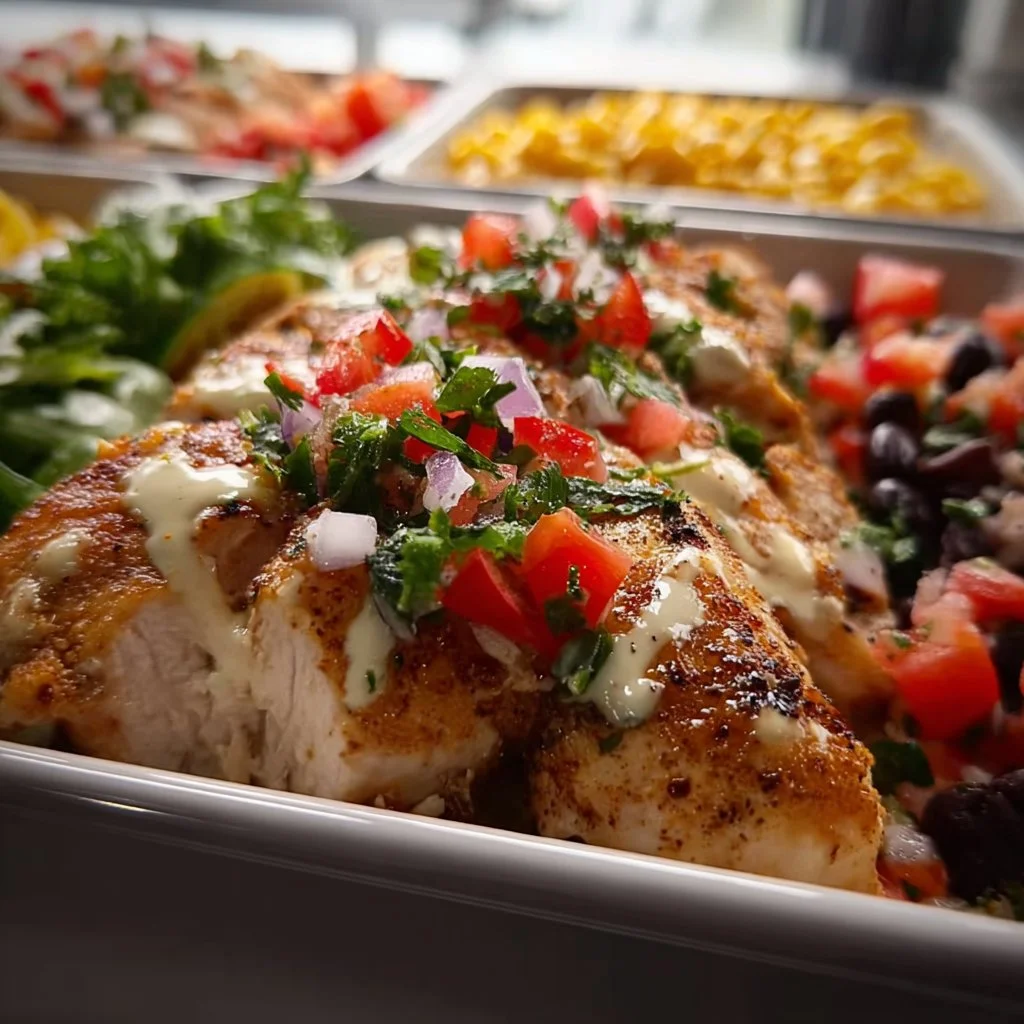
High Protein Chicken Meal Preps
High Protein Chicken Meal Preps: Easy, Delicious, and Nutritious
Hey there, fellow food lovers! Welcome back to my cozy kitchen, where the aroma of home-cooked goodness fills the air. Today, I’m thrilled to share a game-changer for anyone looking to level up their meal prep game—High Protein Chicken Meal Preps! This dish is not only perfect for those busy weekdays but also a delightful way to ensure you’re nourishing your body with all the goodness it deserves.
Meal prepping is more than just a trend. It’s a lifestyle that helps you stay on track with your health and wellness goals. And let’s face it, life can sometimes get a little chaotic—between work, social commitments, and life’s many surprises, cooking every day can feel like an uphill battle. That’s where fabulous meal preps come to save the day! Imagine having delicious, protein-packed chicken ready to go, so you can simply grab and heat whenever hunger strikes. Life just got a whole lot easier!
In this blog post, not only am I going to guide you through creating these satisfying High Protein Chicken Meal Preps, but I’ll also sprinkle in some personal stories and tips that reflect my journey in the kitchen. We’ll explore flavorful combinations, serving suggestions, and creative variations to keep your taste buds dancing. So let’s throw on those aprons, grab your favorite cutting board, and get ready to cook up a storm together!
Personal Story
I’ll never forget the first time I decided to attempt meal prepping. It was a Sunday afternoon, and I had just finished a grueling week of work. All I wanted was to kick back and relax, but I knew Monday was looming, and my usual whirlwind of cooking would be upon me again. As I dug through the fridge, I stumbled across some leftover chicken breasts, veggies that were on the verge of wilting, and a half-empty jar of my mom’s beloved marinade.
I threw everything together, hoping for the best. Little did I know that this mishmash would become my new obsession. Not only were those meal preps a lifesaver during the week, but they also sparked fond memories of my Mom whipping up her famous chicken dishes when I was growing up. The simple act of cutting, marinating, and baking brought me joy beyond just filling my belly. It was a journey into nostalgia, and it inspired me to make meal prepping a regular part of my cooking routine. You know what? I’m excited to pass this love of meal prepping on to you!
Ingredients
Let’s get started with the star of today’s dish, shall we? Here’s what you’ll need to create your High Protein Chicken Meal Preps:
-
Chicken Breasts (boneless, skinless): Choose organic or free-range if you can! Chicken breasts are an excellent source of lean protein. If you want a vegetarian option, try tofu or chickpeas as substitutes.
-
Olive Oil: A baking staple with heart-healthy fats. Avocado oil works great too; it has a higher smoke point, so feel free to use it!
-
Garlic Powder: This adds depth to your chicken without the fuss of fresh garlic. If you prefer fresh, use about two cloves minced instead.
-
Paprika: Gives a beautiful color and a subtle smokiness to the dish! Don’t have paprika on hand? Cumin is a great alternative for an earthy flavor.
-
Italian Seasoning: A blend that usually contains oregano, basil, rosemary, and thyme. You can easily make your own if you have individual dried herbs.
-
Salt and Pepper: Essential for balancing flavors. Make sure to season well; this will elevate your dish from good to absolutely fabulous.
-
Broccoli florets: Packed with vitamins and great for adding color and crunch. If you’re not a fan of broccoli, try bell peppers or green beans instead!
-
Quinoa (or brown rice): A fantastic source of fiber and protein! If you’re looking for a grain-free option, cauli-rice works beautifully too.
-
Lemon juice: Adds brightness and acidity to the dish. You can replace it with apple cider vinegar for a tangy twist.
With all these ingredients at hand, you’re well on your way to creating a delicious meal prep that will fuel your week!
Step-by-Step Instructions
Ready to dive into the cooking process? Here’s a step-by-step guide to crafting your High Protein Chicken Meal Preps:
Step 1: Preheat the Oven
Set your oven to 400°F (200°C). Preheating is crucial for even cooking and crispy chicken—trust me, you don’t want sad, moist pieces when you could have golden brown perfection!
Step 2: Marinate the Chicken
In a large bowl, combine 1 tablespoon of olive oil, 1 teaspoon of garlic powder, 1 teaspoon of paprika, 2 teaspoons of Italian seasoning, salt, and pepper. Mix it all together until it forms a fragrant paste. Coat your chicken breasts in the marinade, making sure they’re evenly covered. Let them marinate for at least 20 minutes (or up to overnight if you want to plan ahead). This step is where the magic happens; the longer it marinates, the more flavors will penetrate the chicken.
Step 3: Prepare the Quinoa
While the chicken is marinating, rinse 1 cup of quinoa under cold water. This helps remove the bitter coating and makes it taste incredible! Combine the rinsed quinoa with 2 cups of water in a medium saucepan. Bring it to a boil, then reduce the heat to a simmer, cover, and let it cook for about 15 minutes, or until all the water has been absorbed and the quinoa is fluffy. If you’re using brown rice, just follow the package instructions!
Step 4: Roast the Chicken and Broccoli
Once the chicken has marinated and the quinoa is cooking, line a baking sheet with parchment paper for easy cleanup. Place the marinated chicken breasts on one side and spread your broccoli florets on the other. Drizzle both with a bit of olive oil and sprinkle with salt and pepper. Roast everything in the oven for about 20-25 minutes or until the chicken reaches an internal temperature of 165°F (75°C). Flip the chicken halfway for that beautiful golden color!
Step 5: Assemble the Meal Prep Containers
Once everything is cooked, it’s time to assemble! In each meal prep container, layer a scoop of quinoa, add a portion of the roasted broccoli, and a delicious chicken breast. If you want to add some zing, drizzle a bit of lemon juice on top before sealing the container.
Step 6: Cool and Store
Let your meals cool completely before sealing the containers with lids. Store them in the fridge where they can keep for up to 4 days. When you’re ready to eat, simply reheat in the microwave for about 2-3 minutes, and you’ll have a healthy, protein-packed meal ready to go!
Serving Suggestions
When it comes to serving, you can jazz things up a bit! Garnish with fresh herbs like parsley or cilantro for a pop of color. If you’re feeling extra indulgent, a sprinkle of feta cheese or a dollop of Greek yogurt can add creaminess and zing to your dish.
Recipe Variations
Want to keep things interesting? Here are a few twists you can try:
- Spicy Kick: Add red pepper flakes or a drizzle of sriracha to the marinade for some heat.
- Asian Flair: Replace paprika with sesame oil and add a splash of soy sauce; serve with edamame instead of broccoli.
- Mediterranean Magic: Use lemon juice instead of olive oil in the marinade and add olives and sun-dried tomatoes to your meal prep.
- Herbaceous Delight: Swap out Italian seasoning for fresh herbs like dill and tarragon, adding an aromatic freshness.
- Curry Infusion: Mix in some curry powder with your marinade and serve with roasted sweet potatoes instead of quinoa.
The possibilities are endless!
Chef’s Notes
This recipe has evolved over the years, mostly due to the many wonderful flavors I’ve encountered on my culinary journey. It’s always fun to embellish the core recipe with seasonal veggies or localized spices I pick up during my travels. Each twist brings a new story and satisfaction to my meal preps.
And here’s a little hack for you: Don’t throw away those chicken bones! They can be used to make a wholesome chicken stock, which is perfect for soups or to cook your grains in next time. Waste not, want not!
FAQs and Troubleshooting
1. What if my chicken seems dry?
If your chicken turns out dry, it’s often due to overcooking. Using a meat thermometer can help ensure you hit that perfect 165°F and keep your chicken juicy.
2. Can I freeze these meal prep containers?
Absolutely! Just be mindful that broccoli may become a bit mushy upon thawing. To avoid this, consider using heartier vegetables like carrots or bell peppers that can withstand freezing.
3. How long does this meal prep last in the fridge?
Your High Protein Chicken Meal Preps can last up to 4 days in the fridge. Beyond that, the quality might not be as delightful. If you’re prepping for a longer week, think about freezing a few!
4. Can I use different proteins?
Yes, you can! Turkey, lean pork, or even fish like salmon would work wonderfully with this marinade. Just be mindful of cooking times, as different proteins require different cooking times to reach that tasty tenderness.
Nutritional Info
(Per serving, based on this recipe giving 4 servings)
- Calories: 450
- Protein: 40g
- Carbohydrates: 45g
- Dietary Fiber: 7g
- Fats: 10g
There you have it, my delightful friends—a nutrition-packed High Protein Chicken Meal Prep recipe that’s as good for the soul as it is for the body. Let’s transform your kitchen into a haven of flavor and fun! Remember, cooking is about the love you put into it. Enjoy and happy cooking!
Print
High Protein Chicken Meal Preps
- Total Time: 45 minutes
- Yield: 4 servings
- Diet: High Protein
Description
Delicious and nutritious high protein chicken meal prep perfect for busy weekdays.
Ingredients
- Chicken Breasts (boneless, skinless)
- Olive Oil
- Garlic Powder
- Paprika
- Italian Seasoning
- Salt and Pepper
- Broccoli florets
- Quinoa (or brown rice)
- Lemon juice
Instructions
- Preheat the oven to 400°F (200°C).
- Marinate the chicken with olive oil, garlic powder, paprika, Italian seasoning, salt, and pepper for at least 20 minutes.
- Prepare the quinoa by rinsing it and cooking with water until fluffy.
- Roast the marinated chicken and broccoli on a baking sheet for 20-25 minutes.
- Assemble each meal prep container with quinoa, broccoli, and a chicken breast.
- Cool the meal prep containers completely before sealing them.
Notes
For serving, garnish with fresh herbs or a sprinkle of feta cheese for added flavor.
- Prep Time: 20 minutes
- Cook Time: 25 minutes
- Category: Meal Prep
- Method: Baking
- Cuisine: American
Nutrition
- Serving Size: 1 serving
- Calories: 450
- Sugar: 3g
- Sodium: 600mg
- Fat: 10g
- Saturated Fat: 1.5g
- Unsaturated Fat: 8g
- Trans Fat: 0g
- Carbohydrates: 45g
- Fiber: 7g
- Protein: 40g
- Cholesterol: 70mg
Keywords: high protein, chicken meal prep, healthy meals, easy recipes
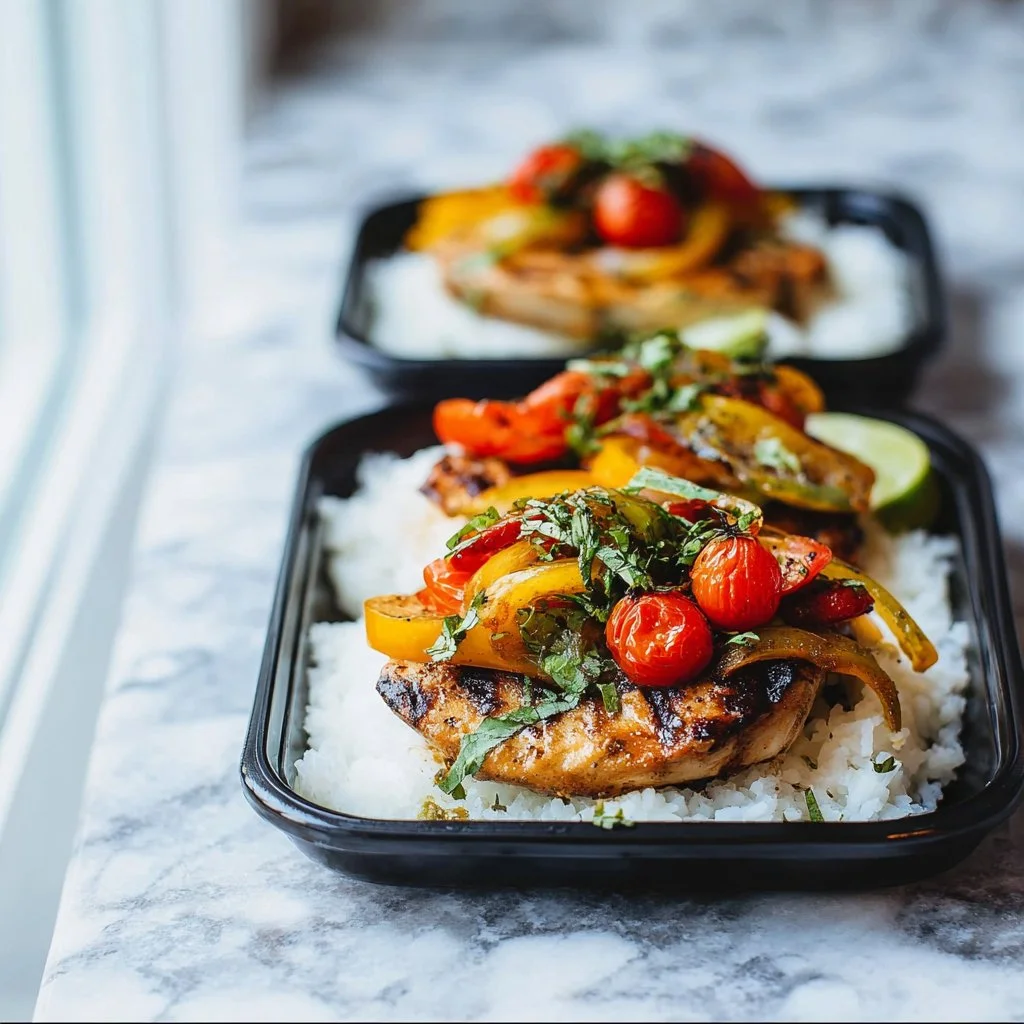
How To Meal Prep On A Budget: 10 Great Recipes To Try
How To Meal Prep On A Budget: 10 Great Recipes To Try
Hello, lovely food enthusiasts! Welcome back to my kitchen! Today, we’re diving headfirst into the wonderful world of meal prep. If you’re like me and find joy in eating delicious food without breaking the bank, you’re in the right place! Meal prepping isn’t just a trend; it’s a lifestyle that can save you time, money, and the hassle of last-minute cooking.
Imagine this: It’s a busy weeknight. You’ve had a long day, and the last thing you want to do is spend hours in the kitchen figuring out what to eat. With meal prep, those worries evaporate like steam off a pot of boiling water. You simply open your fridge—where your meals are neatly stored—and voilà, you’re ready to enjoy a delicious, home-cooked meal!
In this post, I’m going to share 10 budget-friendly recipes that are perfect for meal prepping. Not only are these recipes cost-effective, but they’re also packed with flavor and variety. From hearty grains to vibrant veggies and proteins that will leave your taste buds dancing, we’ve got all bases covered! But first, let me tell you how I got into meal prepping and why it’s become a staple in my kitchen.
Back in my college days, I was juggling classes, part-time jobs, and a budding passion for cooking. Time was scarce, and my budget was pretty tight. Between grabbing quick bites on-the-go and relying on takeout, my wallet (and my waistline) took a hit! That’s when I stumbled upon meal prepping. I started dedicating a couple of hours over the weekend to preparing wholesome meals. Not only did I save money, but I also learned to cook a variety of dishes that I still cherish today.
Now that we’ve set the scene, grab your favorite apron (or a comfortable one, like mine) and let’s get cooking!
Personal Story
One of my most cherished meal prep memories dates back to the summer leading into my last year of college. I scrambled to save up for my dream vacation and had no choice but to stick to a tight grocery budget. I decided to take a Sunday afternoon and dedicate it to meal prepping for the week. With a playlist of my favorite tunes, I transformed my tiny apartment kitchen into a bustling food haven!
I whipped up a large pot of chili, roasted a tray of seasonal veggies, and even made a big batch of quinoa. Each recipe was filled with love, and the aroma that filled my space was nothing short of magical. Friends would pop in during those hours, lured by the delicious smells, and suddenly my apartment turned into a mini cooking class. We laughed, tasted, and shared tips, making that day an unforgettable culinary adventure.
That weekend taught me that meal prepping isn’t just about convenience — it’s about gathering people, sharing good food, and creating memories. So, let’s dive into these 10 fantastic recipes that will make your meal prep not only budget-friendly but also a joy to do!
Ingredients
Here’s a list of ingredients for our 10 budget-friendly meal prep recipes. I’ll also provide quick tips and substitution suggestions to make your cooking experience even smoother!
1. Brown Rice
- Why it’s great: Brown rice is a whole grain that’s filling, nutritious, and super versatile.
- Substitution Tip: Feel free to swap it for quinoa or cauliflower rice if you’re looking for a low-carb option.
2. Canned Beans (Black or Chickpeas)
- Why it’s great: Beans are a fantastic source of protein and fiber.
- Chef Insight: Canned beans save time; just rinse them under cold water to reduce sodium.
3. Seasonal Vegetables (Carrots, Bell Peppers, Broccoli)
- Why they’re great: Using seasonal veggies ensures you save money while prioritizing freshness.
- Substitution Tip: You can switch out these veggies for whatever is on sale that week! Zucchini and spinach are also great alternatives.
4. Chicken Breast or Tofu
- Why it’s great: Both are excellent sources of protein and can easily soak up flavors from spices and marinades.
- Substitution Tip: Swap chicken for turkey or use lentils for a vegetarian protein.
5. Olive Oil
- Why it’s great: A staple in my kitchen! It adds flavor and healthy fats to your meals.
- Substitution Tip: You can use vegetable or canola oil in a pinch.
6. Soy Sauce or Tamari
- Why it’s great: Adds a savory, umami depth to your dishes.
- Substitution Tip: If you’re gluten-free, opt for tamari; coconut aminos work as a great alternative too!
7. Spices (Cumin, Paprika, Garlic Powder)
- Why they’re great: Spices are what give your meals character, so don’t hold back!
- Chef Insight: Store spices in airtight containers to ensure they stay fresh longer!
8. Eggs
- Why they’re great: They’re full of protein and versatile for various recipes.
- Substitution Tip: For egg dishes, you can use flaxseed meal mixed with water as an egg substitute.
9. Whole Wheat Pasta
- Why it’s great: Whole wheat pasta is hearty and nutty, making it a satisfying base for meals.
- Substitution Tip: Zoodles (zucchini noodles) are a fun lower-carb alternative!
10. Fresh Herbs (Basil, Parsley)
- Why they’re great: Fresh herbs brighten up any dish with their vibrant flavors.
- Substitution Tip: If you don’t have fresh herbs, dried herbs can work; just adjust the quantity since dried herbs are more potent!
Step-by-Step Instructions
Let’s roll up our sleeves and get started! Here’s how to create delicious meal prep recipes that make the week ahead much easier.
1. Chili Con Carne
- In a large pot, heat olive oil over medium heat. Add chopped onion and sauté until translucent.
- Tip: Use a wooden spoon to scrape the bottom of the pan to incorporate all the flavorful brown bits!
- Add ground beef (or turkey) and cook until browned.
- Stir in canned tomatoes, drained beans, corn, and spices. Let it simmer for about 30 minutes to lock in flavors.
- Chef Hack: More simmering time means richer flavors!
2. Roasted Vegetable Medley
- Preheat your oven to 425°F (220°C).
- Chop seasonal vegetables into bite-sized pieces. Toss with olive oil, salt, and pepper.
- Spread on a baking sheet and roast for 20-25 minutes, flipping halfway for even cooking.
- Tip: Line your baking sheet with parchment paper for easy cleanup!
3. Brown Rice & Quinoa
- Rinse brown rice in cold water prior to cooking. This helps remove excess starch.
- In a pot, combine rice with twice the amount of water and a pinch of salt. Bring to a boil, then cover and reduce to a simmer for about 45 minutes or until tender.
4. Stir-Fried Chicken or Tofu
- Marinate chicken strips (or cubed tofu) in soy sauce and spices for at least 30 minutes.
- In a wok or skillet over high heat, add olive oil. Stir-fry marinated protein until cooked through.
- Chef Hack: For extra flavor, toss in a tablespoon of peanut butter during the last minute of cooking!
5. Herbed Pasta Salad
- Cook whole wheat pasta according to package instructions; rinse under cold water and drain well.
- In a large mixing bowl, combine cooked pasta with olive oil, chopped herbs, veggies, and other mix-ins.
- Season with salt, pepper, and a splash of lemon juice.
- Tip: This salad is perfect served cold and can last for several days in the fridge!
Serving Suggestions
Once you’re done cooking, it’s time to serve and enjoy! Stack those meals in clear, airtight containers for a colorful display in your fridge. This not only keeps everything fresh but also allows you to see what deliciousness awaits you each day. Pair each meal with a tiny container of your favorite dressing or sauce to sprinkle on when you’re ready to indulge!
Recipe Variations
Here are a few creative twists you can consider for your meal prep dishes:
- Chili with Sweet Potato: Add cubed sweet potatoes to your chili for a sweet and hearty variation.
- Mediterranean Style Pasta Salad: Incorporate olives, feta cheese, and sun-dried tomatoes for a Mediterranean flair.
- Southwest Tofu Bowl: Season tofu with taco spices and serve with brown rice, black beans, and avocado.
- One-Pan Breakfast Scramble: Toss all your favorite breakfast veggies and proteins together in a pan for a satisfying breakfast meal.
- Curried Lentils: Use lentils in place of beans in the chili for an entirely new flavor profile.
Chef’s Notes
I’ve learned so much from meal prepping over the years, and what started as a necessity has turned into a joyful ritual. One thing I absolutely love is how leftovers can surprise you. A chili can morph into a pasta sauce, and roasted veggies become an omelet star! Funny enough, I once mixed up spices for a meal in a hurry and ended up creating my favorite chili that way. Embrace the unexpected in the kitchen; it’s all part of the adventure!
FAQs and Troubleshooting
1. Can I freeze these meals?
Absolutely! Most of these recipes freeze beautifully. Just make sure to double-check for items that might not freeze well, like cooked pasta or delicate veggies.
2. How long can I keep these meal prep recipes in the fridge?
Generally, meals stored in airtight containers can last about 4-5 days. Just trust your nose; if it smells off, toss it!
3. How do I prevent veggies from getting mushy?
Avoid overcooking your veggies during the initial prep, and if reheating, put them in the microwave for short bursts to maintain some crunch.
4. What if I don’t have time to meal prep on the weekend?
No worries! Pick a day during the week where you can set aside 1-2 hours. Even prepping just a couple of meals makes a difference.
Nutritional Info
(Feel free to customize this section based on the recipes you choose to meal prep!)
- Chili Con Carne: Calories – 300, Protein – 24g, Carbs – 35g, Fat – 10g.
- Roasted Vegetables: Calories – 150, Carbs – 30g, Fat – 5g.
- Brown Rice: Calories – 215 per cup, Protein – 5g, Fiber – 3g.
So, there you have it! A cozy guide to meal prepping on a budget, filled with personal stories, tips, and creativity! Remember, the most important ingredient in your kitchen is love, so let your passion shine through every dish. Happy meal prepping, my friends!
Print
10 Budget-Friendly Meal Prep Recipes
- Total Time: 150 minutes
- Yield: 4 servings
- Diet: Vegetarian
Description
Discover how to meal prep delicious and budget-friendly meals for the week ahead.
Ingredients
- Brown Rice
- Canned Beans (Black or Chickpeas)
- Seasonal Vegetables (Carrots, Bell Peppers, Broccoli)
- Chicken Breast or Tofu
- Olive Oil
- Soy Sauce or Tamari
- Spices (Cumin, Paprika, Garlic Powder)
- Eggs
- Whole Wheat Pasta
- Fresh Herbs (Basil, Parsley)
Instructions
- Heat olive oil in a large pot over medium heat. Add chopped onion and sauté until translucent.
- Add ground beef (or turkey) and cook until browned.
- Stir in canned tomatoes, drained beans, corn, and spices. Let it simmer for about 30 minutes.
- Preheat your oven to 425°F (220°C).
- Chop seasonal vegetables, toss with olive oil, salt, and pepper. Spread on a baking sheet and roast for 20-25 minutes.
- Rinse brown rice in cold water prior to cooking.
- Combine rice with twice the amount of water and a pinch of salt. Bring to a boil, then cover and reduce to a simmer for about 45 minutes.
- Marinate chicken strips (or cubed tofu) in soy sauce for at least 30 minutes.
- Add olive oil to a wok or skillet over high heat. Stir-fry marinated protein until cooked through.
- Cook whole wheat pasta according to package instructions, rinse under cold water, and drain well. Combine with olive oil, chopped herbs, veggies, and seasonings.
Notes
You can freeze most of these meals for later. Store in airtight containers.
- Prep Time: 90 minutes
- Cook Time: 60 minutes
- Category: Meal Prep
- Method: Various
- Cuisine: Various
Nutrition
- Serving Size: 1 serving
- Calories: 350
- Sugar: 5g
- Sodium: 400mg
- Fat: 12g
- Saturated Fat: 4g
- Unsaturated Fat: 6g
- Trans Fat: 0g
- Carbohydrates: 45g
- Fiber: 3g
- Protein: 15g
- Cholesterol: 30mg
Keywords: meal prep, budget-friendly, healthy meals, cooking tips, easy recipes
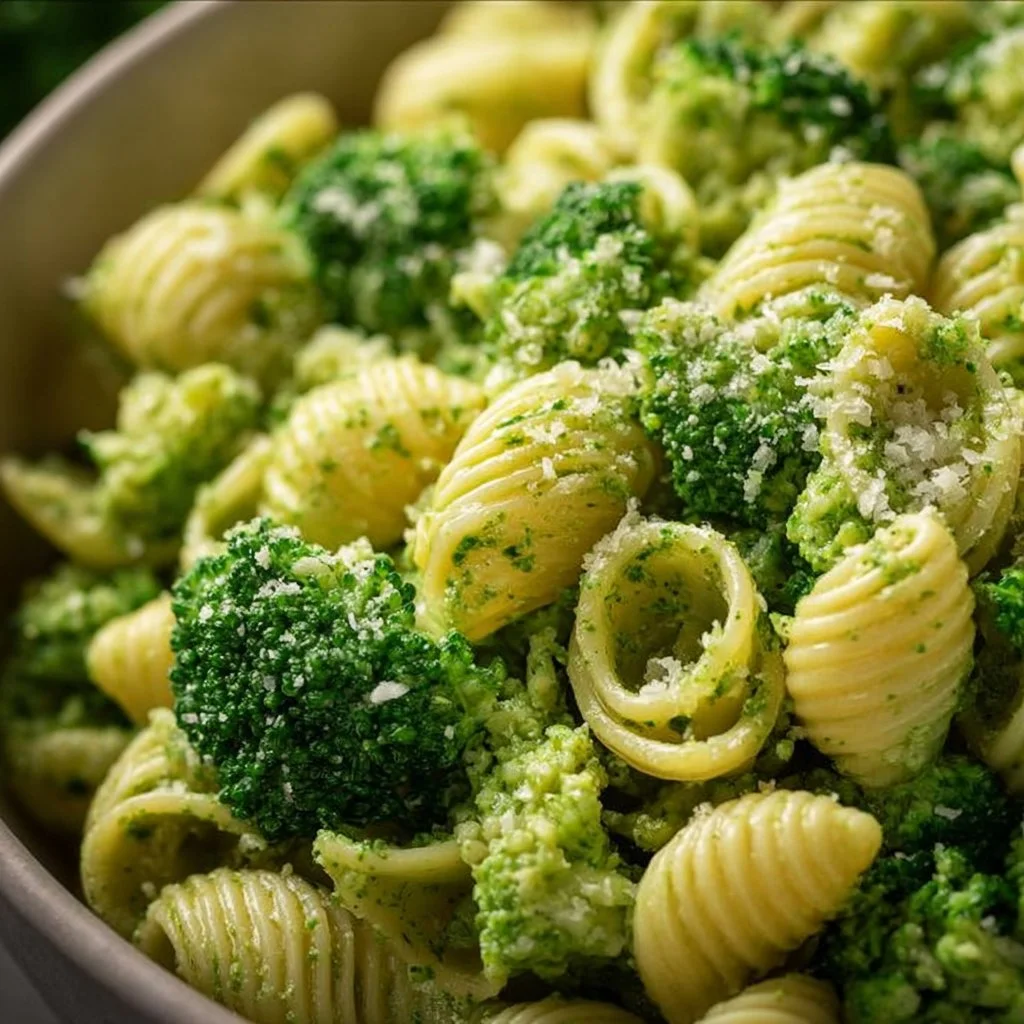
Easy Healthy Broccoli Pasta
Easy Healthy Broccoli Pasta: A Recipe to Savor
Welcome back to my cozy kitchen! Today, I’m excited to share a delightful dish that beautifully balances health and taste—Easy Healthy Broccoli Pasta. This dish is a celebration of fresh ingredients, vibrant flavors, and the simplicity of home-cooking. Picture this: you walk into your kitchen, and the aroma of garlic wafts through the air, mingling with fresh broccoli and al dente pasta—it’s enough to make anyone’s heart skip a beat!
This recipe is not just about feeding yourself; it’s about nourishing your spirit and those you love. Broccoli is the unsung hero of vegetables—packed with nutrients and a proud member of the cruciferous family. When paired with whole grain pasta and a hint of zest, it transforms into a meal that’s both comforting and energizing. Each bite whispers of sunshine (yes, even in the depths of winter!) and carries you through your busy day with ease.
And let’s be honest, who doesn’t love a one-pan wonder? This Easy Healthy Broccoli Pasta comes together in under 30 minutes, giving you more time to kick back, either on your couch or at your dinner table, enjoying the company of family and friends. Whether it’s a casual weeknight dinner or a fun get-together with loved ones, this dish is versatile, delicious, and a great way to get your greens!
With straightforward steps and ingredients you likely already have on hand, cooking becomes an enjoyable experience, rather than a chore. So, grab your apron, and let’s dive into the world of pasta, where broccoli is not just a side dish but a star player in a delightful symphony of flavors!
Personal Story
Whenever I make this Easy Healthy Broccoli Pasta, I’m transported back to Sunday dinners at my grandma’s house. My brothers and I would rush into the kitchen, where the golden light illuminated a table laden with steaming dishes—each plate a testament to her culinary prowess. One of my favorites was her simple broccoli pasta.
She had a magical way of making even the simplest meals feel special—usually by adding a sprinkle of fresh herbs or a dash of lemon zest that made everything come alive. I remember our laughter filling the room as we fought over the last bite of broccoli, trying to outsmart each other for that deliciously garlicky morsel.
Years later, when I first started cooking seriously, I found myself recreating her recipes, trying to infuse them with the same warmth and love. This Easy Healthy Broccoli Pasta reminds me not only of those cherished family gatherings but also of forging my own path in the kitchen. It’s a dish that wraps you in a cozy hug, encouraging you to slow down and enjoy life, one delicious bite at a time.
Ingredients
Here’s what you’ll need for your Easy Healthy Broccoli Pasta:
-
Whole Grain Pasta (12 oz)
- Whole grain options like whole wheat or brown rice pasta offer more fiber and nutrients than traditional pasta. If you’re gluten-free, try chickpea or lentil pasta!
-
Fresh Broccoli (2 cups, chopped)
- Broccoli is rich in vitamins K and C. Choose firm, bright green heads for the best flavor. If you’re short on fresh, frozen broccoli works too; just be sure to thaw and drain it well.
-
Garlic (4 cloves, minced)
- Garlic not only adds flavor but also has numerous health benefits. Fresh is best, but if you’re short on time, pre-minced garlic can save the day.
-
Olive Oil (3 tablespoons)
- A good quality extra virgin olive oil enhances flavor and is full of healthy fats. You can swap it out for avocado oil if you prefer a neutral taste.
-
Lemon Juice (1 tablespoon, freshly squeezed)
- Fresh lemon juice brings brightness to the dish. If you don’t have fresh lemons, bottled juice will do in a pinch—but fresh is always better!
-
Parmesan Cheese (½ cup, grated)
- Parmesan adds a salty, umami-rich flavor that ties everything together. Nutritional yeast is a fantastic dairy-free alternative for a similar flavor profile.
-
Salt and Pepper (to taste)
- Seasoning is personal! Adjust the salt and pepper to your taste—don’t be shy with these kitchen staples!
-
Red Pepper Flakes (optional)
- A sprinkle of red pepper flakes adds a bit of heat. Feel free to leave it out if you prefer a milder dish!
Step-by-Step Instructions
Step 1: Cook the Pasta
-
Boil a large pot of salted water.
- Bring it to a roaring boil before adding your whole grain pasta. The salt helps flavor the pasta.
-
Add the pasta and cook according to package instructions.
- Typically, this should take about 8–12 minutes for whole grain pasta. Stir occasionally to prevent sticking.
-
Reserve some pasta water.
- Before draining the pasta, make sure to scoop out about 1 cup of the starchy cooking water. It will be used later to create a lovely sauce.
-
Drain the pasta and set it aside.
- Remember: don’t rinse the pasta! It’s coated with starch, which helps the sauce cling better.
Step 2: Sauté the Broccoli and Garlic
-
In a large skillet, heat the olive oil over medium heat.
- Wait until it’s shimmering—not smoking—before moving on to the next step.
-
Add minced garlic and sauté for about a minute.
- You want the garlic to turn golden but not burnt, as this will keep its robust flavor intact. Stir often!
-
Toss in the chopped broccoli.
- Cook for about 3–5 minutes, stirring frequently, until the broccoli is vibrant and just tender.
-
Season with salt and pepper.
- This step enhances the broccoli’s natural sweetness; don’t skip it!
Step 3: Combine Pasta and Broccoli
-
Add the drained pasta to the skillet with broccoli and garlic.
- If your skillet isn’t large enough, you could also transfer everything back into the pasta pot.
-
Pour in the reserved pasta water.
- Start with half a cup, and gradually add more if needed. This starchy water helps create a luscious sauce.
-
Add fresh lemon juice and grated Parmesan cheese.
- Toss everything together over low heat. The cheese will melt beautifully, coating the pasta and broccoli.
-
Adjust seasoning to taste.
- This is your final chance to taste and tweak. More salt? More lemon juice? Go for it!
Step 4: Serve and Enjoy!
-
Remove from heat and serve immediately.
- Spoon into bowls, reserving a bit of the grated Parmesan for garnish on top.
-
Top with red pepper flakes if desired.
- This adds a lovely kick for those who enjoy a bit of spice!
-
Pair with a light salad or crusty bread.
- The freshness of a side salad or the heartiness of bread complements this dish beautifully.
Serving Suggestions
To make your Easy Healthy Broccoli Pasta pop visually on the plate, consider adding a handful of fresh basil or parsley just before serving. A sprinkle of lemon zest can elevate it even further, providing a refreshing brightness and an eye-catching finish. Serve it with a side of garlic bread or a light arugula salad for a complete meal. This dish shines best when shared among friends and family, so set the table, pour some sparkling water, and let the conversations flow as freely as the flavors!
Recipe Variations
- Pasta Primavera: Add seasonal vegetables such as bell peppers, cherry tomatoes, or zucchini for a vibrant twist.
- Pesto Addition: Mix in a couple of tablespoons of your favorite pesto for an extra layer of flavor and creaminess.
- Protein Boost: Toss in grilled chicken, shrimp, or chickpeas to make this dish heartier and more filling.
- Vegan Option: Omit the cheese or substitute it with nutritional yeast and use a plant-based pasta.
- Herb Infusion: Swap out broccoli for spinach, kale, or even asparagus depending on what you have on hand!
Chef’s Notes
This Easy Healthy Broccoli Pasta is one of those dishes that feels both comforting and nourishing—a real win-win! It’s evolved over the years; my original version was much simpler, but I always found adding garlic and a splash of lemon juice made it feel festive and special. The beauty of this dish lies in its adaptability; you can swap around ingredients based on what you have or what’s fresh at the market.
And here’s a funny story: one time, I was in a rush to whip this up for dinner and accidentally mistook sugar for salt while seasoning. Let’s just say my family got a rather sweet surprise! Learn from my mistake—double-check your ingredients, and have fun with it! The kitchen should be a place of laughter, learning, and lots of delicious food.
FAQs and Troubleshooting
1. Why is my pasta mushy?
Mushy pasta typically occurs when it’s overcooked. Make sure to watch your cooking times closely and consider sampling a strand a minute or two before the full time is up!
2. Can I store leftovers?
Absolutely! Store any leftovers in an airtight container in the fridge for up to three days. Just reheat it in a skillet with a splash of water to keep it moist.
3. What if my sauce is too thick?
If you find that the dish has become too dry after cooking, just add a bit more reserved pasta water! It’s an easy fix to bring back that creamy consistency.
4. Can I use frozen broccoli?
Definitely! Frozen broccoli can be a great time-saver. Just make sure to thaw and drain it before adding it to the skillet to avoid excess moisture.
5. What side dishes pair well with this pasta?
This broccoli pasta goes wonderfully with a light, refreshing salad or a slice of garlic bread for a comforting touch.
Nutritional Info
While precise nutritional values will depend on your specific ingredients and portion sizes, this Easy Healthy Broccoli Pasta is packed with whole grains, fiber, and essential vitamins. It’s a wholesome dish that’s relatively low in calories but high in nutrients, making it a fantastic choice for anyone looking to eat healthily without sacrificing taste!
So there you have it, my friends—an Easy Healthy Broccoli Pasta that’s perfect for any day of the week. I’m thrilled to share this with you, and I hope it brings as much joy to your kitchen as it has to mine. Happy cooking, and enjoy every delicious bite!
Print
Easy Healthy Broccoli Pasta
- Total Time: 30 minutes
- Yield: 4 servings
- Diet: Vegetarian
Description
A delightful dish that balances health and taste, featuring fresh broccoli and whole grain pasta.
Ingredients
- Whole Grain Pasta (12 oz)
- Fresh Broccoli (2 cups, chopped)
- Garlic (4 cloves, minced)
- Olive Oil (3 tablespoons)
- Lemon Juice (1 tablespoon, freshly squeezed)
- Parmesan Cheese (½ cup, grated)
- Salt and Pepper (to taste)
- Red Pepper Flakes (optional)
Instructions
- Boil a large pot of salted water.
- Add the pasta and cook according to package instructions.
- Reserve some pasta water before draining.
- Drain the pasta and set it aside.
- Heat the olive oil over medium heat in a large skillet.
- Add minced garlic and sauté for about a minute.
- Toss in the chopped broccoli and cook for about 3–5 minutes.
- Season with salt and pepper.
- Add the drained pasta to the skillet with broccoli and garlic.
- Pour in the reserved pasta water.
- Add fresh lemon juice and grated Parmesan cheese.
- Adjust seasoning to taste.
- Remove from heat and serve immediately.
- Top with red pepper flakes if desired.
Notes
Serve with a side salad or garlic bread for a complete meal. You can customize by adding other vegetables or protein.
- Prep Time: 10 minutes
- Cook Time: 20 minutes
- Category: Main Course
- Method: Sautéing
- Cuisine: Italian
Nutrition
- Serving Size: 1 serving
- Calories: 350
- Sugar: 3g
- Sodium: 400mg
- Fat: 12g
- Saturated Fat: 2g
- Unsaturated Fat: 8g
- Trans Fat: 0g
- Carbohydrates: 45g
- Fiber: 6g
- Protein: 15g
- Cholesterol: 10mg
Keywords: broccoli, pasta, healthy cooking, vegetarian recipe, quick meal




