Greek Chicken Bowls
Greek Chicken Bowls: A Flavorful Journey to the Mediterranean
Welcome back to my kitchen, friends! Today, I’m thrilled to whisk you away on a Mediterranean adventure with my delicious Greek Chicken Bowls! If you’re yearning for a dish that bursts with vibrant flavors, freshness, and comfort, then you’ve hit the jackpot. Picture succulent marinated chicken, crisp veggies, creamy tzatziki, and fluffy rice or quinoa — this dish has it all!
Growing up, my family had a special affinity for Greek cuisine. I fondly remember our Sunday dinners, where my mom would magically transform the kitchen with the aromatic scents of oregano, lemon, and garlic. It was the kind of place where the air was filled with laughter and the clinking of plates — a true feast of love, flavors, and cherished memories. Those Sunday gatherings never felt complete without a selection of colorful bowls brimming with goodies, inviting everyone to build their perfect plate.
These Greek Chicken Bowls embody that same spirit. They are versatile, filling, and straightforward to whip up, even on a busy weeknight. Whether you’re meal prepping for the week or serving guests on a sunny afternoon, this dish will impress everyone at your table while keeping your heart happy and satisfied.
So, let’s roll up our sleeves, throw on our aprons, and embark on this flavorful journey together. Not only will you discover how to make my favorite Greek Chicken Bowls, but you’ll also find tips, tricks, and stories from my own culinary escapades. Ready? Let’s dive in!
Personal Story
Ah, the memories tied to food are some of the best, aren’t they? One of my most cherished kitchen tales revolves around the first time I attempted to recreate my mom’s Greek chicken dish. I was in my college dorm, surrounded by textbooks and ramen noodle packets, feeling particularly nostalgic. My heart was longing for that family warmth, so I called her, excitedly asking for her secrets.
With a chuckle, she responded, “Sweetheart, it’s all about love and a few good ingredients.” I remember scribbling down her notes on a napkin, full of joy and determination. That night, I marinated chicken thighs in olive oil, garlic, and lots of lemon. The moment I pulled that first bowl of Greek chicken onto my desk — alongside fuzzy memories of loud family dinners — I knew I had created something special.
Though my first attempt didn’t match my mom’s, it opened a new chapter of cooking for me. That messy night in my tiny dorm, along with plenty of spilled tzatziki and laughter, led me to discover the joy of creating dishes that bring people together. Cooking is about sharing love, memories, and delicious bites. So, yes, every Greek Chicken Bowl holds a small piece of my heart!
Ingredients
Before we jump into the actual cooking, let’s gather our ingredients like a well-prepared chef! For these Greek Chicken Bowls, you’ll need:
For the Chicken Marinade:
-
Chicken Thighs or Breasts (1.5 lbs):
- Juicy chicken thighs are the secret to a tender bite, but chicken breasts can also do the job! For a lighter option, you could substitute them with turkey cutlets.
-
Olive Oil (1/4 cup):
- A staple in Mediterranean cooking! Extra virgin olive oil enhances flavor. If you’re looking for a change, avocado oil is a suitable substitute.
-
Garlic (4 cloves, minced):
- Garlic is the flavor bomb! Feel free to swap it with garlic powder in a pinch — however, fresh is always best!
-
Lemon Juice (1/4 cup):
- Freshly squeezed lemon juice brings brightness to the dish. In a pinch, bottled lemon juice can work, but fresh is highly recommended for maximum flavor!
-
Dried Oregano (2 tablespoons):
- A quintessential herb in Greek cooking with a warm flavor profile. Don’t have oregano? Try dried thyme or Italian seasoning instead!
-
Salt and Pepper (to taste):
- A must-have combo! You can always add more, but start with a pinch. I love using sea salt for its flavor.
For the Bowls:
-
Cooked Rice or Quinoa (2 cups):
- These hearty bases make the perfect canvas! Brown rice or cauliflower rice are fantastic alternatives depending on your dietary preference.
-
Chopped Cherry Tomatoes (1 cup):
- Juicy and sweet! Diced cucumbers work well too if you want something crunchier!
-
Red Onion (1/2, thinly sliced):
- Tart and crunchy! If onion isn’t your thing, feel free to skip or substitute with green onions.
-
Feta Cheese (1/2 cup, crumbled):
- Creamy and tangy, feta ties all the flavors together! Try goat cheese for a different spin, or use dairy-free feta for a vegan option!
-
Tzatziki Sauce (1 cup):
- The soul of Greek cuisine; this cucumber-yogurt sauce is a must! You can buy it ready-made, but making it fresh at home is much more rewarding!
-
Plain Greek Yogurt (for topping, optional):
- Extra creaminess never hurt anyone! You can mix it with a little garlic and dill for an upgraded version.
Step-by-Step Instructions
Now that our ingredients are ready, let’s cook up these delectable Greek Chicken Bowls! Grab your favorite playlist, channel that kitchen energy, and let’s get moving!
Step 1: Marinate the Chicken
-
Combine the Marinade: In a bowl, whisk together olive oil, minced garlic, lemon juice, dried oregano, salt, and pepper.
- Pro Tip: Let the marinade sit for a few minutes! The flavors will meld beautifully, creating a divine taste explosion.
-
Add Chicken: Place the chicken thighs or breasts in a resealable bag or a shallow dish. Pour the marinade over the chicken, ensuring they are well coated.
- Chef Insight: For the most flavor, let your chicken marinate in the fridge for at least 30 minutes or up to 8 hours if you plan ahead! The longer it marinates, the more delicious it becomes.
Step 2: Cook the Chicken
-
Heat the Grill or Skillet: Preheat your grill or a skillet over medium-high heat.
- If grilling, brush the grates with a little oil to prevent sticking! If you’re using a skillet, a splash of olive oil will do the trick!
-
Cook the Chicken: Once hot, place the marinated chicken on the grill or in the skillet. Sear for 5-7 minutes on each side until fully cooked (internal temperature of 165°F).
- Chef Hack: Once you see those beautiful grill marks, resist the urge to flip too early! Let it sear properly for a tasty caramelization!
-
Rest the Chicken: Once cooked, take the chicken off the heat and let it rest on a cutting board for about 10 minutes.
- Resting is key! It allows the juices to redistribute throughout the meat, keeping it tender and moist.
Step 3: Prepare the Accompaniments
-
Cook the Rice or Quinoa: While the chicken is resting, follow the package instructions to cook rice or quinoa.
- Quick Tip: Add a pinch of salt and a squeeze of lemon juice to the water for added flavor.
-
Prep the Veggies: Meanwhile, chop your cherry tomatoes and slice the red onion.
- Sweet tip: If your onions are too pungent, soak them in cold water for about 10-15 minutes before using them! It reduces the bite!
Step 4: Assemble the Bowls
-
Slice the Chicken: After resting, slice the chicken into strips.
- Presentation Matters! Angle your knife at 45 degrees for beautiful, delicious-looking slices!
-
Build Your Bowls: Start with a base of rice or quinoa, then layer your sliced chicken, chopped tomatoes, onions, and sprinkle with crumbled feta. Drizzle tzatziki over top!
- Remember! This is a create-your-own moment; feel free to layer and mix according to your preference!
Serving Suggestions
Time to serve these beauties! I love presenting them in colorful bowls that show all the vibrant ingredients. Add a sprinkle of fresh herbs like parsley or mint on top for a finishing touch, and don’t forget extra tzatziki on the side for those who can’t get enough! The vibrant colors, aromatic scents, and delicious flavors make a delightful combination that’s not just a meal — it’s a feast for the eyes!
Recipe Variations
Want to jazz up your Greek Chicken Bowls? Here are a few fun variations you can try:
-
Mediterranean Grain Bowl: Swap out rice or quinoa for farro or couscous for a trendy hidden gem!
-
Spicy Kick: Add some sliced jalapeños or a drizzle of chili oil for those who like an extra kick!
-
Vegetarian Option: Instead of chicken, use grilled veggies like zucchini, eggplant, or portobello mushrooms for a hearty and satisfying bowl!
-
Pesto Twist: Swap out tzatziki with basil pesto — it’s a deliciously unique spin that brings out the lush flavors of summer.
-
Hummus Base: Use hummus as a base instead of grains for a protein-packed, lower-carb option!
Chef’s Notes
Cooking is not just about following a recipe; it’s about the stories we build in the kitchen. If you saw my kitchen right now, you’d laugh! Tzatziki in the hair, chicken drippings on the floor, and a profusion of chopped veggies scattered around. But you know what? Each bit adds to the fun of creating something delicious.
Over the years, I’ve adapted this recipe countless times! Sometimes I’ll toss in sautéed spinach or layer in roasted chickpeas for extra texture and flavor. Each adjustment has only enriched my love for cooking and reminded me to always bring my creativity into every dish.
FAQs and Troubleshooting
1. What if my chicken is dry?
- Dry chicken usually comes from overcooking. To prevent this, always use a meat thermometer, and let it rest after cooking! Trust me — this will save your meal!
2. Can I make this ahead of time?
- Absolutely! You can marinate the chicken up to a day in advance, and pre-cook rice/quinoa. Alternatively, prep all the veggie toppings and store in the fridge until you’re ready to assemble.
3. How do I make tzatziki from scratch?
- Mix 1 cup of Greek yogurt with half a grated cucumber (squeeze out excess moisture), 2 minced garlic cloves, a tablespoon of olive oil, 1 tablespoon of lemon juice, and season with salt and pepper. It’s easy and absolutely delicious!
4. What should I do with leftovers?
- Leftovers can be stored in an airtight container in the fridge for up to 3 days. Simply reheat the chicken and enjoy another lovely bowl!
Nutritional Info
(Approximate per serving)
- Calories: 450
- Protein: 36g
- Carbohydrates: 45g
- Fat: 18g
- Fiber: 5g
And there you have it! A delightful, tasty journey to the Mediterranean right in your own kitchen. I hope you’re excited to embark on this culinary adventure and create your own Greek Chicken Bowls brimming with flavor and love. Remember, cooking is all about making it your own, so feel free to experiment and share this journey with those you love. Until next time, happy cooking!
Print
Greek Chicken Bowls
- Total Time: 45 minutes
- Yield: 4 servings 1x
- Diet: Paleo
Description
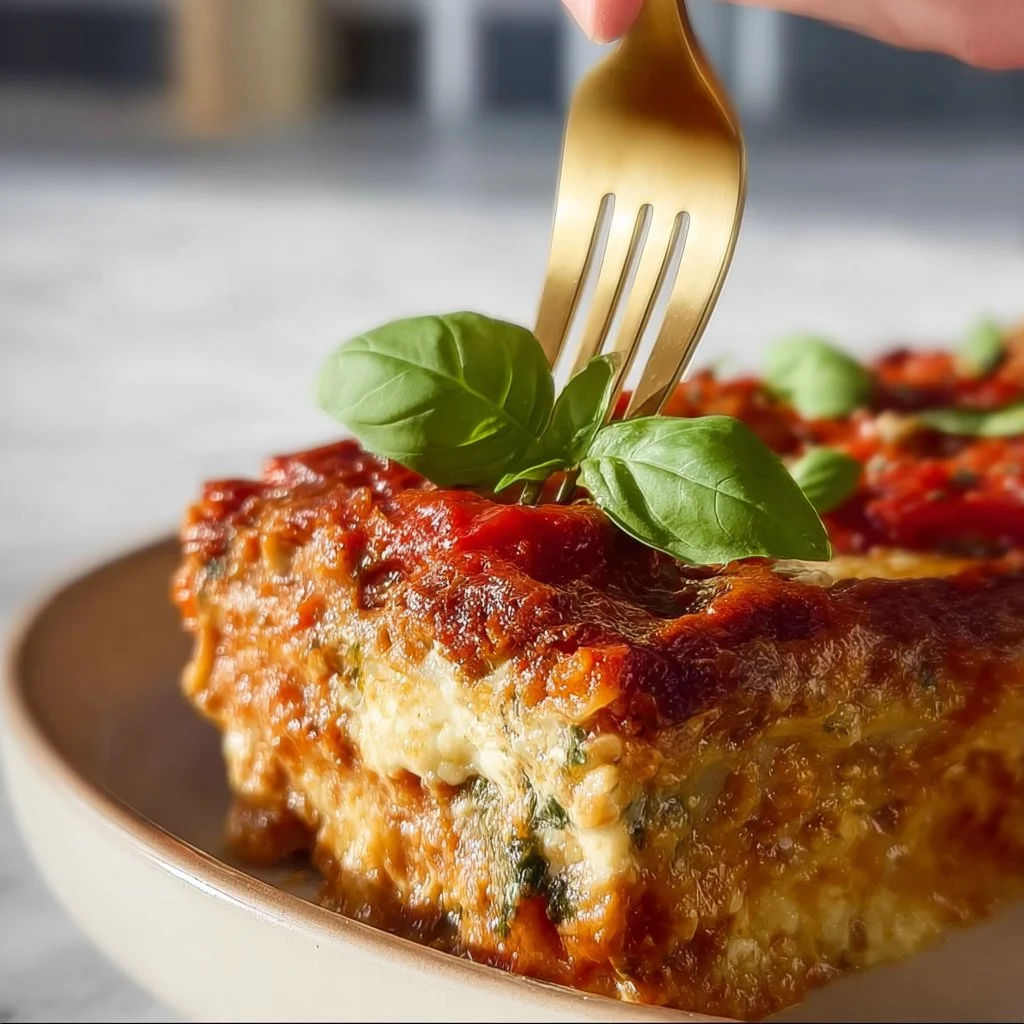
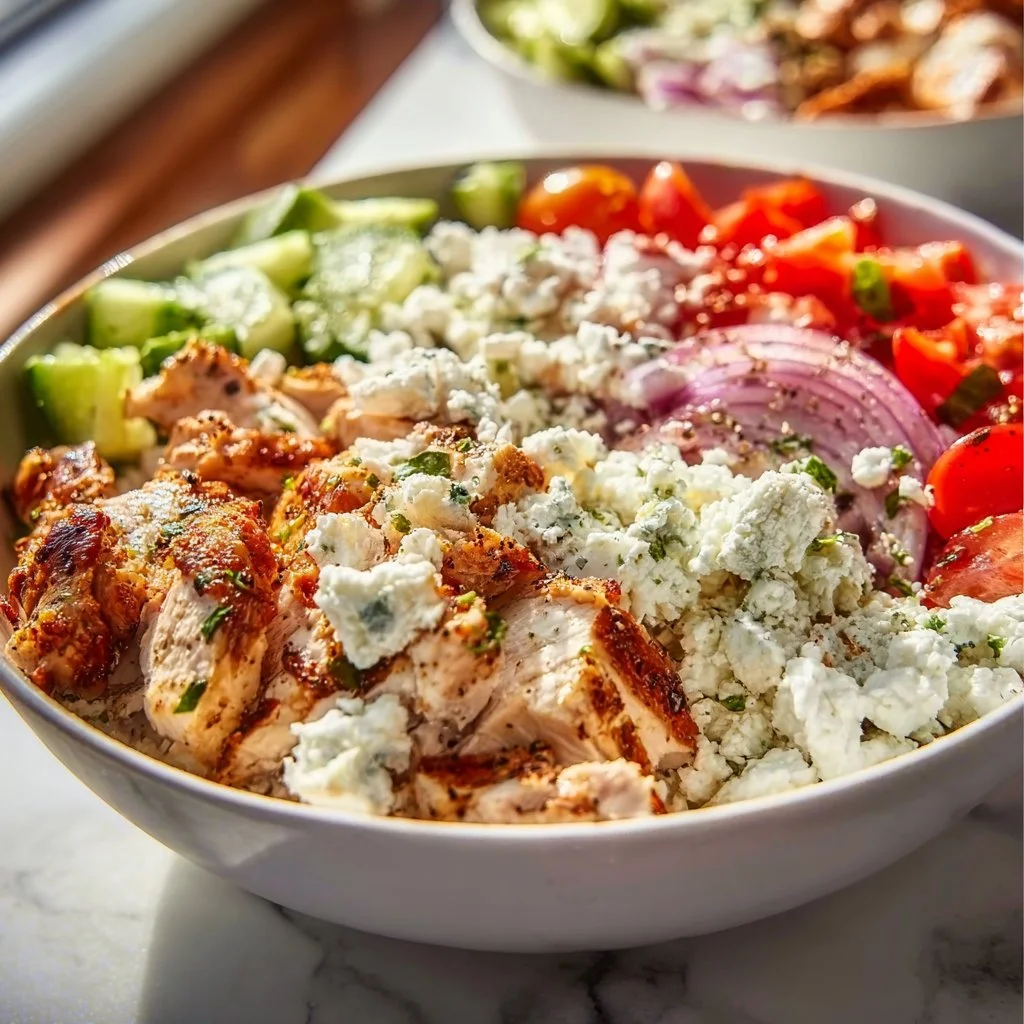
A flavorful journey to the Mediterranean with succulent marinated chicken, crisp veggies, creamy tzatziki, and fluffy rice or quinoa.
Ingredients
- 1.5 lbs Chicken Thighs or Breasts
- 1/4 cup Olive Oil
- 4 cloves Garlic, minced
- 1/4 cup Lemon Juice
- 2 tablespoons Dried Oregano
- Salt and Pepper, to taste
- 2 cups Cooked Rice or Quinoa
- 1 cup Chopped Cherry Tomatoes
- 1/2 Red Onion, thinly sliced
- 1/2 cup Feta Cheese, crumbled
- 1 cup Tzatziki Sauce
- Plain Greek Yogurt, for topping (optional)
Instructions
- Combine the Marinade: In a bowl, whisk together olive oil, minced garlic, lemon juice, dried oregano, salt, and pepper.
- Add Chicken: Place the chicken in a resealable bag or a shallow dish. Pour the marinade over and ensure they are well coated.
- Heat the Grill or Skillet: Preheat your grill or skillet over medium-high heat.
- Cook the Chicken: Once hot, place the marinated chicken on the grill or in the skillet. Sear for 5-7 minutes on each side until fully cooked (internal temperature of 165°F).
- Rest the Chicken: Once cooked, take the chicken off the heat and let it rest on a cutting board for about 10 minutes.
- Cook the Rice or Quinoa: While the chicken is resting, follow the package instructions to cook rice or quinoa.
- Prep the Veggies: Meanwhile, chop your cherry tomatoes and slice the red onion.
- Slice the Chicken: After resting, slice the chicken into strips.
- Build Your Bowls: Start with a base of rice or quinoa, then layer with sliced chicken, tomatoes, onions, and sprinkle with crumbled feta. Drizzle tzatziki over top!
Notes
Feel free to layer the ingredients according to your preference. Explore variations with different grains or toppings.
- Prep Time: 15 minutes
- Cook Time: 30 minutes
- Category: Main Course
- Method: Grilling
- Cuisine: Mediterranean
Nutrition
- Serving Size: 1 serving
- Calories: 450
- Sugar: 4g
- Sodium: 500mg
- Fat: 18g
- Saturated Fat: 4g
- Unsaturated Fat: 12g
- Trans Fat: 0g
- Carbohydrates: 45g
- Fiber: 5g
- Protein: 36g
- Cholesterol: 75mg
Keywords: Greek Chicken, Mediterranean Bowl, Healthy Recipe, Chicken Bowl, Meal Prep

Creamy High Protein Beef Pasta
Creamy High Protein Beef Pasta: Your New Favorite Comfort Dish
Welcome to my cozy corner of the culinary world! I’m thrilled to share with you a dish that’s not only scrumptious but also packed with protein. Get ready to embark on a culinary journey with my Creamy High Protein Beef Pasta! Whether you’re cooking for family or just for yourself, this recipe is so comforting and delicious that it will become a staple in your kitchen.
Imagine this: it’s a chilly evening, you’ve had a long day, and the last thing you want to do is prepare an elaborate meal. But wait! You have a package of ground beef in the fridge, some creamy goodness waiting to be whipped up, and a whirlwind of pasta dreams rolling around in your head! Sounds like the perfect evening to dive into the world of creamy beef pasta. With the rich flavors and comforting texture, this dish is sure to warm your heart and fill your belly.
Now, let’s talk ingredients. Don’t worry if you’re not a culinary genius; I promise this dish is super approachable! We’ll keep it straightforward because cooking should be fun, not stressful. Just a few simple ingredients simmered together thoughtfully, and you’re in for a treat! So roll up your sleeves, put on your favorite apron (messy recommended), and let’s make some pasta magic together!
Personal Story
I vividly remember when I first learned to make pasta from scratch with my grandma when I was about 8 years old. Oh, the flour dust everywhere! She had this incredible wooden board that we used for rolling out the dough while laughing and sharing stories about our family. One particular Saturday, we decided to experiment by adding ground beef to a creamy sauce, inspired by a dish her mother used to make. We didn’t have a recipe; we just threw things together with love and the spirit of adventure.
That day, as the aromas filled the kitchen, I discovered how powerful food could be in bringing people together. The laughter, the stories, and that delicious first bite remain etched in my memory. This Creamy High Protein Beef Pasta is my way of honoring that moment, making it simple yet brimming with flavor, just like my grandma taught me. It’s about sharing joy through food, sparking conversations, and crafting new memories in the kitchen.
Ingredients
For the Beef Pasta
- 8 ounces whole wheat pasta: The star of our show! Whole wheat adds a nice nutty flavor and extra fiber—try substituting with gluten-free pasta if needed.
- 1 pound ground beef: Rich in protein! You can use lean ground beef to cut back on fat, or even swap with ground turkey for a lighter version.
- 1 medium onion, diced: Adds a sweet yet savory base. Feel free to substitute with shallots for a milder taste.
- 2 cloves garlic, minced: The aromatic foundation! Fresh garlic is best, but also consider garlic powder in a pinch.
- 1 cup beef broth: Brings depth to our dish! If you don’t have it, use vegetable broth or even water.
- 1 cup heavy cream: Makes the sauce creamy and luscious! You can use milk or a plant-based alternative (like coconut milk) for a lighter dish.
- 1 tablespoon Worcestershire sauce: Adds umami! You can skip this if you don’t have it, but it adds a delicious depth.
- 1 teaspoon Italian seasoning: A blend that brings out a wonderful flavor! Substitute with dried basil or oregano if that’s what you have.
- Salt and pepper to taste: Essential for seasoning! Always taste as you go.
- Fresh parsley, chopped, for garnish: Optional but pretty! A sprinkle of fresh herbs brightens the dish.
Step-by-Step Instructions
-
Cook the Pasta:
Start by boiling a large pot of salted water. Once it’s bubbling, add in your whole wheat pasta. Cook according to package instructions until al dente—generally about 8-10 minutes. Quick tip: reserve about ½ cup of pasta water before draining! It’s liquid gold for your sauce. -
Brown the Beef:
In a large skillet over medium heat, add a splash of olive oil and the diced onion. Sauté until they become translucent (about 5 minutes). Then, increase the heat slightly, add in the ground beef, and cook until browned. Use a wooden spoon to break up the meat; we want nicely browned bits for extra flavor. -
Add the Garlic:
Toss in the minced garlic and cook for another minute until fragrant. Be cautious not to burn it! A little trick: if your garlic starts to brown too quickly, lower the heat a bit. -
Season and Create the Sauce:
Pour the beef broth into the skillet, scraping any browned bits off the bottom (these bits are packed with flavor!). Mix in the Worcestershire sauce and then the heavy cream. Let it simmer on low heat for about 5-7 minutes, allowing the flavors to meld together. Keep stirring regularly—it should be silky smooth and luxurious! -
Combine the Pasta and Sauce:
Gently toss the cooked pasta into the sauce. If it seems too thick, add a splash of that reserved pasta water. This will help everything stick together and create that creamy consistency we love. -
Final Seasoning:
Add the Italian seasoning, and season with salt and pepper to taste. Give everything one last good stir, and voila!
Serving Suggestions
Plate your creamy high protein beef pasta in hearty bowls. I love to add a little sprinkle of freshly chopped parsley on top for a pop of color. Serving with crusty garlic bread or a vibrant side salad elevates this dish to a whole new level. And don’t forget a glass of red wine—it just pairs beautifully!
Recipe Variations
- Spicy Kick: Add red pepper flakes while cooking the beef for a spicy twist.
- Veggie Packed: Incorporate diced bell peppers, mushrooms, or spinach into the mix for extra nutrition.
- Cheesy Goodness: Stir in shredded mozzarella or parmesan cheese right before serving for a cheesy variation!
- One-Pan Wonder: Replace beef with shredded chicken or cooked chickpeas for a lighter vegetarian version.
- Herb Infusion: Add fresh herbs like basil or thyme in place of Italian seasoning for a fresh herbal note.
Chef’s Notes
This creamy beef pasta is pretty forgiving, and I’ve had my fair share of kitchen adventures (or misadventures!) while perfecting it. Early on, I tried making it with too much cream—whoops! It was delicious, but… a bit too rich for my taste. After some experimenting, I learned to balance the creaminess with the meat and broth for the perfect blend. Every time I make this dish, I can’t help but smile, reminiscing about my grandma in that flour-dusted kitchen, creating something special out of nothing.
FAQs and Troubleshooting
What if my sauce is too thick?
No problem! Just add a bit of the reserved pasta water, a splash at a time, until you reach the desired consistency.
Can I use a different type of pasta?
Absolutely! Feel free to experiment with any pasta shape you love—penne, fusilli, or even spaghetti bring different fun textures to this dish.
What if there are leftovers?
Lucky you! Store them in an airtight container in the fridge for up to 3 days. This dish reheats beautifully in the microwave or on the stove with a splash of broth or cream to keep it saucy!
Can I make this dish ahead of time?
Of course! You can prepare the sauce in advance and simply reheat it when ready to serve. Cook the pasta fresh for the best texture.
Nutritional Info
While the specific nutritional content can vary based on ingredients and serving sizes, this creamy high protein beef pasta is typically high in protein thanks to the beef and dairy, while being lower in fat when you choose lean meats and whole grains. Each serving offers a comforting balance of proteins, carbs, and healthy fats.
And there you have it! A delightful, creamy high protein beef pasta that’s sure to brighten your kitchen and warm your heart. I’m so excited for you to make this at home! Let me know about your pasta adventures, and remember—cooking is as much about the journey as it is about the destination. Happy cooking!
Print
Creamy High Protein Beef Pasta
- Total Time: 30 minutes
- Yield: 4 servings 1x
- Diet: None
Description
A comforting and delicious creamy beef pasta packed with protein, perfect for a chilly evening.
Ingredients
- 8 ounces whole wheat pasta
- 1 pound ground beef
- 1 medium onion, diced
- 2 cloves garlic, minced
- 1 cup beef broth
- 1 cup heavy cream
- 1 tablespoon Worcestershire sauce
- 1 teaspoon Italian seasoning
- Salt and pepper to taste
- Fresh parsley, chopped, for garnish
Instructions
- Cook the pasta: Start by boiling a large pot of salted water. Once it’s bubbling, add in your whole wheat pasta. Cook according to package instructions until al dente—generally about 8-10 minutes. Quick tip: reserve about ½ cup of pasta water before draining!
- Brown the beef: In a large skillet over medium heat, add a splash of olive oil and the diced onion. Sauté until they become translucent (about 5 minutes). Then, increase the heat slightly, add in the ground beef, and cook until browned.
- Add the garlic: Toss in the minced garlic and cook for another minute until fragrant. Be cautious not to burn it!
- Season and create the sauce: Pour the beef broth into the skillet, scraping any browned bits off the bottom. Mix in the Worcestershire sauce and then the heavy cream. Let it simmer on low heat for about 5-7 minutes.
- Combine the pasta and sauce: Gently toss the cooked pasta into the sauce. If it seems too thick, add a splash of that reserved pasta water.
- Final seasoning: Add the Italian seasoning, and season with salt and pepper to taste. Give everything one last good stir, and voila!
Notes
Serve with crusty garlic bread or a vibrant side salad and a glass of red wine.
- Prep Time: 10 minutes
- Cook Time: 20 minutes
- Category: Main Course
- Method: Stovetop
- Cuisine: Italian
Nutrition
- Serving Size: 1 serving
- Calories: 550
- Sugar: 3g
- Sodium: 450mg
- Fat: 28g
- Saturated Fat: 14g
- Unsaturated Fat: 9g
- Trans Fat: 0g
- Carbohydrates: 45g
- Fiber: 5g
- Protein: 30g
- Cholesterol: 75mg
Keywords: creamy pasta, beef pasta, high protein pasta, comfort food, easy recipe
Chinese Beef and Broccoli
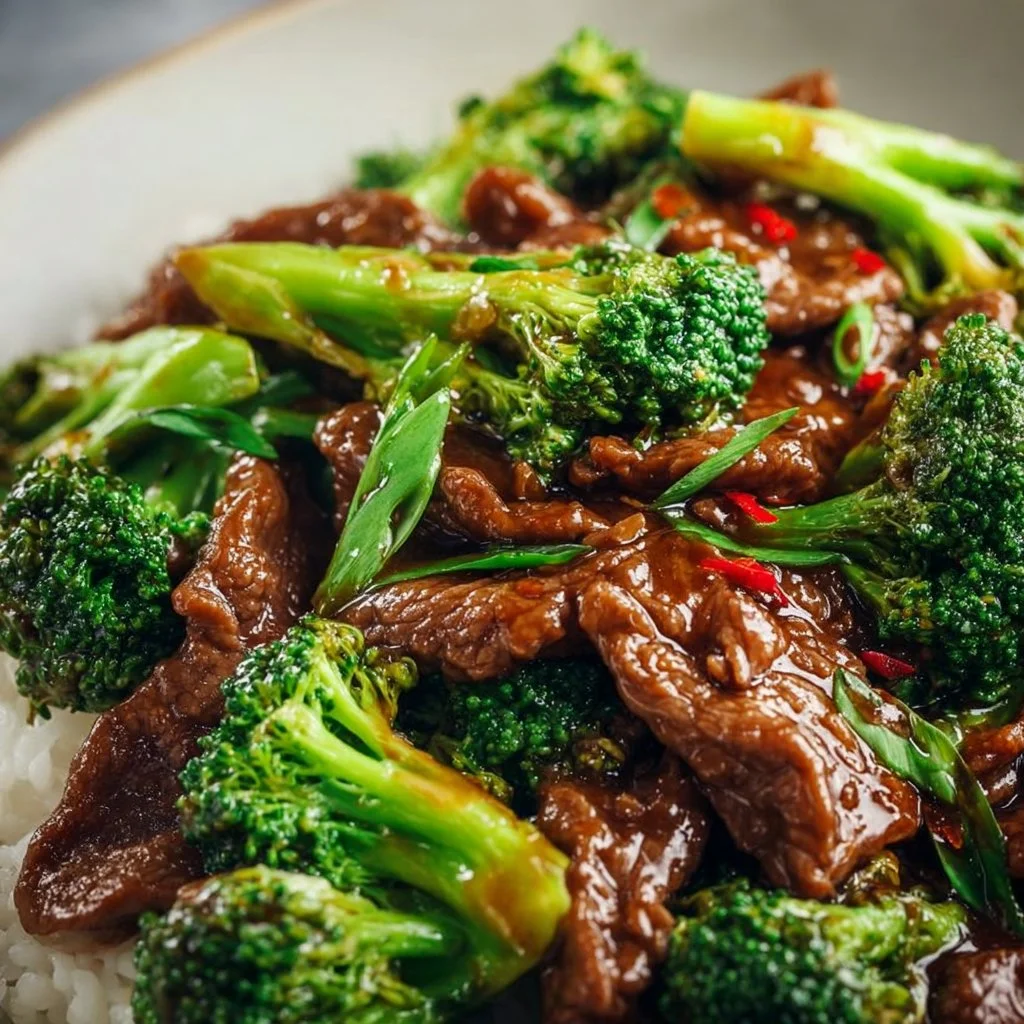
Ultimate Chinese Beef and Broccoli: A Cozy Kitchen Classic
Hey there, my fellow flavor lovers! Welcome back to my kitchen, where every pot and pan has a story, and every spatula is ready to whip up something amazing. Today, we’re diving into a dish that holds a special place in my heart: Chinese Beef and Broccoli. If you’ve ever experienced the fragrant aroma of beef marinated in a savory sauce, mingling with crisp broccoli and hints of garlic and ginger, then you know just how comforting and delicious this dish can be!
As I write this, I can’t help but remember the first time I had homemade beef and broccoli. I was about eight years old, and my dad decided to tap into his love for cooking by trying his hand at Asian flavors. The moment that sizzling pan hit the table, my family gathered around, and all chatter came to a hush. We were entranced. With each bite, I was transported to a little corner of my imagination, where chopsticks danced in hand, and laughter echoed through the air. That dinner sparked my lifelong love for simple, hearty meals that bring people together.
In today’s blog post, I’ll not only guide you through the steps to create this culinary experience at home, but I’ll sprinkle in my personal tips, tricks, and stories to make it as enjoyable as possible. Trust me; you don’t need years of experience in the kitchen to create a dish that dazzles! So grab your apron, and let’s have some fun as we explore this classic recipe together!
Personal Story
Growing up, our kitchen was always filled with laughter, secret ingredients, and the mouthwatering aroma of various cuisines. I’ll never forget one memorable family night when we attempted to recreate the local take-out spot’s “best-seller” – a Beef and Broccoli dish that was packed with flavor and charm. My dad, inspired by our favorite restaurant, decided to make it from scratch. I remember bouncing on my toes with excitement as he shared secrets about how to make the beef tender and the broccoli vibrantly green.
With the kitchen buzzing with energy, I held the soy sauce bottle like it was a prized possession and miscalculated the amount a little too liberally. As the rich dark liquid splashed everywhere, we erupted in laughter! Only a sprinkle of that savory seasoning ended up in the bowl, but it made for one memorable evening that taught me a valuable lesson: it’s not just about the food you’re making; it’s about the memories you create along the way.
Ever since then, Beef and Broccoli has become not just a dish but a tradition for us. It’s a recipe that continues to evolve in my kitchen, bringing my loved ones to the table for another kind of adventure.
Ingredients
Let’s gather our dream team of ingredients! Here’s what you’ll need for this delectable dish:
-
Flank Steak (1 lb)
- A lean cut that’s perfect for stir-frying. Look for vibrant red meat with minimal fat. If unavailable, sirloin or skirt steak works well too!
-
Broccoli (2 cups)
- Fresh or frozen, broccoli is your colorful companion here. If you’re using frozen, just let it thaw and drain excess water beforehand.
-
Soy Sauce (¼ cup)
- This salty star ingredient brings umami to your dish. Low-sodium soy sauce can be used if you’re watching your salt intake.
-
Oyster Sauce (2 tablespoons)
- A sweet and savory blend that enhances flavor. If you’re feeling adventurous, try using hoisin sauce for a different sweetness.
-
Garlic (3 cloves, minced)
- No dish is complete without garlic! Fresh minced garlic packs a punch, but garlic powder can serve as an alternative.
-
Ginger (1 tablespoon, minced)
- This zingy root adds warmth and depth. Fresh ginger is preferred for its pungency; dried ginger is a great backup.
-
Cornstarch (1 tablespoon)
- Our secret weapon for silky sauce sauce! Feel free to swap it with arrowroot powder if you’re looking for a gluten-free option.
-
Sesame Oil (1 tablespoon)
- A little drizzle brings a delightful nuttiness to the dish. Olive oil can be used in a pinch, but it won’t provide that signature flavor.
-
Water (½ cup)
- To create that luscious sauce finish.
-
Salt and Pepper to taste
- Always essential for enhancing flavor!
To make sure you have a tasty balance, keep these tips in your back pocket:
- Meat Tenderizer Tip: Marinating flank steak in a little soy sauce for 15-30 minutes can help it become ultra-tender!
- Substitution Insights: You can easily swap out veggies like bell peppers or snap peas if you want to add variety.
- Freshness Matters: Keep your broccoli vibrant and crunchy by opting for the freshest produce available.
Step-by-Step Instructions
Now, let’s roll up our sleeves and get cooking! Follow these simple steps to achieve a scrumptious Beef and Broccoli dish that will have you singing praises.
Step 1: Prepare the Marinade
- In a bowl, whisk together soy sauce, oyster sauce, minced garlic, minced ginger, and cornstarch until smooth. This is your flavor powerhouse! Let your butcher know you’re making a stir-fry, and the beef will be cut properly for you.
Step 2: Marinate the Beef
- Slice your flank steak thinly against the grain, aiming for about 1/4 inch thick. Toss the sliced beef into the marinade, ensuring every piece is well coated. Allow it to marinate for at least 15 minutes; the longer, the better!
Tip: You can prep this ahead of time and let it marinate in the fridge for up to an hour to develop flavor.
Step 3: Prepare the Broccoli
- While your beef is marinating, bring a pot of water to boil. Blanch the broccoli florets for about 2-3 minutes until they turn vibrantly green but remain crisp. Drain and plunge them into ice water to stop the cooking process. This step keeps your broccoli looking fresh!
Step 4: Heat Things Up
- In a large skillet or wok, heat sesame oil over medium-high heat. Once it’s shimmering, toss in the marinated beef in a single layer. Allow it to sear without stirring for about 1-2 minutes to develop a browning effect, then toss everything together until the beef is just cooked through (3–4 minutes total).
Tip: Work in batches for a perfect sear on the beef; too much meat in the pan can cause steaming instead of frying!
Step 5: Cheers to Broccoli
- Add the blanched broccoli to the skillet with the beef. Pour in the water (and a little more soy sauce if desired), and toss everything together, letting it simmer for a couple of minutes. This will help the flavors integrate while keeping everything beautifully coated.
Step 6: Plate it Up
- Once everything is well coated and heated through, taste and adjust seasoning with salt and pepper as needed. Serve it hot over steamed rice or with your favorite noodles for that ultimate comfort dish.
Chef’s Hack: Use a spatula to scoop the beef and broccoli right off the skillet and onto a bed of rice for that Instagram-worthy presentation!
Serving Suggestions
Presentation is key, folks! Serve this vibrant Beef and Broccoli in a wide, colorful bowl over a fluffy mound of jasmine or brown rice. Add a sprinkle of sesame seeds on top for that crunchy finish, and toss in a few slices of green onion for extra flair! Highlight the freshness with a wedge of lime на the side to let your guests spritz some citrus goodness on top.
Recipe Variations
Now, let’s put a creative spin on our classic:
-
Spicy Beef and Broccoli: Add a teaspoon of red pepper flakes to the marinade for a fiery kick or drizzle sesame oil over with the chili oil for extra flavor.
-
Beefless Broccoli: Replace beef with your favorite plant-based protein or tofu for a delightful vegan option!
-
Add More Veggies: Toss in bell peppers, snap peas, or mushrooms for extra color, texture, and nutrition.
-
Sweet and Sour Variation: Swap out oyster sauce for a sweeter sauce like teriyaki if sweet and savory is your style.
-
Cashew Love: Stir in a handful of toasted cashews for that crunchy texture and nutty flavor.
Chef’s Notes
This Beef and Broccoli dish holds a special place in my heart, not only for its amazing taste but also for all the fun, embarrassing kitchen blunders from my childhood. I’ve learned that even mishaps can lead to delicious creations! Over the years, I’ve embraced using whatever veggies I have on hand, allowing this recipe to evolve with the seasons and what’s fresh at the local farmer’s market.
Who knew cooking could create so many memories? Whether you’re gathering the family for dinner or inviting friends over to impress them, I hope this beef and broccoli dish becomes a cherished staple in your home.
FAQs and Troubleshooting
1. Why is my beef not tender?
- If your beef has become tough, it’s likely due to overcooking. Keep an eye on it and aim for medium-rare—the beef will continue to cook off the heat!
2. My broccoli turned mushy; what did I do wrong?
- Overcooking can cause mushiness; ensure you blanch only for a few minutes and scoop them into ice water immediately!
3. Can I make this dish in advance?
- While it’s best to enjoy Beef and Broccoli fresh, you can prep the ingredients ahead of time and cook them right before serving.
4. How can I store leftovers?
- Prepare for the ultimate meal prep by storing leftovers in an airtight container in the fridge for up to 3 days. Reheat gently on the stovetop or in the microwave, stirring to avoid overheating.
Nutritional Info (Optional)
This section is optional, but if you’re interested, here’s a rough estimate for a one-cup serving:
- Calories: 350
- Protein: 32g
- Carbohydrates: 24g
- Fat: 15g
- Fiber: 3g
And there you have it! You now have all the tools to create a delicious, memorable Beef and Broccoli dish in your very own kitchen. Thank you for joining me today and allowing me to share this delightful experience with you. Happy cooking, and may your kitchen be filled with laughter and love!
Print
Ultimate Chinese Beef and Broccoli
- Total Time: 30 minutes
- Yield: 4 servings 1x
- Diet: None
Description
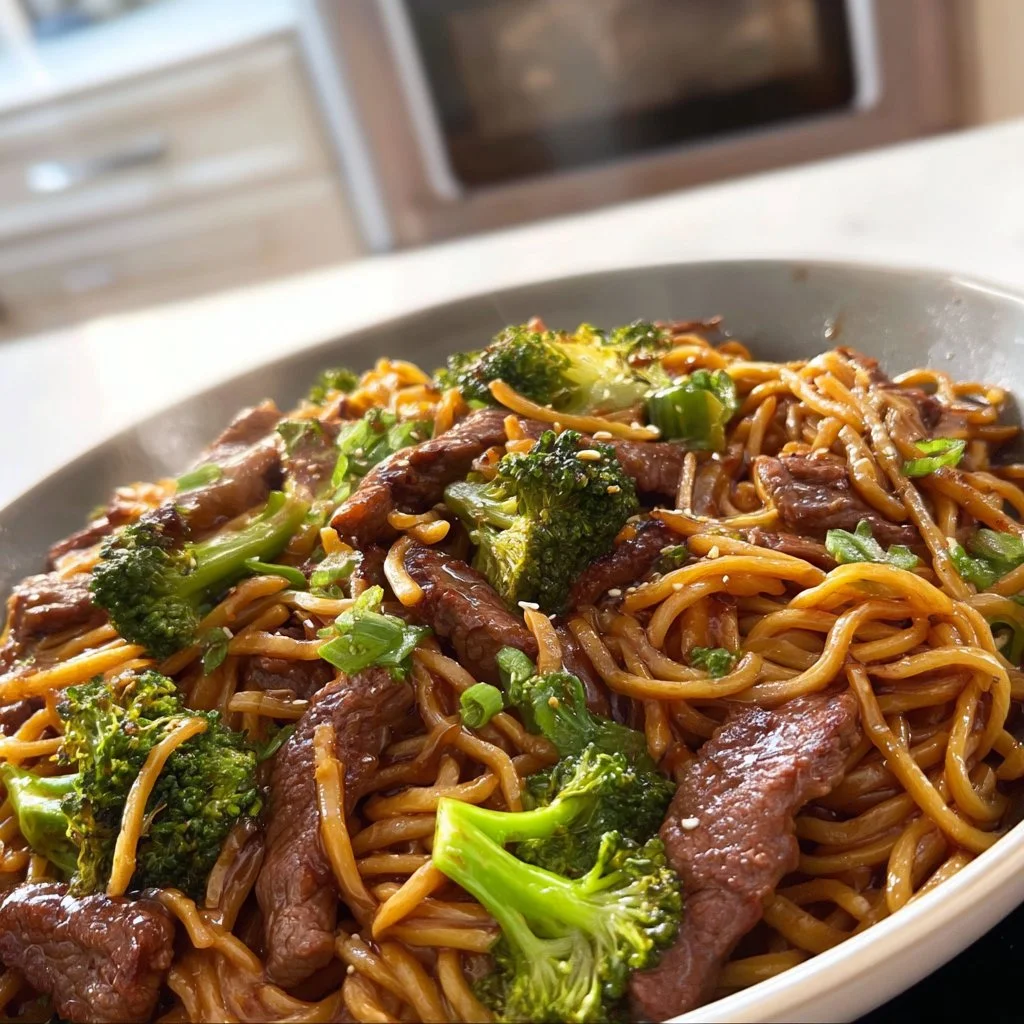
A comforting and flavorful dish of marinated beef and crisp broccoli cooked in a savory sauce.
Ingredients
- 1 lb Flank Steak
- 2 cups Broccoli
- ¼ cup Soy Sauce
- 2 tablespoons Oyster Sauce
- 3 cloves Garlic, minced
- 1 tablespoon Ginger, minced
- 1 tablespoon Cornstarch
- 1 tablespoon Sesame Oil
- ½ cup Water
- Salt and Pepper to taste
Instructions
- Prepare the Marinade: In a bowl, whisk together soy sauce, oyster sauce, minced garlic, minced ginger, and cornstarch until smooth.
- Marinate the Beef: Slice the flank steak thinly against the grain. Toss the sliced beef into the marinade, ensuring every piece is well coated. Allow it to marinate for at least 15 minutes.
- Prepare the Broccoli: Blanch the broccoli florets in boiling water for about 2-3 minutes until vibrantly green. Drain and plunge them into ice water.
- Heat Things Up: In a large skillet or wok, heat sesame oil over medium-high heat. Add the marinated beef in a single layer and sear without stirring for about 1-2 minutes.
- Add the blanched broccoli to the skillet with the beef. Pour in the water and toss everything together.
- Plate it Up: Taste and adjust seasoning with salt and pepper as needed. Serve it hot over rice or noodles.
Notes
For extra flavor, marinate the beef for up to an hour. Use fresh veggies for the best texture.
- Prep Time: 15 minutes
- Cook Time: 15 minutes
- Category: Main Course
- Method: Stir-frying
- Cuisine: Chinese
Nutrition
- Serving Size: 1 serving
- Calories: 350
- Sugar: 5g
- Sodium: 800mg
- Fat: 15g
- Saturated Fat: 3g
- Unsaturated Fat: 8g
- Trans Fat: 0g
- Carbohydrates: 24g
- Fiber: 3g
- Protein: 32g
- Cholesterol: 60mg
Keywords: beef, broccoli, Chinese, stir-fry, comfort food, easy recipe

Spicy Buffalo Chicken Wraps for Two
# Spicy Buffalo Chicken Wraps for Two: A Fiery Kick You’ll Love!

## Introduction
Welcome to my cozy culinary corner! Today, we’re diving into a dish that packs a punch — Spicy Buffalo Chicken Wraps, perfect for you and a lucky someone to share. If you’ve ever bitten into a crispy, savory wrap bursting with flavor, you know it’s an experience that’s hard to beat. Whether you’re looking to spice up your weeknight dinners or impress your weekend guests, these wraps are where fun meets flavor.

Buffalo chicken is a classic that has conquered palates everywhere and for good reason! It gives you that exciting kick with each bite, while remaining simple enough to whip up any night of the week. Plus, wraps are just so versatile! By switching up the fillings, the sauces, or even the salad ingredients, you can make this dish perfect for anyone — even those who shy away from spicy foods. So roll up your sleeves, and let’s turn up the heat for an unforgettable dining experience!

For me, nothing evokes warm childhood memories quite like the smell of chicken wings roasting away in the oven, saturated in that dreamy, tangy hot sauce. As a kid, I remember the family gatherings centered around game nights, decorated with baskets of juicy buffalo wings, and my aunt's contagious laughter filling the room. We’d all pile around, tossing crispy wings with glee, seeing how far we could go with the heat without needing copious amounts of ranch dressing as a follow-up!

In this wrap, we're taking that nostalgic flavor combo and wrapping it up in a warm, soft tortilla, paired with crisp greens and a cooling sauce to balance out the spice. Having a cheerful meal like this is such a lovely reminder of the connections food can create. So grab your apron, and let’s bring some zest into your kitchen!


## Personal Story
Ah, buffalo chicken wraps — they always take me back to those lively college days! I remember my roommate and I, with our tight budget and even tighter schedules, relied heavily on quick, delicious meals. One Friday evening, we were determined to kickstart the weekend with something special. We rummaged through our tiny fridge, discovering some leftover rotisserie chicken and a rogue bottle of hot sauce we’d impulsively purchased weeks earlier.

The moment we decided to make buffalo chicken wraps, the aroma dancing in our little kitchen swept us into an evening filled with laughter and creativity. Each spicy bite reminded us of our football game-watching parties, where we would snack until the game was over. As we assembled those wraps filled with our fiery mix, we discovered that not only did they hit the spot, but they also ignited an exciting cooking passion within us. That night we danced around the kitchen, utensils in hand, acting like we were on a cooking show. We conquered those wraps and made a tradition out of them.

Now, years later, buffalo chicken wraps remain a go-to for me, whether I’m entertaining friends or enjoying a cozy night at home. They signify good times and great flavors, transforming ordinary evenings into cherished memories. So let’s create your own memories today!


## Ingredients
Here's what you’ll need for your Spicy Buffalo Chicken Wraps, along with some insights to elevate your cooking:

- **2 cups shredded rotisserie chicken**: A time-saver in the kitchen! Shredded chicken is a great way to quickly infuse flavor without the fuss of cooking chicken from scratch. If you don’t have rotisserie chicken, feel free to boil some chicken breasts, shred them, and toss them in hot sauce.

- **1/4 cup of hot sauce**: Frank's RedHot is the classic choice for that beloved buffalo flavor; however, any hot sauce can work! For a milder version, try using a mixed pepper sauce.

- **1 tablespoon butter**: This adds richness to the sauce and can help mellow the heat slightly. If you want a vegan option, try using olive oil or a plant-based butter.

- **4 medium tortillas**: Whole wheat or spinach tortillas can offer a wholesome twist, while a classic flour tortilla keeps it traditional. Go for gluten-free wraps if you need a dietary swap.

- **1 cup lettuce**: Crunchy Romaine works best, but feel free to use Iceberg or even baby spinach for some fresh greens. This adds a refreshing element to balance the heat.

- **1/2 cup diced tomatoes**: Fresh cherry tomatoes or a chunky salsa can add a zesty burst! And if you’re not keen on tomatoes, avocado is a fabulous alternative.

- **1/2 cup ranch dressing (or your favorite dressing)**: Ranch is the classic pairing, but try blue cheese dressing if you’re feeling adventurous. Or go for hummus or tzatziki for a fun twist.

- **Optional toppings**: Chopped green onions, shredded cheese, or extra hot sauce for those who crave more heat!

## Step-by-Step Instructions

1. **Prepare Your Chicken**:
   - Start by shredding your rotisserie chicken into bite-sized pieces, which should take just a couple of minutes. (Chef's tip: Using two forks does wonders for shredding and can get you a fluffy texture!). Once this is done, transfer the chicken to a bowl.

2. **Create the Buffalo Sauce**:
   - In a small saucepan over medium heat, melt the tablespoon of butter. Pour in your hot sauce and stir until well combined. Allow it to simmer for about 2-3 minutes to meld their delicious flavors. (This is where the magic happens, folks!). Remove from heat and combine with the shredded chicken in the bowl.

3. **Assemble the Wrap**:
   - Lay out your tortillas on a clean surface. Start by placing a generous scoop of the spicy buffalo chicken mixture in the center of each tortilla. Keep it in the middle – you don’t want the filling spilling out when you start wrapping.

4. **Add the Freshness**:
   - Layer in your lettuce and diced tomatoes right on top of the chicken! This crunchy and juicy addition is where the wraps truly shine. (Little Chef Hack: Consider squeezing a tiny bit of lime juice over the veggies for an extra zing!).

5. **Drizzle the Dressing**:
   - Take your ranch (or alternative dressing) and drizzle it generously over the top of the veggies. No such thing as too much dressing — it’ll balance the spice lovably!

6. **Roll It Up**:
   - Grab the sides of the tortilla and fold them over the filling, then roll from the bottom up tightly. Tuck in the sides as you go to secure everything inside. (A good tip is to keep it snug but not too tight; you want it to be easy to bite into).

7. **Grill or Heat (Optional)**:
   - For a crispier wrap, consider grilling it in a pan with a dash of cooking spray for about 2-3 minutes on each side until golden brown. This method adds a delightful crunch - just imagine that satisfying sound when you take a bite!

8. **Cut and Serve**:
   - Slice each wrap in half on a diagonal and serve immediately. I like serving these up with extra ranch and hot sauce on the side for dipping. Perfect for sharing!

## Serving Suggestions
Present your wraps on a colorful platter, garnished with sliced cucumbers or carrot sticks for a vibrant touch! A sprinkle of fresh cilantro or parsley on top can add a lovely visual appeal. Serve with a side of sweet potato fries or a light salad for a complete meal. And don't forget the drinks — an ice-cold lemonade or a craft beer goes wonderfully alongside!

## Recipe Variations
- **Vegetarian Twist**: Swap out the chicken for crispy cauliflower or roasted chickpeas for a satisfying vegetarian version!
- **Southeast Asian Flair**: Toss in hoisin sauce, and add cucumber and shredded carrots to the filling for a sweet and savory kick.
- **Mediterranean Style**: Use tzatziki dressing and add diced cucumbers and olives to transport your taste buds abroad.
- **Mild & Sweet**: Mix some honey or maple syrup with your hot sauce for a sweet and spicy concoction, perfect for those who prefer milder flavors.

## Chef’s Notes
I’ve been making variations of Buffalo chicken wraps for years now. They started as a fun college meal and then grew into a mainstay in my cooking repertoire! I often switch up the toppings based on the season; in the summer, I love adding fresh corn and black beans for a delicious fiesta vibe.

One time, I accidentally grabbed a bottle of extremely potent ghost pepper sauce instead of my regular hot sauce — let me tell you, the result was memorable! Despite my teary-eyed experience, we ended up laughing and just creating a spicy challenge to see who could take the heat!

## FAQs and Troubleshooting

- **What if my wraps fall apart?**
  Make sure to wrap them tightly and ideally grill them for that crispy exterior, which can help keep everything together.

- **How can I make these wraps gluten-free?**
  Use gluten-free tortillas, available at most grocery stores – your wraps will still taste incredible!

- **My chicken is dry; what went wrong?**
  Rotisserie chicken should remain juicy. If you boiled yours, consider adding some chicken broth or a bit of mayo to your mix to enhance moisture.

- **Can I make these ahead of time?**
  Absolutely! Just keep the wraps assembled without dressing and refrigerate. Dress and grill just before you’re ready to serve for the best results.

## Nutritional Info
These wraps are approximately 550 calories each per serving (depending on the ingredients and toppings), making them a hearty and filling option for lunch or dinner. Remember, the nutrition can vary based on specific ingredients used.

Enjoy cooking and feel free to get creative with these spicy buffalo chicken wraps! They’re not only packed with heartwarming memories but are also open to endless possibilities — just like your love for food! Happy cooking!

Spicy Buffalo Chicken Wraps
- Total Time: 15 minutes
- Yield: 4 servings 1x
- Diet: Gluten-free Option Available
Description
A delicious and fiery buffalo chicken wrap perfect for sharing, combining shredded chicken, hot sauce, and fresh toppings in a warm tortilla.
Ingredients
- 2 cups shredded rotisserie chicken
- 1/4 cup hot sauce
- 1 tablespoon butter
- 4 medium tortillas
- 1 cup lettuce
- 1/2 cup diced tomatoes
- 1/2 cup ranch dressing (or your favorite dressing)
- Optional toppings: chopped green onions, shredded cheese, or extra hot sauce
Instructions
- Prepare your chicken: Shred the rotisserie chicken into bite-sized pieces and transfer to a bowl.
- Create the buffalo sauce: Melt butter in a saucepan, add hot sauce, simmer for 2-3 minutes, and combine with shredded chicken.
- Assemble the wrap: Lay tortillas on a clean surface and place a scoop of the chicken mixture in the center.
- Add the freshness: Layer in lettuce and diced tomatoes over the chicken.
- Drizzle the dressing over the veggies.
- Roll it up: Fold the sides of the tortilla and roll tightly from the bottom up.
- Grill or heat optionally for a crispy wrap.
- Cut and serve: Slice in half and serve immediately with extra ranch and hot sauce on the side.
Notes
For a crispier wrap, grill it in a pan until golden brown. Consider adding lime juice over the veggies for extra flavor.
- Prep Time: 10 minutes
- Cook Time: 5 minutes
- Category: Main Course
- Method: Grilling
- Cuisine: American
Nutrition
- Serving Size: 1 wrap
- Calories: 550
- Sugar: 3g
- Sodium: 850mg
- Fat: 25g
- Saturated Fat: 10g
- Unsaturated Fat: 12g
- Trans Fat: 0g
- Carbohydrates: 45g
- Fiber: 3g
- Protein: 28g
- Cholesterol: 70mg
Keywords: buffalo chicken wraps, spicy wraps, easy dinner recipes, comfort food
Egg Roll in a Bowl
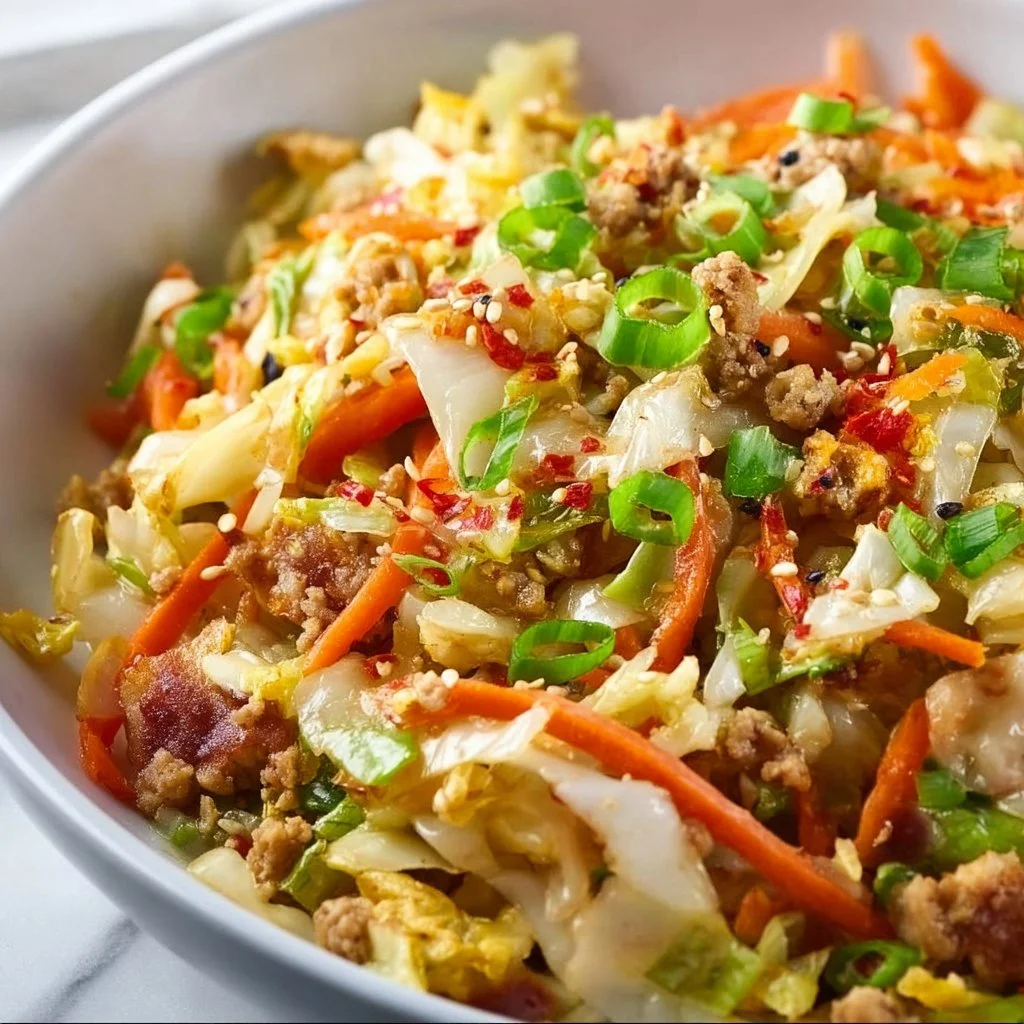
Egg Roll in a Bowl: A Cozy Delight
Hey there, flavor adventurers! Welcome back to my cozy kitchen. Today, I’m cooking up something that’s a delightful nod to a classic we all love – the egg roll. But instead of deep-frying our way through a kitchen mess, we’re going to create a scrumptious and healthy flavor bomb I like to call Egg Roll in a Bowl. This dish is a perfect mix of cozy and fresh, a bit like wrapping yourself in your favorite blanket on a chilly evening.
Picture this: a vibrant bed of seasoned cabbage, crisp carrots, and more goodies, all topped with a perfectly fried egg or a sprinkle of sesame seeds—yum! Not only does this recipe come together in around 30 minutes, but it’s also a fantastic way to load up on fresh veggies without sacrificing flavor. Plus, you can customize it with your favorite protein or vegan options, making it a versatile meal that’s sure to please everyone at the table.
As someone who finds immense joy in cooking and feeding others, I can’t wait for you to dig into this dish. It’s not just about food; it’s about creating memories, sharing laughter, and gathering around the table with those you love. So roll up your sleeves, grab your apron (or don’t—no judgment here!), and let’s dive into this comforting and delicious recipe that will have you feeling like a pro in your kitchen.
Personal Story
Let me whisk you back for a moment. Growing up, Saturday nights were a feast at my parents’ kitchen. Dad would whip up a batch of homemade egg rolls, their crispy, golden-brown edges practically glowing with deliciousness. The smell of savory pork, ginger, and garlic wafting through the air was pure magic, enticing the whole family to gather around the dining table and share stories.
One particular night, my little brother decided it would be hilarious to dip his egg roll in a dish meant for sweet and sour sauce. The look on my dad’s face—half horror, half amusement—was priceless, and we all burst into laughter. These little moments made those egg rolls so much more than just food; they created a sense of community and warmth. As I grew older, I realized that while egg rolls are delicious, the process of cooking together is what truly binds us. Hence, Egg Roll in a Bowl was born—a simpler way to replicate that dish without the deep-frying fuss, and a new tradition that anyone can whip up.
Ingredients
Let’s get down to the essentials! Here’s what you’ll need for this cozy dish:
-
Ground Pork (or Chicken/Turkey/Tofu):
- The star protein! Ground pork gives you that savory richness, but feel free to substitute with chicken for a leaner option, turkey for a lighter twist, or tofu for a plant-based version.
-
Coleslaw Mix:
- A colorful blend of shredded cabbage and carrots. If you’re feeling adventurous, try using a mix of rainbow carrots or even add shredded Brussels sprouts for a unique twist.
-
Garlic:
- Minced or grated to release those aromatic flavors. Pro tip: fresh garlic is key for depth, but jarred garlic will work if you’re in a pinch.
-
Ginger:
- Freshly grated ginger offers a zing and warmth. If the fresh stuff intimidates you, ground ginger will do, but start with less since it’s more concentrated.
-
Soy Sauce:
- This brings all the umami! If you’re watching your sodium intake or need a gluten-free option, tamari is a great substitute.
-
Sesame Oil:
- Just a drizzle adds a delightful nuttiness. If you can’t find it, a high-quality olive oil will work, but you’ll miss that signature sesame flavor.
-
Green Onions:
- Chopped for garnish and bright flavor. Scallions can also add that fresh crunch, giving a slight kick.
-
Fried Eggs:
- A topping that takes this dish over the top! Serve each bowl with a perfectly fried egg, sunny-side-up or over easy for that gooey goodness.
-
Sesame Seeds (optional):
- These tiny guys add a crunch and an authentic touch. Toast them lightly in a pan to enhance their flavor even more.
Step-by-Step Instructions
Now it’s time to get cookin’! Let’s create this cozy dish that will fill your kitchen with mouthwatering aromas.
1. Prepare Your Ingredients
Start by gathering all your ingredients. This makes the cooking process smoother and more organized. Chop up your garlic, ginger, and green onions; it’s showtime!
2. Heat Up Your Pan
Grab a large skillet or wok and heat it over medium heat. Drizzle about 1 tablespoon of sesame oil into the pan. Wait until the oil shimmers—this is your cue that it’s nicely heated!
3. Sauté the Aromatics
Add your minced garlic and grated ginger to the pan. Sauté them for about 30 seconds until fragrant (but be careful not to burn them!). This step is crucial because it infuses your oil with flavor, setting the stage for the rest of your dish.
4. Cook the Ground Meat
Next, add your ground pork (or chosen protein). Break it apart with a spatula and cook until browned and fully cooked through—about 5-7 minutes. If there’s excess grease, feel free to drain it; we want the tasty bits, not the soggy.
5. Toss in the Cabbage
Once the meat is golden and cooked, toss in the coleslaw mix. Use a spatula or tongs to mix it in with the meat. As the cabbage wilts, we want to retain a bit of crunch, so stir for another 2-3 minutes.
6. Season It Up
Pour in your soy sauce and stir everything together. Allow the flavors to meld for another minute or so. I always recommend tasting at this point—if it’s lacking seasoning, you can sprinkle in a bit more soy sauce or even a dash of salt.
7. Plate it Up!
Spoon generous portions into bowls. This dish is perfect for serving family-style, so don’t be afraid to get in there!
8. Fry Those Eggs
In a separate skillet, add a bit more sesame oil and fry up some eggs—sunny-side-up or however you prefer! Place an egg on top of each bowl of egg roll goodness. The runny yolk will create a luscious sauce that ties everything together.
9. Garnish and Enjoy!
Finish off your masterpiece with sliced green onions and a sprinkle of sesame seeds. Now it’s time to dig in!
Serving Suggestions
This hearty dish is perfect on its own, but if you want to take it up a notch, consider serving it with some steamed jasmine rice or cauliflower rice for a low-carb option. You can also whip up a quick side salad or some pickled vegetables to add a refreshing crunch that complements the rich flavors of the egg roll in a bowl.
Recipe Variations
Now for the fun part—don’t be afraid to get creative! Here are a few twists to inspire you:
-
Spicy Kick: Add a teaspoon of sriracha or chili paste when you mix in the soy sauce for a spicy kick.
-
Veggie-Loaded: Toss in more veggies like bell peppers, snap peas, or even some zucchini ribbons for extra nutrition.
-
Sweet and Savory: Drizzle a touch of hoisin sauce over the top for a sweet twist that pairs beautifully with the savory meat.
-
Low-Carb Alternative: Swap out the coleslaw mix for spiralized zucchini or do a combination for a fun noodle-like texture!
-
Vegan Delight: Use tempeh or a hearty veggie blend in place of meat, and serve with a tofu scramble on top instead of eggs.
Chef’s Notes
In my journey as a home cook, I’ve learned that recipes are living entities; they evolve as our tastes and experiences change. This Egg Roll in a Bowl has been my go-to on busy weeknights, and it’s become a family favorite. Last week, I decided to switch things up and used leftover grilled chicken and some extra veggies in my fridge. Guess what? It was a hit, proving that improvisation can lead to delicious meals!
Also, don’t sweat it if something goes a little off-plan. The kitchen is a place for experimentation; embrace the mishaps and find joy in the process! A good dish can withstand a bit of culinary adventure.
FAQs and Troubleshooting
1. What if I can’t find coleslaw mix?
No problem! You can make your own using finely shredded cabbage and julienned carrots. If you have other veggies like bell peppers or kale, feel free to add those as well.
2. Can I make this dish ahead of time?
Absolutely! You can prepare the egg roll mix ahead of time and store it in the fridge for up to 2 days. Just warm it up and fry your eggs fresh before serving!
3. My dish turned out too salty. What can I do?
If your egg roll in a bowl is overly salty, try adding a splash of a sweet element, like honey or brown sugar, to balance it out. You could also mix in more cabbage to dilute the saltiness.
4. How can I store leftovers?
Store any leftovers in an airtight container in the refrigerator for up to 3 days. When reheating, add a splash of water to keep it moist and flavorful.
Nutritional Info
(Optional but helpful)
- Servings: 4
- Calories: Approximately 350 per serving
- Protein: 25g
- Carbohydrates: 10g
- Fat: 25g
- Fiber: 3g
And there you have it, my friends! A scrumptious and easy-to-make Egg Roll in a Bowl that captures comfort food in a healthy way. I hope you enjoy making and sharing this dish as much as I do. Happy cooking, and may your kitchens be filled with laughter, good food, and lasting memories!
Print
Egg Roll in a Bowl: A Cozy Delight
- Total Time: 45 minutes
- Yield: 4 servings 1x
- Diet: Paleo
Description
A healthy and scrumptious twist on the classic egg roll, packed with fresh veggies and topped with a delicious fried egg.
Ingredients
- 1 lb Ground Pork (or Chicken/Turkey/Tofu)
- 1 bag Coleslaw Mix
- 3 cloves Garlic, minced
- 1 inch Ginger, grated
- 3 tbsp Soy Sauce
- 1 tbsp Sesame Oil
- 3 Green Onions, chopped
- 4 Fried Eggs (for topping)
- 1 tbsp Sesame Seeds (optional)
Instructions
- Prepare your ingredients by chopping garlic, ginger, and green onions.
- Heat a large skillet over medium heat and add sesame oil.
- Sauté the garlic and ginger for 30 seconds until fragrant.
- Cook the ground pork until browned, about 5-7 minutes.
- Toss in the coleslaw mix and stir for another 2-3 minutes until slightly wilted.
- Season with soy sauce, mixing well.
- Plate generous portions into bowls.
- Fry eggs in a separate skillet and place on top of each bowl.
- Garnish with green onions and sesame seeds.
Notes
Feel free to customize with different proteins or extra veggies as desired.
- Prep Time: 15 minutes
- Cook Time: 30 minutes
- Category: Main Course
- Method: Stovetop
- Cuisine: Asian
Nutrition
- Serving Size: 1 serving
- Calories: 350
- Sugar: 5g
- Sodium: 400mg
- Fat: 25g
- Saturated Fat: 6g
- Unsaturated Fat: 10g
- Trans Fat: 0g
- Carbohydrates: 10g
- Fiber: 3g
- Protein: 25g
- Cholesterol: 186mg
Keywords: egg roll, healthy recipe, cozy dish, comfort food, quick meal

Hearty Ground Beef and Potatoes
Hearty Ground Beef and Potatoes: A Comforting Classic
Welcome to my cozy corner of the internet! I’m so glad you’ve stopped by. Today, I’m thrilled to share a delightful recipe for Hearty Ground Beef and Potatoes. Just saying the name evokes warm memories of family dinners, laughter echoing off the kitchen walls, and that unmistakable aroma wafting through the house—a signal that something delicious is on the way!
This dish is not just about satisfying your stomach; it’s about bringing people together, creating connections, and cherishing moments that become lifelong memories. Whether it’s a chilly evening or a busy weeknight, this hearty recipe is the best friend you didn’t even know you needed. Who doesn’t love the combination of savory ground beef paired with tender potatoes? It’s comfort food at its finest!
I can still remember the very first time I made this dish—clad in my mismatched apron (who cares about matching, right?), I was a little nervous but also brimming with excitement. The sizzle of the beef hitting the skillet and the steamy aroma rising filled my kitchen with pure magic. Fast forward to today, I’ve made this dish countless times, sharing it with friends, family, and anyone who just needed a little love in the form of food.
So grab your apron, roll up those sleeves, and let’s embark on this culinary adventure together. With simple steps and a sprinkling of love, you’ll create a dish that not only fills bellies but warms hearts.
Personal Story
As a child, I spent countless weekends at my grandparents’ house where the kitchen was always bustling with activity. My grandmother would whip up a big pot of her famous beef and potato stew each Sunday. The whole family would gather around the table, sharing stories about our week while eagerly awaiting that first taste.
I can still see the way her eyes sparkled as she served us, and the sounds of laughter and clattering silverware filled the room. It wasn’t just a meal; it was a bond, a tradition, an expression of love. I remember being so fascinated watching her cook, my tiny hands desperately trying to help while she gently guided me with her ever-patient demeanor.
Years later, I found myself recreating her recipe, often calling her for advice because let’s be honest, it’s hard to match a grandmother’s love! With each simmering pot and browning beef, I was not only making a meal; I was celebrating a legacy, holding onto those warm memories that meant everything to me.
Now I’m here to pass on that same love to you, hoping that every bite of this Hearty Ground Beef and Potatoes dish reminds you of joy, comfort, and the magic that happens around the dinner table.
Ingredients
Here’s what you’ll need to make this mouthwatering dish:
-
Ground Beef (1 lb)
- Use lean or extra-lean ground beef for a healthier option. If you’re looking for a lighter choice, ground turkey or chicken work well too!
-
Potatoes (3-4 medium-sized)
- A classic choice! Yukon Gold or Russets are perfect for this dish, as they’re fluffy and absorb the flavors beautifully. If you want to add a fun twist, try sweet potatoes!
-
Onion (1 medium, diced)
- Onions add flavor and sweetness. Yellow onions are a staple, but red onions can add a nice bite. You can even skip them if you’re not a fan!
-
Garlic (2-3 cloves, minced)
- Because everything’s better with garlic! Fresh minced garlic adds depth, but you can use garlic powder in a pinch.
-
Beef Broth (1 cup)
- Homemade is best, but store-bought works too! Vegetable broth can be used for a vegetarian twist.
-
Carrots (2, diced)
- Carrots add a pop of color and sweetness. Feel free to swap in any favorite veggies, like peas or green beans!
-
Celery (1 stalk, diced)
- For extra crunch! If you’re not a fan of celery, you can skip it or substitute it with bell peppers.
-
Olive Oil (2 tablespoons)
- Perfect for sautéing. You can also use butter, which adds a lovely richness!
-
Seasonings: Salt, Pepper, Thyme, and Paprika
- Basic but essential! Fresh herbs can add extra flair. Add red pepper flakes for a kick!
Step-by-Step Instructions
Alright, let’s dive into the cooking magic. Here’s how to whip up this comforting dish step-by-step:
-
Prepare Your Ingredients:
- First, gather all your ingredients and give them a quick wash and chop. There’s nothing worse than realizing halfway through cooking that you forgot to dice the onions!
-
Sauté the Vegetables:
- In a large skillet or Dutch oven, heat your olive oil over medium heat. Add in the diced onions and sauté for about 3-4 minutes, until they become translucent. Add the minced garlic and stir it in for another minute, letting that wonderful aroma fill your kitchen.
-
Brown the Ground Beef:
- Push the onions to one side of the skillet and add your ground beef. Break it up with a spatula as it cooks, about 5-7 minutes. You want it nicely browned! Don’t forget to season with salt, pepper, and a sprinkle of paprika while it’s cooking.
-
Add the Vegetables:
- Once the beef is cooked through, mix in the carrots, celery, and any other vegetables you choose to include. Stir everything together for a couple of minutes, letting the flavors mingle.
-
Deglaze the Pan:
- Pour in your beef broth, scraping the bottom of the pan to get all those tasty brown bits mixed in. This adds depth and richness to your dish.
-
Add the Potatoes:
- Now, toss in the diced potatoes. They’ll absorb all those flavors as they cook! Make sure to cover the pot and let it simmer over low heat for about 25-30 minutes. Check occasionally, giving it a good stir to prevent sticking.
-
Taste and Adjust:
- After about 25 minutes, taste your dish. This is the best part! You might want to add a bit more salt, pepper, or thyme to suit your preferences.
-
Serve:
- Once everything is tender, and the broth has thickened a bit, your Hearty Ground Beef and Potatoes are ready! If you fancy a garnish, sprinkle some fresh parsley on top before serving.
-
Clean Up:
- While everyone digs in, take a moment to appreciate the glorious mess in your kitchen—it’s part of the fun!
Serving Suggestions
This Hearty Ground Beef and Potatoes dish looks beautiful when served right from the pot. For a more elegant presentation, use a deep bowl, and garnish with freshly chopped parsley or even a sprinkle of cheese for added richness. Pair it with crusty bread or homemade biscuits to soak up every last drop of that delicious broth; trust me, it’s a game-changer!
Recipe Variations
If you’re feeling adventurous or need to cater to different dietary needs, here are a few fun twists:
- Swap Proteins: Use ground turkey, chicken, or even a plant-based meat substitute if you’re looking for vegetarian options.
- Herb It Up: Experiment with different herbs like rosemary, oregano, or even a pinch of fresh basil for a fragrant twist!
- Cheesy Delight: Add a handful of cheese such as cheddar or mozzarella in the last few minutes of cooking for a gooey, cheesy finish.
- Spicy Kick: If you love heat, add some diced jalapeños or a splash of hot sauce to really spice things up.
- One-Pot Wonder: Throw in some frozen veggies (like peas or corn) toward the end for added nutrition.
Chef’s Notes
This Hearty Ground Beef and Potatoes recipe has evolved a bit over the years. I started with my grandmother’s basic version, but along the way, I played around with spices, vegetable additions, and cooking methods. I’ve even made it in a slow cooker when I wanted a hands-free approach!
One of my favorite memories was when I decided to cook it for a surprise family gathering. Little did I know that one of my cousins was avoiding gluten. It was an honest mistake, but I learned to adapt quickly — that’s when I started experimenting with different broths and adding more veggies. In the end, it became a favorite for all my family to enjoy, gluten-free or not!
FAQs and Troubleshooting
1. Why is my dish too watery?
- If you find that your dish is too watery, try simmering it uncovered for a bit longer to allow the liquid to evaporate and thicken.
2. How can I make it gluten-free?
- Always check your beef broth for gluten content or opt for homemade broth. All other ingredients listed are gluten-free as long as they don’t have any additives.
3. Can I add other vegetables?
- Absolutely! Feel free to throw in some frozen peas, bell peppers, or even mushrooms, which can add delicious earthiness to the mix.
4. What do I do if my potatoes are still firm?
- If your potatoes aren’t cooking through, simply cover the pot again and let them simmer for a bit longer — patience is a virtue in cooking!
Nutritional Information
(Per serving – approximated)
- Calories: 380
- Protein: 27g
- Carbohydrates: 45g
- Fat: 12g
- Fiber: 5g
And there you have it, my dear food-loving friends! This Hearty Ground Beef and Potatoes recipe is more than just a meal; it’s a dish steeped in memories, shared stories, and love. So, gather your loved ones around the table; this dish is ready to fill not just bellies, but hearts too. Happy cooking and enjoy!
Print
Hearty Ground Beef and Potatoes
- Total Time: 45 minutes
- Yield: 4 servings 1x
- Diet: None
Description
A comforting classic that brings together savory ground beef and tender potatoes for a warm family meal.
Ingredients
- 1 lb Ground Beef (lean or extra-lean)
- 3–4 medium Potatoes (Yukon Gold or Russets)
- 1 medium Onion (diced)
- 2–3 cloves Garlic (minced)
- 1 cup Beef Broth
- 2 Carrots (diced)
- 1 stalk Celery (diced)
- 2 tablespoons Olive Oil
- Seasonings: Salt, Pepper, Thyme, and Paprika
Instructions
- Prepare your ingredients: Gather all your ingredients and give them a quick wash and chop.
- Sauté the vegetables: Heat olive oil in a large skillet or Dutch oven, add diced onions and sauté for 3-4 minutes. Add minced garlic and stir for another minute.
- Brown the ground beef: Push onions aside, add ground beef, and cook for 5-7 minutes until browned, seasoning with salt, pepper, and paprika.
- Add the vegetables: Mix in the diced carrots, celery, and any other vegetables, stirring together for a couple of minutes.
- Deglaze the pan: Pour in beef broth, scraping the bottom of the pan to mix in the flavorful bits.
- Add the potatoes: Toss in diced potatoes, cover, and let simmer over low heat for about 25-30 minutes.
- Taste and adjust: After 25 minutes, taste and adjust seasonings to your preference.
- Serve: Once everything is tender, serve the dish with a garnish of fresh parsley.
- Clean up: Enjoy your meal and appreciate the mess!
Notes
For added richness, sprinkle some cheese on top during the last minutes of cooking, or use crusty bread for soaking up the broth.
- Prep Time: 15 minutes
- Cook Time: 30 minutes
- Category: Main Course
- Method: Stovetop
- Cuisine: American
Nutrition
- Serving Size: 1 serving
- Calories: 380
- Sugar: 3g
- Sodium: 600mg
- Fat: 12g
- Saturated Fat: 4g
- Unsaturated Fat: 6g
- Trans Fat: 0g
- Carbohydrates: 45g
- Fiber: 5g
- Protein: 27g
- Cholesterol: 70mg
Keywords: beef, comfort food, potatoes, family dinner, hearty meal

Sheet Pan Chicken Shawarma
Perfectly Easy Sheet Pan Chicken Shawarma: A Flavor-Packed Journey
Welcome back to my kitchen, friends! Today, I’m excited to take you on a delightful culinary adventure with my Sheet Pan Chicken Shawarma. You might be wondering, "What’s the big deal about shawarma?” Well, let me tell you, it’s not just a dish; it’s a whole experience. A medley of spices wraps around marinated chicken, roasted to juicy perfection alongside vibrant veggies, all in one tidy pan. Perfect for busy weeknights or gathering friends around the table, this dish is sure to impress your taste buds and anyone lucky enough to enjoy it with you.
Imagine the warm, aromatic scent of cumin, coriander, and smoked paprika wafting through your home as the chicken roasts. This recipe brings together the complexity of Middle Eastern flavors with the ease of a simple sheet pan dinner. And guess what? You don’t even need to be a master chef to pull it off. Just a few ingredients, a mix of spices, and you’ll have a meal that feels like a restaurant-quality feast right in your kitchen.
As someone who loves creating cozy vibes through food, shawarma holds a special place in my heart. It reflects the joy of cooking as a community, where shared meals bring people together. Whether topped on a fluffy pita, served alongside a crisp salad, or paired with creamy tahini sauce, this dish is versatile and comforting. So roll up your sleeves, grab your apron, and let’s dive into the magic of Sheet Pan Chicken Shawarma — because good food is all about the journey as much as the destination!
Personal Story
I vividly remember the first time I tasted shawarma. I was on a family trip during my college years, roaming the bustling streets of a foreign city filled with tantalizing aromas and lively chatter. A little street vendor caught my eye with flames licking the skewers of marinated meat, beckoning hungry passersby. The first bite of that tender, spiced chicken wrapped in a warm pita was life-changing. I was hooked, and at that moment, I knew I had to recreate this delicious dish back home.
Fast forward a few years, and I’m here in my cozy kitchen, trying to replicate the magic that ignited my love for shawarma. The goal was to harness those authentic flavors without needing a specialty restaurant kitchen. I spent days experimenting with different spice ratios, marinades, and cooking methods. My friends were more than willing to taste-test, and I still chuckle when I recall their faces as I presented my first oven-baked shawarma attempt. It was a joyously messy affair, but their laughter and encouragement made it all worthwhile. That’s the heart of my cooking philosophy: food is meant for sharing, laughter, and love.
Ingredients
For our Sheet Pan Chicken Shawarma, here’s what you’ll need:
- 1.5 lbs chicken thighs: I prefer thighs for their juicy texture that holds up beautifully against the spices. If you’re not a fan, boneless chicken breasts can work, but keep an eye on cooking time since they cook faster.
- 2 tablespoons olive oil: This helps bind the spices to the chicken and encourages that gorgeous golden-brown color. Feel free to use avocado oil if you’re looking for a higher smoke point!
- 3 tablespoons shawarma spice blend: This is where the magic happens! A mix of cumin, paprika, coriander, turmeric, garlic powder, and cinnamon. Don’t have it? You can whip up your own (I’ll share my blend in the variations section) or buy it pre-made from the store.
- 1 teaspoon salt: Essential for flavor enhancement—your chicken needs love too! If you’re watching your sodium, use a low-salt alternative.
- 1 teaspoon black pepper: To add a little kick! Freshly ground is always best, but pre-ground works too.
- 1 red onion, sliced: Adds sweetness when roasted; it’s perfect alongside the chicken. Pick any onion variety, or even sweet onions for a milder flavor.
- 1 bell pepper, sliced (any color): Colorful veggies not only add crunch but elevate the dish’s visual appeal. Zucchini or eggplant would work in a pinch!
- 1 lemon, juiced: Brightens up the entire dish with a zesty finish. Don’t have fresh? Bottled juice will do if necessary.
- Pita bread or rice for serving: Choose your favorite! I love serving mine with fluffy jasmine rice, but you can’t go wrong with warm pita.
Let’s go ahead and get into this scrumptious recipe, shall we?
Step-by-Step Instructions
-
Marinate the Chicken
Start by combining the olive oil, shawarma spice blend, salt, black pepper, and lemon juice in a large bowl. Add in the chicken thighs, making sure they’re thoroughly coated with that aromatic mixture. This might get a little messy, but don’t worry, mess means love! Cover the bowl and let it marinate in the refrigerator for at least 30 minutes, or even overnight if time allows.Tip: Marinating longer allows the flavors to penetrate deeper into the chicken, making each bite even more delicious!
-
Preheat the Oven
While your chicken bathes in those lovely spices, preheat your oven to 425°F (220°C). A hot oven is key to achieving that crispy, caramelized exterior we desire! -
Prepare the Sheet Pan
Grab a large baking sheet and line it with parchment paper for easier cleanup. Spread out the sliced red onions and bell peppers evenly on the pan. This creates a beautiful bed for the chicken to roast atop, adding flavor and nutrition—talk about multitasking! -
Arrange the Chicken
Once marinated, take the chicken out of the fridge and place it on top of the vegetables, ensuring it’s spaced out well. This helps to cook evenly and brown beautifully. You can also drizzle any remaining marinade over the veggies for an extra flavor boost. -
Roast Away!
Slide your sheet pan into the preheated oven and roast for 25-30 minutes, or until the chicken is fully cooked (165°F/75°C) and the edges are just starting to caramelize. Using a meat thermometer ensures that your chicken stays juicy and tender!Chef Hack: Broil for an additional 2-3 minutes if you want an extra crispy finish. Just keep an eye on it to avoid burning!
-
Rest and Slice
Once out of the oven, allow the chicken to rest for about 5 minutes. This step is crucial for keeping those juicy juices locked inside. After resting, slice the chicken into bite-sized pieces. -
Serve It Up!
Plate that glorious chicken and vegetables! If you’ve opted for rice or pita, now’s the time to add that to your serving.Serving Tip: Drizzle tahini sauce or yogurt over the top for extra creaminess and flavor. Fresh parsley or cilantro makes for a beautiful garnish!
Serving Suggestions
For a warm and inviting presentation, place a generous scoop of lemon-infused rice on one side of a large platter. Next, arrange the roasted chicken shawarma and veggies artfully on top. Drizzle with tahini sauce or a dollop of creamy yogurt, and sprinkle with fresh herbs for that extra pop of color. Don’t forget to have warm pita or lettuce wraps on the side for a fun, interactive meal experience!
Recipe Variations
- Spicy Kick: Add a teaspoon of cayenne or chili powder to the spice blend for a fiery version.
- Vegetarian Version: Substitute the chicken with chickpeas or tofu, and use the veggies as-is for a plant-based delight!
- Greek Twist: Toss in some olives and feta cheese right before serving for a Mediterranean flair.
- Herbaceous Harmony: Swap some of the spices for fresh herbs like oregano and mint for an aromatic twist.
- Citrus Love: Use lime juice instead of lemon for a different zest profile!
Chef’s Notes
This recipe has become a cherished staple in my kitchen over the years. The original inspiration came from my many adventures diving into different cuisines, but what truly evolved was how I started treating it as a cozy meal for get-togethers. I love to double the recipe – because who doesn’t appreciate leftovers? The flavors deepen as they sit, making for epic next-day shawarma wraps!
And here’s a funny kitchen story: Once, I decided to impress some friends with an elaborate shawarma party. I forgot to check my spice inventory! I had to improvise with whatever I had on hand, resulting in a strangely exciting adventure! They still talk about that ‘mystery shawarma night.’ Sometimes, the kitchen accidents turn into the most memorable moments!
FAQs and Troubleshooting
-
What can I do if my chicken is dry?
If your chicken turns out dry, it might have been overcooked. Always use a meat thermometer and aim for 165°F (75°C) at the thickest part. Marinating also locks in moisture! -
Can I use bone-in chicken?
Absolutely! Bone-in chicken will enhance flavor, but it may require a longer cooking time. Just be sure to check that it’s fully cooked. -
How do I prevent my veggies from burning?
Cutting your vegetables into larger pieces can help them cook more evenly. You can also add a splash of water to the baking sheet if you notice them browning too quickly. -
Can I freeze leftovers?
Yes! This dish freezes well. Just make sure to store it in airtight containers. When you’re ready to enjoy, defrost in the fridge and reheat in the oven until heated through.
Nutritional Info (if applicable)
Note: Nutritional values are estimates based on the ingredients used and portion sizes included in the recipe.
- Calories: Approximately 400 per serving
- Protein: 34g
- Carbohydrates: 30g
- Fats: 18g
And there you have it! My easy Sheet Pan Chicken Shawarma, bursting with flavor and love. It’s perfect for any day of the week—from cozy family dinners to vibrant get-togethers. I can’t wait for you to give it a try! Let me know how your culinary adventure goes. Happy cooking! 🍽️✨
Print
Perfectly Easy Sheet Pan Chicken Shawarma
- Total Time: 60 minutes
- Yield: 4 servings 1x
- Diet: None
Description
A flavorful and easy-to-make sheet pan chicken shawarma recipe that brings the taste of Middle Eastern cuisine to your home.
Ingredients
- 1.5 lbs chicken thighs
- 2 tablespoons olive oil
- 3 tablespoons shawarma spice blend
- 1 teaspoon salt
- 1 teaspoon black pepper
- 1 red onion, sliced
- 1 bell pepper, sliced (any color)
- 1 lemon, juiced
- Pita bread or rice for serving
Instructions
- Marinate the chicken by combining olive oil, shawarma spice blend, salt, black pepper, and lemon juice in a large bowl. Add chicken thighs and coat well. Cover and marinate for at least 30 minutes.
- Preheat your oven to 425°F (220°C).
- Prepare a large baking sheet by lining it with parchment paper. Spread sliced red onions and bell peppers evenly on the pan.
- Arrange the marinated chicken on top of the vegetables, ensuring it’s spaced out.
- Roast in the oven for 25-30 minutes, or until the chicken reaches 165°F (75°C).
- Rest the chicken for about 5 minutes, then slice into bite-sized pieces.
- Serve with rice or pita, and optionally drizzle with tahini sauce or yogurt.
Notes
For extra flavor, consider drizzling tahini sauce or yogurt over the top. Fresh herbs make a beautiful garnish.
- Prep Time: 30 minutes
- Cook Time: 30 minutes
- Category: Main Course
- Method: Baking
- Cuisine: Middle Eastern
Nutrition
- Serving Size: 1 serving
- Calories: 400
- Sugar: 5g
- Sodium: 600mg
- Fat: 18g
- Saturated Fat: 4g
- Unsaturated Fat: 10g
- Trans Fat: 0g
- Carbohydrates: 30g
- Fiber: 3g
- Protein: 34g
- Cholesterol: 90mg
Keywords: chicken shawarma, sheet pan dinner, Middle Eastern cuisine, easy recipes, family dinner

Mac & Beef
# Cozy Mac & Beef: A Perfect Marriage of Comfort Food

## Introduction

Hey there, kitchen enthusiasts! Welcome back to my little corner of the internet where the aroma of delicious food fills the air and every recipe is crafted with love. Today, I am thrilled to share a dish that has always held a special place in my heart: Mac & Beef. If you're like me, when you hear the word "comfort food," your mind might drift to that creamy, cheesy goodness we all adore. But, oh, let me tell you — when you add some savory beef into the mix, you’ve got a meal that goes beyond just comfort; it turns dinner into a warm hug for your soul!

Picture this. You’re rushing home from work, the stress of the day clinging to your shoulders like an unwanted jacket. You walk into your kitchen, and what do you find yourself craving? That’s right — mac and cheese. But let's kick it up a notch (or maybe four!). Combine that gooey goodness with seasoned ground beef, and suddenly you’re not just feeding your hunger; you’re igniting a spark of joy. This dish is not only easy to whip up, but it’s also perfect for family dinners, cozy nights in, or even a potluck where you want to impress without the fuss.

In today’s post, we’ll dive into the *how-tos* of creating this delightful Mac & Beef. I promise you, we’ll keep it light and fun! You don’t need to be a culinary wizard to make something extraordinary. We’ll have a sweet cooking journey filled with tips, anecdotes, and possibly a few laughs along the way. So grab your apron, put on some fun music, and let’s get cooking!

## Personal Story

Ah, Mac & Beef. For me, it’s not just a dish; it’s a flood of memories. I still remember the first time my mom made it for my family. I was about ten years old, and after a long day of school — like every classic movie scene...well, maybe a bit more chaotic. We rushed home, backpacks flying, and our noses filled with the scent of melting cheese and seasoned meat wafting through our cozy little kitchen.

I could hardly contain my excitement! Sitting around the dining table, we eagerly dug into our bowls, and with every spoonful, I felt warmth spreading through me. It wasn’t just the food — it was the laughter, the conversations, and the stories that danced around with us. My mom would share how she learned the recipe from Grandma, who made it for her growing up. I felt like part of a delicious legacy, propelling me into my future adventures in the kitchen.

As the years went by, I tried to recreate that magical meal. Each attempt brought more joy and a sprinkle of nostalgia. Now, I carry that recipe close to my heart, ready to share it with you! Let’s make it together and create some of your own beautiful memories!

## Ingredients

To whip up this delightful dish, here’s what you’ll need:

- **Macaroni Pasta (8 ounces)**
  - This is the classic choice! Feel free to swap it with any pasta shape you love, such as shells, bowties, or even gluten-free options.

- **Ground Beef (1 pound)**
  - Lean ground beef works best! If you're looking for alternatives, ground turkey or even plant-based crumbles could be great substitutes for a lighter option.

- **Cheddar Cheese (2 cups, shredded)**
  - A staple in mac and cheese! Look for sharp cheddar for a bold flavor, or mix in mozzarella for extra creaminess.

- **Milk (1 cup)**
  - Whole milk is preferred for richness, but you can also use almond milk or oat milk if you're dairy-free.

- **Butter (2 tablespoons)**
  - Unsalted butter gives you complete control over seasoning. Margarine can easily replace it if you’re looking for a dairy-free option.

- **All-Purpose Flour (2 tablespoons)**
  - This helps create a roux for your cheese sauce. If you need a gluten-free version, almond flour works in a pinch!

- **Garlic Powder (1 teaspoon)**
  - Adds flavor magic! Fresh minced garlic also works beautifully — about 1-2 cloves should do!

- **Onion Powder (1 teaspoon)**
  - A delightful savory touch! You can use finely chopped onions for more texture.

- **Salt & Pepper (to taste)**
  - Always taste as you go! You can also add some smoked paprika or cayenne pepper for a spicy kick.

- **Breadcrumbs (optional, for topping)**
  - Adds a crunchy layer! You can use panko for extra crispiness or crushed crackers.

With these ingredients, you’re well on your way to creating a dish that feels like home in every bite!

## Step-by-Step Instructions

Alright, let’s get down to the good stuff — cooking! Here’s a step-by-step guide to making the fabulous Mac & Beef.

1. **Boil the Pasta:**
   - Start by bringing a pot of salted water to a boil. Once boiling, add your macaroni and cook according to package instructions until al dente. This usually takes about 7-8 minutes. Remember, we want it slightly undercooked since it will continue to cook in the oven later! Drain and set aside.

2. **Cook the Beef:**
   - In a large skillet over medium heat, add your ground beef. Let it sizzle until browned, about 5-7 minutes. Make sure to break it up with a wooden spoon. This step is where you'll infuse a ton of flavors! Season with a little salt and pepper while it’s cooking for extra depth.

3. **Make the Cheese Sauce:**
   - In a separate saucepan, melt the butter over medium heat. Sprinkle in the flour, and whisk it together to form a roux. Cook this for about 1-2 minutes until it’s golden brown and starts to smell nutty. Gradually add the milk, whisking continuously to avoid lumps. Let it simmer until thickened — about 3-5 minutes.

4. **Add the Cheese:**
   - Once your milk mixture is thick, lower the heat and stir in the shredded cheddar until it’s melty and lovely. (Feel free to sneak a taste or two; I won’t tell!) If it’s too thick, just add a splash more milk!

5. **Combine Everything:**
   - Now, toss in your perfectly cooked macaroni and ground beef into the cheese sauce. Give it a good mix until everything is coated in cheesy goodness!

6. **Transfer and Top:**
   - If you’re using a baking dish, transfer the mixture now. For an extra layer of crunch, sprinkle breadcrumbs on top. It adds such a delightful texture contrast!

7. **Bake:**
   - Preheat your oven to 350°F (175°C) and bake your dish for about 20-25 minutes until bubbly and golden on top. Trust me; this is the moment you’ll want to peek through the oven door!

8. **Serve and Enjoy!**
   - Once out of the oven, let it sit for about 5 minutes — this allows the flavors to settle. Serve warm and watch the smiles light up around the table!

## Serving Suggestions

Now that you’ve got your dish made, how can you serve it up like a pro? I love to scoop generous portions into warm, rustic bowls. Grate a bit of fresh cheese on top for that melty finish. You can also sprinkle some chopped parsley or green onion for a pop of color and freshness — it dazzles! For a complete meal, serve alongside a simple salad or some roasted veggies.

## Recipe Variations

Feeling adventurous? Here are some fun variations to give your Mac & Beef a unique twist:

1. **Spicy Southwest Mac & Beef:**
   - Add diced jalapeños and a sprinkle of taco seasoning to give it that zesty kick!

2. **Creamy Mushroom Blend:**
   - Sauté some garlic and mushrooms in the beef mixture for an umami punch.

3. **Veggie-Packed Delight:**
   - Toss in some steamed broccoli or peas to amp up the nutritional value and color!

4. **BBQ Twist:**
   - Mix a few tablespoons of your favorite barbecue sauce into the beef for a smoky flavor.

5. **Plant-Based Version:**
   - Use lentils or quinoa in place of beef for a filling and nutritious alternative.

## Chef’s Notes

Over the years, I’ve tinkered with this recipe to fit my mood, the seasons, and what I have on hand. Sometimes a swap of cheese can change the game entirely, using Gruyère for a luxurious touch or some feta for an unexpected zing. And let’s not forget about the endless possibilities of toppings! A drizzle of sriracha or a sprinkle of chili flakes can add an extra dimension of flavor. Life is all about experimentation in the kitchen, and those little moments of inspiration have led to countless cherished gatherings with friends and family.

## FAQs and Troubleshooting

**Q: Can I make this dish ahead of time?**
- Absolutely! You can prepare everything up to the baking step. Just cover and refrigerate. When you're ready to bake, allow it to come to room temperature and then pop it in the oven!

**Q: How do I avoid overcooked pasta?**
- Always refer to the package instructions! Remember, the pasta will cook a little more in the oven, so make sure it’s al dente when you drain it.

**Q: What if my cheese sauce is too thick?**
- No worries! Just add a splash more milk, stir it in, and it will loosen up beautifully.

**Q: How do I know when my dish is done baking?**
- Look for bubbly edges, a golden top, and that irresistible aroma filling your kitchen.

## Nutritional Info (Optional)

While comfort food isn’t always meant to be a low-calorie option, this Mac & Beef is packed with protein and carbohydrates to fuel your day. One serving (approx. 1 cup) typically contains:

- Calories: 550
- Protein: 30g
- Carbohydrates: 50g
- Fat: 25g

***Remember, these values can vary greatly depending on ingredient choices, so feel free to adjust according to your dietary needs.***

So, there you have it! My cozy Mac & Beef recipe that brings together nostalgia, flavor, and a whole lot of love. I can’t wait for you to try it out and create your own delicious memories. Happy cooking, and don’t forget to share the love around your dinner table!

Cozy Mac & Beef
- Total Time: 45 minutes
- Yield: 4 servings 1x
- Diet: Omnivore
Description
A hearty and comforting dish combining creamy macaroni and seasoned ground beef, perfect for family dinners or potlucks.
Ingredients
- 8 ounces Macaroni Pasta
- 1 pound Ground Beef
- 2 cups Cheddar Cheese, shredded
- 1 cup Milk
- 2 tablespoons Butter
- 2 tablespoons All-Purpose Flour
- 1 teaspoon Garlic Powder
- 1 teaspoon Onion Powder
- Salt & Pepper, to taste
- Breadcrumbs (optional, for topping)
Instructions
- Boil the Pasta: Start by bringing a pot of salted water to a boil. Once boiling, add your macaroni and cook according to package instructions until al dente, about 7-8 minutes. Drain and set aside.
- Cook the Beef: In a large skillet over medium heat, add your ground beef. Let it sizzle until browned, about 5-7 minutes. Season with salt and pepper.
- Make the Cheese Sauce: In a separate saucepan, melt the butter over medium heat. Sprinkle in the flour, whisk to form a roux, and cook for about 1-2 minutes. Gradually whisk in the milk, and let simmer until thick, about 3-5 minutes.
- Add the Cheese: Stir in the shredded cheddar until melted. If too thick, add more milk.
- Combine Everything: Toss in the cooked macaroni and ground beef into the cheese sauce. Mix well.
- Transfer and Top: Transfer the mixture to a baking dish and sprinkle breadcrumbs on top if using.
- Bake: Preheat the oven to 350°F (175°C) and bake for about 20-25 minutes until bubbly and golden.
- Serve and Enjoy!: Let sit for 5 minutes, then serve warm.
Notes
Feel free to customize with your favorite toppings or mix-ins for a unique twist!
- Prep Time: 15 minutes
- Cook Time: 30 minutes
- Category: Main Course
- Method: Baking
- Cuisine: American
Nutrition
- Serving Size: 1 cup
- Calories: 550
- Sugar: 5g
- Sodium: 700mg
- Fat: 25g
- Saturated Fat: 10g
- Unsaturated Fat: 10g
- Trans Fat: 0g
- Carbohydrates: 50g
- Fiber: 2g
- Protein: 30g
- Cholesterol: 80mg
Keywords: comfort food, mac and cheese, beef casserole, family dinner, easy recipe