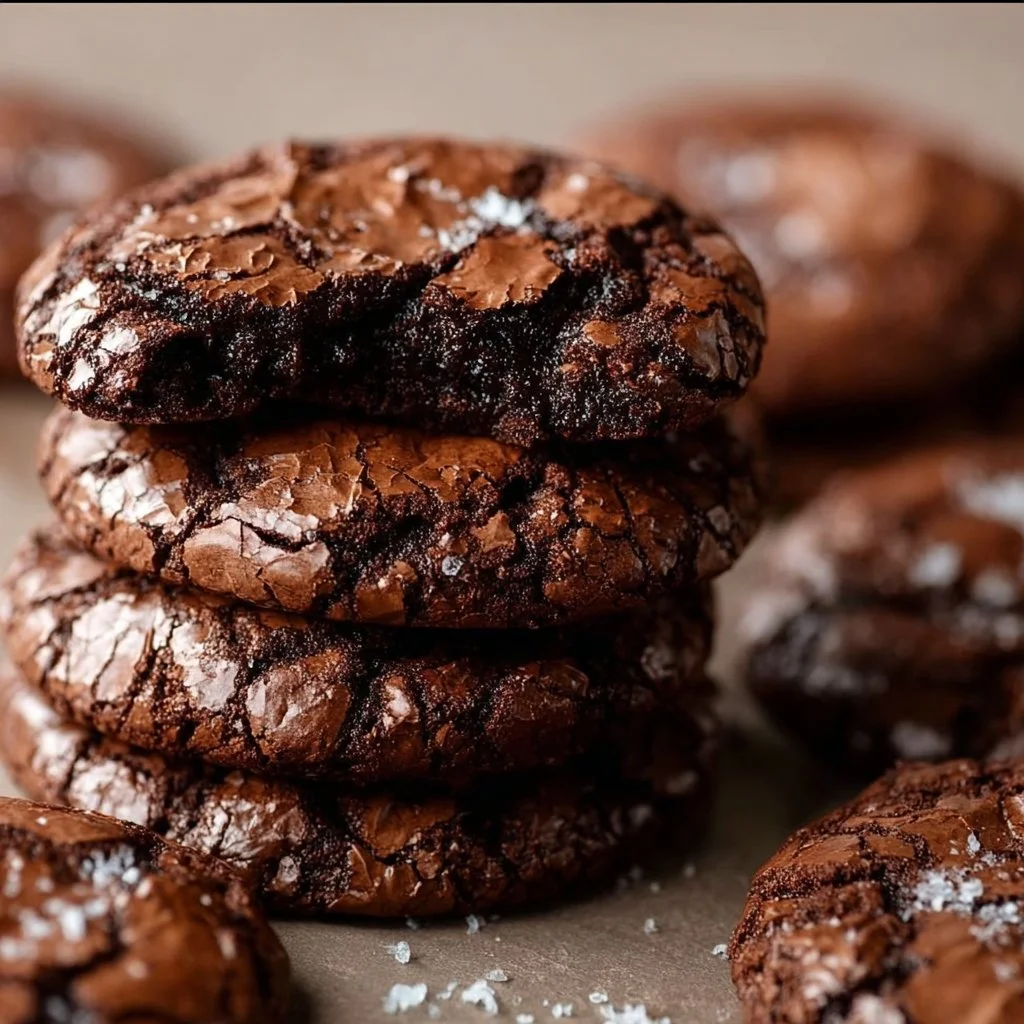
Gourmet Brownie Cookies: The Perfect Fusion of Brownies and Cookies!
Welcome back to my cozy kitchen, my fellow food enthusiasts! Today, we’re diving into a recipe that’s sure to steal the show at your next gathering—Gourmet Brownie Cookies! These little delights boast all the rich, fudgy decadence of brownies combined with the delightful chewiness of cookies. Imagine biting into a deeply chocolatey cookie that’s crisp on the edges and gooey in the middle—a slice of heaven right here on Earth!
I’ve always believed that some of the best memories are made in the kitchen, especially when it comes to baking. The aroma of chocolate melting, sugar whisking, and a sprinkle of flour dusting the countertops takes me on a nostalgic trip back to my childhood. I remember my grandma’s kitchen filled with laughter and warmth as she’d gather all of us around her. Making cookies felt like a sacred ritual, and though we often ended up with a flour fight, the joy of baking together was always worth it.
Whether you’re whipping these up for a family gathering or just because it’s a Tuesday, these gourmet brownie cookies are sure to impress. What’s more? They’re surprisingly easy to make! So gather your ingredients and let’s embark on this chocolatey adventure together.
Personal Story
Oh, let me take you back to a sunny Saturday morning at my grandma’s house. The whole family was buzzing with excitement as the smell of something chocolatey wafted through the air. Grandma was making her signature brownie cookie recipe, and you know what that meant—each of us had a specific job. My sister and I would race to measure the flour and cocoa powder, while our cousins fought over who got to crack the eggs. We’d find ourselves peeking into the oven, eyes wide with anticipation, as the cookies baked to a beautiful, glossy finish.
It was during one of those kitchen adventures that I learned the importance of patience—fighting the urge to devour them straight from the oven and waiting just a few minutes for them to cool. Little did I know, this recipe would become a cherished tradition in my life. It holds memories of laughter, love, and, the occasional chocolate-covered disaster. I revisit this recipe from time to time, not just for its rich flavor but for the connection it builds. Now, it’s my turn to share this love with you!
Ingredients
Here’s what you’ll need to create these heavenly treats:
For the Cookies:
-
1 cup (2 sticks) unsalted butter
- Why? The butter adds richness and flavor.
- Substitution: You can use coconut oil or a dairy-free butter alternative for a vegan version.
-
1 ½ cups granulated sugar
- Why? This helps your cookies spread out beautifully while keeping them chewy.
-
1 cup brown sugar, packed
- Why? The molasses in brown sugar adds depth and a chewy texture.
-
2 large eggs
- Why? Eggs help bind the cookies together.
- Tip: If you’re vegan, you can replace each egg with 1/4 cup unsweetened applesauce.
-
2 teaspoons vanilla extract
- Why? Pure vanilla takes the flavor from good to great!
-
1 cup all-purpose flour
- Why? This gives your cookies structure.
- Substitution: For a gluten-free option, substitute with a 1:1 gluten-free flour blend.
-
1 cup unsweetened cocoa powder
- Why? Essential for that brownie taste!
- Tip: Use Dutch-processed cocoa for a deeper flavor.
-
1 teaspoon baking powder
- Why? Helps the cookies rise just a tad without losing that chewy brownie-like texture.
-
1/2 teaspoon salt
- Why? A touch of salt amplifies sweetness and balances flavors.
-
2 cups semi-sweet chocolate chips or chunks
- Why? Melty chocolate bits in each bite—need I say more?
- Variation: Swap for dark chocolate or even white chocolate chips for a unique twist!
Step-by-Step Instructions
Now that we have our ingredients prepped, let’s get rolling on these delicious brownie cookies!
Step 1: Preheat Your Oven
Preheat your oven to 350°F (175°C). This step is crucial because we want those cookies to bake evenly and help them achieve that perfect chewy texture.
Step 2: Cream the Butters and Sugars
In a large mixing bowl, beat the unsalted butter, granulated sugar, and brown sugar together until light and fluffy. This should take about 2-3 minutes. You can use a handheld mixer or a stand mixer. Pro tip: allow your butter to sit at room temperature for about 30 minutes before using it. This will give you that creamy texture we’re after!
Step 3: Incorporate Eggs and Vanilla
Next, add in the eggs (one at a time) and the vanilla extract. Beat until everything is combined. You want that batter to be smooth—trust me, this is going to make it all come together beautifully!
Step 4: Mix the Dry Ingredients
In a separate bowl, whisk together the flour, cocoa powder, baking powder, and salt. Now, this step is important—sifting the cocoa powder before adding it to the mixture ensures there are no lumps and keeps our batter silky smooth. Once combined, gradually add this dry mixture into the wet ingredients. Mix until just combined—overmixing could lead to dry cookies!
Step 5: Fold in the Chocolate Chips
Here comes the fun part! Fold in the chocolate chips or chunks gently into your dough. You might want to save a few to sprinkle on top right before baking for that professional touch!
Step 6: Scoop and Bake
Using a cookie scoop or two tablespoons, drop heaping amounts of dough onto a baking sheet lined with parchment paper, spacing them about 2 inches apart to allow for spreading. Pop them into the preheated oven and bake for 10-12 minutes. Keep an eye on them—the edges should be set while the centers will look slightly underbaked (trust me, they’ll firm up as they cool).
Step 7: Cool
Remove the cookies from the oven and let them rest on the baking sheet for about 5 minutes. This helps them set up before transferring them to a wire rack to cool completely. Don’t skip this step—this is where that gooey center magic happens!
Enjoy Your Cookies
Wait for them to cool a bit before diving in. I know it’s hard, but those few minutes will reward you with a fudgy, melty, chocolate-filled experience!
Serving Suggestions
These gourmet brownie cookies can be served on a beautiful platter, perhaps garnished with a dusting of powdered sugar or a drizzle of chocolate sauce for that eye-catching finish. Pair them with a tall glass of milk or a scoop of vanilla ice cream for an irresistible treat that nobody will be able to resist. ❤️ They also make fantastic gifts in cute cookie tins—just try not to eat them all before you get a chance to give them away!
Recipe Variations
If you’re feeling adventurous or catering to specific dietary preferences, here are a few ideas to switch up this recipe:
- Nutty Addition: Fold in 1 cup of your favorite nuts, such as walnuts or pecans, for a delightful crunch.
- Minty Fresh: Add a few drops of peppermint extract for a chocolate-mint flair that’s perfect during the holidays.
- Spicy Kick: Incorporate a pinch of cayenne pepper into the dry ingredients for a subtle kick that enhances the chocolate flavor.
- Flourless Option: Go for a gluten-free version by omitting the flour entirely and using ground almonds instead, yielding ultra-fudgy cookies.
Chef’s Notes
Over the years, this brownie cookie recipe has become a staple in my home, and I can’t help but tweak it each time I make it! Lately, I’ve been experimenting with adding a hint of espresso powder to the mix, which enhances that chocolate flavor even more! One of my funniest kitchen memories was when I accidentally used salt instead of sugar—I had a room full of disappointed taste testers whose faces were priceless! Remember to check your ingredients before diving in, friends!
FAQs and Troubleshooting
1. My cookies are too cakey! What went wrong?
This could happen if you overmixed the dough or added too much flour. Make sure to measure accurately and mix until just combined to maintain that chewy texture.
2. Why are my cookies spreading too much?
Chilling your dough for at least 30 minutes can help the cookies maintain their shape while baking, as well as keeping your ingredients cool.
3. My cookies didn’t turn out gooey!
If they were left in the oven for too long, they might dry out. Remember, they’ll continue to cook on the baking sheet after being pulled from the oven, so take them out while they still look slightly underbaked.
4. Can I freeze the dough?
Absolutely! You can scoop the dough into balls and freeze them on a baking sheet. Once frozen, transfer them to a zip-top bag and pop them in the freezer. When you’re ready, bake directly from frozen, adding an extra minute or two to the bake time.
Nutritional Information (optional)
Caloric Content: Each cookie is approximately 150 calories.
Health Tip: These cookies are rich in antioxidants from the cocoa but should be consumed in moderation due to their sugar content.
Now, are you ready to transform your kitchen into a chocolatey wonderland? Collect your ingredients, turn on those ovens, and let’s get baking! Share your creations with me—there’s nothing better than the joy of homemade goodies shared with love. Happy baking! 🍪❤️
Print
Gourmet Brownie Cookies
- Total Time: 27 minutes
- Yield: 24 cookies 1x
- Diet: Vegetarian
Description
Delicious gourmet brownie cookies that combine the fudgy richness of brownies with the chewy texture of cookies. Perfect for any gathering!
Ingredients
- 1 cup (2 sticks) unsalted butter
- 1 ½ cups granulated sugar
- 1 cup brown sugar, packed
- 2 large eggs
- 2 teaspoons vanilla extract
- 1 cup all-purpose flour
- 1 cup unsweetened cocoa powder
- 1 teaspoon baking powder
- 1/2 teaspoon salt
- 2 cups semi-sweet chocolate chips or chunks
Instructions
- Preheat your oven to 350°F (175°C).
- Cream the unsalted butter, granulated sugar, and brown sugar in a large mixing bowl until light and fluffy.
- Incorporate the eggs and vanilla extract, beating until combined.
- Mix the flour, cocoa powder, baking powder, and salt in a separate bowl.
- Gradually add the dry mixture into the wet ingredients, mixing until just combined.
- Fold in the chocolate chips or chunks.
- Scoop heaping amounts of dough onto a parchment-lined baking sheet, spacing them 2 inches apart.
- Bake for 10-12 minutes until edges are set and centers are slightly underbaked.
- Cool on the baking sheet for 5 minutes before transferring to a wire rack.
Notes
For variations, consider adding nuts, peppermint extract, or a pinch of cayenne. These cookies can also be frozen in dough form for later baking.
- Prep Time: 15 minutes
- Cook Time: 12 minutes
- Category: Dessert
- Method: Baking
- Cuisine: American
Nutrition
- Serving Size: 1 cookie
- Calories: 150
- Sugar: 15g
- Sodium: 150mg
- Fat: 7g
- Saturated Fat: 4g
- Unsaturated Fat: 3g
- Trans Fat: 0g
- Carbohydrates: 23g
- Fiber: 2g
- Protein: 2g
- Cholesterol: 30mg
Keywords: brownies, cookies, chocolate, dessert, baking