
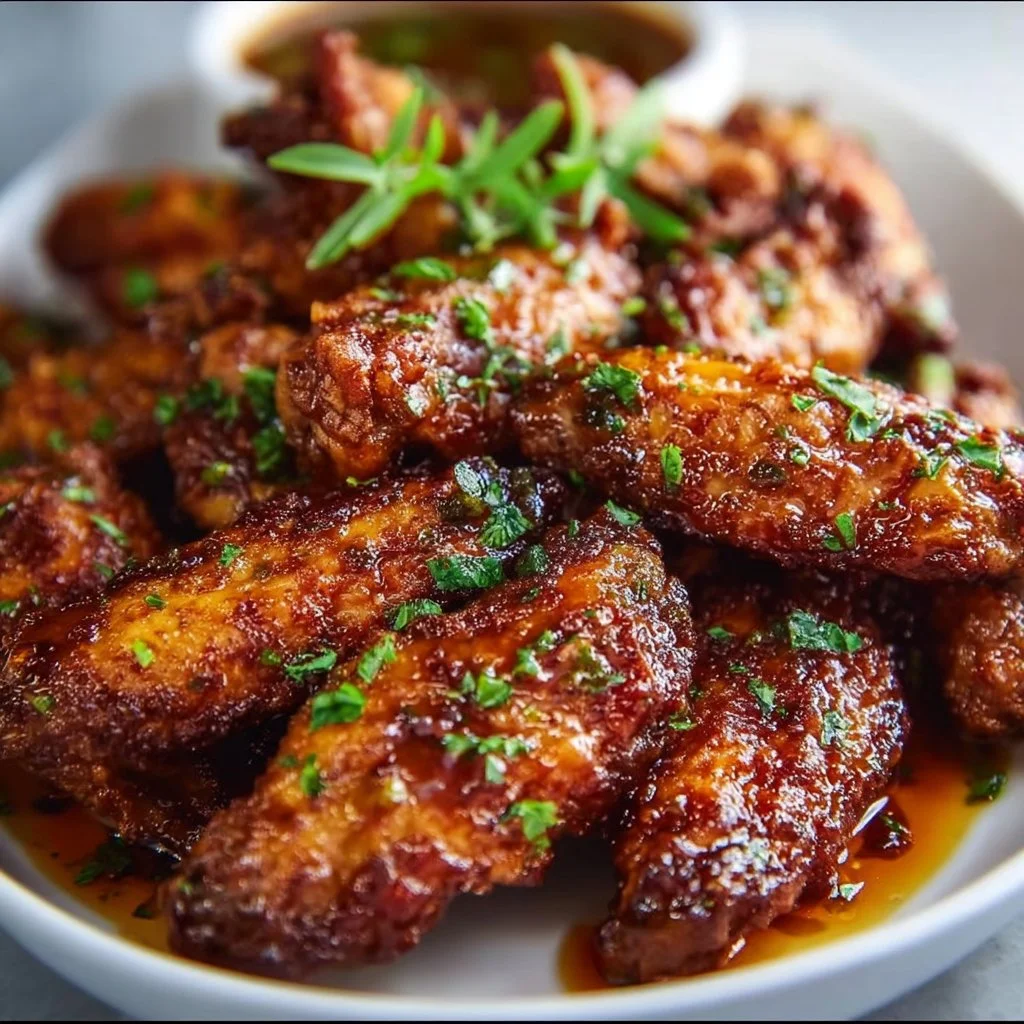
Brown Sugar Cajun Wings
Brown Sugar Cajun Wings: The Ultimate Comfort Food
Welcome back to my cozy corner of the kitchen! I’m Olivia Bennett, your enthusiastic home cook and part-time flavor magician. Today, we’re diving into a dish that might just become your new go-to for game days, casual gatherings, or even an impromptu weeknight feast: Brown Sugar Cajun Wings. These wings hit all the right notes: crispy, sweet, spicy, and utterly mouthwatering.
I don’t know about you, but for me, wings have always been a sign of good times and great company. Whether it’s the heart-pounding thrill of a football game, a family movie night, or an outdoor gathering with friends, wings have a way of bringing people together. They’re one of those magical foods that make every occasion feel special. And let’s be honest—a good set of wings can capture any crowd’s heart.
Now, what sets these Brown Sugar Cajun Wings apart? The answer lies in the blend of sweet brown sugar and bold Cajun spices that create an irresistible glaze. Picture this: tender, juicy chicken wings caramelized to perfection, with just the right amounts of sweetness and heat. It’s a flavor experience that will make you the star of your next gathering. Plus, they’re surprisingly easy to make, so let’s roll up our sleeves and get cooking because I’m here to help you feel confident and excited in your kitchen!
Ready to join me on this flavorful adventure? Let’s gather our ingredients!
Personal Story
Ah, wings! They remind me of childhood family gatherings on Sunday afternoons. Every weekend, my dad would take my siblings and me to our favorite local diner, known for its famous wings. The dining room would be buzzing with laughter, music, and the irresistible scent of sizzling chicken. My dad would always order a platter to share, expertly navigating the napkin pile for those sticky fingers. As we devoured the wings, drenching them in tangy sauce and swiping at our faces, we’d share stories, laugh, and sometimes argue over who got to pick the next movie or game.
Eventually, those diner outings transformed into a passion for cooking my own wings at home. I started experimenting with various marinades and flavors, incorporating elements from those Sunday outings. Brown Sugar Cajun Wings are one of my proudest discoveries. It’s a recipe that marries my love for sweet and spicy flavors with those nostalgic family moments.
So, when you sink into those crispy, flavorful wings, remember that they’re infused not just with spices or sugar but with a whole lot of love and memories from my kitchen to yours.
Ingredients
Let’s gather those beautiful ingredients you’ll need to create your delicious Brown Sugar Cajun Wings. Here’s what you’ll be working with:
-
Chicken Wings (2 lbs.)
Tip: You can use a mix of drumettes and flats or just flat or drumettes alone. If you’re short on wings, you can substitute with chicken drumsticks. -
Brown Sugar (1/4 cup)
Insight: Using light brown sugar adds a mild caramel flavor. For a deeper flavor, consider using dark brown sugar, which has more molasses. -
Cajun Spice Blend (2 tablespoons)
Tip: You can buy pre-made Cajun seasoning for convenience or mix your own with smoked paprika, cayenne pepper, garlic powder, and onion powder. -
Olive Oil (2 tablespoons)
Tip: If you want a neutral flavor, feel free to use canola or vegetable oil instead. Olive oil adds a lovely richness and mouthfeel. -
Garlic Powder (1 teaspoon)
Insight: If garlic isn’t your thing, you can skip it or replace it with onion powder for a different flavor profile. -
Salt and Pepper (to taste)
Tip: Season generously but remember that the Cajun spices will add sodium, so taste as you go! -
Fresh Parsley (for garnish, optional)
Tip: Fresh herbs add a pop of color and brightness. Swap out for green onions if you prefer an additional layer of flavor.
Step-by-Step Instructions
Ah, the cooking part! This is where the magic happens. Let’s get those wings sizzling!
Step 1: Prepare the Wings
Start by preheating your oven to 425°F (220°C). This high temperature is crucial for achieving that crispy outside you crave. While that’s warming up, rinse the chicken wings under cold water and pat them dry with paper towels.
Chef Hack: Drying them well is the key to crispy skin. The more moisture you eliminate, the better that crust will be!
Step 2: Prep the Seasoning
In a large mixing bowl, combine the brown sugar, Cajun spice blend, garlic powder, olive oil, salt, and pepper. Stir until you create a paste-like mixture. If you find the mixture too dry, add a drizzle more olive oil to help it coat the wings evenly.
Tip: Don’t hesitate to taste the mixture. You can always adjust the sweetness or spice level to suit your palate.
Step 3: Coat the Wings
Add the chicken wings to the bowl with your spice mixture. Using your hands, toss the wings until they are evenly coated. I recommend wearing kitchen gloves for easy cleanup!
Pro Tip: To ensure a delectably sticky glaze, let the wings marinate for 15-30 minutes if time allows—we all know that good things take time!
Step 4: Bake
Arrange the wings in a single layer on a lined baking sheet. Make sure they are not overcrowded; this allows them to crisp up properly. Bake in the preheated oven for 25-30 minutes, flipping them halfway through for even cooking.
Chef Note: Keep an eye on them towards the end; every oven is different. You want the wings golden brown and crispy!
Step 5: Glaze and Caramelize
Once your wings are beautifully browned and cooked through, remove them from the oven. For an extra touch, brush on a bit of the reserved marinade for that sticky finish. Pop them back in the oven for an additional 5 minutes to caramelize further.
Final Touch: Your wings are almost ready—don’t forget to make your home smell amazing in the process!
Step 6: Let them Rest
After taking them out of the oven, let the wings rest for a few minutes. This step is essential: it allows the flavors to settle and keeps the wings juicy.
Serving Suggestions
Now, the fun part: serving those gorgeous Brown Sugar Cajun Wings! Arrange them on a large platter, garnished with fresh chopped parsley for that pop of color. You can serve them with dipping sauces like ranch or blue cheese on the side to appeal to different tastes. I also love adding some celery sticks for that classic touch and a crunch that complements the wings beautifully.
Recipe Variations
Feeling adventurous? Here are a few fun twists to make these wings your own:
-
Honey Garlic Cajun Wings: Replace brown sugar with honey for a different sweetness that pairs beautifully with garlic.
-
Spicy Mango Cajun Wings: Add chopped dried mango to your spice mix for a fruity kick to balance out the heat.
-
Lemon Zest Cajun Wings: Mix in lemon zest with your marinade for a zesty brightness that cuts through the richness.
-
Cheesy Cajun Wings: After baking, suppose you sprinkle freshly grated parmesan cheese on top—yes, please!
-
Cajun Dry Rub Wings: If sauce isn’t your favorite, try tossing the wings in dry Cajun seasoning and roasting them for a crisper texture.
Chef’s Notes
These Brown Sugar Cajun Wings have evolved over time; they started as just a basic wing recipe and transformed into something extraordinary through trial and error. I remember a particularly chaotic kitchen disaster when I tried to put the mixing bowl in the fridge for a ‘quick chill,’ and it toppled over, leaving me with brown sugar and spices sprawled across the floor!
But that moment taught me that the kitchen is a space for experimentation. Sometimes, the best recipes come from a complete mess—seriously! Now I know to keep things stable and secure while mixing. So, if you’re up for an adventure in your cooking, embrace those cooking hiccups—they might lead to your new favorite recipe, too!
FAQs and Troubleshooting
1. Why are my wings not crispy?
Ensure you thoroughly dry the wings before applying the marinade and use a high enough temperature. If they’re overcrowded on the baking sheet, they’ll steam instead of crisp.
2. Can I use frozen wings?
Absolutely! Just make sure to thaw them completely and dry them as much as you can before seasoning.
3. How do I know when my wings are done?
The best way to check is by using an instant-read thermometer—wings should reach an internal temperature of 165°F (74°C). Look for that golden brown color, too!
4. What can I do with leftovers?
Leftover wings can be stored in an airtight container in the refrigerator for up to three days. They’re fantastic reheated in the oven for that crispiness or tossed in a spicy sauce for an upgrade!
Nutritional Info
While I believe in indulging, being informed is also essential. Here’s a rough estimate per serving (3 wings, without sauce):
- Calories: 345
- Protein: 25g
- Fat: 24g
- Carbohydrates: 5g
- Fiber: 0g
- Sugars: 4g
And there you have it, my lovely foodie friends! Brown Sugar Cajun Wings that are easy to whip up yet packed with deliciousness and adventure. I can’t wait to hear how they turn out for you, so make sure to share your kitchen successes and stories! Now go forth and get cooking—flavors await!
Print
Brown Sugar Cajun Wings
- Total Time: 45 minutes
- Yield: 4 servings 1x
- Diet: Paleo
Description
Crispy, sweet, and spicy Brown Sugar Cajun Wings that are perfect for game days and gatherings.
Ingredients
- 2 lbs. Chicken Wings
- 1/4 cup Brown Sugar
- 2 tablespoons Cajun Spice Blend
- 2 tablespoons Olive Oil
- 1 teaspoon Garlic Powder
- Salt and Pepper (to taste)
- Fresh Parsley (for garnish, optional)
Instructions
- Prepare the wings by preheating your oven to 425°F (220°C) and rinsing the wings under cold water; pat them dry.
- Combine brown sugar, Cajun spice blend, garlic powder, olive oil, salt, and pepper in a large bowl until a paste forms.
- Coat the wings with the spice mixture, tossing to ensure they are evenly covered.
- Bake the wings on a lined baking sheet for 25-30 minutes, flipping halfway through.
- Glaze the wings with reserved marinade and bake for an additional 5 minutes to caramelize.
- Let them rest for a few minutes before serving to keep them juicy.
Notes
For added flavor, let the wings marinate for 15-30 minutes before baking. Serve with dipping sauces like ranch or blue cheese.
- Prep Time: 15 minutes
- Cook Time: 30 minutes
- Category: Appetizer
- Method: Baking
- Cuisine: American
Nutrition
- Serving Size: 3 wings
- Calories: 345
- Sugar: 4g
- Sodium: 500mg
- Fat: 24g
- Saturated Fat: 4g
- Unsaturated Fat: 18g
- Trans Fat: 0g
- Carbohydrates: 5g
- Fiber: 0g
- Protein: 25g
- Cholesterol: 70mg
Keywords: wings, Cajun wings, Brown sugar, chicken wings, game day food
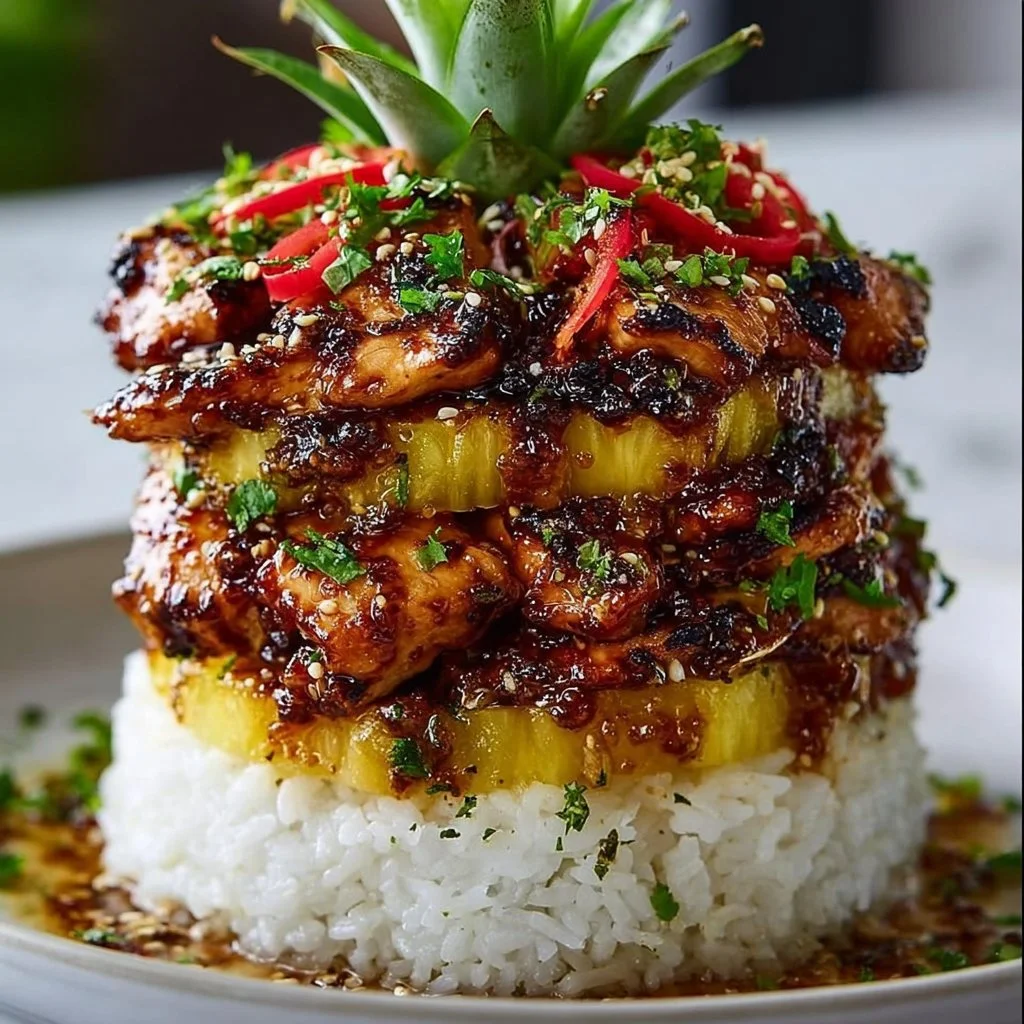
Hawaiian Huli Huli Chicken Stack
Hawaiian Huli Huli Chicken Stack: A Slice of Aloha in Your Kitchen
Introduction
Aloha and welcome to my kitchen! Today, we’re taking a deliciously tropical journey to the sunny islands of Hawaii with a dish that’s bursting with flavor and good vibes: the Hawaiian Huli Huli Chicken Stack. If the mere mention of grilled chicken marinated in a sweet and tangy sauce makes your taste buds dance, you’re definitely in for a treat! This colorful dish not only tantalizes the palate, but it also brings a splash of island sunshine right into your home.
Growing up, family gatherings often included a BBQ in the backyard, where the smell of marinated chicken sizzling on the grill would fill the air, making my heart race with anticipation. The recipe for Huli Huli chicken has become a staple in my home, seamlessly merging the unpretentious comfort of home cooking with the joy of hosting friends and family. It’s a dish that sparks laughter, stories, and, of course, hearty appetites.
Now, let’s get down to it! The beauty of Huli Huli chicken lies in its carefree, laid-back vibe. This isn’t just about filling your belly; it’s about creating memories! So roll up your sleeves and grab your apron. Together, we’re going to create a feast that’s as inviting as the islands themselves, and trust me—you don’t need to be a culinary expert to whip this up!
Personal Story
Ah, the memories! One of my most cherished moments connected to Huli Huli chicken dates back to a summer family reunion in my uncle’s backyard. We gathered around the grill, the intoxicating aroma of marinated chicken wafting through the air, bringing everyone together. I could see my cousins racing around while my aunts prepared sides of fluffy coconut rice, grilled vegetables, and fresh pineapple slices.
As my uncle flipped the chicken on the grill, he would regale us with stories of his Hawaiian adventures, showcasing his love for the islands and their incredible food culture. We all laughed, ate, and shared tales, creating a bond over perfectly charred chicken that was sticky sweet with every bite. It was in that moment, surrounded by laughter, love, and delectable flavors, that I fell in love with cooking—especially dishes that bring people together. Huli Huli chicken became more than just a recipe for me; it became a symbol of connection.
Fast forward to today, and I’ve adapted this dish into my own kitchen. But every time I fire up the grill, I am reminded of those treasured summer days with family—a reminder that food is best moments shared.
Ingredients
Here’s what you’ll need to get started on your Hawaiian Huli Huli Chicken Stack! Each ingredient plays a vital role in bringing this dish to life:
-
Chicken Thighs (Boneless, Skinless)
- Tender and juicy, chicken thighs are perfect for grilling. They stay moist and absorb flavors beautifully. If you’re not a thigh fan, chicken breasts work too, though they might need a bit more attention to avoid drying out!
-
Soy Sauce
- The backbone of the marinade, soy sauce adds umami and depth. For a gluten-free option, you can substitute with tamari or coconut aminos which still deliver robust flavor.
-
Brown Sugar
- This ingredient contributes that delicious sweet contrast to the savory elements. If you want a less sugary version, you can use honey or maple syrup, but keep in mind that it might alter the flavor slightly.
-
Pineapple Juice
- Fresh is best! Pineapple juice tenderizes the chicken while adding a refreshing note. Don’t have fresh juice? Canned is fine; just make sure it’s 100% juice without additives.
-
Garlic (Minced)
- Fresh garlic gives that aromatic kick that complements the sweetness. If you’re in a pinch, garlic powder works, though I recommend fresh whenever possible.
-
Ginger (Grated)
- Ginger elevates the flavor with its warmth and slight spiciness. You can swap it out for ground ginger, but fresh will always provide a more vibrant flavor.
-
Sesame Oil
- Adding a nutty flavor, sesame oil ties all these wonderful tastes together. It’s rich, so just a little goes a long way. In a bind, canola or vegetable oil can substitute, but the taste won’t be quite the same!
-
Green Onions
- A sprinkle of green onions adds a fresh crunch to the stack. If you’re out, chives or shallots can work as alternatives for garnish.
-
Sesame Seeds
- Toasted sesame seeds not only bring crunch but also a beautiful presentation. You can choose to skip these if you want a lighter option.
Step-by-Step Instructions
Ready to bring the sunshine into your kitchen with Huli Huli chicken? Let’s roll up those sleeves and dive into the deliciousness!
-
Prepare the Marinade: In a medium bowl, combine soy sauce, brown sugar, pineapple juice, minced garlic, grated ginger, and sesame oil. Whisk the ingredients together until the sugar has dissolved. By blending these, we’re creating that tropical sweet tang that defines Huli Huli chicken! Don’t forget to taste—cooking is all about adjustments, and this is the time to find your perfect flavor.
-
Marinate the Chicken: Place your chicken thighs in a large resealable plastic bag or a shallow dish. Pour half of the marinade over the chicken, making sure each piece is well coated. Seal the bag (or cover the dish) and let it marinate for at least 30 minutes in the refrigerator. For optimal flavor, aim for 2–4 hours if time permits! This marinating time is a small investment for maximum flavor payoff.
-
Preheat the Grill: While the chicken is marinating, preheat your grill to medium-high heat. If you’re using a charcoal grill, you want a nice even layer of glowing coals. For gas grills, ensure the grates are clean and get them hot! This step is key to achieving those beautiful grill marks and a smoky flavor.
-
Grill Chicken: Remove the chicken from the marinade and shake off excess liquid (don’t toss the remaining marinade just yet!). Place the chicken on the grill and cook for 6-7 minutes on each side, or until the internal temperature reaches 165°F (74°C). You’ll know it’s done when you see those gorgeous grill marks!
-
Make the Glaze: While the chicken is grilling, take the reserved marinade and bring it to a boil in a small saucepan over medium heat. Let it simmer for about 5-10 minutes until it thickens slightly. This will serve as a glaze that adds an extra layer of flavor when served!
-
Stack It Up: Once grilled, remove the chicken and let it rest for a few minutes. While it’s resting, you can toast some burger or sandwich buns on the grill for that added crunch. Slice the chicken into thick pieces, then layer it on toasted buns with toppings like grilled pineapple, fresh greens, and a drizzle of the reduced marinade glaze. Serve with a sprinkle of toasted sesame seeds and green onions for added texture and presentation!
Serving Suggestions
To serve, pile that succulent Huli Huli chicken high on a toasted bun, accompanied by fresh toppings. A vibrant salad of mixed greens dressed lightly with sesame vinaigrette makes a perfect side. For a bit of crunch, lay some crispy coleslaw next to your stacks—or get adventurous and pair it with coconut rice. You can also serve with grilled pineapple slices to amplify those tropical vibes!
Recipe Variations
If you’re looking to mix things up, here are some delicious variations to try:
-
Spicy Kick: Add sriracha to the marinade for a spicy version of Huli Huli chicken—perfect for those who crave a bit of heat!
-
Teriyaki Twist: Substitute traditional marinade ingredients with teriyaki sauce, pairing sweet and savory flavors together for dynamism.
-
Vegetarian Option: Marinate and grill portobello mushrooms or eggplant slices using the same marinade as a tasty alternative!
-
Tropical Salsa: Top the chicken with a fresh mango salsa made from diced mangoes, red onion, jalapeño, cilantro, and lime juice for an extra burst of tropical flavor.
-
Cauliflower Stacks: Replace chicken with cauliflower steaks for a vegetarian take while still enjoying that beloved tangy, grilled flavor!
Chef’s Notes
This Huli Huli chicken recipe has come a long way! The first time I attempted it, I forgot to let the chicken rest before slicing—I ended up with a juicy mess! Learning from that mistake, I now preach the importance of resting for optimal texture. And whenever I make it, I’m reminded that cooking is not just about the food; it’s about laughter, love, and the thrill of trying new things! Over the years, I’ve also found that adding some fresh herbs—like cilantro or mint—can elevate it with exciting new profiles, so feel free to experiment!
FAQs and Troubleshooting
-
Why is my chicken dry?
- Overcooking is usually the culprit! Use a meat thermometer for accuracy. Chicken should aim for 165°F (74°C) for juicy results.
-
Can I make the marinade ahead of time?
- Absolutely! You can prepare the marinade up to 3 days in advance. Just store it in an airtight container in the refrigerator.
-
What can I use if I don’t have a grill?
- Check out your oven! You can bake the marinated chicken at 400°F (200°C) for about 25-30 minutes, flipping halfway through for even cooking.
-
How long can I store leftovers?
- Store any leftover chicken in an airtight container in the fridge for up to 3-4 days. It makes for an amazing addition to salads or wraps!
Nutritional Info
(For one serving of Huli Huli Chicken)
- Calories: 350
- Protein: 30g
- Carbohydrates: 32g
- Fats: 15g
(Note: Nutrition will vary based on choice of sides and toppings. Adjust as needed for your dietary goals!)
There you have it—your very own Hawaiian Huli Huli Chicken Stack! I hope this recipe fills your kitchen with wonderful aromas and brings smiles to you and your loved ones. Cooking doesn’t have to be fancy; it just has to come from the heart. Enjoy and mahalo! 🌸
Print
Hawaiian Huli Huli Chicken Stack
- Total Time: 45 minutes
- Yield: 4 servings
- Diet: Gluten-Free
Description
A deliciously tropical dish featuring grilled chicken marinated in a sweet and tangy sauce, perfect for gatherings.
Ingredients
- Chicken Thighs (Boneless, Skinless)
- Soy Sauce
- Brown Sugar
- Pineapple Juice
- Garlic (Minced)
- Ginger (Grated)
- Sesame Oil
- Green Onions
- Toasted Sesame Seeds
Instructions
- Prepare the Marinade: In a medium bowl, combine soy sauce, brown sugar, pineapple juice, minced garlic, grated ginger, and sesame oil. Whisk together until the sugar dissolves.
- Marinate the Chicken: Place chicken thighs in a large resealable plastic bag or a shallow dish. Pour half of the marinade over them, coat well, and marinate for at least 30 minutes.
- Preheat the Grill: While the chicken marinates, preheat your grill to medium-high heat.
- Grill Chicken: Remove the chicken from the marinade. Grill for 6-7 minutes on each side until the internal temperature reaches 165°F (74°C).
- Make the Glaze: While grilling, bring the reserved marinade to a boil and then simmer for 5-10 minutes until thickened.
- Stack It Up: After resting the chicken, slice it and layer on toasted buns with toppings like grilled pineapple and greens. Drizzle with glaze, and top with sesame seeds and green onions.
Notes
Let the chicken rest before slicing to maintain juiciness. Using fresh ingredients enhances flavor.
- Prep Time: 30 minutes
- Cook Time: 15 minutes
- Category: Main Course
- Method: Grilling
- Cuisine: Hawaiian
Nutrition
- Serving Size: 1 serving
- Calories: 350
- Sugar: 10g
- Sodium: 800mg
- Fat: 15g
- Saturated Fat: 2g
- Unsaturated Fat: 10g
- Trans Fat: 0g
- Carbohydrates: 32g
- Fiber: 1g
- Protein: 30g
- Cholesterol: 80mg
Keywords: Huli Huli Chicken, Hawaiian recipe, grilled chicken, BBQ chicken, tropical flavors
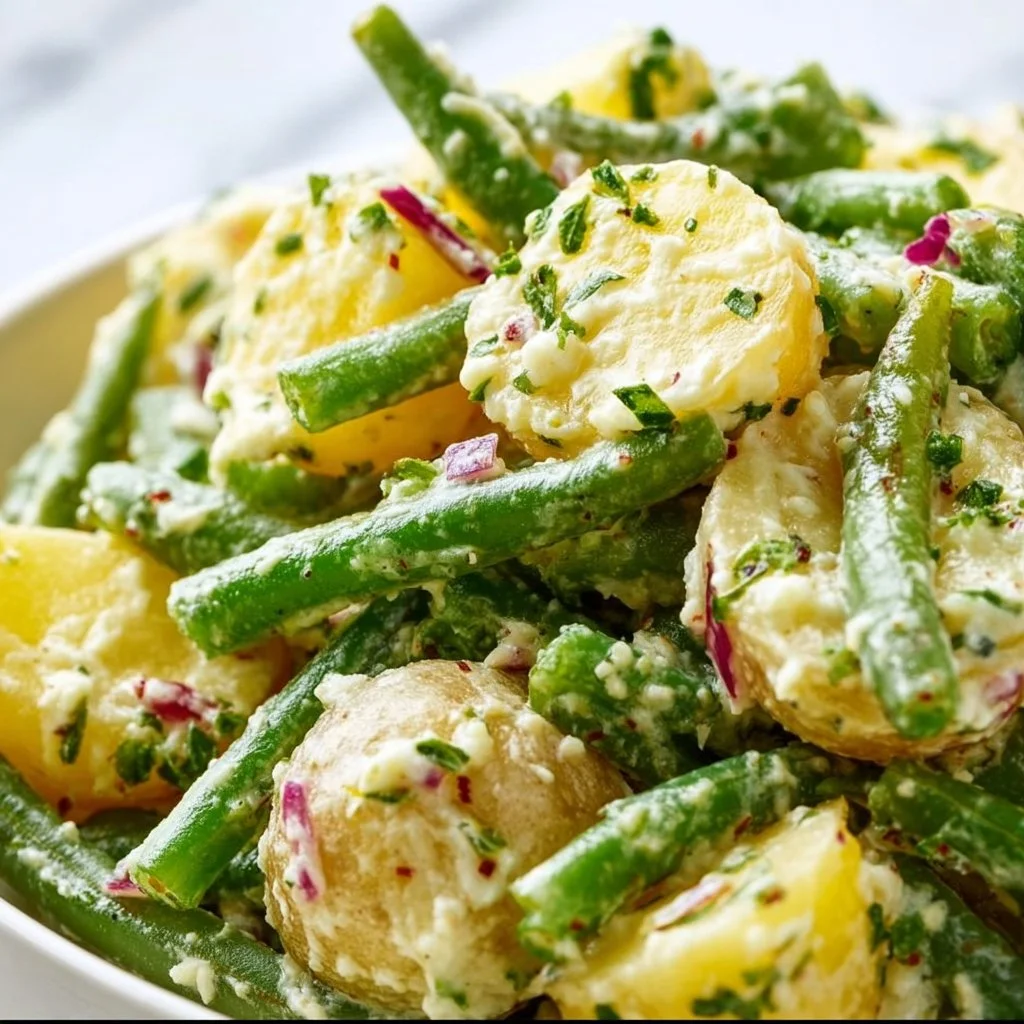
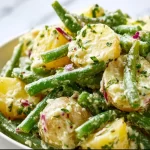
Creamy Green Bean Potato Salad
# Creamy Green Bean Potato Salad: A Comforting Classic with a Twist

## Introduction

Hey there, foodies! Welcome back to my cozy corner of the internet. Today, I’m excited to dive into a dish that’s not just a side, but a vibrant and flavorful masterpiece that can elevate your next gathering: **Creamy Green Bean Potato Salad**. Now, I know what you might be thinking—potato salad? Isn’t that just a summer BBQ staple? Well, let me tell you, this creamy delight is anything but ordinary!

This salad is a perfect blend of tender potatoes and crisp green beans, all enveloped in a rich and creamy dressing that dances on your taste buds. It’s not just the traditional recipe you might remember from childhood cookouts; it’s a modern twist that’s chock-full of freshness and flavor. Whether you’re serving it up at a picnic, a holiday feast, or just as a comforting side for dinner, this potato salad will brighten your plate and warm your heart.

As you prepare this dish, the fragrant aromas of herbs and spices will fill your kitchen, making it an inviting and cozy space. Imagine an afternoon spent cooking with loved ones, laughter echoing, and the joyful anticipation of sharing a meal—this salad embodies that feeling. So, roll up your sleeves and let’s get cooking together in the kitchen!

## Personal Story

This creamy green bean potato salad holds a special place in my heart—it's a recipe that brings back fond memories of family gatherings and the warmth that comes from being together. Growing up, my grandmother would whip up her famous version every summer when we’d gather in her backyard, surrounded by blooming flowers and laughter. The kitchen was perfumed with the smell of freshly boiled potatoes and the crunch of green beans being snapped into place.

I vividly remember the excitement of helping her in the kitchen. I’d get to wash the potatoes and beans, and she’d give me little tasks to keep me engaged. She always said that cooking was about love and sharing, and I could feel that vibrant energy radiating from her. When the salad was finally ready, we’d all gather around the picnic table, plates piled high, ready to enjoy her creation. Each bite reminded me of the care she poured into her cooking and made me realize just how important food is in connecting us.

As the years passed, I often found myself craving that same comfort and nostalgia. So, I decided to create my own version of her classic salad, adding my own flair while staying true to the essence of family and gatherings. The result? A creamy green bean potato salad that pays homage to those sunny days and the joy of bringing people together around the table.

## Ingredients

Let’s gather our ingredients! Here’s what you’ll need to make this creamy dream come true:

- **Baby potatoes** (2 pounds): These tender gems are the star of our salad! Small and waxy, they hold their shape well when boiled. Substitute with fingerling potatoes or Yukon Gold for a buttery flavor.

- **Fresh green beans** (1 pound): Crisp and vibrant, green beans add a crunchy texture that contrasts beautifully with the creamy dressing. You can substitute with asparagus or snap peas for a different twist.

- **Greek yogurt** (1 cup): A healthier alternative to mayonnaise, Greek yogurt adds creaminess and tang. If you prefer, you can swap it out for regular mayo or even vegan mayo for a dairy-free option.

- **Dijon mustard** (2 tablespoons): This zesty ingredient brings a wonderful depth of flavor to the dressing. Feel free to use yellow mustard if that’s what you have on hand, but the flavor will be slightly milder.

- **Fresh dill** (2 tablespoons, chopped): Dill enhances the freshness of the salad. You can use dried dill (1 tablespoon) if you don’t have fresh—just remember that dried herbs are more concentrated.

- **Lemon juice** (2 tablespoons): The acidity from fresh lemon juice brightens the flavors and aids in preserving the color of the dish. Lime juice works in a pinch, too!

- **Salt and pepper** (to taste): Essential for bringing out all the flavors, adjust these to suit your preference.

- **Chopped red onion** (1/2 cup): Adds a bit of crunch and sweetness. You can substitute with green onions or shallots for a milder taste.

### Chef Tips:
- Always taste as you go! Seasoning at each step will build layers of flavor in your salad.
- For an extra flavorful dressing, let it sit in the fridge for at least 30 minutes before mixing it into the salad. This allows the flavors to meld beautifully!

## Step-by-Step Instructions

Alright, let’s get cooking! Follow these step-by-step instructions to create the perfect creamy green bean potato salad. Grab your apron, and let’s get started!

1. **Boil the potatoes**: Start by placing your baby potatoes in a large pot and cover them with cold water. Add a generous pinch of salt and bring to a boil. Once boiling, reduce to a simmer and cook for about 15-20 minutes or until they’re fork-tender. You want them to be soft but not mushy! Drain and let them cool a bit before slicing into bite-sized pieces.

   *Chef Hack*: To make sure your potatoes cook evenly, try to cut them into similar sizes when boiling. This way, you’ll avoid the dreaded mix of undercooked and overcooked potatoes!

2. **Prep the green beans**: While your potatoes are boiling, you can prepare the green beans. Trim the ends and chop them into 1-inch pieces. Bring a smaller pot of water to a boil, add a pinch of salt, and blanch the green beans for about 3-4 minutes, until they’re bright green and tender-crisp. Drain and immediately plunge them into icy cold water to stop the cooking process and preserve that vibrant color.

   *Chef Tip*: Blanching the beans not only keeps the color but also helps maintain their crunch! Plus, it makes the beans easier to digest.

3. **Make the creamy dressing**: In a mixing bowl, combine Greek yogurt, Dijon mustard, lemon juice, chopped dill, and a pinch of salt and pepper. Whisk it all together until smooth and creamy. Adjust the seasoning to your liking—don’t be shy!

   *Little Pro Tip*: If you want a bit more zing in your dressing, consider adding a splash of apple cider vinegar!

4. **Combine everything**: In a large mixing bowl, add the cooled potatoes and green beans. Pour the creamy dressing over the top and gently fold everything together until well coated. Be careful not to mash the potatoes—remember, we want them to hold their shape!

   *Chef Insight*: Mixing the salad gently ensures that the creamy dressing wraps around each piece, creating that delightful experience with every bite.

5. **Chill and serve**: Cover the salad and let it chill in the refrigerator for at least 30 minutes. This step allows the flavors to marry beautifully! Right before serving, give it another quick stir and add a little extra seasoning if necessary.

   *Tip for Flavors*: The longer you let it sit, the more pronounced the flavors will be. This is definitely a dish that benefits from a little wait time!

## Serving Suggestions

Plating this creamy green bean potato salad is simple yet beautiful! Scoop generous portions into a big serving bowl, and consider garnishing with a sprig of fresh dill or a sprinkle of paprika for a pop of color. Serve it alongside grilled chicken, burgers, or a hearty vegetarian dish for a complete meal. This salad also makes for lovely leftovers, so don’t hesitate to prepare it in advance for your next gathering!

## Recipe Variations

Feeling inspired? Here are a few fun variations you can try if you want to switch things up a bit:

- **Herby Potato Salad**: Add fresh parsley, chives, or tarragon to the dressing for a fresh herbal twist.
- **Mediterranean Style**: Toss in crumbled feta cheese, olives, and cherry tomatoes for a Mediterranean take.
- **Bacon Lover’s Delight**: Add crispy bacon bits for that smoky flavor and a little extra crunch!
- **Vegan Version**: Substitute Greek yogurt with a plant-based yogurt and consider adding avocado for creaminess.
- **Spicy Kick**: Mix in a pinch of cayenne or red pepper flakes for a little heat to balance the creamy texture.

## Chef’s Notes

As I reflect on my journey with this creamy green bean potato salad, I’m reminded of how recipes evolve over time. Each time I make it, I find inspiration from different cuisines, experimenting with ingredients based on what’s fresh and seasonal. The simplicity of this dish reminds me that cooking is not only a skill but a creative outlet. It’s also a chance to share pieces of our lives with one another through food.

One particularly funny kitchen moment was when I decided to add some bittersweet chocolate shavings as an experiment. Let’s just say, it didn’t go over well with my family! They responded with laughter, and although it was a flop, those moments remind me that cooking is a joyful journey, not just a destination. So, don’t be afraid to make mistakes—embrace them, learn, and have fun in the kitchen!

## FAQs and Troubleshooting

Absolutely! Here are some common questions you might have about making creamy green bean potato salad, along with solutions to potential mishaps:

### 1. **Can I use frozen green beans?**
Yes! If you're short on fresh green beans, frozen will work just fine. Blanch them briefly, and they’ll taste great in this salad.

### 2. **Why did my dressing separate?**
If your dressing separates, it’s likely due to too much liquid. Ensure to mix your ingredients thoroughly and adjust the ratio of yogurt to mustard if needed. A quick whisk before serving can also help recombine it.

### 3. **How can I make this salad ahead of time?**
You can prepare this salad a day ahead! Just keep it covered in the refrigerator. The flavors will deepen, making it even more delicious!

### 4. **Why are my potatoes mushy?**
Mushy potatoes often result from overcooking. Keep an eye on them while boiling and start testing for doneness at around 15 minutes. Fork-tender is the perfect texture to aim for!

## Nutritional Info

If you’re curious about the nutrition in this creamy green bean potato salad, here’s a rough breakdown for a serving size of about 1 cup:

- **Calories**: 220
- **Total Fat**: 6g
- **Saturated Fat**: 2g
- **Cholesterol**: 10mg
- **Sodium**: 240mg
- **Total Carbohydrates**: 34g
- **Dietary Fiber**: 4g
- **Sugars**: 2g
- **Protein**: 6g

Each serving is a delicious balance of flavors and nutrients, making it a delightful addition to any meal!

## Conclusion

So there you have it! A creamy green bean potato salad that’s not only easy to make but also packed with flavor and heart. It’s one of those recipes that you’ll come back to time and again, whether it’s for a family gathering or just a cozy dinner at home.

I hope you enjoyed cooking alongside me today and that this dish brings as much joy to your table as it has to mine over the years. Remember, the kitchen is a place for exploration and creativity, so don’t be afraid to tweak this recipe and make it your own. Happy cooking, and until next time—stay hungry and inspired!
Creamy Green Bean Potato Salad
- Total Time: 40 minutes
- Yield: 4 servings 1x
- Diet: Vegetarian
Description
A vibrant and flavorful creamy green bean potato salad that combines tender potatoes and crispy green beans in a rich dressing.
Ingredients
- 2 pounds baby potatoes
- 1 pound fresh green beans
- 1 cup Greek yogurt
- 2 tablespoons Dijon mustard
- 2 tablespoons fresh dill, chopped
- 2 tablespoons lemon juice
- Salt and pepper, to taste
- 1/2 cup chopped red onion
Instructions
- Boil the potatoes: Place baby potatoes in a large pot, cover with cold water, add salt, and bring to a boil. Simmer for 15-20 minutes until fork-tender. Drain and cool before slicing.
- Prep the green beans: Trim ends and chop green beans into 1-inch pieces. Blanch in boiling salted water for 3-4 minutes until bright green. Drain and plunge into icy water.
- Make the creamy dressing: In a bowl, whisk together Greek yogurt, Dijon mustard, lemon juice, dill, salt, and pepper until smooth.
- Combine everything: In a large bowl, add cooled potatoes and green beans. Pour dressing over and gently fold until well coated.
- Chill and serve: Let the salad chill in the fridge for at least 30 minutes to meld flavors. Stir before serving and adjust seasoning if necessary.
Notes
For best flavor, let the salad sit in the refrigerator before serving. Try adding herbs or feta for variations.
- Prep Time: 15 minutes
- Cook Time: 25 minutes
- Category: Side Dish
- Method: Boiling
- Cuisine: American
Nutrition
- Serving Size: 1 cup
- Calories: 220
- Sugar: 2g
- Sodium: 240mg
- Fat: 6g
- Saturated Fat: 2g
- Unsaturated Fat: 4g
- Trans Fat: 0g
- Carbohydrates: 34g
- Fiber: 4g
- Protein: 6g
- Cholesterol: 10mg
Keywords: potato salad, green bean salad, creamy salad, summer side dish
Portuguese Grilled Chicken
Portuguese Grilled Chicken: A Flavorful Journey to the Heart of the Kitchen
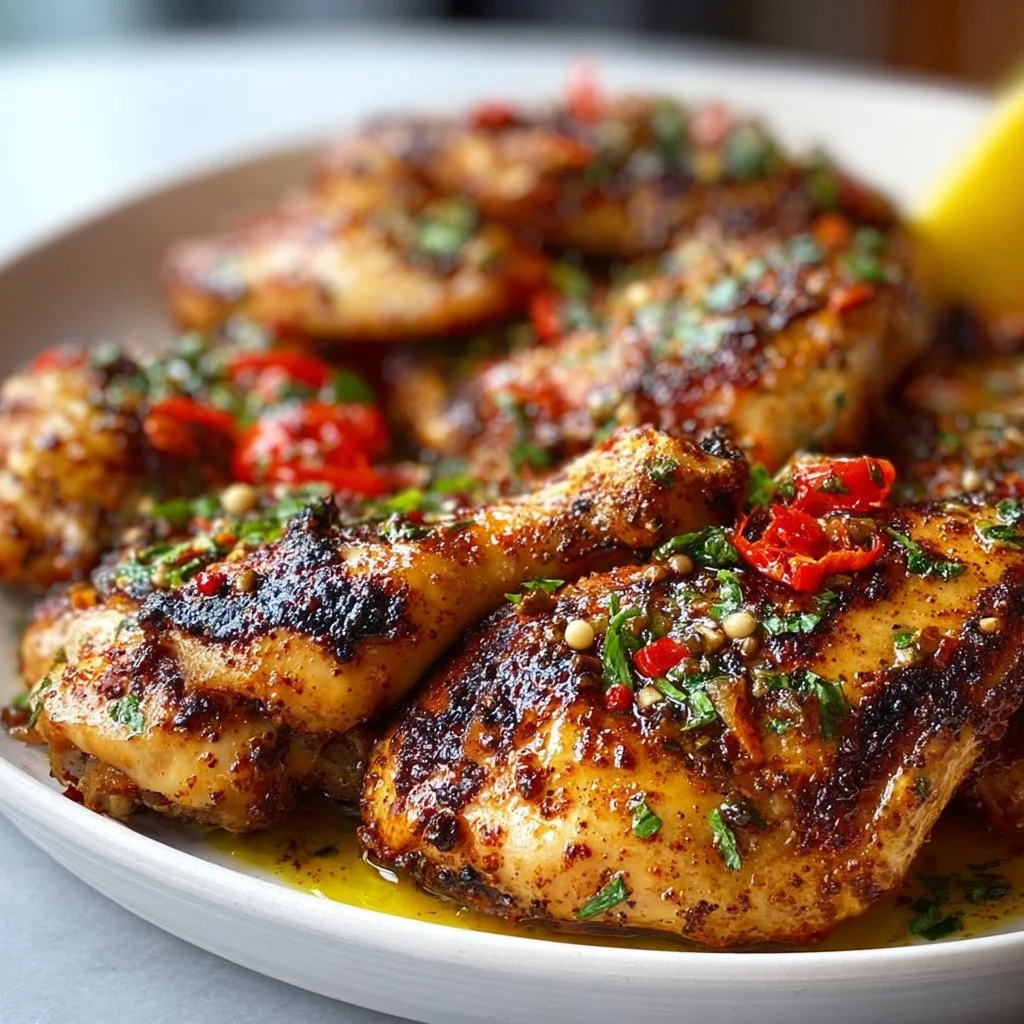
Welcome to the vibrant world of my kitchen! Today, we’re diving into a dish that speaks to the soul and brings flavors to the forefront in the most delightful way: Portuguese Grilled Chicken. Imagine the aromatic spices wafting through your kitchen, the sizzling sound of chicken hitting the grill, and the mouth-watering anticipation of sharing a delicious meal with your loved ones. This dish isn’t just a recipe – it’s an experience that invites warmth, conversation, and a sprinkle of joy.
Growing up, my culinary adventures began in my grandmother’s kitchen, where I learned the importance of flavor and love in cooking. Every dish she crafted was like a warm embrace, and her grilled chicken was legendary! Her secret? A tantalizing marinade infused with fragrant spices that danced on the palate. Every family gathering was a celebration, and her grilled chicken always took center stage. Now, I want to share that essence with you!
The beauty of Portuguese Grilled Chicken lies in its simplicity. While it showcases the robust flavors of paprika, garlic, and lemon, it also embodies the spirit of bringing people together. Whether you’re firing up the grill for a summer cookout or making a cozy weeknight dinner, this dish is perfect for any occasion. Don your apron and roll up those sleeves; we’re about to embark on a culinary adventure that will transform your kitchen into a haven of flavor!
Personal Story
I’ll never forget the first time I attempted my grandmother’s grilled chicken recipe. I was a teenager armed with enthusiasm but lacking finesse. One sunny Saturday morning, I decided to surprise my family by recreating her famous dish. As I gathered my ingredients, I felt a sense of nostalgia wash over me. The pungent aroma of garlic, the fiery touch of paprika, and the zing of fresh lemon brought back memories of smoky backyard barbecues and laughter.
With my family gathered around, I nervously placed the marinated chicken on the grill. The moment the flames kissed the meat, I felt a thrill—this was it! As we sat down to eat, I held my breath, waiting for their reaction. The first bite was magic! My family’s eyes lit up, and I knew then that I had successfully infused my love for cooking into that dish. That day marked the beginning of my journey from a novice cook to a passionate flavor enthusiast. Now, I can’t wait to help you create unforgettable memories just like that!
Ingredients
Here’s what you’ll need to create this mouth-watering dish:
-
Whole Chicken (or Chicken Pieces): The star of the show! Choose a whole chicken for a showstopper, or opt for thighs and drumsticks for a quicker cook. Bone-in, skin-on chicken will yield extra juiciness.
-
Paprika: This spice adds a sweet, smoky flavor that’s quintessential to Portuguese cuisine. If you’re in the mood for something mildly spicy, try using smoked paprika for an added depth.
-
Garlic: Fresh garlic is a must! It brings a pungent kick that balances beautifully with the other flavors. If you’re in a pinch, garlic powder can be used, but fresh is best!
-
Olive Oil: Essential for marinating and grilling, olive oil helps keep the chicken moist. Use extra virgin for a rounder flavor, or substitute with avocado oil for a higher smoke point.
-
Lemon Juice: Freshly squeezed lemon juice brightens the dish and helps tenderize the chicken. In a pinch, bottled lemon juice will work, but fresh is always preferred.
-
Chili Powder: For those who love a little heat, chili powder adds a nice kick. Adjust the amount to suit your taste; you can always add more, but you can’t take it away!
-
Salt and Pepper: Essential for enhancing flavors. Use kosher salt for seasoning the chicken before grilling— it clings well and enhances the flavors without overpowering.
-
Fresh Parsley: For a pop of color and freshness, sprinkle chopped parsley on top before serving. You can substitute with cilantro if you prefer a different flavor profile.
Step-by-Step Instructions
Now that we’ve gathered our ingredients, let’s get cooking! Follow these steps to create the most delicious Portuguese Grilled Chicken:
-
Prepare the Marinade: In a mixing bowl, combine 1/4 cup of olive oil, the juice of one lemon, 4 minced garlic cloves, 2 tablespoons of paprika, 1 tablespoon of chili powder, and a generous pinch of salt and pepper. This marinade is the backbone of flavor, so don’t be shy—mix it well until all ingredients are combined!
-
Marinate the Chicken: Place your chicken (whole or cut pieces) into a large resealable bag or a dish. Pour the marinade over the chicken, ensuring every piece is coated. Seal the bag (or cover the dish) and refrigerate for at least 2 hours, or ideally overnight. This allows the flavors to penetrate the chicken deeply. Chef Tip: If you’re short on time, even 30 minutes can make a difference, but overnight is best!
-
Preheat the Grill: About 20-30 minutes before you’re ready to grill, preheat your grill to medium-high heat (about 375°F to 400°F). If using a charcoal grill, let the coals get nice and hot. This will give your chicken those beautiful grill marks and caramelization.
-
Grill the Chicken: Remove the chicken from the marinade, letting any excess drip off (don’t rinse—it washes away the flavor!). Place the chicken on the grill, skin-side down first. Grill for about 6-8 minutes, or until you see lovely grill marks. Flip the pieces and grill for an additional 6-8 minutes on the other side.
-
Check for Doneness: Use a meat thermometer to check the internal temperature of the chicken. It should reach 165°F for it to be cooked through. If you’re grilling a whole chicken, consider closing the lid to help cook evenly and retain moisture.
-
Rest the Chicken: Once the chicken is done, remove it from the grill and let it rest on a cutting board for about 10 minutes. This is crucial! Resting allows the juices to redistribute throughout the meat, ensuring each bite is juicy and flavorful.
-
Serve and Enjoy: Carve the chicken into pieces if needed and drizzle with a little extra lemon juice before serving.
Chef Hack: Squeeze fresh lemon juice over the chicken right before serving for that extra zesty punch! Your taste buds will thank you.
Serving Suggestions
This dish is best served family-style. Arrange the grilled chicken on a platter, garnished with fresh parsley for a pop of color. Pair it with herby couscous, a refreshing cucumber salad, or some crusty bread to soak up those flavorful juices. Want to up the game? A tangy chimichurri sauce drizzled on top takes it to the next level!
Recipe Variations
-
Spicy Piri Piri Chicken: Add red pepper flakes or a splash of hot sauce to the marinade for a traditional Portuguese twist.
-
Herbed Lemon-Dill Chicken: Swap out the paprika and chili powder for fresh dill and oregano for a vibrant, herbal flavor.
-
Coconut-Grilled Chicken: Substitute half the olive oil with coconut milk for a tropical twist. The chicken will be even juicier!
-
BBQ Twist: Brush your favorite barbecue sauce on the chicken during the final moments of grilling for a smoky-sweet glaze.
-
Vegetable Skewers: Add some colorful veggies (bell peppers, zucchini, onion) tossed in olive oil and seasoning onto the grill alongside your chicken for a complete meal.
Chef’s Notes
Over the years, this Portuguese Grilled Chicken has taken on many forms in my kitchen. I remember a particularly fun barbecue night where I attempted to grill it using a cedar plank. The smoky flavor was phenomenal, and it added a unique twist that my friends raved about! My most treasured kitchen stories often revolve around the shared laughter and joy during the cooking process. Savoring the delicious end result with friends and family keeps me inspired to keep evolving this ever-so-delicious recipe!
FAQs and Troubleshooting
-
What if my chicken is not browning?
Make sure your grill is hot enough before you place the chicken on. Preheating is essential for that beautiful sear. -
Can I bake the chicken instead?
Absolutely! Preheat your oven to 375°F and place the chicken in a baking dish for about 30-45 minutes, or until it reaches 165°F internal temperature. -
How can I store leftovers?
Store any leftover chicken in an airtight container in the fridge for up to 3 days. It’s great cold in salads or sandwiches! -
Why is my chicken dry?
Overcooking is often the culprit! Use a meat thermometer to avoid this. Resting the chicken after cooking also helps keep it juicy!
Nutritional Info (Optional)
For those curious about nutrition, here’s a quick overview:
- Serving Size: 4 oz of Grilled Chicken
- Calories: Approximately 210
- Protein: 27g
- Fat: 9g
- Carbohydrates: 0g
- Fiber: 0g
That wraps up our culinary adventure into Portuguese Grilled Chicken! I hope you’re inspired to fire up the grill and create some delicious memories in your kitchen. Share your creations with me—I would love to hear your stories and see your flavorful triumphs. Until next time, happy cooking!
Print
Portuguese Grilled Chicken
- Total Time: 150 minutes
- Yield: 4 servings 1x
- Diet: Paleo
Description
A flavorful and aromatic Portuguese Grilled Chicken, perfect for family gatherings or cozy dinners.
Ingredients
- 1 Whole Chicken (or Chicken Pieces)
- 1/4 cup Paprika
- 4 cloves Garlic, minced
- 1/4 cup Olive Oil
- Juice of 1 Lemon
- 1 tablespoon Chili Powder
- Salt and Pepper to taste
- Fresh Parsley, for garnish
Instructions
- Prepare the Marinade: In a mixing bowl, combine olive oil, lemon juice, garlic, paprika, chili powder, and a pinch of salt and pepper.
- Marinate the Chicken: Place chicken in a resealable bag, pour marinade, seal, and refrigerate for at least 2 hours.
- Preheat the Grill: Heat grill to medium-high (375°F to 400°F) for about 20-30 minutes.
- Grill the Chicken: Remove from marinade, grill skin-side down for 6-8 minutes, flip and grill for another 6-8 minutes.
- Check for Doneness: Ensure chicken reaches an internal temperature of 165°F.
- Rest the Chicken: Let it sit off the grill for about 10 minutes before serving.
- Serve and Enjoy: Carve and drizzle with extra lemon juice before serving.
Notes
For extra flavor, squeeze fresh lemon juice before serving. Pair with herby couscous or a refreshing salad.
- Prep Time: 120 minutes
- Cook Time: 30 minutes
- Category: Main Course
- Method: Grilling
- Cuisine: Portuguese
Nutrition
- Serving Size: 1 serving
- Calories: 350
- Sugar: 0g
- Sodium: 200mg
- Fat: 12g
- Saturated Fat: 2g
- Unsaturated Fat: 8g
- Trans Fat: 0g
- Carbohydrates: 5g
- Fiber: 0g
- Protein: 27g
- Cholesterol: 80mg
Keywords: grilled chicken, Portuguese recipe, barbecue chicken
Asian Chicken Crunch Salad
Asian Chicken Crunch Salad: A Flavorful Journey from the Heart
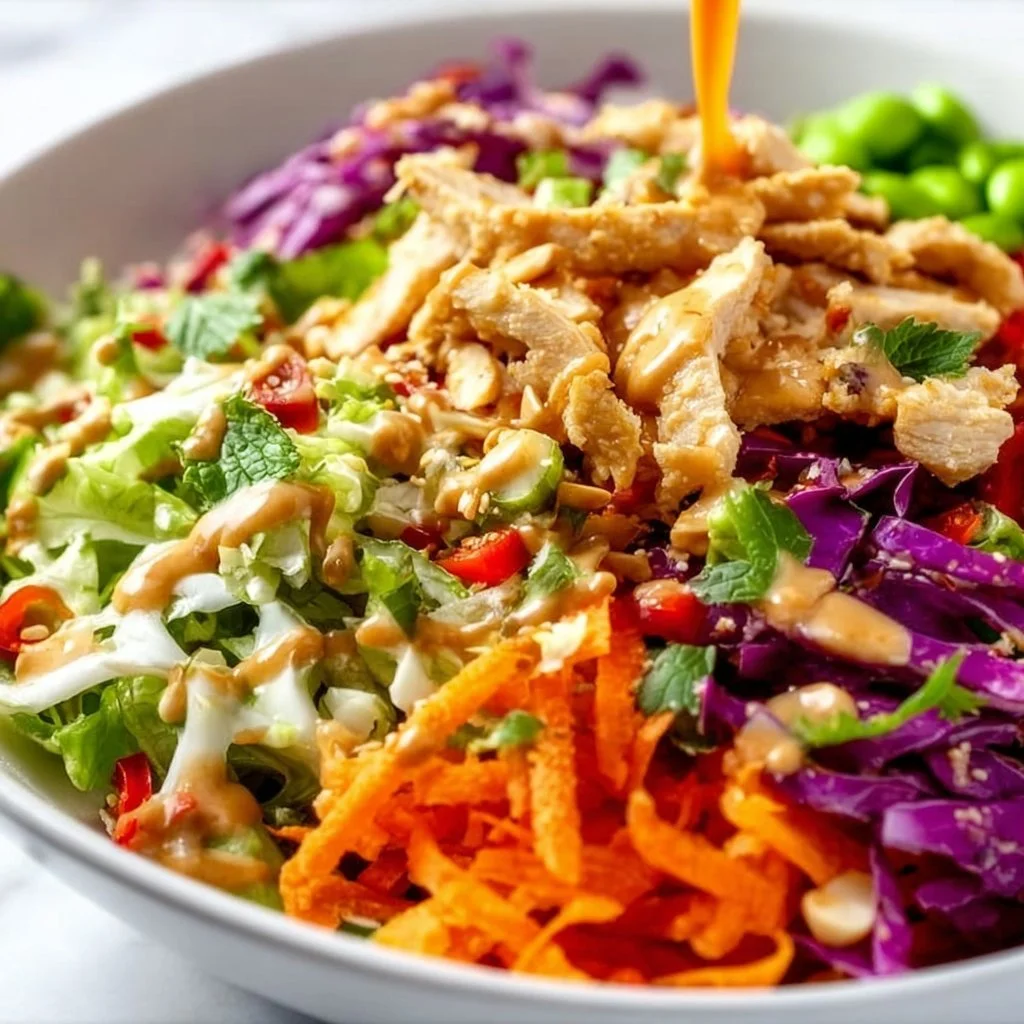
Welcome back to my cozy kitchen! I’m so thrilled you’re here. Today, we’re diving into a delightful dish that’s not just a feast for your taste buds, but also a celebration of vibrant flavors and textures—the Asian Chicken Crunch Salad! This is not just a salad, friends; it’s an experience that transforms simple ingredients into a masterpiece, perfect for any lunch or dinner gathering.
Picture this: a rainbow of crisp veggies, tender juicy chicken, and a zesty sesame dressing that brings everything to life. This salad is my go-to for those days when I crave something refreshing yet satisfying. It’s packed with nutrients and seasoned to perfection, making it a staple in my kitchen.
Before we dig into the ingredients and instructions, let me share a little story about how this recipe came to be. You see, like all great dishes, it has a story worth telling. Back in my college days, I had a group of friends who were always a little skeptical about salads. They considered salads a boring sidekick to our favorite meals. So, I took it upon myself to change their minds with my version of the Asian Chicken Crunch Salad. The first time I served it was at an impromptu dinner party; let me tell you, the reaction was priceless!
Everyone went back for seconds, some even thirds! That magical moment sparked my love for combining simple ingredients into something beautiful and scrumptious. This salad encapsulates everything I adore about cooking – bringing people together, celebrating flavors, and creating something memorable in the process. So, are you ready to whip up a salad that could turn any skeptic into a salad lover? Let’s jump right in!
Personal Story
As I mentioned, the inception of the Asian Chicken Crunch Salad dates back to my college years. I vividly remember one rainy Saturday afternoon, when I decided to host a small get-together with a few friends who had the usual complaints about salads. Armed with a plethora of fresh veggies and roasted chicken, I giddily set to work, determined to whip up something special.
As the scents wafted through my tiny apartment’s open kitchen, one friend, in particular, raised an eyebrow, skeptically eyeing the colorful chaos I was creating. But then, I drizzled my homemade sesame dressing over the salad and tossed everything together, unveiling a gorgeous, colorful bowl that looked too good to resist.
When we sat down for dinner that night, the room filled with laughter and spirited conversation, punctuated by crunching sounds as my friends savored every bite. It was in that moment, surrounded by friends and good food, that I realized food has the power to bring people together, to connect, and to create lasting memories. Now, this salad continues to be a beloved fixture in my kitchen—and in the hearts of everyone who tries it.
Ingredients
Here’s what you’ll need to create this crunchy, flavor-packed goodness:
-
Chicken Breasts (2): Perfectly grilled or roasted, chicken breasts add protein and heartiness to this salad. Tip: For a quicker option, use rotisserie chicken from your local grocery store!
-
Cabbage (2 cups, shredded): The crunchiest base for your salad, cabbage provides both texture and nutrition. Bok choy or Napa cabbage can also work if you want something a bit different.
-
Carrots (1 cup, shredded): Add a sweet crunch to your salad. Feel free to use pre-shredded carrots for convenience, or you can spiralize them for a fun twist!
-
Bell Peppers (1, any color): Their vibrant color and sweetness brighten up the dish. Go for a mix of colors—red, yellow, and green sparkle beautifully in the salad!
-
Cucumber (1, sliced): Adds freshness and crunch. English cucumbers are great because of their thin skin—just wash them and chop!
-
Green Onions (3, chopped): A burst of flavor that uplifts the dish. You can substitute these with chives if you prefer a milder taste.
-
Chopped Peanuts (1/2 cup): For that essential crunch factor! If you’re allergic to peanuts, try toasted sunflower seeds or almonds instead.
-
Sesame Seeds (2 tablespoons): Toasted or raw, they add a nutty depth that can’t be missed. Black sesame seeds add a lovely contrast!
-
Soy Sauce (1/4 cup): The backbone of the dressing. For a gluten-free alternative, you can use tamari or coconut aminos.
-
Rice Vinegar (2 tablespoons): Provides a tart, lively flavor that balances the soy. You could also use apple cider vinegar in a pinch.
-
Honey (1 tablespoon): Just a touch of sweetness to round things out. Agave nectar or maple syrup are fantastic alternatives for a vegan option!
-
Sesame Oil (2 tablespoons): A little goes a long way for flavor—nutty and aromatic. If you don’t have sesame oil, a light olive oil works as well.
-
Olive Oil (1/4 cup): For the dressing’s base. Use extra virgin for the best flavor depth.
Chef Insight
Using fresh, high-quality ingredients is key to making this salad truly stand out. The freshness of your veggies directly impacts the flavor and crunch, so don’t skimp here! Also, the dressing can be adjusted to taste; don’t hesitate to add a hint more honey or soy sauce if you like things a bit sweeter or saltier.
Step-by-Step Instructions
Now, let’s get down to business! Here’s how to make this delightful Asian Chicken Crunch Salad.
1. Prepare the Chicken
- Cook Your Chicken: If you’re grilling or roasting chicken breasts, start by seasoning them with salt, pepper, and a splash of soy sauce. Grill them on medium heat for about 6-7 minutes on each side until fully cooked through.
- Chef Tip: Let the chicken rest for 5 minutes before slicing to keep it juicy!
2. Wash and Chop Your Veggies
- Cabbage & Carrots: Rinse and shred your cabbage, then finely shred the carrots.
- Bell Peppers and Cucumber: Slice your bell pepper and cucumber into thin strips or bite-sized pieces.
- Chef Insight: The more colors you add, the prettier and more nutritious your salad will be!
3. Whip Up the Dressing
- Combine Ingredients: In a small bowl, mix together the soy sauce, rice vinegar, honey, sesame oil, and olive oil. Whisk until well combined.
- Tip: Taste the dressing and adjust according to your preference!
4. Assemble the Salad
- Toss It Together: In a large bowl, combine the shredded cabbage, carrots, bell peppers, cucumber, green onions, and peanuts. Toss them gently to combine.
- Add the Chicken: Slice the cooked chicken and lay it on top. Drizzle the dressing over the salad and toss everything until fully coated.
- Chef Hack: If you’re preparing this for a gathering, I recommend keeping the dressing on the side until just before serving to keep everything crisp.
5. Garnish
- Finishing Touch: Sprinkle the salad with sesame seeds and more chopped peanuts for that extra crunch.
- Tip: A squeeze of lime or lemon juice adds a lovely zesty kick right before serving!
Serving Suggestions
To serve this vibrant salad, place it in a large, beautiful bowl centered on your table, or create individual servings in crispy lettuce cups for a fun twist! Pair it with some warm, crusty bread for a complete meal or serve it as a side dish alongside grilled fish or chicken. It’s also fantastic for meal prep—store it in an airtight container in the fridge for a refreshing lunch any day!
Recipe Variations
Get creative with your Asian Chicken Crunch Salad! Here are a few fun twists:
- Spicy Kick: Add thinly sliced jalapeños or a pinch of red pepper flakes for some heat.
- Fruit Fusion: Toss in some mandarin oranges or sliced strawberries for a sweet twist.
- Protein Alternatives: Swap out chicken for tofu, shrimp, or edamame to cater to different dietary preferences.
- Crunch Factor: Incorporate crunchy tortilla strips or crispy rice noodles for an added crunch.
- Herbs and Greens: Add fresh herbs like cilantro or mint for extra flavor.
Chef’s Notes
As you can see, this Asian Chicken Crunch Salad has evolved over the years, but the heart of it remains the same: fresh, simple ingredients that bring everyone together. I remember one summer when a few friends and I decided to host a “salad potluck,” and it was wonderful to see how everyone put their own spin on this incredibly versatile dish. One friend added avocados, another brought a homemade spicy dressing, and it was pure magic watching how a simple salad became a canvas for creativity!
FAQs and Troubleshooting
1. What if my dressing is too salty?
- If your dressing is overly salty, try adding a little more honey and vinegar to balance it out. Adding more oil can also help dilute the saltiness.
2. Can I make it ahead of time?
- Yes! You can prepare everything in advance, but keep the dressing separate until you’re ready to serve to maintain the salad’s crunch.
3. How long will leftovers last?
- Store leftovers in an airtight container in the fridge for up to 3 days. Use up any leftovers for a tasty lunch the next day!
4. Can I make this salad vegetarian?
- Absolutely! Just omit the chicken and consider adding tofu or chickpeas for protein. You can also amp up the veggies for a heartier meal.
So there you have it—the ultimate guide to creating an unforgettable Asian Chicken Crunch Salad that will knock your socks off! Thank you for joining me today in my kitchen, and I hope this recipe brings as much joy to your table as it has to mine. Happy cooking!
Print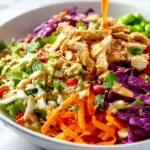
Asian Chicken Crunch Salad
- Total Time: 30 minutes
- Yield: 4 servings 1x
- Diet: Gluten-Free
Description
A vibrant and refreshing salad featuring grilled chicken, crisp vegetables, and a zesty sesame dressing.
Ingredients
- 2 Chicken Breasts, grilled or roasted
- 2 cups Cabbage, shredded
- 1 cup Carrots, shredded
- 1 Bell Pepper, any color
- 1 Cucumber, sliced
- 3 Green Onions, chopped
- 1/2 cup Chopped Peanuts
- 2 tablespoons Sesame Seeds
- 1/4 cup Soy Sauce
- 2 tablespoons Rice Vinegar
- 1 tablespoon Honey
- 2 tablespoons Sesame Oil
- 1/4 cup Olive Oil
Instructions
- Cook your chicken: Season chicken breasts with salt, pepper, and soy sauce, then grill for 6-7 minutes on each side until cooked through.
- Rinse and shred the cabbage, and finely shred the carrots.
- Slice the bell pepper and cucumber into thin strips.
- Combine the soy sauce, rice vinegar, honey, sesame oil, and olive oil in a small bowl; whisk until well combined.
- Toss together the cabbage, carrots, bell peppers, cucumber, green onions, and peanuts in a large bowl.
- Add sliced chicken and drizzle with dressing; toss to combine.
- Sprinkle with sesame seeds and extra peanuts before serving.
Notes
For added flavor, consider a squeeze of lime or lemon juice before serving. Keep dressing separate until serving for freshness.
- Prep Time: 15 minutes
- Cook Time: 15 minutes
- Category: Salad
- Method: Mixing
- Cuisine: Asian
Nutrition
- Serving Size: 1 serving
- Calories: 400
- Sugar: 6g
- Sodium: 600mg
- Fat: 20g
- Saturated Fat: 3g
- Unsaturated Fat: 10g
- Trans Fat: 0g
- Carbohydrates: 34g
- Fiber: 4g
- Protein: 25g
- Cholesterol: 45mg
Keywords: salad, Asian Chicken, healthy recipe, summer salad, nutritious meal
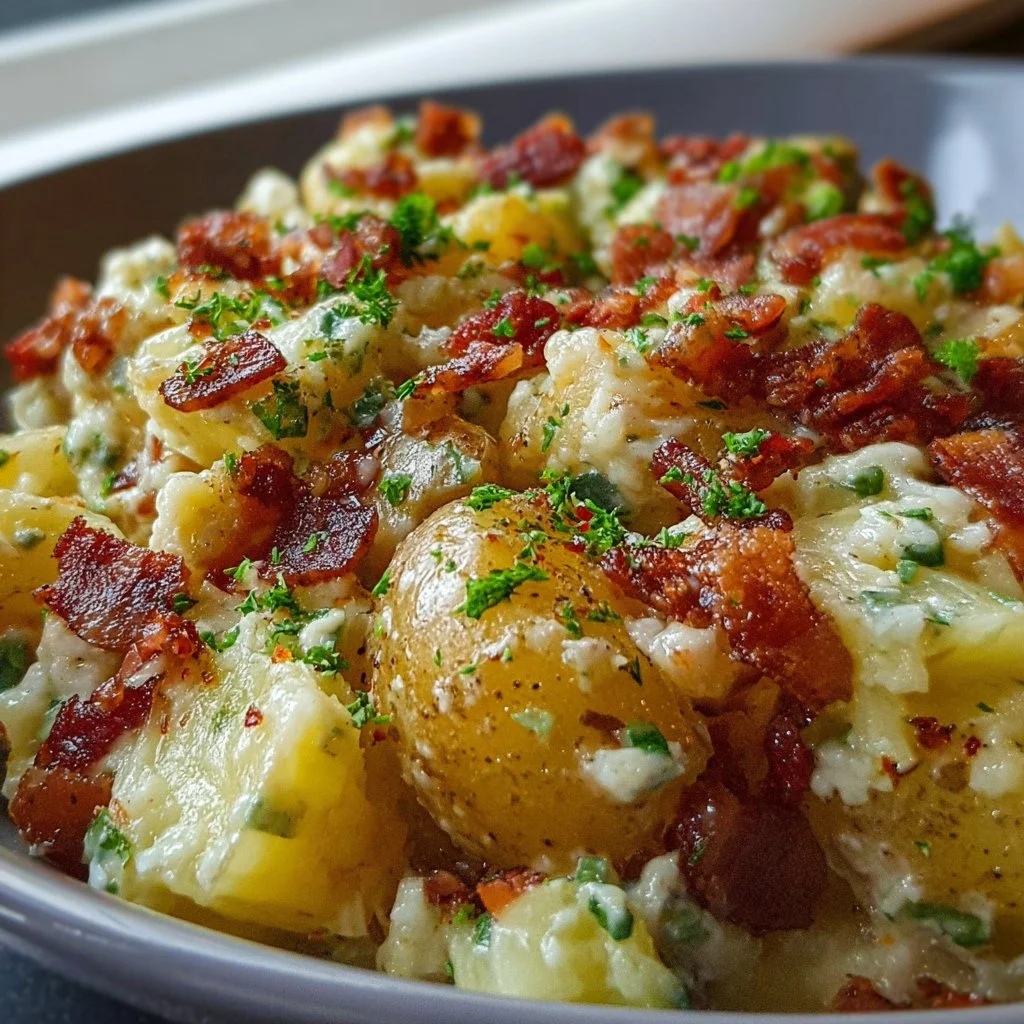
Authentic German Potato Salad
Discovering Comfort: Authentic German Potato Salad
Hey there, fellow food lovers! I’m Olivia Bennett, and I can’t tell you how excited I am to dive into this delightful dish with you today. If you’ve ever stepped into a cozy kitchen filled with the aroma of warm, roasted potatoes mingling with the tangy bite of vinegar and herbs, then you already know you’re in for a treat. Today, we’re making Authentic German Potato Salad, a dish that whispers comfort and hails from the heart of Germany, where family gatherings and sunny picnics reign supreme.
Now, while you might think of potato salad as a classic summer side dish, this delightful recipe is not just great for cookouts; it’s also perfect for winter gatherings or even a quiet dinner at home. It’s hearty, warm, and satiates the soul, especially if you’re reminiscing about family meals or childhood memories. Plus, it comes together with minimal fuss — perfect for those who crave deliciousness but might not have all day to spend in the kitchen.
As we journey through this recipe, I’ll sprinkle in some personal anecdotes and tips to make sure you feel just as at ease in your own kitchen as I do in mine. So, roll up those sleeves, throw on your favorite apron (mine is probably a little too flour-stained, but I love it), and let’s whip up a batch of this comforting, flavorful dish together!
Personal Story
One of my fondest memories of German Potato Salad takes me back to the summer BBQs hosted by my Uncle Klaus. We’d gather at his backyard, a lush garden filled with bright flowers and the hearty laughter of family and friends. Uncle Klaus, a true culinary magician, would always bring his Kartoffelsalat, made with love, of course!
I remember the way his eyes twinkled when he’d see everyone digging into his dish, that balance of tangy and savory flavors washing over each potato slice. It wasn’t just a side dish; it became the star of our gatherings, warming the hearts and bellies of everyone around the table. That’s the magic of food, isn’t it? It brings people together and creates memories that linger long after the last bite. So, as we embark on this cooking adventure, just know that each potato salad recipe has the potential to create new joyful moments in your kitchen — just like Uncle Klaus did for us!
Ingredients
Here’s what you’ll need to create your very own authentic German Potato Salad:
-
2 pounds of waxy potatoes (like Yukon Gold or Red Bliss)
- Waxy potatoes hold their shape beautifully when cooked, making them perfect for potato salad. Avoid starchy potatoes like Russets, as they’ll turn mushy.
-
1 cup of chicken or vegetable broth
- This adds a depth of flavor to the salad. If you’re vegetarian or vegan, stick with vegetable broth. Homemade broth is awesome, but store-bought works fine too!
-
½ cup of apple cider vinegar
- This is a key ingredient that gives German potato salad its distinctive tang. If you want to switch it up, white wine vinegar is a great alternative.
-
1 small red onion, finely chopped
- Red onions bring a lovely crunch and color. You can also use scallions or a sweeter onion if you prefer less bite.
-
3–4 tablespoons of Dijon mustard
- This adds a delightful zing. Feel free to experiment with whole-grain mustard for added texture and flavor!
-
3 tablespoons of sugar
- To balance the acidity of the vinegar, this is often key. You can substitute honey or maple syrup for a natural sweetness.
-
½ cup of vegetable or olive oil
- Olive oil will lend a fruity note while keeping it rich. For a lighter option, use canola oil or any neutral oil.
-
Salt and freshly cracked black pepper, to taste
- Essential for enhancing the flavors. Taste your salad before serving to adjust accordingly!
-
Fresh chopped parsley (for garnish)
- This brightens the dish with color and freshness. If you’re not a parsley fan, try dill or chives for a different herbal twist!
Step-by-Step Instructions
Alright, let’s get cooking! Follow these steps, and soon you’ll be the proud creator of an authentic German Potato Salad.
Step 1: Boil the Potatoes
Begin by scrubbing the potatoes under cold water (no need to peel them just yet—let’s keep that delicious skin intact!). Place them in a large pot and cover with cold water. Add a generous pinch of salt to the pot, then bring it to a boil. Lower the heat and simmer until you can easily pierce them with a fork, about 15–20 minutes depending on their size.
Tip: Keep an eye on the potatoes. Overcooking them can lead to mushiness!
Step 2: Prepare the Dressing
While the potatoes are cooking, let’s whip up the dressing. In a medium-sized bowl, combine the apple cider vinegar, Dijon mustard, sugar, broth, salt, and pepper. Whisk it all together until the sugar dissolves and the mixture is well combined. Finally, slowly drizzle in the oil while whisking — this will help emulsify the dressing and create a lovely texture.
Chef Hack: Feel free to adjust the sweetness and acidity of the dressing based on your personal taste. Add a touch more vinegar if you like it tart!
Step 3: Chop the Onions
Now, it’s time to chop the red onion. Aim for small, even pieces so they distribute nicely throughout the salad without overpowering any bites. If raw onion is a little too strong for your taste, soak the chopped onion in cold water for about 10 minutes. This will mellow the flavor.
Step 4: Drain and Slice the Potatoes
Once the potatoes are done, drain them in a colander. Let them cool slightly, but while they are still warm, slice the potatoes into rounds or quarters (depending on your preference). Remember, don’t peel them — those skins add flavor and a lovely rustic touch!
Pro Tip: Slicing the potatoes while warm allows them to absorb the dressing better, enhancing overall flavor.
Step 5: Assemble the Salad
In a large bowl, gently toss the warm potatoes with the dressing, chopped onions, and parsley. Mix carefully to avoid breaking up the potato slices. Taste and adjust the seasoning if necessary.
Step 6: Chill and Serve
Let the salad sit for about 20-30 minutes to cool slightly, allowing the flavors to meld. If you’re not ready to serve it right away, you can refrigerate it for an hour or two. This salad is also delicious served warm!
Step 7: Garnish and Enjoy!
Just before serving, give it one last sprinkle of fresh parsley for a pop of color. Grab your favorite serving bowl and dish out this delightful salad to share with your family and friends.
Serving Suggestions
Now for the plating! Serve this potato salad as a side dish alongside grilled bratwurst or roasted chicken for a quintessential German experience. For a lighter option, pair it with a fresh green salad topped with your favorite vinaigrette. Trust me, your guests will love the combination of flavors!
Recipe Variations
Feeling adventurous? Here are some fun variations to shake things up:
- Bacon-Infused: Add crispy, crumbled bacon for a savory crunch that elevates the dish!
- Herb-Infused: Experiment with different herbs like dill, tarragon, or even chervil for a unique flavor profile.
- Vegan Twist: Substitute chicken broth with water and skip the oil. Add avocado for healthy fats and creaminess.
- Spicy Kick: Mix in a teaspoon of hot sauce or a pinch of red pepper flakes for an unexpected zing.
- Sneaky Veg: Toss in diced celery or pickles for extra texture and a flavorful surprise!
Chef’s Notes
This recipe has come a long way in my kitchen! I’ve experimented with different herbs, substitutes, and ingredients, and it’s been a joy finding that perfect balance. One hilarious moment was when I accidentally grabbed what I thought was sugar but turned out to be salt. Let’s just say my taste tester was NOT pleased! Now I have a handy little container for my sugar labeled in big letters—safety first, right?
Each time I make this dish, I’m reminded of Uncle Klaus and those summer BBQs. It’s all about creating and sharing, and I genuinely hope this recipe brings you as much joy as it has for me.
FAQs and Troubleshooting
-
Can I make this salad ahead of time?
- Absolutely! This salad actually tastes better when made ahead of time as the flavors have a chance to meld. Just store it in the refrigerator and give it a gentle toss before serving.
-
What can I do if my salad is too sour?
- If your salad has a bit too much kick from the vinegar, try adding a pinch of sugar to balance it out!
-
How do I store leftovers?
- Store any leftovers in an airtight container in the fridge for up to 3 days. Just be sure to give it a quick stir when you’re ready to enjoy it again!
-
Can I freeze German potato salad?
- I wouldn’t recommend it; the texture of the potatoes can suffer when frozen, leading to a mushy salad once thawed. It’s best enjoyed fresh!
Nutritional Info
While I won’t dive deeply into the numbers, I can say this salad offers a hearty dose of carbohydrates and, depending on your broth and oil choices, can be made quite healthy. Just remember the beauty of homemade — you control what goes into it!
So there you have it, my lovely foodies! A heartwarming recipe for Authentic German Potato Salad, straight from my kitchen to yours. Now go forth, make some culinary magic happen, and let’s keep the joy of cooking alive together!
Print
Authentic German Potato Salad
- Total Time: 45 minutes
- Yield: 6 servings 1x
- Diet: Vegetarian
Description
A comforting and flavorful German Potato Salad perfect for family gatherings or cozy dinners.
Ingredients
- 2 pounds waxy potatoes (like Yukon Gold or Red Bliss)
- 1 cup chicken or vegetable broth
- ½ cup apple cider vinegar
- 1 small red onion, finely chopped
- 3–4 tablespoons Dijon mustard
- 3 tablespoons sugar
- ½ cup vegetable or olive oil
- Salt and freshly cracked black pepper, to taste
- Fresh chopped parsley (for garnish)
Instructions
- Boil the potatoes in salted water until tender, about 15–20 minutes.
- Prepare the dressing by whisking together apple cider vinegar, Dijon mustard, sugar, broth, salt, and pepper.
- Chop the red onion into small pieces.
- Drain the potatoes and slice them while they are still warm.
- Assemble the salad by tossing the warm potatoes with the dressing, chopped onions, and parsley.
- Chill the salad for 20-30 minutes to allow the flavors to meld.
- Garnish with fresh parsley before serving.
Notes
This salad tastes better when made ahead of time as the flavors meld together. Adjust sweetness or acidity according to personal taste.
- Prep Time: 15 minutes
- Cook Time: 30 minutes
- Category: Side Dish
- Method: Boiling, Mixing
- Cuisine: German
Nutrition
- Serving Size: 1 serving
- Calories: 250
- Sugar: 6g
- Sodium: 450mg
- Fat: 14g
- Saturated Fat: 2g
- Unsaturated Fat: 10g
- Trans Fat: 0g
- Carbohydrates: 30g
- Fiber: 4g
- Protein: 5g
- Cholesterol: 0mg
Keywords: German potato salad, comfort food, side dish, easy recipe
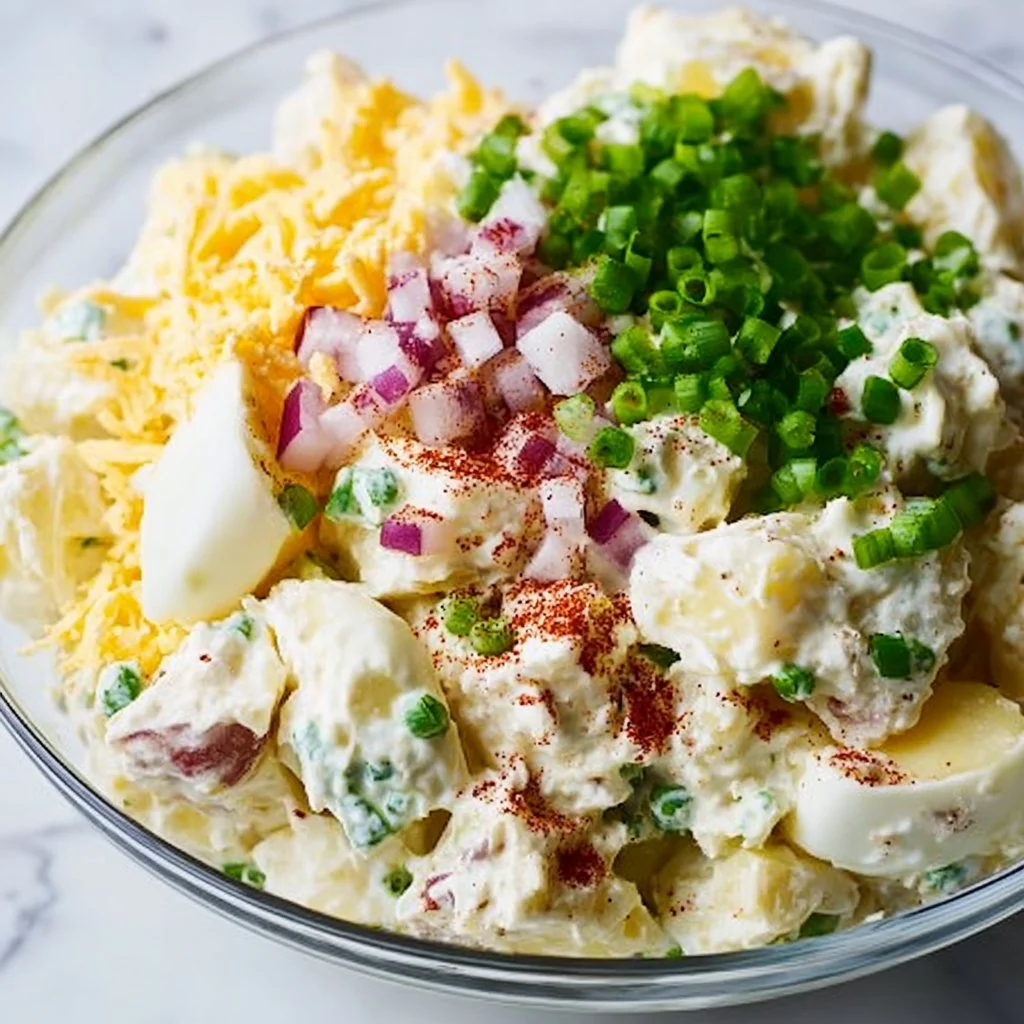
Classic Potato Salad
Classic Potato Salad: A Timeless Dish
Welcome back to my cozy kitchen, food lovers! Today, we’re diving into a classic dish that has graced countless picnics, BBQs, and family gatherings: potato salad. Whether you’re looking to impress your friends at a summer cookout or simply want to treat your loved ones to a homemade delight, this creamy, flavorful potato salad is sure to do the trick.
Potato salad isn’t just a dish; it’s woven into the fabric of family traditions and delightful gatherings. The moment that creamy goodness hits your palate, you can feel the warmth and love that went into creating it. Today, we’ll explore how to whip up this classic recipe while also sharing some heartwarming stories and tips to make your cooking adventure unforgettable.
So, grab your apron and get ready to channel your inner chef because cooking potato salad isn’t just about following a recipe; it’s about the joy of bringing people together through food. Let’s jump right in!
Personal Story
Ah, potato salad! The memories it sparks are almost as delightful as the dish itself. I remember my childhood summers spent at my grandparents’ house, where family and friends would gather potluck-style under the sun, laughter echoing in the air. My grandmother, with a twinkle in her eye, was known for her spectacular potato salad — the kind that made everyone ask for seconds (and often thirds)!
One particularly sunny afternoon, my cousins and I helped her in the kitchen, our small hands awkwardly handling vegetables and measuring cups. We giggled as we tasted spoonfuls of mayo straight from the jar, and she lovingly guided us with a wink, reminding us of the secret ingredient: a dash of love. The potato salad was always the star of the show, and I cherished how something so simple could bring us all together, sharing stories and creating memories under the warmth of the sun.
Now, as I recreate this timeless dish, I carry those cherished moments in every scoop. To me, potato salad is not just a side dish; it’s a vessel for nostalgia, family, and love. Let’s create our own beautiful memories with this classic recipe!
Ingredients
Here’s what you’ll need to create your delicious potato salad:
-
Potatoes (2 lbs): Use waxy potatoes like Yukon Gold or red potatoes for a creamier texture. They hold their shape well after boiling, making them perfect for salads. Need a substitute? Sweet potatoes can give a unique twist!
-
Mayonnaise (1 cup): This is the creamy hug that binds the ingredients. You can use full-fat, light, or even vegan mayo if you prefer. Greek yogurt is a fantastic substitute for a tangy twist!
-
Dijon Mustard (2 tablespoons): This brings a subtle zing that brightens the flavors. If you’re not a mustard fan, try a splash of apple cider vinegar instead!
-
Celery (2 stalks, diced): Add crunch! Celery gives your potato salad a refreshing bite. You could swap it for diced pickles or green bell peppers if you want something a little different.
-
Red Onion (1 small, finely chopped): For a bit of sweetness and color. If you’re not a fan of raw onion, soaking them in cold water for 10 minutes can tone down the intensity.
-
Hard-boiled Eggs (3 large): These add richness and make the dish even more satisfying. You can skip the eggs for a vegan version or replace them with mashed avocado for a creamy alternative.
-
Salt (to taste): Always taste as you go! Salt enhances the flavors.
-
Black Pepper (to taste): A sprinkle of pepper adds a lovely touch of warmth. Feel free to introduce some smoked paprika for an exciting twist!
-
Fresh Dill or Parsley (for garnish): These herbs lift the dish and add freshness. You could use chives or even cilantro if that’s what you have on hand.
Step-by-Step Instructions
Let’s get our hands dirty and create this delightful potato salad together. Here’s how:
1. Prep the Potatoes
- Start by washing your potatoes thoroughly to remove any dirt. Peel them only if you like a smoother texture; the skin adds flavor and nutrients!
- Cut the potatoes into evenly sized chunks (about 1-2 inches). This ensures they cook evenly. Tip: If you cut them too small, you risk them falling apart during boiling!
2. Boil the Potatoes
- Place your potato chunks in a large pot and cover them with cold, salted water. Why cold? It helps cook the potatoes evenly from the outside in.
- Bring the water to a gentle boil and let them cook for about 15-20 minutes, or until fork-tender. Test them by poking with a fork; they should feel tender but not mushy.
3. Drain and Cool
- Carefully drain the potatoes in a colander and let them cool for about 10-15 minutes. This is crucial – if they are too hot, they could cause your mayo to turn runny.
4. Mix the Dressing
- In a large mixing bowl, combine the mayonnaise, Dijon mustard, salt, black pepper, and any other seasonings you love. Whisk until creamy and well combined. Taste! Adjust the seasoning as needed—cooking is all about personal preference.
5. Combine Everything
- Once the potatoes have cooled, gently fold them into the dressing. I like to do this with a spatula to keep the potato pieces intact.
- Add the diced celery, chopped onions, and hard-boiled eggs. Again, fold carefully to maintain the integrity of the potatoes.
6. Chill
- Cover your salad and let it chill in the refrigerator for at least 30 minutes, allowing the flavors to meld. Patience, my foodie friend! This is where the magic happens.
7. Final Touches
- Before serving, give your potato salad a taste test and adjust any seasoning. Garnish with fresh dill or parsley for a pop of color. It’s all in the presentation!
Voilà! Your classic potato salad is ready to shine at any gathering or just as a delicious treat for yourself.
Serving Suggestions
To plate your potato salad, scoop it into a beautiful serving bowl or individual dishes. Garnish generously with fresh herbs, and don’t be shy with the black pepper! Serve chilled alongside grilled meats, fresh veggies, or even atop a bed of greens for a delightful lunch. Trust me, your guests will be singing your praises all day long!
Recipe Variations
Feeling adventurous? Here are a few fun twists to try:
-
Herbed Potato Salad: Mix fresh herbs like rosemary, thyme, or tarragon into the dressing for a fragrant surprise!
-
Italian Flair: Add diced salami, olives, or mozzarella balls to give your potato salad an Italian vibe.
-
Creamy Avocado Twist: Substitute half the mayo with creamy avocado for an indulgent yet healthy twist.
-
Bacon Delight: Fold in crispy bacon bits for a smoky flavor that will have everyone coming back for more.
-
Spicy Kick: Introduce diced jalapeños or a splash of hot sauce for a zesty flavor explosion!
Chef’s Notes
This classic potato salad recipe has been passed down and adapted throughout the years in my family. I remember the first time I tried to make it on my own—it was a hilarious disaster! I accidentally added way too much mustard and had to quickly figure out how to fix it. With a bit of added mayo and a prayer, I salvaged it! Since then, I’ve embraced the notion that cooking is an evolution full of happy accidents. So don’t stress if things don’t go perfectly — just keep stirring and taste-testing!
FAQs and Troubleshooting
Q1: Why did my potato salad turn mushy?
A: If your potatoes are overcooked, they can get mushy. Aim for fork-tender, and you’ll be golden!
Q2: Can I make this salad ahead of time?
A: Absolutely! Potato salad actually tastes even better after chilling in the fridge, allowing the flavors to meld.
Q3: What if my dressing is too thick?
A: You can thin it out with a splash of lemon juice or a bit of pickle juice for some tang.
Q4: How long will the potato salad last in the fridge?
A: Typically, it will stay fresh for about 3-4 days in an airtight container. Just make sure to check for any changes in smell or appearance before serving!
Nutritional Info (optional)
Note: Nutritional values are approximate and will vary based on exact ingredients used and portion sizes.
- Serving Size: 1 cup
- Calories: 250
- Total Fat: 12g
- Saturated Fat: 2g
- Cholesterol: 80mg
- Sodium: 300mg
- Total Carbohydrates: 30g
- Dietary Fiber: 3g
- Sugars: 2g
- Protein: 6g
And there you have it, my friends! An inviting, delicious classic potato salad that’s easy to craft and filled with delightful memories. I can’t wait for you to bring this dish to your next gathering. As always, remember that cooking is about exploration, so feel free to add your personal touch. Happy cooking, and don’t forget to share your potato salad adventures — I love hearing your stories!
Print
Classic Potato Salad
- Total Time: 45 minutes
- Yield: 4 servings 1x
- Diet: Vegetarian
Description
A creamy and flavorful potato salad that is perfect for picnics, BBQs, and family gatherings, bringing a timeless taste and delightful memories to your table.
Ingredients
- 2 lbs Potatoes (Yukon Gold or red)
- 1 cup Mayonnaise
- 2 tablespoons Dijon Mustard
- 2 stalks Celery, diced
- 1 small Red Onion, finely chopped
- 3 large Hard-boiled Eggs
- Salt, to taste
- Black Pepper, to taste
- Fresh Dill or Parsley, for garnish
Instructions
- Prep the Potatoes. Wash thoroughly and cut into 1-2 inch chunks.
- Boil the Potatoes. Place in salted cold water, bring to a gentle boil, and cook for 15-20 minutes until fork-tender.
- Drain and Cool the potatoes in a colander for 10-15 minutes.
- Mix the Dressing. In a bowl, combine mayonnaise, Dijon mustard, salt, and black pepper; whisk until creamy.
- Combine Everything. Fold cooled potatoes, celery, onions, and eggs into the dressing.
- Chill in the refrigerator for at least 30 minutes.
- Give final touches by adjusting seasoning and garnish with fresh dill or parsley.
Notes
This classic recipe can be customized with various additions like herbs, meats, or avocados for a unique twist.
- Prep Time: 15 minutes
- Cook Time: 20 minutes
- Category: Salad
- Method: Boiling
- Cuisine: American
Nutrition
- Serving Size: 1 cup
- Calories: 250
- Sugar: 2g
- Sodium: 300mg
- Fat: 12g
- Saturated Fat: 2g
- Unsaturated Fat: 10g
- Trans Fat: 0g
- Carbohydrates: 30g
- Fiber: 3g
- Protein: 6g
- Cholesterol: 80mg
Keywords: potato salad, classic recipe, picnic dish, family gathering
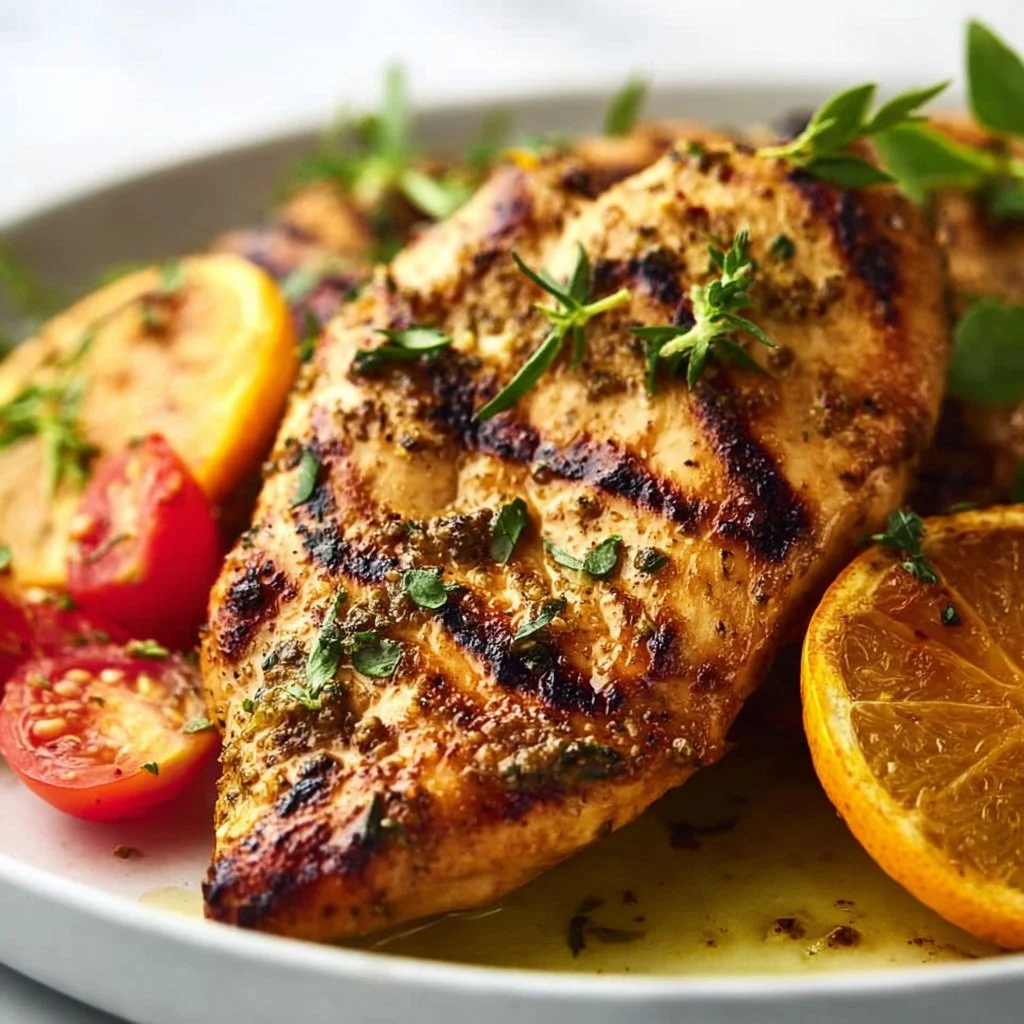
Citrus Dijon Grilled Chicken
Citrus Dijon Grilled Chicken: A Zingy Delight for Your Next Meal!
Hello, culinary adventurers! I’m Olivia Bennett, and today, I’m thrilled to share a recipe that perfectly embodies the spirit of sunshine and good times — Citrus Dijon Grilled Chicken. This dish is not just a feast for your taste buds; it’s a celebration of flavors that can brighten up even the cloudiest days! If you find joy in the thrill of grilling, the aroma of citrus wafting through your kitchen, and the laughter of loved ones gathering around the table, you’re in for a treat.
Imagine this: it’s a warm summer evening, and the sun is slowly setting, casting a golden hue over your backyard. You’ve got a gentle breeze ruffling the leaves of the trees, and the grill is sizzling, emitting that oh-so-familiar sound that makes your mouth water. This Citrus Dijon Grilled Chicken is the star of the show, marrying the zesty brightness of citrus with the rich, tangy kick of Dijon mustard. As it cooks, the scent fills the air, drawing friends and family to the kitchen like moths to a flame. What’s more? You’ll find that this dish is incredibly simple to prepare, making it perfect for both casual dinners and festive gatherings.
Not only is it delicious, but it also allows for some fun creative touches that cater to all palates. So grab your apron, channel your inner chef, and let’s dive into this vibrant recipe together. Whether you’re a seasoned grill master or a novice in the kitchen, I promise you’ll feel confident as we embark on this flavorful journey. So, let’s dust off the grill and get ready to serve up some mouthwatering plates!
Personal Story
Every time I prepare Citrus Dijon Grilled Chicken, it brings me back to those sun-soaked summer weekends spent in my parents’ backyard. My dad was the grill master, and he had this infectious energy each time we fired it up. I remember gathering around, the chatter of family and friends blending seamlessly with the sizzle of meats and veggies, all seasoned to perfection.
One particular moment stands out to me. My family decided to host a mini barbecue for our neighbors, and Dad decided to experiment with a citrus marinade that involved orange juice, lemon zest, and, of course, mustard. As he slathered it all over the chicken, we all had our doubts — would the flavor be too bold? But boy, were we in for a surprise! The first bite was an explosion of flavor. Suddenly, everyone was raving about this “new” dish, and that day, we all learned the magic of citrus combined with Dijon. It became a family favorite, one that I now cherish and love to recreate. Every time I make it, I can still hear echoes of laughter and clinking glasses from that day. And now, I can’t wait for you to create your own memories with this dish!
Ingredients
Here’s what you’ll need to whip up some Citrus Dijon Grilled Chicken. Each ingredient has its unique flair, so let’s break it down a bit:
-
Chicken Breasts (4 boneless, skinless): The star of the show! Chicken breasts are perfect for grilling as they absorb flavors well. If you’re looking for a leaner option, swap them for chicken thighs. They remain juicy even if cooked a tad longer!
-
Dijon Mustard (1/4 cup): This gives that delightful tangy kick. If you’re not a mustard fan, try using a honey mustard for a sweeter touch or even a grainy mustard for some texture.
-
Fresh Orange Juice (1/2 cup): Adds sweetness and acidity. No fresh oranges? Don’t fret! You can use bottled juice — just go for 100% pure juice, no added sugars!
-
Fresh Lemon Juice (2 tablespoons): Brightens up the whole dish! You could substitute with lime juice for a zippier profile, or add a dash of vinegar for an alternative tartness.
-
Garlic (3 cloves, minced): A must-have! For an easier prep, feel free to use pre-minced garlic available at the store or garlic powder (about 1 teaspoon).
-
Olive Oil (1/4 cup): This helps to keep the chicken moist on the grill. If you’re looking to switch it up, avocado oil or even melted coconut oil can work here too!
-
Salt and Pepper (to taste): For seasoning. Use sea salt for a burst of flavor or opt for pink Himalayan salt if you’re feeling fancy.
-
Fresh Herbs (like parsley or thyme, for garnish): Fresh herbs add a beautiful touch to the presentation; however, feel free to use dried herbs if that’s all you have on hand!
Now that we’ve gathered our ingredients, let’s get down to business and bring this dish to life!
Step-by-Step Instructions
Alright, food lovers, it’s game time! Grab your apron (and maybe a glass of your favorite beverage), and let’s start cooking this vibrant Citrus Dijon Grilled Chicken.
Step 1: Marinate the Chicken
In a mixing bowl, combine the Dijon mustard, fresh orange juice, lemon juice, minced garlic, olive oil, salt, and pepper. Whisk it all together until it’s nice and smooth. Chef Tip: The longer you marinate the chicken, the more flavor it absorbs. Ideally, let it marinate at least 30 minutes, but if you can manage 2-4 hours (or even overnight), you’ll thank yourself later!
Step 2: Preheat Your Grill
This is a crucial step. Preheat your grill to medium-high heat (around 375°F to 400°F). For those of you using a gas grill, just turn it on. If you’re working with charcoal, let the coals burn until they’re ashy. Chef Hack: If your grill grates tend to stick, brush them with oil before you start grilling.
Step 3: Grill the Chicken
Once your grill is preheated, take the marinated chicken breasts out of the bowl, allowing any excess marinade to drip off (but don’t discard it!). Place the chicken on the grill. It’s important to give each piece enough space. Pro Tip: Avoid flipping the chicken too soon. Let it cook about 5-7 minutes on one side before you attempt to flip, as this helps to achieve those beautiful grill marks!
Step 4: Flip and Glaze
After about 7 minutes, it’s time to flip those beauties. Brush a little extra marinade on the grilled side (because why not?!) and let them grill for another 5-7 minutes, until the chicken reaches an internal temperature of 165°F. Chef’s Insight: If you have a meat thermometer, you’ll take the guesswork out of cooking chicken. Trust me, no one wants dry chicken!
Step 5: Rest the Chicken
Once cooked, remove the chicken from the grill and let it rest for a few minutes to allow juices to redistribute. This step is essential for tender chicken! You can cover it lightly with aluminum foil during this time.
Step 6: Serve and Garnish!
Slice the juicy chicken breast and serve it up with a sprinkle of freshly chopped herbs for that finishing touch. Presentation Tip: Pair it with grilled veggies or a fresh side salad to make the colors pop on your plate!
Serving Suggestions
When serving your Citrus Dijon Grilled Chicken, a colorful presentation goes a long way. You can serve it atop a bed of mixed greens, drizzled with a citrus vinaigrette. Alternatively, accompanying it with grilled asparagus or seasonal roasted vegetables makes for a visually stunning and nutritious plate. Don’t forget to keep some of that leftover marinade on hand — it’s great as a dipping sauce!
Recipe Variations
Feeling adventurous? Here are some fun twists you can try with the base recipe:
-
Herb-Infused Marinade: Add fresh dill or rosemary to the marinade for an aromatic twist.
-
Spicy Kick: Mix in a teaspoon of red pepper flakes or sriracha for those who love a little heat.
-
Tropical Vibe: Use pineapple juice instead of orange juice for a tropical finish.
-
Honey-Lime Glaze: Replace the orange juice with honey and lime juice for a sweeter, tangy flavor.
-
Grilled Citrus Slices: Toss some orange and lemon slices on the grill alongside your chicken for an extra burst of flavor that’s also super gorgeous on the plate!
Chef’s Notes
As I mentioned, this recipe has transformed over the years. Initially, it was just a quick dinner idea my dad made when guests popped over. Over time, I’ve added different elements to the marinade based on what was in season and what my friends loved. Once, I even added a splash of whiskey during a playful get-together, and it turned out to be a hit! Cooking for me is not just about following a recipe; it’s about creating moments and traditions that last a lifetime. I encourage you to play around with this dish, too. You just might stumble upon your own secret twist that makes it unforgettable!
FAQs and Troubleshooting
FAQ 1: What if my chicken is dry?
Dry chicken can be a result of overcooking. Always use a meat thermometer for accuracy, and ensure you let the chicken rest after grilling.
FAQ 2: Can I bake this chicken instead?
Absolutely! Preheat the oven to 375°F and bake for about 25-30 minutes or until it reaches an internal temperature of 165°F.
FAQ 3: How long can I marinate the chicken?
You can marinate the chicken for anywhere from 30 minutes to 24 hours. Just remember, the longer you marinate, the more flavorful it becomes!
FAQ 4: What sides pair well with the Citrus Dijon Grilled Chicken?
This dish is versatile and pairs beautifully with grilled veggies, roasted potatoes, a fresh salad, or even over rice!
Nutritional Info
While specific nutritional values can vary based on portion sizes and specific ingredients, a typical serving of Citrus Dijon Grilled Chicken comes in around:
- Calories: 250
- Protein: 28g
- Fat: 10g
- Carbohydrates: 3g
This chicken is not only delicious but also a healthy option packed with protein!
There you have it, my friends! A step-by-step guide to making Citrus Dijon Grilled Chicken that’s bound to impress. I’m excited for you to try this recipe and make it your own. Remember, cooking is about creativity, joy, and making memories. So turn up that upbeat music, grab your loved ones, and let’s create something magical in the kitchen together! Happy cooking!
Print
Citrus Dijon Grilled Chicken
- Total Time: 45 minutes
- Yield: 4 servings 1x
- Diet: Poultry
Description
A zesty and flavorful grilled chicken dish with a tangy citrus marinade, perfect for summer gatherings.
Ingredients
- 4 boneless, skinless chicken breasts
- 1/4 cup Dijon mustard
- 1/2 cup fresh orange juice
- 2 tablespoons fresh lemon juice
- 3 cloves garlic, minced
- 1/4 cup olive oil
- Salt and pepper, to taste
- Fresh herbs (like parsley or thyme, for garnish)
Instructions
- Marinate the chicken: In a mixing bowl, combine the Dijon mustard, orange juice, lemon juice, garlic, olive oil, salt, and pepper. Whisk until smooth. Marinade for at least 30 minutes.
- Preheat your grill to medium-high heat (375°F to 400°F).
- Grill the chicken: Remove marinated chicken from the bowl, allowing excess marinade to drip off. Place chicken on the grill, cooking for 5-7 minutes without flipping.
- Flip and glaze: After 7 minutes, flip the chicken. Brush with additional marinade and grill for another 5-7 minutes until the internal temperature reaches 165°F.
- Rest the chicken for a few minutes before slicing.
- Serve and garnish with fresh herbs.
Notes
For added flavor, let the chicken marinate longer (up to 4 hours or overnight). Serve with grilled veggies or a fresh salad.
- Prep Time: 30 minutes
- Cook Time: 15 minutes
- Category: Main Course
- Method: Grilling
- Cuisine: American
Nutrition
- Serving Size: 1 chicken breast
- Calories: 250
- Sugar: 5g
- Sodium: 300mg
- Fat: 10g
- Saturated Fat: 1.5g
- Unsaturated Fat: 8g
- Trans Fat: 0g
- Carbohydrates: 3g
- Fiber: 0g
- Protein: 28g
- Cholesterol: 70mg
Keywords: grilled chicken, citrus chicken, summer recipes, easy grilling, healthy dinner
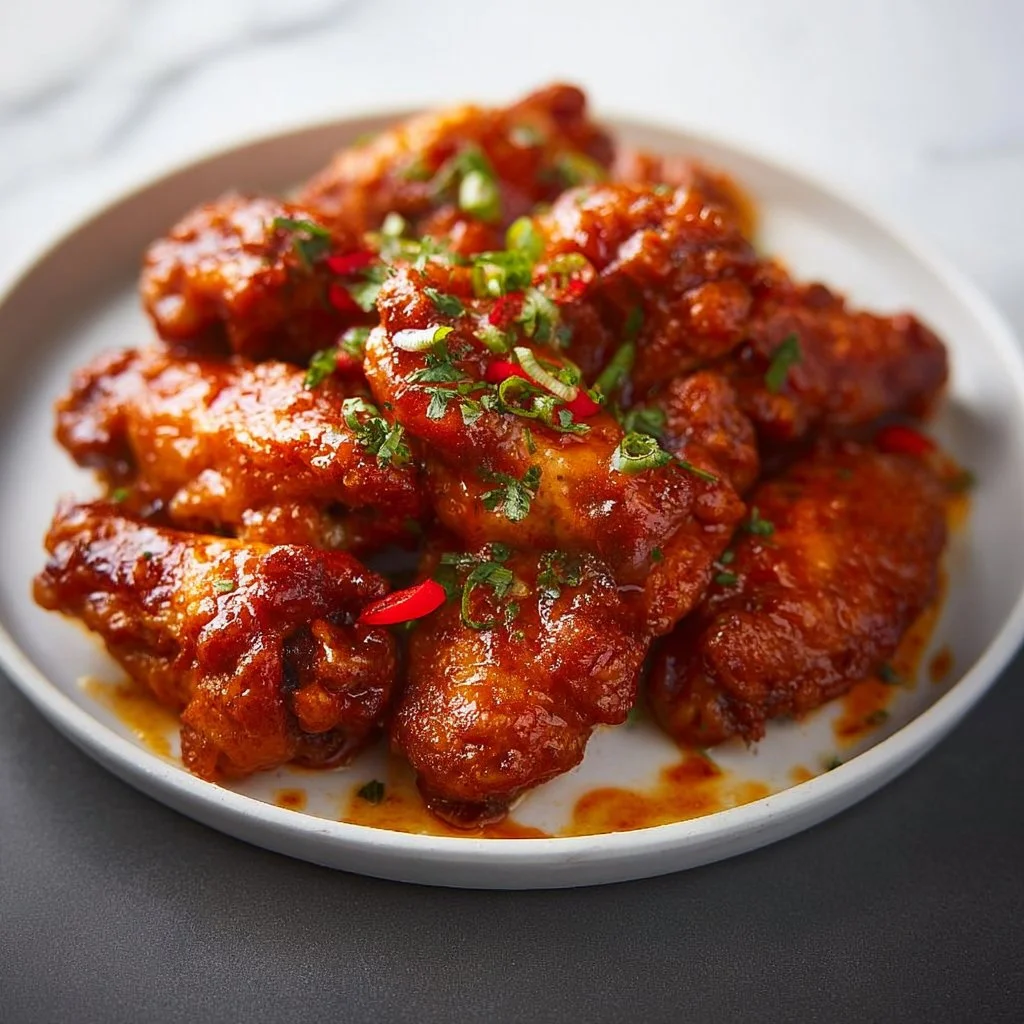
Asian Buffalo Wings
Asian Buffalo Wings: A Flavorful Twist on a Classic Favorite
Welcome back to my kitchen, fellow foodies! Today, I’m excited to dive into a recipe that’s sure to become a favorite in your house: Asian Buffalo Wings. These wings are a delightful fusion of spicy, savory, and tangy flavors that tickle your taste buds and keep you coming back for more. Perfect for game day, family gatherings, or just a cozy night in front of the TV, these wings combine the best of both worlds—you get the heartiness of traditional buffalo wings with a tasty twist inspired by Asian cuisine.
Now, if you’re like me, wings hold a special place in your heart. They remind me of summer barbecues, friends gathering around the dining table, and the carefree laughter that fills the air during game nights. Who doesn’t love fingers covered in sauce and the satisfaction of devouring a delicious wing? The adrenaline rush of your favorite team scoring in the background just adds to the joy of savoring these crispy delights.
This recipe is not only delicious but also simple enough to create for any occasion, whether it’s an intimate dinner for two or a bustling gathering of friends. We’ll be bathed in sweet and spicy sauce, tantalizing aromatics, and crispy textures. So, roll up your sleeves, don that apron, and let’s transform some chicken wings into a mouthwatering masterpiece. Ready? Let’s get cooking!
Personal Story
One of my fondest memories involving wings goes back to college. I lived with a group of my closest friends, and every Sunday was “Wings Day.” We turned our tiny kitchen into a makeshift sports bar, complete with funky décor, cold drinks, and, of course, plate after plate of wings. We experimented with flavors we found on the internet, varying from the classic Buffalo to honey garlic and even teriyaki.
I’ll never forget the day I decided to combine two of my favorite styles—buffalo and Asian. It all started when I got tired of my usual wing sauces and thought, “Why not mix it up?” I grabbed a bottle of sriracha and some soy sauce, threw in some ginger and garlic, and the rest is history! We called them "Asian Buffalo Wings," and the savory, spicy profile made our taste buds dance.
There we were, laughing, chatting, and devouring our wing creations while watching the game on a hot summer afternoon. As the sweat dripped from our brows—thank you, sriracha—we all shook our heads in disbelief, secretly asking if we had struck gold in the kitchen. Those moments made me fall in love with cooking even more, and I knew I had to share this recipe with you, my fellow food enthusiasts.
Ingredients
-
Chicken Wings (2 pounds)
- The main attraction! Look for fresh, organic wings if possible. You can also use frozen wings, just ensure they’re fully thawed and patted dry before cooking.
-
Soy Sauce (½ cup)
- This savory sauce adds umami depth to the wings. Feel free to swap in tamari to make this gluten-free or coconut aminos if you prefer a lighter flavor.
-
Sriracha Sauce (1/4 cup)
- This spicy, tangy condiment takes the classic buffalo flavor up a notch. If you’re sensitive to spice, reduce the amount, or use sweet chili sauce for a milder kick.
-
Honey (2 tablespoons)
- A natural sweetener balances the heat from the sriracha and adds a glossy finish to the sauce. Maple syrup can be a great alternative for a vegan version.
-
Garlic (4 cloves, minced)
- Fresh garlic provides aromatic depth. Feel free to use garlic powder in a pinch; about 1 teaspoon should suffice.
-
Ginger (1 tablespoon, minced)
- Fresh ginger adds a warm, spicy kick that amplifies the Asian flavors. You can substitute with ground ginger if necessary.
-
Rice Vinegar (2 tablespoons)
- This tangy vinegar helps cut through the richness of the wings while adding a zesty touch to the sauce. Apple cider vinegar could be used as a swap in a pinch.
-
Sesame Oil (1 teaspoon)
- A little bit of this fragrant oil goes a long way in enhancing Asian flavors. Don’t have any? Light olive oil will work in a pinch, but it won’t add that nutty aroma.
-
Green Onions (for garnish)
- Fresh green onions always liven up a dish and add a dash of color. Feel free to throw in some sesame seeds for added crunch!
Step-by-Step Instructions
Step 1: Prepare the Wings
-
Rinse and Dry: First, rinse your chicken wings under cold water and place them on a paper towel-lined baking sheet. Pat them dry thoroughly. This step is crucial—if the wings are wet, they won’t crisp up nicely!
-
Prep for Cooking: Preheat your oven to 425°F (220°C). If you prefer deep-fried wings, get your oil heated to 350°F (175°C). But for this recipe, we’ll be baking them for optimal crunch and less mess.
Step 2: Make the Marinade
-
Combine Ingredients: In a medium bowl, whisk together soy sauce, sriracha, honey, minced garlic, minced ginger, rice vinegar, and sesame oil until well combined. This sticky and spicy marinade will pack a serious punch!
-
Marinade the Wings: Place the chicken wings in a large resealable plastic bag or a bowl. Pour the marinade over the wings, ensuring they’re fully coated. Chef Tip: For best results, let them marinate for at least 30 minutes—feel free to let them sit in the fridge for up to 24 hours for deeper flavor.
Step 3: Bake the Wings
-
Arrange on Baking Sheet: Line a baking sheet with parchment paper (for easy cleanup!) or aluminum foil. Arrange the marinated wings in a single layer on the sheet, ensuring they don’t touch. If they sit too close, they’ll steam instead of crisp!
-
Bake: Pop those bad boys in the preheated oven for 40-45 minutes, flipping them halfway through. The goal is to have them golden brown and crispy. Chef Hack: For extra crispiness, toss them under the broiler for the last 5 minutes of cooking. Just keep an eye on them—no one likes burnt wings!
Step 4: Toss in the Sauce
-
Prepare a Second Batch: While the wings cook, you can strain any leftover marinade into a small saucepan. Simmer it on low heat for about 5-7 minutes until it thickens slightly. This will be your glaze!
-
Tossing Time: When the wings are done and crispy, remove them from the oven and place them in a large bowl. Pour the thickened sauce over the freshly baked wings and toss to coat evenly. Make sure each wing is beautifully glistening!
Step 5: Serve Them Up
-
Garnish: Serve the wings warm with a sprinkle of sliced green onions and sesame seeds on top. The fresh crunch complements the spicy wings perfectly.
-
Enjoy: Grab some napkins because things are about to get messy—and oh-so-delicious!
Serving Suggestions
These Asian Buffalo Wings are perfect for platters, game day, or a casual gathering. Serve them alongside cooling dips like ranch or a tangy garlic sauce to help balance out the heat. Pair your wings with a side of crispy vegetable spring rolls and Asian slaw for a complete feast, or some classic celery and carrot sticks for that crunchy detox!
Recipe Variations
-
Baked Buffalo Cauliflower Wings: For a vegetarian take, swap chicken wings for cauliflower florets and adjust the cooking time to about 25-30 minutes.
-
Spicy Honey Garlic Wings: Add extra honey and skip the sriracha for a sweeter profile.
-
Korean BBQ Wings: Replace soy sauce with gochujang (Korean chili paste) and add more sesame oil for a different kick.
-
Lemon Zest Addition: Brighten up the flavors by adding lemon zest into the marinade for a light, refreshing twist.
-
Naked Wings: Cook the wings without sauce for a classic crispy wing that can be dipped later in a variety of flavors.
Chef’s Notes
Oh, the fun I’ve had with these wings over the years! Initially, my attempts were a flavorful mess! I once miscalculated with sriracha and accidentally unleashed a firestorm that had everyone reaching for glasses of milk and running for the door. Since then, I’ve learned the importance of balance—too much heat can overshadow delicate flavors.
Over time, this recipe has evolved from mere experimentation to a family staple. I love whipping them up for get-togethers or just for a cozy movie night. There’s something magical about sharing these wings with others; they bring people together over shared laughter (and the occasional sauce-smeared face).
FAQs and Troubleshooting
Q: Why didn’t my wings get crispy?
A: Ensure the wings are thoroughly dried before cooking, and avoid overcrowding the pan. High heat also helps develop that crispy exterior!
Q: Can I use chicken breast or thighs?
A: Sure! Bone-in, skin-on chicken thighs also work well, but cooking times will vary. Thighs might take a bit longer to become tender and fully cook.
Q: What should I do if my sauce is too thick?
A: If your sauce thickens too much while simmering, just add a splash of water to achieve your desired consistency!
Q: Can these wings be made ahead of time?
A: Definitely! You can prep the wings and marinate them the day before. Just bake them before your guests arrive.
Nutritional Info
- Serving Size: 4 wings
- Calories: Approximately 350 calories
- Protein: 24g
- Carbohydrates: 14g
- Fat: 24g
So, there you have it—a labor of love and a dish that’s bound to become a new favorite. I hope you enjoy creating this delightful Asian Buffalo Wings recipe just as much as I’ve enjoyed sharing it with you. Give it a try, gather your loved ones, and make some delicious memories in the kitchen. Happy cooking!
Print
Asian Buffalo Wings
- Total Time: 75 minutes
- Yield: 4 servings
- Diet: None
Description
A flavorful fusion of spicy, savory, and tangy flavors, these Asian Buffalo Wings are perfect for game day or cozy nights in.
Ingredients
- Chicken Wings (2 pounds)
- Soy Sauce (½ cup)
- Sriracha Sauce (¼ cup)
- Honey (2 tablespoons)
- Garlic (4 cloves, minced)
- Ginger (1 tablespoon, minced)
- Rice Vinegar (2 tablespoons)
- Sesame Oil (1 teaspoon)
- Green Onions (for garnish)
Instructions
- Prepare the Wings: Rinse and dry the chicken wings under cold water and pat them dry thoroughly.
- Preheat your oven to 425°F (220°C).
- Make the Marinade: In a bowl, whisk together soy sauce, sriracha, honey, minced garlic, minced ginger, rice vinegar, and sesame oil.
- Marinade the Wings: Place wings in a large resealable bag or bowl and coat with marinade. Marinate for at least 30 minutes.
- Arrange on Baking Sheet: Line a baking sheet with parchment paper and arrange wings in a single layer.
- Bake: Bake wings for 40-45 minutes, flipping halfway through for even cooking.
- Toss in the Sauce: Remove wings and toss in thickened marinade for coating.
- Garnish: Serve warm, topped with sliced green onions and sesame seeds.
- Enjoy: Dig in and savor the flavors!
Notes
Wings can be prepared and marinated ahead of time for convenience. Adjust spice levels as per your preference.
- Prep Time: 30 minutes
- Cook Time: 45 minutes
- Category: Appetizer
- Method: Baking
- Cuisine: Asian
Nutrition
- Serving Size: 4 wings
- Calories: 350
- Sugar: 12g
- Sodium: 700mg
- Fat: 24g
- Saturated Fat: 6g
- Unsaturated Fat: 14g
- Trans Fat: 0g
- Carbohydrates: 14g
- Fiber: 0g
- Protein: 24g
- Cholesterol: 90mg
Keywords: wings, buffalo wings, Asian cuisine, game day, appetizer
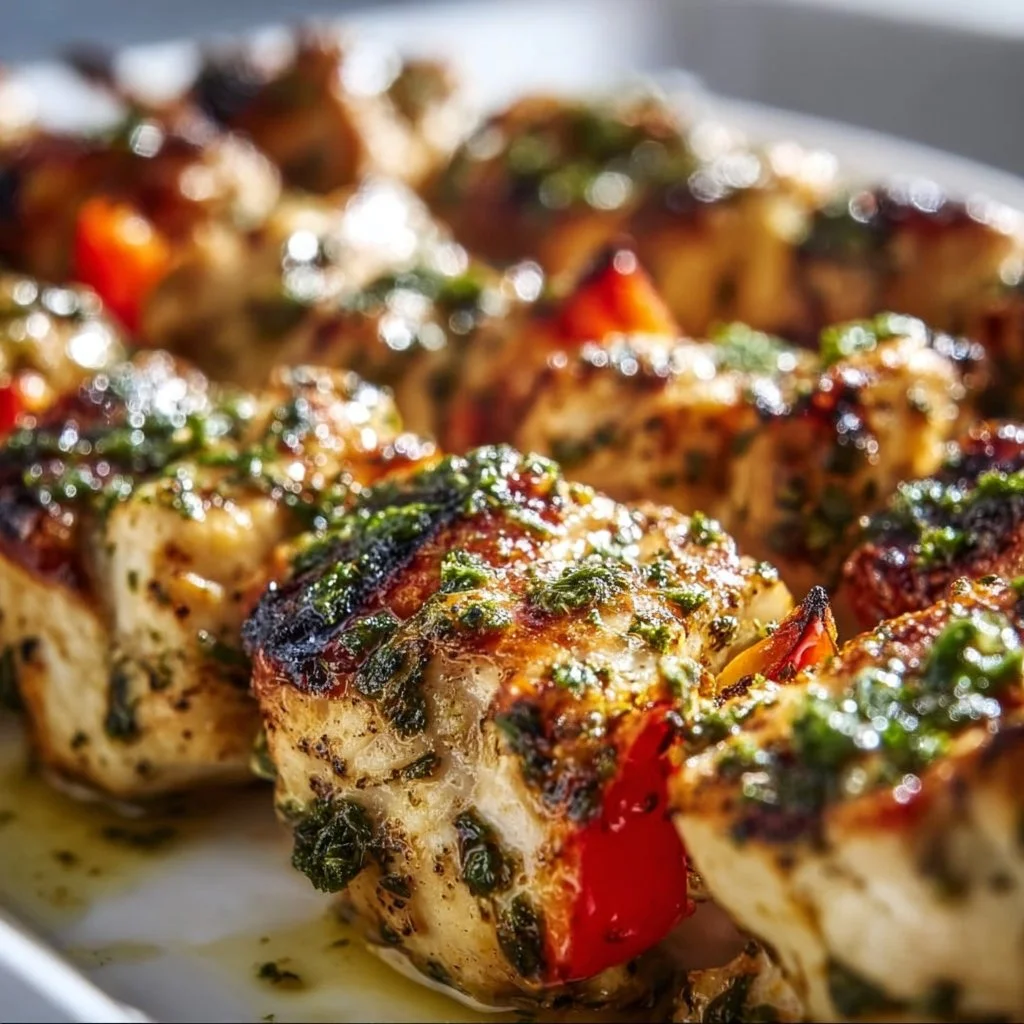
Greek Marinated Chicken Kabobs
# Greek Marinated Chicken Kabobs: A Flavorful Journey

## Introduction

Welcome to another tasty adventure in my kitchen! Today, we’re diving deep into the delightful world of Greek Marinated Chicken Kabobs. If you haven’t yet discovered the joys of marinated meats threaded onto skewers and grilled to perfection, you’re in for a treat! These kabobs embody everything I love about cooking: vibrant flavors, fresh ingredients, and a meal that feels like a party on a plate.

Greek cuisine is celebrated for its bold flavors, freshness, and aromatic herbs. These chicken kabobs bring all of that directly to your kitchen. Picture succulent pieces of chicken marinated in a zesty blend of olive oil, lemon juice, garlic, and an array of herbs, then grilled to create smoky, juicy bites that burst with flavor. It’s a dish that makes you feel like you’ve taken a mini-vacation to a sun-drenched Greek island, complete with the sound of waves crashing in the background – even if you’re just in your backyard!

One of the best things about these kabobs is their versatility. They can be served as a quick weeknight dinner, a fun barbecue treat, or a delightful addition to your next gathering. Pair them with a refreshing tzatziki sauce and a colorful Greek salad, and you have a meal that’s both satisfying and healthy.

So grab your aprons, and let’s get cooking! Together, we’ll navigate the steps to create this beautiful dish, share some tasty tips, and maybe even inspire you to share it with someone you love. Trust me; it’s going to be a delicious journey!

## Personal Story

Growing up, my family had a tradition of hosting summer barbecues that always came with an aroma-filled promise of good food, laughter, and togetherness. One dish that always made an appearance was my dad’s Greek chicken kabobs. The memory of sitting in our garden, the sun casting a warm glow over everyone, while the kabobs sizzled on the grill, is etched in my mind. I can still hear my dad’s hilarious banter as he skewered the marinated chicken, trying to fit as many pieces as he could onto the stick – a true testament to his belief that more is always better!

Whenever I take that first bite of a kabob now, I not only taste the flavors but also feel a sense of nostalgia that wraps around me like a cozy blanket. It reminds me of summer, laughter, and the joy of sharing beautiful meals with family and friends. It's a love that I’ve carried forward, and now it’s my turn to share this with you!

## Ingredients

Here’s what you'll need to create these mouthwatering Greek Marinated Chicken Kabobs:

- **Chicken Breasts (or Thighs):**
  - Use boneless, skinless chicken for easy skewering. Thighs are juicier, while breasts are leaner; either will work well!

- **Olive Oil:**
  - A key ingredient that keeps the chicken moist and helps the spices stick. Extra virgin olive oil adds a wonderful flavor, but any good-quality olive oil will do.

- **Lemon Juice:**
  - Freshly squeezed lemon juice adds bright acidity and helps tenderize the chicken. If you're in a pinch, bottled juice can work, but fresh is best!

- **Garlic:**
  - Minced garlic is essential for depth of flavor. You can substitute with garlic powder if you’re out of fresh.

- **Oregano:**
  - Dried or fresh, this herb is quintessential in Greek cooking. If you’re out, dried basil or thyme can be good alternatives, though they offer a different flavor profile.

- **Salt and Pepper:**
  - Essential for seasoning. Don’t skip these – they enhance the natural flavors.

- **Bell Peppers (optional):**
  - If you’d like to get a bit creative, colorful bell peppers make great additions to the skewers and add a pop of sweetness.

- **Red Onion (optional):**
  - Also an excellent pairing with the chicken, adding a crunchy texture and subtle sweetness when grilled.

## Step-by-Step Instructions

Let’s get cooking! Follow these steps to create irresistible Greek Marinated Chicken Kabobs:

1. **Marinate the Chicken:**
   - In a large bowl, combine ¼ cup of olive oil, ¼ cup of freshly squeezed lemon juice, and four cloves of minced garlic. Add 2 tablespoons of dried oregano, along with 1 teaspoon of salt and pepper. Whisk until well mixed.
   - Cut your chicken into 1- to 1.5-inch pieces, ensuring they are cut uniformly for even cooking. Add the chicken to the marinade, making sure every piece is coated. Cover with plastic wrap and let it marinate in the fridge for at least 30 minutes (or up to 4 hours for super flavorful chicken!)

2. **Prepare Skewers:**
   - If you’re using wooden skewers, soak them in water for about 30 minutes to prevent them from burning on the grill. Metal skewers are great too; make sure they’re clean and ready to go!

3. **Preheat the Grill:**
   - Preheat your grill to medium-high heat (about 375°F to 400°F). A hot grill gives you those irresistible grill marks and keeps the juices inside!

4. **Assemble the Kabobs:**
   - Thread the marinated chicken pieces onto the skewers. If you’re adding veggies, alternate them with the chicken for a colorful presentation. Leave a bit of space between each piece for even cooking.

5. **Grill the Kabobs:**
   - Place the skewers on the grill, cooking for about 10-12 minutes, rotating every couple of minutes until the chicken is nicely browned and cooked through (internal temperature should reach 165°F).

6. **Let Them Rest:**
   - Once done, remove the kabobs from the grill and let them rest for a few minutes before serving. This helps the juices redistribute!

### Tips to Enhance Your Kabobs:
- **Don’t rush the marinade!** The longer you can marinate, the more flavor the chicken will absorb.
- **Experiment with spices!** Try adding cumin or smoked paprika for a twist on traditional flavors.
- **Grill with a friend!** Cooking with someone can make the experience even more enjoyable, turning the kitchen into a fun gathering spot.

## Serving Suggestions

When it comes to serving these Greek Marinated Chicken Kabobs, simplicity is key. Lay the kabobs on a large platter, garnished with fresh parsley or dill. A side of homemade tzatziki sauce (made from Greek yogurt, cucumber, garlic, and dill) is a fabulous complement. You could also serve them atop a bed of fluffy couscous or alongside warm pita bread, maybe with a Greek salad bursting with ripe tomatoes, cucumbers, and feta to round everything out. Don’t forget to squeeze a bit of fresh lemon juice over the top for extra zing!

## Recipe Variations

- **Vegetarian Option:** Substitute chicken with firm tofu or mushrooms marinated in the same Greek marinade for a delightful vegetarian version.
- **Spicy Kick:** Add some crushed red pepper flakes or a bit of harissa to the marinade for a zesty punch!
- **Mediterranean Medley:** Incorporate cherry tomatoes and zucchini on the skewers for a colorful and nutritious addition.
- **Herb swaps:** Play around with herbs – dill and thyme work beautifully in this marinade!
- **Different Proteins:** Swap chicken for shrimp or even beef, just adjust the cooking time as needed.

## Chef’s Notes

One of my favorite things about this recipe is its adaptability. Over the years, I’ve switched up the marinade slightly based on what’s in my pantry or the season. Sometimes I might add a splash of white wine for depth, or even a dollop of yogurt for extra creaminess in the marinade. Every time I make these kabobs, they remind me of those family barbecues, filled with joy and laughter. Plus, they’re fantastic for meal prep; just marinate a batch, grill them, and you’ll have delicious lunches ready for the week!

## FAQs and Troubleshooting

**1. What if my chicken is dry?**
   - If your chicken ends up dry, it likely cooked for too long. Using thighs can help prevent this as they retain more moisture.

**2. Can I use frozen chicken?**
   - Definitely! Just ensure it’s completely thawed before marinating, or it won't absorb the flavors fully.

**3. What’s the best way to know the chicken is done?**
   - Use a meat thermometer to check for an internal temperature of 165°F. Alternatively, cut into the thickest piece to confirm it’s no longer pink inside.

**4. My veggies charred but the chicken is undercooked. What did I do wrong?**
   - Different proteins and vegetables cook at different rates. If you’re adding veggies, cut them larger than the chicken pieces and stagger the cooking times.

## Nutritional Info (optional)

Each kabob contains approximately 200 calories, 25g of protein, and 11g of fat, depending on the size and preparation method. For a healthier twist, consider serving with a salad to increase fiber and nutrients!

---

I hope you’re excited to try these Greek Marinated Chicken Kabobs! They’re a fantastic way to bring flavor, fun, and a touch of Greece into your home. Happy cooking, friends, and remember to share the love (and the kabobs) with those around you!
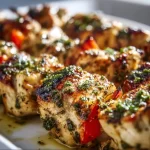
Greek Marinated Chicken Kabobs
- Total Time: 42 minutes
- Yield: 4 servings 1x
- Diet: Gluten-Free
Description
Succulent pieces of chicken marinated in a zesty blend of olive oil, lemon juice, garlic, and herbs, grilled to perfection.
Ingredients
- 1 lb Chicken Breasts or Thighs, boneless and skinless
- ¼ cup Olive Oil
- ¼ cup Lemon Juice, freshly squeezed
- 4 cloves Garlic, minced
- 2 tablespoons Oregano, dried
- 1 teaspoon Salt
- 1 teaspoon Pepper
- Bell Peppers, optional
- Red Onion, optional
Instructions
- Marinate the Chicken: In a large bowl, combine ¼ cup of olive oil, ¼ cup of freshly squeezed lemon juice, and four cloves of minced garlic. Add 2 tablespoons of dried oregano, along with 1 teaspoon of salt and pepper. Whisk until well mixed. Cut your chicken into 1- to 1.5-inch pieces, ensuring they are cut uniformly for even cooking. Add the chicken to the marinade, making sure every piece is coated. Cover with plastic wrap and let it marinate in the fridge for at least 30 minutes (or up to 4 hours).
- Prepare Skewers: If you’re using wooden skewers, soak them in water for about 30 minutes to prevent them from burning on the grill.
- Preheat the Grill: Preheat your grill to medium-high heat (about 375°F to 400°F).
- Assemble the Kabobs: Thread the marinated chicken pieces onto the skewers, alternating with veggies if desired. Leave a bit of space between each piece for even cooking.
- Grill the Kabobs: Place the skewers on the grill, cooking for about 10-12 minutes, rotating every couple of minutes until the chicken is cooked through.
- Let Them Rest: Once done, remove the kabobs from the grill and let them rest for a few minutes before serving.
Notes
For best results, marinate the chicken longer for more flavor. Experiment with spices or add vegetables to the skewers for added color and taste.
- Prep Time: 30 minutes
- Cook Time: 12 minutes
- Category: Main Course
- Method: Grilling
- Cuisine: Greek
Nutrition
- Serving Size: 1 kabob
- Calories: 200
- Sugar: 1g
- Sodium: 400mg
- Fat: 11g
- Saturated Fat: 2g
- Unsaturated Fat: 5g
- Trans Fat: 0g
- Carbohydrates: 6g
- Fiber: 1g
- Protein: 25g
- Cholesterol: 70mg
Keywords: Greek chicken kabobs, marinated chicken, easy dinner recipes




