
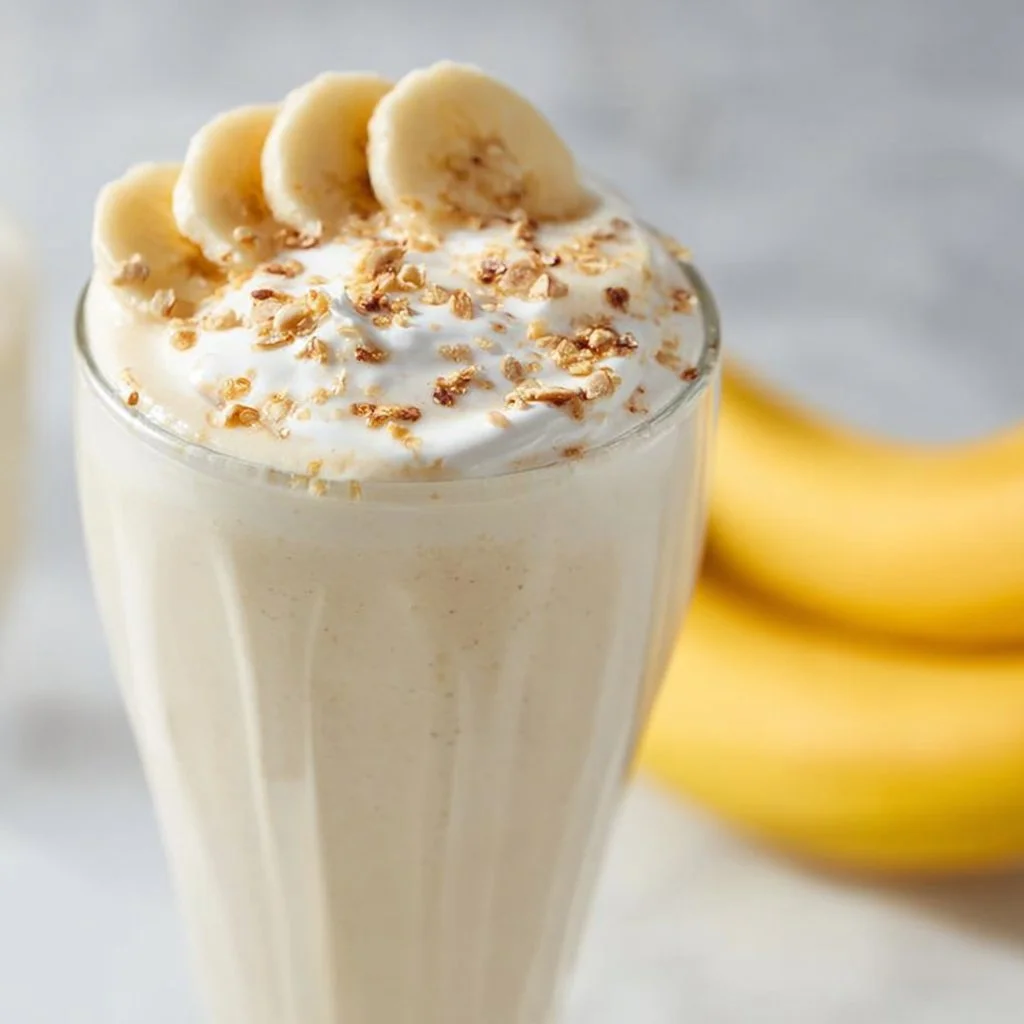
Banana Milkshake
The Ultimate Banana Milkshake Recipe: A Creamy Adventure Awaits!
Welcome to my kitchen, where we’re about to embark on a delightful journey that’s creamy, dreamy, and oh-so-banana-y! I’m Olivia Bennett, your friendly guide to all things delicious. Today, we’re diving into the world of smoothies with one of my all-time favorites — the classic Banana Milkshake. It’s a drink that’s not only fun to whip up, but it also brings back some sweet memories for me, and I bet it will do the same for you!
Picture this: it’s a sunny Saturday morning, and I’m back at my grandmother’s cozy cottage, the air thick with the sweet scent of ripe bananas. I remember standing on my tiptoes to reach the blender on the kitchen counter, barely able to contain my excitement. Grandma would laugh as she tightened the blender’s lid, reminding me to “stand back, sweetheart — things might get a little bananas!” Her famous banana milkshake was like a golden ticket to a world of flavor — thick, creamy, and topped with a dollop of whipped cream that crowned the glass like royalty. This treat was our breakfast ritual, a little bit of tradition that made those mornings feel extra special.
Banana milkshakes are not just for kids; they are pure nostalgia in a glass! So grab your blender and let’s create a milkshake that’s perfectly chilled, sweetly fruity, and super easy to make. This recipe is sure to bring a smile to your face (and maybe a little dance in the kitchen, too!).
Ingredients
To whip up your banana milkshake, you’ll need a handful of simple ingredients that come together to create a harmonious blend of flavors:
-
Ripe Bananas: Look for bananas with a few brown spots for the sweetest flavor. You can substitute with frozen bananas for an even creamier shake!
-
Milk: Whole milk will give you a rich and creamy texture, but feel free to swap in almond milk, oat milk, or your favorite dairy alternative if you prefer.
-
Vanilla Ice Cream: The magic ingredient that adds indulgence — you can use dairy-free ice cream or frozen yogurt for a lighter touch.
-
Vanilla Extract: A splash of pure vanilla extract enhances the flavor beautifully; choose quality extract for the best taste.
-
Honey or Maple Syrup: This gives a touch of extra sweetness. You can adjust this based on your taste preferences or leave it out if your bananas are perfectly ripe!
-
Optional Toppings: Whipped cream, chocolate syrup, or a sprinkle of cinnamon for the ultimate finish.
Each ingredient has a role to play in making this banana milkshake utterly delicious, so let’s make sure we choose wisely!
Step-by-Step Instructions
Time to get blending! Here’s how to create the perfect banana milkshake:
-
Choose Your Bananas: Start by peeling and slicing 2 ripe bananas. I prefer medium-sized ones; they’re just the right amount of banana flavor. Slicing them allows them to blend smoother.
Tip: If you have overly ripe bananas, don’t toss them! They’re perfect for this recipe, and you can even freeze them to use later—just peel and pop them in a freezer bag.
-
Add the Milk: Pour 1 cup of milk into your blender. If you’re not sure what milk to use, I’m a fan of whole milk for creaminess, but oat milk adds a nice nutty flavor too.
Chef Insight: If you’re using frozen bananas, reduce the amount of milk slightly, as they’ll thicken the shake more than fresh ones.
-
Ice Cream Time!: Scoop in 2 generous scoops of vanilla ice cream. This is where the indulgence happens! Make sure it’s slightly softened for easier blending.
-
Vanilla Extract: Add 1 teaspoon of pure vanilla extract. It’s a simple addition that lifts the flavor to new heights!
-
Sweeten It Up: Drizzle in 1 tablespoon of honey or maple syrup. Taste as you go, and adjust the sweetness to your liking.
-
Blend It Up: Secure the lid on your blender and blend on high until all the ingredients are smooth and creamy. About 30-45 seconds should do it!
Chef Trick: For an extra frothy milkshake, pulse the blender a few times, then give it a good shake before blending again.
-
Taste Test: Grab a spoon and indulge in a quick taste! If you want it thicker, add more ice cream; if it’s too thick, a splash of milk will do the trick.
-
Serve: Pour your beautifully blended banana milkshake into tall glasses, and don’t skimp on the froth!
Tip: For a fun presentation, dip your glasses in chocolate syrup before pouring in the shake for a decadent twist.
Serving Suggestions
Now, it’s time to present your banana milkshake! Top it with a generous swirl of whipped cream, and drizzle with chocolate syrup for that extra touch of decadence. Sprinkle some crushed graham crackers or a dusting of cinnamon on top, and you’ve got a show-stopping treat! You can even add a slice of banana on the rim or a cute paper straw for that perfect Instagram-worthy finish.
Recipe Variations
Here are some fun twists to keep your banana milkshake game fresh:
-
Chocolate Banana Milkshake: Add 2 tablespoons of unsweetened cocoa powder or chocolate syrup for a chocolatey delight.
-
Nutty Banana Milkshake: Toss in a tablespoon of almond butter or peanut butter for a protein-packed treat.
-
Tropical Twist: Add a handful of frozen pineapple chunks for a fruity explosion that will transport you to a beach resort.
-
Spiced Banana Milkshake: Mix in a dash of nutmeg or pumpkin spice for a cozy, autumnal flavor.
-
Vegan Banana Milkshake: Substitute ice cream with a non-dairy version and use almond milk for a vegan-friendly treat!
Chef’s Notes
Banana milkshakes are a go-to for me, not just because they taste incredible, but also because they remind me of sweet moments spent with family. I’ve whipped up this recipe for birthday parties, lazy Sunday afternoons, and even as an after-school snack for my little niece, who absolutely adores them!
Over the years, I’ve tried countless variations, always excited to experiment with new flavors and toppings. Once, on a whim, I added a pinch of cayenne to a batch I made for friends — and let’s just say their surprised faces were priceless! It’s all about finding joy in the kitchen and making these flavors your own.
FAQs and Troubleshooting
-
Why is my milkshake too thin?
If your milkshake is thinner than you’d like, add more ice cream to thicken it up! Alternatively, reduce the amount of milk next time. -
Can I use frozen bananas?
Absolutely! Frozen bananas will make your milkshake extra creamy. Just use a bit less milk for the right consistency! -
What if my milkshake is too thick?
If it’s too thick to blend, just add a little more milk, one splash at a time, until you reach your desired consistency. -
How do I store leftovers?
Drink it up! But if you have to save any, pour it into an airtight container and place it in the freezer. Just blend it again before serving to restore its creamy texture.
Nutritional Info (Optional)
While I love sharing recipes that make our hearts sing, I also think it’s good to know what we’re nourishing our bodies with! A typical banana milkshake made from the ingredients listed above contains approximately:
- Calories: 350-450 (depending on portion size and added ingredients)
- Protein: 8-10g
- Sugar: 30-40g
- Fat: 12-15g
Remember, these figures can vary based on your ingredients and serving sizes.
Now, go ahead and grab those bananas, fire up the blender, and make some incredible memories with your very own banana milkshake! Whether enjoyed solo or shared with friends, this drink never fails to warm my heart. Enjoy, and remember, every sip is a little moment of joy! Happy blending! 🍌🥤
Print
The Ultimate Banana Milkshake
- Total Time: 10 minutes
- Yield: 2 servings 1x
- Diet: Vegetarian
Description
A classic and creamy banana milkshake that brings back sweet memories, perfect for any occasion!
Ingredients
- 2 ripe bananas
- 1 cup whole milk (or almond/oat milk)
- 2 scoops vanilla ice cream (or dairy-free ice cream)
- 1 teaspoon vanilla extract
- 1 tablespoon honey or maple syrup
- Optional toppings: whipped cream, chocolate syrup, cinnamon
Instructions
- Choose your bananas: Peel and slice 2 ripe bananas.
- Add the milk: Pour 1 cup of milk into your blender.
- Scoop in ice cream: Add 2 generous scoops of vanilla ice cream.
- Add vanilla extract: Put in 1 teaspoon of pure vanilla extract.
- Drizzle in honey or maple syrup: Adjust the sweetness to your liking.
- Blend it up: Blend on high until smooth and creamy.
- Taste test: Adjust thickness with more ice cream or milk as needed.
- Serve: Pour into glasses and top with optional toppings.
Notes
For a fun presentation, dip glasses in chocolate syrup before pouring in the shake. Enjoy with a slice of banana on the rim or a cute paper straw!
- Prep Time: 10 minutes
- Cook Time: 0 minutes
- Category: Beverage
- Method: Blending
- Cuisine: American
Nutrition
- Serving Size: 1 serving
- Calories: 400
- Sugar: 30g
- Sodium: 150mg
- Fat: 15g
- Saturated Fat: 8g
- Unsaturated Fat: 5g
- Trans Fat: 0g
- Carbohydrates: 60g
- Fiber: 3g
- Protein: 10g
- Cholesterol: 50mg
Keywords: banana milkshake, creamy drink, easy recipe, smoothie, dessert
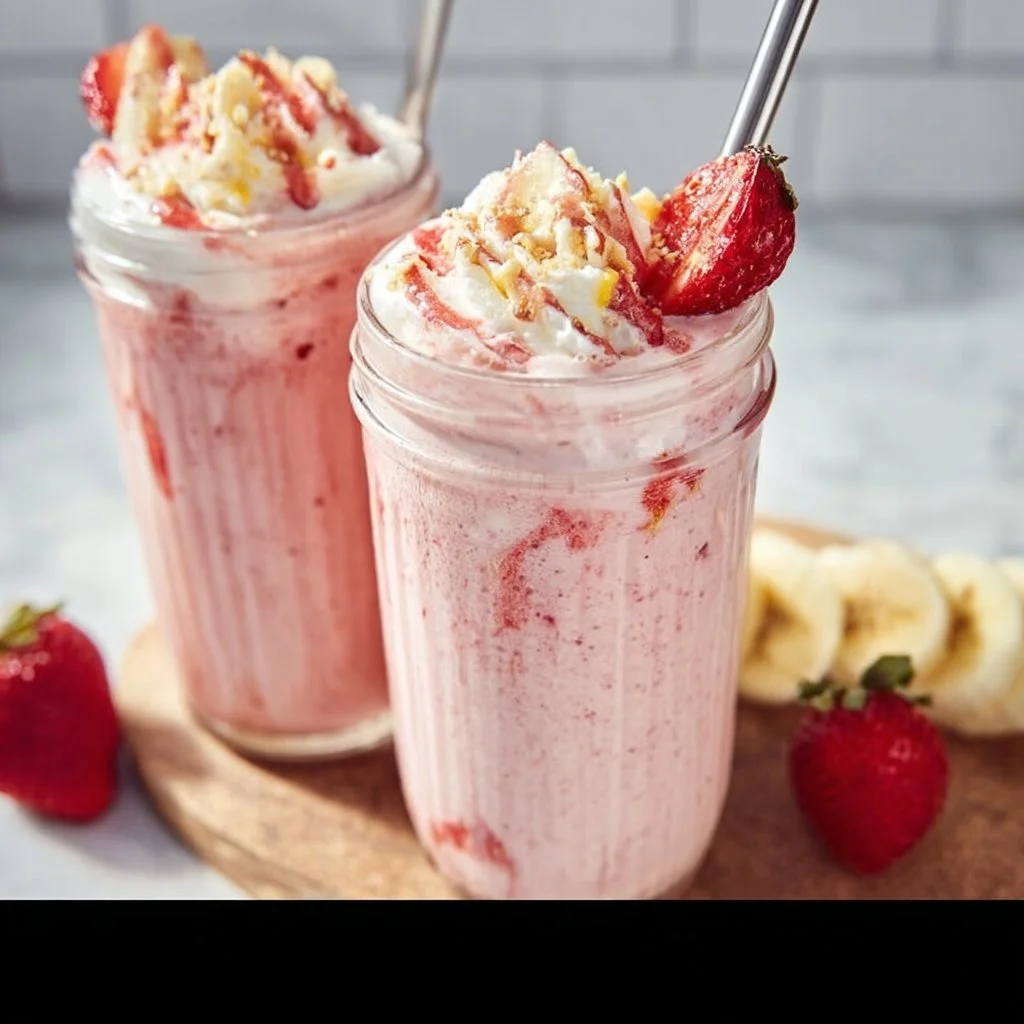
Strawberry Banana Milkshake
Strawberry Banana Milkshake: A Nostalgic Sip of Summer
Introduction
Hey there, friends! Welcome back to my cozy little corner of the internet! Today, we’re diving into one of my all-time favorite treats: the classic strawberry banana milkshake. If there’s one thing that brings back sweet childhood memories, it’s sitting in my grandma’s kitchen, watching her blend up this refreshing drink on a hot summer day. The way the creamy vanilla ice cream would swirl together with ripe bananas and luscious strawberries was pure magic, and I couldn’t wait to get my hands on the first frosty glass.
As the blender whirred, I could feel the anticipation building. There was something about that bright pink color and the sugary-sweet aroma that made my heart skip a beat! Whenever we made milkshakes, it became a mini celebration — a reason to gather, to laugh, and to indulge. Now, I’m all grown up, but the delight of a homemade milkshake still captures my heart in the same way.
This strawberry banana milkshake isn’t just a delicious, creamy treat; it also holds the power to revive those fond memories and connect us with the people we care about. It’s a perfect pick-me-up for any occasion—whether you’re enjoying an afternoon snack, hosting friends for brunch, or just treating yourself on a lazy Sunday.
So grab your apron and let’s get shaking! We’re about to blend up something fantastic that will leave you craving more. Whether you’re channeling your inner child or trying your hand at homemade shakes for the first time, I’ve got everything you need right here. Trust me, once you whip this up, you’ll be dreaming of summer days all year long!
Personal Story
I remember it vividly—the sweltering summer afternoons spent at my grandmother’s house. It was one of those days when the sun blazed in the sky, and the air was sticky with the promise of heat. Grandma, with her ever-present apron tied around her waist, would announce, “It’s milkshake time!” And just like that, the world outside vanished as we gathered around her well-loved kitchen counter.
With a mischievous twinkle in her eye, she would pull out the blender and start tossing in fresh strawberries, creamy bananas, and a healthy scoop of vanilla ice cream. As a kid, I was tasked with the all-important duty of taste-testing—it was a responsibility I took very seriously! I can still recall the exhilarating blend of sweetness and creaminess that danced on my taste buds, with the burst of strawberry flavor taking the lead. Grandma always added a splash of milk and a hint of vanilla to enhance the flavors, and she had a knack for getting the consistency just right: not too thick but perfectly sippable.
These milkshake moments weren’t just about the drink; they were about connection, laughter, and creating memories that I cherish to this day. So when I whip up my own strawberry banana milkshake now, it’s like a delicious time capsule that transports me back to those warmer days filled with love, laughter, and the pure joy of being together.
Ingredients
To bring this wonderful milkshake to life, you’ll need the following ingredients. Don’t worry—this list isn’t intimidating at all!
-
Fresh Strawberries (1 cup): Sweet, juicy strawberries are the star of the show. Look for ripe ones that have a bright red color and a sweet aroma. If you don’t have fresh berries, feel free to use frozen ones—just slightly adjust the amount of milk since frozen berries can release water as they thaw!
-
Ripe Bananas (1 medium): A perfectly ripe banana adds a natural sweetness and creamy texture. Choose one that has small brown speckles; this indicates it’s at peak sweetness and flavor. If you’re out of bananas, use ½ cup of yogurt instead for a creamy base.
-
Vanilla Ice Cream (2 scoops): The creamy element that elevates this milkshake to indulgent heights! You can use any flavor you like, but the classic vanilla pairs beautifully with strawberry and banana. If you’re looking for a lighter option, consider Greek yogurt or dairy-free ice cream.
-
Milk (½ cup, adjust to preference): Whole milk offers a rich consistency, but any milk (almond, oat, or coconut) will work. You can adjust the amount depending on how thick or thin you prefer your milkshake. Start with less and add more if needed!
-
Vanilla Extract (1 teaspoon): A splash of vanilla extract brings all the flavors together and adds warmth. If you don’t have vanilla extract, almond extract could impart a unique flavor twist.
-
Whipped Cream (optional for topping): For that classic indulgent touch! Homemade whipped cream takes it to the next level, but store-bought is perfectly fine too.
Step-by-Step Instructions
Ready to blend up some nostalgia? Let’s jump into the steps!
-
Prep Your Ingredients: Start by washing your strawberries. Remove the green tops using a small knife or your fingers, then slice the strawberries to help them blend smoothly. Peel your banana and slice it into rounds for easier blending.
Chef Tip: Make sure your fruits are at room temperature for the best flavor. Cold ingredients can dull the taste, so let them sit out for a bit if they’ve been in the fridge!
-
Blend the Base: In a blender, combine the sliced strawberries and bananas. Add in two generous scoops of vanilla ice cream. Yes, this is the time to be generous—treat yourself!
Commentary: The key to a well-blended milkshake is to layer your ingredients in this order. Fruits first help them get blitzed right up against the blades, ensuring no chunky bits are left.
-
Add the Milk: Pour in about ½ cup of milk and the teaspoon of vanilla extract. This will help create that creamy, sippable consistency.
Chef Hack: If you want a super-thick milkshake, start with less milk and gradually add more during blending until you reach the desired thickness.
-
Blend Away: Secure the lid on your blender and blend on high speed for about 30 seconds to a minute. You want everything to be beautifully mixed—no banana chunks! If needed, give it a shake halfway through and keep blending until smooth.
Tip: If it’s too thick, add more milk a splash at a time; if too runny, toss in a bit more ice cream or a few extra berries.
-
Taste Test: Here’s the best part—grab a spoon and taste your creation! Adjust sweetness by adding a tiny bit of honey or sugar if necessary.
-
Serve: Pour your divine milkshake into tall glasses. Work your magic when pouring—let the creaminess cascade down the sides.
Chef Insight: Feel free to use a fancy glass if you’re feeling extra! Presentation can elevate the experience, even in your own kitchen!
-
Garnish: Top it off with a swirl of whipped cream and sprinkle some crushed strawberries or chocolate shavings, if you’re feeling indulgent.
Serving Suggestions
When it comes to serving your delightful strawberry banana milkshake, the options are endless! You can top it off with a dollop of whipped cream, drizzle some chocolate or caramel syrup, and sprinkle crushed nuts for a crunchy twist. Serve it alongside a slice of your favorite cake or some freshly baked cookies for a delicious dessert platter. If you’re entertaining, consider making milkshake flights with different flavors to wow your guests!
Recipe Variations
-
Peanut Butter Banana Milkshake: Add a couple of tablespoons of creamy peanut butter for a nutty twist that pairs perfectly with banana.
-
Chocolate Strawberry Banana Milkshake: Mix in a tablespoon of chocolate syrup or cocoa powder for a chocolatey spin.
-
Dairy-Free Delight: Use almond milk, coconut ice cream, and agave instead of regular milk and ice cream for a creamy, dairy-free version.
-
Berry Blast: Replace some of the strawberries with blueberries or blackberries for a mixed berry delight.
-
Protein Power: Sneak in a scoop of protein powder to turn this treat into a post-workout shake without sacrificing taste!
Chef’s Notes
I love how this strawberry banana milkshake recipe has evolved over the years! It started as a simple summer treat and has now turned into a versatile base for creativity. I remember a kitchen disaster when I accidentally added too much vanilla extract—my shake turned out almost too fragrant. I laughed about it, but hey, these little moments remind me why cooking is so fun! After all, cooking is about experimentation, learning, and having joy in the process, even when things don’t go exactly as planned.
FAQs and Troubleshooting
1. My milkshake is too thick! What can I do?
Simply add a little more milk, one tablespoon at a time, and blend until you reach the desired consistency.
2. Can I make this milkshake in advance?
While fresh is best, you can prepare all your ingredients and store them in the fridge for up to a few hours before blending. If making ahead, consider storing the blended shake for a short time in the fridge, but it might need a stir and a bit more milk to bring it back to life!
3. What if I don’t have ripe bananas?
Using a frozen banana or a splash of banana extract can help replicate that sweetness and flavor—just adjust the added sugar accordingly!
4. How can I make a lower-sugar version?
You can swap out the ice cream for a yogurt base or use unsweetened almond milk with a little bit of honey or stevia for sweetening. You can also reduce the amount of strawberries!
Now that you’ve got all the essential tips and tricks, why not grab your blender and whip up this delightful strawberry banana milkshake? It’s not just a recipe; it’s an experience waiting to unfold! Cheers to savoring every sweet sip! 🍓🥤
Print
Strawberry Banana Milkshake
- Total Time: 10 minutes
- Yield: 2 servings 1x
- Diet: Vegetarian
Description
A classic strawberry banana milkshake that brings back sweet childhood memories, blending creamy vanilla ice cream with fresh strawberries and ripe bananas for a refreshing treat.
Ingredients
- 1 cup Fresh Strawberries
- 1 medium Ripe Banana
- 2 scoops Vanilla Ice Cream
- ½ cup Milk (adjust to preference)
- 1 teaspoon Vanilla Extract
- Whipped Cream (optional for topping)
Instructions
- Prep your ingredients: Wash strawberries, remove tops, and slice. Peel and slice banana.
- Blend the base: Combine strawberries and bananas in a blender with vanilla ice cream.
- Add the milk and vanilla extract.
- Blend on high speed for 30 seconds to a minute until smooth.
- Taste and adjust sweetness if necessary.
- Serve the milkshake in tall glasses.
- Garnish with whipped cream and optional toppings.
Notes
Adjust the milk to achieve your desired thickness. Use frozen strawberries if fresh ones aren’t available.
- Prep Time: 10 minutes
- Cook Time: 0 minutes
- Category: Beverage
- Method: Blending
- Cuisine: American
Nutrition
- Serving Size: 1 serving
- Calories: 300
- Sugar: 40g
- Sodium: 100mg
- Fat: 10g
- Saturated Fat: 6g
- Unsaturated Fat: 4g
- Trans Fat: 0g
- Carbohydrates: 45g
- Fiber: 3g
- Protein: 5g
- Cholesterol: 30mg
Keywords: milkshake, strawberry, banana, summer drink, nostalgic dessert
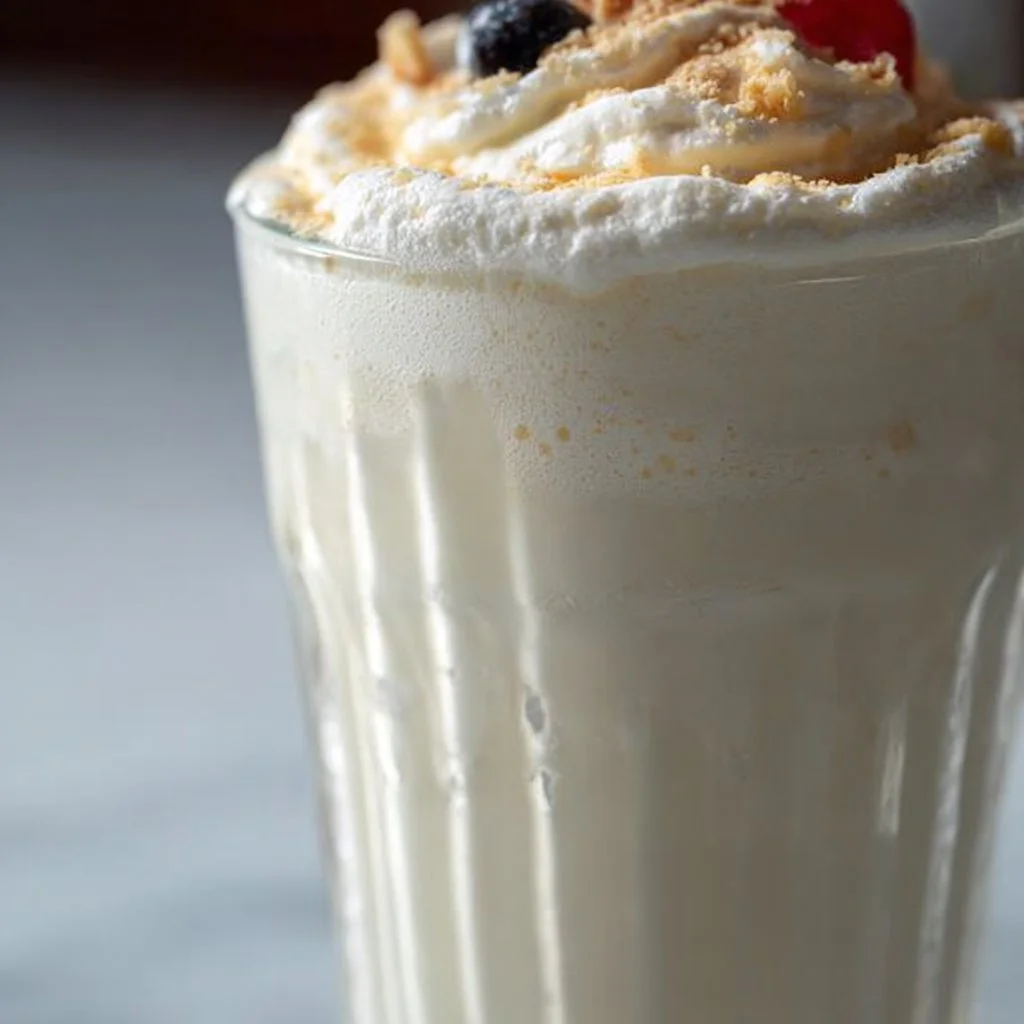
Vanilla Milkshake Recipe (Vanilla Shake)
The Creamy, Dreamy Vanilla Milkshake: A Slice of Nostalgia
Welcome back to my cozy corner of the kitchen! Today, we’re diving into a treat that’s as classic as they come: the vanilla milkshake. With its smooth, creamy texture and the sweet aroma of fresh vanilla, there’s something so comforting and nostalgic about sipping on one of these delightful drinks. Whether it’s a hot summer day or a chilly evening, who can resist a milkshake?
I have fond memories of making vanilla milkshakes in my childhood kitchen alongside my family. It wasn’t just about the milkshake itself; it was the mini celebration we had every time we blended those ingredients together. My siblings and I would take turns walking on our tiptoes to peek into the blender, eagerly anticipating the moment when smooth, frothy goodness would emerge. We would race to claim our favorite glass, often ending up with sticky hands and big smiles, sharing stories about our day while we sipped on our creamy creations.
Today, I’m excited to share that same joy with you! This recipe is simple, fun, and uses ingredients you probably already have at home. Plus, it comes with some twists to make it your own. Ready? Let’s get blending!
Ingredients
Here’s what you’ll need for your luscious vanilla milkshake:
-
Ice Cream (Vanilla)
- The star of the show! Use high-quality vanilla ice cream for the best flavor. If you’re looking for lighter options, try frozen yogurt or even a non-dairy ice cream.
-
Milk
- You can use whole milk for a rich shake or opt for almond milk or oat milk for a lighter alternative. Adjust the quantity based on how thick or thin you like your milkshake!
-
Vanilla Extract
- This adds a depth of flavor that elevates your milkshake. Think about substituting with almond extract for a unique twist, but start with half the amount as it can be quite strong.
-
Whipped Cream (optional)
- Perfect for that finishing touch! Want to make it extra special? Consider adding a drizzle of chocolate or caramel sauce on top for a mouth-watering presentation.
-
Maraschino Cherries (optional)
- These sweet little cherries are the cherry on top of your classic vanilla shake! If you don’t have them, you can always skip this or garnish with fresh berries instead.
Quick Chef Insight:
The key to the perfect milkshake is the ice cream-to-milk ratio, which will determine its thickness. If you want it really thick, use less milk; for a thinner milkshake, add more!
Step-by-Step Instructions
Now that you have everything ready, let’s get to the fun part—making the milkshake!
-
Scoop the Ice Cream
- Start by scooping about 2 cups of vanilla ice cream into your blender. This is where the magic begins! Use an ice cream scooper if you have one—trust me, it makes the task much easier.
-
Pour in the Milk
- Add ½ to 1 cup of milk, depending on how thick you want your shake. Feel free to start with less; you can always add more after blending if you want it thinner. If you’re using a high-speed blender, it might blend up faster than you think!
-
Add Vanilla Extract
- Pour in about a teaspoon of pure vanilla extract. This is my secret to a shake that sings with flavor! It enhances the creamy taste and makes the whole thing smell heavenly.
-
Blend it Up
- Seal the lid tightly and blend on medium speed for about 30 seconds. If there’s ice cream stuck to the sides, pause and scrape it down with a spatula before blending again. Welcome the wonderful whir of the blender—it’s like music to my kitchen-loving heart! Blend until it’s smooth and mixed thoroughly.
-
Taste Test
- Don’t forget this step! Grab a spoon and taste your concoction. If you want it sweeter, you can add a bit more vanilla extract or even a spoon of sugar until it hits the right note for your taste buds.
-
Serve in Style
- Now for the fun part! Pour your milkshake into tall glasses—this is where you can get creative. Add whipped cream on top if you’d like, and don’t hold back on garnishing with a cherry right on top.
Serving Suggestions
For an Instagram-worthy presentation, consider interesting glassware. Mason jars add a cute farmhouse vibe, while classic milkshake glasses bring back that retro diner feel. And let’s be real—what’s a milkshake without a couple of straws? Opt for fun, colorful ones to add to that bright, cheerful vibe you’re creating!
Recipe Variations
Feeling like adding a personal touch? Here are some delightful variations you can try:
-
Chocolate Vanilla Milkshake
- Add chocolate syrup or cocoa powder for a chocolatey twist. Mix things up by drizzling chocolate sauce inside the glass before pouring!
-
Biscoff Cookie Shake
- Blend in crushed Biscoff cookies for a cookie-cinnamon flavor that’ll have your taste buds dancing!
-
Fruit-Infused Shake
- Toss in some fresh fruit while blending, like strawberries or bananas, for an added health kick.
-
Malted Vanilla Milkshake
- For a nostalgic creamy taste reminiscent of childhood ice cream parlors, mix in some malt powder along with the other ingredients.
-
Nutty Vanilla Shake
- Add a spoonful of peanut butter or almond butter for that nutty flavor that pairs perfectly with vanilla!
Chef’s Notes
I truly cherish the memories connected with making milkshakes. Over the years, my recipe has evolved from simply ice cream and milk into this more intricate (but still straightforward) version. Sometimes I experiment by adding a sprinkle of sea salt to bring out the sweetness, and instead of always opting for vanilla, I look at whatever we have in our pantry. You can even throw in a dollop of Nutella when I’m feeling cheeky! A perfect blend of salty and sweet can be just what you need to elevate your homemade treats.
One of my fondest moments in the kitchen was when my niece, who was about six at the time, decided she wanted to help me make milkshakes. She reached for the ice cream tub—but instead of grabbing the scoop, she took a cheeky spoonful and promptly declared she could totally help! Watching her giggle and giggle with every bite was a reminder that cooking is as much about the memories we create as the delicious food we make.
FAQs and Troubleshooting
1. My milkshake is too thick! What now?
- No worries! Just add a little more milk a tablespoon at a time until it reaches your desired consistency.
2. How can I make a vegan version?
- Simple! Choose a dairy-free ice cream and use plant-based milk. Almond milk or oat milk works wonders.
3. Can I use flavorings other than vanilla?
- Absolutely! Feel free to get creative with flavors like chocolate, strawberry, or even mint. Just remember, the base principle remains the same—ice cream, milk, and your chosen flavoring.
4. How do I store leftover milkshake?
- While it’s best enjoyed fresh, you can store any leftovers in an airtight container in the freezer. Just give it a little stir or blend again before serving!
Nutritional Info (Optional)
When you combine all these ingredients, you’ll likely yield two servings of milkshake, each containing:
- Calories: 450-550 (depending on ingredients)
- Protein: 8-10g
- Fat: 20-25g
- Carbohydrates: 50-70g
- Sugars: 35-50g
(Note that these values can vary based on specific brands and substitutions made.)
Well, friends, there you have it—your simple, homey, and absolutely delightful vanilla milkshake recipe! I hope you walk away inspired to whip up something sweet in your kitchen today. Gather some loved ones, raise those glasses, and let the buttery, vanilla-nutty flavors take you back to simpler times. Until next time, happy cooking!
Remember, it’s all about having fun and enjoying the process—get those aprons on and let’s shake it up!
Print
Creamy, Dreamy Vanilla Milkshake
- Total Time: 5 minutes
- Yield: 2 servings 1x
- Diet: Vegetarian
Description
A classic vanilla milkshake that’s smooth, creamy, and nostalgic, perfect for any occasion.
Ingredients
- 2 cups Vanilla Ice Cream
- ½ to 1 cup Milk (whole, almond, or oat)
- 1 teaspoon Vanilla Extract
- Whipped Cream (optional)
- Maraschino Cherries (optional)
Instructions
- Scoop the ice cream into your blender.
- Pour in the milk, adjusting for thickness.
- Add the vanilla extract.
- Blend on medium speed until smooth.
- Taste and adjust sweetness if needed.
- Serve in tall glasses with optional garnishes.
Notes
For a thicker shake, use less milk. You can also experiment with different flavorings or add-ins for a unique twist!
- Prep Time: 5 minutes
- Cook Time: 0 minutes
- Category: Dessert
- Method: Blending
- Cuisine: American
Nutrition
- Serving Size: 1 serving
- Calories: 500
- Sugar: 40g
- Sodium: 150mg
- Fat: 25g
- Saturated Fat: 15g
- Unsaturated Fat: 5g
- Trans Fat: 0g
- Carbohydrates: 60g
- Fiber: 0g
- Protein: 10g
- Cholesterol: 70mg
Keywords: milkshake, vanilla, dessert, classic, easy recipe
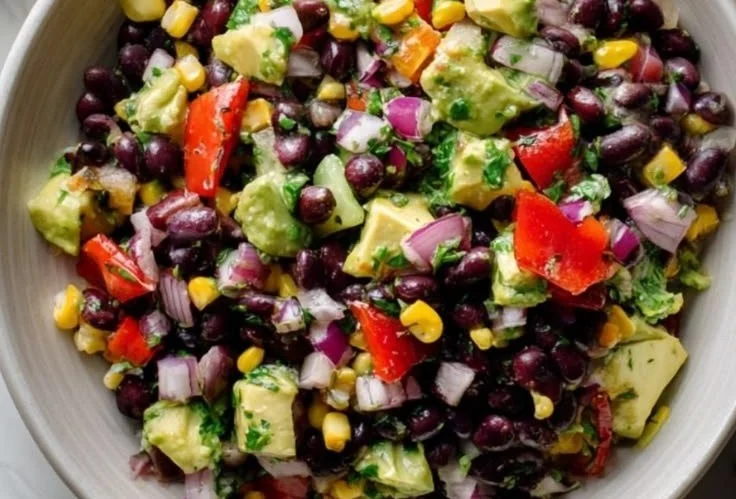
Ina Garten Black Bean Salad
Ina Garten’s Black Bean Salad: A Colorful, Flavorful Feast!
Welcome to my kitchen! I’m Olivia Bennett, and today, we’re diving into a vibrant, healthy dish that’s perfect for any occasion: Ina Garten’s Black Bean Salad. This isn’t just a salad—it’s a celebration of flavor, texture, and color that brings joy to your table and heart. Whether you enjoy it as a main dish, a side, or a filling addition to your next BBQ, this salad is all about simplicity and deliciousness.
There’s something incredibly comforting about a meal that ticks all the boxes of taste, nutrition, and nostalgia. For me, Ina Garten’s Black Bean Salad encompasses that perfectly. Bright, fresh ingredients come together to create a dish that is as photogenic as it is delectable. When I first discovered this recipe, I was captivated by its vibrant colors and the simplicity with which it came together. It became a staple in my cooking repertoire, perfect for summer gatherings, family dinners, and even cozy nights in.
This salad is not just about the ingredients; it’s a testament to the joy of cooking and sharing good food. Every time I make this salad, I think about those sunny afternoons spent barbecuing with friends, laughter echoing through the yard, and the tantalizing mix of aromas that wafted through the air. This isn’t just food; it’s a memory, a connection, and an experience.
What’s wonderful about this dish is that it’s incredibly versatile. Packed with protein, fiber, and vibrant veggies, a black bean salad invites everyone to dig in—whether you are a health nut, a busy parent, or a culinary explorer seeking new flavors. It’s not just a salad; it’s a conversation starter, a gathering point, and a delicious option for those embracing a plant-based lifestyle. So, grab your knives, put on your apron, and let’s make magic happen in the kitchen!
Personal Story
I still remember the first time I tasted Ina Garten’s Black Bean Salad at a friend’s outdoor barbecue. It was a sunny Saturday, and the scent of grilled veggies filled the air. Among the dishes laid out on the picnic table, this colorful salad caught my eye. I took a spoonful hesitantly, unsure of whether black beans could really be the star of the show. But as soon as I took that first bite, it was love at first taste!
The crunchy bell peppers, fresh cilantro, and zesty lime vinaigrette danced on my palate, and I soon found myself heading back for seconds (and thirds). The simplicity of the ingredients made it even more remarkable—how could something so easy be so delicious? That day marked my introduction to not just a recipe, but a cooking philosophy: good food doesn’t have to be complicated.
From that moment on, I’ve made this salad countless times, always adding my personal twist or two and sharing it with family and friends. Every time I pull this recipe out, I’m reminded of that joyful barbeque and the happiness that good food can bring into our lives.
Ingredients
Here are the ingredients you’ll need to create this delicious black bean salad, along with some helpful notes and substitution tips:
-
Black Beans (2 cans, drained and rinsed): The star of the salad! High in protein and fiber, black beans add a hearty touch. If you prefer, you can use cooked black beans—just make sure they’re tender!
-
Red Bell Pepper (1, diced): Adds sweetness and crunch. Prefer a bit more spice? Swap for a jalapeño or any other pepper you like!
-
Red Onion (½, diced): This gives a lovely sharpness and color. For a milder taste, soak the diced onion in cold water for 10 minutes before adding it to the salad.
-
Corn (1 cup, fresh or canned): Sweet corn adds a delightful crunch. If it’s not corn season, frozen corn works beautifully; just thaw it before using.
-
Cilantro (½ cup, chopped): Fresh cilantro brings a burst of brightness. If you’re not a fan of cilantro, parsley or green onions make excellent substitutes.
-
Lime (1, juiced): A squeeze of lime brightens all the flavors. You can use lemon juice in a pinch for a different citrusy kick.
-
Olive Oil (¼ cup): A good quality extra virgin olive oil enhances the salad’s richness. For a different flavor profile, try avocado oil!
-
Cumin (1 tsp): This spice adds depth to the salad. If you love heat, consider adding smoked paprika or chili powder for an extra kick!
-
Salt and Pepper (to taste): Essential for bringing out all the flavors. Remember, you can always adjust the seasoning to match your preference!
With these simple ingredients, you’ll create a stunning salad that not only tastes amazing but also looks beautiful on your table. Cooking is all about using what you love and adapting to fit your palate!
Step-by-Step Instructions
Now, let’s dive into the cooking process! Follow these steps to prepare Ina Garten’s Black Bean Salad, and I promise you’ll be showered with compliments.
Step 1: Prep Your Ingredients
Get everything ready before you start mixing. This makes the process smooth and enjoyable!
- Drain and rinse the black beans under cold water to remove excess sodium and prevent a gritty texture.
- Dice up your red bell pepper and red onion, and chop the fresh cilantro. Keep your ingredients in separate bowls for easy mixing later.
Step 2: Whip Up the Dressing
This salad deserves a flavorful dressing that ties everything together!
- In a small bowl, combine the fresh lime juice, olive oil, cumin, salt, and pepper. Whisk until fully emulsified.
- For an added punch, taste it and adjust the seasoning based on your preference. Sometimes I sneak in a dash of hot sauce for an extra kick!
Step 3: Mix the Salad
The fun part! Watch those colors blend together beautifully.
- In a large mixing bowl, add the black beans, diced red bell pepper, corn, and red onion. Toss them gently so they mingle without breaking the beans.
- Pour in your dressing, and sprinkle in the chopped fresh cilantro. Toss again until everything is well-coated in that zesty goodness.
Step 4: Let It Chill
This step is totally optional, but trust me, it’s worth it!
- Cover the salad and let it sit in the fridge for 20-30 minutes before serving. This will allow the flavors to meld together and create a more harmonious taste.
Step 5: Serve and Enjoy
Now, it’s time for the grand unveiling!
- When you’re ready to serve, give the salad one last toss. Scoop into a beautiful serving bowl, and watch as everyone gathers around.
- Pair it with grilled chicken, on top of tacos, or even all by itself! This black bean salad is sure to steal the show!
Chef’s Tip: If you’re preparing this dish for a gathering, consider making a double batch—it vanishes quickly!
Serving Suggestions
This black bean salad is incredibly versatile! Serve it in a vibrant bowl to showcase the colors. You can also use it as a filling for tacos or as a refreshing topping for grilled meats. It pairs beautifully with lime wedges on the side for that extra citrusy zest as guests can customize their portions. Accompany it with tortilla chips for a crunchy contrast or nestle it into crisp lettuce leaves for a light, healthy wrap.
Recipe Variations
Feel like changing things up? Here are a few creative twists you can try:
-
Avocado Add-In: Dice ripe avocados for a creamy texture that brings an extra layer of flavor and health benefits.
-
Quinoa Twist: Add cooked quinoa for a grainy component that boosts the protein and makes it a filling meal by itself.
-
Tropical Flair: Swap out some of the bell peppers for diced mango or pineapple for a sweet, tropical vibe.
-
Spicy Kick: Toss in diced jalapeños or chipotle powder for a zesty, fiery version of this salad!
-
Mediterranean Style: Use chickpeas instead of black beans, and add feta cheese, diced cucumber, and a drizzle of balsamic reduction. Totally different but equally delightful!
Chef’s Notes
Cooking is always an adventure, and what I love about this black bean salad is its adaptability. The original recipe from Ina Garten has always been a hit, but I like to take inspiration from whatever ingredients are on hand or in season. The beauty of home cooking is that it evolves with you!
One time, while preparing this salad for a family reunion, I miscalculated the lime and accidentally added too much. At first, I was horrified, but then I decided to balance out the acidity with a splash of honey! That unexpected change created a delightful variation that everyone adored. The best kitchen moments often come from “mistakes” that turn into delicious recipes!
FAQs and Troubleshooting
1. What if my black beans are mushy?
If your beans are overcooked or mushy, consider using them in a creamy dip or soup where they can blend right in! If they’re just slightly soft, avoid stirring too vigorously as you mix your ingredients.
2. How long will this salad last in the fridge?
This salad can last for about 3-5 days when stored in an airtight container. Just remember to give it a good stir before serving again, as the flavors may settle.
3. Can I prepare the salad in advance?
Absolutely! You can prep the ingredients and assemble the salad the day before. Just wait to add the dressing until about 30 minutes before serving to keep everything fresh and crunchy.
4. What should I do if I don’t like black beans?
No problem at all! You can swap out the black beans for pinto beans, kidney beans, or chickpeas. Each type brings its own unique flavor and texture to the dish!
Nutritional Info (optional)
This vibrant salad is not just a treat for your taste buds but also a powerhouse packed with nutrition:
- Calories: Approximately 250 per serving
- Protein: 10g
- Fiber: 8g
- Fat: 11g (healthy fats from olive oil and avocado if used)
- Carbohydrates: 30g
This salad is a fantastic way to boost your veggie intake while enjoying a hearty, flavor-packed dish!
And there you have it—a delicious adventure through Ina Garten’s Black Bean Salad! I hope this recipe finds a cozy spot in your kitchen and helps create memories around your table—just like it has for me. Happy cooking!
Print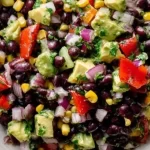
Ina Garten’s Black Bean Salad
- Total Time: 15 minutes
- Yield: 4 servings 1x
- Diet: Vegan
Description
A vibrant, healthy black bean salad that celebrates flavor, texture, and nutrition, perfect for any occasion.
Ingredients
- 2 cans Black Beans, drained and rinsed
- 1 Red Bell Pepper, diced
- ½ Red Onion, diced
- 1 cup Corn, fresh or canned
- ½ cup Cilantro, chopped
- 1 Lime, juiced
- ¼ cup Olive Oil
- 1 tsp Cumin
- Salt and Pepper, to taste
Instructions
- Prep your ingredients by draining and rinsing the black beans, diced red bell pepper, and red onion, and chopping the cilantro.
- Whip up the dressing by combining lime juice, olive oil, cumin, salt, and pepper in a small bowl and whisk until emulsified.
- Mix the salad by adding black beans, diced red bell pepper, corn, and red onion to a large bowl. Toss gently.
- Pour in the dressing and sprinkle the cilantro, tossing again to coat.
- Let it chill in the fridge for 20-30 minutes to enhance flavors.
- Serve in a nice bowl and enjoy!
Notes
For a twist, you can add diced avocado, cooked quinoa, or swap black beans with chickpeas.
- Prep Time: 15 minutes
- Cook Time: 0 minutes
- Category: Salad
- Method: Mixing
- Cuisine: Mexican
Nutrition
- Serving Size: 1 serving
- Calories: 250
- Sugar: 5g
- Sodium: 200mg
- Fat: 11g
- Saturated Fat: 1.5g
- Unsaturated Fat: 9.5g
- Trans Fat: 0g
- Carbohydrates: 30g
- Fiber: 8g
- Protein: 10g
- Cholesterol: 0mg
Keywords: black bean salad, vegetarian salad, summer salad, healthy recipes
Crab & Avocado Towers with Mango and Lime-Cilantro Vinaigrette
Crab & Avocado Towers with Mango and Lime-Cilantro Vinaigrette
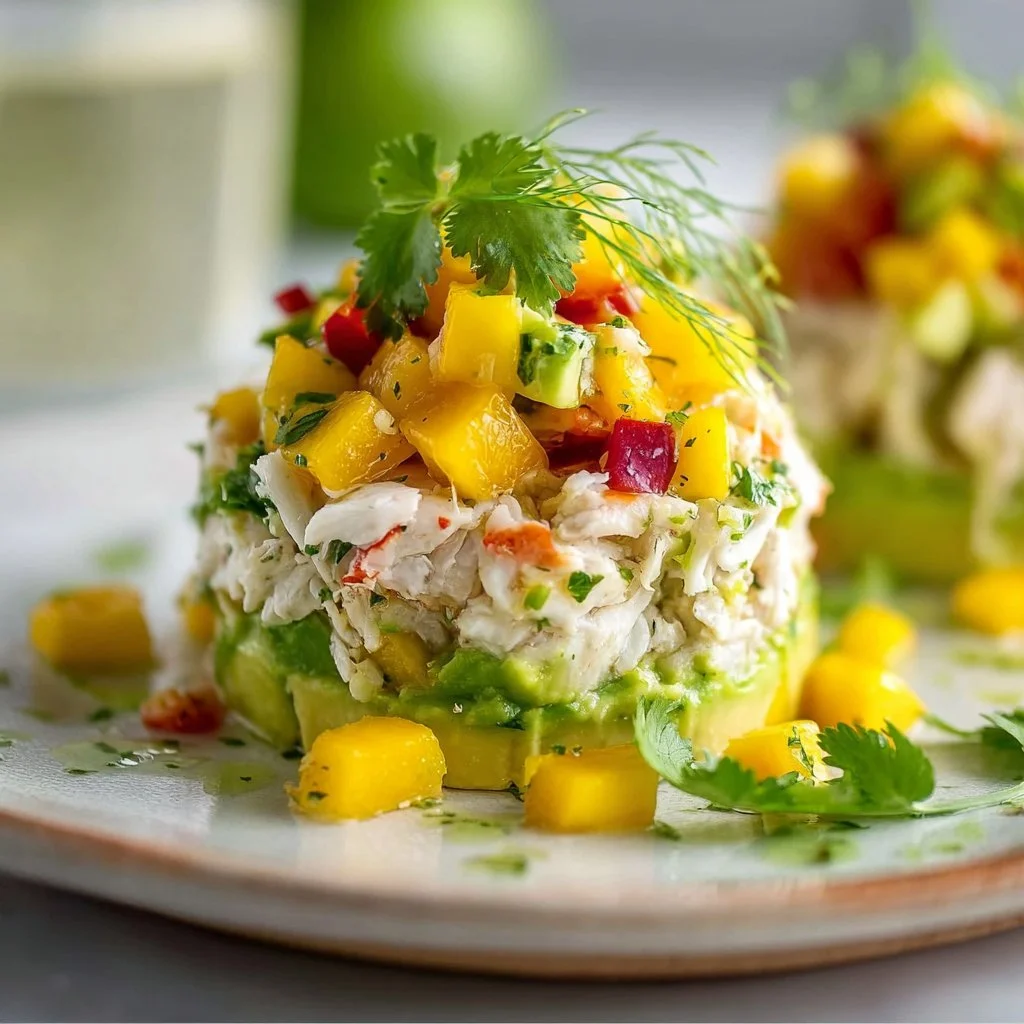
Welcome to my kitchen, friends! Today, I’m going to share a fabulous dish that’s all about vibrant flavors and beautiful presentation: Crab & Avocado Towers with Mango and Lime-Cilantro Vinaigrette. This dish is not only a feast for the eyes but also a scrumptious delight for your palate. Imagine the creaminess of ripe avocado paired with the sweet, succulent crab meat and the zesty burst of a mango vinaigrette; it gets even better when topped with a sprinkle of fresh cilantro. Trust me, this recipe will be your go-to for impressing guests, hosting brunch, or simply enjoying a light, elegant dinner at home.
There’s something inherently cozy about serving beautifully layered food. It’s like a work of culinary art that invites everyone to dig in. Plus, using fresh ingredients during the harvest season truly brings this dish to life. So grab your apron, and let’s dive into the delightful world of layers, flavors, and love as we prepare these glorious crab and avocado towers together!
Personal Story
One of the fondest memories I hold dear is from my summer vacations spent at my grandparents’ beach house. As a little girl, I would run through the sand, feeling the salty breeze in my hair and hoarding seashells while listening to the relaxing sounds of waves crashing against the shore. Each evening, my grandmother would prepare our dinner using fresh seafood from the local fish market. One evening, she presented the most dazzling plates filled with colorful layers of crab, avocado, and tropical fruits.
We gathered around the old farmhouse table, everyone eagerly digging in, trying to guess the secret ingredients in her signature sauce. The laughter we shared over those meals, the stories swapped between bites, and the elevated flavors ignited my love for cooking at a young age. Today, I strive to recreate those magical moments through food, believing that meals should be as joyful as they are delicious. With this crab and avocado tower recipe, I hope you can create your own beautiful memories around the table!
Ingredients
Here’s what you’ll need for our Crab & Avocado Towers:
-
Fresh Lump Crab Meat
- A true star of the dish! When buying crab meat, look for high-quality lump crab for the best texture and flavor. If lump crab isn’t available, you can use backfin or even canned crab, but make sure to drain it well.
-
Ripe Avocados
- The creaminess of avocado really contributes to the tower’s richness. Choose avocados that yield slightly to pressure but aren’t mushy. If they aren’t ripe yet, leave them at room temperature to ripen, and don’t rush them in the microwave!
-
Ripe Mango
- Sweet and juicy mango complements the crab perfectly, adding an inviting tropical flavor. Look for mangoes that are slightly soft but not overripe. If you can’t find fresh mango, try using frozen mango chunks (just thaw before using)—canned mango works in a pinch, too!
-
Fresh Lime Juice
- Fresh lime juice adds acidity to balance the richness of the crab and avocado. You can substitute with lemon juice for a different citrus twist, but fresh is always best!
-
Fresh Cilantro
- A vital herb in this dish! Cilantro brings a freshness that elevates all the flavors. If you’re not a fan of cilantro, try swapping it for fresh parsley for a milder flavor.
-
Olive Oil
- Extra virgin olive oil here enhances the vinaigrette’s flavor; it’s also good for your heart! If you want a different taste, try using avocado oil or coconut oil for a richer taste.
-
Honey or Agave Syrup
- Just a bit of sweetness to balance the tartness of the lime and the savory crab. Maple syrup is a nice swap if you’re looking for an alternative sweetener.
-
Salt and Pepper
- Essential for seasoning! I recommend using kosher salt for cooking—it offers more control over how much you’re using.
Step-by-Step Instructions
Let’s get cooking! Follow these steps, and you’ll have stunning Crab & Avocado Towers on the table in no time.
-
Prepare the Vinaigrette:
- In a small bowl, whisk together 1/4 cup of fresh lime juice, 1/4 cup of olive oil, and 1 tablespoon of honey (or agave syrup). Add salt and pepper to taste.
- Chef Tip: Adjust the sweetness of the vinaigrette by adding more honey or lime juice until it tastes perfectly balanced. This is your flavor guide—trust your instincts!
-
Prepare the Ingredients:
- In a medium bowl, gently toss 1 cup of fresh lump crab meat with half of the vinaigrette. Add salt and pepper to taste, and set aside.
- Memory Hack: Be sure not to break up the crab too much—you want those lovely lumps intact!
-
Avocado Layering:
- Scoop the flesh of 2 ripe avocados into another bowl and mash them lightly with a fork. Keep some texture—this isn’t guacamole!
- Chef Insight: Add a splash of lime juice to prevent browning and keep that vibrant green color.
-
Prepare the Mango:
- Peel and dice 1 ripe mango into small cubes.
- Adding Depth: You could toss the mango with a squeeze of lime juice, cilantro, and a pinch of salt for an extra flavor pop.
-
Assembly Time:
- Line a ring mold (or a small bowl) with plastic wrap for easy removal. Start by adding a layer of mashed avocado. Pack it tightly at the bottom.
- Chef Hack: Wetting your fingers or the back of a spoon makes it easier to smooth out the layers!
-
Next Layer:
- Add a layer of the seasoned crab, gently pressing down to keep it compact.
- Pro Tip: Keep the layers clear and distinct to create that beautiful tower look—presentation is everything!
-
Top it Off:
- Finally, finish with a layer of diced mango on top.
- Carefully remove the mold by lifting the plastic wrap and letting your tower slide onto the plate.
-
Drizzle and Garnish:
- Drizzle the remaining lime-cilantro vinaigrette over each tower and garnish with fresh cilantro leaves.
- Final Touch: You can even add thinly sliced radishes or microgreens for a trendy garnish.
Serving Suggestions
These Crab & Avocado Towers make an eye-catching centerpiece for your table! Serve them on chilled plates to keep them fresh and cool, and feel free to offer more of that zesty vinaigrette on the side. This dish pairs beautifully with crispy tortilla chips or lightly toasted baguette slices—perfect for scooping up every last bite!
Recipe Variations
Want to switch things up? Here are some creative alternatives to explore:
-
Spicy Twist: Add diced jalapeños to the avocado layer or a dash of sriracha to the vinaigrette for a spicy kick.
-
Substitute Proteins: Try swapping crab for seared shrimp or even diced cooked chicken for a different take.
-
Veggie Versions: Layer the towers with roasted vegetables like zucchini, cherry tomatoes, or artichokes for a vegetarian option.
-
Fruity Delight: Incorporate other fruits like kiwi or pineapple in the layers for an explosion of flavors.
-
Gluten-Free Option: Serve the towers over a bed of mixed greens instead of on bread for a gluten-free meal.
Chef’s Notes
This recipe has been a crowd-pleaser since the day I first tried it. I fondly remember the first time I plated these up for my friends—the looks on their faces were priceless! It seems like the simpler, fresher ingredients shine through and make anyone excited about cooking. It was then I realized how food can transport us back to memories, places, and people.
Whenever I make these towers, I feel like I’m at the beach again, with that warm sun and ocean air. And trust me, even the tiniest of mishaps in the kitchen—like a slipped crab or a soft avocado—can turn into funny stories, so just roll with it. If nothing else, your creativity in the kitchen only gets better with every attempt!
FAQs and Troubleshooting
1. What can I do if my avocados aren’t ripe?
If your avocados aren’t ripening quickly enough, place them in a paper bag, and they should ripen within a day or two. Want to use them right now? Try mixing with a splash of lime juice and some diced tomatoes for a chunky dip instead.
2. What if I can’t find lump crab?
No worries at all! You can use canned crab—just make sure to drain it thoroughly, or substitute with shredded cooked chicken for a different protein hit.
3. Can I make this ahead of time?
Absolutely! You can prepare the vinaigrette and layer your towers a few hours in advance. Just cover with plastic wrap and store them in the fridge. Serve fresh out of the fridge for a delightful chill contrast!
4. The avocado turned brown! How can I prevent that?
To keep the avocado from browning, minimize its exposure to air by covering tightly with plastic wrap or adding lime juice directly to the avocado mash. The acid will help slow down oxidation!
Nutritional Info
For those of you counting calories or just curious, here’s a rough estimate per serving of Crab & Avocado Tower (serves 2):
- Calories: 360
- Protein: 20g
- Fat: 28g
- Carbohydrates: 15g
- Fiber: 7g
And there you have it, lovely folks! Crab & Avocado Towers— a celebration of freshness and comfort, all served in delightful layers. I hope you find as much joy in preparing and sharing this dish with your loved ones as I do. Happy cooking, and remember to keep your apron a little messy; that’s where the magic happens!
Print
Crab & Avocado Towers with Mango and Lime-Cilantro Vinaigrette
- Total Time: 15 minutes
- Yield: 2 servings 1x
- Diet: Gluten-Free
Description
A vibrant and visually stunning dish that layers creamy avocado, succulent crab, and zesty mango in a delightful presentation.
Ingredients
- 1 cup Fresh Lump Crab Meat
- 2 Ripe Avocados
- 1 Ripe Mango
- 1/4 cup Fresh Lime Juice
- 1/4 cup Olive Oil
- 1 tablespoon Honey or Agave Syrup
- Salt and Pepper to taste
- Fresh Cilantro for garnish
Instructions
- Prepare the Vinaigrette: In a small bowl, whisk together 1/4 cup of fresh lime juice, 1/4 cup of olive oil, and 1 tablespoon of honey (or agave syrup). Add salt and pepper to taste.
- Prepare the Ingredients: In a medium bowl, gently toss 1 cup of fresh lump crab meat with half of the vinaigrette. Add salt and pepper to taste, and set aside.
- Scoop the flesh of 2 ripe avocados into another bowl and mash them lightly with a fork.
- Peel and dice 1 ripe mango into small cubes.
- Line a ring mold with plastic wrap for easy removal. Start by adding a layer of mashed avocado.
- Add a layer of the seasoned crab, gently pressing down to keep it compact.
- Finish with a layer of diced mango on top.
- Drizzle the remaining lime-cilantro vinaigrette over each tower and garnish with fresh cilantro leaves.
Notes
Serve on chilled plates for best presentation. Pair with crispy tortilla chips or toasted baguette slices.
- Prep Time: 15 minutes
- Cook Time: 0 minutes
- Category: Appetizer
- Method: No-cook
- Cuisine: Seafood
Nutrition
- Serving Size: 1 serving
- Calories: 360
- Sugar: 12g
- Sodium: 250mg
- Fat: 28g
- Saturated Fat: 4g
- Unsaturated Fat: 22g
- Trans Fat: 0g
- Carbohydrates: 15g
- Fiber: 7g
- Protein: 20g
- Cholesterol: 60mg
Keywords: crab, avocado, mango, seafood, appetizer, healthy
Pineapple Cucumber Salad
The Ultimate Pineapple Cucumber Salad: A Taste of Summer
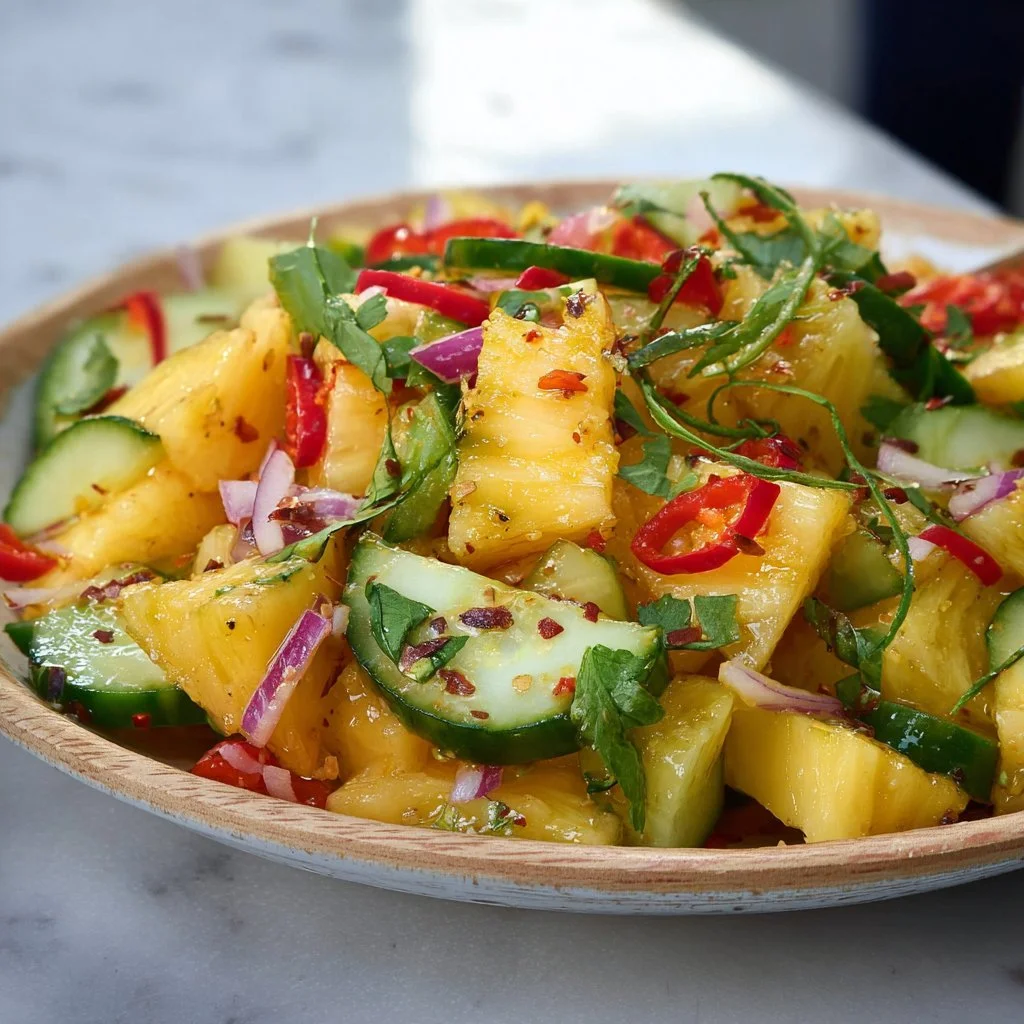
Hey there, kitchen enthusiasts! I’m so glad you decided to join me today in exploring a refreshing and vibrant dish that’s perfect for those warm summer days: Pineapple Cucumber Salad! The combination of sweet, juicy pineapples and crunchy, crisp cucumbers creates a flavor explosion that’s not only delicious but also incredibly simple to whip up. This salad is a delightful way to showcase the bounties of summer, and it brings sunshine to any meal.
Whether you’re hosting a backyard BBQ, looking for a quick dish to accompany grilled proteins, or just in need of a refreshing snack, this Pineapple Cucumber Salad has got you covered. What I love about this salad is its versatility; it can be a side dish, a main course (the kind you make when you’re too hot to cook), or a picnic staple that will impress your friends. Trust me, once you dig into this delightful mix, you’ll want to share it with everyone!
The star of the show here is the pineapple, of course. It adds that sweet tropical flair that we all crave during the hotter months. But let’s not forget about our cool friend, the cucumber! Together, they create a symphony of flavors and textures that’s simply irresistible.
As we dive into this recipe, I invite you to join me on a culinary journey filled with love, warmth, and a sprinkle of fun. Grab your apron, and let’s get cooking!
Personal Story
I’ll never forget the first time I made this Pineapple Cucumber Salad. It was a hot summer afternoon, and I was trying to impress my friends for our annual cookout. The sun was shining, and I could already smell the smoky aroma of the grill mingling with the gentle ocean breeze wafting in through my kitchen window.
As I diced the pineapple and sliced the cucumbers, memories flooded back of homemade salads my grandmother used to make during family gatherings. She had this magical way of making healthy food taste absolutely divine. I recalled spending afternoons in her garden, picking ripe cucumbers and sun-warm tomatoes, harvesting the ingredients to toss into her famous salad.
Inspired by those nostalgic moments, I decided to go a bit off-script and add elements of sweetness and zing to the dish. A little adventure never hurt anyone, right? That decision turned out to be a crowd-pleaser! As I brought the colorful bowl to the patio, I saw the smiles light up my friends’ faces, and we all gathered ’round, sharing stories, laughter, and, of course, hearty bites of that spectacular salad.
From that day on, this Pineapple Cucumber Salad has found its way into my heart and kitchen more times than I can count. It’s not just a recipe; it’s a connection to my roots, my family, and the joy of bringing people together around the table.
Ingredients
Let’s chat about what you’ll need for this vibrant salad! Below is the list of ingredients and quick tips to inspire your creations.
-
Fresh Pineapple: About 2 cups, diced. Choose a ripe pineapple; the sweeter, the better! If fresh isn’t available, canned pineapple works, but make sure it’s packed in juice, not syrup.
-
Cucumbers: 2 medium-sized. English cucumbers have fewer seeds and a thinner skin, but any cucumber will do! You can also use pickling cucumbers for a crunchier texture.
-
Red Bell Pepper: 1 medium-sized, diced. This adds a pop of color and sweetness! Feel free to swap it for yellow or orange bell peppers for a different flavor profile.
-
Red Onion: ½ small, finely chopped. For a milder flavor, soak the onions in cold water for 10 minutes before adding them to the salad.
-
Fresh Cilantro: ¼ cup, chopped. Cilantro adds freshness that brightens the dish! If you’re not a fan of cilantro, fresh parsley or basil can provide a delightful alternative.
-
Lime Juice: Juice of 1 lime. This will add acidity and balance out the sweetness! You can also use lemon juice if lime is unavailable.
-
Olive Oil: 2 tablespoons. Adds richness and helps meld the flavors together. Feel free to use avocado oil for a different twist.
-
Salt and Pepper: To taste. Enhances flavors; start with a pinch of each and adjust according to preference.
Step-by-Step Instructions
Now that we have our vibrant ingredients, let’s dive into the cooking process!
-
Prep Your Ingredients: Start by giving everything a good wash. Use a vegetable brush to scrub the cucumbers. For the pineapple, cut off the top and base, then stand it up and slice off the skin in strips. This step can get a little messy, but the joy comes from the fresh smell filling your kitchen!
-
Chop the Pineapple: Once your pineapple is peeled and cored, cut it into bite-sized chunks. The trick for the perfect size? Aim for pieces that are about the same size as your cucumber chunks, so each bite has a delightful mix of flavors.
-
Slice the Cucumbers: Next, for the cucumbers, if using an English cucumber, simply slice them in half lengthwise and then chop into crescents. If you’re using a regular cucumber, you can peel them if you like, but the skin holds a lot of nutrients and crunch!
-
Bell Pepper and Onion: Dice your red bell pepper and chop the red onion. Remember, the smaller the dice, the more evenly the flavors will blend. And don’t hesitate to taste as you go. Cooking is all about adjusting flavors to what you love!
-
Mix It All Together: In a large bowl, combine the pineapple, cucumbers, bell peppers, and onions. Now, here’s a little chef hack: to ensure everything is evenly mixed, use your hands to toss the ingredients gently. It’s fun, and you can feel the textures coming together beautifully!
-
Dress It Up: In a small bowl, whisk together the lime juice, olive oil, salt, and pepper. Drizzle this dressing over your vibrant mix, and voilà! You’ve just transformed your salad into a flavorful delight. Feel free to taste and adjust the lime juice or seasoning as needed.
-
Add Freshness: Finally, sprinkle chopped cilantro over the top and give it another light toss to incorporate all those zesty flavors. Your kitchen should smell absolutely divine right now!
-
Chill and Serve: Let your salad sit in the refrigerator for about 15 minutes before serving. This step allows the flavors to marinate and mingle. If you’re in a hurry, you can skip it, but trust me, it’s worth the wait!
Serving Suggestions
Now that you have your Pineapple Cucumber Salad ready, let’s talk about how to serve it up! Transfer it into a beautiful serving bowl or individual cups for a stylish touch. Feel free to garnish with a few extra sprigs of cilantro or slices of lime for that pops of color. Pair it with grilled chicken, fish, or tacos for a lovely meal, or enjoy it on its own for a light lunch.
Recipe Variations
Here are some fun twists you can add to this salad to keep things interesting:
-
Add Avocado: Dice up some ripe avocado for a creamy texture and extra healthy fats.
-
Spicy Kick: Toss in some minced jalapeño for those who enjoy a bit of heat.
-
Add Fruits: Consider mixing in mango or strawberries for a delightful fruity twist.
-
Protein Power: For a more filling meal, add canned chickpeas or cooked quinoa for protein.
-
Nutty Crunch: Sprinkle toasted nuts, like slivered almonds or cashews, on top for a satisfying crunch!
Chef’s Notes
One of the things I adore about this Pineapple Cucumber Salad is its ability to evolve! Over the years, I’ve experimented with endless variations, swapping out ingredients depending on the season or what I’ve had lingering in my fridge. I once made a version using grilled pineapple, which gave it an incredible smoky flair that stole the show at a summer party.
And I still chuckle when I think of that one time I accidentally added way too much lime juice. Instead of tossing the entire batch, I transformed it into a tangy dressing for some fish tacos instead. Sometimes mishaps lead to delicious discoveries! Trust me; don’t be afraid to make it your own and mix things up!
FAQs and Troubleshooting
1. Can I make this salad ahead of time?
Yes! You can prepare the salad a few hours in advance and store it in the refrigerator. Just be cautious with incredibly juicy fruits like pineapple, as they may release water over time. If you prepare it too far in advance, you might want to add the dressing closer to serving!
2. What if I don’t like cilantro?
No worries! Substitute with fresh parsley, basil, or even mint for a herbaceous flair that complements the sweetness of the pineapple.
3. How do I store leftovers?
Seal any leftovers in an airtight container in the fridge. This salad is best eaten within 1-2 days when the ingredients are still fresh and crispy.
4. Can I freeze this salad?
While I wouldn’t recommend freezing this salad due to the high water content in cucumbers and pineapples (they can turn mushy when thawed), you can freeze individual components (like pineapple) and prepare a fresh salad later!
Nutritional Info
Here’s a quick overview of the nutritional benefits of our Pineapple Cucumber Salad (per serving):
- Calories: 140
- Protein: 2g
- Carbohydrates: 15g
- Dietary Fiber: 3g
- Sugars: 9g
- Fats: 8g
(Values may vary based on specific ingredient brands and quantities.)
And just like that, you’ve created a delicious Pineapple Cucumber Salad full of flavor and a little bit of sunshine! Thank you for joining me on this culinary adventure. I can’t wait to hear how it turns out for you. Remember, the kitchen is always a place for creativity, so feel free to experiment and share the love. Happy cooking, friends! 🍍🥒❤️
Print
Ultimate Pineapple Cucumber Salad
- Total Time: 15 minutes
- Yield: 4 servings 1x
- Diet: Vegetarian
Description
A refreshing and vibrant salad that combines sweet pineapples and crunchy cucumbers, perfect for summer gatherings.
Ingredients
- 2 cups Fresh Pineapple, diced
- 2 medium Cucumbers
- 1 medium Red Bell Pepper, diced
- ½ small Red Onion, finely chopped
- ¼ cup Fresh Cilantro, chopped
- Juice of 1 Lime
- 2 tablespoons Olive Oil
- Salt and Pepper, to taste
Instructions
- Prep your ingredients by washing and preparing them.
- Chop the pineapple into bite-sized chunks.
- Slice the cucumbers into crescents.
- Dice the red bell pepper and chop the red onion.
- Mix the pineapple, cucumbers, bell peppers, and onions in a bowl.
- Dress the salad with a mixture of lime juice, olive oil, salt, and pepper.
- Add chopped cilantro and toss gently to combine.
- Chill in the refrigerator for about 15 minutes before serving.
Notes
Feel free to add variations like avocado, jalapeño, or nuts for extra flavor and texture.
- Prep Time: 15 minutes
- Cook Time: 0 minutes
- Category: Salad
- Method: Mixing
- Cuisine: Fusion
Nutrition
- Serving Size: 1 serving
- Calories: 140
- Sugar: 9g
- Sodium: 100mg
- Fat: 8g
- Saturated Fat: 1g
- Unsaturated Fat: 7g
- Trans Fat: 0g
- Carbohydrates: 15g
- Fiber: 3g
- Protein: 2g
- Cholesterol: 0mg
Keywords: salad, summer, pineapple, cucumber, healthy
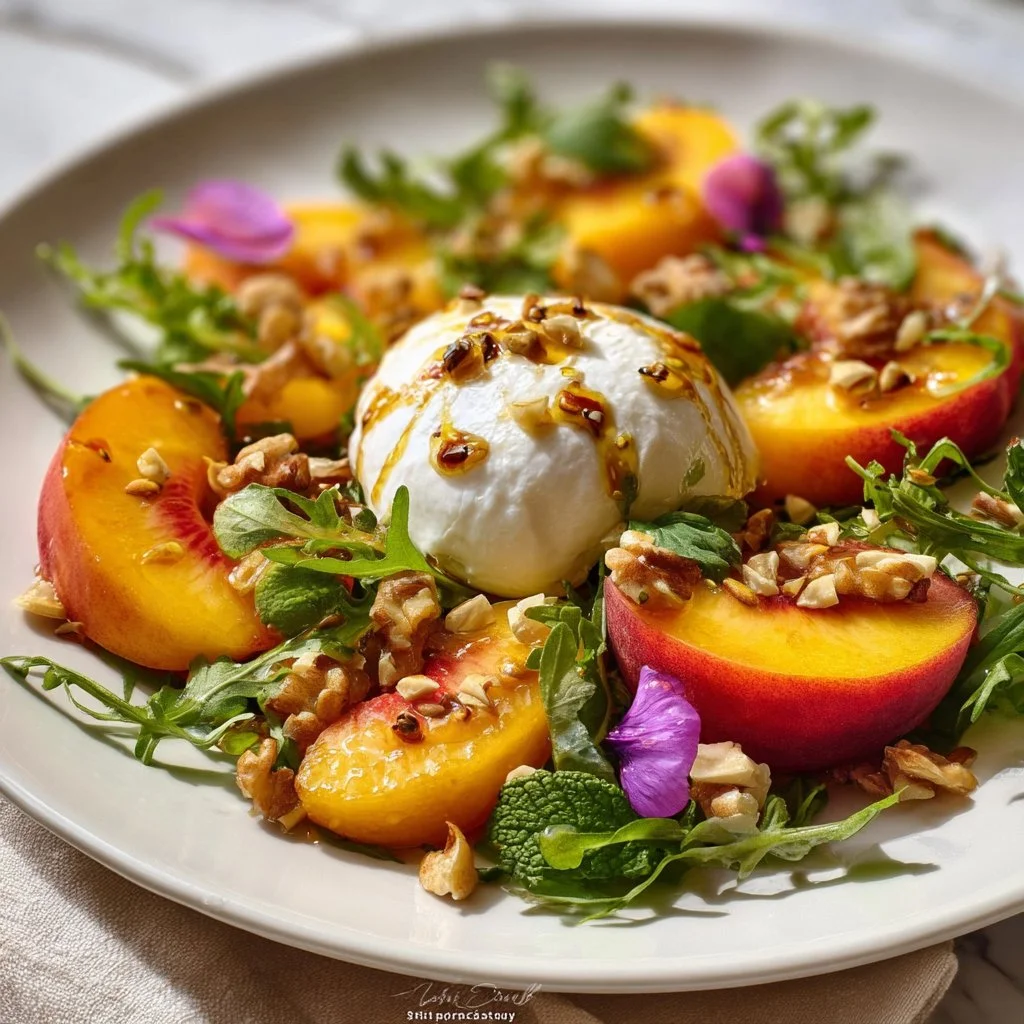
Peach Burrata Salad
Peach Burrata Salad: A Culinary Love Story
Welcome to another delicious adventure in my kitchen! Today, we’re diving into a dish that beautifully balances the sweetness of ripe summer peaches with the creamy indulgence of burrata cheese. This Peach Burrata Salad is the epitome of what summer cooking should be—simple, fresh, and bursting with flavor. It’s the kind of dish that’s perfect for a laid-back lunch on the patio, a chic dinner party starter, or even a casual picnic with friends.
Picture this: a sunny afternoon, the air fragrant with the smell of freshly cut grass. You’re gathered with friends, laughing and sipping on ice-cold lemonade. As you chat, someone brings out a vibrant, colorful bowl filled with the juiciest peaches you can imagine, drizzled with extra virgin olive oil and topped with velvety burrata. Just as the first bite hits your palate, the world seems to slow down, and you can’t help but smile as the flavors dance on your tongue. That’s the kind of magic I want to capture today, and trust me, it’s easier to create than you might think!
This salad is also a fantastic way to showcase the fleeting nature of summer produce. Ripe peaches are a treasure that deserves to shine in all their juicy glory, and burrata cheese? Oh, it’s like a creamy hug for your taste buds. Plus, this dish is easily customizable; you can toss in some greens, add a drizzle of balsamic reduction, or sprinkle some nuts for that delightful crunch. The goal here is to enjoy the process while creating something that not only feeds the body but also nourishes the soul.
So, grab your apron and let’s get started on this gorgeous Peach Burrata Salad! With just a handful of ingredients and a few simple steps, you’ll be on your way to impressing everyone at the table—your friends, your family, or just yourself on a cozy night in!
Personal Story
Every dish I create has a story, and this Peach Burrata Salad holds a particularly special place in my heart. It all began during a spontaneous summer gathering at my best friend Clara’s house. The sun was setting, painting the sky in hues of pink and orange, and we cooked up a storm in her kitchen. Clara, an absolute wizard with fresh ingredients, decided that we needed something light yet decadent for our dinner.
As we rummaged through her fridge, she pulled out a creamy ball of burrata and a few ripe peaches. I remember her saying, “Olivia, this is going to be incredible!” At first, I was skeptical. I’d never thought of combining peaches with cheese, but oh, how wrong I was! The dish was a revelation—all the flavors melded together so beautifully.
We drizzled it with balsamic glaze and sprinkled it with a few crunchy nuts for texture and—just like that—our simple creation became one of our favorite summer memories. Every bite reminded me of long summer days filled with laughter and good company. Now, whenever I make this salad, I’m transported back to that magical evening, and it seems like the perfect way to honor those sweet moments with friends and family.
Ingredients
Here’s your shopping list of simple yet vibrant ingredients you’ll need to whip up this delightful Peach Burrata Salad:
-
Ripe Peaches (4-5): Choose soft, juicy peaches that yield slightly when gently pressed. If they’re not in season, you can substitute with nectarines for a similar taste.
-
Burrata Cheese (8 oz): This creamy, dreamy cheese is the star of the show! If you can’t find burrata, fresh mozzarella is a great alternative, though it won’t have the same creamy texture.
-
Arugula or Mixed Greens (4 cups): These greens add a peppery bite that complements the sweetness of the peaches. Feel free to swap in spinach or kale for a milder flavor profile.
-
Extra Virgin Olive Oil (2-3 tablespoons): Invest in a quality olive oil; it makes all the difference! If you’re feeling adventurous, try a flavored oil like basil or chili.
-
Balsamic Glaze (optional): A drizzle of balsamic reduction adds a tart sweetness to balance the dish beautifully. If you don’t have glaze, balsamic vinegar works, too—just use it sparingly.
-
Salt and Pepper: Simple seasonings that are essential! Use flaked sea salt and freshly cracked pepper for the best flavor, but any of your favorite seasonings will do.
-
Pistachios or Walnuts (½ cup, optional): A handful of nuts adds a delightful crunch. If you’re nut-free, consider pumpkin seeds for some texture!
Step-by-Step Instructions
Now that you’ve gathered your lovely ingredients, let’s dive into the cooking process! Follow these steps, and you’ll be enjoying a beautiful dish in no time.
Step 1: Prepare the Peaches
Start by washing the peaches under cold water to remove any dirt or residue. Next, slice the peaches in half, removing the pit. Then, cut each half into wedges or slices. If you’re feeling adventurous, you can grill them for a few minutes to enhance their flavor, but fresh peaches will taste divine, too! The key here is to work with ripe peaches so you can savor that juicy sweetness.
Step 2: Arrange Your Greens
Take a large platter or bowl and spread out the arugula or mixed greens as the base. Make sure to create an even layer; this will not only make your salad pretty but also ensure every bite gets a bit of that peppery goodness. As a fun chef hack, try to position the greens in a slight mound—the height will give your salad an impressive look!
Step 3: Add the Burrata
Now for the star of the show: burrata cheese! Gently tear or cut the burrata into pieces and place them evenly on top of the greens. The cheese’s creaminess is going to melt into the salad a bit, and trust me, that’s a delicious thing! You can sprinkle some salt and cracked pepper over the cheese to enhance the flavor.
Step 4: Layer on the Peaches
Carefully place the peach slices over the burrata and greens. Take a step back and admire how gorgeous your salad already looks! This dish is all about the visual appeal, so don’t be shy—feel free to arrange the peaches artistically.
Step 5: Drizzle with Olive Oil and Balsamic
Drizzle the extra virgin olive oil over the entire salad, followed by a light drizzle of balsamic glaze if you’re using it. This is where the flavor explosion happens! Just a little goes a long way, enhancing the freshness of the peaches and cheese.
Step 6: Sprinkle on the Nuts
Finally, for the finishing touch, sprinkle the chopped pistachios or walnuts over the top. This adds a wonderful crunch that complements the creamy burrata and the soft peaches.
Step 7: Toss and Serve
You can serve the salad as a composed dish (as described), where everyone helps themselves, or if you prefer, you can give everything a gentle toss just before serving. Either way, you’re in for a treat!
Serving Suggestions
To serve this Peach Burrata Salad, present it on a large, beautiful platter to share with your guests, or in individual bowls for a more personal touch. Pair it with a light white wine, like a Sauvignon Blanc, which complements the sweetness of the peaches and the creaminess of the burrata perfectly. This salad also goes well alongside grilled meats or as a refreshing starter at any summer gathering!
Recipe Variations
-
Herb-Infused: Toss in fresh basil or mint for an added burst of flavor that elevates your salad.
-
Add Protein: Grilled chicken, shrimp, or even chickpeas make for a hearty addition, perfect for a full meal.
-
Fruit Swaps: Try swapping peaches for strawberries or cherries in different seasons for a refreshing twist.
-
Nutty Delight: Experiment with different nuts, such as almond slivers or candied pecans, for an unexpected crunch.
-
Dairy-Free Option: If you’re looking for a dairy-free alternative, try using cashew cheese or a plant-based mozzarella.
Chef’s Notes
This Peach Burrata Salad has become a staple for me; it’s so versatile and can easily evolve based on what you have on hand. I remember experimenting with this recipe at a potluck, bringing it as a last-minute dish. Little did I know, it would steal the show! It’s one dish that keeps surprising and delighting everyone.
And let’s talk about those peach-induced kitchen disasters I’ve had. One summer, I tried to make jam with overripe peaches, and let’s just say it was more of a syrupy disaster than a jar of jam! Lesson learned: stick to fresh peaches for your salads, and save the overripe ones for baking or cooking. Despite my mishaps, each adventure teaches me something new—and that’s the beauty of cooking!
FAQs and Troubleshooting
Q: What if my peaches aren’t ripe enough?
A: If you can’t find juicy, ripe peaches, you can speed up the ripening process by placing them in a paper bag at room temperature for a day or two. Alternatively, you can roast them in the oven for a few minutes to bring out their sweetness!
Q: Can I prepare this salad ahead of time?
A: While the salad is best enjoyed fresh, you can slice the peaches and prepare the greens a few hours in advance. Just wait to add the burrata and drizzle the dressing until you’re ready to serve.
Q: How long will leftovers last?
A: Generally, this salad is best eaten the same day it’s made, but if you have leftovers, store them in an airtight container in the fridge for up to 2 days. The textures might change slightly, but the flavors will still be delicious!
Q: What if I can’t find burrata cheese?
A: No worries! You can always substitute burrata with fresh mozzarella or goat cheese. Each offers a different flavor profile but will still complement the peaches beautifully!
Nutritional Info (Optional)
If you’re curious, here’s a rough nutritional breakdown per serving (with walnuts):
- Calories: 210
- Protein: 7g
- Fat: 15g
- Carbohydrates: 22g
- Fiber: 2g
This is a healthy, satisfying salad packed with nutrients, and it makes for a great light meal or side dish!
So there you have it, a Peach Burrata Salad that not only delights your taste buds but also fills your soul with summer joy. Get ready to impress your friends and family, and don’t forget to tell them the story behind this delightful dish! Enjoy every delicious bite!
Print
Peach Burrata Salad
- Total Time: 15 minutes
- Yield: 4 servings 1x
- Diet: Vegetarian
Description
A delightful summer salad that combines ripe peaches with creamy burrata cheese, enhanced by fresh greens and drizzled with olive oil and balsamic glaze.
Ingredients
- 4–5 Ripe Peaches
- 8 oz Burrata Cheese
- 4 cups Arugula or Mixed Greens
- 2–3 tablespoons Extra Virgin Olive Oil
- Balsamic Glaze (optional)
- Salt and Pepper to taste
- ½ cup Pistachios or Walnuts (optional)
Instructions
- Prepare the peaches by washing them and slicing them into wedges or pieces.
- Arrange the arugula or mixed greens on a large platter.
- Add the burrata cheese pieces on top of the greens.
- Layer the peach slices over the burrata and greens.
- Drizzle olive oil and balsamic glaze over the entire salad.
- Sprinkle the chopped nuts over the top for added crunch.
- Toss the salad gently before serving, or serve as a composed dish.
Notes
Feel free to swap peaches for other fruits like strawberries or cherries depending on the season. For a dairy-free version, use cashew cheese or plant-based mozzarella.
- Prep Time: 15 minutes
- Cook Time: 0 minutes
- Category: Salad
- Method: No Cook
- Cuisine: Italian
Nutrition
- Serving Size: 1 serving
- Calories: 210
- Sugar: 8g
- Sodium: 200mg
- Fat: 15g
- Saturated Fat: 5g
- Unsaturated Fat: 8g
- Trans Fat: 0g
- Carbohydrates: 22g
- Fiber: 2g
- Protein: 7g
- Cholesterol: 30mg
Keywords: salad, peach, burrata, summer, healthy, vegetarian
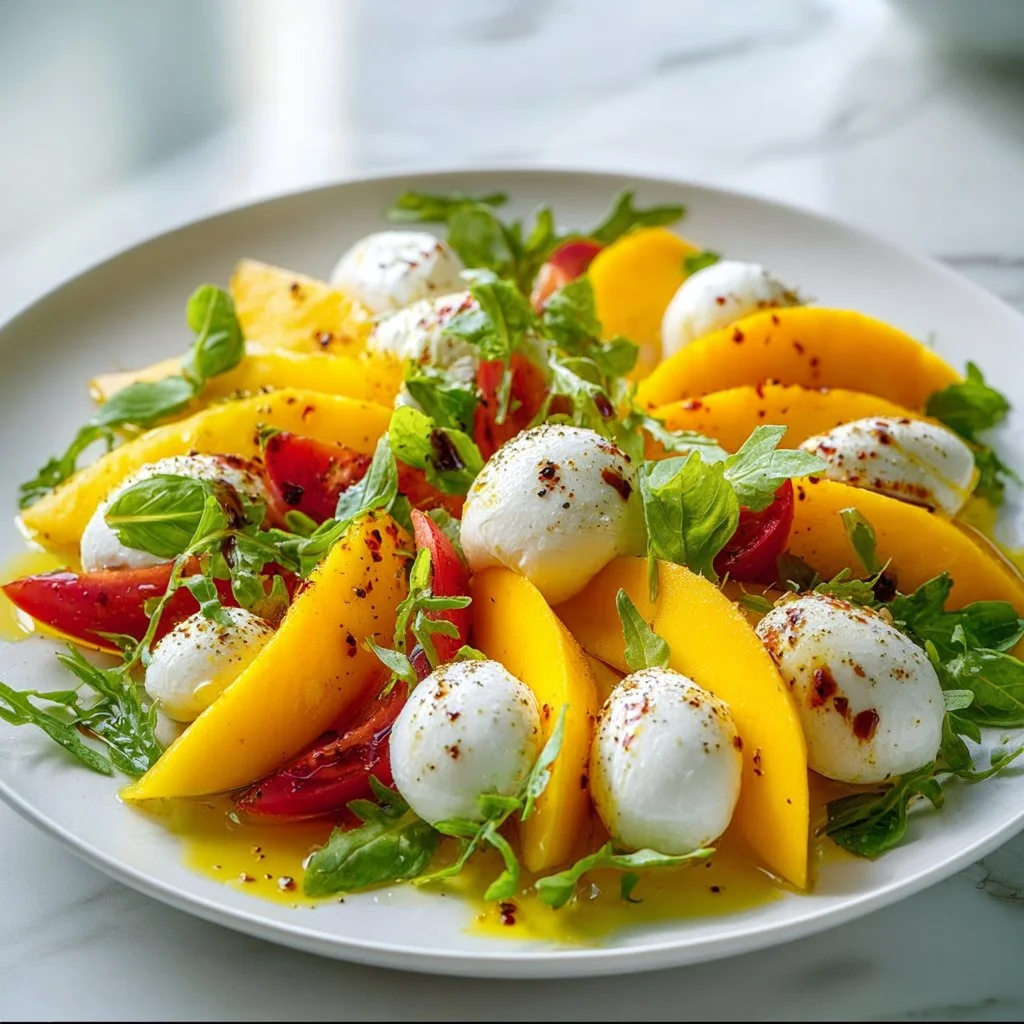
Mango-Mozzarella Salad
Refreshing Mango-Mozzarella Salad: A Burst of Flavors in Every Bite
Welcome back, my lovely food enthusiasts! Today, I’m excited to share a delightful recipe that will transport your taste buds straight to a sunny tropical paradise—Mango-Mozzarella Salad. Imagine this: ripe, juicy mangoes that drip with sweetness, perfectly paired with the creamy freshness of mozzarella, and balanced with vibrant herbs and a zesty dressing. It’s a harmony of flavors that feels like a sun-soaked picnic in your mouth!
This salad is one of those dishes that reminds me of carefree summer days spent outdoors, soaking in the sunshine and snacking on something light and refreshing. Whether you’re preparing a laid-back barbecue, a backyard gathering, or a light lunch, this Mango-Mozzarella Salad perfectly captures the essence of joy in cooking and sharing meals with loved ones.
Why is this recipe special to me? Well, it all started one summer afternoon when my dear friend Sarah and I decided to host a spontaneous picnic at the park. With a limited budget and a bit of creativity, we made this salad, using fresh produce from our local farmer’s market. The laughter, stories, and sandwiches we shared that day were dramatically enhanced by the sweet and savory notes of the salad. Ever since then, it’s been one of my go-to recipes for gatherings and potlucks.
So, grab your apron and let’s dive into this vibrant recipe that’s so easy to whip up, you might just find yourself making it every week!
Personal Story
I can still hear the sound of the birds chirping and the rustling leaves in the gentle breeze from that unforgettable summer day with Sarah. We had zero plans, but as true food lovers, we can never resist a trip to the farmer’s market. We filled our baskets with whatever caught our eyes—colorful bell peppers, fragrant herbs, and, of course, the most heavenly ripe mangoes we had ever laid our eyes on.
Back at my place, with only a few kitchen essentials, we decided to combine our treasures into a salad. As we sliced into the mango, the juicy aroma was intoxicating. We tossed together our offerings, and that first bite? Pure delight! The creaminess of mozzarella blending with the bursting sweetness of mango took me straight back to every joyful summer I had ever lived. It was a lightbulb moment; simplicity truly is the star of great cooking! Now, every time I make this salad, I’m reminded of that day, a celebration of friendship and the joy of home-cooked goodness.
Ingredients
Let’s get to the fun part—gathering our ingredients! Here’s what you’ll need to create this vibrant Mango-Mozzarella Salad:
-
2 ripe mangoes
Tip: Choose mangoes that yield slightly to gentle pressure; that means they’re ripe and juicy! If you can’t find ripe mangoes, you can substitute with peaches or nectarines. -
1 ball of fresh mozzarella
Chef Insight: Fresh mozzarella is soft, creamy, and a million times better than the pre-shredded kind. You can also use burrata for extra creaminess! -
1 cup cherry tomatoes
Substitution Tip: Feel free to use heirloom tomatoes or even sun-dried tomatoes if you’re in a pinch! -
1 small red onion
Chef Insight: Soak sliced onions in cold water for 10 minutes to mellow their flavor if they’re too pungent for your taste! -
Fresh basil leaves (about ¼ cup)
Recommendation: Use Thai basil for a slightly different flavor profile, or substitute with mint for a refreshing twist! -
Juice of 1 lime
Chef Hack: If you want more zing, add some lime zest too! -
3 tablespoons extra virgin olive oil
Tip: Choose a good quality olive oil—it makes a difference in flavor! -
Salt and pepper to taste
Suggestion: Sea salt or fleur de sel offers a delightful crunch—and don’t be shy with the pepper!
Step-by-Step Instructions
Let’s roll up those sleeves and get started on this mouthwatering salad! Follow these steps, and we’ll have a bowl of colorful flavor to enjoy in no time.
Step 1: Prepare the Mangoes
- Begin with your ripe mangoes. Stand each mango upright on a cutting board and carefully slice down the sides of the pit.
- Use a paring knife to score the flesh in a crisscross pattern, then scoop out the cube-shaped mango pieces with a spoon.
- Add the mango to a large mixing bowl, and let its juices mingle!
Tip: Rinse your hands after cutting mangoes to avoid sticky fingers!
Step 2: Slice the Cherry Tomatoes
- Grab your cherry tomatoes; slice them in half or quarters if they are on the larger side.
- Add those to the mixing bowl, allowing the juices from the tomatoes to play with the mango.
Chef Hack: If possible, choose a mix of colored cherry tomatoes for a stunning visual effect!
Step 3: Cut the Mozzarella
- Take your ball of fresh mozzarella and slice it into small bite-sized pieces or tear it into chunks for a rustic touch.
- Toss these delightful cheese bites into the bowl.
Pro Tip: Don’t throw away any of the liquid from the mozzarella! It’s delicious, so spoon it in for extra flavor!
Step 4: Red Onion Magic
- Slice the red onion thinly, as thick slices can overwhelm the salad.
- If you find the onion too pungent, soak the slices in cold water for about 10 minutes before adding them to the salad.
Tip: Methodically layering flavors is key! Add the onion right after the tomatoes to lock in flavors.
Step 5: Add Fresh Herbs
- Tear the fresh basil leaves and sprinkle them over the salad.
- Basil loves mango; trust me on this one!
Step 6: Dress It Up
- In a small bowl, whisk together the lime juice, olive oil, salt, and pepper until combined.
- Pour the dressing lovingly over the salad, ensuring everything gets a good, juicy bath.
Chef Hack: If you want an extra kick, add a pinch of chili flakes to the dressing for a subtle heat!
Step 7: Gently Toss and Serve
- Using a spatula, gently fold the mixture together to combine all those beautiful flavors.
- Serve immediately or let it sit for a few minutes to allow the ingredients to marinate!
Chef Note: If serving later, wait to dress the salad until just before serving to keep the ingredients fresh!
Serving Suggestions
This Mango-Mozzarella Salad is a splendid side dish for grilled meats or fish, or it can shine as a light main course. To plate, consider layering the salad ingredients in a clear serving bowl, showcasing the stunning colors. A light drizzle of balsamic reduction on top adds an elegant touch, and a sprinkle of additional basil can elevate the presentation. Don’t forget some crusty bread or tortilla chips for dipping!
Recipe Variations
Here are some creative twists to keep your Mango-Mozzarella Salad fresh and exciting:
- Add Avocado: For extra creaminess, toss in some ripe avocado cubes!
- Grill the Ingredients: Slightly char the mango and tomatoes on a grill for a smoky flair.
- Quinoa Base: To make it heartier, serve the salad over a mound of fluffy quinoa!
- Fiesta Style: Add black beans and corn for a fun South-of-the-Border vibe!
- Vegan Option: Substitute mozzarella with tofu or cashew cheese for a delicious plant-based version.
Chef’s Notes
Oh, the memories this salad brings back! I’ve experimented over the years, adding different ingredients to suit seasonal produce or my guests’ preferences. Sometimes, I even serve it with a spicy avocado dressing for a little twist! Cooking is about evolution; let your creativity run wild! And if a mess occurs, consider it a badge of honor—one of my favorite kitchen stories involved a mango explosion that had us giggling for days.
FAQs and Troubleshooting
-
How do I choose the perfect mango?
Look for mangoes that give slightly when you press them. They should have a fruity aroma near the stem area. If they’re overly firm, they may not be ripe yet. -
Can I make the salad ahead of time?
While the salad can be prepped in advance, I recommend adding the dressing just before serving to keep the freshness of the ingredients intact. -
What do I do if my mangoes are not sweet enough?
Drizzle a little honey or agave syrup over the salad to elevate the sweetness. You could also add a pinch of sugar to the dressing! -
How can I store leftovers?
Keep any leftover salad in an airtight container in the fridge for up to a day. Be aware that the ingredients may lose some texture, but the flavors will still be delicious!
Nutritional Info (Optional)
This Mango-Mozzarella Salad is not only delicious but offers nutritional benefits too! You’ll get:
- Rich vitamins from mangoes (Vitamin C, Vitamin A)
- Protein and calcium from mozzarella
- Healthy fats from olive oil
- Antioxidants and fiber from fresh vegetables
So there you have it: a refreshing Mango-Mozzarella Salad bursting with flavor and perfect for any occasion! I hope you enjoy making it as much as I do. Happy cooking, and let’s raise a toast to the simple joys of kitchen adventures! 🍽️
Print
Refreshing Mango-Mozzarella Salad
- Total Time: 15 minutes
- Yield: 4 servings 1x
- Diet: Vegetarian
Description
A delightful salad combining ripe mangoes and creamy mozzarella, perfect for summer gatherings.
Ingredients
- 2 ripe mangoes
- 1 ball of fresh mozzarella
- 1 cup cherry tomatoes
- 1 small red onion
- Fresh basil leaves (about ¼ cup)
- Juice of 1 lime
- 3 tablespoons extra virgin olive oil
- Salt and pepper to taste
Instructions
- Prepare the mangoes by slicing down the sides of the pit and scooping out cubes.
- Slice the cherry tomatoes in half and add them to the mixing bowl.
- Cut the fresh mozzarella into small bite-sized pieces and add them into the bowl.
- Slice the red onion thinly and soak in cold water if too pungent, then add to the salad.
- Add the fresh basil leaves over the salad.
- Dress the salad by whisking together lime juice, olive oil, salt, and pepper, then pour over the salad.
- Gently toss the mixture together to combine all the flavors.
Notes
Add avocado for creaminess, grill the ingredients for a smoky flavor, or serve over quinoa for a heartier dish.
- Prep Time: 15 minutes
- Cook Time: 0 minutes
- Category: Salad
- Method: Mixing
- Cuisine: Fusion
Nutrition
- Serving Size: 1 serving
- Calories: 250
- Sugar: 14g
- Sodium: 150mg
- Fat: 16g
- Saturated Fat: 4g
- Unsaturated Fat: 10g
- Trans Fat: 0g
- Carbohydrates: 24g
- Fiber: 3g
- Protein: 6g
- Cholesterol: 15mg
Keywords: mango, mozzarella, salad, summer recipe, vegetarian dish
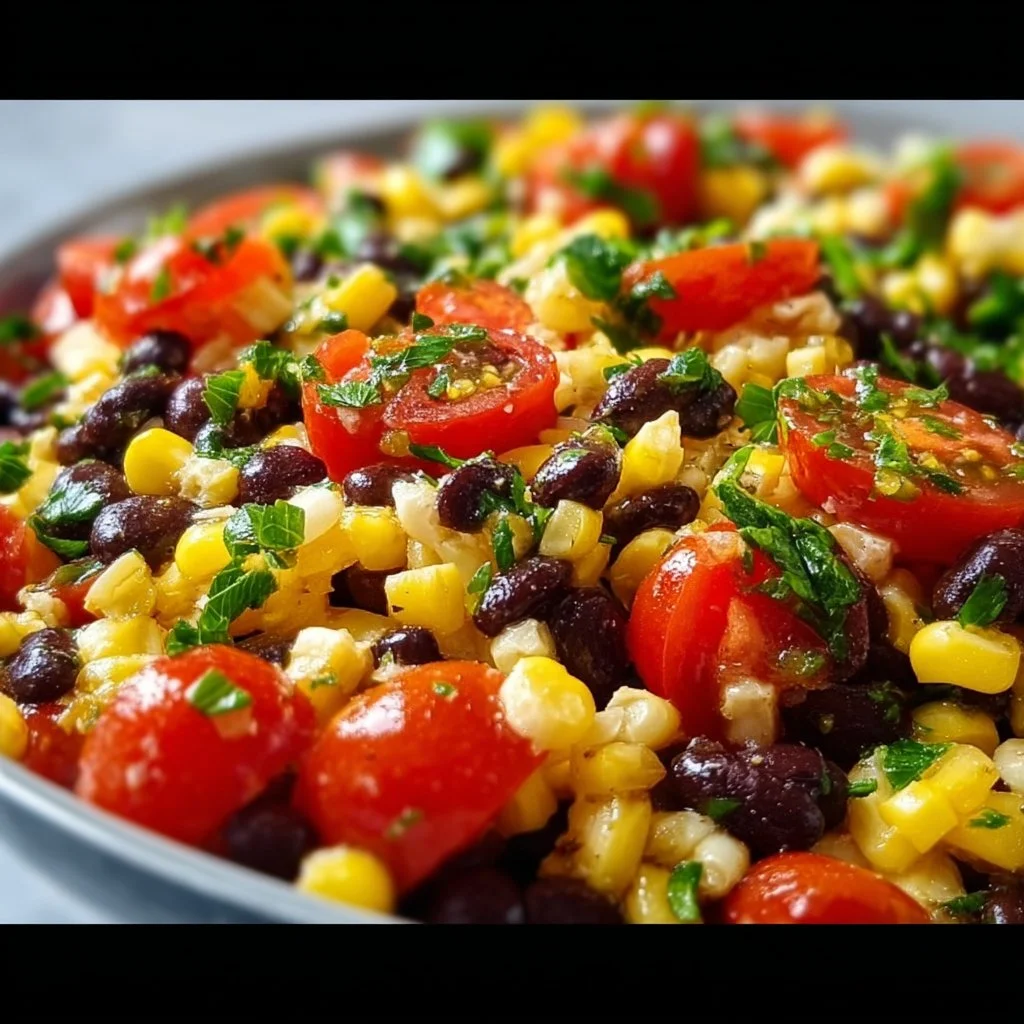
Corn and Black Bean Salad
The Perfect Corn and Black Bean Salad: A Flavorful Celebration of Freshness
Hey there, food lovers! Olivia Bennett here, excited to welcome you into my cozy kitchen again! Today, we’re diving into a vibrant dish that’s not only super easy to whip up but also packs a punch of flavor and nutrition: Corn and Black Bean Salad! This dish is perfect for lazy summer days, bustling backyard barbecues, or whenever you’re in the mood for something refreshingly delicious.
There’s nothing quite like the crunch of fresh corn and the earthy tones of black beans mingling together with a zesty lime dressing. This salad is not just a sidekick to your meals; it shines as the star of the show! Whip it up in just a few minutes, and you’ll have vibrant colors and bold flavors dancing on your palate, leaving you craving more.
I’ve made this salad countless times over the years, each time honed into a recipe that not only celebrates seasonal produce but also brings memories flooding back—like family dinners on the patio or sunny picnics at the park. Trust me, once you feel the warmth of fresh ingredients combined in this bowl, you’ll understand why it holds a special place in my heart.
So, grab your apron, and let’s prepare to create something beautiful together! All you need are a few simple ingredients and an adventurous spirit. Let’s get cooking!
Personal Story
I can still remember the first time I laid my eyes on a vibrant corn and black bean salad. It was a sultry summer day, and my family had gathered for a weekend barbecue in our backyard. My aunt—an incredible cook and a constant source of inspiration—brought this corn and black bean masterpiece to share.
As she tossed together the colorful ingredients, I was infatuated by the way she transformed humble ingredients into something that sparkled with life. The sounds of laughter and the sizzle of the grill filled the air, but it was that salad that captivated me. Each scoop was a burst of sweetness from the corn, the creaminess of the beans, and an explosion of zesty flavors from lime and cilantro. With each bite, it felt like a celebration not just of food but of family and love.
That summer day sparked my journey into the world of cooking, and ever since, I’ve never looked at a black bean or ear of corn the same way. I’ve tweaked my aunt’s recipe over the years, adding my own flair and experimentation. Now, I’m thrilled to share this beloved dish with you, hoping it brings you as much joy and satisfaction as it has for me.
Ingredients
Here’s what you’ll need to make this colorful salad:
-
Fresh Corn (3 ears)
Fresh corn is the star of this dish with its sweet crunch! If it’s out of season, feel free to use frozen corn—simply thaw and drain it. -
Black Beans (1 can or 1.5 cups cooked)
A great source of protein and fiber, black beans add earthiness to this salad. Opt for low-sodium canned beans to control salt levels— rinse and drain them before using to cut back on sodium! -
Red Bell Pepper (1, diced)
This sweet and crunchy veggie adds a pop of color and flavor. Substitute with yellow or orange bell peppers for a different take! -
Red Onion (1 small, finely chopped)
Adds depth and zing! If red onion is too strong for your taste, a sweet onion like Vidalia works beautifully, or even green onions for milder flavors. -
Fresh Cilantro (1/4 cup, chopped)
Brightens the salad with its fresh flavor. If you’re not a cilantro fan, parsley is a wonderful alternative that will still add freshness! -
Lime (1, juiced)
The magic ingredient that brings everything together with a zesty punch! Fresh is best, but if you have bottled lime juice, it’ll work in a pinch (use about 2 tablespoons). -
Olive Oil (2 tablespoons)
Adds richness and helps dress the salad. If you’re into bold flavors, try avocado oil for a nutty twist! -
Cumin (1 teaspoon)
Adds warmth and earthiness. If you want to switch it up, try smoked paprika for a different spin! -
Salt and Pepper (to taste)
Essential seasonings that elevate all the flavors.
Quick Chef Insights
Each ingredient in this salad plays a role, lending texture and flavor. The sweet corn pairs beautifully with bold beans while the crunchy veggies keep everything light and fresh. It’s a balanced dish that not only tastes amazing but also looks gorgeous!
Step-by-Step Instructions
Now that we have our ingredients ready, let’s dive into the cooking process!
1. Prepare the Corn
First things first—if you’re using fresh corn, shuck it! It’s surprisingly easy—simply peel back the husks and remove those pesky silk threads. To cook the corn, you have a couple of options:
- Boiling: Bring a large pot of water to a boil, add the corn (in the cob), and boil for about 4-6 minutes. Takes no time at all, and the corn will be perfectly tender!
- Grilling: For a smoky flavor, toss the husked corn directly onto a grill for about 10-15 minutes, turning occasionally until slightly charred. This adds a nice depth to the overall flavor profile of your salad.
2. Let’s Mix the Base
Once your corn is ready to go, allow it to cool for a few minutes before slicing the kernels off the cob. In a large mixing bowl, combine the fresh corn, rinsed black beans, diced bell pepper, finely chopped red onion, and cilantro. Give it a good toss so all those vibrant colors mingle together.
3. Dress to Impress
Now, let’s create that zesty dressing! In a small bowl, whisk together the lime juice, olive oil, cumin, salt, and pepper. Feel free to adjust to your taste—like increasing lime juice for extra zing or adding a sprinkle of chili powder for a kick. Drizzle this dressing over your salad and mix well—you want every ingredient coated in that zesty goodness.
4. Taste Test Time
Before you dig in, taste the salad! This is where you can make any final adjustments. A pinch more salt? Extra lime juice? Cooking is all about personalizing flavors, so make it your own!
5. Chill Out
For optimal results, let your salad sit in the refrigerator for at least 30 minutes. This time allows the flavors to meld together beautifully. If you’re short on time, no worries! You can serve it right away; it will still taste fantastic.
Serving Suggestions
To plate your gorgeous corn and black bean salad, consider serving it in a beautiful bowl that highlights its colorful nature. Pair it with tortilla chips for a fun appetizer, or serve it alongside grilled chicken or fish for a delicious and balanced meal. Because of its bright flavors, it also shines as a refreshing side dish to any barbecue spread.
Recipe Variations
Feeling adventurous? Here are some fun twists to make this salad your own:
- Avocado Bliss: Add diced avocado for a creamy texture and healthy fats.
- Spicy Kick: Toss in some diced jalapeños for that extra heat.
- Fruit Fusion: Add diced mango or pineapple for a sweet tropical twist.
- Cheesy Delight: Consider adding crumbled feta or cheddar cheese for extra richness.
Chef’s Notes
Over the years, my corn and black bean salad has evolved. Initially a quick summer side dish, it now holds a special place in my heart! It has been served at birthdays, BBQs, and family gatherings — always bringing people together. I’ve even made this as a filling for tacos or as a topping for baked sweet potatoes. Trust me, when life gives you fresh corn, make this salad!
FAQs and Troubleshooting
1. Can I make this salad ahead of time?
Absolutely! In fact, it tastes even better after sitting in the fridge for a few hours or overnight.
2. What if I don’t like black beans?
You can easily substitute with chickpeas or white beans; both will hold up nicely in the salad!
3. How long will leftovers last?
Stored in an airtight container, your salad will keep for about 3-4 days in the fridge.
4. Can I make it vegan?
This salad is already vegan! Just watch out for any non-vegan toppings or dressings you might consider adding.
Nutritional Info
While I won’t bore you with exact numbers, this salad is packed with protein and fiber, complements of the black beans, and is low in calories, thanks to the fresh veggies. Plus, it’s gluten-free, making it suitable for many dietary preferences.
And there you have it! A delicious and delightful Corn and Black Bean Salad that’s bursting with flavors, colors, and memories. So gather your friends and family, bring this dish to the table, and watch how it sparks joy and laughter! Happy cooking!
Print
The Perfect Corn and Black Bean Salad
- Total Time: 30 minutes
- Yield: 4 servings
- Diet: Vegan
Description
A vibrant and refreshing salad celebrating fresh corn and black beans with a zesty lime dressing.
Ingredients
- Fresh Corn (3 ears)
- Black Beans (1 can or 1.5 cups cooked)
- Red Bell Pepper (1, diced)
- Red Onion (1 small, finely chopped)
- Fresh Cilantro (1/4 cup, chopped)
- Lime (1, juiced)
- Olive Oil (2 tablespoons)
- Cumin (1 teaspoon)
- Salt and Pepper (to taste)
Instructions
- Prepare the Corn: Shuck the corn and cook by boiling for 4-6 minutes or grilling for 10-15 minutes until charred.
- Mix the Base: In a large bowl, combine corn, black beans, bell pepper, onion, and cilantro; toss.
- Dress to Impress: Whisk lime juice, olive oil, cumin, salt, and pepper in a bowl, then drizzle over the salad and mix.
- Taste Test Time: Adjust seasoning and dressing to your preference.
- Chill Out: Refrigerate for at least 30 minutes before serving to meld flavors.
Notes
For an extra kick, consider adding diced jalapeños or diced avocado for creaminess.
- Prep Time: 15 minutes
- Cook Time: 15 minutes
- Category: Salad
- Method: Mixing
- Cuisine: Mexican
Nutrition
- Serving Size: 1 serving
- Calories: 250
- Sugar: 3g
- Sodium: 200mg
- Fat: 10g
- Saturated Fat: 1g
- Unsaturated Fat: 9g
- Trans Fat: 0g
- Carbohydrates: 39g
- Fiber: 8g
- Protein: 10g
- Cholesterol: 0mg
Keywords: corn salad, black bean salad, summer salad, vegan recipes, healthy salad
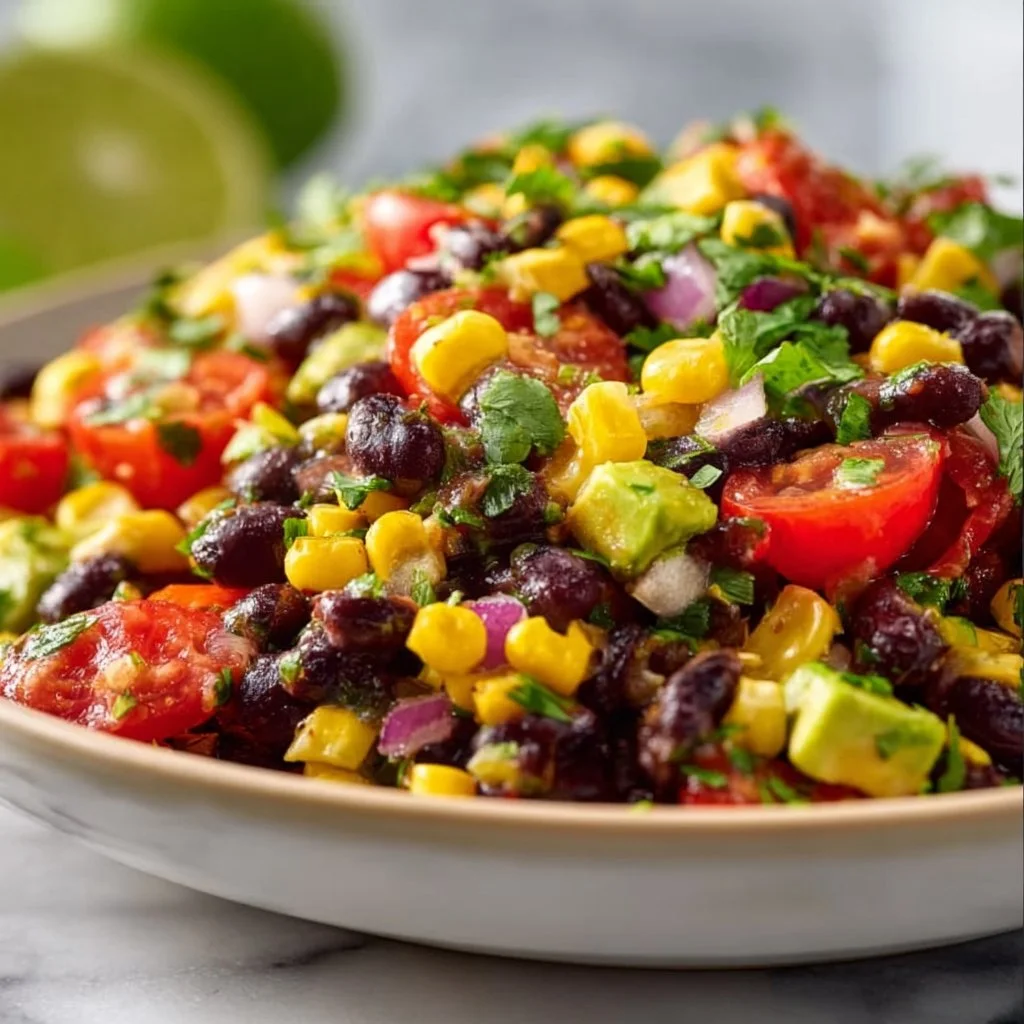
Southwest Black Bean & Corn Salad
Southwest Black Bean & Corn Salad
Hello, my fellow food lovers! Welcome back to my cozy kitchen, where the air is always filled with the intoxicating aroma of fresh ingredients and delightful spices. Today, we’re diving into one of my all-time favorite recipes: Southwest Black Bean & Corn Salad! This vibrant, zesty dish celebrates the colors and flavors of the sun-kissed Southwest, and let me tell you, it’s as delicious as it is easy to whip up.
When I think about this black bean and corn salad, I’m reminded of vibrant summer barbecues spent under the warm sunlight, laughter echoing in the air, and friends and family sharing delicious food. It’s a dish that brings people together, whether you’re picnic-ing at the park, hosting a potluck, or just looking for a fresh meal at home. Best of all? It’s packed with healthy ingredients. You don’t have to be a kitchen wizard to create this festivity on a plate—you just need a handful of fresh ingredients and a sprinkle of love!
Now, let’s get our aprons on and roll up our sleeves as we embark on this culinary adventure! You’ll find this recipe not only feeds your stomach but also nourishes your spirit. So gather your amigos, and let’s make this Southwest Black Bean & Corn Salad that is bursting with flavor and made for sharing!
Personal Story
I remember the first time I made this Southwest Black Bean & Corn Salad. It was a sweltering July afternoon, and the air was so thick that it felt like everyone was melting into their lawn chairs. My dear friend Carla and I decided to have an impromptu get-together, inviting some neighbors over. We were eager to escape the heat but desperate to enjoy a meal that didn’t involve turning on the oven.
As I rummaged through my pantry, I stumbled upon some canned black beans and frozen corn. A light bulb went off! I quickly grabbed a handful of colorful bell peppers, cilantro, and lime from my fridge, and voila—we were on our way to making something truly special. I’ll never forget how vibrant that bowl of salad looked on our picnic table, surrounded by colorful produce and the buzzing chatter of friends. Everyone scooped it up with tortilla chips, and we laughed until the sun began to set. That day planted the seed for this dish to become a staple in my kitchen, and I still whip it up as a refreshing side or a vibrant main course whenever friends come over.
It’s funny how some of the best recipes come together in the most unexpected moments, isn’t it? So grab those ingredients, and let’s start creating a memory of our own!
Ingredients
Here’s what you’ll need to create this Southwest Black Bean & Corn Salad:
-
1 can (15 oz) black beans
A protein-packed star of the dish! Choose low-sodium if you prefer; they’re super versatile. If you want a little kick, try using spiced black beans! -
1 can (15 oz) sweet corn
Sweet and delicious, corn adds a pop of color and texture. Fresh or frozen corn works just as well! You could even grill it for an added smoky flavor. -
1 red bell pepper, diced
Speaking of color, here’s a red gem! Sweet, crunchy, and packed with vitamins, diced red bell pepper brings a delightful crunch. You can swap it with yellow or orange bell peppers for a sweeter flavor or even jalapeños for spice! -
1 small red onion, finely chopped
Adding a bit of sharpness, red onions bring depth to this salad. If you find raw onions too overpowering, soak them in cold water for 10 minutes to mellow out the flavor. -
1 cup cherry tomatoes, halved
Juicy and sweet, cherry tomatoes are a must in this recipe! You can substitute them with diced Roma tomatoes if needed, but the bite-sized cherries are just too fun. -
1 avocado, diced
Creamy and rich, avocado adds a wonderful texture. For the freshest taste, wait to add it right before serving to prevent browning. If you’re avoiding avocados, you can swap in crumbled feta cheese for creaminess. -
1/4 cup fresh cilantro, chopped
Here comes the herbal freshness! If you’re not a fan of cilantro, parsley makes a fantastic alternative with a milder flavor. -
Juice of 2 limes
Tart and zesty, lime juice brightens everything up! If you’re feeling adventurous, try lemon juice or even orange juice for a sweeter twist. -
1 teaspoon cumin
Earthy and warm, cumin is the perfect spice to round out the Southwest flavors. If you don’t have cumin on hand, use chili powder for a different but delightful flavor profile. -
Salt and pepper to taste
Always taste as you go! Adjust salt and pepper to your liking for the perfect seasoning.
Step-by-Step Instructions
Now that we’ve gathered our ingredients, it’s time to get cooking! Let’s dive into the steps:
-
Rinse and Drain Beans and Corn:
Start by rinsing the black beans under cold water in a colander. This helps remove excess sodium and any canning liquid. Do the same for the sweet corn. This simple step will also enhance the flavors as you mix everything together. -
Chop Your Veggies:
Get your chopping board ready! Dice the red bell pepper, chop the red onion, halve the cherry tomatoes, and peel and cube the avocado. Try to cut everything around the same size for even bites—’cause who likes a mouthful of just onions, right? -
Time for Tossing:
In a large mixing bowl, combine the black beans, corn, bell pepper, onion, cherry tomatoes, and cilantro. Let’s get messy! Use a wooden spoon or spatula to gently mix all those colorful ingredients together—don’t be too rough, or the avocados will mush up! -
Dress the Salad:
Squeeze the juice of those fresh limes right over the salad. Add the cumin, salt, and pepper. Toss everything together gently again, ensuring the dressing coats all the ingredients. The lime juice keeps everything fresh and zesty! -
Avocado Time:
Now for the star of the show—add your diced avocado! Give it one last gentle toss to incorporate, being careful not to mash the avocado too much. It’s all about achieving those beautiful green morsels! -
Taste Testing:
This is the fun part! Taste your salad and adjust the seasoning if necessary. Need a bit more lime? Go for it! A dash more cumin? Absolutely. Cooking is all about making it your own! -
Chill and Serve:
Once everything is mixed, cover the bowl with plastic wrap or an airtight lid and let it chill in the fridge for at least 30 minutes. This allows all those flavors to meld together beautifully. Just before serving, give it a final toss to redistribute the dressing.
Serving Suggestions
When it comes to serving this salad, there are endless possibilities! For a fun presentation, serve it in a large, colorful bowl that showcases all those beautiful ingredients. I love pairing this salad with tortilla chips for scooping, or serve it alongside grilled chicken or shrimp for a heartier meal. If you’re feeling fancy, drizzle a little extra lime juice and sprinkle some additional cilantro right on top.
Recipe Variations
Here are some creative twists you can try out with this salad:
-
Quinoa Boost:
For a filling, protein-rich alternative, add cooked quinoa to the mix! It adds an extra layer of texture and makes for great leftovers. -
Spicy Kick:
Add diced jalapeños or a dash of hot sauce to amp up the heat. If you’re feeling adventurous, try chipotle peppers for a smoky flavor. -
Cheesy Goodness:
Crumble some feta cheese or sprinkle shredded cheddar cheese on top for a creamy goodness that complements the freshness. -
Tropical Twist:
Swap out the tomatoes for diced mango or pineapple for a sweet and tropical take on this salad! -
Vegan Delight:
For a completely plant-based twist, top it with a dollop of cashew cream or a sprinkle of nutritional yeast for a cheesy flavor.
Chef’s Notes
This Southwest Black Bean & Corn Salad has grown to become not just a recipe but a workshop of creativity in my kitchen! I love how it evolves based on what’s in my fridge or what’s in season. I remember one time I added some roasted red peppers leftover from a fancy dinner party, and it kicked things up a notch! Plus, it’s a great dish to make ahead of time for meal prep—it keeps well for a few days in the fridge and makes a fantastic lunch with or without additional protein.
Funny enough, I once mistook cumin for cinnamon in a hurry and created an entirely different dish! The lesson? Always taste as you go, and don’t be afraid to embrace the mishaps because they often lead to delightful surprises. Cooking should be a joyful journey, not a stressful experience.
FAQs and Troubleshooting
-
Can I make this salad ahead of time?
Absolutely! This salad tastes even better after it rests in the fridge for a day. Just hold off on adding the avocado until right before serving to keep it from browning. -
What can I substitute for lime juice if I don’t have any?
Lemon juice works in a pinch! It’s not as tangy as lime but will still provide that necessary acidity. Another option is apple cider vinegar for a different flavor. -
How can I store leftovers?
Store any leftovers in an airtight container in the refrigerator for up to 3 days. Keep in mind the avocado might brown slightly, but it will still taste fresh! -
Why is my salad watery?
If you find your salad is too watery, it’s usually due to excessive moisture from the tomatoes or canned corn. Make sure to thoroughly rinse and drain those cobs of joy! If needed, try using fresh tomatoes, as they may have less moisture.
Nutritional Info (if applicable)
This salad is not only bursting with flavor but also packed with nutritional benefits. A serving (about 1 cup) provides:
- Approximately 180 calories
- 8g protein
- 15g carbohydrates
- 8g healthy fat from the avocado
- Rich in fiber and vitamins A, K, and C
Conclusion
And there you have it—your guide to creating a dazzling Southwest Black Bean & Corn Salad! I hope this recipe brings joy, flavor, and a little bit of sunshine into your home. Remember, cooking is about expression, discovery, and most importantly—having fun!
So grab those ingredients, let’s get cooking, and create delightful memories together in the kitchen. I can’t wait to see how your salad turns out and hear your kitchen stories! Happy cooking, friends!
Print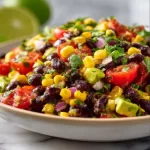
Southwest Black Bean & Corn Salad
- Total Time: 15 minutes
- Yield: 4 servings 1x
- Diet: Vegan
Description
A vibrant and zesty Southwest Black Bean & Corn Salad packed with fresh ingredients and bursting with flavor, perfect for sharing at gatherings or enjoying as a light meal.
Ingredients
- 1 can (15 oz) black beans, rinsed and drained
- 1 can (15 oz) sweet corn, rinsed and drained
- 1 red bell pepper, diced
- 1 small red onion, finely chopped
- 1 cup cherry tomatoes, halved
- 1 avocado, diced
- 1/4 cup fresh cilantro, chopped
- Juice of 2 limes
- 1 teaspoon cumin
- Salt and pepper to taste
Instructions
- Rinse and drain the black beans and corn.
- Chop the red bell pepper, red onion, cherry tomatoes, and avocado.
- Combine the black beans, corn, bell pepper, onion, cherry tomatoes, and cilantro in a large mixing bowl.
- Dress the salad with lime juice, cumin, salt, and pepper, and toss gently.
- Add the diced avocado and toss again carefully.
- Taste and adjust seasoning as desired.
- Chill in the fridge for at least 30 minutes before serving.
Notes
Best served fresh, but can be made ahead of time. Add avocado right before serving to prevent browning.
- Prep Time: 15 minutes
- Cook Time: 0 minutes
- Category: Salad
- Method: Mixing
- Cuisine: Southwestern
Nutrition
- Serving Size: 1 serving
- Calories: 180
- Sugar: 3g
- Sodium: 200mg
- Fat: 8g
- Saturated Fat: 1g
- Unsaturated Fat: 7g
- Trans Fat: 0g
- Carbohydrates: 15g
- Fiber: 5g
- Protein: 8g
- Cholesterol: 0mg
Keywords: salad, black bean salad, corn salad, summer salad, vegan recipe




