
The Ultimate Peanut Butter Milkshake: A Creamy Dream Come True!
Welcome to my kitchen! If you’re anything like me, you’re someone who can’t resist the rich, nutty aroma of peanut butter wafting through the air. Combine that with the creamy goodness of milk and the sweet kiss of ice cream, and you have a peanut butter milkshake that feels like a warm hug in a glass! Today, I’m excited to share my go-to recipe for this delightful treat, perfect for a hot summer day or just when you need a little pick-me-up.
Imagine standing in your cozy kitchen, the sun shining through the window, and the sounds of laughter filling the air. This isn’t just any ordinary milkshake; it’s a classic that sparks nostalgia and evokes memories of childhood afternoons spent at the local diner, where the milkshakes were thick enough to stand a spoon in.
Peanut butter milkshakes are a celebration of comfort, and they’re very easy to whip up at home. With just a few simple ingredients, you can create something that will impress your friends and family — or just give yourself a special treat after a long day. So, grab your blender (or a trusty mason jar if you’re feeling adventurous), and let’s dive into the deliciousness that is the peanut butter milkshake!
A Nostalgic Journey Through Peanut Butter
Growing up, my weekends were often filled with the delight of baking cookies and indulging in sweet treats. My fondest memories revolve around my late grandmother, who could make the best peanut butter cookies. When she was in the kitchen, it was an aromatic wonderland. I remember standing on a stool, peering over the counter as she mixed ingredients and shared stories about her favorite family recipes.
One day, I caught her making a batch of peanut butter milkshakes for dessert. I’d never seen anyone blend ice cream and peanut butter together before, but I can still recall the pure bliss on her face as she poured thick, creamy goodness into tall glasses. She always topped them off with crushed peanuts and a drizzle of chocolate syrup — and let me tell you, I was in heaven. Every sip was a burst of comfort and happiness.
Now, whenever I make this milkshake, I’m reminded of those beautiful moments and the passion my grandmother had for sharing love through food. It’s a simple drink, but it holds a wealth of love, just like the time spent with family over a delicious meal. And that’s what it’s all about — bringing people together over food that warms the soul!
Ingredients: The Essentials for a Delicious Peanut Butter Milkshake
Before we dive into the preparations, let’s gather our ingredients. Here’s what you’ll need:
-
2 cups vanilla ice cream
- The hero of our milkshake! Use your favorite brand for the creamiest consistency.
-
1 cup milk (whole or almond)
- Whole milk gives a rich texture, but you can swap it for almond milk for a dairy-free option.
-
1/2 cup creamy peanut butter
- Look for natural peanut butter without added sugars. Smooth and creamy works best, but crunchy peanut butter can add some fun texture!
-
2 tablespoons chocolate syrup (optional)
- Who could resist a hint of chocolate? Drizzling some chocolate syrup elevates the flavor and adds visual appeal!
-
Whipped cream for topping
- A must! It adds a fluffy contrast. You can make your own or grab a can from the store for convenience.
-
Crushed peanuts (optional)
- These add a lovely crunch and a fun finishing touch to your milkshake!
Substitution Tips:
- If you’re watching your sugar intake, use a sugar-free ice cream or a healthier alternative for milk and peanut butter.
- Feel free to swap in other flavors of ice cream – chocolate or banana peanut butter shake? Yes, please!
- Experiment with flavor extracts like vanilla or even a pinch of cinnamon for an added twist.
Step-by-Step Instructions: Crafting the Perfect Milkshake
Now that we have everything set, let’s get to blending! Follow these steps for a peanut butter milkshake that’s sure to satisfy:
-
Start with the Ice Cream
Scoop those 2 cups of vanilla ice cream straight into your blender. This is the foundation of your milkshake, so make sure it’s nice and soft — let it sit out for a few minutes if needed. -
Pour in the Milk
Add 1 cup of milk. Depending on your preferred thickness, adjust the milk. Less milk means a thicker shake, and more milk gives you a slightly thinner, sippable delight. -
Add the Peanut Butter
Spoon in your 1/2 cup of creamy peanut butter. This magical ingredient is what gives the shake that sweet, nutty goodness. If you’re a peanut butter lover (like me), feel free to toss in a little extra! -
Blend It Up
Secure the lid on your blender and blend on medium speed for about 30 seconds until your mixture is smooth and creamy. Here’s a little chef hack: Start on lower speed to avoid splatters, and gradually increase to ensure everything combines beautifully. -
Check the Consistency
After blending, stop and give it a taste! This is where you can decide if it’s creamy enough for you. If you want it thicker, add more ice cream. For a thinner shake, add a splash more milk. -
Add Chocolate Syrup (Optional)
If you’re feeling fancy and want to introduce a hint of chocolate, drizzle about 2 tablespoons of chocolate syrup into the blender and give it a quick swirl. You don’t need to blend this completely; some ribbons of chocolate can give you that swirly, café-style finish. -
Serve in Style
Now, pour your shake into tall, chilled glasses. Here’s a pro tip: pre-chill your glasses in the freezer for about 10 minutes before pouring for an extra frosty treat! -
Top and Enjoy
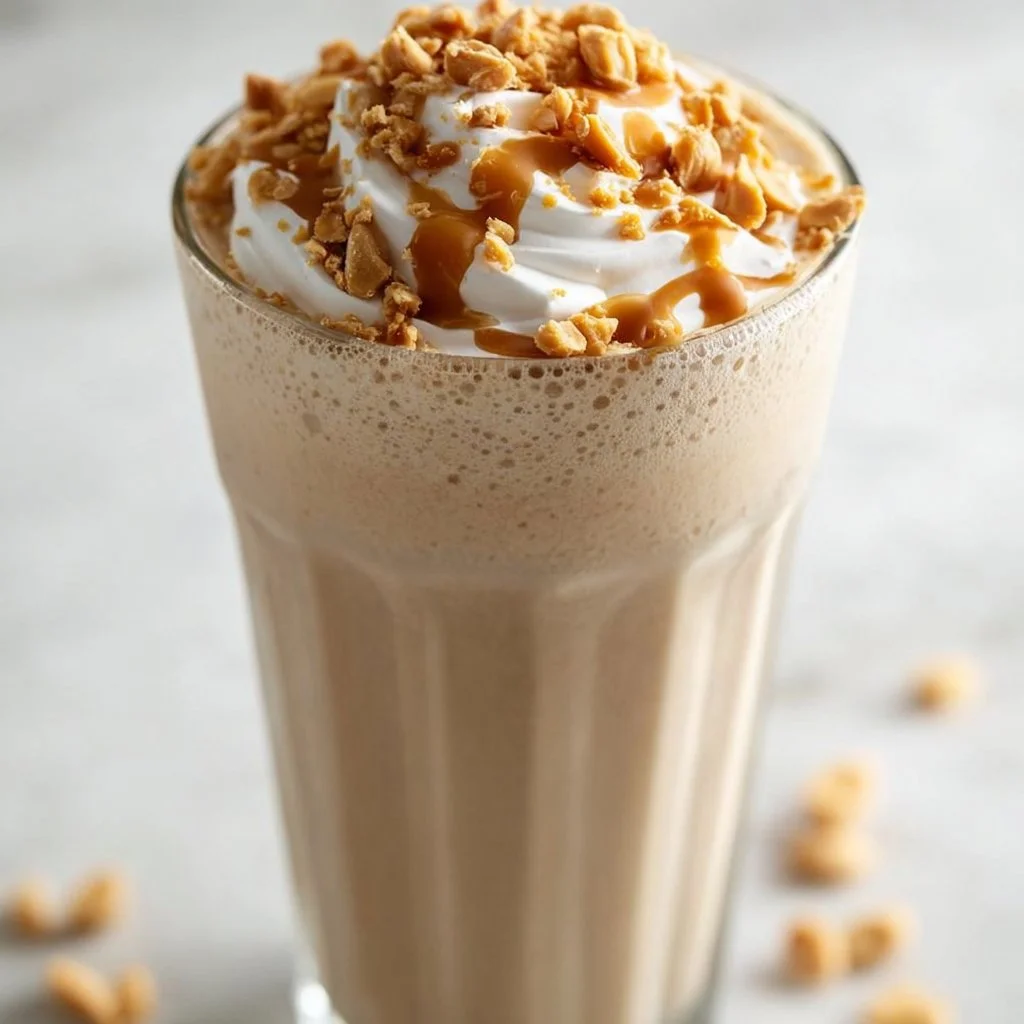
Finish off with a generous dollop of whipped cream on top, a drizzle of chocolate syrup, and a sprinkle of crushed peanuts for that added texture. Grab a straw (or a spoon, no judgment here) and dig in!
Serving Suggestions: Presenting Your Masterpiece
Serving a peanut butter milkshake is all about the presentation! Use tall glasses for that classic diner feel. Feel free to garnish with additional toppings — maybe some chocolate shavings, a cherry on top, or a fun straw that matches your kitchen vibe. If you’re feeling adventurous, serve them alongside some homemade cookies or a slice of your favorite pie for a delightful dessert spread. Trust me, your guests will be impressed!
Recipe Variations: Shake Things Up!
Here are some fun twists to consider for your peanut butter milkshake:
-
Banana Peanut Butter Milkshake: Add 1 ripe banana to the blender for a naturally sweet and creamy twist!
-
Chocolate Peanut Butter Milkshake: Swap in chocolate ice cream for vanilla and add an extra tablespoon of chocolate syrup for that rich chocolatey flavor.
-
Peanut Butter Banana Smoothie: For a healthier option, blend in some spinach for a hidden veggie boost. You can add hemp seeds for protein, too!
-
Nutty Protein Shake: Add a scoop of your favorite protein powder for a post-workout treat. This will keep you energized and fill you up.
-
Dairy-Free Delight: Use coconut milk ice cream and almond milk to create a magical dairy-free version without sacrificing flavor.
Chef’s Notes: Every Milkshake Tells a Story
This recipe has been a staple in my kitchen for years, with little tweaks over time to suit my evolving tastes. One “oops” moment I remember is when I accidentally added too much milk during a late-night milkshake craving. Instead of panicking, I fixed it by adding more ice cream and, voila! A happy accident turned into a new favorite version! So remember, if things don’t quite go as planned in the kitchen, just embrace it. Cooking is all about experimenting and making joyful messes.
FAQs and Troubleshooting: Your Questions Answered
1. Why is my milkshake too thick?
If you find your milkshake too thick, simply add a touch more milk and blend again. Remember, it’s all about finding the perfect consistency that you enjoy!
2. Can I make this dairy-free?
Absolutely! Use dairy-free ice cream and nut milk, such as almond or oat milk, to create a deliciously creamy shake without any dairy.
3. How can I store leftovers?
If you have leftovers (though I doubt it!), store your milkshake in an airtight container for up to 24 hours. However, just keep in mind that the texture might change slightly after freezing, so a quick stir before enjoying again can help.
4. Can I double the recipe?
Yes! This recipe can easily be doubled for parties or gatherings. Just make sure you have a blender large enough to handle the increased volume.
Nutritional Info (Optional)
For a single serving of the classic peanut butter milkshake (using vanilla ice cream and whole milk), you can expect:
- Calories: Approximately 600
- Protein: 15g
- Fat: 25g (primarily from the peanut butter)
- Carbohydrates: 60g
Remember, these can fluctuate based on any variations or substitutions made!
And there you have it — the ultimate peanut butter milkshake, infused with love, memories, and just the right amount of nostalgia. I hope this recipe becomes a beloved addition to your kitchen just as it is in mine. Whether you’re sipping it solo or sharing it with friends, may your days be filled with cozy flavor and sweet memories. Happy blending!
Print
The Ultimate Peanut Butter Milkshake
- Total Time: 5 minutes
- Yield: 2 servings 1x
- Diet: Vegetarian
Description
A creamy peanut butter milkshake that’s perfect for a refreshing treat on a hot day.
Ingredients
- 2 cups vanilla ice cream
- 1 cup milk (whole or almond)
- 1/2 cup creamy peanut butter
- 2 tablespoons chocolate syrup (optional)
- Whipped cream for topping
- Crushed peanuts (optional)
Instructions
- Start with the Ice Cream: Scoop those 2 cups of vanilla ice cream straight into your blender.
- Pour in the Milk: Add 1 cup of milk.
- Add the Peanut Butter: Spoon in your 1/2 cup of creamy peanut butter.
- Blend It Up: Secure the lid on your blender and blend on medium speed for about 30 seconds.
- Check the Consistency: After blending, stop and give it a taste!
- Add Chocolate Syrup (Optional): Drizzle about 2 tablespoons of chocolate syrup into the blender.
- Serve in Style: Pour your shake into tall, chilled glasses.
- Top and Enjoy: Finish off with whipped cream, a drizzle of chocolate, and a sprinkle of crushed peanuts.
Notes
Experiment with other flavors of ice cream and toppings for a unique twist.
- Prep Time: 5 minutes
- Cook Time: 0 minutes
- Category: Dessert
- Method: Blending
- Cuisine: American
Nutrition
- Serving Size: 1 serving
- Calories: 600
- Sugar: 45g
- Sodium: 300mg
- Fat: 25g
- Saturated Fat: 10g
- Unsaturated Fat: 10g
- Trans Fat: 0g
- Carbohydrates: 60g
- Fiber: 3g
- Protein: 15g
- Cholesterol: 60mg
Keywords: peanut butter, milkshake, dessert, creamy, summer treat


