
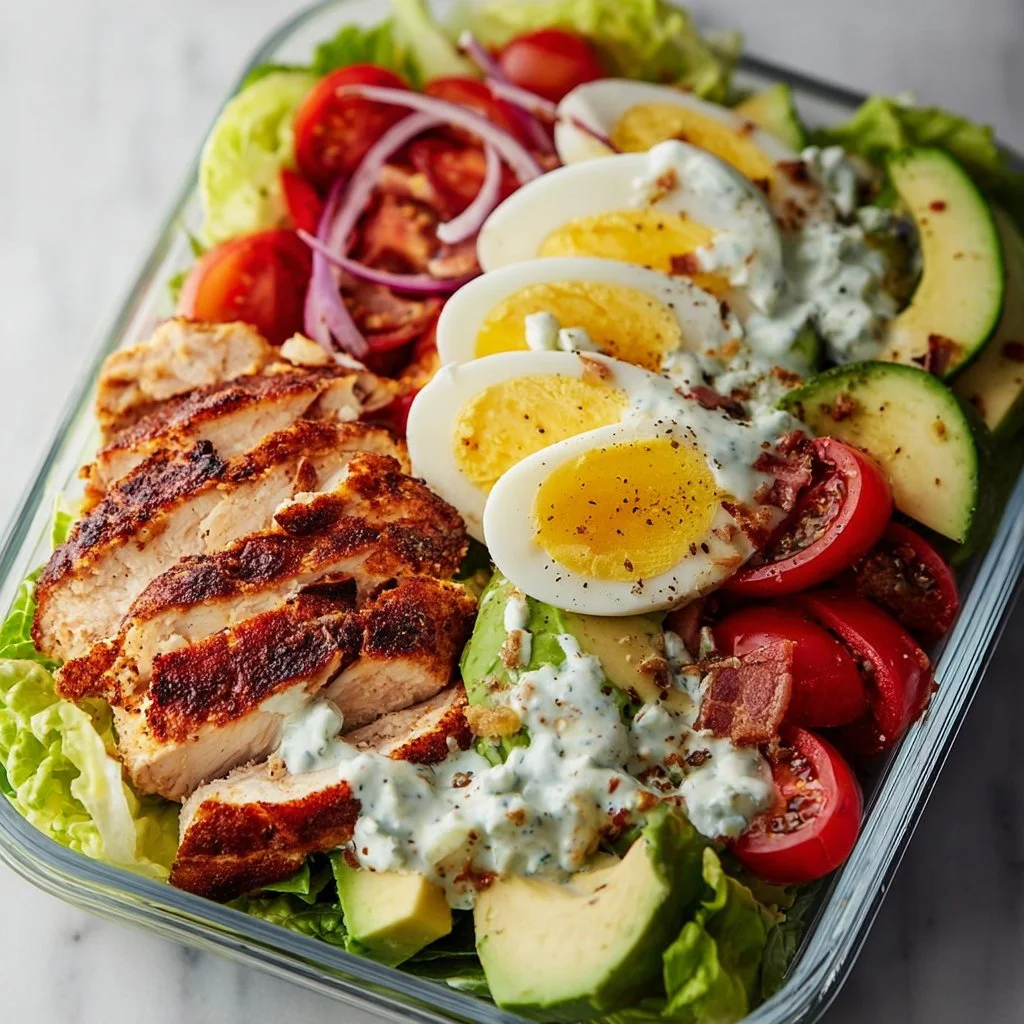
Meal Prep Cobb Salad
A Deliciously Colorful Journey: Meal Prep Cobb Salad
Welcome to my cozy little corner of the internet, fellow food lovers! I’m Olivia Bennett, and I’m thrilled to have you here. Today, we’re diving into a crunchy, colorful world of flavors with a timeless favorite: the Meal Prep Cobb Salad. This dish is not just a salad—it’s a symphony of textures, colors, and tastes that will brighten up your week ahead. Picture fresh greens, crispy bacon, creamy avocado, and a sprinkle of blue cheese all coming together to create something magical. Who doesn’t love a good salad that saves time and brings a burst of flavor?
Now, what I adore about Cobb Salad isn’t just its deliciousness—it’s the memories it sparks. This dish has a way of bringing people together, whether it’s a picnic in the park, a casual dinner with friends, or simply fueling your week with wholesome goodness. So, slip on your apron, and let’s get cooking!
Personal Story: A Family Tradition Rediscovered
Growing up, some of my fondest memories revolve around family dinners and the vibrant patchwork of dishes sprawling across our dining table. My mom was an incredible cook who could turn even the simplest ingredients into something exquisite. One summer evening, I remember her preparing a lavish spread that included her version of a Cobb Salad.
As she sliced the ingredients, the whole kitchen filled with the wafts of crispy bacon, fresh greens, and that unmistakable tang of blue cheese. We gathered around the table, laughter mingling with the melody of cutting boards and serving utensils clinking together. Each forkful was a joyful bite, reminding us of summer barbecues and the togetherness that good food can inspire. That meal turned into a cherished family ritual, with each forkful carrying echoes of laughter and love.
Now, whenever I whip up a Cobb Salad, I’m stirred by those simple, precious moments—a reminder of how food can create not just meals but memories.
Ingredients: What You’ll Need
Here’s a list of ingredients to create your perfect Meal Prep Cobb Salad. Each component plays a pivotal role, contributing to the symphony of flavors. And don’t worry; I’ve included some handy substitution tips to help you adjust according to your pantry!
-
Romaine Lettuce (or Mixed Greens)
- A crunchy, fresh base that provides a crisp texture. You can also swap it with kale for a more nutrient-dense option, or use spinach for a milder flavor.
-
Grilled Chicken Breast
- A lean protein that makes this salad filling. You can replace it with turkey, chickpeas for a vegetarian twist, or even tofu for a plant-based option.
-
Crispy Bacon
- The salty crunch brings a delightful contrast to the fresh ingredients. If bacon isn’t your thing, crispy pancetta or turkey bacon could work well, or even toasted nuts for a crunchy alternative.
-
Hard-Boiled Eggs
- They add creaminess and protein. If you’re short on time, you can use scrambled eggs or omit them for a lighter dish altogether.
-
Avocado
- This creamy fruit adds richness. If you’re short on avocados, consider using a dollop of Greek yogurt or some hummus for a similar creamy texture.
-
Cherry Tomatoes
- Bursting with sweetness, these beauties pop with color. If tomatoes aren’t in season, you can use diced bell peppers or radishes as a substitute.
-
Blue Cheese (or Feta)
- A tangy cheese that complements the salad beautifully. If blue cheese isn’t your favorite, crumbled feta or goat cheese works wonderfully.
-
Cucumber
- For added crunch and freshness. If you’re not keen on cucumbers, consider swapping them with bell peppers or snap peas.
-
Red Onion
- Just a hint of sharpness helps to elevate the flavors. If you want something milder, go for green onions or even omit it altogether.
-
Olive Oil & Vinegar (for dressing)
- A simple mix comes together for a light, zesty dressing. Use your favorite dressing instead—store-bought or homemade!
Step-by-Step Instructions
Now, let’s get into the fun part—the cooking! This Meal Prep Cobb Salad not only assembles quickly but can also be prepped in advance to make your week seamless. Follow along for a delicious adventure!
-
Prep Your Ingredients
- Start by washing your greens. If you’re using romaine lettuce, chop it into bite-sized pieces. For mixed greens, simply tear the leaves and place them in a large salad bowl. Pro Tip: A salad spinner can help those greens dry quickly and prevent sogginess!
-
Grill Your Chicken
- Season your chicken breast with salt, pepper, and a drizzle of olive oil. Heat a grill pan or skillet over medium-high heat. Cook the chicken for about 6-7 minutes on each side until golden brown and cooked through (internal temp shouldn’t exceed 165°F!). Once cooked, let it rest for a few minutes before slicing. Little Chef Hack: While resting the chicken, cover it with foil to keep it warm and juicy.
-
Cook Your Bacon
- In the same skillet (or a separate one if you like), cook your bacon until it’s crispy. This usually takes about 5-7 minutes. Once done, place it on a paper towel to absorb excess grease. Savory alert: Don’t toss that bacon fat! It can be saved to add flavor to future dishes—just be mindful of how much you use.
-
Boil Your Eggs
- Place your eggs in a pot, cover them with cold water, and bring to a boil. Once boiling, turn off the heat and cover. Let them sit for about 10-12 minutes. Afterward, transfer them to an ice bath (or cold water) to stop the cooking process and make peeling easier. Chef Insight: This method makes for perfect hard-boiled eggs!
-
Assemble the Salad
- In a large mixing bowl, combine your romaine base with the sliced grilled chicken, diced avocado, halved cherry tomatoes, chopped cucumbers, crumbled blue cheese, and sliced red onion. Chop the hard-boiled eggs and sprinkle them on top.
-
Prepare Your Dressing
- In a small bowl, whisk together olive oil and your choice of vinegar along with a pinch of salt and pepper. Feel free to add a dash of Dijon mustard for an extra kick! Drizzle the dressing over your salad and mix everything gently to combine. Just a note: Keep the dressing on the side if you’re meal prepping to retain freshness.
-
Pack for Meal Prep
- If meal prepping, use airtight containers and layer the ingredients starting with the dressing at the bottom, followed by your protein, then veggies, and greens on top to prevent wilting. You’ll have a vibrant, fresh salad ready to grab during the week!
Serving Suggestions
Present your gorgeous Cobb Salad in a shallow bowl, arranging the toppings in sections for a colorful display. You can sprinkle some extra blue cheese on top for a pretty finish or garnish with a few slices of lemon for that zesty touch! Pair it with a slice of crusty bread or crispy pita chips for a complete meal that’s both filling and incredibly satisfying.
Recipe Variations
-
Southwestern Cobb Salad: Swap out the blue cheese for queso fresco and add black beans and corn for a southwestern flair. A drizzle of chipotle dressing will enhance the flavor!
-
Mediterranean Cobb Salad: Use feta cheese instead of blue cheese, and toss in some Kalamata olives and diced bell peppers. Add a splash of lemon vinaigrette for freshness.
-
Fruit-Infused Cobb Salad: Toss in some sliced strawberries or mango for a sweet twist and switch to a light balsamic vinaigrette.
-
Vegan Cobb Salad: Substitute the chicken with roasted chickpeas, the bacon with crispy tempeh, and omit eggs and cheese or replace them with avocado and nutritional yeast.
Chef’s Notes
Looking back, my Cobb Salad recipe has evolved over time—it’s like a reflection of my culinary journey. I’ve experimented with countless variations, hunting for that perfect balance of textures and flavors. The things I love most about this salad? It’s versatile! Depending on what’s in season or what’s left in my fridge, it can turn out different every single time. Embrace that freedom! After all, cooking should be fun, not just a chore.
Oh, and a little kitchen humor—once, I thought I could juggle while cooking (what a sight!). Let’s just say the avocado didn’t survive the drop, but we all had a hearty laugh!
FAQs and Troubleshooting
-
Can I make this salad ahead of time?
- Absolutely! If you layer the ingredients correctly in an airtight container, it can last up to 3 days in the fridge. Just remember to keep the dressing separate until you’re ready to eat!
-
What do I do if my eggs crack while boiling?
- No worries! The key is to add a teaspoon of vinegar to the boiling water, which helps coagulate the egg white if it breaks. It won’t be perfect, but at least it won’t make a huge mess!
-
My avocado turned brown! How can I prevent this?
- Oxidation is the culprit here. A sprinkle of lemon juice can help slow down the process. If it happens, just slice off the brown areas—your salad will still taste amazing!
-
Can I use other proteins?
- Definitely! Beyond chicken, think grilled shrimp, fish, or even a hearty bean mix, such as black beans or lentils, for added protein and nutrition.
Nutritional Info (Optional)
While I won’t overload you with too many numbers, a typical serving of this Meal Prep Cobb Salad offers a fantastic balance of protein, healthy fats, and fiber. It’s loaded with vitamins and minerals, keeping your energy levels charged throughout the day!
So there you have it! Your guide to creating the ultimate Meal Prep Cobb Salad. I hope you dive into this colorful world of flavors, just like I have. Remember, cooking is all about enjoying yourself and experimenting! Happy cooking, and may your kitchen always be filled with warmth and joy! 🍳🥗💖
Print
Meal Prep Cobb Salad
- Total Time: 35 minutes
- Yield: 4 servings
- Diet: Gluten-Free
Description
A colorful and crunchy Cobb Salad, perfect for meal prepping and bursting with fresh flavors.
Ingredients
- Romaine Lettuce (or Mixed Greens)
- Grilled Chicken Breast
- Crispy Bacon
- Hard-Boiled Eggs
- Avocado
- Cherry Tomatoes
- Blue Cheese (or Feta)
- Cucumber
- Red Onion
- Olive Oil & Vinegar (for dressing)
Instructions
- Prep Your Ingredients
- Grill Your Chicken
- Cook Your Bacon
- Boil Your Eggs
- Assemble the Salad
- Prepare Your Dressing
- Pack for Meal Prep
Notes
Layer ingredients carefully in airtight containers if meal prepping. Keep dressing separate until ready to serve.
- Prep Time: 15 minutes
- Cook Time: 20 minutes
- Category: Salad
- Method: No Cook & Stovetop
- Cuisine: American
Nutrition
- Serving Size: 1 serving
- Calories: 400
- Sugar: 4g
- Sodium: 600mg
- Fat: 24g
- Saturated Fat: 6g
- Unsaturated Fat: 12g
- Trans Fat: 0g
- Carbohydrates: 12g
- Fiber: 4g
- Protein: 28g
- Cholesterol: 150mg
Keywords: Cobb Salad, Meal Prep, Healthy Recipe, Salad, Fresh Ingredients
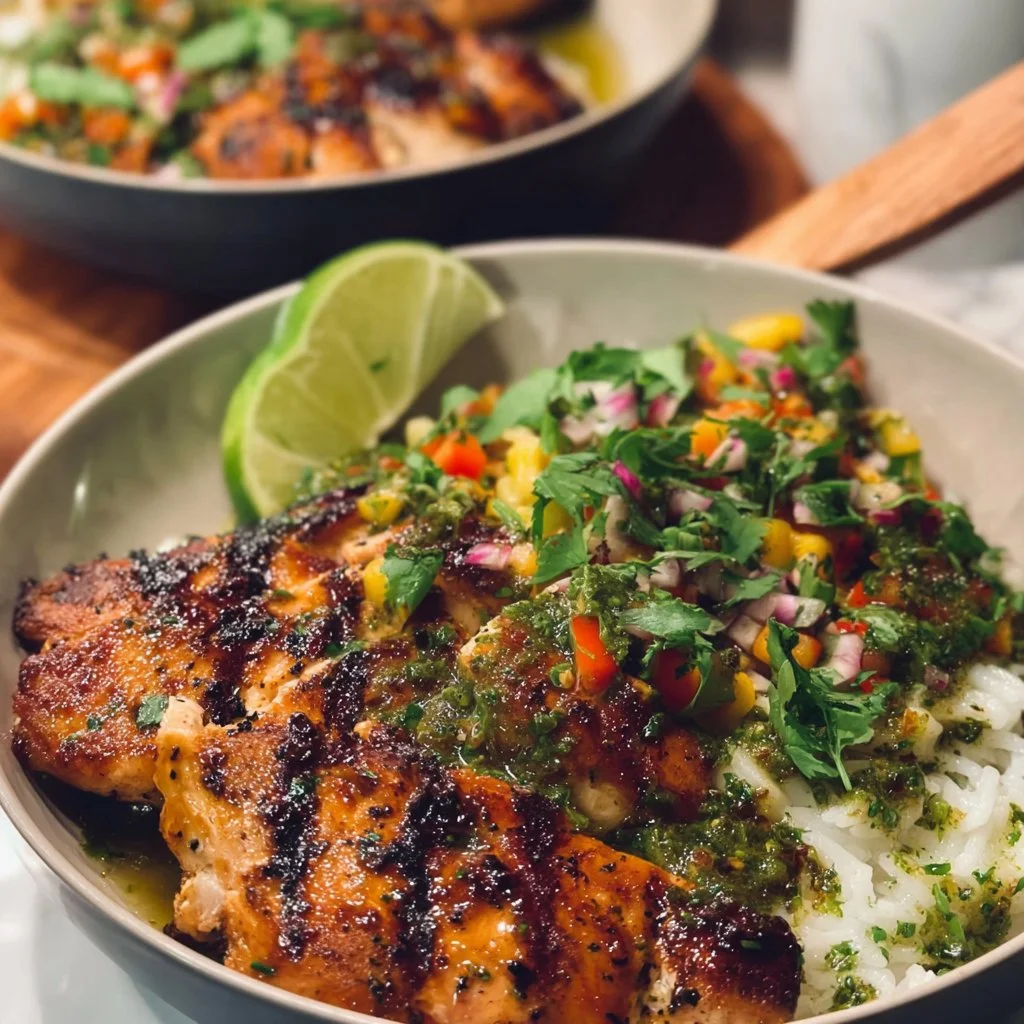
Honey Cilantro Lime Chicken Bowl
Honey Cilantro Lime Chicken Bowl
Welcome back to my kitchen, fellow food lovers! Today, I have a treat that combines the flavors of sweetness, tanginess, and a touch of herbaceous goodness: Honey Cilantro Lime Chicken Bowl. This dish is not just a meal; it’s a celebration of flavors that harmoniously come together to create a vibrant, satisfying bowl perfect for dinner or a delightful lunch.
Picture this: You’re having a cozy evening at home, the sun is setting, and the aroma of marinated chicken sizzling on the grill fills the air. You pull together colorful veggies, warm rice, and a drizzle of honey lime dressing, transforming a simple dinner into a feast that’s bursting with life and flair. Whether you’re entertaining guests or treating yourself to a tasty meal after a long day, this bowl ticks all the boxes—delicious, accessible, and memorable.
I’ve always been passionate about crafting meals that are not only packed with flavor but also encourage a sense of connection. There’s something so special about gathering around a table, sharing stories, and savoring good food together. The Honey Cilantro Lime Chicken Bowl perfectly embodies that spirit. It’s fresh, bright, and full of positive vibes, making it an ideal dish to bring friends and family together.
So grab your apron, roll up your sleeves, and let’s embark on this culinary adventure together! By the end of this post, you’ll be empowered to whip up your own beautiful Honey Cilantro Lime Chicken Bowl that will impress anyone lucky enough to join you. Let’s dive into a delightful recipe that will make your flavor-loving heart sing!
Personal Story
I remember the first time I made Honey Cilantro Lime Chicken Bowl. It was a sunny Saturday afternoon, and my friends and I were gathered for a casual cookout in my backyard. We had an array of ingredients and a general idea, but that day was all about spontaneity and creativity. As the aromas of grilling chicken filled the air, laughter erupted as we tasted the honey-lime marinade, debating whether to add more lime or turn up the heat with a touch of chili.
At one point, I decided to toss some fresh cilantro into the mix, and it instantly transformed everything! The vibrant green sprigs were not just a flavor boost; they brought a fresh character to our gathering. As we piled our bowls high with chicken, colorful veggies, and a drizzle of that sweet and tangy sauce, I felt a sense of warmth wash over us. We were not just eating; we were engaging in connection, laughter, and culinary discovery.
That day sparked my love for creating bowls that speak to the heart. It’s amazing how a simple dish can draw people closer together, leaving behind nothing but smiles and satisfied stomachs. Now, every time I make this dish, it brings back that joyful, carefree moment—a reminder that good food and good company are the secret ingredients to happiness!
Ingredients
Now, let’s gather our ingredients for this delicious bowl! Here’s what you’ll need:
-
Chicken Breasts (2 large)
Perfect for grilling, pan-searing, or baking! You can substitute with thighs for a richer flavor or even use tofu for a vegetarian option. -
Honey (1/4 cup)
Sweet, sticky goodness! If you’re avoiding sugar, agave syrup or maple syrup works well too. -
Fresh Lime Juice (from 2 limes)
Bright and zesty, it cuts through the sweetness. For a twist, orange juice can be an interesting alternative. -
Cilantro (1/4 cup, chopped)
Fresh and fragrant! If you’re not a fan, parsley can substitute nicely, although it lacks that distinct cilantro flavor. -
Garlic (2 cloves, minced)
Adds depth and aromatic flavor. Fresh garlic is always best, but garlic powder can be used if you’re in a pinch. -
Olive Oil (2 tablespoons)
For marinating and sautéing the chicken. Feel free to use avocado oil or another high-heat oil as a substitute. -
Salt and Pepper
Essential for seasoning. You can add chili flakes for a kick or smoked paprika for those smoky notes. -
Rice (1 cup, cooked)
A great base for the bowl. Quinoa, farro, or cauliflower rice are excellent options for a grain swap. -
Toppings (Cherry tomatoes, avocado, or corn)
These are optional, but they add color and texture. Get creative here! You can use black beans or roasted bell peppers for variation.
Step-by-Step Instructions
Ready to create your wonderful Honey Cilantro Lime Chicken Bowl? Let’s break it down step by step!
Step 1: Prepare the Marinade
In a medium bowl, whisk together the honey, juice of the limes, minced garlic, olive oil, salt, and pepper. This is where the magic starts! Take a moment to inhale the fragrant mix and imagine the flavors you’re about to experience. Feel free to adjust the lime juice and honey to your taste. Want it zesty? Add more lime!
Step 2: Marinate the Chicken
Place your chicken breasts (or your chosen protein) in a large resealable bag or shallow dish. Pour the marinade over the chicken, ensuring every piece gets a generous coating. Seal the bag or cover the dish and let it marinate in the fridge for at least 30 minutes (or up to 4 hours). This helps the flavors penetrate and tenderize the chicken.
Step 3: Cook the Chicken
Heat a grill pan or outdoor grill over medium-high heat. Once hot, remove the chicken from the marinade (reserving the marinade for later). Cook the chicken for about 6-7 minutes per side, or until it reaches an internal temperature of 165°F (75°C). For an extra burst of flavor, baste it with the reserved marinade while cooking. Just be careful not to contaminate it with raw chicken juices.
Step 4: Prepare the Rice
While the chicken is cooking, let’s get the rice ready. If you haven’t done so already, cook your rice according to package instructions. I love using a rice cooker for perfectly fluffy grains, but the stovetop works just fine too!
Step 5: Chop the Veggies
While everything is cooking, chop your avocado, slice cherry tomatoes in half, and prepare any other toppings. Let your creativity shine! This is where you get to add pops of color and texture to your bowl.
Step 6: Assemble the Bowl
Once the chicken is cooked to perfection, let it rest for a few minutes before slicing it into strips. In a large bowl, start with a bed of rice, layer on the sliced chicken, and sprinkle with cilantro. Add the chopped veggies on top, drizzle with any extra honey-lime dressing, and finish with a squeeze of fresh lime. Don’t hold back—this is where you want to go wild with toppings!
Step 7: Enjoy!
Grab your favorite spoon or fork and dig in! Take a moment to appreciate the vibrant colors and the enticing aromas before you dive into this delicious bowl of goodness.
Serving Suggestions
Present your Honey Cilantro Lime Chicken Bowl in a large, colorful bowl to showcase all those beautiful layers of ingredients. You can serve it with lime wedges on the side for that extra zesty punch. A sprinkle of additional chopped cilantro on top gives a fresh finish, making it not just a meal but a work of art! Pair it with a cool drink, like sparkling water with a splash of lime, and you’re all set for a relaxed dining experience.
Recipe Variations
- Spicy Twist: Add diced jalapeños or a splash of hot sauce to the marinade for a kick.
- Grain-Free: Swap out the rice for a bed of spiralized zucchini noodles for a lighter option.
- Vegan Delight: Use chickpeas or tempeh in place of chicken and add roasted sweet potatoes for extra flavor.
- Asian Fusion: Substitute soy sauce for honey and lime for a soy-sesame flavored bowl, topped with sesame seeds and green onions.
- Tropical Flair: Toss in diced mango or pineapple for a sweet and fruity variation.
Chef’s Notes
This recipe has evolved beautifully over the years. Originally, it was all about marinated grilled chicken on a plate, but I quickly realized that creating a bowl allows for more creativity and flavor. It’s all about layering—textures, colors, and tastes! Whenever I’m in need of a meal that’s comforting yet fresh, this bowl is my go-to, and every time I make it, I come up with new twists! You’ll find me jamming out to my favorite tunes in the kitchen, taking bites along the way, and savoring every moment.
FAQs and Troubleshooting
-
What if my chicken turns out dry?
Overcooking is usually the culprit! Always use a meat thermometer to check for doneness, and remember to let the chicken rest before slicing. -
Can I make this dish ahead of time?
Absolutely! You can marinate the chicken the night before and cook it ahead of time. Just store everything separately in the fridge and assemble when you’re ready to serve. -
What if I’m allergic to honey?
You can simply replace honey with maple syrup or agave as a natural sweetener. The flavor will still shine through without compromising your health. -
How can I store leftovers?
Keep any leftovers in airtight containers in the fridge for up to three days. To reheat, gently warm in the microwave or on a stovetop to maintain that juicy goodness.
Nutritional Info (if applicable)
While I like to keep things wholesome, specific nutritional information can vary based on your ingredients and portion sizes. As a rough estimate, here’s what you can expect for a single serving:
- Calories: Approximately 450
- Protein: 35g
- Carbohydrates: 45g
- Fiber: 6g
- Fats: 15g
Remember, these are just guidelines! You can always make substitutions that fit your dietary needs.
So there you have it—a delicious Honey Cilantro Lime Chicken Bowl that’s sure to become a favorite in your home. Cooking is not just about filling bellies; it’s about creating moments and memories. Get in the kitchen, make a bit of a mess, and enjoy every bite! Happy cooking! 🍽️✨
Print
Honey Cilantro Lime Chicken Bowl
- Total Time: 45 minutes
- Yield: 4 servings 1x
- Diet: Gluten-Free
Description
A vibrant and satisfying bowl combining sweet honey, zesty lime, and fresh cilantro with grilled chicken and colorful veggies, perfect for dinner or lunch.
Ingredients
- 2 large Chicken Breasts
- 1/4 cup Honey
- Juice from 2 Fresh Limes
- 1/4 cup Cilantro, chopped
- 2 cloves Garlic, minced
- 2 tablespoons Olive Oil
- Salt and Pepper to taste
- 1 cup Rice, cooked
- Toppings: Cherry tomatoes, avocado, corn (optional)
Instructions
- Prepare the Marinade: In a medium bowl, whisk together honey, lime juice, minced garlic, olive oil, salt, and pepper.
- Marinate the Chicken: Place chicken in a large resealable bag, pour the marinade over, seal, and refrigerate for at least 30 minutes.
- Cook the Chicken: Heat a grill over medium-high and cook chicken for 6-7 minutes per side until it reaches 165°F (75°C).
- Prepare the Rice: Cook rice according to package instructions.
- Chop the Veggies: Chop avocado, slice cherry tomatoes and prepare other toppings.
- Assemble the Bowl: Layer rice, sliced chicken, cilantro, and toppings in a large bowl.
- Enjoy!
Notes
Feel free to substitute ingredients like chicken with tofu for a vegetarian option or adjust the marinade to taste.
- Prep Time: 30 minutes
- Cook Time: 15 minutes
- Category: Main Course
- Method: Grilling
- Cuisine: Fusion
Nutrition
- Serving Size: 1 bowl
- Calories: 450
- Sugar: 25g
- Sodium: 350mg
- Fat: 15g
- Saturated Fat: 2g
- Unsaturated Fat: 12g
- Trans Fat: 0g
- Carbohydrates: 45g
- Fiber: 6g
- Protein: 35g
- Cholesterol: 75mg
Keywords: chicken bowl, healthy meals, cilantro lime chicken, easy dinner, grilled chicken
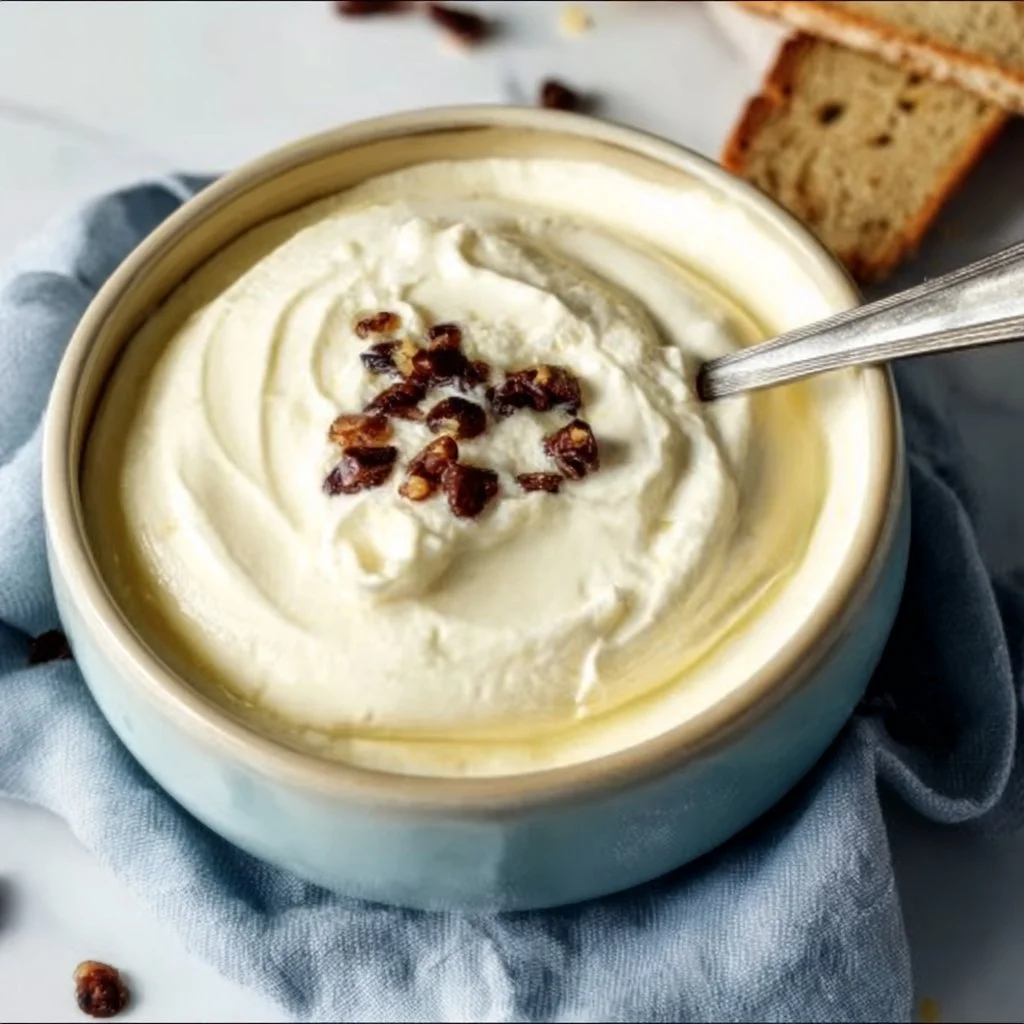
Baked Greek Yogurt: Quick, Healthy Protein Packed Breakfast
# Baked Greek Yogurt: Quick, Healthy, Protein-Packed Breakfast

## Introduction

Welcome to my cozy kitchen, friends! Today, we're diving into a delightful breakfast that will change the way you think about starting your day. Say goodbye to the mundane bowl of cereal and hello to Baked Greek Yogurt. Yes, you heard me right! This recipe not only packs a punch of protein but also offers a warm, comforting twist that will make you want to leap out of bed.

Baked Greek yogurt is a simple yet satisfying dish that brings joy to your morning routine. Picture this: you open your oven to reveal a golden-brown, fluffy delight topped with your favorite fruits and a drizzle of honey. It’s like a hug in breakfast form! And the best part? You can personalize it to match your mood or the season.

Let’s not forget the health benefits – Greek yogurt is a powerhouse of protein and probiotics, perfect for getting your digestion in check while also keeping you full and energized. Whether you’re rushing to work or enjoying a lazy weekend brunch with family, this dish effortlessly fits into any scenario. Plus, it’s quick to whip up on busy mornings, making breakfast a breeze!

So, grab your favorite apron and let’s get baking! This recipe is about to become your new breakfast superstar. It’s time to transform a simple ingredient into something that feels like a special treat. Ready? Let’s jump in!

## Personal Story

Growing up, breakfast was a big deal in our house. My mom had a knack for turning simple ingredients into unforgettable meals, and one of my absolute favorites was her baked yogurt. I can still remember waking up to the sweet aroma wafting through the house; it was always a delightful surprise to discover what flavor she had whipped up that morning.

I fondly remember one winter morning when it was snowing outside, and the warmth of the kitchen was heavenly. My mom made baked Greek yogurt topped with warm cinnamon apples, and we all gathered around the table, cozy in our pajamas. Our laughter filled the space as we enjoyed every spoonful while listening to soft music in the background. Those moments ignited my passion for cooking and my deep love for sharing food with friends and family.

Today, I’m excited to recreate that experience and share it with you. A little nostalgia goes a long way in our kitchens, and I hope this recipe brings as much joy to your mornings as it did to mine.

## Ingredients

Here’s what you’ll need to create this mouthwatering Baked Greek Yogurt:

- **2 cups Greek yogurt**
  - **Insight**: Opt for plain unsweetened to control the sweetness. It’s creamy, rich, and full of protein.

- **2 large eggs**
  - **Substitution Tip**: To make this recipe vegan, use flaxseed meal (1 tablespoon mixed with 2.5 tablespoons of water) for each egg.

- **1/4 cup honey or maple syrup**
  - **Insight**: Adjust sweetness according to your taste! You could also try agave nectar or coconut sugar for a different flavor.

- **1 teaspoon vanilla extract**
  - **Chef Tip**: Using pure vanilla extract elevates the flavor. Homemade vanilla extract is even better!

- **1/2 teaspoon baking powder**
  - **Insight**: This helps your yogurt bake up light and fluffy. Don’t skip it!

- **Toppings**: Your choice! Fruits, nuts, granola, or a sprinkle of cinnamon.
  - **Insight**: Fresh berries are fantastic in the summer, while roasted apples or pears work wonders in the fall.

## Step-by-Step Instructions

### Step 1: Preheat Your Oven
First things first, preheat your oven to 350°F (175°C). This step sets the stage for a perfectly baked yogurt.

### Step 2: Mix the Ingredients
In a large mixing bowl, combine the Greek yogurt, eggs, honey (or maple syrup), vanilla extract, and baking powder. Mix with a whisk until all ingredients are thoroughly blended. Don’t worry if it looks a little lumpy at this stage; it will smooth out beautifully as it bakes!

### Step 3: Prepare a Baking Dish
Lightly grease an 8x8-inch baking dish or a medium-sized cast-iron skillet with cooking spray or a little olive oil. This prevents any sticking and helps achieve a gorgeous color on the edges.

### Step 4: Pour and Spread
Pour the yogurt mixture into the greased baking dish. Use a spatula to spread it evenly, smoothing the top for a lovely finish.

### Step 5: Get Creative with Toppings
Here’s where you can have some fun! Sprinkle your choice of toppings over the yogurt mixture. I love using a mix of fresh sliced strawberries and a handful of crunchy granola. But feel free to experiment with what’s in season or what you have on hand.

### Step 6: Bake it Up
Place your dish in the preheated oven and bake for 25-30 minutes. Keep an eye on it as it bakes – you’re looking for a light golden top and a slight jiggle in the center. The edges should be puffed and set, while the middle might still be a touch soft.

### Step 7: Cool & Serve
Once it’s done baking, remove it from the oven and let it cool for about 5-10 minutes. This allows it to firm up just enough for easy serving. You can cut it into squares or serve it right from the dish.

## Serving Suggestions

Serve your baked Greek yogurt warm, straight from the oven, or let it cool slightly and plate it up with a drizzle of honey or a dollop of yogurt on top. It’s delightful with a side of fresh fruit or a sprinkle of nuts for crunch – perfect for elevating your breakfast experience!

## Recipe Variations

- **Berry Blast**: Add a blend of fresh or frozen berries mixed into the yogurt for a fruity twist.
- **Tropical Escape**: Mix in crushed pineapple and coconut flakes for a summery vibe.
- **Chocolate Delight**: Stir in some cocoa powder or chocolate chips for a rich, indulgent breakfast treat.
- **Nutty Banana**: Top with sliced banana and a drizzle of peanut butter for an extra protein boost.
- **Savory Twist**: Consider adding herbs like rosemary or thyme and topping with sautéed mushrooms or spinach for a savory breakfast version.

## Chef's Notes

This recipe has been a staple in my kitchen for years! I love how easy it is to tweak depending on what’s in the fridge or the season. Plus, I have to confess, I've had my share of “kitchen disasters” – like the time I forgot to add the eggs and ended up with a yogurt pudding instead. But hey, they say every great chef has their stories, right? Embrace the mess, enjoy the journey, and remember that every mishap is just a delicious learning experience!

## FAQs and Troubleshooting

**1. Can I make this ahead of time?**
Yes! You can prepare the mixture the night before and refrigerate it. Just bake it in the morning when you're ready to enjoy.

**2. It turned out too runny — what happened?**
If your yogurt mixture ends up too runny, it might be due to underbaking. Make sure it’s set and not too jiggly in the center before removing it from the oven.

**3. Can I add protein powder to this recipe?**
Absolutely! Just replace a portion of the Greek yogurt with protein powder, but you may need to add a bit more liquid to maintain the right consistency.

**4. How do I store leftovers?**
Store any leftovers in an airtight container in the refrigerator for up to 3 days. You can reheat it in the microwave for a quick breakfast!

## Nutritional Info

- **Calories**: Approximately 150 per serving (based on 8 servings)
- **Protein**: 10g
- **Carbohydrates**: 15g
- **Fat**: 6g

With this Baked Greek Yogurt recipe, you’re not just making breakfast; you’re creating memories, sharing joy, and enjoying all the goodness that comes from cooking. Each bite brings warmth and smiles, making every morning a little brighter. Happy baking, foodies! 🍽️
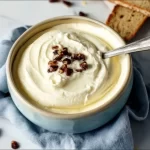
Baked Greek Yogurt
- Total Time: 40 minutes
- Yield: 4 servings 1x
- Diet: Vegetarian
Description
A warm, protein-packed baked yogurt delight, perfect for breakfast.
Ingredients
- 2 cups Greek yogurt (plain, unsweetened)
- 2 large eggs
- 1/4 cup honey or maple syrup
- 1 teaspoon vanilla extract
- 1/2 teaspoon baking powder
- Toppings: fruits, nuts, or granola of your choice
Instructions
- Preheat your oven to 350°F (175°C).
- Mix the Greek yogurt, eggs, honey (or maple syrup), vanilla extract, and baking powder in a large bowl.
- Prepare an 8×8-inch baking dish or cast-iron skillet by greasing it lightly.
- Pour the yogurt mixture into the greased dish and smooth the top with a spatula.
- Get creative by adding your favorite toppings on top.
- Bake for 25-30 minutes until lightly golden and set around the edges.
- Cool for 5-10 minutes, then serve warm.
Notes
Feel free to personalize with seasonal fruits or favorite toppings.
- Prep Time: 10 minutes
- Cook Time: 30 minutes
- Category: Breakfast
- Method: Baking
- Cuisine: Mediterranean
Nutrition
- Serving Size: 1 serving
- Calories: 150
- Sugar: 10g
- Sodium: 80mg
- Fat: 6g
- Saturated Fat: 2g
- Unsaturated Fat: 2g
- Trans Fat: 0g
- Carbohydrates: 15g
- Fiber: 1g
- Protein: 10g
- Cholesterol: 50mg
Keywords: baked yogurt, healthy breakfast, quick breakfast, protein-packed breakfast




