Instant Pot Yogurt
Making Homemade Instant Pot Yogurt: A Culinary Adventure
Welcome, fellow cooking enthusiasts, to another delightful culinary journey! If you’ve ever been curious about making your own yogurt at home, you’ve landed in the right spot. Today, we’re diving into the world of homemade yogurt using that magical kitchen gadget—the Instant Pot! Yogurt-making might sound intimidating if you’ve never attempted it before, but I promise you, it’s easier than you think, and you’ll find yourself immersed in a world of creamy, deliciousness.
Ah, yogurt! It’s that versatile ingredient that can brighten your breakfast bowls, enrich smoothies, and even elevate savory dishes. There’s something truly special about making yogurt right in the comfort of your home. Picture this: creamy, smooth, tangy yogurt that’s brimming with probiotics, all made from scratch. Plus, once you master this recipe, it’ll become an effortless staple in your kitchen repertoire.
What I love most about making yogurt at home is the ability to customize it. You can choose your favorite milk—that’s right! Whole, low-fat, or even non-dairy alternatives—and you have the freedom to tweak the flavor and consistency to your heart’s content. The process of watching the yogurt transform from milk to that luscious, creamy goodness is not only rewarding but also a great way to impress your friends and family. So, roll up your sleeves, and let’s embark on this creamy adventure together!
Personal Story
Let me take you back to a sunny Saturday morning when I was a little girl, standing beside my grandmother in her warm, inviting kitchen. She was a master at creating simple yet spectacular dishes from scratch, and one of my favorites was her homemade yogurt. I would watch in awe as she carefully stirred the warm milk and added the starter culture, creating a magical transformation that seemed almost otherworldly. The smell of yogurt setting was comforting and always made our home feel more inviting.
As it sat on the kitchen counter wrapped in a cozy blanket, we’d spend the time chatting and preparing fresh fruit and honey to serve with it. Those moments of laughter, warmth, and deliciousness were priceless, and they instilled in me a love of cooking that has only grown over the years.
Fast forward to today—using my trusty Instant Pot reminds me of those moments with my grandmother, and now I can share that joy with you. Making yogurt at home is a wonderful way to reconnect with the simple joys of cooking and to create lasting memories in your kitchen. Let’s get started on making our very own batch!
Ingredients
Here’s what you’ll need to make your own Instant Pot yogurt:
-
Milk (Whole or Low-Fat):
- Explanation: Milk serves as the base for your yogurt. The creaminess of whole milk will give you thick and luscious yogurt, while low-fat will yield a lighter texture.
- Substitution Tip: If you prefer a non-dairy option, you can use almond milk, coconut milk, or soy milk, but be sure to use unsweetened and unflavored varieties for best results.
-
Plain Yogurt (with live active cultures):
- Explanation: This serves as the starter culture for your homemade yogurt, introducing beneficial bacteria that ferment the milk.
- Substitution Tip: You can use any brand of plain yogurt that contains live active cultures. Just make sure it’s free of added flavors or sweeteners.
-
Instant Pot:
- Note: No ingredient list would be complete without our hero, the Instant Pot! This amazing gadget can simplify the entire yogurt-making process—so if you don’t have one yet, consider investing in this kitchen marvel!
-
Optional Sweetener (Honey, Maple Syrup, or Sugar):
- Explanation: If you prefer a sweeter yogurt, add honey or maple syrup after it’s done churning.
- Chef Insight: I recommend adding sweeteners only after the yogurt has set to keep the fermentation process effective.
Step-by-Step Instructions
Now, let’s break down the yogurt-making process step-by-step!
Step 1: Prepare Your Milk
Pour 1/2 gallon of milk into your Instant Pot. Close the lid and set it to the "Yogurt" function. You want to heat the milk until it reaches about 180°F (82°C). This is an important step for thickening and removing any unwanted bacteria.
Chef Hack: If you don’t have an instant-read thermometer, just heat it for about 30 minutes. You’ll see small bubbles forming along the edges when it’s hot enough!
Step 2: Cool It Down
Once the milk reaches the desired temperature, remove the inner pot and let it cool to 110°F (43°C). You can speed this up by placing the pot in a cold water bath.
Pro Tip: Stir gently as it cools to help release steam and speed up the cooling process.
Step 3: Add the Yogurt Starter
Once your milk has cooled, add 1/4 cup of plain yogurt to the warm milk. Whisk it gently until it’s fully incorporated. This is where the magic begins!
Chef Insight: If your yogurt is still intact and you haven’t stirred it vigorously, no worries! The cultures will still work their magic.
Step 4: Incubate the Yogurt
Return the pot to the Instant Pot, close the lid, and select the "Yogurt" function again. Let it incubate for anywhere from 8 to 12 hours, depending on how tangy you want it.
Commentary: The longer you let it sit, the tangier it becomes. I often check mine at the 8-hour mark for a perfect balance.
Step 5: Check for Doneness
Once the incubation period is over, your yogurt will have set! It should look thick and creamy with a lovely tangy aroma.
Chef Hack: If you want Greek yogurt, you can strain it using a cheesecloth or coffee filter to remove excess whey.
Step 6: Chill and Store
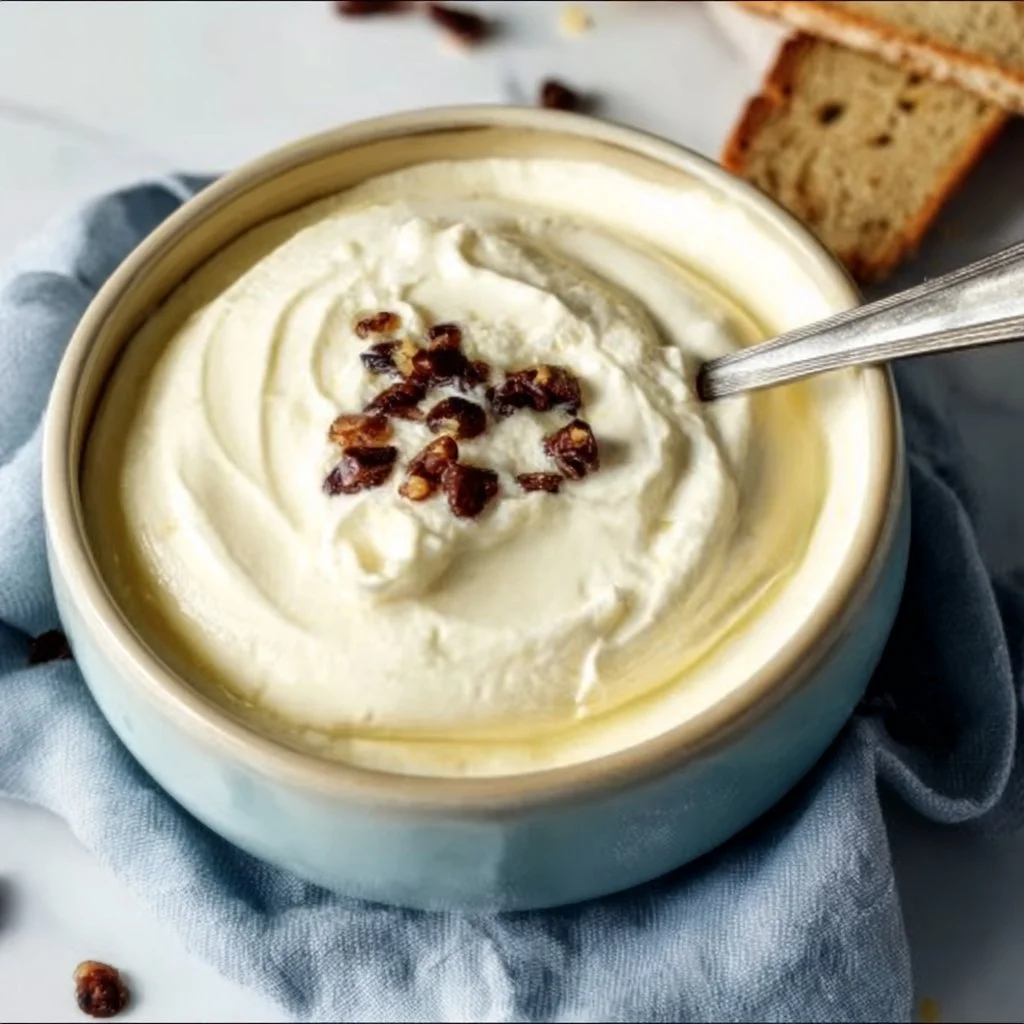
Transfer the yogurt into clean glass jars and refrigerate for at least a few hours before using, allowing it to thicken just a bit more.
Pro Tip: Add any desired sweeteners and fruit toppings before serving!
Serving Suggestions
For a delightful presentation, serve your homemade yogurt in a lovely bowl, topped with fresh fruits, a drizzle of honey, and maybe a sprinkle of granola for crunch. You can also serve it alongside a refreshing fruit salad or even use it as a base for savory dishes like tzatziki. The possibilities are endless!
Recipe Variations
Feeling adventurous? Here are some creative spins you can try with your homemade yogurt:
- Flavor Infusions: Add vanilla extract, cinnamon, or cardamom for flavored yogurt.
- Fruit-Infused: Blend in pureed fruits like berries or mango to create fruity yogurt.
- Savory Spin: Mix in herbs, garlic, and lemon juice for a delicious savory yogurt dip!
- Nutty Bliss: Stir in nut butter or chopped nuts for added texture and protein.
- Vegan Alternative: Use coconut milk or almond milk along with a vegan yogurt starter for dairy-free yogurt.
Chef’s Notes
Before I wrap things up, I want to share a little wisdom from my kitchen adventures. The first time I ever made yogurt was a complete disaster! I forgot to check the temperature of the milk and ended up with a soupy mess. But that taught me the importance of patience and precision in the kitchen. Making yogurt is a learning curve just like any other culinary endeavor—it’s all about experimenting and finding what works best for you. Each batch becomes a part of your kitchen story; embrace the journey!
FAQs and Troubleshooting
Q: My yogurt didn’t set; what went wrong?
- A: There are several reasons yogurt may not set! Check if your milk reached the right temperature and your starter yogurt contained live cultures. If you mixed in the starter too early, that can also inhibit the setting.
Q: Can I use flavored yogurt as a starter?
- A: While it’s best to use plain yogurt, you can get creative here! Just be cautious of added sweeteners and flavorings that may affect the fermentation.
Q: How long does homemade yogurt last?
- A: It typically stays good for about 1-3 weeks in the fridge. Just keep it in an airtight container to maintain freshness.
Q: Can I freeze homemade yogurt?
- A: Yes! You can freeze yogurt in portions. Just keep in mind that the texture may change once defrosted, but it’s still great for smoothies or cooking.
Nutritional Info (if applicable)
Each serving of homemade yogurt can vary depending on the milk you use. Generally, though, you’re looking at about:
- Calories: Approximately 100-150 (for whole milk yogurt)
- Protein: 8-10 grams
- Fat: 4-8 grams
- Carbohydrates: 5-7 grams
There you have it, my beautiful foodies! Making homemade Instant Pot yogurt not only brings back fond memories but also sets you on the path to culinary creativity. I hope you enjoy every creamy spoonful of your homemade yogurt and find joy in sharing it with loved ones. Happy cooking, and don’t forget to get a little messy in your kitchen—those flour-covered aprons are badges of honor!
Print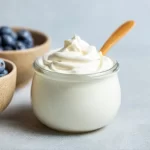
Homemade Instant Pot Yogurt
- Total Time: 735 minutes
- Yield: 10 servings 1x
- Diet: Vegetarian
Description
A simple and rewarding recipe for making creamy and tangy yogurt at home using an Instant Pot.
Ingredients
- 1/2 gallon of Whole or Low-Fat Milk
- 1/4 cup of Plain Yogurt (with live active cultures)
- Optional Sweetener (Honey, Maple Syrup, or Sugar)
Instructions
- Pour 1/2 gallon of milk into your Instant Pot. Close the lid and set it to the “Yogurt” function. Heat until it reaches about 180°F (82°C).
- Remove the inner pot and let it cool to 110°F (43°C).
- Add 1/4 cup of plain yogurt to the warm milk and whisk gently.
- Return the pot to the Instant Pot, close the lid, and select the “Yogurt” function again. Let it incubate for 8 to 12 hours.
- Check for doneness; the yogurt should be thick and creamy.
- Transfer the yogurt into clean glass jars and refrigerate for a few hours before using.
Notes
The longer yogurt sits, the tangier it becomes. For Greek yogurt, strain it using a cheesecloth or coffee filter.
- Prep Time: 15 minutes
- Cook Time: 720 minutes
- Category: Dairy
- Method: Instant Pot
- Cuisine: American
Nutrition
- Serving Size: 1 serving
- Calories: 120
- Sugar: 5g
- Sodium: 100mg
- Fat: 4g
- Saturated Fat: 2g
- Unsaturated Fat: 2g
- Trans Fat: 0g
- Carbohydrates: 6g
- Fiber: 0g
- Protein: 8g
- Cholesterol: 15mg
Keywords: instant pot, yogurt, homemade yogurt, creamy yogurt, dairy recipe
Homemade Greek Yogurt
The Ultimate Guide to Homemade Greek Yogurt: Simple, Delicious, and So Rewarding!
Welcome to my kitchen! I’m Olivia Bennett, your friendly guide on this culinary adventure, and today we’re diving into something incredibly simple yet utterly delightful: homemade Greek yogurt. If you’re a foodie like me who loves creamy textures, tangy flavors, and the satisfaction of making something from scratch, you’re in just the right place!
Have you ever tasted fresh yogurt that’s velvety smooth, bursting with flavor, and made with just a few beautiful ingredients? If not, get ready for your taste buds to do a happy dance! Homemade Greek yogurt is a game-changer. It’s vastly different from store-bought versions, often overloaded with additives and preservatives, which can take away from that wholesome natural goodness we all crave.
Picture this: It’s early summer, and the flowers are in full bloom. I’m in my cozy kitchen, sunlight streaming through the windows, the faint aroma of lavender from my herb garden wafting in the air. I’ve just made a fresh batch of Greek yogurt, and the anticipation of tasting that first creamy spoonful sends a flutter through my heart. The nutritional benefits are just the icing on the cake! Packed with probiotics and protein, this yogurt is not just a treat; it’s a powerhouse for your gut health too.
Now, let’s get started! I promise you that making homemade Greek yogurt is one of the most rewarding (and delicious) kitchen projects you’ll ever take on. From setting the yogurt to that magical moment of scooping it out of the strainer, every step is filled with joy. And don’t worry — it’s super easy. Grab your apron, and let’s get creating!
A Little Personal Story
Ah, yogurt! I have fond memories of my grandma — a feisty Italian woman with an unmatched love for food. Every summer, she would set aside a whole day just for yogurt making. I remember standing beside her, eyes wide with fascination, as she carefully poured milk, added the starter, and wrapped the jars in fluffy towels as if they were precious treasures. The whole house smelled divine after a day of waiting, and the first spoonful of her homemade yogurt was always a moment of pure bliss.
What I loved most was that we always topped it with whatever fruit was fresh from the market or whatever was ripe in our garden that day. Whether it was a handful of tart berries or a drizzle of honey, it was personal, it was special, and excitedly messy. My grandmother taught me that cooking is not just about nourishment; it’s about creating memories, sharing flavors, and celebrating the act of togetherness. I carry that tradition with me, and each time I whip up a batch of Greek yogurt, I feel like I’m keeping a little piece of her spirit alive.
Ingredients
Let’s gather everything you’ll need for this lovely homemade Greek yogurt:
-
Whole Milk (1 quart): For the creamiest, richest yogurt, whole milk is the way to go. You can use 2% or skim milk if you prefer a lighter version, but remember, the creamier the milk, the creamier the yogurt!
-
Plain Yogurt (1/4 cup): This will act as your starter culture. Make sure it contains live active cultures, as these little guys are what give your yogurt its signature tang. If you’re dairy-free, you can use a non-dairy yogurt starter.
-
Cheesecloth or Fine Mesh Strainer: This is for straining your yogurt and achieving that thick, luscious Greek yogurt consistency. If you don’t have cheesecloth, you can use a clean dish towel or a coffee filter!
-
A Pot: Any medium-sized pot will do. Just make sure it has enough space to hold the milk without spilling over.
-
A Thermometer: This isn’t absolutely necessary, but a kitchen thermometer makes it easier to ensure your milk is just the right temperature for culturing. If you don’t have one, I’ll guide you through the approximate steps!
-
A Whisk: Perfect for whisking together your yogurt starter with the milk. It helps the cultures blend beautifully.
Step-by-Step Instructions
You ready? Let’s make some magic happen! Here’s how to whip up your Greek yogurt:
Step 1: Heat the Milk
Pour the whole milk into a medium pot and gently heat it over medium-low heat. You want to warm it up to about 180°F (82°C) — this pasteurizes the milk. If you don’t have a thermometer, just keep an eye on it; you’ll see steam forming, and tiny bubbles starting to appear around the edges.
Chef Tip: Stir occasionally to prevent the milk from scorching at the bottom. You want your yogurt to be smooth and silky, not burned!
Step 2: Cool the Milk
Once you’ve reached that magic temperature, remove the pot from heat and let it cool down to around 110°F (43°C). You can whisk it every now and then to speed up the cooling process!
Chef Insight: Patience is key here. Temperature affects how well the yogurt cultures will thrive, which ultimately results in a delicious final product.
Step 3: Mix in the Starter
In a separate bowl, take your plain yogurt and whisk it until smooth. Then, add a couple of tablespoons of the warm milk into the yogurt to temper it. This step is crucial because it helps the cultures gradually adjust to the warmer temperature.
Now, whisk that mixture back into the pot of warm milk until everything is blended evenly.
Step 4: Let It Culture
Transfer the pot to a warm place, like an oven with the light on, or cover it with towels and place it in a cozy spot. Let it sit undisturbed for 6 to 12 hours.
Chef Tip: The longer you let it sit, the tangier it will become! I recommend checking it after 6 hours and deciding if it needs more time.
Step 5: Strain the Yogurt
Once your yogurt has thickened to your liking, it’s time to strain it! Set up a fine mesh strainer over a large bowl, line it with cheesecloth, and pour the yogurt into the strainer.
Cover it with plastic wrap or set it aside to drain for about 2 hours for a creamy Greek texture, or longer if you want it extra thick—up to 8 hours!
Step 6: Transfer and Store
Carefully transfer your strained Greek yogurt into an airtight container, and guess what? You just made yogurt from scratch!
Chef Note: Reserve a couple of tablespoons of your homemade yogurt for the next batch — that’s your starter culture for the next time around!
Serving Suggestions
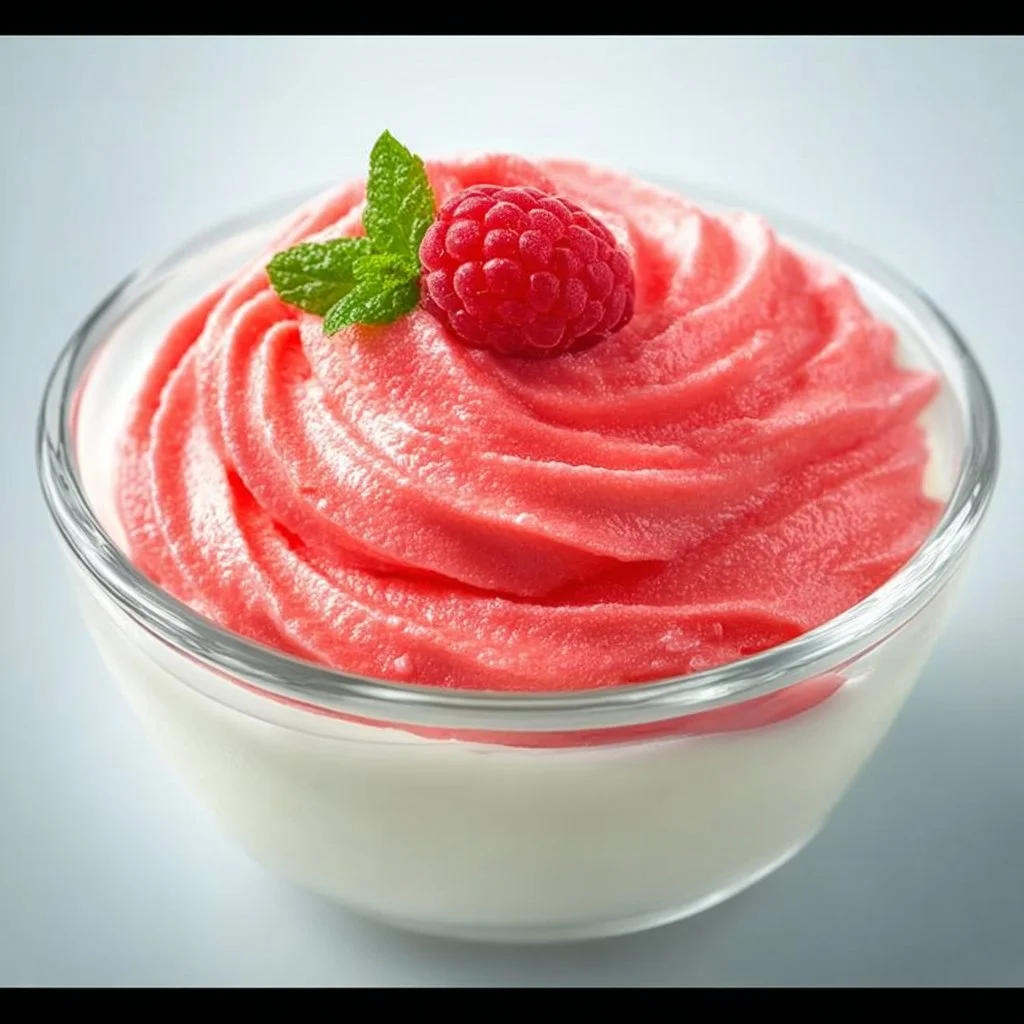
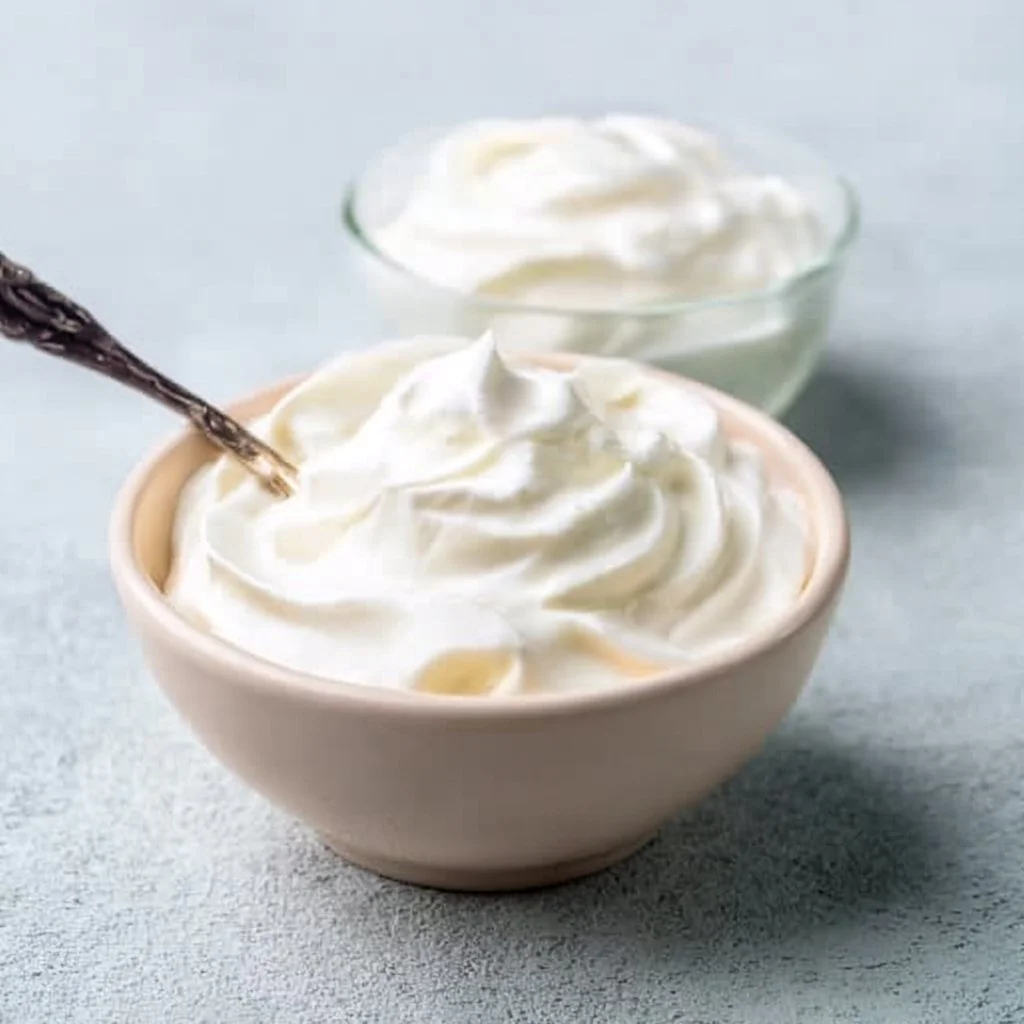
Homemade Greek yogurt is so versatile! You can enjoy it in a multitude of ways. Serve it in a beautiful bowl topped with fresh berries, a drizzle of honey, and a sprinkle of granola for crunch. Or, mix it into smoothies for an extra protein boost.
You can also use it as a tangy base for savory dishes like tzatziki or as a creamy addition to your favorite salad dressings. The possibilities are endless!
Recipe Variations
-
Flavored Yogurt: Stir in some vanilla extract, cocoa powder, or even fresh herbs for a twisted version.
-
Dairy-Free Option: Substitute whole milk with coconut milk for a tropical twist that’s equally creamy.
-
Honey Vanilla Yogurt: Mix in honey and vanilla extract after straining for a deliciously sweet treat.
-
Fruit-Infused Yogurt: Blend fresh fruits like strawberries or mangoes into your Greek yogurt for a fresh burst of flavor.
-
Savory Yogurt Bowls: Top it with olive oil, fresh herbs, and a sprinkle of sea salt for a savory snack or dip.
Chef’s Notes
Homemade Greek yogurt has been a staple in my kitchen, and every time I make it, I think about those warm summer days spent with my grandma. I’ve experimented over the years, trying different cultures, milk varieties, and even different straining times. Each time, I learn something new. The beauty of making yogurt at home is that you can completely customize it and make it your own.
And let me tell you — the first time I made it and tasted that velvety goodness, it felt like the culinary equivalent of discovering a treasure chest! No more store-bought yogurt for me; you can taste the love in every luscious spoonful.
FAQs and Troubleshooting
1. Why didn’t my yogurt thicken?
If your yogurt didn’t thicken properly, it might be due to the milk not being heated to the right temperature or not enough time to culture it. Patience is key — try letting it sit longer next time!
2. How can I make my yogurt less tangy?
For a milder flavor, simply reduce the culturing time. Check it after about 4 hours for a gentler tang.
3. Can I reuse my homemade yogurt as a starter?
Absolutely! Just save a few tablespoons of your batch for your next round. It’s such a great circle of flavor!
4. My yogurt has separated; is it still good?
No worries! It’s completely normal for whey to separate from the yogurt. You can just stir it back in for a creamier texture or drain it off if you prefer a thicker product.
Nutritional Info
While the nutritional content can vary based on specific ingredients used, typically, one cup of homemade Greek yogurt contains:
- Calories: Approximately 140
- Protein: 12-15g
- Fat: 6-10g
- Carbohydrates: 6-8g
- Calcium: A good source!
Now, what are you waiting for? Dive into this delightful culinary project, and savor the joys of homemade Greek yogurt. It truly is a labor of love that brings happiness to both your taste buds and your kitchen! Happy cooking, my fellow food lover! 💖
Print
Homemade Greek Yogurt
- Total Time: 12 hours 15 minutes
- Yield: 4 servings 1x
- Diet: Vegetarian
Description
A simple and rewarding guide to making creamy homemade Greek yogurt from scratch.
Ingredients
- 1 quart Whole Milk
- 1/4 cup Plain Yogurt (with live active cultures)
- Cheesecloth or Fine Mesh Strainer
- A medium-sized Pot
- A Thermometer
- A Whisk
Instructions
- Pour the whole milk into a medium pot and gently heat it over medium-low heat until it reaches about 180°F (82°C).
- Remove the pot from heat and let it cool down to around 110°F (43°C).
- Whisk the plain yogurt in a separate bowl until smooth, then add a couple of tablespoons of warm milk to temper it.
- Blend the tempered yogurt mixture back into the pot of warm milk until evenly mixed.
- Transfer the pot to a warm place and let it sit undisturbed for 6 to 12 hours to culture.
- Set up a fine mesh strainer over a large bowl, line it with cheesecloth, and pour the yogurt into the strainer to strain for about 2 to 8 hours.
- Carefully transfer the strained yogurt into an airtight container.
Notes
Reserve a couple of tablespoons of your homemade yogurt for the next batch as your starter culture.
- Prep Time: 15 minutes
- Cook Time: 12 hours
- Category: Snack
- Method: Culturing
- Cuisine: Greek
Nutrition
- Serving Size: 1 serving
- Calories: 140
- Sugar: 6g
- Sodium: 100mg
- Fat: 8g
- Saturated Fat: 4g
- Unsaturated Fat: 4g
- Trans Fat: 0g
- Carbohydrates: 8g
- Fiber: 0g
- Protein: 12g
- Cholesterol: 30mg
Keywords: Greek yogurt, homemade yogurt, yogurt recipe, dairy recipes, probiotic food