
Cheesy Taco Potatoes
Cheesy Taco Potatoes: A Cozy Comfort Dish to Bring Everyone Together
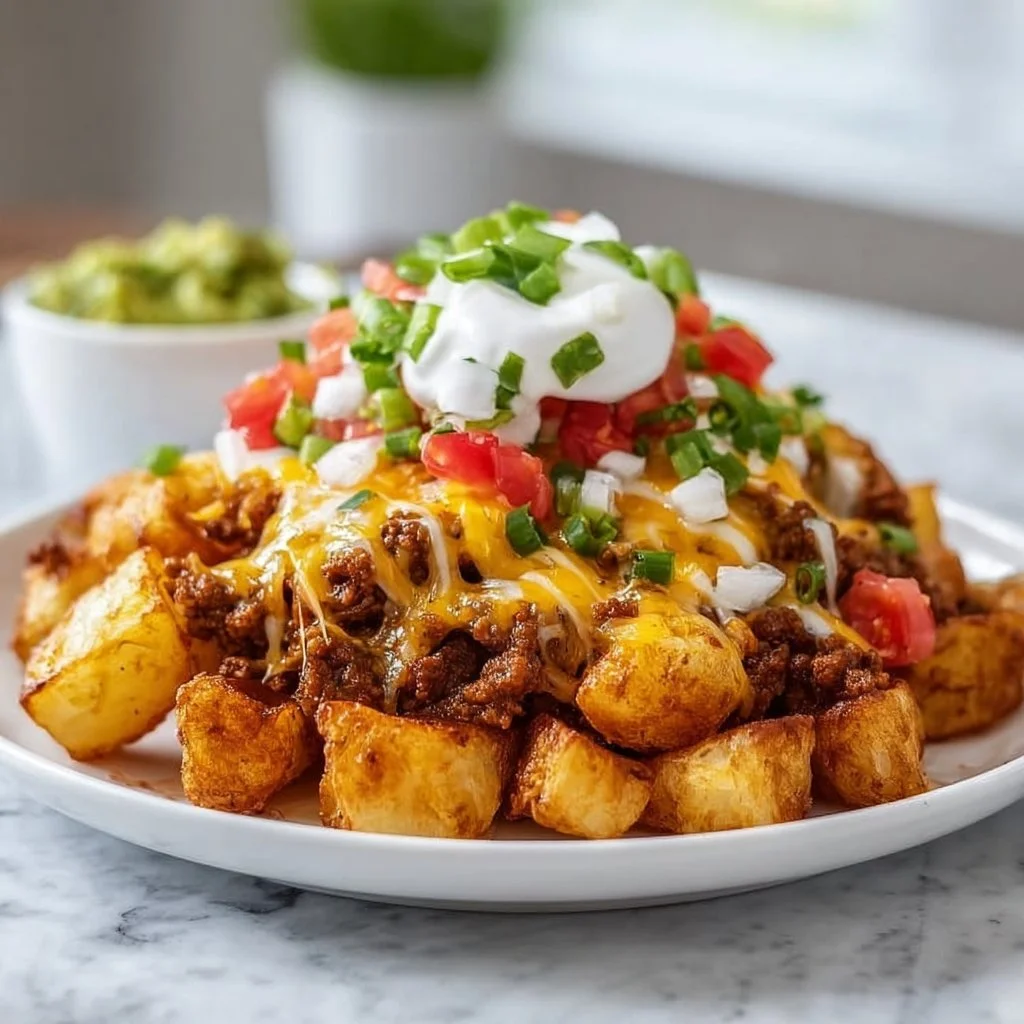
Welcome to my kitchen! Today, we’re diving into a dish that’s close to my heart—Cheesy Taco Potatoes. Picture crispy golden potatoes, smothered in melted cheese, and packed with all the bold, zesty flavors of taco night. It’s a comforting blend that’s sure to bring smiles, laughter, and maybe even a bit of nostalgia to your dinner table. Whether you’re having a casual weeknight meal or hosting friends for game night, these cheesy potatoes will be the star of your spread!
Cheesy Taco Potatoes are more than just a recipe; they’re a celebration of flavors that transform humble ingredients into something spectacular. With pantry staples like potatoes, cheese, and taco seasoning, this dish is simple yet oh-so-satisfying. Plus, it’s versatile enough to please everyone’s taste buds, making it the perfect option for family dinners or gatherings with friends!
A Taste of Nostalgia
Growing up, taco night was always a family favorite. I vividly remember my parents whipping up tacos with all the fixings—ground beef simmering with spices, fresh veggies chopped, and an array of toppings laid out in colorful bowls. But what I looked forward to the most was when we made taco-loaded potatoes. My mom would bake some potatoes until crisp and fluffy and then let us go wild adding our favorite taco toppings. It became a tradition, and those meals were filled with laughter, creativity, and a whole lot of cheese!
To this day, I cherish those memories, and every time I whip up a batch of Cheesy Taco Potatoes, I’m transported back to those joyful evenings around the dinner table. It’s not just a dish; it’s a connection to my roots, and I can’t wait to share it with you!
Ingredients
Here’s what you’ll need to make your own Cheesy Taco Potatoes:
-
Potatoes (Russet or Yukon Gold)
Tip: These starchy varieties are ideal for baking. If you’re in a pinch, sweet potatoes add a lovely twist, too!
-
Ground Beef or Turkey
Chef Insight: Use lean ground meat for a healthier option. You can also substitute with black beans for a vegetarian version!
-
Taco Seasoning
Substitution: Homemade taco seasoning is super easy to whip up with spices like cumin, chili powder, garlic powder, and paprika!
-
Cheddar Cheese
Quick Tip: Experiment with different cheese types—Monterey Jack or Pepper Jack can add a spicy kick!
-
Sour Cream
Substitution: Greek yogurt is a fantastic substitute for a lighter option that still packs that creamy flavor.
-
Chopped Green Onions
Nutritional Bonus: These add a fresh crunch and a burst of color! Feel free to toss in some bell peppers or tomatoes for extra veggies.
-
Corn (canned or frozen)
Chef Advice: Corn adds sweetness and texture. You can swap it for black olives or diced avocados if you prefer!
-
Olive Oil
Tip: A splash of butter will add richness, but olive oil keeps things light and fragrant.
Step-by-Step Instructions
Let’s get cooking! Follow these steps for the yummiest Cheesy Taco Potatoes.
1. Preheat the Oven
Start by preheating your oven to 400°F (200°C). This will ensure that your potatoes have a crispy texture on the outside while remaining fluffy on the inside.
2. Prepare the Potatoes
Wash your potatoes thoroughly, then pierce them a few times with a fork. This will allow steam to escape while they bake. Drizzle with a little olive oil and sprinkle with salt before wrapping them in aluminum foil. This will help them roast evenly and keep them moist.
3. Bake the Potatoes
Pop those bad boys in the preheated oven for about 45-60 minutes or until they’re fork-tender. Pro tip: you can check if they’re done by simply inserting a fork into the center. If it slides in easily, you’re good to go!
4. Cook the Meat
While your potatoes are baking, it’s time to get the taco meat ready. In a skillet, heat a splash of olive oil over medium heat. Add in your ground beef or turkey and cook it until it’s browned. Be sure to break it up with a spatula to ensure even cooking.
Once the meat is fully cooked, add in your taco seasoning with a splash of water. Let it simmer for about 5-7 minutes until the flavors meld beautifully. Ooh, that aroma!
5. Assemble Your Ingredients
Now, it’s assembly time! Once the potatoes are baked, carefully remove them from the oven. When they’re cool enough to handle, slice them open (but don’t cut all the way through!). Gently fluff the insides with a fork.
6. Load It Up
For each potato, start with a generous scoop of the seasoned meat. Follow it up with a handful of corn, a sprinkle of cheese, and a dollop of sour cream. Top with chopped green onions. Can you smell that? Heaven!
7. Back to the Oven
Return the loaded potatoes back to the oven for an additional 10 minutes or until the cheese is perfectly melted and bubbly. Trust me; this step is crucial for that melty goodness!
8. Final Touches
Once your Cheesy Taco Potatoes are out of the oven, let them cool for a minute before serving. You can garnish them with additional toppings like diced tomatoes, jalapeños, or even a drizzle of hot sauce for that extra kick!
Serving Suggestions
Plate these beauties by arranging them on a large platter, sprinkle with chopped cilantro, or keep it casual by serving them in their skins. These potatoes are perfect for sharing and make an impressive centerpiece for any gathering!
Recipe Variations
Feel free to get creative with your Cheesy Taco Potatoes! Here are a few variations to consider:
-
Tex-Mex Loaded Potatoes: Add black beans, corn, and salsa to your meat mixture for a zesty twist.
-
Buffalo Chicken Version: Swap taco meat for buffalo chicken and top with ranch dressing instead of sour cream for a spicy kick!
-
Vegetable Medley: Load your potatoes with sautéed bell peppers, onions, and mushrooms for a flavorful veggie option.
-
Breakfast Style: Top your potatoes with scrambled eggs, avocado, and salsa for a hearty brunch dish.
Chef’s Notes
This recipe has evolved over the years as I’ve played around with flavors and ingredients. My favorite memory is when a friend suggested I try making them with sweet potatoes instead of regular ones. Although initially skeptical, I gave it a shot, and it turned out AMAZING! Who knew they could be so versatile and delicious?
Another tip—sometimes I even whip up a batch and freeze the leftovers. The next time you have a craving for a cheesy fix, just pop them in the oven, and you’re all set!
FAQs and Troubleshooting
1. My potatoes are undercooked—what do I do?
If your potatoes are still hard after the first cook, pop them back in the oven for an additional 10-15 minutes. You can also microwave them for a quick fix, but be sure to check them frequently.
2. How do I prevent my potatoes from getting soggy?
Keeping the skin on while baking helps maintain their integrity. Be sure to only wrap them loosely in aluminum foil—not tightly, as this can trap steam.
3. Can I make this ahead of time?
Absolutely! You can prep everything ahead of time—just assemble your loaded potatoes and store them in the fridge. When you’re ready, just pop them in the oven to heat and melt the cheese.
4. What if I don’t have taco seasoning?
No problem! You can mix up your own with chili powder, cumin, garlic powder, onion powder, and a pinch of salt.
Nutritional Information
While I didn’t calculate exact nutritional values, these Cheesy Taco Potatoes can be a satisfying and hearty meal! Just remember to indulge in portions that fit your dietary needs.
So, there you have it—my delightful take on Cheesy Taco Potatoes. As you whip up this cozy dish, I hope you feel the warmth of those family dinners I cherish so much, and I can’t wait to hear about your own culinary adventures! Happy cooking! 🍽️🤗
Print
Cheesy Taco Potatoes
- Total Time: 75 minutes
- Yield: 4 servings
- Diet: Gluten-Free, Vegetarian (if using beans)
Description
A cozy comfort dish featuring crispy golden potatoes smothered in melted cheese and packed with bold taco flavors.
Ingredients
- Russet or Yukon Gold Potatoes
- Ground Beef or Turkey
- Taco Seasoning
- Cheddar Cheese
- Sour Cream
- Chopped Green Onions
- Corn (canned or frozen)
- Olive Oil
Instructions
- Preheat the oven to 400°F (200°C).
- Prepare the potatoes by washing and piercing them with a fork, drizzling with olive oil, and seasoning with salt.
- Bake the potatoes for 45-60 minutes until fork-tender.
- Cook the meat in a skillet with olive oil until browned; add taco seasoning and a splash of water. Simmer for 5-7 minutes.
- Assemble by removing baked potatoes and fluffing the insides.
- Load each potato with seasoned meat, corn, cheese, and sour cream. Top with green onions.
- Return the loaded potatoes to the oven for an additional 10 minutes to melt the cheese.
- Cool for a minute before serving and garnish with additional toppings if desired.
Notes
Feel free to substitute with black beans for a vegetarian version or try different cheeses for variety.
- Prep Time: 15 minutes
- Cook Time: 60 minutes
- Category: Main Course
- Method: Baking
- Cuisine: Mexican
Nutrition
- Serving Size: 1 potato
- Calories: 350
- Sugar: 5g
- Sodium: 400mg
- Fat: 12g
- Saturated Fat: 4g
- Unsaturated Fat: 6g
- Trans Fat: 0g
- Carbohydrates: 45g
- Fiber: 3g
- Protein: 15g
- Cholesterol: 30mg
Keywords: cheesy potatoes, taco potatoes, comfort food, Mexican cuisine, easy recipes
Crock Pot Crack Chicken
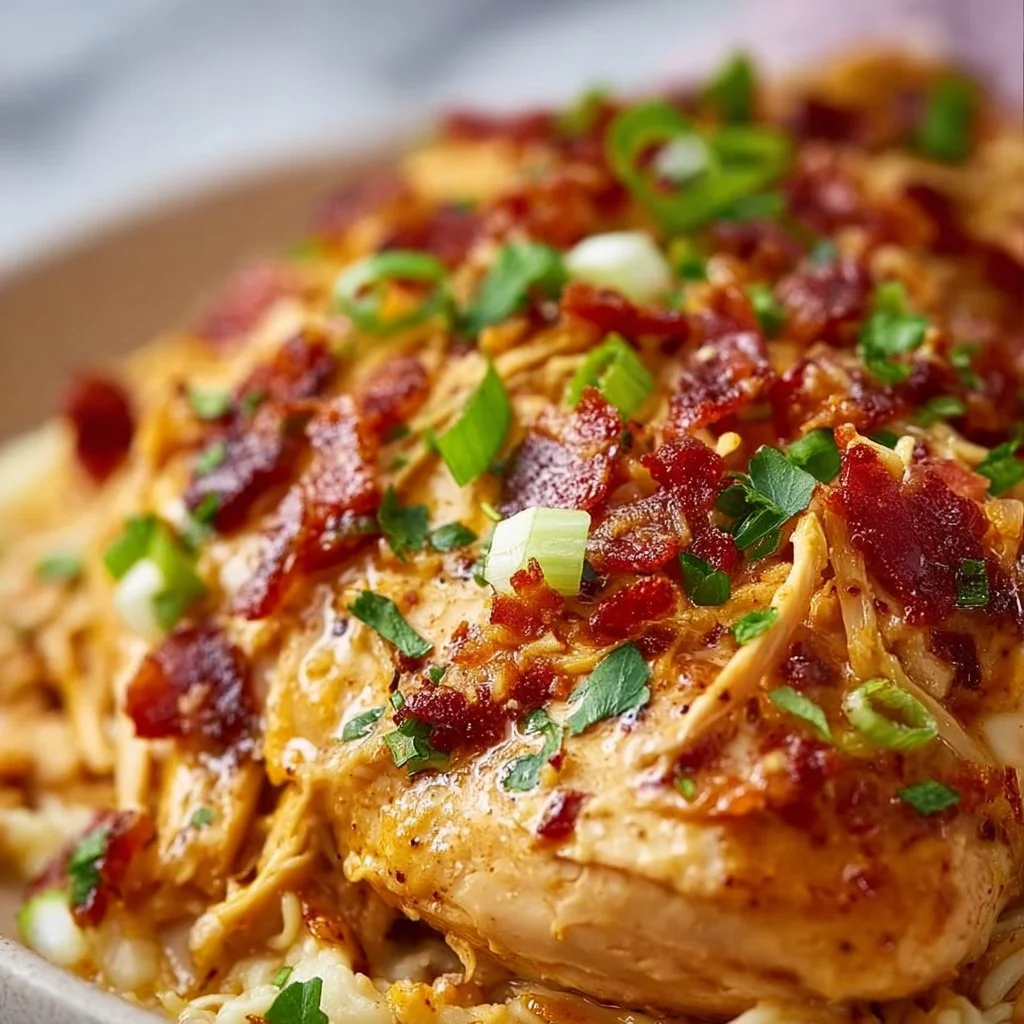
Crock Pot Crack Chicken: The Ultimate Comfort Dish
Hey there, kitchen enthusiasts and fellow food lovers! Welcome back to my cozy corner of culinary adventures! Today, I’m super excited to share one of my all-time favorite recipes — Crock Pot Crack Chicken. This dish has a special place in my heart and is guaranteed to become a family favorite at your dinner table, too.
Picture this: it’s a chilly Sunday afternoon, and you’re snuggled up at home with your loved ones. You catch a whiff of something absolutely mouth-watering simmering away in your kitchen — that’s the magic of crack chicken! This creamy, flavorful dish is not only packed with savory goodness but is also ridiculously easy to whip up in your trusty crock pot, making it perfect for busy days or lazy weekends.
What’s more, this recipe is versatile; you can serve it over rice, on a baked potato, or even stuffed into a tortilla or bun! The possibilities are endless, just like the flavors. Trust me, once you taste it, you’ll not only understand the name but will also find yourself coming back for second (or third) helpings. So, let’s roll up our sleeves and dive into this comforting, creamy dish that’s bound to make your taste buds dance!
Personal Story
Let me take you back to a fond memory that made this dish even more special for me. Several winters ago, I decided to host a game night for my friends. It was the perfect excuse to gather around and enjoy some hearty comfort food. I wanted something easy yet delicious, something that would fill our bellies and warm our hearts.
That’s when I stumbled upon a version of crock pot crack chicken. With a bit of tweaking and love, I created the version I’m sharing with you today. As the aroma filled my little apartment, my kitchen transformed into a bustling hub of laughter and chatter. Everyone was digging in, and I could see the delight on their faces with every bite. My friends asked for the recipe, and well, the rest is history! This dish has been a part of my cooking repertoire ever since. It serves as a reminder that food not only nourishes but also brings people together, creating precious moments worth cherishing.
Ingredients
Here’s what you’ll need to create this delectable dish:
-
Boneless, Skinless Chicken Breasts (3-4)
A classic choice! You can substitute with chicken thighs for a richer flavor or even use rotisserie chicken if you’re in a pinch for time! -
Cream Cheese (8 oz)
This creamy base is a game-changer! You can use reduced-fat cream cheese for a lighter version, or even dairy-free options if you’re avoiding dairy. -
Ranch Seasoning Mix (1 packet)
The secret flavor booster! For a homemade twist, try mixing dried herbs (dill, parsley, chives, and garlic powder). Just make sure you have enough to equal the one packet amount. -
Buffalo Sauce (1/2 cup)
Adds a kick! If you’re looking for less heat, go for a mild buffalo sauce or replace it with barbecue sauce for a sweeter touch. -
Shredded Cheddar Cheese (1 cup)
Because who doesn’t love cheese? Feel free to use a mix of cheeses such as Monterey Jack or pepper jack for an extra kick! -
Sliced Green Onions (1/4 cup)
Fresh and vibrant! If you’re not a green onion fan, you can replace them with chives for a subtler flavor. -
Cooked Bacon (4-6 slices, crumbled)
Because bacon makes everything better! Turkey bacon can be used as a healthier alternative or omit it altogether for a vegetarian version. -
Salt and Pepper to taste
Essential for enhancing flavor! Always taste and adjust to suit your preferences!
Step-by-Step Instructions
Now, let’s get to the fun part — cooking! Follow these easy steps to create your delicious Crock Pot Crack Chicken:
-
Prep the Chicken:
- Begin by placing the boneless and skinless chicken breasts in the bottom of your crock pot. No need for oil; as the chicken cooks, it will release juices that keep everything moist.
-
Cream Cheese Layer:
- Take the entire block of cream cheese and place it right on top of the chicken. Don’t worry about spreading it; it will melt beautifully throughout the cooking process.
-
Add Ranch Seasoning Mix:
- Sprinkle the ranch seasoning all over the cream cheese and chicken. It’s the secret to that classic “crack” flavor!
-
Buffalo Sauce Time:
- Pour the buffalo sauce over everything. You can adjust the amount here depending on how spicy you like it. Mix it all around a bit — it’s messy, but that’s part of the fun!
-
Set the Temperature:
- Cover the crock pot and cook on LOW for 6-7 hours or HIGH for 3-4 hours until the chicken is fully cooked and shreddable. Make sure you resist the urge to lift the lid and peek too often; trust me, you want all that heat to stay inside!
-
Shred the Chicken:
- Once fully cooked, take two forks and shred the chicken right in the pot. Mix it all up to combine with the cheesy goodness.
-
Final Touches:
- Add the crumbled bacon and shredded cheese, then cover for an additional 15-20 minutes until the cheese is melted and everything is well combined.
-
Garnish and Serve:
- Finally, sprinkle those freshly sliced green onions on top for a pop of color and flavor.
And there you have it — easy peasy!
Serving Suggestions
To serve up your fantastic crack chicken, try plating it over a bed of fluffy rice, in a warm baked potato, or heaped inside soft tortillas. You can also enjoy it as a hearty dip for tortilla chips! I love to garnish it with a few extra green onions and maybe a dollop of sour cream for richness. Everyone will be grabbing seconds, so be prepared!
Recipe Variations
Feeling inspired? Here are a few variations to suit your taste preferences:
- Italian Twist: Swap the ranch seasoning for Italian seasoning and toss in some spinach for a fresh take!
- Southwest Style: Add black beans and corn, and serve with a cilantro-lime crema for a fiesta in your mouth.
- BBQ Sliders: Replace buffalo sauce with barbecue sauce and serve it on slider buns with a side of slaw.
- Vegetarian Delight: Use chickpeas instead of chicken for a hearty vegetarian alternative.
Chef’s Notes
This recipe has truly evolved over time! The first time I made it, I almost dumped in too much buffalo sauce in my excitement, and boy, was it spicy! But hey, that’s the beauty of cooking in the home kitchen — it’s all a learning curve. I love the way this dish brings people together, and I can’t wait to hear your stories as you share it with your loved ones. Cooking is as much about the journey as it is the destination, and every spoonful of crack chicken is sure to create some wonderful memories.
FAQs and Troubleshooting
Here are some common questions that folks often have about making Crock Pot Crack Chicken:
-
What if my chicken is dry after cooking?
- If overcooked, chicken can definitely dry out. Make sure to set an appropriate timer, and trust your crock pot! Always check for doneness a bit earlier if you’re unsure.
-
Can I use frozen chicken breasts?
- Yes, you can! Just note that you’ll need to extend the cooking time by about an hour and make sure the chicken reaches a safe internal temperature.
-
What if I don’t have ranch seasoning?
- No worries! Homemade seasonings with dried herbs like dill, garlic powder, and black pepper will work just fine.
-
How do I store leftovers?
- Store any leftovers in an airtight container in the fridge for up to four days. Reheat in the microwave or on the stove with a splash of broth to keep it moist.
Nutritional Info
While enjoying your delicious crock pot crack chicken, you may want to know the nutritional breakdown. A typical serving (about 1 cup) includes approximately 450 calories, 25g protein, 30g fat, and 6g carbohydrates. It’s a comforting dish, so enjoy it as part of a balanced meal!
And there you have it, a cozy journey into one of my all-time favorite dishes! I can’t wait for you to try this Crock Pot Crack Chicken and make it your own. Happy cooking, friends — let’s make those taste buds sing!
Print
Crock Pot Crack Chicken
- Total Time: 255 minutes
- Yield: 6 servings 1x
- Diet: None
Description
A creamy, flavorful crock pot dish that combines chicken, cream cheese, ranch seasoning, and buffalo sauce for a comforting family favorite.
Ingredients
- 3–4 Boneless, Skinless Chicken Breasts
- 8 oz Cream Cheese
- 1 packet Ranch Seasoning Mix
- 1/2 cup Buffalo Sauce
- 1 cup Shredded Cheddar Cheese
- 1/4 cup Sliced Green Onions
- 4–6 slices Cooked Bacon, crumbled
- Salt and Pepper to taste
Instructions
- Place the boneless and skinless chicken breasts in the bottom of your crock pot.
- Add the entire block of cream cheese on top of the chicken.
- Sprinkle ranch seasoning all over the cream cheese and chicken.
- Pour the buffalo sauce over everything and mix it around.
- Cover the crock pot and cook on LOW for 6-7 hours or HIGH for 3-4 hours until fully cooked.
- Take two forks and shred the chicken right in the pot.
- Add the crumbled bacon and shredded cheese, then cover for an additional 15-20 minutes.
- Sprinkle sliced green onions on top for garnish.
Notes
Serve over rice, in baked potatoes, or stuffed in tortillas. This dish can also be a hearty dip for tortilla chips.
- Prep Time: 15 minutes
- Cook Time: 240 minutes
- Category: Main Course
- Method: Slow Cooking
- Cuisine: American
Nutrition
- Serving Size: 1 serving
- Calories: 450
- Sugar: 4g
- Sodium: 900mg
- Fat: 30g
- Saturated Fat: 12g
- Unsaturated Fat: 16g
- Trans Fat: 0g
- Carbohydrates: 6g
- Fiber: 0g
- Protein: 25g
- Cholesterol: 80mg
Keywords: crock pot, crack chicken, comfort food, easy dinner, creamy chicken
Black Pepper Chicken
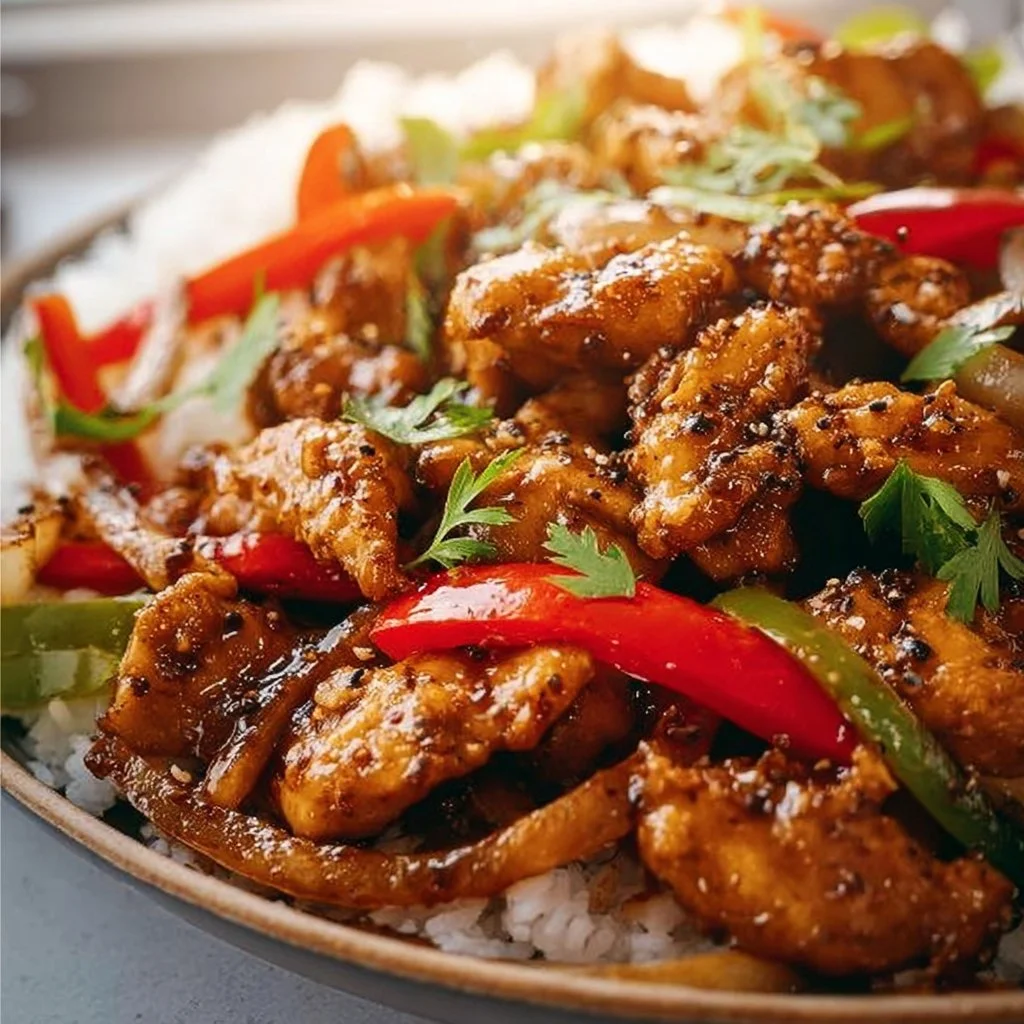
Black Pepper Chicken: A Flavorful Journey in Your Kitchen
Welcome back to my cozy kitchen, friends! Today, I’m thrilled to share one of my all-time favorite recipes: Black Pepper Chicken. This dish is a celebration of bold flavors, simplicity, and the kind of comfort food that warms your soul and brings everyone to the table. It’s one of those dishes that has a fantastic balance of spicy and savory, making every bite feel like a little culinary adventure.
Black Pepper Chicken is not just your everyday chicken stir-fry. Oh no, my friend! It’s a delightful dish that’s quick enough for weeknights but special enough to impress your crowd during weekend gatherings. Picture this: juicy chicken pieces, fresh veggies, and a aromatic pepper sauce that packs a punch—who could resist that?
What I love most about this recipe is its versatility. You can amp up the heat or keep it mild; it’s all about catering to your taste buds or that of your loved ones. As we dive into this recipe, I want you to feel inspired and excited to cook! There’s something magical that happens when you transform simple ingredients into something so delightful that it leaves everyone wanting more. So, roll up your sleeves and let’s make some delicious Black Pepper Chicken together!
Personal Story
Every dish I create has a story, and Black Pepper Chicken is no exception. I remember the first time I made this dish—it was a rainy Saturday afternoon, the kind of day where you want to stay indoors, cozy, and surrounded by delicious aromas. I had just moved into my quaint little apartment and wanted to make something special. With only a few ingredients on hand and a craving for something flavorsome, I decided it was the perfect time to experiment.
As I chopped the onions and bell peppers, my best friend, Mia, dropped by unannounced with a bottle of wine and an appetite for adventure. We laughed, danced around the kitchen, and concocted what would become our go-to recipe for busy weeknights. I remember the look of sheer happiness on her face with the first mouthful. Since then, Black Pepper Chicken has graced our table countless times, during both impromptu dinners and “fancy” get-togethers. I think it’s safe to say, this dish has truly woven itself into the fabric of my culinary journey, reminding me of the joy that cooking and sharing food with loved ones can bring.
Ingredients
Here’s everything you’ll need to whip up this tantalizing Black Pepper Chicken:
-
Chicken Breast (500g): The star of the show! Boneless, skinless chicken breast is lean and cooks quickly, but thighs also work beautifully for a juicier result. If you’d like a vegetarian option, tofu is a fantastic substitution.
-
Bell Peppers (2): A colorful addition that not only looks amazing but adds sweetness and crunch. You can use any color you like—red, green, or yellow! If you’re out of bell peppers, snap peas or broccoli could step in nicely.
-
Onion (1 large): Sweet and aromatic, onions create a foundation of flavor. Yellow or white onions provide a perfect balance for the dish, but red onions can add a hint of sweetness if preferred.
-
Garlic (3 cloves): Fresh garlic adds an unbeatable aroma and depth to your dish. If you’re in a pinch, minced garlic from a jar works, but nothing beats the fresh stuff!
-
Fresh Black Pepper (2 tsp): The true hero here! A robust and spicy kick; freshly cracked black pepper elevates your dish onto another level. If you prefer milder flavors, reduce the amount or swap with white pepper.
-
Soy Sauce (1 tablespoon): Provides a savory base while enhancing the earthy, umami notes of the chicken. Tamari or coconut aminos are great gluten-free alternatives.
-
Honey (1 tablespoon): A touch of sweetness to balance out the heat. If you’re vegan, feel free to swap with maple syrup or agave.
-
Sesame Oil (1 tablespoon): Adds a nutty aroma that perfectly complements the dish. If you don’t have any on hand, you can use vegetable oil, though the flavor won’t be as rich.
-
Cornstarch (for coating): Helps achieve a beautiful texture on the chicken. If you prefer a gluten-free option, arrowroot powder works well too.
-
Spring Onions (optional): For garnish. They’re not just pretty; they add a fresh pop of flavor! You can also use cilantro if you prefer.
Now that we have our lineup ready, we’re all set to dive into the cooking process!
Step-by-Step Instructions
Step 1: Prepare the Chicken
Start by cutting your chicken breast into bite-sized pieces. Aim for uniform pieces so they cook evenly. In a small bowl, toss the chicken pieces with cornstarch. This will help create that irresistible crispy coating that elevates the dish! Set this bowl aside while you tackle the veggies.
Step 2: Chop the Veggies
Next, let’s chop our onion and bell peppers. For the onion, slice it in half, then make thin quarter-inch slices. With the bell peppers, remove the stem and seeds, and cut them into similar-sized strips. Don’t worry if they’re not perfect—cooking is about joy, not precision!
Step 3: Heat Things Up
In a large skillet or wok, heat about 2 tablespoons of oil over medium-high heat. Once it’s shimmering, add the chicken—all at once, please! Sear the chicken until it’s golden brown and cooked through, about 4-5 minutes, stirring occasionally. Don’t overcrowd the pan; you want those crispy bits!
Step 4: Aromatic Time
Toward the end of the chicken cooking time, push the chicken to the side of the skillet and toss in your onions and garlic. Cook them for about 2 minutes until fragrant, stirring occasionally. The garlic should start to turn golden without burning, or it’ll develop a bitter taste. Sprinkle in the black pepper here—it’ll fill your kitchen with an amazing aroma.
Step 5: Let it Sizzle
Now add the sliced bell peppers to the pan. Stir everything together, allowing the veggies to get tender-crisp—around 3-4 minutes should do the trick. At this point, add in the soy sauce and honey, stirring well to coat all the chicken and vegetables. This is where the magic happens!
Step 6: Final Touches
Cook for another minute, allowing the flavors to marry, and take it off the heat. Taste and adjust the seasoning, adding more pepper or a drizzle of soy sauce if needed.
Step 7: Plating Up
Time to serve up your delicious Black Pepper Chicken! Plate it with some fluffy rice or noodles, and don’t forget those fresh spring onions on top—they’ll add a beautiful pop of green!
Serving Suggestions
For an authentic experience, serve your Black Pepper Chicken over a bed of steamed jasmine rice or alongside some tender udon noodles. For an added touch of fun and crunch, consider sprinkling some toasted sesame seeds over the top. You can create a delightful family-style spread by putting the chicken and rice in the center of the table and allowing everyone to help themselves. Trust me; the communal vibe adds to the experience!
Recipe Variations
- Spicy Twist: If you love heat, add some sliced fresh jalapeños or crushed red pepper flakes to the mix for an extra kick.
- Veggie-Heavy: Swap out half the chicken for more veggies like carrots, snow peas, or broccoli to bulk up the nutritional factors.
- Gluten-Free Delight: Use tamari instead of soy sauce, and make sure your cornstarch is certified gluten-free.
- Creamy Version: Add a splash of coconut cream toward the end for a creamy, comforting twist.
- High-Protein Option: Swap chicken for shrimp or tofu for a different, yet equally delicious protein source!
Chef’s Notes
Oh, the stories this dish could tell! As I’ve traveled and explored various cultures, I’ve come to learn that every corner of the world has a unique way of spicing up chicken, and this recipe holds a special place in my heart. I’ve tweaked it here and there depending on what was fresh at the market, and each adjustment has brought a delightful new experience. Sometimes, it’s the simplest recipes that evolve with you, and this one has been by my side through many meal-prepping sessions.
Remember, cooking is a journey, not a destination. So, don’t stress if things aren’t going perfectly—every mistake is a lesson learned!
FAQs and Troubleshooting
1. Why is my chicken not browning?
- If your chicken isn’t browning, it’s likely overcrowded in the pan. Cook in batches, ensuring enough space for the chicken to sear.
2. How do I store leftovers?
- Store your Black Pepper Chicken in an airtight container in the fridge for up to 3 days. Reheat gently on the stove or microwave to enjoy the next day!
3. Can I make this ahead of time?
- Absolutely! You can marinate the chicken beforehand or prep the veggies. Just cook everything fresh the day you plan to serve it for the best flavor.
4. What if it’s too spicy?
- If it’s too spicy, serve with a side of yogurt or sour cream to balance the heat. You could also add a touch more honey to mellow things out.
Nutritional Info
Here’s a rough estimate per serving (based on 4 servings):
- Calories: 350
- Protein: 30g
- Carbohydrates: 30g
- Fat: 15g
So there you have it—my beloved Black Pepper Chicken recipe that’s as easy to make as it is delicious! I hope you find as much joy in cooking and sharing this dish as I do. Happy cooking! 🍽️
Print
Black Pepper Chicken
- Total Time: 30 minutes
- Yield: 4 servings 1x
- Diet: Non-Vegetarian
Description
A delightful blend of juicy chicken, fresh veggies, and a bold pepper sauce, perfect for weeknight dinners or weekend gatherings.
Ingredients
- 500g Chicken Breast
- 2 Bell Peppers
- 1 large Onion
- 3 cloves Garlic
- 2 tsp Fresh Black Pepper
- 1 tablespoon Soy Sauce
- 1 tablespoon Honey
- 1 tablespoon Sesame Oil
- Cornstarch (for coating)
- Spring Onions (optional, for garnish)
Instructions
- Prepare the Chicken by cutting into bite-sized pieces and tossing with cornstarch.
- Chop the Veggies including onion and bell peppers.
- Heat about 2 tablespoons of oil in a large skillet over medium-high heat and sear the chicken until golden brown.
- Aromatic Time: Push chicken to the side and cook onions and garlic until fragrant.
- Let it Sizzle by adding bell peppers and stir well with soy sauce and honey.
- Final Touches: Cook a minute more and taste for seasoning adjustments.
- Plating Up with fluffy rice or noodles and garnish with spring onions.
Notes
For added heat, incorporate jalapeños or crushed red pepper flakes. Store leftovers in an airtight container for up to 3 days.
- Prep Time: 15 minutes
- Cook Time: 15 minutes
- Category: Main Course
- Method: Stir-frying
- Cuisine: Asian
Nutrition
- Serving Size: 1 serving
- Calories: 350
- Sugar: 6g
- Sodium: 800mg
- Fat: 15g
- Saturated Fat: 2g
- Unsaturated Fat: 7g
- Trans Fat: 0g
- Carbohydrates: 30g
- Fiber: 2g
- Protein: 30g
- Cholesterol: 75mg
Keywords: chicken stir fry, black pepper chicken, quick dinner, comfort food


