

Thai Chicken Salad
Thai Chicken Salad: A Flavor-Packed Journey to Your Dinner Table
Welcome back to my cozy corner of the culinary world! Today, we’re diving headfirst into a vibrant, crunchy, and oh-so-delicious dish that I cannot wait to share with you: Thai Chicken Salad. If you’ve ever taken a bite of a salad that made you feel like you were magically transported to a bustling street market in Thailand, then this dish is for you. It’s not just a salad; it’s a celebration of flavors, textures, and colors that will have you reaching for second servings—trust me!
Thai cuisine is celebrated for its balance of sweet, sour, salty, and spicy notes, and this salad embodies that spirit beautifully. Picture a bright medley of napa cabbage, tender chicken, crunchy peanuts, and a tangy dressing that dances on your taste buds—what’s not to love? Whether you’re looking to impress your friends at a potluck or simply enjoying a healthy meal at home, this salad checks all the right boxes.
Now, let’s embark on this culinary adventure together! I’ll guide you through every step, sprinkling in my kitchen wisdom so you can whip this up with ease, no matter your cooking experience. Ready to stir up some excitement in your kitchen? Grab your apron—it’s about to get delicious!
Personal Story
When I think of Thai Chicken Salad, I am transported back to a sun-soaked afternoon in the heart of Sydney, where my best friend invited me over for lunch. She’s an incredible cook with a penchant for all things Southeast Asian, and that day, she prepared her version of this salad. The aroma of garlic, lime, and fish sauce wafted through her open kitchen window, mingling with the sound of laughter and chatter from her family gathered around the table.
As we dug into the salad, I was struck by how something so simple could evoke such joy and community. Each of us piled our bowls high with colorful ingredients, squeezing fresh lime on top and adding that deliciously spicy dressing. The chorus of “Mmm!” that followed the first bites was music to my ears. That day not only filled my belly but also ignited my passion for cooking and sharing food with loved ones. It became a tradition for us to make this salad together, each time experimenting with new ingredients and flavors. I’m thrilled to share this experience with you, hoping it brings the same joy to your table!
Ingredients
Here’s what you’ll need to create this flavorful Thai Chicken Salad:
-
2 cups cooked chicken breast, shredded
- You can use rotisserie chicken for a time-saving hack, or poach your chicken with some ginger and garlic for extra flavor.
-
4 cups napa cabbage, finely shredded
- Napa cabbage has a mild flavor and crispy texture, but feel free to substitute with regular green cabbage or even kale if that’s what you have on hand.
-
1 cup carrots, grated
- Fresh carrots add a nice crunch. You can also swap in shredded red cabbage for a pop of color and a slightly different texture.
-
1 red bell pepper, thinly sliced
- This adds sweetness; consider using cucumbers instead for a refreshing twist.
-
1/2 cup fresh cilantro, chopped
- Cilantro provides that signature herbaceous taste. If you’re not a fan, use fresh mint for a variation.
-
1/4 cup chopped peanuts (or cashews)
- These add a lovely crunch. If you need this nut-free, sunflower seeds work wonderfully too!
Dressing Ingredients
-
1/4 cup fresh lime juice
- The zing from lime is essential! Bottled lime juice works, but fresh is always best.
-
2 tablespoons fish sauce (or soy sauce for a vegetarian option)
- This brings umami to the dressing—don’t skip it! You can substitute with coconut aminos for a gluten-free option.
-
1 tablespoon honey or maple syrup
- It balances the acidity perfectly. Use agave syrup for a vegan substitute.
-
1 teaspoon chili paste (adjust to taste)
- This is your spicy element! Sriracha or even red pepper flakes are great alternatives.
Step-by-Step Instructions
Now that we’ve gathered our ingredients, let’s get cooking! Here’s how you can whip up this delightful salad:
Step 1: Cook the Chicken
If you’re using raw chicken breast, season it with salt and pepper. In a pot, bring lightly salted water to a boil. Add the chicken and simmer for about 15-20 minutes, or until fully cooked. Once tender, remove from the pot and shred using two forks. Chef’s Hack: You can save time and hassle by shredding the chicken while it’s still slightly warm—it’s much easier that way!
Step 2: Prepare the Vegetables
While your chicken is cooking, it’s the perfect time to prep your vegetables. Take that napa cabbage and slice it thinly; parents love this sawing method! Grate the carrots, and julienne the bell pepper—these vibrant colors will make your salad pop. Tip: For an added crunch, soak the cabbage in ice-cold water for about 10 minutes before using. This will make it extra crispy.
Step 3: Make the Dressing
In a small bowl, whisk together the lime juice, fish sauce, honey, and chili paste until well combined. Little Chef Insight: Taste as you go! You want it to have a perfectly balanced flavor. Adjust the sweetness or heat according to your preference—there’s no wrong way to dress a salad!
Step 4: Assemble the Salad
In a large mixing bowl, combine the shredded chicken, napa cabbage, grated carrots, bell pepper, and chopped cilantro. Drizzle the dressing over the salad and toss gently until every bite is brightly flavored and coated in that zesty goodness. Chef’s Tip: Use tongs for easy mixing—this will keep your ingredients intact!
Step 5: Garnish
Sprinkle the chopped peanuts (or any nuts you’ve chosen) over the top of your salad before serving. This adds an inviting crunch and visual appeal—who doesn’t love a little texture?
Step 6: Serve
Scoop the salad into individual bowls and garnish each one with an extra wedge of lime on the side for those who love a little extra tang. Voilà! You now have a vibrant, colorful dish that’s sure to impress.
Serving Suggestions
This Thai Chicken Salad is stunning on its own, but it can shine even brighter when paired with other dishes. Consider serving alongside some crispy spring rolls or a warm bowl of coconut soup for a beautifully balanced meal. To plate, mound the salad high on a bright plate and sprinkle some additional cilantro for the wow factor!
Recipe Variations
Now that you’ve mastered the classic, here are some creative twists for your Thai Chicken Salad:
- Grilled Chicken Twist: Swap cooked chicken for thinly sliced grilled chicken marinated in lime and garlic for an extra smoky flavor.
- Vegetarian Delight: Replace chicken with chickpeas or baked tofu for a vegetarian powerhouse meal.
- Fruit Fusion: Toss in some fresh mango or diced pineapple for a touch of sweetness that pairs wonderfully with the salad’s tang.
- Spicy Kick: Add sliced jalapeños or a pinch more chili paste to dial up the heat.
- Crunch Factor: Mix in some crispy chow mein noodles for an unexpected crunch!
Chef’s Notes
This salad has evolved over time, mirroring my own culinary journey in the realm of vibrant, flavor-packed dishes. I remember the first time I adapted a traditional recipe—it felt like a block of weight had lifted from my shoulders. Cooking should be fun and free, an expression of your unique tastes!
Sometimes, I brighten it up even more with a few extra herbs or a sprinkling of sesame seeds. It’s gratifying to see how a simple recipe can adapt to various preferences and quickly become a staple in the kitchen. In my house, we love to pull this together as a quick lunch or a light dinner, especially on those warm summer evenings when cooking feels like too much work.
FAQs and Troubleshooting
Q: Can I make this salad ahead of time?
A: Absolutely! Make the dressing and prep the chicken the day before. However, it’s best to mix the salad just before serving to keep everything fresh and crunchy.
Q: My salad turned out too salty. What can I do?
A: If you find it too salty, try adding more shredded cabbage or carrots to balance out the flavors. Adding a touch of honey can also help draw some of that saltiness out.
Q: Can I make it gluten-free?
A: Yes, just ensure to use gluten-free tamari instead of regular soy sauce and double-check the fish sauce ingredient, as some may contain gluten.
Q: What’s the best way to store leftovers?
A: Store any leftovers in an airtight container in the fridge. It should last about 2 days, but the veggies might lose their crispness, so I recommend eating it fresh!
Nutritional Info
(Optional): Here’s a general nutritional breakdown per serving:
- Calories: 350
- Protein: 30g
- Carbohydrates: 20g
- Fat: 18g
- Fiber: 4g
There you have it! Your complete guide to making a vibrant Thai Chicken Salad that’s sure to delight. I hope it brings a touch of Thailand into your home and fills your kitchen with laughter and joy. Remember, cooking is about connection—both to the ingredients and to each other. Enjoy every delicious bite!
Print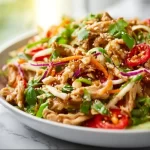
Thai Chicken Salad
- Total Time: 35 minutes
- Yield: 4 servings 1x
- Diet: Gluten-free, High-Protein
Description
A vibrant and crunchy Thai Chicken Salad loaded with flavors, textures, and colors that’s perfect for any occasion.
Ingredients
- 2 cups cooked chicken breast, shredded
- 4 cups napa cabbage, finely shredded
- 1 cup carrots, grated
- 1 red bell pepper, thinly sliced
- 1/2 cup fresh cilantro, chopped
- 1/4 cup chopped peanuts (or cashews)
- 1/4 cup fresh lime juice
- 2 tablespoons fish sauce (or soy sauce for a vegetarian option)
- 1 tablespoon honey or maple syrup
- 1 teaspoon chili paste (adjust to taste)
Instructions
- Cook the chicken: If using raw chicken, season and simmer in salted water until fully cooked, then shred.
- Prepare the vegetables: Slice napa cabbage, grate carrots, and julienne bell pepper.
- Make the dressing: Whisk lime juice, fish sauce, honey, and chili paste until combined.
- Assemble the salad: In a bowl, combine chicken, cabbage, carrots, bell pepper, and cilantro, then drizzle with dressing.
- Garnish the salad: Sprinkle chopped peanuts on top before serving.
- Serve: Place salad in bowls with extra lime wedges for garnish.
Notes
Make the dressing and prep the chicken a day before. Mix the salad just before serving to keep it fresh and crunchy.
- Prep Time: 15 minutes
- Cook Time: 20 minutes
- Category: Salad
- Method: No Cooking
- Cuisine: Thai
Nutrition
- Serving Size: 1 serving
- Calories: 350
- Sugar: 5g
- Sodium: 400mg
- Fat: 18g
- Saturated Fat: 3g
- Unsaturated Fat: 5g
- Trans Fat: 0g
- Carbohydrates: 20g
- Fiber: 4g
- Protein: 30g
- Cholesterol: 75mg
Keywords: Thai salad, chicken salad, healthy salad, quick meal, vibrant recipe
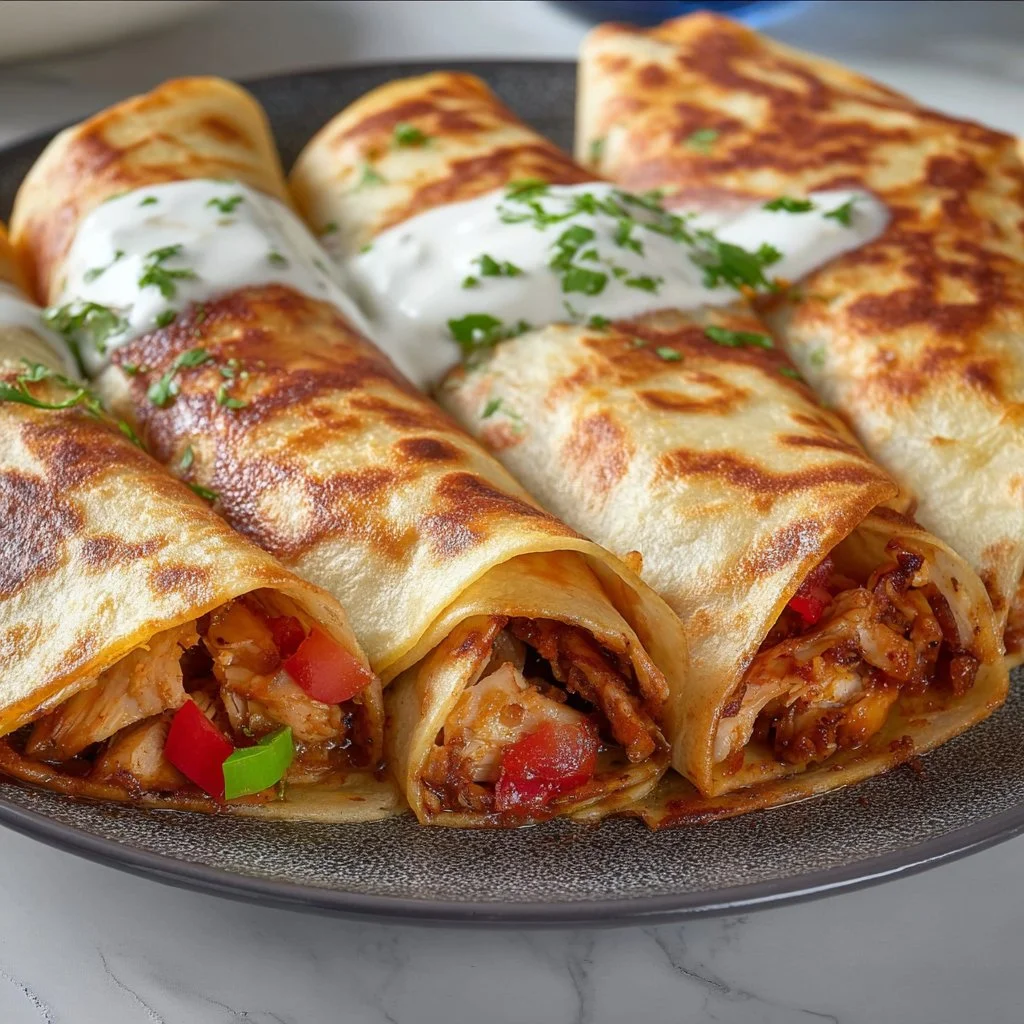
Chicken Crepes Shawarma
Indulge in Flavor: Chicken Crepes Shawarma Recipe
Hey there, fellow food lover! Welcome back to my cozy kitchen where delicious ideas simmer, and delightful aromas waft through the air. Today, we’re diving into a dish that marries my love for savory flavors with the comforting touch of homemade warmth: Chicken Crepes Shawarma. Just the thought of tender, marinated chicken wrapped in soft, buttery crepes makes my heart flutter and my stomach rumble!
You might be asking, "What’s so special about chicken crepes and shawarma?" Well, let me tell you — this dish is a dream come true for anyone who loves the bold and aromatic spices of Middle Eastern cuisine, yet craves the comforting satisfaction of a classic crepe. Imagine your taste buds being taken on a little vacation, where spices dance and flavors harmonize in each bite.
But what really makes this meal shine for me is the way it brings people together. Whether it’s a family gathering, a cozy evening with friends, or just a solo night in to treat yourself, these crepes are the perfect vessel for sharing stories, laughter, and, of course, scrumptious bites. So, grab your apron and an adventurous spirit, and let’s get cooking with this all-time favorite!
Personal Story
Growing up, I always had a love affair with my family’s kitchen. I remember one winter evening when my mom decided to surprise us with a Middle Eastern feast. The delicious smell of spices simmering on the stovetop filled our home as we gathered around the table, buzzing with anticipation. My mom had perfected her shawarma recipe over the years, and that night, she decided to take it a step further by serving it in freshly made crepes.
Our laughter echoed as we filled our crepes with tender chicken, fresh veggies, and tangy sauces, creating our own little wraps. It was more than just a meal; it was a moment of connection, an experience where cooking became part of our family ritual. That night sparked my passion for blending cultures, experimenting with flavors, and making food that creates lasting memories. So trust me when I say that with this Chicken Crepes Shawarma recipe, you’re not just making a meal; you’re crafting memories to savor!
Ingredients
Let’s gather our goodies! Here’s what you need to create Chicken Crepes Shawarma:
For the Chicken Shawarma:
- 1 lb boneless, skinless chicken thighs: Juicy and flavorful, chicken thighs hold up well against spices. If you prefer, swap them for chicken breasts, but remember to adjust cooking times for juiciness.
- 2 tablespoons olive oil: A lovely addition for flavor and moisture. Feel free to substitute with avocado oil for a different taste or for a higher smoke point.
- 3 cloves garlic, minced: Garlic brings a robust flavor. If you’re in a pinch, garlic powder will work, but fresh really packs a punch!
- 1 teaspoon ground cumin: Adds a warm earthiness. Try coriander for a citrusy twist, or smoked paprika for a unique flavor profile.
- 1 teaspoon ground cinnamon: It may sound unconventional, but it adds warmth! You can replace it with nutmeg for a slightly different flavor.
- 1 tablespoon ground turmeric: Celebrated for its vibrant color and health benefits, you can substitute with curry powder for a more complex flavor.
- 1 teaspoon cayenne pepper: For spice lovers, this adds heat! Reduce or omit if you prefer something milder.
- Salt and black pepper, to taste: Essential for balancing flavors; don’t shy away from seasoning well.
For the Crepes:
- 1 cup all-purpose flour: The base of our crepes! You can use whole wheat flour for a healthier twist.
- 2 large eggs: These provide structure and richness. For a vegan option, use flax eggs (1 tablespoon of flaxseed meal mixed with 2.5 tablespoons of water per egg).
- 1.5 cups milk: Whole milk lends creaminess, but any milk (dairy or plant-based) works just fine.
- 1 tablespoon melted butter or oil: This keeps the crepes from sticking. If you want to keep it dairy-free, use coconut oil or canola oil.
For the Toppings:
- Lettuce, shredded: Adds fresh crunch! Spinach or arugula can also be fun alternatives.
- Tomatoes, diced: Juicy and fresh. Feel free to include cucumbers or bell peppers for crunch.
- Cucumber, sliced: For a refreshing bite. You can also opt for pickled cucumbers for a tangy flair.
- Tahini sauce or garlic yogurt sauce: For creaminess and flavor, these sauces make the dish sing! A drizzle of hot sauce wouldn’t hurt either.
Step-by-Step Instructions
1. Marinate the Chicken
Let’s start with that mouthwatering chicken! In a mixing bowl, combine the olive oil, minced garlic, cumin, cinnamon, turmeric, cayenne pepper, salt, and black pepper. Whisk until well blended, then add the chicken thighs. Toss them until each piece is well coated and let it marinate for at least 30 minutes — the longer, the better! If you can let it sit in the fridge overnight, do it; the flavors intensify as it soaks up all that deliciousness.
2. Prepare the Crepe Batter
While the chicken is marinating, let’s whip up those crepes! In another bowl, whisk together the all-purpose flour, eggs, and milk. Keep whisking until you have a smooth batter. If it feels too thick, just add a splash more milk. Let the batter sit for about 10-15 minutes — this helps the gluten relax, and your crepes will turn out all the more tender!
3. Cook the Chicken
Heat a skillet over medium-high heat. Once hot, add the marinated chicken thighs. Cook for about 6-7 minutes on each side, or until they are fully cooked and nicely browned. If you have a meat thermometer handy, the internal temperature should reach 165°F (75°C). Remove the chicken from the skillet and allow it to rest for a few minutes before slicing it into thin strips.
4. Make the Crepes
In the same skillet (don’t wash it, you want those flavors!), reduce the heat to medium-low. Brush the skillet with a bit of oil or melted butter, then pour a ladleful of crepe batter. Swirl the pan to spread the batter evenly. Cook for about 2-3 minutes, or until the edges start to lift and the bottom is lightly browned. Flip and cook for an additional 1-2 minutes. Repeat this with the remaining batter, stacking the cooked crepes on a plate.
5. Assemble Your Crepes
Now comes the fun part! Take a crepe and layer your sliced chicken down the center. Top it with shredded lettuce, diced tomatoes, cucumber slices, and a generous drizzle of tahini sauce or garlic yogurt sauce.
6. Roll It Up
Fold in the sides of the crepe and roll it up tightly, like a cozy little package! You can secure it with a toothpick if you like, or just place the seam side down on a plate.
Serving Suggestions
For a beautiful presentation, serve your Chicken Crepes Shawarma wrapped on a wooden board with small bowls of extra sauces and toppings alongside! Feel free to add a sprinkle of fresh herbs like parsley or cilantro on top for a pop of color. A side of crispy sweet potato fries or a light, refreshing salad would complement these crepes beautifully – it’s all about making it a feast!
Recipe Variations
- Spicy Vegan Option: Replace chicken with marinated grilled tempeh or tofu, and swap the milk in the crepe recipe for a plant-based alternative.
- Add some zest: Incorporate lemon zest into your crepe batter for a burst of freshness!
- Herb-Infused Crepes: Mix in finely chopped fresh herbs (like parsley or chives) into the crepe batter for an aromatic twist.
- Rich & Creamy: Stuff crepes with a simple mixture of ricotta cheese, spinach, and some spices before folding them up.
- Sweet Twist: Dust the cooked crepes with powdered sugar and serve with fruit for a delightful dessert!
Chef’s Notes
This Chicken Crepes Shawarma recipe has evolved over the years, much like my culinary journey. I initially started with simple flavors and techniques, but as I dove deeper into cooking, I discovered that there’s magic in blending them. Every time I make these crepes, I can’t help but smile remembering family gatherings and the joy of sharing good food with loved ones. Pro tip: don’t stress about perfection! The best meals are always made with a pinch of love and a sprinkle of laughter.
FAQs and Troubleshooting
Q1: My crepes are tearing when I flip them. What am I doing wrong?
A: It sounds like your crepe batter might be too thick, or the pan might not be hot enough. Ensure your batter is smooth, and give the skillet a minute to get to the right temperature before pouring in your batter.
Q2: Can I prepare the chicken ahead of time?
A: Absolutely! You can marinate the chicken the night before and even cook it up to a day in advance. Just store it in an airtight container in the fridge and warm it gently before assembling your crepes.
Q3: What if I don’t have all the spices listed?
A: Don’t sweat it! You can experiment with whatever spices you have on hand. A good all-purpose seasoning or even a simple blend of paprika, garlic powder, and black pepper can work wonders.
Q4: Can I freeze the crepes?
A: Yes, you can! Layer your cooled crepes between sheets of parchment paper and store them in a freezer-safe bag for up to three months. Thaw them in the fridge and warm them up in a skillet when you’re ready to use them!
Nutritional Info (if applicable)
This recipe is not only delicious but also packed with protein and flavor! Each serving (1 crepe with chicken and toppings) contains approximately:
- Calories: 320
- Protein: 25g
- Carbohydrates: 30g
- Fat: 10g (varies based on toppings)
So, are you ready to whip up these irresistible Chicken Crepes Shawarma? I can’t wait for you to share in the joy of cooking these flavorful bundles of happiness! Let’s gather our family and friends and create some tasty memories together! Happy cooking, everyone!
Print
Chicken Crepes Shawarma
- Total Time: 60 minutes
- Yield: 4 servings 1x
- Diet: Accepts Meat
Description
A delightful fusion of savory chicken shawarma wrapped in soft, buttery crepes, perfect for gatherings or a cozy night in.
Ingredients
- 1 lb boneless, skinless chicken thighs
- 2 tablespoons olive oil
- 3 cloves garlic, minced
- 1 teaspoon ground cumin
- 1 teaspoon ground cinnamon
- 1 tablespoon ground turmeric
- 1 teaspoon cayenne pepper
- Salt and black pepper, to taste
- 1 cup all-purpose flour
- 2 large eggs
- 1.5 cups milk
- 1 tablespoon melted butter or oil
- Lettuce, shredded
- Tomatoes, diced
- Cucumber, sliced
- Tahini sauce or garlic yogurt sauce
Instructions
- Marinate the Chicken: In a mixing bowl, combine the olive oil, minced garlic, cumin, cinnamon, turmeric, cayenne pepper, salt, and black pepper. Whisk until well blended, then add the chicken thighs. Toss until well coated and let it marinate for at least 30 minutes.
- Prepare the Crepe Batter: In another bowl, whisk together the all-purpose flour, eggs, and milk until smooth. Let the batter sit for about 10-15 minutes.
- Cook the Chicken: Heat a skillet over medium-high heat. Add the marinated chicken thighs and cook for about 6-7 minutes on each side, until fully cooked and browned. Remove and let it rest before slicing.
- Make the Crepes: In the same skillet, reduce heat to medium-low. Brush with oil or melted butter, pour a ladleful of crepe batter, and cook until lightly browned. Repeat with remaining batter.
- Assemble Your Crepes: Take a crepe, layer sliced chicken and toppings, and drizzle with sauce.
- Roll It Up: Fold in the sides and roll up tightly, securing with a toothpick if desired.
Notes
Serve with extra sauces and toppings for a beautiful presentation.
- Prep Time: 30 minutes
- Cook Time: 30 minutes
- Category: Main Course
- Method: Cooking and Baking
- Cuisine: Middle Eastern
Nutrition
- Serving Size: 1 serving
- Calories: 350
- Sugar: 3g
- Sodium: 450mg
- Fat: 12g
- Saturated Fat: 3g
- Unsaturated Fat: 9g
- Trans Fat: 0g
- Carbohydrates: 45g
- Fiber: 2g
- Protein: 25g
- Cholesterol: 100mg
Keywords: Chicken Shawarma, Crepes, Middle Eastern Cuisine, Comfort Food, Easy Dinner

High Protein Chicken Meal Preps
High Protein Chicken Meal Preps: Easy, Delicious, and Nutritious
Hey there, fellow food lovers! Welcome back to my cozy kitchen, where the aroma of home-cooked goodness fills the air. Today, I’m thrilled to share a game-changer for anyone looking to level up their meal prep game—High Protein Chicken Meal Preps! This dish is not only perfect for those busy weekdays but also a delightful way to ensure you’re nourishing your body with all the goodness it deserves.
Meal prepping is more than just a trend. It’s a lifestyle that helps you stay on track with your health and wellness goals. And let’s face it, life can sometimes get a little chaotic—between work, social commitments, and life’s many surprises, cooking every day can feel like an uphill battle. That’s where fabulous meal preps come to save the day! Imagine having delicious, protein-packed chicken ready to go, so you can simply grab and heat whenever hunger strikes. Life just got a whole lot easier!
In this blog post, not only am I going to guide you through creating these satisfying High Protein Chicken Meal Preps, but I’ll also sprinkle in some personal stories and tips that reflect my journey in the kitchen. We’ll explore flavorful combinations, serving suggestions, and creative variations to keep your taste buds dancing. So let’s throw on those aprons, grab your favorite cutting board, and get ready to cook up a storm together!
Personal Story
I’ll never forget the first time I decided to attempt meal prepping. It was a Sunday afternoon, and I had just finished a grueling week of work. All I wanted was to kick back and relax, but I knew Monday was looming, and my usual whirlwind of cooking would be upon me again. As I dug through the fridge, I stumbled across some leftover chicken breasts, veggies that were on the verge of wilting, and a half-empty jar of my mom’s beloved marinade.
I threw everything together, hoping for the best. Little did I know that this mishmash would become my new obsession. Not only were those meal preps a lifesaver during the week, but they also sparked fond memories of my Mom whipping up her famous chicken dishes when I was growing up. The simple act of cutting, marinating, and baking brought me joy beyond just filling my belly. It was a journey into nostalgia, and it inspired me to make meal prepping a regular part of my cooking routine. You know what? I’m excited to pass this love of meal prepping on to you!
Ingredients
Let’s get started with the star of today’s dish, shall we? Here’s what you’ll need to create your High Protein Chicken Meal Preps:
-
Chicken Breasts (boneless, skinless): Choose organic or free-range if you can! Chicken breasts are an excellent source of lean protein. If you want a vegetarian option, try tofu or chickpeas as substitutes.
-
Olive Oil: A baking staple with heart-healthy fats. Avocado oil works great too; it has a higher smoke point, so feel free to use it!
-
Garlic Powder: This adds depth to your chicken without the fuss of fresh garlic. If you prefer fresh, use about two cloves minced instead.
-
Paprika: Gives a beautiful color and a subtle smokiness to the dish! Don’t have paprika on hand? Cumin is a great alternative for an earthy flavor.
-
Italian Seasoning: A blend that usually contains oregano, basil, rosemary, and thyme. You can easily make your own if you have individual dried herbs.
-
Salt and Pepper: Essential for balancing flavors. Make sure to season well; this will elevate your dish from good to absolutely fabulous.
-
Broccoli florets: Packed with vitamins and great for adding color and crunch. If you’re not a fan of broccoli, try bell peppers or green beans instead!
-
Quinoa (or brown rice): A fantastic source of fiber and protein! If you’re looking for a grain-free option, cauli-rice works beautifully too.
-
Lemon juice: Adds brightness and acidity to the dish. You can replace it with apple cider vinegar for a tangy twist.
With all these ingredients at hand, you’re well on your way to creating a delicious meal prep that will fuel your week!
Step-by-Step Instructions
Ready to dive into the cooking process? Here’s a step-by-step guide to crafting your High Protein Chicken Meal Preps:
Step 1: Preheat the Oven
Set your oven to 400°F (200°C). Preheating is crucial for even cooking and crispy chicken—trust me, you don’t want sad, moist pieces when you could have golden brown perfection!
Step 2: Marinate the Chicken
In a large bowl, combine 1 tablespoon of olive oil, 1 teaspoon of garlic powder, 1 teaspoon of paprika, 2 teaspoons of Italian seasoning, salt, and pepper. Mix it all together until it forms a fragrant paste. Coat your chicken breasts in the marinade, making sure they’re evenly covered. Let them marinate for at least 20 minutes (or up to overnight if you want to plan ahead). This step is where the magic happens; the longer it marinates, the more flavors will penetrate the chicken.
Step 3: Prepare the Quinoa
While the chicken is marinating, rinse 1 cup of quinoa under cold water. This helps remove the bitter coating and makes it taste incredible! Combine the rinsed quinoa with 2 cups of water in a medium saucepan. Bring it to a boil, then reduce the heat to a simmer, cover, and let it cook for about 15 minutes, or until all the water has been absorbed and the quinoa is fluffy. If you’re using brown rice, just follow the package instructions!
Step 4: Roast the Chicken and Broccoli
Once the chicken has marinated and the quinoa is cooking, line a baking sheet with parchment paper for easy cleanup. Place the marinated chicken breasts on one side and spread your broccoli florets on the other. Drizzle both with a bit of olive oil and sprinkle with salt and pepper. Roast everything in the oven for about 20-25 minutes or until the chicken reaches an internal temperature of 165°F (75°C). Flip the chicken halfway for that beautiful golden color!
Step 5: Assemble the Meal Prep Containers
Once everything is cooked, it’s time to assemble! In each meal prep container, layer a scoop of quinoa, add a portion of the roasted broccoli, and a delicious chicken breast. If you want to add some zing, drizzle a bit of lemon juice on top before sealing the container.
Step 6: Cool and Store
Let your meals cool completely before sealing the containers with lids. Store them in the fridge where they can keep for up to 4 days. When you’re ready to eat, simply reheat in the microwave for about 2-3 minutes, and you’ll have a healthy, protein-packed meal ready to go!
Serving Suggestions
When it comes to serving, you can jazz things up a bit! Garnish with fresh herbs like parsley or cilantro for a pop of color. If you’re feeling extra indulgent, a sprinkle of feta cheese or a dollop of Greek yogurt can add creaminess and zing to your dish.
Recipe Variations
Want to keep things interesting? Here are a few twists you can try:
- Spicy Kick: Add red pepper flakes or a drizzle of sriracha to the marinade for some heat.
- Asian Flair: Replace paprika with sesame oil and add a splash of soy sauce; serve with edamame instead of broccoli.
- Mediterranean Magic: Use lemon juice instead of olive oil in the marinade and add olives and sun-dried tomatoes to your meal prep.
- Herbaceous Delight: Swap out Italian seasoning for fresh herbs like dill and tarragon, adding an aromatic freshness.
- Curry Infusion: Mix in some curry powder with your marinade and serve with roasted sweet potatoes instead of quinoa.
The possibilities are endless!
Chef’s Notes
This recipe has evolved over the years, mostly due to the many wonderful flavors I’ve encountered on my culinary journey. It’s always fun to embellish the core recipe with seasonal veggies or localized spices I pick up during my travels. Each twist brings a new story and satisfaction to my meal preps.
And here’s a little hack for you: Don’t throw away those chicken bones! They can be used to make a wholesome chicken stock, which is perfect for soups or to cook your grains in next time. Waste not, want not!
FAQs and Troubleshooting
1. What if my chicken seems dry?
If your chicken turns out dry, it’s often due to overcooking. Using a meat thermometer can help ensure you hit that perfect 165°F and keep your chicken juicy.
2. Can I freeze these meal prep containers?
Absolutely! Just be mindful that broccoli may become a bit mushy upon thawing. To avoid this, consider using heartier vegetables like carrots or bell peppers that can withstand freezing.
3. How long does this meal prep last in the fridge?
Your High Protein Chicken Meal Preps can last up to 4 days in the fridge. Beyond that, the quality might not be as delightful. If you’re prepping for a longer week, think about freezing a few!
4. Can I use different proteins?
Yes, you can! Turkey, lean pork, or even fish like salmon would work wonderfully with this marinade. Just be mindful of cooking times, as different proteins require different cooking times to reach that tasty tenderness.
Nutritional Info
(Per serving, based on this recipe giving 4 servings)
- Calories: 450
- Protein: 40g
- Carbohydrates: 45g
- Dietary Fiber: 7g
- Fats: 10g
There you have it, my delightful friends—a nutrition-packed High Protein Chicken Meal Prep recipe that’s as good for the soul as it is for the body. Let’s transform your kitchen into a haven of flavor and fun! Remember, cooking is about the love you put into it. Enjoy and happy cooking!
Print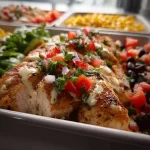
High Protein Chicken Meal Preps
- Total Time: 45 minutes
- Yield: 4 servings
- Diet: High Protein
Description
Delicious and nutritious high protein chicken meal prep perfect for busy weekdays.
Ingredients
- Chicken Breasts (boneless, skinless)
- Olive Oil
- Garlic Powder
- Paprika
- Italian Seasoning
- Salt and Pepper
- Broccoli florets
- Quinoa (or brown rice)
- Lemon juice
Instructions
- Preheat the oven to 400°F (200°C).
- Marinate the chicken with olive oil, garlic powder, paprika, Italian seasoning, salt, and pepper for at least 20 minutes.
- Prepare the quinoa by rinsing it and cooking with water until fluffy.
- Roast the marinated chicken and broccoli on a baking sheet for 20-25 minutes.
- Assemble each meal prep container with quinoa, broccoli, and a chicken breast.
- Cool the meal prep containers completely before sealing them.
Notes
For serving, garnish with fresh herbs or a sprinkle of feta cheese for added flavor.
- Prep Time: 20 minutes
- Cook Time: 25 minutes
- Category: Meal Prep
- Method: Baking
- Cuisine: American
Nutrition
- Serving Size: 1 serving
- Calories: 450
- Sugar: 3g
- Sodium: 600mg
- Fat: 10g
- Saturated Fat: 1.5g
- Unsaturated Fat: 8g
- Trans Fat: 0g
- Carbohydrates: 45g
- Fiber: 7g
- Protein: 40g
- Cholesterol: 70mg
Keywords: high protein, chicken meal prep, healthy meals, easy recipes
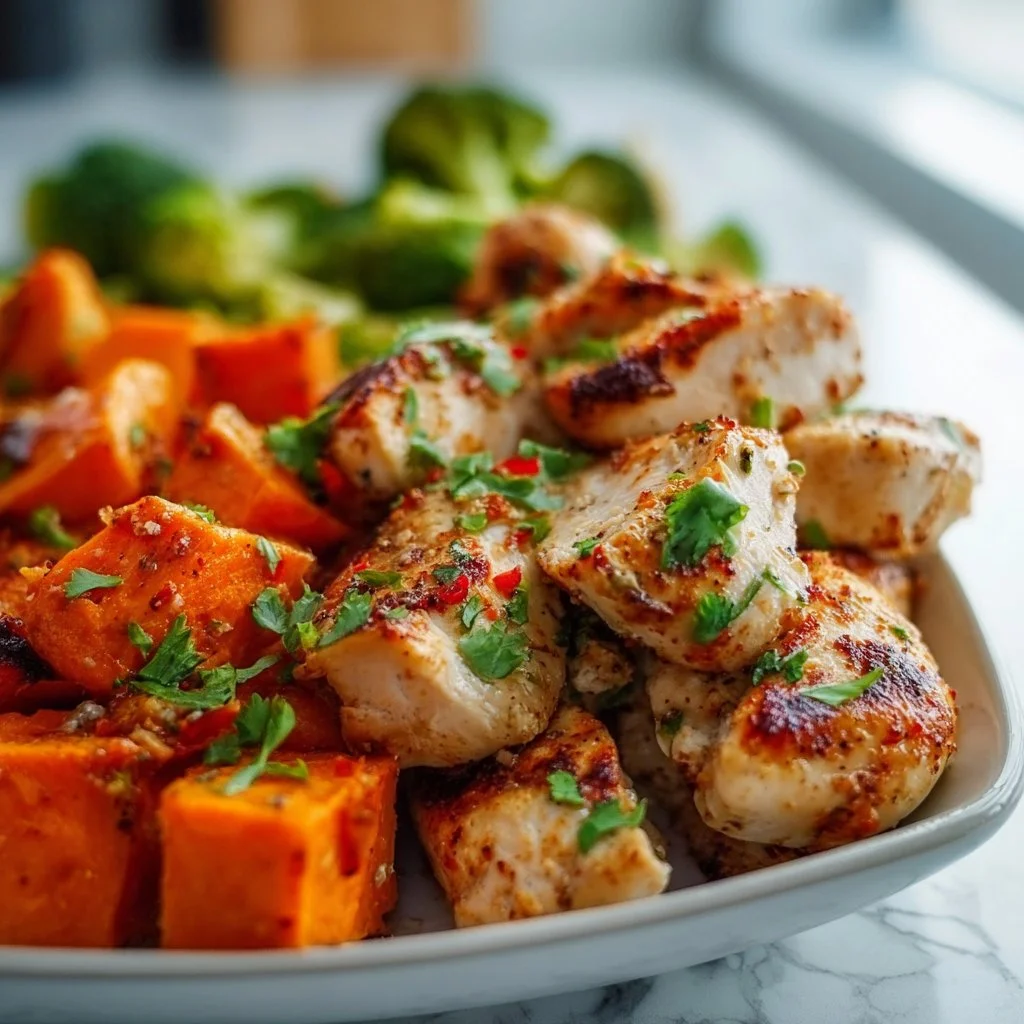
Chicken and Sweet Potato Meal Prep
# The Ultimate Chicken and Sweet Potato Meal Prep: A Cozy Cooking Adventure

## Introduction

Welcome to my cozy kitchen, friends! I’m Olivia Bennett, your guide on this delicious journey of flavor and nostalgia. If you’ve found your way here, it likely means you’re in search of a wonderfully wholesome meal that not only feeds the belly but also warms the soul. Today, we’re all about a delightful Chicken and Sweet Potato Meal Prep that is perfect for busy weekdays, cozy family dinners, and even surprise guests!

Meal prepping is one of my favorite ways to make sure I have home-cooked goodness ready to go when life gets hectic. In the hustle and bustle of our daily lives, there’s something so satisfying about chopping fresh ingredients, roasting them to perfection, and then filling an array of containers with vibrant hues and hearty flavors. The best part? You can whip up this dish in under an hour and have tasty, homemade food at your fingertips all week long.

Now, let’s talk about the stars of this dish—chicken and sweet potatoes! Both are not just nourishing but incredibly versatile. Chicken is a lean source of protein that can be seasoned in countless ways, while sweet potatoes offer a natural sweetness and a treasure trove of vitamins. Together, they create a symphony of flavors and textures that is bound to impress and satisfy. Plus, they play well with various vegetables, spices, and grains, making them a perfect canvas for your culinary creativity.

Believe me, as we dive into this recipe, you’ll discover that meal prepping doesn’t have to be boring or bland. Let’s put on our aprons, turn up the music, and make some magic in the kitchen!

## Personal Story

Ah, sweet potatoes! They remind me of chilly Thanksgiving gatherings at my grandma's house. Every year, she would whip up her famous sweet potato casserole, topped with gooey marshmallows and crushed pecans. The smell alone was enough to bring me running from anywhere in the house, and it made me associate sweet potatoes with home, warmth, and love. That nostalgic flavor has stuck with me through the years, inspiring me to create dishes that not only nourish but remind me of those cozy family moments.

When I started exploring meal prep, I wanted to take that same comforting essence of my grandma's casserole and turn it into something I could enjoy every day, without the sugar overload. And voilà—this Chicken and Sweet Potato Meal Prep was born! It’s packed with nutrients, embodies the warmth of home-cooked meals, and carries that nostalgic feeling, making each bite an ode to family gatherings.

## Ingredients

Here's what you'll need to create our beautiful Chicken and Sweet Potato Meal Prep:

- **2 large chicken breasts**
  Lean proteins that absorb flavors wonderfully! If you're looking for substitutions, try turkey breast, tofu, or chickpeas for a vegetarian twist.

- **2 large sweet potatoes**
  A nutrient powerhouse high in fiber and vitamins. If sweet potatoes aren't available, regular potatoes or butternut squash can work, but adjust cooking times accordingly.

- **1 red bell pepper**
  A pop of color and packed with vitamins! Feel free to swap it out for any seasonal veggie such as zucchini or asparagus for added crunch.

- **1 yellow onion**
  It brings a wonderful sweetness when caramelized. Shallots or leeks can also be used as substitutes for a nuanced flavor.

- **2 cups fresh spinach**
  Packed with iron and vitamin K. You can use kale or arugula instead for a different leafy green experience.

- **3 tablespoons olive oil**
  Healthy fats that enhance flavors during roasting. If you prefer, you can use avocado oil or melted coconut oil.

- **1 teaspoon garlic powder**
  A convenient way to add garlicky goodness. Fresh minced garlic is a great substitute, but reduce the quantity to avoid overwhelming the dish.

- **1 teaspoon smoked paprika**
  Adds a lovely depth of flavor. Regular paprika or chili powder can work, but you might lose that smoky undertone.

- **Salt and pepper to taste**
  Essential seasonings to enhance all flavors! Always taste as you go, adjusting for your personal preference.

## Step-by-Step Instructions

Now, let’s get down to the fun part—cooking!

1. **Preheat the Oven**
   Set your oven to 425°F (220°C). This is the perfect temperature for roasting our sweet potatoes and chicken to golden perfection! A hot oven ensures crispy edges and juicy centers.

2. **Prepare the Chicken**
   While the oven heats, grab your chicken breasts. Pat them dry with a paper towel (this helps with browning), then season both sides generously with salt, pepper, garlic powder, and smoked paprika. I like to massage the spices into the chicken—get in there! This makes such a difference in flavor.

3. **Chop the Veggies**
   Next, peel and cube the sweet potatoes into bite-sized pieces, about 1-inch cubes. Chop the bell pepper and onion too. I love to have a good, sharp knife for this—it cuts down on prep time and makes chopping more enjoyable.

4. **Toss Veggies in Oil**
   In a large mixing bowl, combine your sweet potatoes, bell pepper, and onion with olive oil and a sprinkle of salt and pepper. Toss everything well until they’re evenly coated. This is where the magic starts—oil will help them to roast beautifully!

5. **Bake the Chicken and Veggies**
   On a large parchment-lined baking sheet, spread the seasoned chicken in the center and scatter the sweet potato mixture around it. Bake for about 20 minutes. The goal here is to get that sweet and savory combo happening, and the aromas in your kitchen will be incredible!

6. **Add the Spinach**
   After 20 minutes, carefully remove the baking sheet from the oven. At this point, sprinkle the spinach over the chicken and veggies. It may look like a lot at first, but it will wilt down beautifully! Pop it back in the oven for another 5-10 minutes, until the chicken is fully cooked (internal temperature of 165°F or 75°C) and the sweet potatoes are fork-tender.

7. **Cool and Portion**
   Once cooked, let the dish cool slightly. I like to use this time to dance around the kitchen and appreciate the divine smells! Then, portion everything into your meal prep containers—this recipe usually fills about four to six servings.

## Serving Suggestions

Serving is where you can truly let your creativity shine! I recommend serving your Chicken and Sweet Potato Meal Prep with a generous dollop of Greek yogurt or a splash of balsamic glaze for an extra layer of flavor. And don’t forget to garnish with fresh herbs like parsley or cilantro for that beautiful finishing touch.

## Recipe Variations

Want to mix things up? Here are a few creative twists for your Chicken and Sweet Potato Meal Prep:

1. **Curry Flavors**: Add curry powder to your chicken seasoning and toss in chickpeas for extra protein.
2. **Honey Mustard Glaze**: Brush the chicken with a honey mustard mixture before baking for a sweet-tangy flavor.
3. **Chipotle Kick**: Add chipotle powder to the spices for a smokier, spicier version that packs a punch!
4. **Herb Medley**: Toss in fresh herbs like rosemary, thyme, or sage for a fragrant and earthy experience.
5. **Grain Boost**: Serve over a bed of quinoa or brown rice for added texture and nutrients.

## Chef’s Notes

This Chicken and Sweet Potato Meal Prep recipe has evolved over time—what started as a simple bake has now transformed into a colorful, flavor-packed masterpiece! I once accidentally added too much garlic, making a batch that was utterly delightful but slightly too potent. From that day forward, I learned the importance of moderation!

Cooking should always be about experimenting and finding what you love. Embrace those kitchen mishaps—they often lead to some of the best, most comforting flavors.

## FAQs and Troubleshooting

**1. My chicken turned out dry. What did I do wrong?**
Ensuring your chicken isn’t overcooked is crucial. Use a meat thermometer to check for doneness at 165°F, and consider marinating your chicken beforehand for extra moisture!

**2. Can I use frozen sweet potatoes?**
Absolutely! Just be sure to thaw them before roasting to ensure even cooking.

**3. What if I don’t have a baking sheet?**
No worries! Use any oven-safe dish you have on hand. Just ensure it’s large enough to hold everything without overcrowding.

**4. How long do leftovers last?**
Properly stored in the fridge, your meal prep containers should stay fresh for up to 4 days. Just reheat in the microwave or oven before serving!

## Nutritional Info

Here’s a rough nutritional breakdown for one serving of the Chicken and Sweet Potato Meal Prep:

- Calories: 400
- Protein: 30g
- Carbohydrates: 45g
- Dietary Fiber: 8g
- Fat: 12g

Remember that nutritional values may vary based on ingredient specifics, so feel free to adjust for your dietary needs.

---

And there you have it! My Chicken and Sweet Potato Meal Prep recipe is not just about convenience; it’s about bringing joy and nourishment to your table, harmonizing flavors that evoke warmth and comfort. I hope you love making it as much as I do—and may your kitchen always be filled with love, laughter, and the smell of something delicious baking!

The Ultimate Chicken and Sweet Potato Meal Prep
- Total Time: 45 minutes
- Yield: 4 servings 1x
- Diet: Gluten-Free
Description
A flavorful and wholesome meal prep featuring roasted chicken and sweet potatoes, perfect for busy weekdays and family dinners.
Ingredients
- 2 large chicken breasts
- 2 large sweet potatoes
- 1 red bell pepper
- 1 yellow onion
- 2 cups fresh spinach
- 3 tablespoons olive oil
- 1 teaspoon garlic powder
- 1 teaspoon smoked paprika
- Salt and pepper to taste
Instructions
- Preheat the oven to 425°F (220°C).
- Prepare the chicken by patting it dry and seasoning with salt, pepper, garlic powder, and smoked paprika.
- Chop the sweet potatoes, bell pepper, and onion into bite-sized pieces.
- Toss the veggies with olive oil, salt, and pepper in a mixing bowl.
- Bake the seasoned chicken and veggies on a parchment-lined baking sheet for about 20 minutes.
- Add the spinach and return to the oven for another 5-10 minutes until chicken is cooked through and sweet potatoes are tender.
- Cool slightly before portioning into meal prep containers.
Notes
Serve with a dollop of Greek yogurt or balsamic glaze and garnish with fresh herbs for added flavor.
- Prep Time: 15 minutes
- Cook Time: 30 minutes
- Category: Main Course
- Method: Baking
- Cuisine: American
Nutrition
- Serving Size: 1 serving
- Calories: 400
- Sugar: 5g
- Sodium: 350mg
- Fat: 12g
- Saturated Fat: 2g
- Unsaturated Fat: 8g
- Trans Fat: 0g
- Carbohydrates: 45g
- Fiber: 8g
- Protein: 30g
- Cholesterol: 70mg
Keywords: chicken, sweet potato, meal prep, healthy, wholesome, quick meals
Seasoned Grilled Chicken Wings with Roasted Corn and Sautéed Green Beans
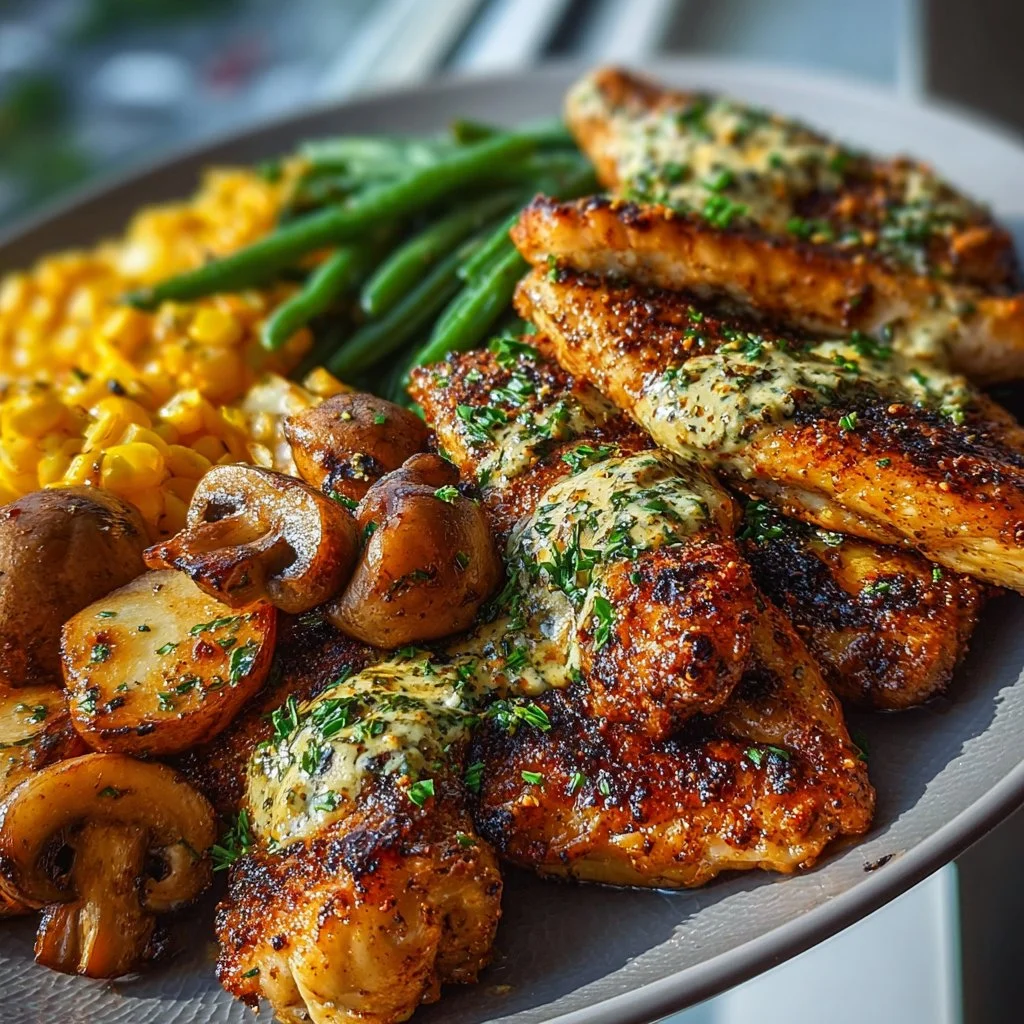
Seasoned Grilled Chicken Wings with Roasted Corn and Sautéed Green Beans
Welcome to my cozy kitchen, food lovers! Today, we’re diving into a dish that screams summer barbecues and family gatherings: Seasoned Grilled Chicken Wings with Roasted Corn and Sautéed Green Beans. Trust me, this recipe is a true crowd-pleaser! Picture this: Your favorite people gathered around, laughter in the air, and the incredible aroma of chicken wings sizzling on the grill. You might even find yourself catching a few drips of barbecue sauce on your shirt—who can resist a good wing, right?
Grilling chicken wings is like hosting a party on your barbecue. The wings transform from simple chicken to flavor-packed bites of joy, especially when they’re marinated in a blend of spices that would make anyone’s mouth water. Pairing them with roasted corn and fresh green beans not only makes this dish feel wholesome, but it also showcases the best of what summer has to offer. You’ll be adding a pop of color and crunch to your table, taking this dish from tasty to next-level delicious.
This meal isn’t just about nourishment—it’s about creating memories! Whether you’re cooking for friends or family, grilling these wings will surely spark smiles and laughter. Energized by a hint of smoke and spices, they’ll be devoured in no time. So, roll up those sleeves, toss on an apron, and let’s cook something magical together!
Personal Story
I still remember the first family barbecue I hosted in my tiny apartment. With a makeshift grill on my balcony and an army of friends ready to feast, I decided to make my go-to chicken wings. I marinated them with an exciting blend of spices that my grandmother had passed down, which instantly transported me to her backyard, where the sun was shining, and the laughter never stopped.
As I flipped those wings over the grill, the wafting aroma attracted not just my friends but the neighbors too! Everyone was intrigued by that delightful scent, and by the end of the evening, I had shared (and highly encouraged) plenty of wing-related stories and plenty of recipes. Spicy, savory, and utterly finger-licking good, those wings became the highlight of the night. Fast forward to today, and I still make those same wings; they’ve become a family tradition, a symbol of the delightful gatherings that bring us all together.
Ingredients
Let’s gather everything you need to whip up these delicious chicken wings. Don’t worry; you might even have some of this on hand already!
Chicken Wings
- 2 pounds chicken wings: The star of the show! Ensure they’re fresh, and if you prefer, you can use drumsticks or thighs as a substitute.
Marinade
- 2 tablespoons olive oil: This helps keep your wings moist and adds a wonderful depth of flavor. You can swap it for avocado oil if you prefer.
- 3 cloves garlic, minced: For that lovely aromatic kick! Fresh garlic is best, but you can use garlic powder in a pinch (1 teaspoon).
- 1 tablespoon smoked paprika: It adds that smoky flavor and vibrant color. Regular paprika works too, but it won’t have that charred essence.
- 1 tablespoon onion powder: A great building block of flavor! Don’t have it? Try finely chopped fresh onion or shallots.
- 1 teaspoon chili powder: A little heat to spice things up! If you like it hotter, cayenne pepper can be a great replacement.
- Salt and pepper to taste: Essential for balancing flavors. Try using flaky sea salt for extra crunch.
Side Dishes
- 4 ears of corn, husked: Sweet corn brings so much summer goodness! Frozen corn can work in a pinch; just sauté it instead.
- 1 pound green beans, trimmed: Fresh green beans add crispness. If they’re not available, snap peas or broccoli florets could work nicely.
Fresh Herbs
- Chopped fresh parsley: To sprinkle on top, adding brightness and a gorgeous pop of green. Cilantro can be a fun, zesty alternative!
Step-by-Step Instructions
Now that we have our ingredients, let’s roll up our sleeves and get cooking!
-
Prepare the Marinade:
- In a mixing bowl, combine olive oil, minced garlic, smoked paprika, onion powder, chili powder, salt, and pepper. Stir well until the ingredients are fully blended. This marinade is where the magic begins! Feel free to adjust the spices to suit your taste—if you love heat, go ahead and throw in a bit more chili!
-
Marinate the Wings:
- Place your chicken wings in a large resealable bag or a shallow dish. Pour the marinade over the wings, ensuring they’re all generously coated. Seal the bag (if using) and shake it around to distribute the marinade evenly. Let them marinate for at least 30 minutes; however, if time allows, marinating for a few hours or even overnight will yield fantastic results. It’s like giving the wings a flavor vacation!
-
Prep the Grill:
- Preheat your grill to medium-high heat (around 375°F to 400°F). If you’re using charcoal, prepare one side for direct heat and the other for indirect heat. This will give you the perfect grilling environment!
-
Grill the Chicken Wings:
- Once your grill is hot, place the marinated wings on the grill over direct heat. Cook the wings for about 8 to 10 minutes on each side, turning occasionally to ensure even cooking. You’re looking for a nice char but don’t let them burn! You can move them to indirect heat if they’re getting too brown before cooking through.
-
Roast the Corn:
- As the wings are grilling, toss the husked corn on the grill. Rotate it every few minutes until it’s lightly charred all over, about 10-15 minutes. Roasting corn adds incredible flavor! If using frozen corn, sauté it in a pan with a splash of olive oil for about 6-8 minutes until golden.
-
Sauté the Green Beans:
- While the wings and corn are cooking, heat a splash of olive oil in a skillet over medium heat. Add the trimmed green beans and sauté for 4-5 minutes until they’re bright green and tender-crisp. A pinch of salt and pepper at the end brings out their natural sweetness.
-
Serve it Up:
- Once everything is cooked, gather the wings, corn, and green beans on a large platter. Squeeze some fresh lemon juice over the veggies for a bright finish! Top with fresh parsley for a stunning presentation.
Serving Suggestions
To serve, arrange the wings beautifully on a platter alongside the roasted corn and sautéed green beans. You can use the corn as a side dish by cutting it off the cob and mixing it with a dab of butter, a sprinkle of salt, and some chopped parsley. For an extra touch, provide a few dipping sauces like ranch or BBQ on the side. Your guests will love mixing flavors!
Recipe Variations
Want to switch things up? Here are some creative twists you can consider:
-
Spicy Teriyaki Wings: Swap the marinade for store-bought or homemade teriyaki sauce. Add sesame seeds for crunch!
-
Herbed Lemon Wings: Instead of the spice blend, marinate in lemon juice, olive oil, and a mix of fresh herbs like thyme and rosemary for a lighter flavor.
-
BBQ Glazed Wings: Toss the grilled wings in your favorite barbecue sauce right before they finish cooking for a sticky, sweet experience.
-
Honey Mustard Glazed: Mix equal parts honey and Dijon mustard, brush over the wings before grilling for a sweet and tangy finish.
-
Vegetarian Option: Swap the chicken wings for cauliflower “wings,” marinating and grilling them the same way for a tasty plant-based dish!
Chef’s Notes
As I continue to evolve this recipe, I often think back to that first barbecue and how far it got me. Occasionally, I experiment with different spices or sides. Recently, I found that adding a splash of apple cider vinegar to the marinade gives it a zingy kick! Just remember, cooking should be fun—don’t be afraid to make it your own. Last but not least, you might want to keep a little extra napkin handy for all that finger-licking goodness!
FAQs and Troubleshooting
Q: My wings came out dry; what did I do wrong?
A: Make sure to monitor the cooking time and use a medium-high heat setting. Overcooking is often the culprit of dry wings. Also, marinating longer can help ensure juiciness!
Q: How can I tell when my wings are cooked through?
A: The best way is to use a meat thermometer; the internal temperature should reach 165°F. If you don’t have one, make sure the juices run clear when you pierce the thickest part of a wing.
Q: Can I bake the wings instead of grilling?
A: Absolutely! Preheat your oven to 425°F and place the wings on a baking sheet lined with parchment paper. Bake for about 25-30 minutes, flipping them halfway through for crispy perfection.
Q: What should I do if I’m cooking for a crowd?
A: Just double or triple the amounts! You can also use an oven and a grill simultaneously to save time. Just remember to ensure they’re spaced out enough to cook evenly!
Nutritional Info
(Per serving—about 5 wings with 1/2 ear of corn and 1/4 pound of green beans)
- Calories: 410
- Protein: 28g
- Fat: 24g
- Carbohydrates: 21g
- Fiber: 4g
- Sugar: 2g
And there you have it—my delectable Seasoned Grilled Chicken Wings with Roasted Corn and Sautéed Green Beans! I hope you feel inspired to take a stroll down flavor lane and create your own kitchen magic. Happy cooking!
Print
Seasoned Grilled Chicken Wings with Roasted Corn and Sautéed Green Beans
- Total Time: 60 minutes
- Yield: 4 servings 1x
- Diet: Gluten-Free
Description
A delicious summer dish featuring marinated chicken wings grilled to perfection, served with roasted corn and sautéed green beans.
Ingredients
- 2 pounds chicken wings
- 2 tablespoons olive oil
- 3 cloves garlic, minced
- 1 tablespoon smoked paprika
- 1 tablespoon onion powder
- 1 teaspoon chili powder
- Salt and pepper to taste
- 4 ears of corn, husked
- 1 pound green beans, trimmed
- Chopped fresh parsley, for garnish
Instructions
- Combine olive oil, minced garlic, smoked paprika, onion powder, chili powder, salt, and pepper in a mixing bowl.
- Place chicken wings in a large resealable bag or shallow dish and pour marinade over them.
- Preheat your grill to medium-high heat (375°F to 400°F).
- Grill marinated wings for about 8-10 minutes on each side until charred.
- Roast corn on the grill, rotating every few minutes for about 10-15 minutes.
- Heat olive oil in a skillet and sauté green beans for 4-5 minutes until tender-crisp.
- Serve wings, corn, and green beans on a platter. Garnish with fresh parsley and lemon juice.
Notes
For a spicier version, add more chili powder or try different marinades like teriyaki or honey mustard.
- Prep Time: 30 minutes
- Cook Time: 30 minutes
- Category: Main Course
- Method: Grilling
- Cuisine: American
Nutrition
- Serving Size: 1 serving
- Calories: 410
- Sugar: 2g
- Sodium: 400mg
- Fat: 24g
- Saturated Fat: 4g
- Unsaturated Fat: 20g
- Trans Fat: 0g
- Carbohydrates: 21g
- Fiber: 4g
- Protein: 28g
- Cholesterol: 90mg
Keywords: grilled chicken wings, summer recipes, barbecue, roasted corn, green beans
One Pot Gnocchi Chicken Pot Pie
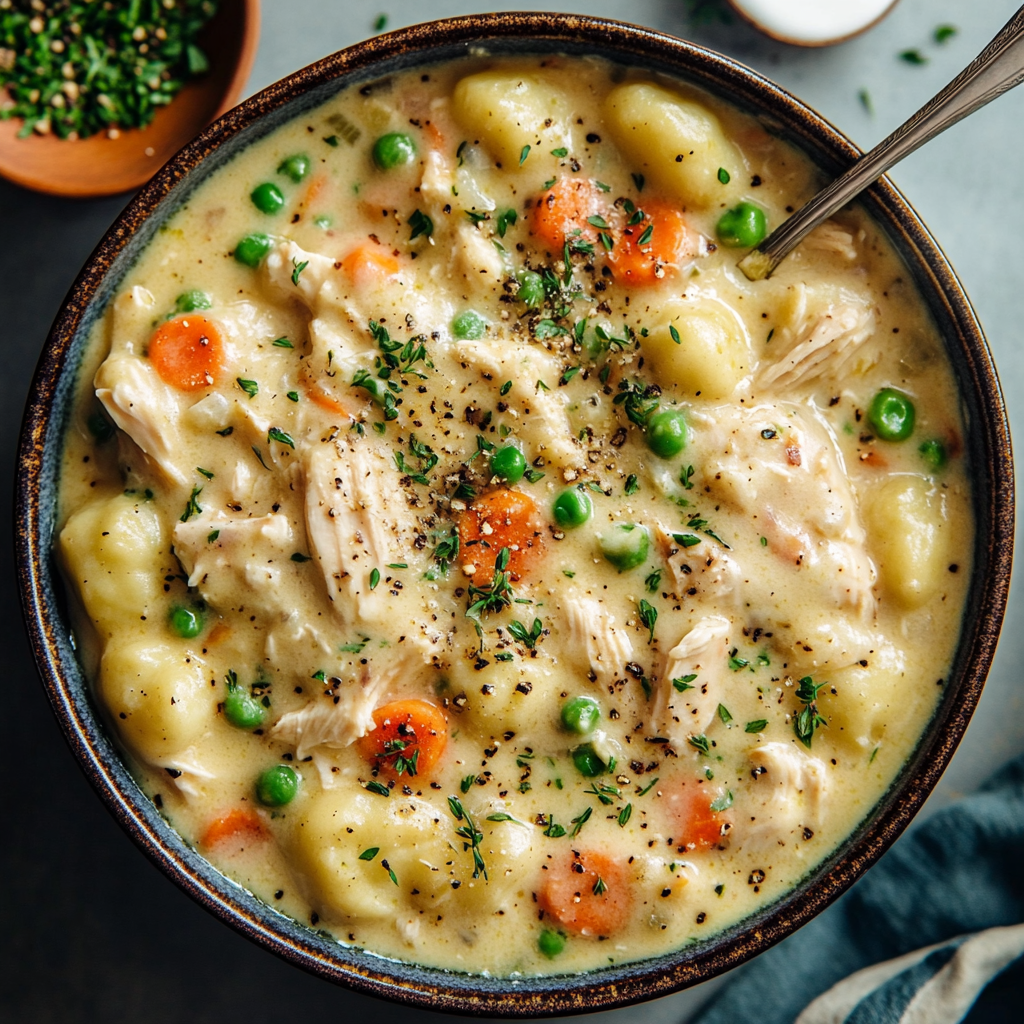
One Pot Gnocchi Chicken Pot Pie: Cozy Comfort with a Twist!
Hey there, foodie friends! I’m ready to spill the beans on a recipe that’s about to become your new cold-weather obsession. Picture this: creamy chicken pot pie filling, loaded with tender veggies and juicy shredded chicken, but instead of a flaky crust? Pillowy, potato-y gnocchi that soak up all that savory goodness. Yep, we’re ditching the rolling pin and keeping it all in one pot—because who has time for dishes? This dish is like a warm hug from your grandma, if your grandma wore a cheeky apron and cursed at burnt roux.
I’ll never forget the first time I served this to my skeptical cousin Dave (“Where’s the crust?!”). Ten minutes later, he was scraping his bowl with a piece of garlic bread and asking for the recipe. That’s the magic of gnocchi pot pie—it’s familiar enough to comfort, but unexpected enough to make Tuesday night feel like a tiny celebration. Plus, it’s faster than ordering pizza.

That Time I Rebelled Against Pie Crusts (And Won)
Rewind to 2018: I’m in my tiny Brooklyn apartment, snowed in with a half-defrosted chicken and a serious case of “I need carbs NOW.” Classic pot pie felt too fussy, but I craved that creamy-chickeny vibe. Then I spotted the gnocchi hiding behind expired mustard. Lightbulb moment!
I threw everything into my trusty Dutch oven—no measuring, just vibes. When those gnocchi puffed up into little flavor clouds, I knew I’d stumbled onto something special. My roommate (RIP, Steve the bassist) wandered in, took one bite, and said, “Dude, this tastes like the inside of happiness.” And just like that, my crustless rebellion had a mascot. Now, it’s my go-to for potlucks, breakups, and “please stop crying, toddler” emergencies.
Over the years, it’s evolved—from a messy fridge dump to a streamlined one-pot wonder that people request by name. If recipes were mixtapes, this one would be my greatest hit.
What You’ll Need (And Why It Rocks)
Here’s what makes this One Pot Gnocchi Chicken Pot Pie so special. It’s flexible, forgiving, and full of pantry and freezer staples you probably already have lurking around. Let’s break it down:
Cooked chicken (1 lb)
Rotisserie is MVP here. Pull it apart while catching up on your favorite show (multitasking = chef power move). No rotisserie? Leftover grilled chicken or roasted thighs work just as well. Even canned chicken in a pinch—we’ve all been there.
Olive oil (1 tbsp)
Or butter for that golden, glossy richness. I alternate depending on my mood. If it’s been a day, I do half oil, half butter. That’s self-care.
Onion + garlic
The dynamic flavor duo—basically the culinary equivalent of Beyoncé and Jay-Z. If you’re out of garlic (gasp!), ½ teaspoon garlic powder will do the trick. But fresh really sings here.
Carrots + peas
Frozen mix is totally cool—we’re not on Top Chef. But if you’ve got fresh carrots, dice them thin so they cook evenly. I often toss in a handful of corn too, just because I can.
Chicken broth (1 cup)
Go for low-sodium so you can control the salt levels. Pro tip: Adding a splash of white wine before the broth adds a little somethin’ somethin’.
Milk or half-and-half (1 cup)
Whole milk = creamy dream. Oat milk = dairy-free delight. Almond milk? Meh—it’ll work, but it won’t be as luscious. Use what suits your vibe.
Thyme (½ tsp)
Fresh or dried—whatever you’ve got. If you’re into rosemary, sage, or Italian seasoning, go ahead and freestyle. This pot’s big enough for all your herby experiments.
Gnocchi (1 lb)
The star! Shelf-stable versions are perfect for last-minute meals. Want to get wild? Try cauliflower gnocchi for a lighter bite or sweet potato gnocchi for autumn vibes.
Parmesan (⅓ cup)
Adds that salty, umami punch. I’ve also used aged cheddar or crumbled feta in a pinch—equally fantastic. Vegan parm works too—just make sure it melts nicely.
Cream cheese (2 tbsp, optional)
This is your silky smooth insurance policy. No cream cheese? Greek yogurt or sour cream adds a nice tang and texture. Totally optional—but you won’t regret it.
How to Make One Pot Gnocchi Chicken Pot Pie
Step 1: Aromatics, Assemble!
Heat oil (or butter) in your largest pot over medium heat. Toss in diced onions, garlic, and carrots. Let them get to know each other, stirring occasionally, for about 5-6 minutes until the onions turn translucent and your kitchen smells like you know what you’re doing.
Pro Tip: Don’t rush this part! Those golden onion edges? That’s where flavor lives.
Step 2: Add the Liquid Love
Stir in your shredded chicken, broth, milk, thyme, salt, and pepper. Go big with that pepper grinder. Stir like you mean it, then bring everything to a gentle simmer. And I do mean gentle—boiling milk is a recipe for sadness and curdles.
Bonus flavor move: Add a splash of dry white wine here. Chardonnay makes it feel fancy.
Step 3: Gnocchi Time
Now the magic happens. Dump in your gnocchi and gently stir. Let them chill in the creamy bath for 6-8 minutes. You’ll see them puff up like tiny potato balloons. When one pierces easily with a fork and feels tender, they’re done.
Don’t over-stir! Gnocchi are softies. Let them soak and do their thing.
Step 4: The Creamy Finale
Fold in the peas, Parmesan, and cream cheese (if using). Stir until melted and the whole pot turns into a creamy, dreamy swirl of comfort. This is your moment to taste. More salt? Dash of hot sauce? Splash of lemon juice for brightness? Customize away.
Step 5: Garnish & Glory
Kill the heat. Sprinkle with chopped parsley, more Parmesan, or even crispy onions if you’re feeling it. Serve in deep bowls—bonus points for bread bowls or over mashed potatoes if you want to go FULL cozy.
Watch the phone cameras come out before the forks do. It’s that kind of dish.
How to Serve One Pot Gnocchi Chicken Pot Pie
This dish doesn’t need a ton of flair—it is the flair. But if you’re aiming to impress, here are a few little extras:
-
Top with: More cheese, fresh herbs, red pepper flakes, or buttery breadcrumbs.
-
Pair with: Bitter greens salad, roasted Brussels sprouts, or warm garlic bread.
-
For a full spread: Add mulled cider, wine, or a crisp cider-based cocktail. This pot pie loves a good drink pairing.
Leftovers? Yes please. This dish reheats like a champ. Pop it in the microwave with a splash of broth or milk to keep it creamy.
Mix It Up! 5 Delicious Twists
Why stick to the usual when you can remix?
-
Veggie Power: Skip the chicken and go with sautéed mushrooms, cannellini beans, and kale.
-
Buffalo Style: Stir in ¼ cup hot sauce and top with blue cheese crumbles. Game day approved.
-
Thanksgiving Remix: Use leftover turkey, roasted sweet potatoes, and a dash of sage. It’s November in a bowl.
-
Gluten-Free Glory: Use GF gnocchi (plenty out there!) and thicken the sauce with a cornstarch slurry.
-
Luxury Edition: Lobster meat, tarragon, and a drizzle of truffle oil. Because you deserve it.
Confessions of a Gnocchi Addict
Let’s be honest—I’ve made this recipe a hundred different ways. Here’s what I’ve learned:
-
Shelf-stable gnocchi > refrigerated for texture. It holds up better in creamy sauces.
-
A splash of wine before the broth elevates everything.
-
Chopped pickles instead of peas? Bad idea. Trust me.
-
Smoked paprika? Oh yeah. Just a little. Adds a cozy depth.
I’ve even tried baking this in a skillet with a cheesy topping. It works—but I still prefer the ease of stovetop one-pot magic.
Your Burning Questions, Answered
Q: Can I use frozen gnocchi?
A: Absolutely! No need to thaw—just give them 2-3 extra minutes in the pot.
Q: Sauce too thin?
A: Whisk 1 tablespoon cornstarch with 2 tablespoons cold milk, stir it in, and simmer for 2 minutes.
Q: Can I make this ahead?
A: Yup. Store in the fridge up to 3 days. Reheat gently with a splash of broth or milk to revive that creamy texture.
Q: Gnocchi sticking together?
A: Stir gently after adding them to the pot and make sure there’s enough liquid for them to cook evenly.
Q: Can I freeze it?
A: Technically yes, but gnocchi can get a little mushy. For best results, freeze the base without the gnocchi and add them fresh when reheating.
Nutritional Facts (Per Serving)
Let’s be real—this isn’t a kale smoothie. But for a cozy, creamy comfort dish? It’s surprisingly balanced! Here’s what you’re working with:
-
Calories: ~520
-
Protein: 32g
-
Fat: 22g
-
Carbohydrates: 45g
-
Cholesterol: 95mg
-
Sodium: ~720mg
-
Calcium: 200mg
-
Iron: 2mg
-
Vitamin A: 80% DV
-
Vitamin C: 20% DV
Want to lighten things up? Swap whole milk for unsweetened almond milk and skip the cream cheese. Trying to bulk up the protein? Add a handful of chopped spinach or use extra chicken. This dish is super flexible—just like your favorite pair of stretchy pants.
Final Thoughts from the (Gnocchi-Loving) Heart
At the end of the day, this One Pot Gnocchi Chicken Pot Pie is about more than ingredients. It’s about reclaiming comfort food on your own terms. It’s about cozying up with a bowl of something creamy and soul-hugging without spending your night elbow-deep in dough or dishes.
Whether you’re feeding picky toddlers, impressing dinner guests, or just needing a food hug after a long day—this one’s for you.
Garlic Butter Chicken Bites with Creamy Parmesan Pasta
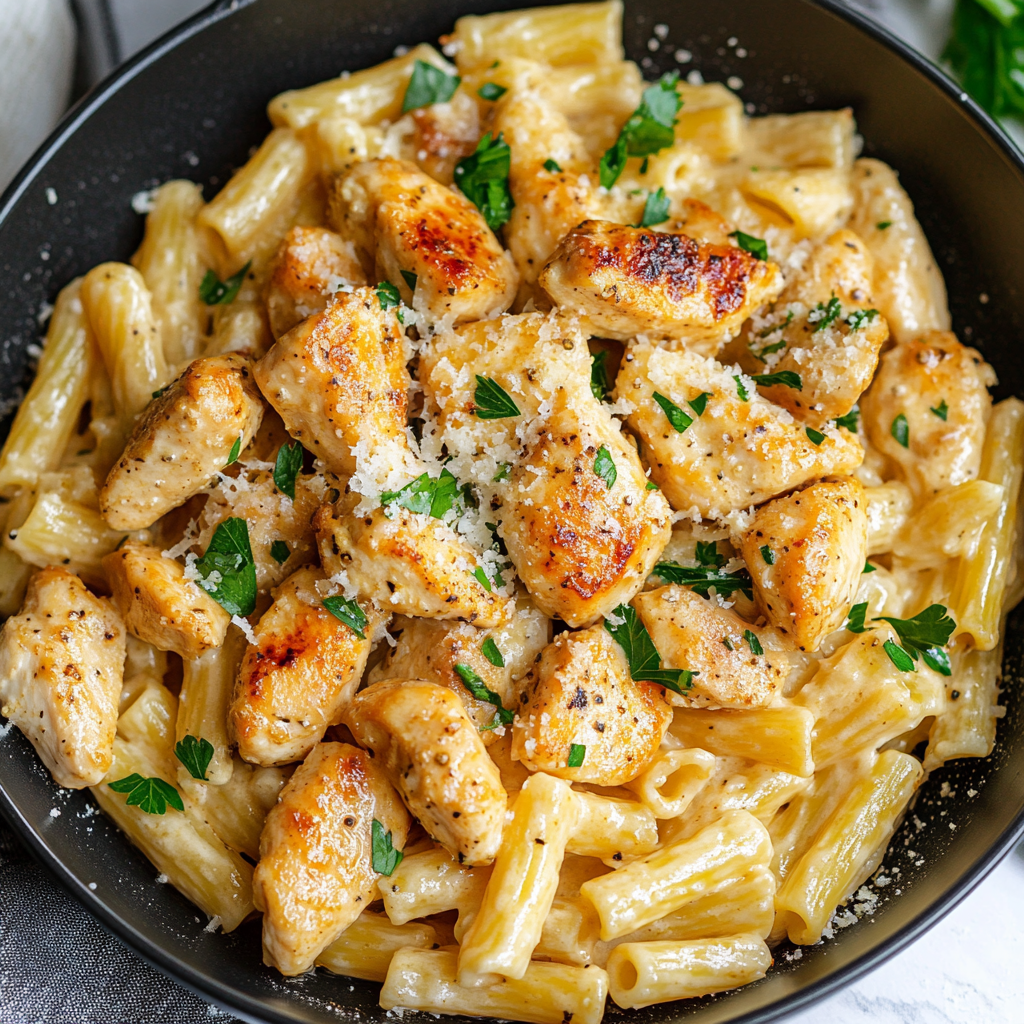
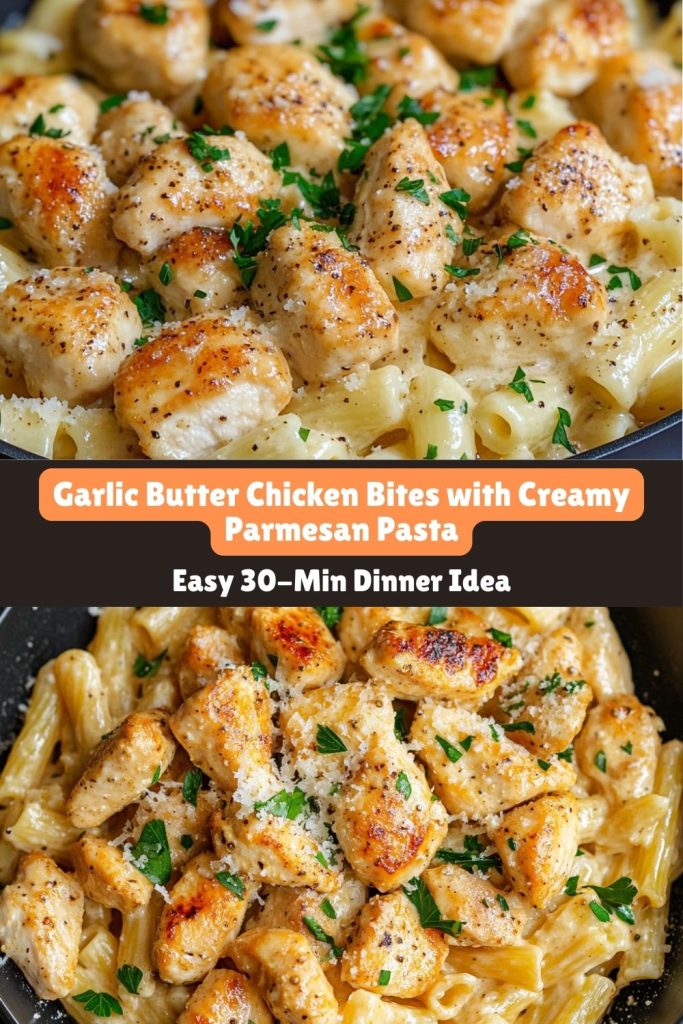
Garlic Butter Chicken Bites with Creamy Parmesan Pasta: Your New Go-To Comfort Feast
Hey there, foodie friend! Let’s talk about that magical moment when crispy garlic butter chicken meets a silky Parmesan pasta hug. You know the feeling—when your fork twirls through creamy noodles, grabs a juicy chicken bite, and suddenly… chef’s kiss. This dish is my culinary security blanket, the one I whip up when I need a guaranteed smile (or when my cousin Dave drops by unannounced—again). It’s quick, unpretentious, and tastes like a fancy bistro meal without the fuss. Ready to turn your kitchen into a comfort food haven? Let’s dive in!
The Snowstorm That Started It All
Picture this: It’s 2018, Chicago’s buried under 14 inches of snow, and my pantry’s down to chicken breasts, half a block of Parmesan, and sheer determination. My then-boyfriend (now husband!) was stuck at my apartment, and let’s just say… my “impressive cooking skills” needed backup. The heat was finicky, we’d watched every episode of The Office twice, and cabin fever was setting in. I had one shot to wow him without trekking outside into the Arctic tundra.
So I seared those chicken bites like my dignity depended on it. I deglazed the pan with butter (because butter fixes everything, right?), stirred in whatever creamy odds and ends remained in the fridge, and dumped in a mountain of freshly grated Parmesan. The result? We ate straight from the skillet, licked spoons, and he proposed six months later. Coincidence? I think not.
From that moment on, this dish became legendary in our home. It’s been served for date nights, girls’ nights, and even Tuesday nights when I need a win. Whether you’re snowed in or just hungry for something warm and cozy, these garlic butter chicken bites and creamy pasta never let you down.
Your Grocery Lineup (Plus Chef Secrets!)
Let’s break down the dream team of ingredients that makes this comfort feast possible. Bonus: most of them are probably already in your pantry or fridge!
For the Garlic Butter Chicken Bites:
-
Chicken breast – 1.5 lbs, cubed. Pro tip: Pop the chicken in the freezer for 15–20 minutes before cutting. It firms up just enough to slice cleanly without slippage. Not a fan of white meat? Swap in boneless thighs for extra juiciness.
-
Paprika + Italian seasoning – The dynamic duo of flavor town. I’m partial to smoked paprika for that cozy, fire-roasted vibe. And Italian seasoning? It’s the shortcut to herbaceous goodness—think oregano, basil, thyme, all in one happy jar.
-
Garlic cloves – You have to use fresh here. Jarred garlic just doesn’t hit the same—it’s like playing Beyoncé on a kazoo. Chop or mince 3–4 cloves and prepare to be hugged by aroma.
For the Creamy Parmesan Pasta:
-
Pasta – Rigatoni is my MVP. Its ridges trap sauce like nobody’s business. Penne, farfalle, or fettuccine also work. Gluten-free? Chickpea pasta is shockingly good and protein-packed to boot.
-
Half-and-half – This is my Goldilocks pick: richer than milk, lighter than cream. If all you’ve got is milk, that’s fine—just whisk in 1 tablespoon of flour to help it thicken.
-
Parmesan – The heart of the sauce. Grate it yourself, please. The pre-shredded kind is coated in anti-caking agents that mess with the texture. I’ve learned the hard way (RIP to that gritty disaster of 2019).
Let’s Get Sizzling! (My Foolproof Roadmap)
Here’s how to bring it all together like a total kitchen rockstar—no culinary school degree required.
Step 1: Chicken Prep Party
Start by patting the chicken cubes very dry. Moisture is the enemy of browning, so give them a good paper towel rubdown. Toss with smoked paprika, Italian seasoning, salt, and pepper. Let them hang out for 5–10 minutes while you heat the skillet—this gives the spices time to work their magic.
Step 2: Sear Like You Mean It
Add a mix of olive oil and 2 tablespoons of butter to a large skillet over medium-high heat. When it’s sizzling hot (test by flicking a drop of water—if it sizzles, you’re good), lay the chicken in a single layer. No crowding! If the pan’s too full, they’ll steam instead of sear, and we’re here for that crispy golden crust.
Cook for about 3 minutes per side, flipping once edges are brown and delicious. You’re not cooking them all the way through yet—they’ll finish in the garlic butter.
Remove the chicken and set it aside on a plate. Don’t wipe the pan—you want to keep those browned bits (aka FLAVOR).
Step 3: Garlic Butter Glory
Lower the heat to medium-low and add the remaining butter. Once melted, stir in the minced garlic. Let it sizzle for just 30 seconds—don’t let it burn or you’ll be sad. Return the chicken to the skillet and toss to coat it in all that fragrant butter goodness. Let everything mingle for another 2–3 minutes so the chicken finishes cooking and soaks up those dreamy flavors.
Meanwhile, in Pasta Land…
While your chicken is sizzling, get your pasta water boiling. Salt it like the ocean! Cook your pasta until just al dente—it’ll keep cooking a bit in the sauce later. Before draining, scoop out about ½ cup of pasta water. This starchy liquid gold helps emulsify your sauce and gives it that luxurious silkiness.
In the same skillet (yes, go ahead—less dishes!), add the half-and-half and warm it gently over medium heat. Sprinkle in your grated Parmesan, whisking constantly to melt it into a velvety sauce. If it’s too thick, add a splash of that pasta water. Too thin? Simmer for another minute or stir in a cornstarch slurry (1 tsp cornstarch + 1 tbsp cold milk).
Add your drained pasta to the skillet and toss everything to coat. The rigatoni should be gleaming and saucy. Now, for the final flourish—nestle those golden garlic butter chicken bites on top.
Plating: From “Meh” to “Michelin-Worthy” (Kinda)
Time to serve it up like a pro. Use tongs to twirl the pasta into high little nests—it’s all about the drama. Arrange the chicken bites on top like you’re stacking precious Jenga pieces. Sprinkle with chopped parsley and more grated Parmesan (obviously). If you’re feeling extra, a candle and glass of wine make this feel like a dinner party even if you’re in sweatpants.
Mix It Up! 5 Flavor Adventures
Here are five delicious twists to make this dish feel brand new every time you cook it. Perfect for picky eaters, adventurous souls, or just those of us who love a remix.
1. Lemon Zest Twist
Brighten things up with a pop of citrus! Add the zest of one lemon into your sauce as it simmers—it lifts the creaminess with a fresh zing. Right before serving, squeeze half a lemon over the finished dish for a restaurant-worthy finish. Bonus: it cuts through the richness like a pro.
2. Mushroom Madness
Craving umami? Slice up some baby bellas or creminis and sauté them with the garlic before adding the chicken back in. The mushrooms soak up that garlicky butter and become little flavor bombs. Add a splash of white wine while they cook if you’re feeling fancy.
3. Spicy Edition
For those who like a little heat with their comfort food, stir in ½ teaspoon of red pepper flakes when the garlic goes into the pan. You can also finish the dish with a dash of your favorite hot sauce or a spoonful of chili crisp. It’s the kind of warmth that makes your soul (and tongue) tingle.
4. Herby Overload
Toss in a handful of chopped fresh basil, parsley, or thyme right before serving. It makes the whole dish taste like a summer garden and pairs especially well with the Parmesan richness. Got leftover pesto? Swirl in a spoonful—it’s a total game changer.
5. Veggie Power-Up
Want to sneak in some greens? Wilt a few handfuls of baby spinach or chopped kale into the sauce as it thickens. Peas, roasted cherry tomatoes, or even steamed broccoli florets also make great additions. It bulks up the dish and adds a pop of color—and you can pretend it’s healthy!
Confessions from My Kitchen
True story: I once tried to “lighten things up” by using low-fat Parmesan. The sauce turned into what I can only describe as wallpaper paste. I’ve made peace with the fact that fat = flavor, especially here. Another hard-earned tip? Don’t forget the pasta water. I didn’t start adding it until 2020 (quarantine cooking epiphanies, anyone?), but it makes a huge difference in how the sauce clings to the pasta.
Also: this dish reheats like a dream. Add a splash of milk before microwaving and it’s just as creamy the next day. Meal prep win!
Burning Questions (Answered!)
Q: My sauce is too thin. Help!
A: No stress! Simmer the sauce for a few extra minutes to reduce it. Still not thick enough? Mix 1 teaspoon cornstarch with 1 tablespoon cold milk and whisk it in slowly until the sauce tightens up.
Q: Can I use rotisserie or pre-cooked chicken?
A: Yep! Just skip to the garlic butter step and warm the chicken in the butter mixture until coated and heated through. Super weeknight-friendly.
Q: What wine pairs well with this?
A: Glad you asked. A crisp white like Sauvignon Blanc or Pinot Grigio cuts through the richness beautifully. If red’s your thing, try a light Pinot Noir.
Nutrition (Per Serving):
-
Calories: 590
-
Protein: 45g
-
Carbs: 38g
-
Fat: 28g
Hearty, balanced, and absolutely soul-satisfying. It’s a hug in a bowl.
Whether you’re feeding your favorite people, meal-prepping your way through the week, or just needing a dinner that feels like a win, this Garlic Butter Chicken Bites with Creamy Parmesan Pasta is here for you. It’s comfort food that doesn’t ask too many questions—just delivers on taste, texture, and joy, every single time.
High Protein Honey Garlic Butter Chicken Mac & Cheese
How to Make the Creamiest, Dreamiest Baked Mac and Cheese of Your Life
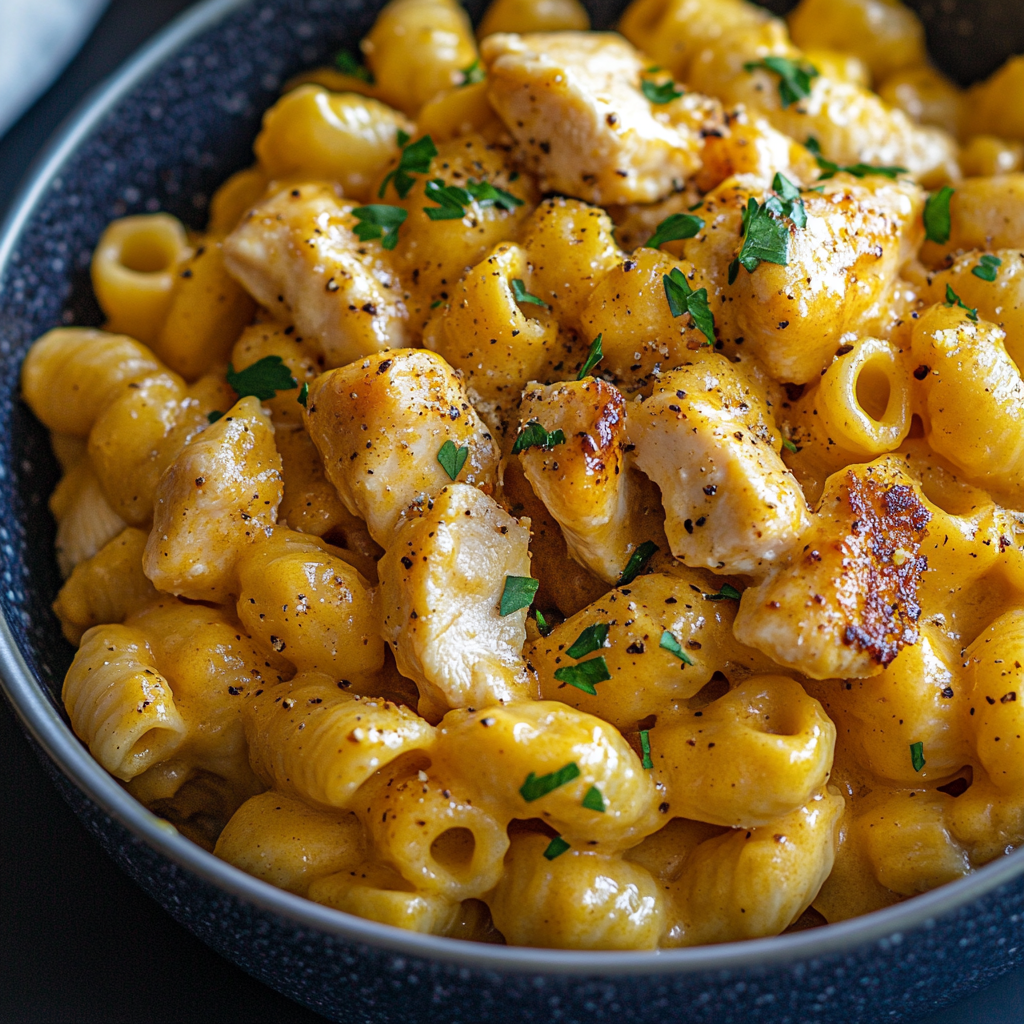
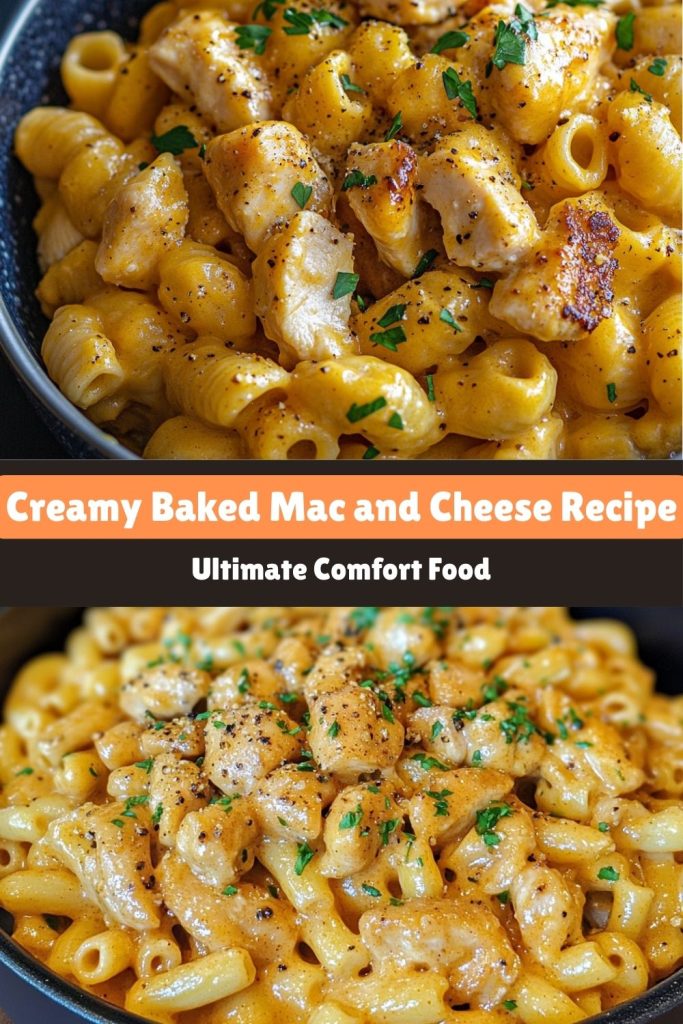
Hey there, foodie friend! Chef Jamie here, your culinary hype-man and self-proclaimed cheese whisperer. Today, we’re diving headfirst into the ultimate comfort food: High Protein Honey Garlic Butter Chicken Mac & Cheese. Not just any mac and cheese, though. We’re talking golden, crispy edges, a sauce so velvety it could double as a blanket, and that magical moment when your fork breaks through the crust into a gooey, cheesy abyss. Are you drooling yet? I sure am.
Now, I know what you’re thinking: “Mac and cheese? That’s kid stuff!” But let me stop you right there. A truly great mac and cheese is an art form—a symphony of textures and flavors that can turn a rough day into a cozy night. Whether you’re feeding a crowd, meal-prepping for the week, or just treating yourself (no judgment here), this recipe is your golden ticket to cheesy bliss. Plus, I’ll spill all my chef secrets—like why a dash of hot sauce is non-negotiable and how to avoid the dreaded “grainy sauce” curse. Let’s get cheesy!
The Time I Almost Burned Down Grandma’s Kitchen (But Nailed the Mac)
Picture this: 12-year-old me, armed with a wooden spoon and a dangerously overconfident attitude, determined to surprise Grandma with her famous mac and cheese while she napped. Spoiler: Things got… dramatic. I forgot to set a timer for the roux (rookie mistake), and next thing I knew, smoke was billowing from the pan. Cue the fire alarm, a very startled grandma, and a kitchen smelling like burnt butter regrets.
But here’s the twist: Grandma, bless her, didn’t scold me. Instead, she handed me a fresh stick of butter and said, “Let’s try that again—together.” That second batch? Pure magic. We added a pinch of smoked paprika from her secret spice stash, swapped in sharp cheddar for extra punch, and laughed until our sides hurt. To this day, every time I make this recipe, I swear I can hear her saying, “More cheese, Jamie. Always more cheese.”
That was the moment I fell in love with food—not just eating it, but creating it, sharing it, celebrating it. And this mac and cheese became my signature dish. I’ve served it at potlucks, dinner parties, holiday feasts, and yes, even at 2 a.m. in pajamas straight from the baking dish. It never fails to hit the spot.
What You’ll Need (+ Why Each Ingredient Matters)
Let’s break it down. Every ingredient here plays a role in crafting a mac and cheese that’s both nostalgic and next-level. Here’s the grocery list—and the why behind it.
-
Elbow macaroni (16 oz): The OG pasta shape for a reason—those curves cradle the sauce like a pro. Want to change it up? Try cavatappi for extra twirl or shells for sauce pockets galore. Gluten-free? Brown rice pasta holds its shape best.
-
Unsalted butter (½ cup): Butter is the foundation of the roux, and flavor starts here. Browning it just slightly before adding flour adds an almost nutty, deep undertone that most people won’t clock—but they’ll know something tastes extra good.
-
All-purpose flour (⅓ cup): This thickens our béchamel base. Want it gluten-free? Use ¼ cup cornstarch, whisked into a slurry with some of the cold milk first, then added to the hot butter to avoid clumping.
-
Whole milk (4 cups): The higher the fat, the creamier the result. You can do a blend of 3 cups whole milk and 1 cup heavy cream if you’re feeling indulgent. Avoid skim—your cheese deserves better.
-
Sharp cheddar (3 cups, shredded): Use aged cheddar—it melts smoother and packs a punch. Grating your own is a must. Pre-shredded cheese is coated in anti-caking agents that make sauces gritty and sad.
-
Gruyère (1 cup, shredded): This cheese brings nutty complexity and stretches like a dream. No Gruyère? Emmental or Fontina are great backups.
-
Paprika (1 tsp): Adds a smoky sweetness and a touch of color. Smoked paprika is my personal favorite for that little wink of BBQ flavor.
-
Hot sauce (½ tsp): Not for heat, but for balance. Just a splash cuts the richness and rounds the flavor. Think of it as the citrus squeeze of the cheese world.
Let’s Build That Cheese Empire: Step-by-Step
Step 1: Cook the Pasta
Boil the macaroni in heavily salted water—think ocean-level salinity. Cook it 1 minute less than the package says. Trust me, overcooked pasta turns to mush in the oven. Drain it and toss with a drizzle of oil to keep it from sticking.
Pro Tip: Save about ½ cup of the pasta water before draining. It’s liquid gold if your cheese sauce needs loosening later.
Step 2: Make the Roux
In a saucepan, melt the butter over medium heat. Once it’s fully melted and just starts to foam, whisk in the flour. Cook it, whisking constantly, for about 2 minutes—until it smells like a buttery pie crust.
Burned it? It happens. No shame in starting over. A bitter roux ruins the whole vibe.
Step 3: Create the Béchamel
Now slowly pour in the milk, whisking as you go. No splashing, no clumping—smooth and steady wins the race. Bring the mixture to a gentle simmer, whisking constantly. After about 5–7 minutes, it should coat the back of a spoon. Stir in the paprika and hot sauce.
This is where the base transforms from plain milk into a rich, creamy canvas ready to welcome cheese.
Step 4: Cheese, Please!
Turn off the heat. Yes—off. Hot milk is enough to melt the cheese; high heat breaks it. Add the cheese by handfuls, stirring between each addition. It should melt into a smooth, luxurious sauce.
If the sauce is a bit thick, stir in a splash of that reserved pasta water. Taste it! Now’s your chance to add salt and pepper before it hits the pasta.
Step 5: Assemble & Bake
In a greased 9×13” baking dish, combine the sauce and cooked pasta. Stir gently to coat every nook and cranny. Top with extra shredded cheese because… more cheese. Bake at 375°F for 25 minutes, then broil for 2–3 minutes to get that crispy, golden top.
Don’t skip the 10-minute rest. It lets the sauce set and keeps your serving from sliding into soup territory.
How to Serve It Like a Pro
You made a masterpiece—let’s plate it accordingly.
-
For weeknights: Ladle into wide bowls, garnish with chopped parsley or chives, and pair with a tangy arugula salad.
-
For dinner parties: Serve in mini cast-iron skillets or ramekins. Top with crispy pancetta or breadcrumbs for flair.
-
For a crowd: Double the batch, bake in a deep roasting pan, and keep it warm in the oven. A mac and cheese bar with toppings? Instant party win.
Bonus tip: A drizzle of garlic-infused olive oil or a few flakes of smoked sea salt right before serving? Next-level.
Mix It Up: 5 Killer Twists
Want to jazz things up? Here are my five favorite variations:
-
Buffalo Chicken: Stir in 2 cups shredded rotisserie chicken and ¼ cup buffalo sauce. Crumble blue cheese on top before baking.
-
Truffle Shuffle: After baking, drizzle with white truffle oil and add sautéed mushrooms for a bougie twist.
-
Lobster Luxe: Gently fold in 1 lb cooked lobster meat right before baking. Finish with a squeeze of lemon.
-
Veggie-Packed: Add roasted cauliflower, spinach, or sun-dried tomatoes for color and texture.
-
Spicy Chorizo: Brown 1 cup Spanish chorizo and scatter over the top before baking for bold flavor and crispy bits.
Chef’s Final Thoughts
This recipe has been my ride-or-dish since culinary school, where my classmates dubbed me “Mac Daddy” (thanks, guys). Over the years, I’ve learned:
-
Grate your own cheese—it truly makes all the difference.
-
Let it rest after baking. Your patience will be rewarded with perfectly creamy forks of joy.
-
Share it. Comfort food is best when served with a side of laughter, conversation, and a whole lot of love.
At the end of the day, mac and cheese isn’t just food—it’s a memory in the making. Whether it’s a snow day lunch, a holiday table staple, or your go-to “I need something cozy now” meal, this dish delivers every time.
Your Mac and Cheese Questions—Answered!
Q: Why is my cheese sauce grainy?
A: You probably melted the cheese over too high a heat. Cheese likes to be coaxed into melting—never rushed. Take the pan off the heat first, then stir in cheese slowly.
Q: Can I make this ahead?
A: Yes! Assemble it fully (minus the baking), cover tightly, and refrigerate for up to 2 days. When ready to bake, add 10 extra minutes to account for the chill.
Q: My mac turned out dry. Help!
A: Stir in ½ cup warm milk just before serving. It brings the sauce back to life. For future batches, keep the pasta slightly undercooked and always add extra sauce before baking—it thickens as it bakes.
Nutritional Facts (Per Serving – Serves 8)
Note: Values are approximate and will vary based on specific brands and ingredient swaps. But hey, knowledge is cheese power.
- Calories: 520
- Total Fat: 32g
- Cholesterol: 95mg
- Sodium: 460mg
- Total Carbohydrates: 35g
- Protein: 22g
- Calcium: 35% DV
- Iron: 10% DV
Want to lighten it up a bit? Try using reduced-fat cheese, skim milk (but be warned: less creaminess!), or toss in some cauliflower florets to stretch the pasta. Or don’t—because sometimes, full-fat cheesy glory is exactly what the soul needs.
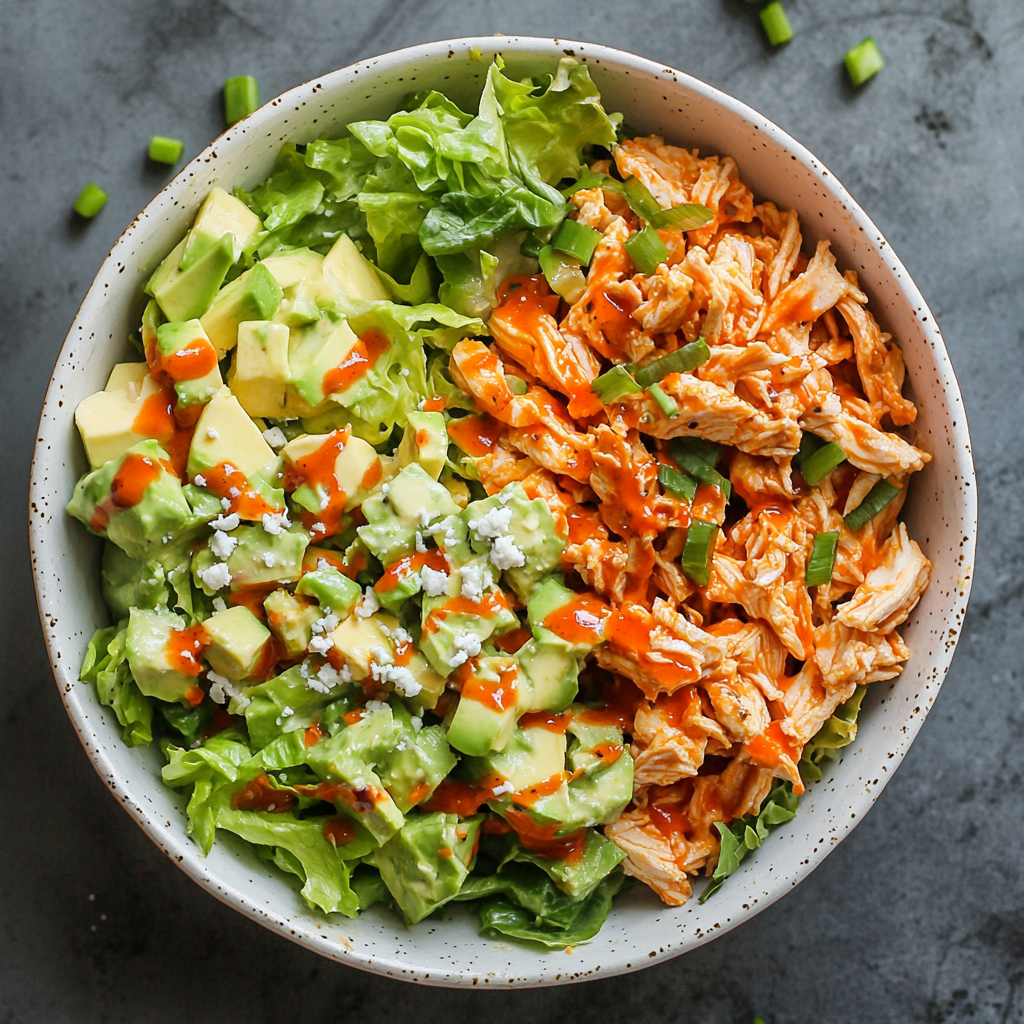
Quick Buffalo Chicken Salad
Game Day Flavors Meet Weekday Wins: My Buffalo Chicken Salad Saga
Picture this: It’s Sunday afternoon. The house is buzzing with anticipation, the couch is a sea of jerseys, and someone’s uncle has already claimed the best seat—even though he showed up late. The TV flashes a touchdown replay in slow motion while the room erupts with high-fives and hollers. Somewhere in the background, that unmistakable scent of tangy buffalo sauce wafts through the air like edible confetti. Classic.
Now imagine bottling up all that electric game-day energy and turning it into a weekday lunch that doesn’t weigh you down like six wings and a pile of fries. That, my friends, is exactly what happened in my kitchen last football season. What started as a snack-attack craving spiraled into a full-blown obsession—a Quick Buffalo Chicken Salad that’s as meal-prep-friendly as it is tailgate-worthy.
This isn’t just another “healthy swap” attempt that tastes like it’s missing something. Nope. This is a flavor-packed revolution. It’s creamy, spicy, crunchy, cool—all the textures and tastes you crave—wrapped into a dish that leaves you satisfied, not sluggish.
We’re talking shredded chicken breast lounging in a spicy Greek yogurt buffalo dressing, with crisp celery and zippy green onions giving it that essential wing-night crunch. Even my husband, a firm believer in “salads are side dishes,” now requests this as his go-to post-gym meal. That’s how I knew we were onto something.
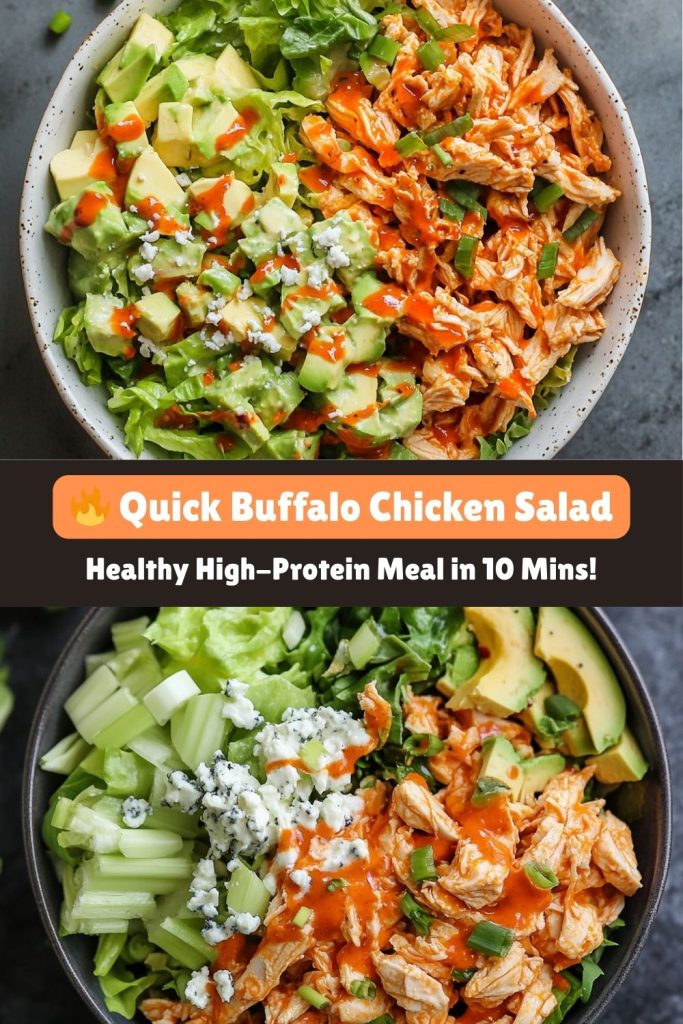
The Wingless Wonder That Saved My Super Bowl Party
Let me take you back to what we now lovingly call “Apocalypse Bowl” 2020—the year we celebrated sports victories over Zoom and passed chip bowls to no one. A time when banana bread reigned and home workouts broke furniture.
My friend Dave, an aspiring marathoner with a buffalo sauce addiction, dared me to invent a game-day snack that wouldn’t derail his training. The stakes? Bragging rights and the last of the sourdough starter.
Three failed attempts later (including one buffalo cauliflower debacle that turned into a mushy crime scene), I had nearly given up. But in a fit of 6AM fridge rummaging, I spotted a tub of Greek yogurt, leftover rotisserie chicken, and the half-empty bottle of Frank’s RedHot glaring at me like, “Do better.”
So I did. I mixed. I tasted. I prayed. And then—magic. The tang of the yogurt. The punch of the hot sauce. The savory whispers of garlic and paprika. A cold, creamy crunch that hit all the notes. I spooned it into lettuce cups and served it, hoping no one noticed I hadn’t made wings.
To my surprise, the group chat exploded. Dave begged for the recipe and claimed it “tasted like cardio never happened.” Karen (yes, that Karen) brought it to book club with fancy toothpicks. And me? I finally found a way to indulge in buffalo flavors without wearing them on my shirt for the rest of the day.
What You’ll Need to Make This Quick Buffalo Chicken Salad
Let’s break it down, so you can make this a staple without second-guessing the grocery aisle.
-
Shredded Chicken Breast:
Rotisserie chicken is your weeknight MVP. Shred it while it’s warm for maximum tenderness. No-cook shortcut? Use canned chicken—just drain it thoroughly and fluff it with a fork. -
Greek Yogurt:
The creamy base that holds it all together. Bonus: It’s protein-packed, tangy, and lighter than mayo. Use full-fat for richness or try plant-based options like Silk almond yogurt for a dairy-free twist. -
Frank’s RedHot:
Accept no substitutes! Its vinegary heat is non-negotiable for that classic buffalo flavor. Go mild if you’re spice-sensitive, or mix in a dash of honey if you’re trying to win over kiddos. -
Celery & Green Onions:
These aren’t just fillers—they’re texture champions. Celery brings that refreshing snap, while green onions add gentle bite. For a creative remix, try thin-sliced radishes or jicama sticks. -
Lemon Juice:
A splash of brightness that ties everything together. Lime juice also works—especially if you’re leaning into a citrus-forward profile. -
Spice Squad:
Garlic powder + paprika = the unsung heroes. Use smoked paprika for a subtle BBQ vibe, or swap in chili powder for depth.
How to Make Quick Buffalo Chicken Salad
Step 1: The Dressing Dance
Grab your biggest mixing bowl (you’ll want room to toss without launching celery across the counter). Whisk together your Greek yogurt and buffalo sauce until smooth. Add lemon juice for a tangy punch—it also helps the dressing hold its consistency.
Step 2: Spice It Up!
Sprinkle in garlic powder and paprika. Let it rest for two minutes. Trust me—this gives the dried spices time to “bloom,” enhancing the flavor like you just spent hours slow-simmering something gourmet.
Step 3: Chicken Shred Sesh
Whether you’re going beast mode with your hands or using the paddle attachment of a stand mixer (life-changing, BTW), shred your chicken until it’s bite-sized and fluffy. Then fold it gently into your spicy dressing.
Step 4: Crunch Time
Add chopped celery and sliced green onions. Stir everything together with love. Give it a taste—now’s your moment to adjust for heat, salt, or add-ins. Pro tip: The flavors deepen after chilling, so don’t be shy with the spice!
Plating Like a Pro (Even in Sweatpants)
This Quick Buffalo Chicken Salad is ridiculously versatile. Don’t limit it to plastic containers. Elevate it (or keep it cozy!) with these fun serving ideas:
-
Lettuce Cups: Butter or romaine leaves make the perfect low-carb taco stand-ins. Top with sliced avocado and a sprinkle of blue cheese if you’re feeling fancy.
-
Spinach Wraps: Roll it up with baby spinach and shredded carrots for a portable lunch that doesn’t need a fork.
-
Toasted Sourdough: Pile high on crunchy bread, maybe with a fried egg on top? Brunch-worthy.
-
Sweet Potato Fries: Use them as scoops. Yes, you’re an adult and you can eat like this.
-
Grain Bowls: Layer over quinoa or farro with cherry tomatoes, cucumber, and a drizzle of extra buffalo sauce.
Switch It Up Like a Seasoned Chef
This base is flexible. Whether you’re accommodating allergies, macros, or just bored of chicken, here’s how to remix it:
-
Buffalo Chickpea Version: Veganize it by mashing chickpeas with a spoonful of tahini and using plant-based yogurt. Add shredded carrots for extra crunch!
-
Buffachos: Spread it over nachos, top with blue cheese crumbles, and broil for 2 minutes. It’s the dinner party nobody knew they needed.
-
Breakfast Edition: Stir into scrambled eggs with a little cheddar and chives. Hello, spicy breakfast burrito filling!
-
Keto Crush: Use full-fat yogurt and serve it in halved avocados or cucumber boats.
Confessions from My Apron Pocket
Not every kitchen story is a success.
One time, in a rush and slightly undercaffeinated, I grabbed wasabi paste instead of buffalo sauce. Let’s just say, if fusion was the goal… it failed spectacularly. Even the dog gave me side-eye. The bowl went straight to the compost bin. The lesson? Don’t shop for groceries while hangry.
Also: this salad tastes even better the next day. The chicken absorbs all those spicy, tangy flavors and the crunch of the celery somehow stays intact. I now double the batch every time and portion it into freezer-safe containers. Thaw overnight, stir, and you’re golden.
Readers’ Burning Questions (Answered!)
Q: Can I make this dairy-free?
A: Yes! Use an unsweetened dairy-free yogurt (Kite Hill almond is a solid choice). If you miss that cheesy essence, try adding a teaspoon of nutritional yeast.
Q: Why is my salad watery after refrigeration?
A: It’s the veggies! Celery naturally releases water over time. You can salt and pat it dry before mixing, or just give the salad a quick stir and drain off excess moisture before serving.
Q: How spicy is this really?
A: It’s more zesty than fiery—I’d call it a 3/10 on the spice scale. Want more heat? Add cayenne or a splash of extra hot sauce. Want less? Stir in a little ranch or cream cheese to mellow it out.
Q: Can I use turkey instead of chicken?
A: Absolutely. Leftover Thanksgiving turkey works great. Just shred and sub 1:1. It’s also a clever way to repurpose holiday extras without another sandwich.
Macros That Make Sense
Per serving (1 cup):
-
Calories: 150
-
Protein: 31g
-
Fat: 3g
-
Carbs: 2g
This Quick Buffalo Chicken Salad is not only high in protein but also naturally low in carbs, making it a perfect choice for low-carb lifestyles, post-workout recovery, or anyone wanting to feel full without feeling weighed down. Bonus: thanks to the Greek yogurt, you’re also getting a healthy dose of probiotics and calcium.
Final Word: Salad, But Make It a Legacy
It’s funny how the most unexpected kitchen wins turn into family legends. This Quick Buffalo Chicken Salad started as a fridge clean-out experiment and became a regular request from everyone from gym bros to book club Karens.
It’s the flavor of football season, the convenience of meal prep, and the joy of eating something that feels indulgent but isn’t. Whether you’re packing it for work, serving it at a party, or sneaking bites straight from the bowl at midnight (we’ve all been there), this dish proves that bold flavor doesn’t need deep fryers or takeout menus.
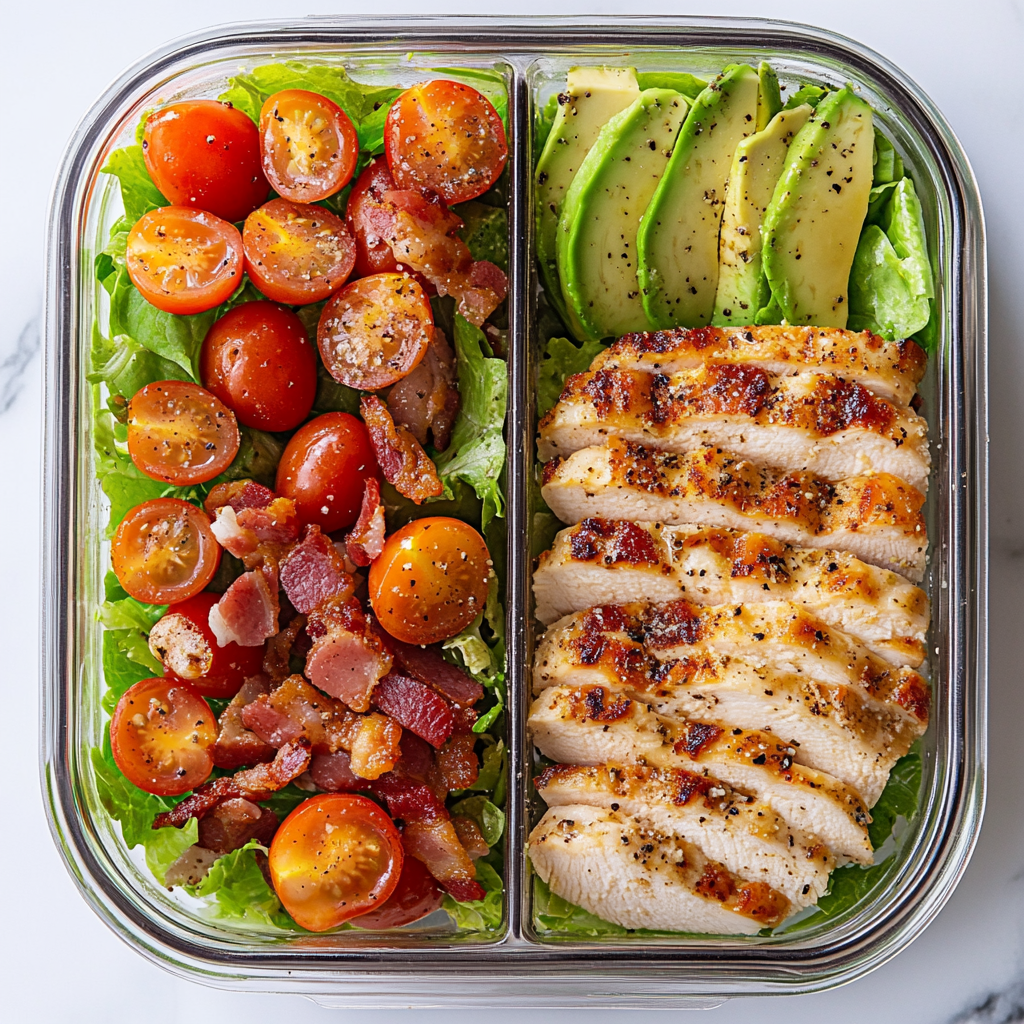
BLT Chicken Salad Meal Prep
The BLT Chicken Salad That’ll Make You Actually *Excited* for Meal Prep
Hey there, foodie friend! Let’s talk about lunch. You know, that meal we all swear we’ll plan ahead for… until 11:30 AM hits, and we’re eyeing the vending machine like it’s a lifeline. Been there, burned that toast. But what if I told you there’s a meal prep recipe so fresh, so crunchy, and so downright delicious that it’ll make you want to open your fridge? Enter: my BLT Chicken Salad. It’s like your favorite bacon-lettuce-tomato sandwich decided to hit the gym, get shredded (literally), and become the protein-packed hero of your week.
Picture this: crisp romaine, juicy chicken, smoky bacon, and bursts of sweet cherry tomatoes, all tied together with a tangy yogurt-Dijon dressing. And the best part? It takes 15 minutes to throw together. No cooking. No fuss. Just you, a few simple ingredients, and four days of lunches that taste like victory. I’ve been making this for years—for busy restaurant shifts, road trips, even picnics—and it never lets me down. Let’s dive in!
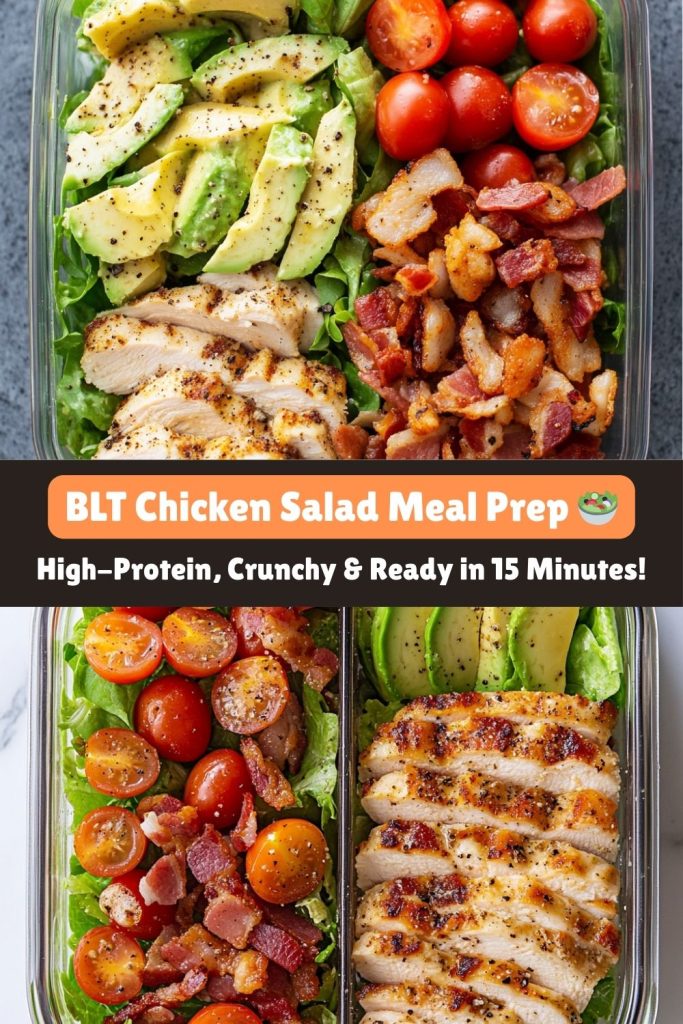
Why This Recipe Feels Like a Hug from My 10-Year-Old Self
Okay, story time. When I was a kid, my grandma would make me BLTs after school. She’d fry the bacon extra crispy, pile it on sourdough with garden tomatoes, and cut the sandwich into four perfect triangles. I remember sitting at the kitchen counter, legs swinging, sun pouring through the windows, and thinking that no food in the world could ever taste better. That combination of crunchy, savory, juicy, and creamy? Pure magic.
Fast-forward to my first kitchen job: 14-hour days, surviving on coffee and whatever I could scarf down between orders. One night, I looked at the leftover roast chicken and bacon bits and thought, “What if I turned Grandma’s sandwich into a salad?”
I threw it together with mayo (hey, it was the 2000s), dumped it in a takeout container, and… it changed my life. Suddenly, lunch wasn’t a chore—it was something I craved. Over the years, I’ve tweaked it (Greek yogurt instead of mayo, avocado because duh), but the soul of that recipe? Still the same. It’s my edible security blanket. And now? It’s yours too.
What You’ll Need to Make Your BLT Chicken Salad Meal Prep
-
2 cups cooked chicken breast – Rotisserie chicken is your BFF here. Short on time? Canned chicken (drained) works in a pinch! Got leftover grilled chicken? Even better—it adds a smoky note.
-
4 cups chopped romaine – Romaine stays crisp for days. Swap with kale (massage it first!) or butter lettuce for a softer vibe. Baby spinach is another solid stand-in if that’s what you’ve got.
-
1 cup cherry tomatoes – Halve ’em for no-slip bites. Grape tomatoes or diced heirlooms work too! The juicier, the better—these are your salad’s “pop factor.”
-
4 strips cooked bacon – Turkey bacon for a lighter twist, or coconut bacon for veg friends. Pro tip: Bake bacon on Sundays—it’s less mess and way more batch-prep friendly.
-
1 avocado (optional) – Add it fresh before eating to prevent browning. No avocado? A handful of almonds or sunflower seeds adds crunch + healthy fats.
-
¼ cup plain Greek yogurt – Mayo works, but yogurt adds protein. Vegan? Use mashed avocado + lemon as dressing!
-
1 tsp Dijon mustard – This is the flavor booster. No Dijon? ½ tsp regular mustard + ½ tsp honey.
-
Lemon juice, salt, pepper – For bright, punchy flavor.
Extra Touches (Totally Optional but Fun!)
-
Croutons or crispy chickpeas for added crunch
-
A sprinkle of paprika or smoked salt
-
Fresh herbs like chives or parsley
-
A drizzle of balsamic glaze if you’re feeling fancy
Let’s Build Your Future Favorite Lunch (No Chef Skills Required!)
1. Make the Dressing
In a small bowl, whisk together your Greek yogurt, Dijon mustard, a big pinch of salt and pepper, and a generous squeeze of lemon juice. Taste it! Want it tangier? Add more lemon. Too thick? A splash of water or olive oil will thin it out perfectly. You want something creamy but pourable.
2. Prep Your Containers
Grab four airtight containers (I love mason jars for layering!). Divide the chopped romaine evenly among them—press it down a little to fit more greens in without bruising them. A compact salad is a crispy salad.
3. Layer Like a Pro
Start with the lettuce, then go in with the chicken (this keeps the lettuce from getting soggy), then add tomatoes, bacon, and avocado if using. The heavier stuff on top keeps everything from wilting too soon. Keep the dressing in a separate container until you’re ready to eat.
4. Store Smart
Refrigerate for up to 4 days. If you’re using avocado, I recommend slicing it fresh each morning and tucking it into your container with a splash of lemon juice. Or store it in a mini container with a tight seal.
Chef’s Hack: Place a dry paper towel on top of the greens before sealing the container—it absorbs moisture and keeps everything crisper, longer. Yes, that one simple trick actually works.
How to Serve Your BLT Chicken Salad Meal Prep
When lunchtime hits, either pour your dressing over the salad or give the whole container a vigorous shake (lid on, of course!) to mix things up. If your ingredients are layered in a mason jar, shaking distributes the dressing evenly and makes it feel like a fancy café salad.
Want to level up? Try these:
-
Wrap It: Spoon into a whole grain or spinach tortilla, wrap it tight, and enjoy on the go.
-
Pita Style: Stuff the salad into warm pita pockets with a little feta cheese for bonus flavor.
-
Open-Faced: Pile everything onto toasted sourdough for a BLT salad toast moment.
-
Power Bowl: Add a scoop of quinoa or couscous underneath for a full-on grain bowl.
-
Taco Tuesday: Toss in corn and black beans, and serve in taco shells or lettuce cups!
Add a side of pickles, a few strawberries, or a square of dark chocolate—because joy matters too.
Mix It Up! 5 Ways to Keep This Salad Exciting
Don’t let salad fatigue creep in. Here’s how to remix your BLT Chicken Salad all week long:
1. Southwest Style
Swap the bacon for black beans, throw in some corn, and use a lime-cilantro vinaigrette. Bonus: add diced red bell pepper or jalapeño for some heat.
2. Mediterranean Twist
Add crumbled feta, Kalamata olives, red onion, and a sprinkle of oregano. Dress with olive oil and lemon juice for that sunny, Greek-island vibe.
3. Low-Carb Crunch
Skip the lettuce entirely and serve everything in halved bell peppers or hollowed-out cucumbers. It’s like eating a sandwich… but a vegetable.
4. Vegetarian Vibes
Swap out the chicken for chickpeas or roasted tofu cubes. Season with smoked paprika or za’atar for extra depth.
5. Cheesy Comfort
Mix in shredded cheddar or crumbled goat cheese. It makes the salad extra satisfying and indulgent (without going overboard).
Notes from My Kitchen (and One Epic Avocado Fail)
Real talk? I once made 10 of these salads ahead of a camping trip—each with chopped avocado already mixed in. I thought I was being efficient. By Day 3… those avocados were sad, brown, mushy puddles of disappointment. They looked (and smelled) like compost. Lesson learned.
Now I always slice my avocado fresh and either store it separately with a splash of lemon juice or swap it out for crunchy nuts and seeds. Avocado drama: avoided.
Pro Tip: If your cooked chicken is tasting a little bland, toss it with a pinch of garlic powder, smoked paprika, or a quick drizzle of vinaigrette before adding it to the salad. It’ll wake the whole thing up.
And if you’re prepping for kids? Let them build their own “BLT bowls” with ingredients in little compartments. They’ll have more fun—and maybe even eat the vegetables. Miracle!
FAQ: Your Questions, Answered!
Q: Can I freeze this salad?
A: Not as-is. Lettuce and fresh veggies don’t freeze well. But you can freeze cooked chicken and bacon. Just thaw them overnight in the fridge, then assemble the salad fresh.
Q: Help! My dressing is too runny.
A: If you’re using Greek yogurt, strain it through a cheesecloth or paper towel-lined sieve for 10–15 minutes. Still too thin? Add 1 tsp of mayo or more yogurt for body.
Q: How do I keep avocado from browning?
A: Store avocado slices in a separate container with a squeeze of lemon or lime juice. Or mist with avocado oil spray and press plastic wrap over the surface to minimize air exposure.
Q: Can I add grains to bulk it up?
A: Totally. Cooked quinoa, farro, or couscous are great. Just keep them in a separate layer or container so they don’t make the lettuce soggy.
Q: What if I hate yogurt?
A: Use a mix of mayo and lemon juice, or even ranch dressing if that’s more your jam. The goal is flavor + creaminess, however you get there.
Nutrition Per Serving (Because Knowledge is Power!)
-
Calories: ~320
-
Protein: 30g
-
Carbs: 10g
-
Fat: 18g
-
Fiber: 4g
Note: Values include avocado and turkey bacon. Using regular bacon adds ~30 calories per serving. Using mayo instead of Greek yogurt? Expect slightly higher fat and calories—but hey, balance!
And that’s it—your new favorite meal prep superstar, wrapped in bacon and bursting with crunchy freshness. Whether you’re packing it for a long day at work, tossing it together for a last-minute dinner, or flexing your meal-prep muscles for the week ahead, this BLT Chicken Salad Meal Prep’s got your back.


