

: Keto Sausage and Cheese Biscuits!
🧀 Savory & Satisfying: Keto Sausage and Cheese Biscuits (The Ultimate Low-Carb Comfort Food)
Picture this: It’s Sunday morning. Sunlight streams through the kitchen window as the aroma of sizzling sausage and melted cheese dances in the air. You pull a tray of golden-brown biscuits from the oven, their edges slightly crisp, their centers begging to be pulled apart. That’s the magic of these Keto Sausage and Cheese Biscuits—a recipe that’s become my family’s not-so-secret weapon for turning ordinary mornings into something special.
As a chef who’s obsessed with making low-carb eating feel indulgent, I created these biscuits during a brunch crisis (more on that later!). They’re gluten-free, packed with protein, and have just 3g net carbs each. But here’s the real kicker: Even my carb-loving brother-in-law hoards these in his freezer. Whether you’re keto-curious or just want a breakfast that won’t leave you hangry by 10 AM, these biscuits are about to become your new kitchen BFF.
❄️ The Snowed-In Brunch That Started It All
Let me take you back to that fateful winter morning. A snowstorm had canceled our pancake house plans, leaving six hangry adults and three cranky kids in my tiny kitchen. My sister joked, “Chef Auntie better work some magic!” Challenge accepted.
I raided the fridge: leftover sausage from pizza night, a block of cheddar, almond flour from my holiday baking spree. What emerged from the oven 20 minutes later looked like fluffy biscuits but tasted like a sausage-stuffed grilled cheese—in the best possible way. My nephew (the pickiest eater alive) asked for thirds. My yoga-instructor sister whispered, “These are keto?!” We’ve recreated that cozy snow day vibe every weekend since.
🛒 Your Grocery List: Simple Ingredients, Big Flavor
- 1 lb breakfast sausage – Go spicy if you dare! (Sub: Ground turkey + 1 tsp fennel seeds)
- 1 cup shredded cheese – Cheddar’s my MVP, but mozzarella keeps it extra melty
- 1 cup almond flour – Super-fine blend works best (Not coconut flour—they’re not twins!)
- 2 large eggs – Room temp = better binding
- 1 tsp baking powder – Freshness matters! Test it with water if it’s old
- 1/2 tsp garlic powder – Optional but oh-so-worth it
Chef’s Tip: For dairy-free pals, swap cheese for 1/4 cup nutritional yeast + 1 tbsp psyllium husk (trust me!).
👩🍳 Let’s Get Baking: Your Foolproof Roadmap
Step 1: Fire up that oven to 350°F (175°C). No parchment? Grease that pan like you’re buttering toast!
Step 2: Brown the sausage in a skillet. Pro Move: Crumble it fine—you want bits in every bite! Drain fat (save it for cooking eggs later!).
Step 3: In your mixing bowl, combine everything. Secret: Mix with your hands! The heat from the sausage helps melt the cheese.
Step 4: Scoop 8 mounds onto the sheet. Ice cream scoop = perfect portion control!
Step 5: Bake 15-20 mins. They’re done when tops look like toasted marshmallows.
Hot Tip: Let them cool 5 mins—they firm up as they rest. Patience, grasshopper!
🍽️ Serving Ideas That’ll Make You Feel Fancy
Slice one open while warm—watch that cheese stretch! Pair with scrambled eggs and avocado for Instagram-worthy brunch boards. Pack them cold in lunchboxes with a side of spicy mayo (1 tbsp mayo + 1 tsp sriracha = chef’s kiss).
✨ Mix It Up: 5 Flavor Twists
- Pizza Party: Add 1/4 cup marinara + pepperoni bits
- Garden Lover: Spinach (squeezed dry!) + feta
- Tex-Mex: Taco-seasoned beef + jalapeños
- Bacon Bliss: Crumbled bacon + blue cheese
- Veggie Boost: Zucchini shreds (pat dry first!)
📝 Chef’s Confessions & Kitchen Wisdom
The first time I made these, I forgot the baking powder. Let’s just say hockey pucks would’ve been softer! Now I keep a backup jar labeled “BISCUIT SAVIOR.” Over the years, I’ve learned: 1) Grease your scoop—sticky dough begone! 2) Freeze extras in muffin tins before bagging (no squished biscuits!). 3) Always double the batch. ALWAYS.
❓ Burning Questions (Answered!)
Q: Can I freeze these?
A: Absolutely! Freeze unbaked dough balls or cooked biscuits. Reheat at 325°F for 10 mins.
Q: Why are mine crumbly?
A: Two culprits: 1) Over-measuring almond flour (spoon & level!) 2) Skipping the egg wash (optional but helpful).
Q: Can I use coconut flour?
A: It’s a thirsty flour! Use 1/3 cup + add 1 extra egg. Texture will be denser but still tasty!

: Keto Sausage and Cheese Biscuits!
- Total Time: 30 min
Description
Snowed in with nothing but leftovers, I whipped up these hearty, cheesy biscuits out of brunch desperation—and they became a family legend. Now, they’re our go-to for slow Sundays, freezer breakfasts, and impress-the-in-laws mornings. Soft inside, golden outside, and bursting with sausage-cheese goodness, these biscuits are proof that keto comfort food is the real deal.
Ingredients
-
1 lb breakfast sausage (spicy or mild)
-
1 cup shredded cheese (cheddar or mozzarella)
-
1 cup super-fine almond flour
-
2 large eggs (room temperature)
-
1 tsp baking powder
-
½ tsp garlic powder (optional but tasty)
Instructions
-
Preheat Oven:
Set to 350°F (175°C). Line or grease a baking sheet. -
Cook the Sausage:
Brown sausage in a skillet until fully cooked. Break it into small crumbles and drain excess fat. -
Mix the Dough:
In a large bowl, combine sausage, cheese, almond flour, eggs, baking powder, and garlic powder. Use your hands—the warmth helps blend the cheese. -
Form Biscuits:
Scoop into 8 equal mounds onto your baking sheet. Flatten slightly. -
Bake:
Cook 15–20 minutes until golden. Let cool 5 minutes before serving.
Notes
-
Cheese Choices: Cheddar for sharpness, mozzarella for melt—mix ‘em for best of both.
-
Storage: Freeze cooled biscuits; reheat in oven or air fryer.
-
Dairy-Free Swap: Use ¼ cup nutritional yeast + 1 tbsp psyllium husk for cheesy flavor.
-
Double Duty: Slice and stuff with scrambled eggs for a killer keto breakfast sandwich.
- Prep Time: 10 min
- Cook Time: 20 min
Nutrition
- Calories: 250 per biscuit
- Fat: 20g
- Carbohydrates: 3g
- Fiber: 2g
- Protein: 14g
📊 Nutrition Per Biscuit (Because You’re Curious!)
Calories: 190 | Fat: 16g | Protein: 9g | Net Carbs: 3g | Fiber: 2g
Pin Title: Keto Sausage Cheese Biscuits Recipe | Low-Carb Breakfast Idea | Gluten-Free
Pin Description: Discover the BEST keto sausage and cheese biscuits—fluffy, low-carb, and ready in 30 mins! Perfect for gluten-free meal prep, high-protein breakfasts, or satisfying snacks. Includes easy ingredient swaps, chef tips, and creative flavor variations. These golden biscuits are family-approved and freezer-friendly! #KetoRecipes #LowCarbBreakfast #GlutenFreeBaking #MealPrepIdeas #ComfortFood
SEO Meta Description: Fluffy keto biscuits with sausage & cheese! Low-carb, gluten-free, ready in 30 mins. Family-approved breakfast or snack with pro tips!
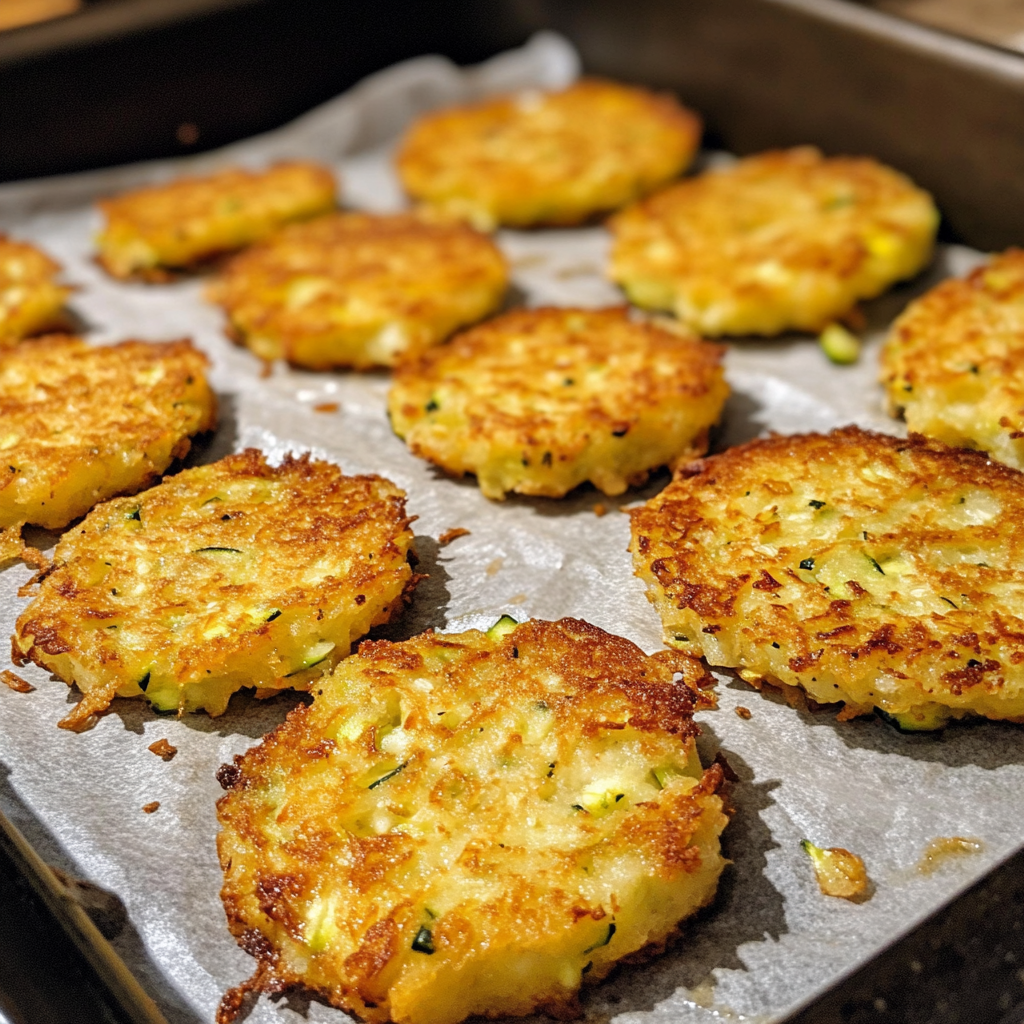
Keto Zucchini Hash Browns!
🥒 Crispy & Clean: Keto Zucchini Hash Browns (That’ll Make You Forget Potatoes!)
Picture this: It’s Sunday morning. The sun’s streaming through your kitchen window, coffee’s brewing, and that craving for crispy, golden hash browns hits HARD. But wait—you’re keto! Enter your new breakfast BFF: Keto Zucchini Hash Browns. These little patties crackle with nostalgia (shoutout to Grandma’s cast iron skillet) but keep it 100% low-carb. Imagine biting into a crispy exterior that gives way to tender, savory zucchini—no potato FOMO here. I’ve eaten these with scrambled eggs, slapped ’em on avocado toast (low-carb bread, obvi), and even crumbled them over salads. Let’s turn that zucchini sitting in your fridge into your new kitchen superstar!
👵 The Hash Brown Heist: How Zucchini Saved My Keto Breakfast
True story: My first attempt at keto hash browns involved… cauliflower. Let’s just say my dog gave me side-eye when I tried to share. Then one summer, my garden EXPLODED with zucchinis—like, “zucchini bread for days” levels of abundance. I channeled my grandma’s technique (she could fry anything into edible gold) and started shredding. Batch one? Soggy mess. Batch two? Fell apart like my patience during Zoom meetings. But batch three? OH BABY. The Parmesan added that umami crunch, and squeezing the life out of the zucchinis (very therapeutic, BTW) was the game-changer. Now my friends demand these at brunch—they don’t even know they’re eating veggies!
🛒 What You’ll Need (Plus Chef’s Secrets!)
- 2 medium zucchinis – The MVP! Pro tip: Pick firm ones—no squishy spots.
- 1/4 cup almond flour – Our crispy glue. Out? Try crushed pork rinds for extra crunch.
- 1 egg – The binder. Vegan? A flax egg works wonders.
- 1/4 cup grated Parmesan – Salty magic. Nutritional yeast for dairy-free folks!
- 1/2 tsp garlic powder – Because bland food is sad food.
- Olive oil/avocado oil – High smoke point = perfect sear.
🔪 Chef’s Hack: Grate zucchinis the night before and store in a towel-lined container to reduce morning prep!
👩🍳 Let’s Get Sizzling: Your Foolproof Guide
Step 1: Grate those zucchinis (big holes on your box grater!). Now, WRING THEM OUT like you’re squeezing out Monday’s stress. Use a cheesecloth or clean dish towel—get every last drop of water out. “Soggy zucchini = floppy hash browns. We want CRISP, not sad!”
Step 2: In a bowl, mix zucchini, almond flour, egg, Parmesan, and spices. Feeling fancy? Add a pinch of smoked paprika. Mix until it resembles damp sand—it should hold together when pressed.
Step 3: Form into patties (about 1/4 cup each). Pro tip: Make them thinner in the center—they’ll cook evenly!
Step 4: Heat oil in skillet over medium. Listen for that gentle sizzle when you add a pinch of batter. Cook 3-4 minutes per side—don’t peek! Let that golden crust form. “Flip once, flip with confidence!”
Step 5: Drain on paper towels. Sprinkle with flaky salt while hot. Cue the crunch!
🍳 How to Serve These Golden Babies
Stack ’em high with a fried egg and sriracha mayo! Crumble over a kale salad for a keto crunch. Or go classic: alongside bacon and sliced avocado. My midnight snack move? Dip in ranch like zucchini totchos!
🔥 Spice It Up: 5 Killer Variations
- Buffalo Style: Mix 2 tbsp hot sauce into batter, top with blue cheese crumbles.
- Mediterranean: Add crumbled feta and chopped sun-dried tomatoes.
- Vegan Vibes: Swap egg for flax egg, use nutritional yeast instead of Parmesan.
- Pizza Party: Top with marinara and mozzarella—broil until bubbly!
📝 Chef’s Confessions & Pro Tips
True story: I once served these to my carb-loving brother who said, “These taste… normal?!” Mission accomplished. Over the years, I’ve learned: 1) A cast iron skillet is your best friend for even browning. 2) Make a double batch and freeze—they reheat beautifully in the air fryer! 3) If your batter feels too wet, add a sprinkle more almond flour. And yes, you CAN bake these (400°F for 20 mins, flip halfway), but frying delivers that diner-style crunch we crave.
❓ Reader Q&A: Solving Your Hash Brown Emergencies
Q: Help! My patties are falling apart!
A: More squeezing! Excess moisture is the enemy. Also, let the batter sit 5 mins so the almond flour can absorb liquid.
Q: Can I use coconut flour instead?
A: Tread carefully—coconut flour drinks moisture. Use 1 tbsp max, and add an extra egg.
Q: Why not air fryer?
A: You can! Spray basket with oil, cook at 375°F for 10 mins, flip, then 5 more. Less grease, still crispy.
Keto Zucchini Hash Browns!
- Total Time: 20 min
Description
Sunday mornings used to mean hash browns and a full belly. But going keto? I thought I had to give that up—until zucchini saved the day. These golden beauties are crispy on the outside, tender in the middle, and totally crave-worthy. Born from a garden overflow and Grandma’s skillet wisdom, they’re now a staple in my brunch lineup. One bite and even the non-keto folks will be begging for the recipe.
Ingredients
-
2 medium zucchinis (firm, no soft spots)
-
¼ cup almond flour (or crushed pork rinds for extra crunch)
-
1 egg (or flax egg for vegan)
-
¼ cup grated Parmesan (or nutritional yeast for dairy-free)
-
½ tsp garlic powder
-
Olive or avocado oil (for frying)
Instructions
-
Grate & Squeeze:
Grate zucchinis (use large holes). Wrap in a clean towel and squeeze hard—remove as much moisture as possible. -
Mix:
In a bowl, combine zucchini, almond flour, egg, Parmesan, and garlic powder. Mix until it holds shape—like damp sand. -
Shape Patties:
Scoop ¼ cup of the mixture and press into flat patties. Make the centers slightly thinner for even cooking. -
Fry to Perfection:
Heat oil in a skillet over medium. Fry patties 3–4 minutes per side until golden brown. Flip just once for the best crust! -
Drain & Serve:
Place on paper towels. Sprinkle with flaky salt. Enjoy hot with eggs, toast, or straight off the plate.
Notes
-
Prep Ahead: Grate and store zucchini overnight in a towel-lined container.
-
Crispy Trick: The drier the mix, the crispier the result. Don’t skip the squeeze!
-
Spice It Up: Add paprika, onion powder, or even a pinch of cayenne for extra flavor.
-
Freezer Friendly: Freeze cooked patties and reheat in a toaster oven for instant crunch.
- Prep Time: 10 min
- Cook Time: 10 min
Nutrition
- Calories: 210 per 2 patties
- Fat: 16g
- Carbohydrates: 4g
- Fiber: 2g
- Protein: 9g
📊 Quick Nutrition Facts (Per Patty)
Calories: 95 | Fat: 7g | Protein: 4g | Net Carbs: 2g | Fiber: 1g
Pin Description: Craving hash browns on keto? These CRISPY Zucchini Hash Browns are gluten-free, low-carb, and ready in 20 mins! Perfect with eggs or avocado. Includes vegan options, air fryer tips, and genius swaps for almond flour. Save this easy keto breakfast recipe that even picky eaters love! #KetoRecipes #LowCarbBreakfast #HealthyEating #GlutenFree
SEO Meta Description: Crispy keto zucchini hash Browns—low-carb, gluten-free, ready in 20 mins! Vegan options included. Say hello to guilt-free crunch!
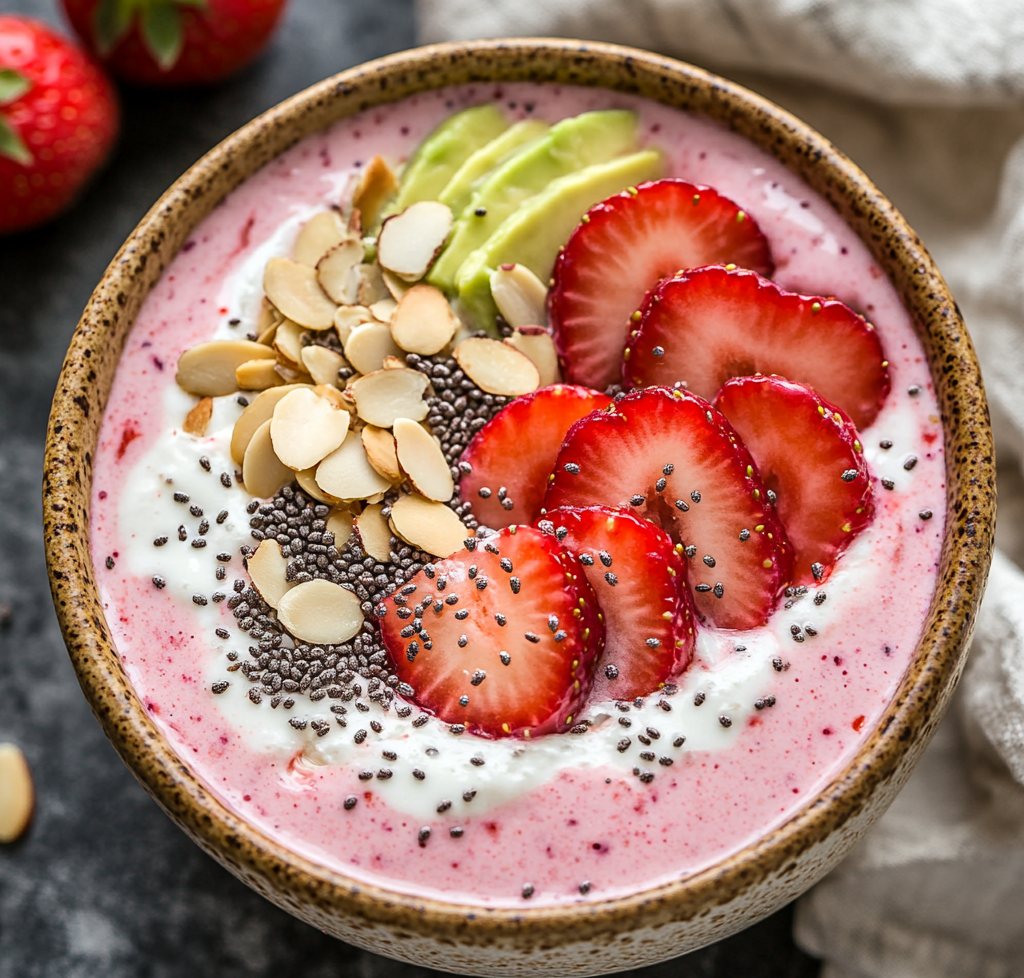
Keto Strawberry Smoothie Bowl!
🍓 Start Your Day with a Scoop of Sunshine: Keto Strawberry Smoothie Bowl
Picture this: It’s 7 a.m., golden light spills through the kitchen window, and the scent of ripe strawberries dances in the air. You’re barefoot, leaning against the counter, blender humming like a happy little robot. In minutes, you’re holding a bowl so thick and creamy, your spoon stands straight up. *This* is breakfast? Feels more like stealing a bite of summer itself. 😉
Hey, foodie friends! Chef Jamie here—your slightly-obsessed-with-berries, keto-curious kitchen buddy. Today, we’re making my Keto Strawberry Smoothie Bowl, the recipe my grandkids swear is “legalized ice cream for breakfast.” (Spoiler: I don’t argue.) It’s cold, luscious, and packed with healthy fats to keep you fueled all morning. Plus, it’s so pretty, you’ll wanna Instagram it before digging in. 📸
Why strawberries? Because they’re nature’s candy—*and* they play nice with keto when used smartly. Frozen berries give that frosty milkshake texture without the sugar crash. Add avocado’s velvet punch, a kiss of monk fruit sweetness, and toppings that crunch like a high-five? You’ve got a breakfast that’s equal parts nostalgic and nourishing. Let’s blend up some magic!
🧑🍳 Why This Bowl Tastes Like My Childhood (But Way Cooler)
When I was six, my grandma would let me pick strawberries from her garden at dawn. We’d race to see who could fill their basket fastest (she always let me win), then she’d make strawberry shortcake—the kind with clouds of whipped cream and biscuits warm from the oven. Fast-forward 40 years: I’m keto, missing those flavors, and craving that same joy.
One summer morning, I tossed frozen strawberries, avocado (yep, avocado!), and coconut cream into a blender, crossed my fingers, and hit “pulse.” What came out tasted like my grandma’s love language—creamy, berry-bright, and unapologetically indulgent. When my granddaughter licked the bowl and said, “Papa, this is better than ice cream!” I knew we’d cracked the code. Now, it’s our Saturday ritual. 🥄
🛒 What You’ll Need (+ Why Each Ingredient Rocks)
- 1/2 cup frozen strawberries – The MVP! Frozen berries = thickness without ice. No fresh? Use raspberries or blackberries.
- 1/4 cup full-fat Greek yogurt – Tangy creaminess. Swap for coconut cream if dairy-free.
- 1/4 avocado – Secret weapon! Adds lush texture and healthy fats. No avocado? Try 1 tbsp almond butter.
- 1/4 cup unsweetened almond milk – Thinner than coconut milk, so you control the consistency. Add slowly!
- 1–2 tsp erythritol or monk fruit – Just enough sweetness. Taste before adding—some brands are stronger!
- Toppings – Chia seeds (omega-3s!), shredded coconut (toast it for extra flair), sliced almonds (crunch!), fresh berries (hello, color!).
👩🍳 Let’s Make It: Spoon-Standing Thick in 5 Minutes Flat
- Blend the BaseToss strawberries, yogurt, avocado, almond milk, and sweetener into your blender. Pro tip: Start with 1 tsp sweetener—you can add more later! Blend on high until smooth, scraping sides as needed. Too thick? Add almond milk 1 tbsp at a time. Want it thicker? Throw in 2 ice cubes.
- Test & TweakDip a spoon in. If it plops like soft-serve, you’re golden! Taste. Need more sweet? Add another tsp. More tang? A squeeze of lemon. This is YOUR bowl—make it sing!
- Pour & PosePour into a chilled bowl (pop it in the freezer for 5 mins first—*next-level hack*). Smooth the top with the back of a spoon. Now, the fun part…
- Top It Like a ProSprinkle toppings in sections—chia here, coconut there—for that “I’m a food blogger” look. Drizzle with sugar-free chocolate syrup if you’re feeling fancy. 📸
🥣 Serving Vibes: How to Make It *Look* As Good As It Tastes
Grab a wide, shallow bowl—it’s all about surface area for those toppings! Layer textures: creamy base, crunchy nuts, chewy coconut. Add fresh berries for a pop of red. For bonus points, write “YUM” in cocoa powder. (Yes, I’ve done this. Yes, my grandkids think I’m a wizard.)
✨ 5 Twists to Keep Your Taste Buds Dancing
- Choco-Berry Bliss: Add 1 tbsp cocoa powder + top with cacao nibs.
- Tropical Escape: Swap strawberries for mango (use sparingly—higher carb!) + top with macadamia nuts.
- Peanut Butter Jelly: Add 1 tbsp PB Fit powder + swirl sugar-free raspberry jam.
- Green Goddess: Toss in 1/2 cup spinach (trust me, you won’t taste it!).
- Protein Punch: Mix in 1 scoop collagen peptides—flavorless fuel!
🧂 Chef Jamie’s Extra Sprinkles of Wisdom
True story: The first time I made this, I forgot the avocado. The result? A sad, runny mess my dog wouldn’t even lick. Lesson learned! Now, I keep frozen avocado chunks on hand just for smoothie emergencies. 🥑
Over the years, I’ve added toppings like hemp seeds (hello, protein!), swapped almond milk for cold brew (for a morning caffeine kick), and even blended in basil for a fancy twist. The core recipe stays the same, but play with it—that’s how kitchen magic happens!
Print
Keto Strawberry Smoothie Bowl!
- Total Time: 5 min
Description
Every Saturday morning, my kitchen becomes a time machine. I’m whisked back to childhood days picking strawberries with Grandma, racing through dew-soaked rows before breakfast. Today’s version? A spoon-thick, ice-cream-for-breakfast bowl that’s keto-friendly, quick to make, and grandkid-approved. It’s creamy, sweet, and cold like summer joy—all in five minutes. Make this your new weekend ritual, and savor a scoop of sunshine!
Ingredients
-
½ cup frozen strawberries
-
¼ cup full-fat Greek yogurt (or coconut cream for dairy-free)
-
¼ ripe avocado
-
¼ cup unsweetened almond milk
-
1–2 tsp erythritol or monk fruit sweetener (start small, taste-test)
-
Toppings: chia seeds, toasted coconut, sliced almonds, fresh berries
Instructions
-
Blend It Up:
Combine strawberries, yogurt, avocado, almond milk, and sweetener in a blender. Blend on high until smooth and thick. Adjust with extra almond milk or a couple ice cubes for perfect consistency. -
Taste & Adjust:
Try a spoonful. Add sweetener or a squeeze of lemon juice to balance flavor as desired. -
Serve with Style:
Pour into a chilled bowl. Smooth the surface. Decorate with toppings in little sections for that picture-perfect look.
Notes
-
Chill Your Bowl First: Pop your serving bowl in the freezer while you prep. It keeps the smoothie thick and frosty longer.
-
Freeze Your Avocado: For an ultra-creamy texture and cold boost, freeze avocado chunks ahead of time.
-
Layer Flavors: Add a splash of vanilla extract or a tiny pinch of salt—it deepens the sweetness naturally.
-
Make It a Meal: Add a scoop of collagen or protein powder to stay full longer.
-
Keep Toppings Crunchy: Add dry toppings just before serving so they stay crisp and fresh.
-
Double and Freeze: Make a double batch and freeze extra in silicone molds for grab-and-blend mornings.
- Prep Time: 5 min
Nutrition
- Calories: 210 (approx)
- Fat: 14g
- Carbohydrates: 6g
- Fiber: 5g
- Protein: 6g
❓ FAQs: Your Questions, My Answers
Q: Can I use fresh strawberries?
A: Sure! But add 3-4 ice cubes to get that thick texture. Frozen berries = less dilution.
Q: Help! My smoothie bowl melted too fast.
A: Chill your bowl first! Also, don’t skimp on the avocado—it stabilizes the creaminess.
Q: Is Greek yogurt keto?
A: Full-fat plain Greek yogurt has ~4g net carbs per 1/4 cup. If you’re strict keto, use coconut cream!
Q: Can I prep this ahead?
A: Blend the base and freeze it in a jar overnight. Let it thaw 10 mins, re-blend, and top!
📊 Nutrition Per Serving (Because You’re Curious!)
Calories: 180–220 | Net Carbs: 6–8g | Fat: 15–18g | Protein: 4–6g
*With toppings, values may vary. Dairy-free version slightly lower in protein.
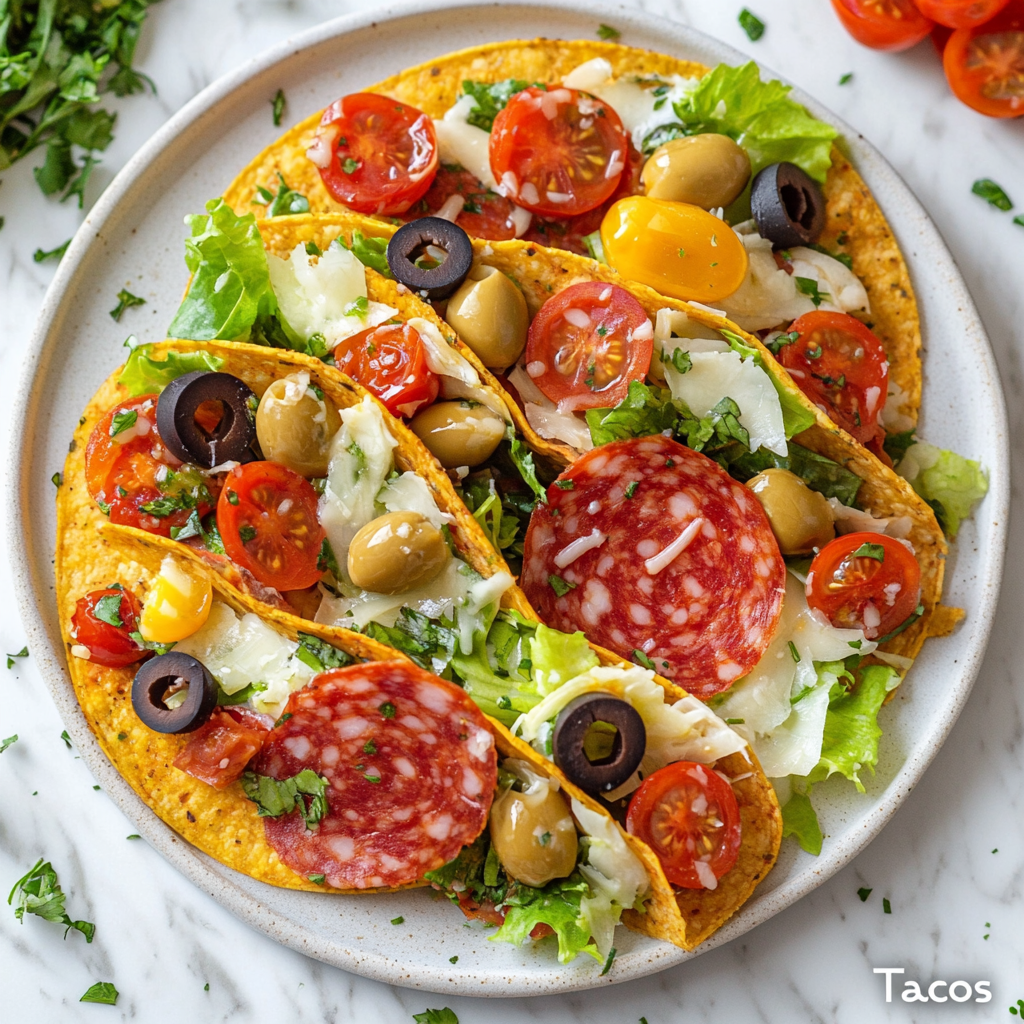
Low-Carb Antipasto Tacos
Low-Carb Antipasto Tacos: When Italy Hijacks Taco Night
Hey foodie friends! Chef here, ready to spill the marinara… er, beans… about my latest kitchen obsession. Picture this: It’s Friday night, your crew’s screaming for tacos, but your keto bestie’s side-eyeing the tortillas like they just insulted their Nonna. Enter the Low-Carb Antipasto Taco – your golden ticket to being the snack hero we all deserve.
These aren’t just “healthy hacks.” They’re flavor grenades, folks. One bite and you’ll forget tortillas ever existed. Imagine crispy salami shells cradling marinated artichokes, peppery mozzarella, juicy cherry tomatoes, briny olives, and that tangy snap from pepperoncini. It’s like your favorite charcuterie board took a yoga class, found its center, and folded itself into taco form. Bliss. Folded. Into. Bliss.
I’ve been road-testing these bad boys literally everywhere – from my niece’s soccer games (shoutout to the soccer moms who demanded the recipe before the second half even started) to my buddy’s “I swear I’m keto this time” BBQ. The verdict? Zero leftovers. Every. Single. Time. People don’t just eat them – they inhale them.
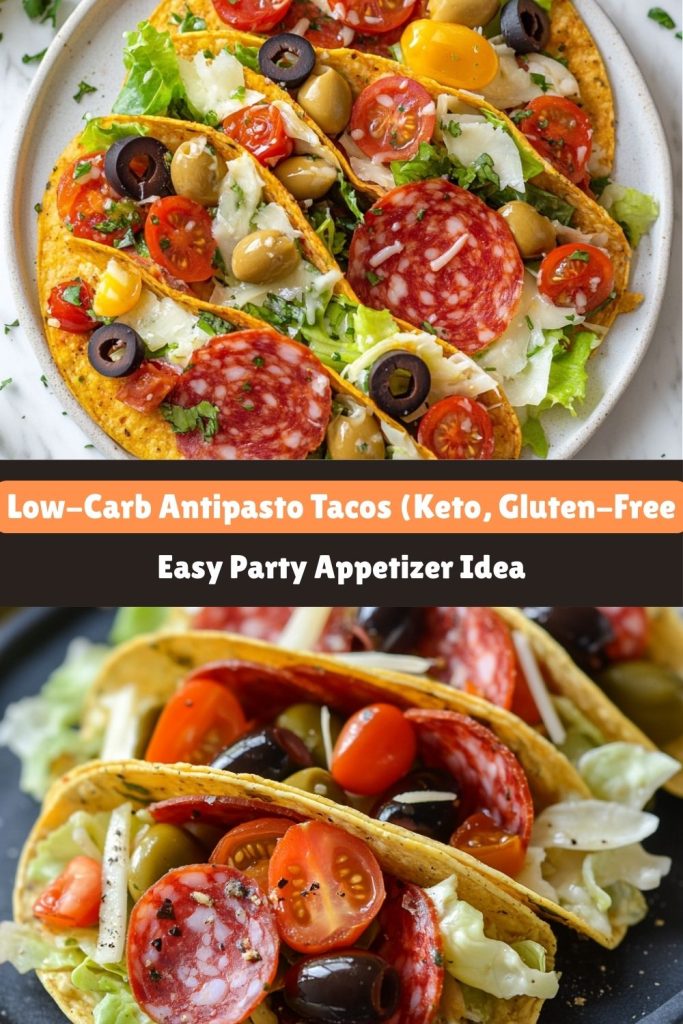
The Salami Epiphany: A Deli Counter Love Story
Let me take you back to 2019. There I was – 22, broke, and working the midnight shift at Tony’s Trattoria. We were down a line cook, the fryer broke mid-service, and a table of hangry firefighters were barking for something “crunchy and meaty, STAT.” The anxiety? Palpable. The adrenaline? Spiked. My culinary degree? Nowhere to be found.
Then – like divine intervention – I spotted it: Tony’s nonna’s stash of finocchiona salami tucked behind the olives. I grabbed a few slices, slapped them under the broiler, and boom – crispy meat cups were born. I tossed in leftover antipasto salad, hit it with a balsamic drizzle that would make Botticelli weep, and sent them out.
Five minutes later? The firefighters were raving, the server wanted to marry me, and I officially had my first kitchen “mic drop” moment. Now? These tacos are my edible business card. Made them for my now-wife on our first date. She still says she married me for the salami shells – and honestly, I don’t blame her.
What You’ll Need to Make Low-Carb Antipasto Tacos
Before we dive into the build, let’s break down your lineup. You can mix and match a bit, but the magic is in the balance of textures and tang:
-
Large salami slices (Genoa or hard salami): Your edible taco shell. Look for ones around 4” in diameter. Genoa gives a smoother chew, while hard salami crisps up a bit more. Pro tip: Go thick enough to hold fillings, but thin enough to crisp.
-
Shredded lettuce: Iceberg brings crunch and classic taco vibes. Want to go gourmet? Toss in a little radicchio or baby arugula for color and a slight bitterness that offsets the richness.
-
Marinated artichokes: Chop them roughly – you want texture. Oil-packed ones are worth the extra pennies. They add a briny punch that pairs beautifully with cured meat.
-
Black olives: Sliced black olives are fine, but if you’ve got Kalamatas or Castelvetranos on hand, your taste buds will thank you.
-
Cherry tomatoes: Halve or quarter these juicy gems to avoid taco blowouts. Bonus points if you slow-roast them for added umami.
-
Mozzarella pearls: Creamy, mild, and poppable. Or go full luxury with torn burrata. Vegan? Marinated tofu cubes soak up flavor like champs.
-
Pepperoncini: That garlic-kissed tang brings the whole bite alive. Banana peppers work too, but pepperoncini are the secret weapon here.
-
Olive oil + red wine vinegar: Classic Italian dressing, no sugar needed. Go 1:1 ratio. No vinegar? Lemon juice gives bright acidity and pairs great with olives.
-
Italian seasoning or fresh herbs: Basil, oregano, parsley – sprinkle them like you mean it. Fresh herbs bring the wow.
How to Make Low-Carb Antipasto Tacos
This is where the party starts. You’re about 10 minutes from taco glory.
Step 1: The Shell Game
Lay your salami slices flat on a paper towel-lined baking sheet. This absorbs excess grease and keeps things crisp. Want that perfect taco “snap”? Bake at 400°F for 3-4 minutes – just until they start to curl at the edges.
Let them cool slightly, then carefully fold them into taco shapes. If they resist, toothpicks are your best friend. Just warn your guests – no one wants a surprise piercing mid-bite.
Step 2: The Taco Fill Hierarchy
This is serious business. There’s a science to not ending up with soggy shells or sad lettuce. Here’s your ideal build order:
-
Lettuce first – creates a moisture barrier.
-
Artichokes, olives, and tomatoes – tuck them in the center to contain juice.
-
Mozzarella – press it into the center.
-
Pepperoncini – layer thin slices on top for zing.
PRO TIP: Let the shells cool fully before assembling if you baked them. Hot salami + cheese = unintentional melt.
Step 3: Dress to Impress
Drizzle your oil + vinegar combo with the confidence of a Renaissance painter. Think Pollock meets pasta salad. Then sprinkle Italian seasoning or fresh herbs generously. Want to get extra? Lemon zest on top brightens everything.
Plating Your Low-Carb Antipasto Tacos
The magic of these tacos? They flex. Dress them down for a casual lunch, or glam them up for a chic dinner party.
-
Casual Mode: Lay them flat on a wooden board, charcuterie-style. Add a ramekin of extra dressing, scatter some basil leaves and lemon wedges around for color.
-
Fancy Mode: Prop them up in a deviled egg tray (yes, really). It keeps them upright and photogenic. Bonus points for edible flowers or microgreens.
Serving a crowd? Let guests build their own taco bar. They’ll love the control, and you’ll love not being the taco cop.
Mix It Up! Variations That Slay
These Low-Carb Antipasto Tacos are a vibe all on their own—but if you’re the type who treats a recipe as a suggestion (hi, same), then buckle up. Here are some remix ideas that’ll take your taco game from awesome to whoa-is-that-legal? levels of delicious:
Mediterranean Twist
Swap the salami shells for grilled eggplant or zucchini ribbons. Add crumbled feta, a dollop of tzatziki, and maybe some fresh mint or dill for that cool, creamy balance. It’s basically like your favorite Greek platter had a street food makeover.
Meat Lover’s Mania
Because sometimes more is more. Add crispy pancetta bits, prosciutto shreds, or even a sliver of capicola inside the taco for extra savory oomph. You’ll want to nap after, but it’ll be a nap of victory.
Spicy Devil Edition
Mix Calabrian chili paste or crushed red pepper flakes into your olive oil and vinegar drizzle for a fiery kick. Bonus: Top with spicy giardiniera or jalapeño slices if you’re feeling dangerous.
Breakfast-for-Dinner Delight
Toss in scrambled eggs, crumbled bacon, avocado slices, and a few cherry tomatoes. Drizzle with a dash of hot sauce or hollandaise if you dare. Yes, it’s breakfast. Yes, it’s still low-carb. Yes, you’re winning at life.
Cheese Bomb
Melt provolone or fontina inside the salami shell during the crisping phase for a gooey, golden surprise. Cheese lovers, this one’s your love language.
Confessions of a Salami Addict
Okay, time for a kitchen confession. I once tried to make heart-shaped salami shells for Valentine’s Day. Thought it’d be romantic. Spoiler: They looked like something that belonged on a different kind of website. Lesson learned – stick to circles.
Over the years, here’s what else I’ve learned:
-
Let guests build their own. Everyone loves a DIY moment – plus, no soggy tacos sitting out too long.
-
Always make double. These go fast. Like, vanishes-before-you-sit-down fast.
-
Toothpicks = taco tamers. For the stubborn shells that won’t stay folded.
-
Baking racks > pans. Want a crispier shell? Bake salami slices on a wire rack over a sheet tray. Better airflow = crunchier bite.
Reader Rescue Squad: Your Top Taco FAQs
Q: Salami gets greasy – help!
A: Blot slices before and after baking. Want crisp without the drip? Use a wire rack when baking and let them cool fully before filling.
Q: Can I prep these ahead?
A: Yes – but keep components separate. Assemble within 2 hours of serving to keep that texture just right. You can bake the shells and store them in an airtight container for 24 hours, no problem.
Q: What if I’m vegetarian or vegan?
A: Totally doable. For veggie shells, use grilled zucchini or eggplant slices. For vegan fillings, go with marinated tofu cubes, dairy-free mozzarella, olives, tomatoes, and a punchy vinaigrette. Everyone gets tacos. Everyone wins.
Q: What wine goes with these?
A: Glad you asked. A chilled Pinot Grigio cuts through the richness. Prefer reds? A light Chianti or Lambrusco adds an earthy kick. Mocktail vibes? Try sparkling lemon water with a basil leaf. Sophisticated and refreshing.
Nutritional Facts (per 2 tacos)
-
Calories: 320
-
Total Fat: 26g
-
Cholesterol: 45mg
-
Sodium: 880mg
-
Total Carbohydrates: 5g
-
Protein: 15g
Note: Nutritional values are estimates and may vary based on ingredient brands and portion sizes. For stricter tracking (especially keto or low-sodium), adjust quantities and check product labels.
Final Bite: A Taco for the Ages
So there you have it – the Low-Carb Antipasto Taco in all its crispy, savory glory. Whether you’re feeding a keto crowd, trying to jazz up taco night, or just looking for something fun and fast to whip up on a lazy afternoon, these little beauties have your back.
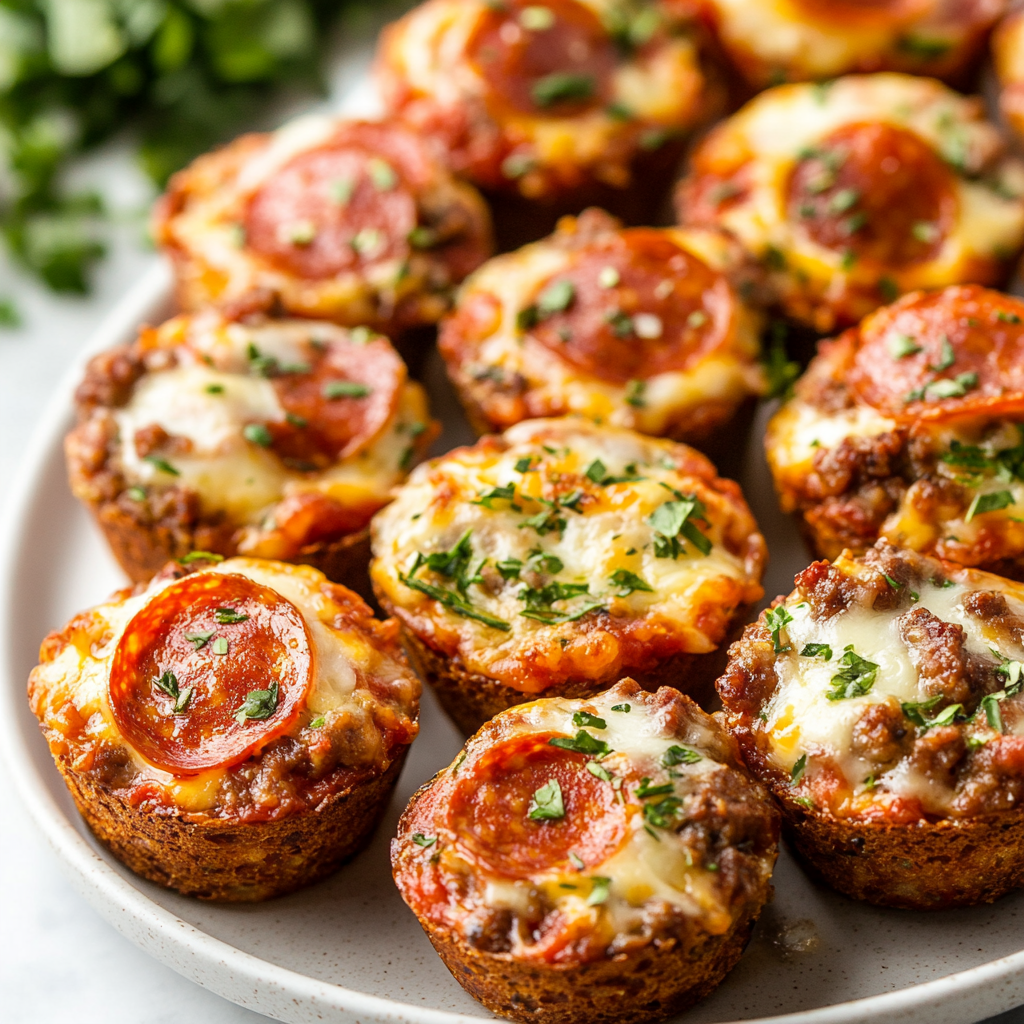
Keto Carnivore Pizza Muffins
Who Needs Crust? Meet Your New BFF: Keto Carnivore Pizza Muffins
Hey there, pizza rebels! Let’s talk about that moment when a cheesy, pepperoni-loaded slice calls your name… but your keto lifestyle says, “Nope, not today.” We’ve all been there. That tug-of-war between craving comfort and sticking to your goals? Yeah, it’s real. But guess what? I’ve got a solution that’ll make you forget crust ever existed. Say hello to Keto Carnivore Pizza Muffins—your new grab-and-go obsession.
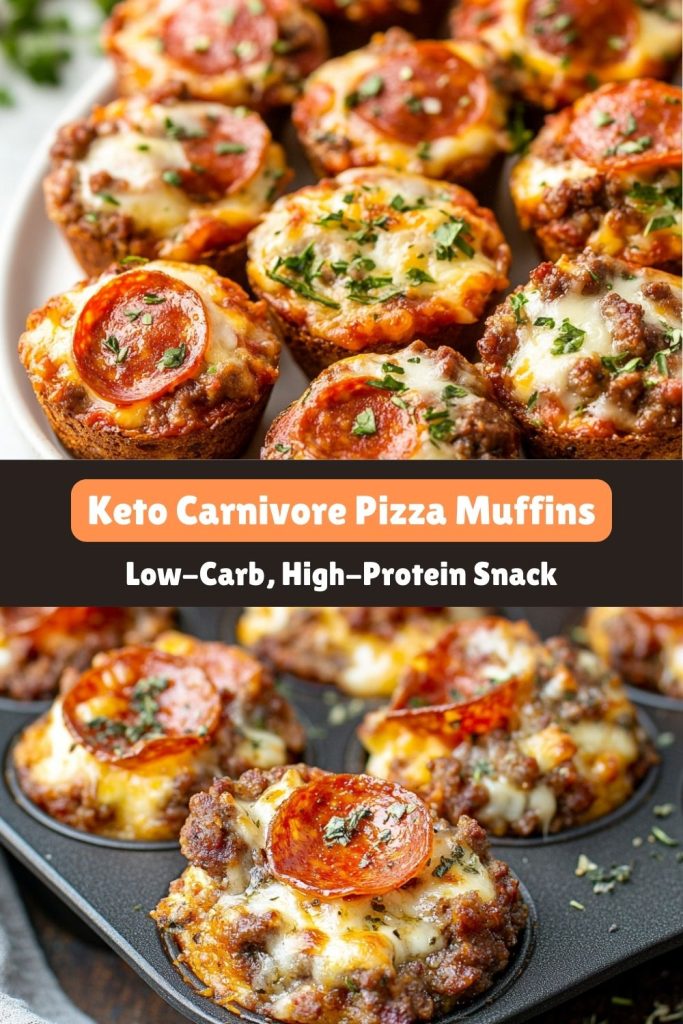
No Crust, No Problem
Picture this: savory sausage, crispy pepperoni, and gooey mozzarella baked into fluffy, handheld muffin magic. No almond flour. No cauliflower gymnastics. Just pure, unapologetic meat-and-cheese glory. These little guys are so good, they’ll make you wonder why we ever bothered with dough in the first place. No bloat, no guilt—just that deep-dish satisfaction without the carb crash.
I’ve spent years in the kitchen chasing that perfect balance between indulgence and “I’ve-got-this-adulting-thing-on-lock.” These muffins? They’re my love letter to everyone who wants pizza night without the carb coma. Perfect for meal prep, post-workout fuel, keto lunchboxes, game day, road trip snacks, or that 3 p.m. snack attack. And the best part? You can whip them up in 30 minutes flat.
The Midnight Pizza Epiphany
Let me take you back to a classic “chef life” moment. It was 11 p.m., my apron was stained with espresso (don’t ask), and my stomach was growling louder than my blender during smoothie hour. I’d just finished a marathon recipe testing session—four failed attempts at a sugar-free caramel, if you must know—and all I wanted was a slice of pepperoni pizza. But my keto streak? Forty-seven days strong. I wasn’t about to break it over a craving, no matter how intense the cheese dreams had become.
So I raided the fridge like a raccoon on a mission. Ground sausage? Check. Pepperoni? Obviously. Eggs and cheese? Duh. In a sleep-deprived haze, I started tossing everything into a bowl, muttering, “What if pizza… but muffins?” Twenty minutes later, my kitchen smelled like a New York pizzeria, and I had six golden-brown muffin-shaped miracles cooling on the counter.
My partner wandered in, sniffed the air like a cartoon character, and said, “You invented meat cupcakes, didn’t you?” (Romantic, right?) We devoured them standing over the stove, laughing at how ridiculous—and ridiculously good—they were. That’s the beauty of cooking, folks. Sometimes the best recipes are born from desperation, a little chaos, and a whole lot of cheese.
What You’ll Need to Make Keto Carnivore Pizza Muffins
Let’s break down the lineup, shall we?
-
1 lb ground sausage – The MVP of this recipe. Spicy Italian brings the heat, but any seasoned sausage will bring that pizza parlor punch. No sausage? Ground beef or turkey is a solid plan B—just bump up the seasonings to compensate.
-
½ cup chopped pepperoni – Your salty, spicy sidekick. Pro tip: use stick pepperoni and dice it for maximum texture. Don’t be afraid to toss in extra if you’re feeling wild.
-
1 cup shredded mozzarella – The gooey glue that binds the dream. Low-moisture mozzarella keeps things tight and toasty—no excess water to make your muffins soggy.
-
¼ cup grated Parmesan – The flavor elevator. It brings that umami depth that whispers, “real pizza” with every bite. Feel free to swap in Romano or Asiago if that’s what you’ve got on hand.
-
3 large eggs – Nature’s perfect binder. They hold everything together like the MVPs they are. For the egg-averse, ¼ cup mashed avocado can pinch hit—but know the texture gets denser.
-
½ tsp garlic powder + ½ tsp Italian seasoning – Flavor fairy dust. These two bring herbaceous balance to the meaty mix. Want to take it up a notch? Fresh oregano, thyme, or basil would all be delicious.
-
Pinch of salt & pepper – Just enough to wake things up. But don’t forget—your sausage and pepperoni are already salty, so taste-test that meat first before you get too generous.
Let’s Build These Keto Carnivore Pizza Muffins
Step 1: Preheat That Oven
Crank it to 375°F (190°C). And don’t skimp on greasing your muffin tin. Whether you use non-stick spray, olive oil, or old-school butter, coat those cups like you’re prepping for a high-stakes baking show. Silicone muffin liners? Even better. They’ll slide out like a dream.
Step 2: Brown the Sausage
Get that skillet sizzling and cook your sausage over medium heat until no pink remains. Don’t just dump the fat—drain it strategically. Leave a tablespoon or so for flavor. And please, let it cool for about 5 minutes before mixing. We want muffins, not scrambled egg meatballs.
Step 3: Mix Like a Boss
In a big ol’ mixing bowl, bring the party together: sausage, chopped pepperoni, shredded cheese, eggs, Parmesan, and seasonings. Use your hands—gloves if you’re fancy, bare hands if you’re bold. Squish and fold until it’s a glorious meat confetti situation. If the mix feels too wet, toss in more Parmesan. Too dry? Add a splash of heavy cream or another egg.
Step 4: Scoop & Smash
Pack the mix into the muffin tin, all the way to the top. No need to worry about rising—they stay pretty compact. A cookie scoop helps with portioning, but a spoon and some finger squishing do the trick too.
Step 5: Bake to Golden Glory
Slide them into the oven for 18–20 minutes. You’re looking for crisp edges and tops that spring back when poked. Let them cool for a few minutes before trying to pop them out—unless you’re into burnt fingers. (No judgment.)
Step 6: The Big Reveal
Run a butter knife around the edges to loosen them, then gently lift out each one. If one sticks? That’s your taste test muffin. Chef’s rules.
How to Serve These Keto Carnivore Pizza Muffins
Grab a plate if you must, but let’s be real—these are handheld by design. A muffin in one hand and a dipping sauce in the other? That’s peak efficiency. Warm marinara, herbed ranch, or a drizzle of pesto takes the experience next-level.
Want to fancy it up for guests or just treat yourself? Garnish with fresh basil, a dusting of chili flakes, or a swirl of garlic-infused olive oil. Add a side of cucumber salad, slaw, or even zucchini noodles for a meal that’s keto AND balanced.
Hosting a party? Stick a toothpick in each one, pile them on a platter, and call it “pizza bites.” Watch them disappear faster than chips at a Super Bowl party.
Switch It Up!
Once you master the basic version, the fun’s just beginning. Here are a few remix ideas to keep things interesting:
-
Buffalo Chicken – Swap in shredded rotisserie chicken + ¼ cup buffalo sauce + blue cheese crumbles. Boom.
-
Meat Lover’s Dream – Add crumbled bacon and diced ham. Throw in a sprinkle of smoked paprika for that flame-grilled vibe.
-
Spicy Devil – Dice up jalapeños or banana peppers and mix in. Pepper jack cheese on top = 🔥
-
Pizza Supreme – A little higher carb, but worth it: sautéed mushrooms, chopped black olives, and bell peppers folded in. A slice of pizza in muffin form.
-
Breakfast Style – Add a dash of hot sauce, some chopped spinach, and serve with a side of avocado. Brunch game = strong.
Confessions from the Kitchen
Let me be real with you: the first time I made these, I forgot the eggs. What came out of the oven looked like meat craters. Dry, crumbly, kind of tragic—but hey, lessons learned. Now I keep a sticky note on the fridge that says “EGGS, DUMMY.” Trust me, don’t skip the binders.
One reader turned these into burger sliders by slicing them in half and adding pickles, keto ketchup, and cheese. Another genius popped them into the air fryer at 375°F for five minutes to get an extra-crispy crust. And someone in my DMs swore they used them as keto “croutons” on Caesar salad. The creativity? Endless.
Your Questions, Answered
Q: Help! My muffins stuck to the pan!
A: Been there. Grease harder, friend. Butter, spray, even bacon grease if you’re feeling wild. Better yet? Invest in silicone muffin liners. They’re worth their weight in gold.
Q: Can I freeze these?
A: Absolutely. Let them cool completely, then store in a zip-top bag or airtight container. Freeze for up to 3 months. Reheat in the microwave (1 minute) or toaster oven (10 minutes at 350°F). Great for batch cooking!
Q: Are these kid-friendly?
A: Totally. My niece calls them “meat cupcakes” and dips them in ketchup like it’s her job. Even picky eaters get excited when pizza’s involved.
Q: Can I make these dairy-free?
A: You can try! Use a dairy-free cheese substitute (just make sure it melts) and skip the Parmesan. The texture won’t be quite the same, but it’ll still be delicious.
Final Thoughts
Keto isn’t about restriction—it’s about reimagining comfort food in ways that feel just as satisfying, if not more. These Keto Carnivore Pizza Muffins are living proof that you don’t need dough to feel indulgent. They’re simple, satisfying, totally crave-worthy, and they prove one thing loud and clear: pizza night is alive and well in keto land.
Whether you’re meal-prepping for the week, packing school lunches, or just looking for a low-carb bite that doesn’t skimp on flavor, these muffins are here to rescue your cravings. They’re quick, customizable, and utterly addictive.
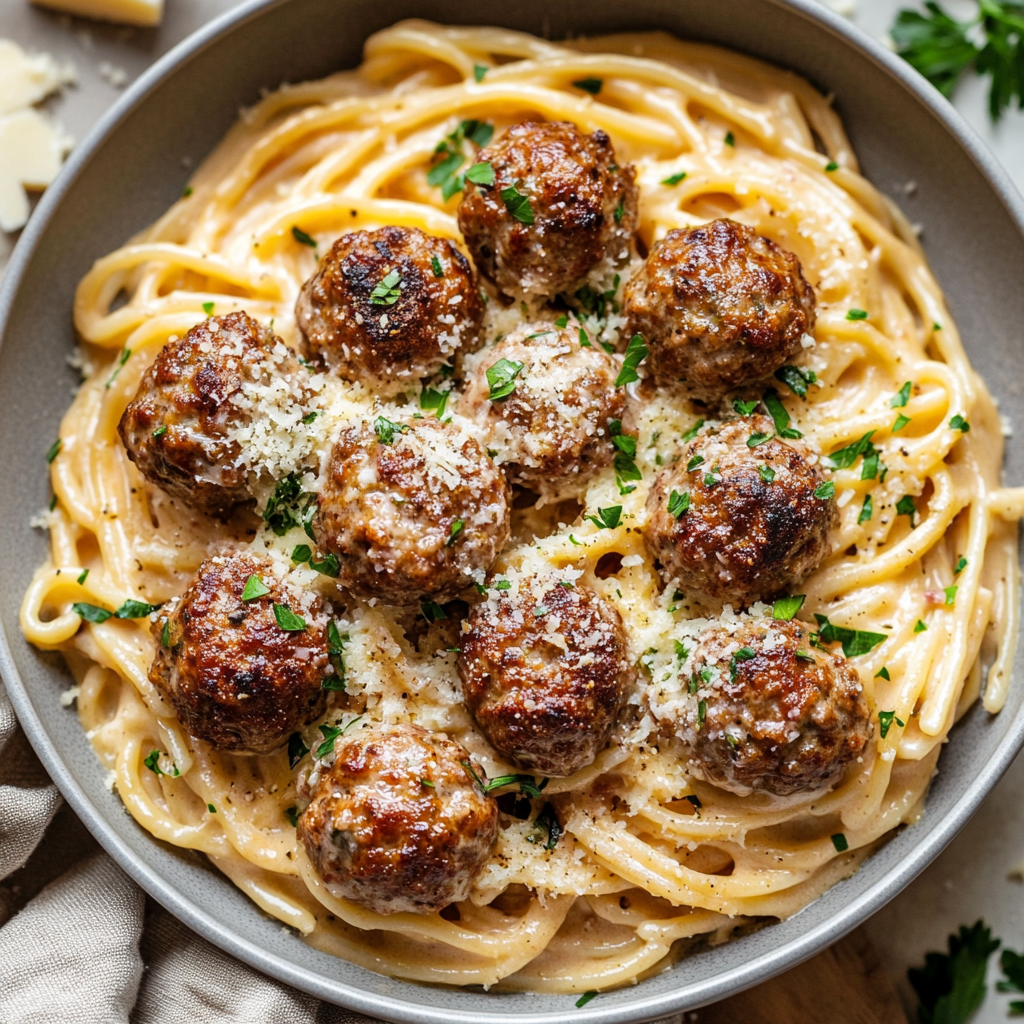
Creamy Garlic Parmesan Pasta with Juicy Meatballs
Creamy Garlic Parmesan Pasta with Juicy Meatballs: The Ultimate Comfort Food Hug
Hey there, foodie friend! Let’s paint a picture together: You’ve had a day—maybe a whirlwind of meetings, a sink full of dishes, or just that existential need for something warm and soul-hugging. You step into your kitchen, pull out some garlic, a splash of cream, and that glorious block of Parmesan waiting patiently in the fridge. Soon, the scent of sizzling garlic is swirling through the air, pasta is bubbling away on the stovetop, and golden meatballs are crisping up like little flavor bombs. Your stress? Melted away faster than butter in that hot pan.
This isn’t just a meal. It’s a full-on edible hug. A creamy, cheesy, garlicky hug with meatballs so juicy and flavorful, you’ll want to write them a thank-you note. Whether you’re serving this on a lazy Sunday, prepping for date night, or just treating yourself on a Tuesday (because you deserve it), this creamy garlic Parmesan pasta with juicy meatballs delivers joy in every bite.
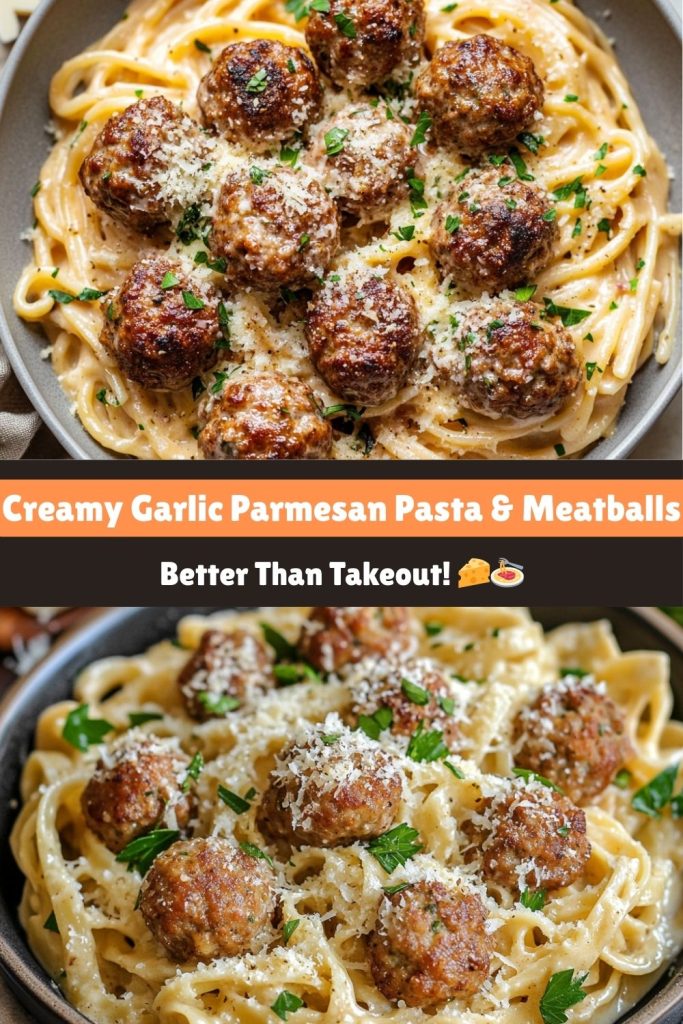
The Meatball That Started It All: A Garlicky Love Story
When I was 8 years old, I thought I was the next great Italian chef. My Nonna (Italian grandma extraordinaire and meatball sorceress) let me “help” her in the kitchen one Sunday. I had one job: help mix the meatballs. What did I do instead? I sneakily added two extra cloves of garlic—because in my kid brain, more garlic = more delicious.
The aftermath? Our house smelled like an anti-vampire fortress for three straight days. My Nonna laughed until she cried, and even though those meatballs were…intense, it became one of my favorite core memories. She let me keep the garlicky twist, and ever since then, my meatballs always get the royal garlic treatment. It’s tradition. It’s flavor. It’s home.
And it’s the exact inspiration behind this recipe.
What You’ll Need to Make Creamy Garlic Parmesan Pasta with Juicy Meatballs
Let’s break down the magic behind the ingredients—each one plays its own role in building this dish’s luscious layers of flavor:
-
Ground beef/pork blend (1 lb): The 80/20 fat ratio is chef’s kiss perfect for juicy, flavorful meatballs. Want a leaner version? Try all ground turkey. Vegetarian? Use a meatless blend like Beyond or Impossible—shockingly tasty!
-
Breadcrumbs (¼ cup): They hold everything together. Panko gives a light crunch, while almond flour makes this gluten-free-friendly.
-
Fresh garlic (5 cloves total): Yes, five. It’s bold. It’s fragrant. It’s the soul of this dish. Mince finely for max infusion!
-
Heavy cream (1 cup): Want that luxurious, velvety sauce? Cream’s the way. Half-and-half will work in a pinch, but you’ll miss some of the richness.
-
Freshly grated Parmesan: Don’t reach for that pre-shredded bag, friend—it just doesn’t melt the same. A wedge of Parm is your ticket to sauce nirvana.
How to Make Creamy Garlic Parmesan Pasta with Juicy Meatballs
This recipe is a mini adventure, but it’s 100% manageable—even on a weeknight. Here’s your step-by-step comfort food compass:
Step 1: Meatball Mixology
In a large bowl, combine your ground meat, 1 egg, breadcrumbs, two minced garlic cloves, a handful of grated Parmesan, salt, pepper, and a sprinkle of Italian seasoning. Mix gently with your hands—overworking = dense meatballs.
Pro tip: Wet your hands before rolling to keep the mixture from sticking. You’re aiming for golf-ball-sized beauties. Don’t stress about making them perfect—imperfect meatballs have character.
Want to go next-level? Chill the formed meatballs in the fridge for 15 minutes. This helps them hold their shape and sear more beautifully.
Step 2: Sear Like a Pro
Heat 1–2 tablespoons of olive oil in a large skillet over medium-high heat. Once the oil shimmers, gently place your meatballs in the pan. The key here? Don’t crowd the pan! Crowding = steaming = sadness. Sear in batches if needed.
Brown each side for about 2–3 minutes, until they have a gorgeous crust. They don’t have to cook all the way through just yet—they’ll finish simmering in the sauce later.
Step 3: Sauce Sorcery
Remove meatballs and set them aside. In the same skillet (hello, flavor base!), melt 2 tablespoons of butter. Toss in the remaining garlic (3 cloves, minced) and sauté for 30 seconds. Your kitchen will smell heavenly—don’t walk away now, garlic burns fast!
Pour in the heavy cream, reduce the heat to medium-low, and whisk until smooth. Then, slowly sprinkle in the grated Parmesan, stirring as you go. The sauce will thicken into velvety goodness.
If it gets too thick, no worries—just add reserved pasta water (1 tablespoon at a time) until it’s dreamy again. Too thin? Let it simmer a few minutes longer, or add a touch of cornstarch slurry.
Step 4: Pasta Party
While your sauce bubbles and your meatballs wait patiently, cook your favorite pasta. Fettuccine, spaghetti, rigatoni—they’re all winners. Save ½ cup of pasta water before draining (you’ll thank me later).
Toss the cooked pasta into the sauce and stir to coat every strand. Gently add the meatballs back in, letting them cozy up and soak in all that creamy garlic-Parmesan bliss for about 2 minutes.
Plating Creamy Garlic Parmesan Pasta with Juicy Meatballs
It’s all about presentation, baby. Grab your favorite shallow bowl. Twirl the pasta into a nest. Gently place 3–4 meatballs on top like the crown jewels they are. Drizzle extra sauce like you’re Jackson Pollock with a ladle. Then finish with:
-
Fresh cracked black pepper
-
Chopped parsley for a pop of color
-
A snowstorm of Parmesan (trust me: there’s no such thing as too much cheese)
Garlic bread on the side? Yes. Please. Always.
Mix It Up! (Creative Twists for Every Craving)
Want to remix this Creamy Garlic Parmesan Pasta with Juicy Meatballs? Whether you’re spicing things up, going plant-based, or chasing new flavor dimensions, this dish is your blank canvas. Here are a few delicious detours to take your comfort food game to the next level:
Spicy Arrabiata Twist: Bring the Heat
Add a pinch (or a big shake) of red pepper flakes to the garlic as it sautés, and swap in chorizo or spicy Italian sausage meatballs for a smoky, savory punch. The fat from the sausage melts beautifully into the sauce, infusing it with irresistible warmth. Top with a pinch of chili oil or Calabrian chili paste if you’re feeling bold. It’s like date night in Naples—with a side of fireworks.
Vegan Vibes: Plant-Based Perfection
You can totally veganize this dish without sacrificing that rich, creamy texture. Use your favorite plant-based meatballs (lentil, mushroom, or Beyond Meat work great). For the sauce, blend soaked cashews with garlic, lemon juice, and a splash of veggie broth until smooth and dreamy. Vegan Parmesan or nutritional yeast adds that signature nutty-salty depth. Add baby spinach at the end for a little green goodness—it wilts right into the sauce.
Lemon Zest Brightness: Light and Lively
If you’re looking to brighten things up, stir 1 teaspoon of fresh lemon zest into the sauce just before serving. It adds a vibrant citrusy pop that balances the richness perfectly. Pro tip: toss in a handful of torn basil leaves or a few mint leaves for a fresh, aromatic lift. Great for springtime dinners or when you just want something a little lighter without skimping on flavor.
Mushroom Magic: Umami Overload
Before starting your sauce, sauté a mix of cremini, shiitake, or portobello mushrooms in a bit of olive oil and butter until deeply golden and caramelized. Their earthy richness adds serious depth to the creamy garlic-Parmesan base. For extra credit, splash in a touch of white wine or dry sherry and let it reduce before adding the cream. You’ll feel like a gourmet wizard—and your kitchen will smell divine.
Chef’s Confidential: Meatball Truth Bombs
Let’s get real: Mistakes happen. I once grabbed cinnamon instead of Italian seasoning. The result? A meatball that tasted like confused baklava. Lesson learned: label your spice jars.
Other fun (and actually helpful) lessons I’ve learned along the way:
-
Chill your meatballs for 10–15 minutes before cooking. They’ll hold their shape better and brown more evenly.
-
Taste your mixture! Before you commit to the full batch, fry a tiny meatball and taste for seasoning. It’s totally safe, and your tastebuds will thank you.
-
Don’t overthink the size. Irregular meatballs are charming and delicious—and proof that a human made them.
You Asked, I Answered!
Q: Can I bake the meatballs?
A: Absolutely! Preheat your oven to 400°F and bake for 18–20 minutes on a parchment-lined sheet. They won’t be quite as crispy, but they’ll cook evenly and are perfect for meal prepping.
Q: My sauce is too thick/thin—help!
A: For thick sauce, stir in pasta water one tablespoon at a time until it loosens. For thin sauce, simmer it a bit longer or whisk in a teaspoon of cornstarch dissolved in cold water.
Q: Can I freeze leftovers?
A: Totally! Just freeze meatballs and sauce separately in airtight containers. When reheating, warm gently on the stovetop with a splash of milk or cream. Avoid microwaving cream sauce on high—it tends to separate.
Q: Can I make this ahead?
A: Yes! Make the meatballs a day ahead and store them in the fridge. The sauce is best fresh, but it reheats well if you stir in a splash of cream and whisk to revive the texture.
Nutrition (Per Serving)
-
Calories: 620
-
Protein: 35g
-
Carbs: 40g
-
Fat: 35g
-
Fiber: 2g
-
Sugar: 3g
Want a lighter version? Use lean ground turkey, low-fat cream, and whole wheat pasta. Still dreamy, just a little less indulgent.
Final Bite: The Ultimate Comfort Food Hug
If comfort food had a mascot, this creamy garlic Parmesan pasta with juicy meatballs would be waving the flag. It’s everything: rich, satisfying, nostalgic, and joyfully garlicky. It’s the kind of meal that makes you close your eyes after that first bite and just sigh in happiness.
So whether you’re cooking for someone you love or just giving yourself a little weeknight celebration (you should!), this dish is ready to become your new go-to.
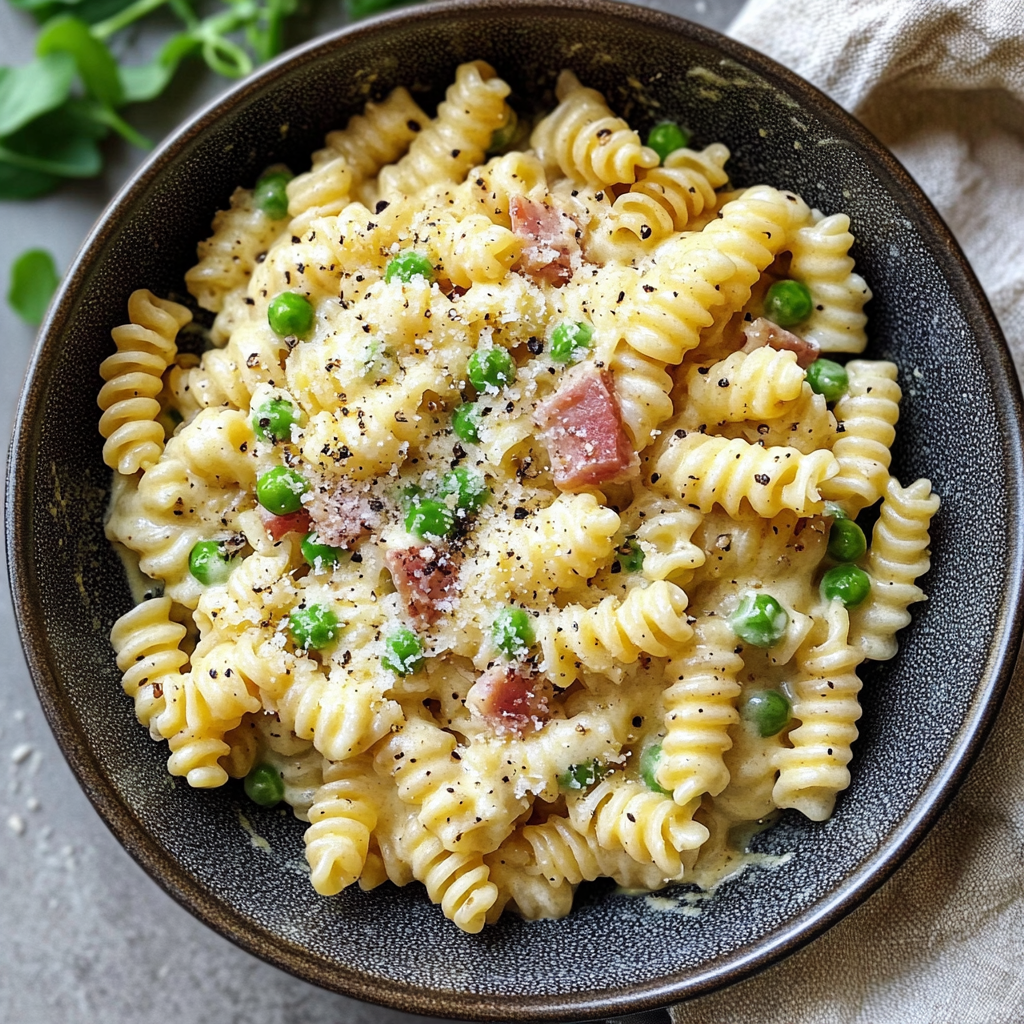
Creamy Pasta with Peas & Pancetta
Creamy Pasta with Peas & Pancetta: The Comfort Food That’ll Steal Your Heart (and Seconds!)
Hey there, foodie friend! Let’s talk about the kind of meal that feels like a warm hug after a long day—creamy, salty, slightly sweet, and packed with flavors that make you close your eyes and go, “Mmm.” This Creamy Pasta with Peas & Pancetta isn’t just a dish; it’s a mood. It’s the recipe I turn to when I want to impress without stress, feed a crowd, or just treat myself to something cozy. Imagine al dente pasta swirled in a silky Parmesan cream sauce, studded with crispy pancetta and pops of sweet peas. Yeah, that kind of magic.
What I love most? It’s fancy enough for date night but easy enough for a Tuesday. You don’t need a culinary degree—just a skillet, a pot, and 25 minutes. Plus, it’s endlessly customizable (more on that later!). So grab your apron, pour yourself a glass of wine, and let’s make some comfort food magic together. Trust me, your future self (and your stomach) will thank you. 🥂
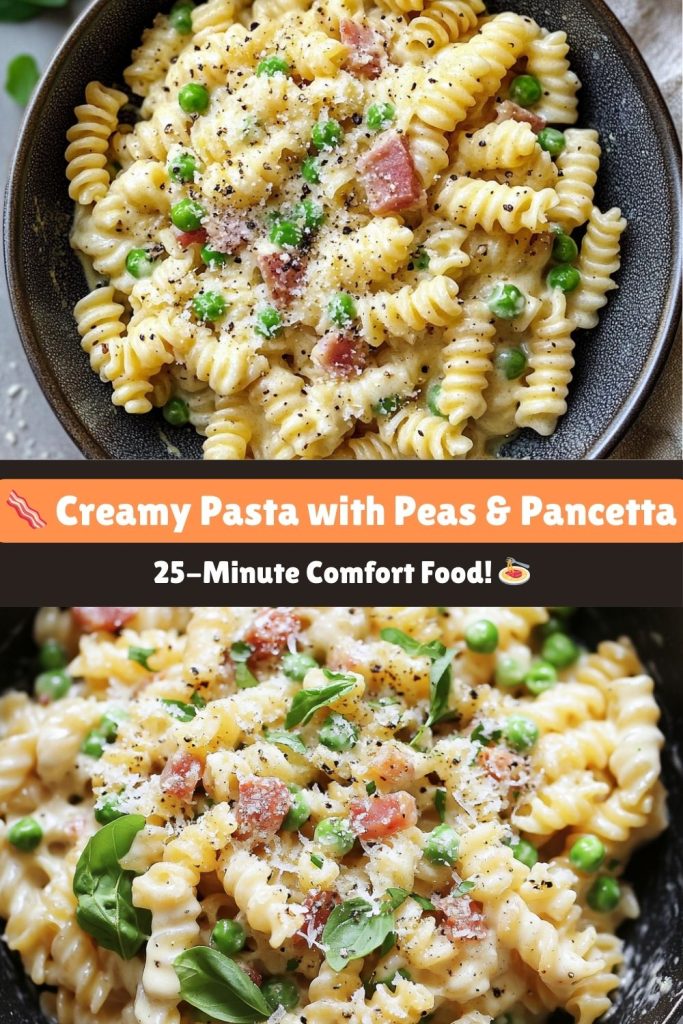
The Sunday Supper That Started It All
Picture this: 8-year-old me, perched on a wobbly stool in Nonna’s kitchen, “helping” her fry pancetta for Sunday dinner. Translation: I was sneaking crispy bits straight from the pan when she wasn’t looking. (Spoiler: She totally knew.) That smoky, salty aroma? It’s my childhood in a scent. Nonna’s version didn’t have peas—those were my mom’s addition to “make it healthy.” Kid me side-eyed those green invaders, but one bite of that creamy, savory-sweet combo? Sold.
Now, every time I make this dish, I’m back in that kitchen, laughing as Nonna swats my hand away from the pancetta. Some things never change… including my inability to resist stealing a crispy bite or three.
Ingredients (+ Chef’s tips)
Here’s what you’ll need to make this Creamy Pasta with Peas & Pancetta:
-
12 oz short pasta (fusilli, penne, or rotini) – Twirl-friendly shapes grab the sauce like edible Velcro!
-
1 tbsp olive oil – Extra virgin for fruity depth, but regular works too.
-
4 oz diced pancetta – Bacon’s Italian cousin! Swap in thick-cut bacon if needed—just drain excess grease.
-
1 small shallot (or ½ onion) – Shallots add subtle sweetness, but onions bring the cozy.
-
2 garlic cloves – Freshly minced = flavor MVP. Jarred? Use 1.5 tsp.
-
1 cup frozen peas – No thawing! They cook in the sauce. Fresh peas? Blanch first.
-
¾ cup heavy cream – Half-and-half works, but cream = luxury. For dairy-free, try cashew cream + nutritional yeast.
-
½ cup grated Parmesan – Freshly grated melts smoother. Romano or Asiago? Go for it!
-
Salt & pepper – Pancetta’s salty, so taste before adding extra!
-
Optional greens – Arugula adds peppery zing; basil brings summer vibes.
Pro Tip: Want more veggies? Toss in chopped spinach, sautéed zucchini, or even roasted cherry tomatoes. It’s the pasta version of a cozy sweater—layerable and oh-so-flexible.
Let’s Get Cooking: Your Roadmap to Delicious
Here’s your complete step-by-step guide on how to make this Creamy Pasta with Peas & Pancetta:
Step 1: Boil that pasta!
Salt the water like the sea—it’s your only chance to season the noodles. Cook to al dente (check the package minus 1-2 minutes). Save that starchy pasta water! It’s liquid gold for adjusting sauce thickness later.
Step 2: Crisp the pancetta.
Heat oil in a skillet, add pancetta, and let it sizzle until golden (5–7 minutes). Remove with a slotted spoon—leave that glorious fat in the pan! (This is where the flavor lives, folks.)
Step 3: Sauté the aromatics.
Toss shallots into the pancetta drippings. Cook 2 minutes until soft, then add garlic for 30 seconds (don’t let it burn!). Stir in peas for 2 minutes—they’ll thaw as they dance in the pan.
Step 4: Build the sauce.
Pour in cream and ¼ cup pasta water. Simmer 2 minutes. Stir in Parmesan until melty. Too thick? Add more pasta water, 1 tbsp at a time.
Chef’s Hack: Take the pan off heat before adding cheese to prevent grainy texture!
Step 5: Bring it home!
Toss the pasta and pancetta into the sauce. Stir vigorously—this helps the sauce cling. Taste! Need salt? Pepper? More cheese? (The right answer is always more cheese.)
Serving Creamy Pasta with Peas & Pancetta: Plate It Like a Pro
This pasta deserves a little flair, whether it’s a Tuesday night or a dinner party moment. Below are some ideas on how to serve your pasta!
Solo or Date Night?
Twirl generous heaps into shallow bowls for that “restaurant-at-home” feel. Top with extra Parmesan, cracked black pepper, and a handful of arugula. Light a candle, pour a glass of wine, and cue the cozy vibes.
Feeding a Crowd?
Go family-style with a big rustic serving bowl. Pile it high, scatter pancetta on top, and finish with a drizzle of olive oil. Pair with garlic bread and a green salad, and you’ve got comfort food perfection.
Bonus Tip:
Set out little toppings—Parmesan, chili flakes, lemon zest—so everyone can make their plate just right. It’s fun, interactive, and adds a personal touch.
Mix It Up! 5 Delicious Twists
Here are five tried-and-true variations that keep things interesting without straying from the cozy vibe of the classic Creamy Pasta with Peas & Pancetta we all love:
1. Vegetarian Vibes
No pancetta? No problem. For a meat-free version that still hits those umami notes, sauté a mix of mushrooms (like cremini or shiitake) until golden and sprinkle in a bit of smoked paprika for depth. Add a splash of soy sauce or tamari for that salty punch, and boom—rich, savory, satisfying, and still full of soul.
2. Gluten-Free Goodness
Gluten-sensitive or cooking for someone who is? Just swap in your favorite gluten-free pasta (we love brown rice or chickpea-based varieties for extra protein!). Also, double-check your Parmesan—some processed versions can sneak in anti-caking agents that include gluten. Stick to a high-quality wedge you grate yourself, and you’re golden.
3. Lightened-Up Luxe
Craving comfort without the extra creaminess? Sub in evaporated milk (yep, the shelf-stable can!) and whisk in a tablespoon of flour while the aromatics are cooking to help the sauce thicken. It’s still dreamy and smooth, just a touch less indulgent. You can also sneak in some spinach for bonus greens—just stir it into the sauce until wilted!
4. Seafood Lovers’ Dream
Give it a coastal twist by adding pan-seared shrimp, scallops, or even flaky chunks of salmon. Just season lightly and cook separately, then toss them in during the final minute so they stay tender and juicy. The sweetness of seafood plays beautifully with the peas and creamy Parmesan sauce—it’s basically summer vacation in a bowl.
5. Bring the Heat
If you’re someone who likes a little fire with your forkfuls, spice things up! A pinch of red pepper flakes in the garlic stage adds just enough kick without overpowering the dish. Want even more heat? A drizzle of chili crisp or spicy Calabrian chili oil just before serving will wake up every bite. Bonus: it looks extra fancy.
Notes from My Kitchen to Yours
True story: The first time I made this, I accidentally used whipping cream instead of heavy. The result? A slightly thinner sauce… and zero complaints. Recipes evolve! Now, I sometimes add lemon zest for brightness or a splash of white wine in the sauce.
Got a picky eater? Blend the peas into the sauce and they will never know. And if you burn the garlic (we’ve all been there), start over. Burnt garlic = bitter pasta. Your taste buds deserve better!
I’ve even added sun-dried tomatoes or chopped artichoke hearts when cleaning out the fridge. The base recipe is forgiving and endlessly adaptable, which makes it one of my go-to weeknight wonders.
FAQs: Your Questions, Answered
Q: Can I make this ahead?
A: The sauce thickens as it sits. Reheat with a splash of milk or broth, stirring constantly.
Q: My sauce broke! Help!
A: Don’t panic! Remove from heat, add 1–2 tbsp cold butter, and whisk like your dinner depends on it (it does).
Q: No pancetta—can I use prosciutto?
A: Absolutely! Add it at the end (it’s thinner and can overcook if crisped too long).
Q: Can I freeze leftovers?
A: Cream sauces can get grainy when frozen. Eat fresh or store up to 3 days in the fridge. Reheat gently on the stovetop for best texture.
Q: Can I use milk instead of cream?
A: You can! Add a little flour or cornstarch to thicken, and toss in extra cheese to boost richness.
Nutrition Facts (Per Serving)
Estimated for 4 servings. Actual values will vary based on brands and measurements.
-
Calories: 520
-
Protein: 19g
-
Carbs: 45g
-
Fat: 28g
-
Fiber: 4g
-
Sugar: 4g
Final Thoughts: Cozy on a Plate
If ever there were a dish that brings people together, it’s this one. It’s the kind of recipe you keep in your back pocket for when life feels a little chaotic and you just want to reconnect—with your kitchen, with your people, and with something that tastes like home. Whether you’re serving it up for Sunday dinner, a random Tuesday night, or just because you want something warm and satisfying, this Creamy Pasta with Peas & Pancetta delivers.
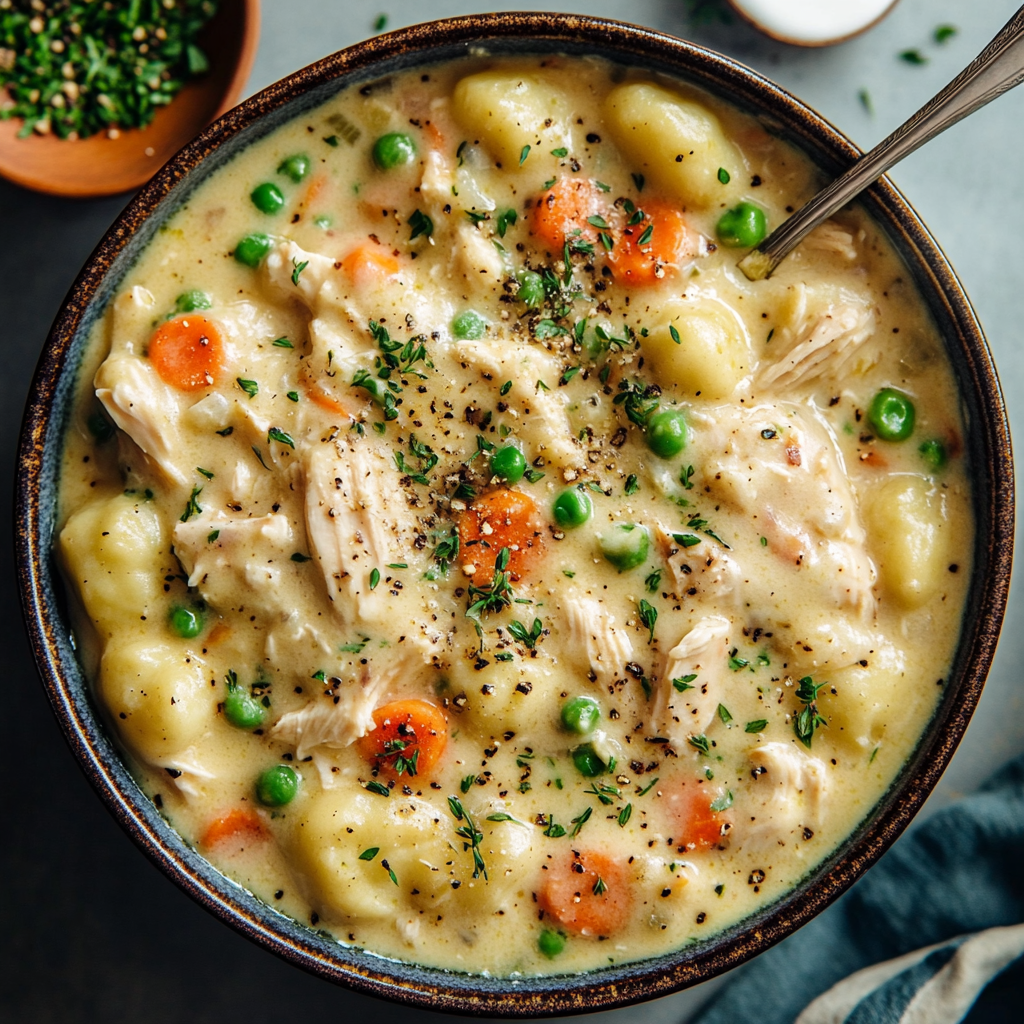
One Pot Gnocchi Chicken Pot Pie
One Pot Gnocchi Chicken Pot Pie: Cozy Comfort with a Twist!
Hey there, foodie friends! I’m ready to spill the beans on a recipe that’s about to become your new cold-weather obsession. Picture this: creamy chicken pot pie filling, loaded with tender veggies and juicy shredded chicken, but instead of a flaky crust? Pillowy, potato-y gnocchi that soak up all that savory goodness. Yep, we’re ditching the rolling pin and keeping it all in one pot—because who has time for dishes? This dish is like a warm hug from your grandma, if your grandma wore a cheeky apron and cursed at burnt roux.
I’ll never forget the first time I served this to my skeptical cousin Dave (“Where’s the crust?!”). Ten minutes later, he was scraping his bowl with a piece of garlic bread and asking for the recipe. That’s the magic of gnocchi pot pie—it’s familiar enough to comfort, but unexpected enough to make Tuesday night feel like a tiny celebration. Plus, it’s faster than ordering pizza.

That Time I Rebelled Against Pie Crusts (And Won)
Rewind to 2018: I’m in my tiny Brooklyn apartment, snowed in with a half-defrosted chicken and a serious case of “I need carbs NOW.” Classic pot pie felt too fussy, but I craved that creamy-chickeny vibe. Then I spotted the gnocchi hiding behind expired mustard. Lightbulb moment!
I threw everything into my trusty Dutch oven—no measuring, just vibes. When those gnocchi puffed up into little flavor clouds, I knew I’d stumbled onto something special. My roommate (RIP, Steve the bassist) wandered in, took one bite, and said, “Dude, this tastes like the inside of happiness.” And just like that, my crustless rebellion had a mascot. Now, it’s my go-to for potlucks, breakups, and “please stop crying, toddler” emergencies.
Over the years, it’s evolved—from a messy fridge dump to a streamlined one-pot wonder that people request by name. If recipes were mixtapes, this one would be my greatest hit.
What You’ll Need (And Why It Rocks)
Here’s what makes this One Pot Gnocchi Chicken Pot Pie so special. It’s flexible, forgiving, and full of pantry and freezer staples you probably already have lurking around. Let’s break it down:
Cooked chicken (1 lb)
Rotisserie is MVP here. Pull it apart while catching up on your favorite show (multitasking = chef power move). No rotisserie? Leftover grilled chicken or roasted thighs work just as well. Even canned chicken in a pinch—we’ve all been there.
Olive oil (1 tbsp)
Or butter for that golden, glossy richness. I alternate depending on my mood. If it’s been a day, I do half oil, half butter. That’s self-care.
Onion + garlic
The dynamic flavor duo—basically the culinary equivalent of Beyoncé and Jay-Z. If you’re out of garlic (gasp!), ½ teaspoon garlic powder will do the trick. But fresh really sings here.
Carrots + peas
Frozen mix is totally cool—we’re not on Top Chef. But if you’ve got fresh carrots, dice them thin so they cook evenly. I often toss in a handful of corn too, just because I can.
Chicken broth (1 cup)
Go for low-sodium so you can control the salt levels. Pro tip: Adding a splash of white wine before the broth adds a little somethin’ somethin’.
Milk or half-and-half (1 cup)
Whole milk = creamy dream. Oat milk = dairy-free delight. Almond milk? Meh—it’ll work, but it won’t be as luscious. Use what suits your vibe.
Thyme (½ tsp)
Fresh or dried—whatever you’ve got. If you’re into rosemary, sage, or Italian seasoning, go ahead and freestyle. This pot’s big enough for all your herby experiments.
Gnocchi (1 lb)
The star! Shelf-stable versions are perfect for last-minute meals. Want to get wild? Try cauliflower gnocchi for a lighter bite or sweet potato gnocchi for autumn vibes.
Parmesan (⅓ cup)
Adds that salty, umami punch. I’ve also used aged cheddar or crumbled feta in a pinch—equally fantastic. Vegan parm works too—just make sure it melts nicely.
Cream cheese (2 tbsp, optional)
This is your silky smooth insurance policy. No cream cheese? Greek yogurt or sour cream adds a nice tang and texture. Totally optional—but you won’t regret it.
How to Make One Pot Gnocchi Chicken Pot Pie
Step 1: Aromatics, Assemble!
Heat oil (or butter) in your largest pot over medium heat. Toss in diced onions, garlic, and carrots. Let them get to know each other, stirring occasionally, for about 5-6 minutes until the onions turn translucent and your kitchen smells like you know what you’re doing.
Pro Tip: Don’t rush this part! Those golden onion edges? That’s where flavor lives.
Step 2: Add the Liquid Love
Stir in your shredded chicken, broth, milk, thyme, salt, and pepper. Go big with that pepper grinder. Stir like you mean it, then bring everything to a gentle simmer. And I do mean gentle—boiling milk is a recipe for sadness and curdles.
Bonus flavor move: Add a splash of dry white wine here. Chardonnay makes it feel fancy.
Step 3: Gnocchi Time
Now the magic happens. Dump in your gnocchi and gently stir. Let them chill in the creamy bath for 6-8 minutes. You’ll see them puff up like tiny potato balloons. When one pierces easily with a fork and feels tender, they’re done.
Don’t over-stir! Gnocchi are softies. Let them soak and do their thing.
Step 4: The Creamy Finale
Fold in the peas, Parmesan, and cream cheese (if using). Stir until melted and the whole pot turns into a creamy, dreamy swirl of comfort. This is your moment to taste. More salt? Dash of hot sauce? Splash of lemon juice for brightness? Customize away.
Step 5: Garnish & Glory
Kill the heat. Sprinkle with chopped parsley, more Parmesan, or even crispy onions if you’re feeling it. Serve in deep bowls—bonus points for bread bowls or over mashed potatoes if you want to go FULL cozy.
Watch the phone cameras come out before the forks do. It’s that kind of dish.
How to Serve One Pot Gnocchi Chicken Pot Pie
This dish doesn’t need a ton of flair—it is the flair. But if you’re aiming to impress, here are a few little extras:
-
Top with: More cheese, fresh herbs, red pepper flakes, or buttery breadcrumbs.
-
Pair with: Bitter greens salad, roasted Brussels sprouts, or warm garlic bread.
-
For a full spread: Add mulled cider, wine, or a crisp cider-based cocktail. This pot pie loves a good drink pairing.
Leftovers? Yes please. This dish reheats like a champ. Pop it in the microwave with a splash of broth or milk to keep it creamy.
Mix It Up! 5 Delicious Twists
Why stick to the usual when you can remix?
-
Veggie Power: Skip the chicken and go with sautéed mushrooms, cannellini beans, and kale.
-
Buffalo Style: Stir in ¼ cup hot sauce and top with blue cheese crumbles. Game day approved.
-
Thanksgiving Remix: Use leftover turkey, roasted sweet potatoes, and a dash of sage. It’s November in a bowl.
-
Gluten-Free Glory: Use GF gnocchi (plenty out there!) and thicken the sauce with a cornstarch slurry.
-
Luxury Edition: Lobster meat, tarragon, and a drizzle of truffle oil. Because you deserve it.
Confessions of a Gnocchi Addict
Let’s be honest—I’ve made this recipe a hundred different ways. Here’s what I’ve learned:
-
Shelf-stable gnocchi > refrigerated for texture. It holds up better in creamy sauces.
-
A splash of wine before the broth elevates everything.
-
Chopped pickles instead of peas? Bad idea. Trust me.
-
Smoked paprika? Oh yeah. Just a little. Adds a cozy depth.
I’ve even tried baking this in a skillet with a cheesy topping. It works—but I still prefer the ease of stovetop one-pot magic.
Your Burning Questions, Answered
Q: Can I use frozen gnocchi?
A: Absolutely! No need to thaw—just give them 2-3 extra minutes in the pot.
Q: Sauce too thin?
A: Whisk 1 tablespoon cornstarch with 2 tablespoons cold milk, stir it in, and simmer for 2 minutes.
Q: Can I make this ahead?
A: Yup. Store in the fridge up to 3 days. Reheat gently with a splash of broth or milk to revive that creamy texture.
Q: Gnocchi sticking together?
A: Stir gently after adding them to the pot and make sure there’s enough liquid for them to cook evenly.
Q: Can I freeze it?
A: Technically yes, but gnocchi can get a little mushy. For best results, freeze the base without the gnocchi and add them fresh when reheating.
Nutritional Facts (Per Serving)
Let’s be real—this isn’t a kale smoothie. But for a cozy, creamy comfort dish? It’s surprisingly balanced! Here’s what you’re working with:
-
Calories: ~520
-
Protein: 32g
-
Fat: 22g
-
Carbohydrates: 45g
-
Cholesterol: 95mg
-
Sodium: ~720mg
-
Calcium: 200mg
-
Iron: 2mg
-
Vitamin A: 80% DV
-
Vitamin C: 20% DV
Want to lighten things up? Swap whole milk for unsweetened almond milk and skip the cream cheese. Trying to bulk up the protein? Add a handful of chopped spinach or use extra chicken. This dish is super flexible—just like your favorite pair of stretchy pants.
Final Thoughts from the (Gnocchi-Loving) Heart
At the end of the day, this One Pot Gnocchi Chicken Pot Pie is about more than ingredients. It’s about reclaiming comfort food on your own terms. It’s about cozying up with a bowl of something creamy and soul-hugging without spending your night elbow-deep in dough or dishes.
Whether you’re feeding picky toddlers, impressing dinner guests, or just needing a food hug after a long day—this one’s for you.
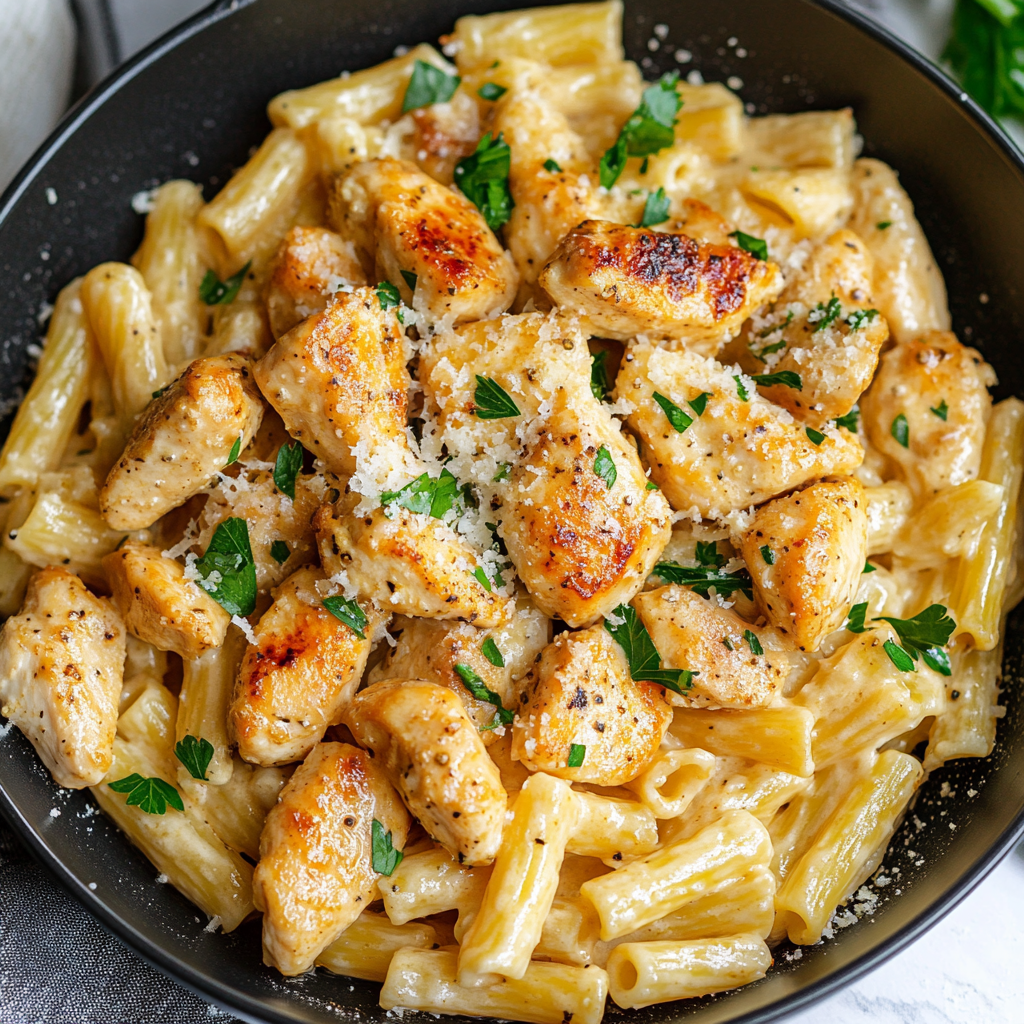
Garlic Butter Chicken Bites with Creamy Parmesan Pasta
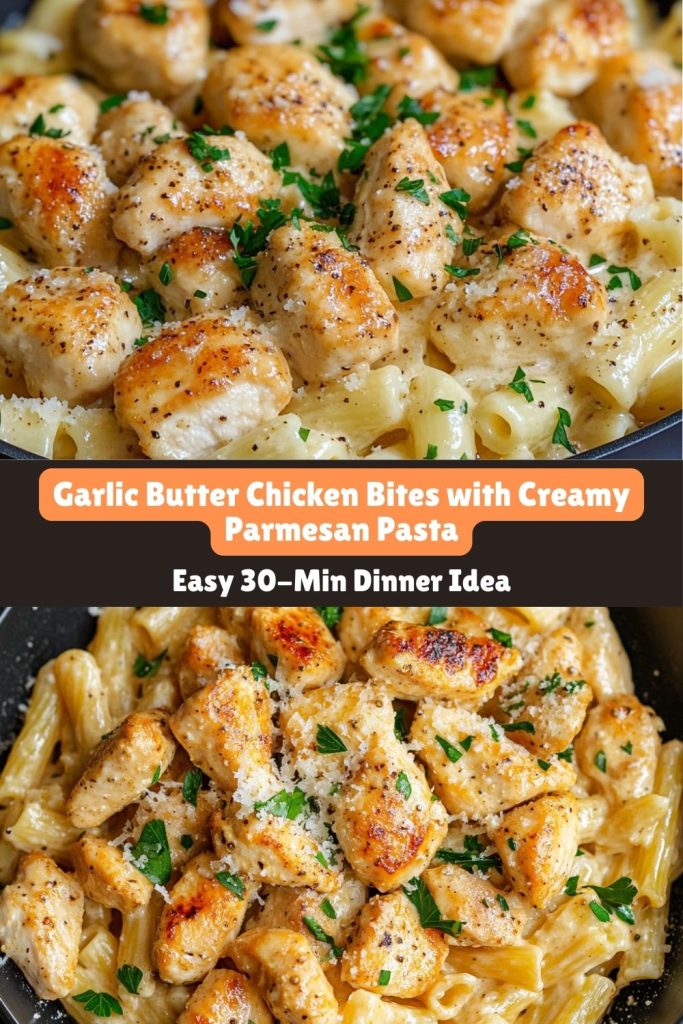
Garlic Butter Chicken Bites with Creamy Parmesan Pasta: Your New Go-To Comfort Feast
Hey there, foodie friend! Let’s talk about that magical moment when crispy garlic butter chicken meets a silky Parmesan pasta hug. You know the feeling—when your fork twirls through creamy noodles, grabs a juicy chicken bite, and suddenly… chef’s kiss. This dish is my culinary security blanket, the one I whip up when I need a guaranteed smile (or when my cousin Dave drops by unannounced—again). It’s quick, unpretentious, and tastes like a fancy bistro meal without the fuss. Ready to turn your kitchen into a comfort food haven? Let’s dive in!
The Snowstorm That Started It All
Picture this: It’s 2018, Chicago’s buried under 14 inches of snow, and my pantry’s down to chicken breasts, half a block of Parmesan, and sheer determination. My then-boyfriend (now husband!) was stuck at my apartment, and let’s just say… my “impressive cooking skills” needed backup. The heat was finicky, we’d watched every episode of The Office twice, and cabin fever was setting in. I had one shot to wow him without trekking outside into the Arctic tundra.
So I seared those chicken bites like my dignity depended on it. I deglazed the pan with butter (because butter fixes everything, right?), stirred in whatever creamy odds and ends remained in the fridge, and dumped in a mountain of freshly grated Parmesan. The result? We ate straight from the skillet, licked spoons, and he proposed six months later. Coincidence? I think not.
From that moment on, this dish became legendary in our home. It’s been served for date nights, girls’ nights, and even Tuesday nights when I need a win. Whether you’re snowed in or just hungry for something warm and cozy, these garlic butter chicken bites and creamy pasta never let you down.
Your Grocery Lineup (Plus Chef Secrets!)
Let’s break down the dream team of ingredients that makes this comfort feast possible. Bonus: most of them are probably already in your pantry or fridge!
For the Garlic Butter Chicken Bites:
-
Chicken breast – 1.5 lbs, cubed. Pro tip: Pop the chicken in the freezer for 15–20 minutes before cutting. It firms up just enough to slice cleanly without slippage. Not a fan of white meat? Swap in boneless thighs for extra juiciness.
-
Paprika + Italian seasoning – The dynamic duo of flavor town. I’m partial to smoked paprika for that cozy, fire-roasted vibe. And Italian seasoning? It’s the shortcut to herbaceous goodness—think oregano, basil, thyme, all in one happy jar.
-
Garlic cloves – You have to use fresh here. Jarred garlic just doesn’t hit the same—it’s like playing Beyoncé on a kazoo. Chop or mince 3–4 cloves and prepare to be hugged by aroma.
For the Creamy Parmesan Pasta:
-
Pasta – Rigatoni is my MVP. Its ridges trap sauce like nobody’s business. Penne, farfalle, or fettuccine also work. Gluten-free? Chickpea pasta is shockingly good and protein-packed to boot.
-
Half-and-half – This is my Goldilocks pick: richer than milk, lighter than cream. If all you’ve got is milk, that’s fine—just whisk in 1 tablespoon of flour to help it thicken.
-
Parmesan – The heart of the sauce. Grate it yourself, please. The pre-shredded kind is coated in anti-caking agents that mess with the texture. I’ve learned the hard way (RIP to that gritty disaster of 2019).
Let’s Get Sizzling! (My Foolproof Roadmap)
Here’s how to bring it all together like a total kitchen rockstar—no culinary school degree required.
Step 1: Chicken Prep Party
Start by patting the chicken cubes very dry. Moisture is the enemy of browning, so give them a good paper towel rubdown. Toss with smoked paprika, Italian seasoning, salt, and pepper. Let them hang out for 5–10 minutes while you heat the skillet—this gives the spices time to work their magic.
Step 2: Sear Like You Mean It
Add a mix of olive oil and 2 tablespoons of butter to a large skillet over medium-high heat. When it’s sizzling hot (test by flicking a drop of water—if it sizzles, you’re good), lay the chicken in a single layer. No crowding! If the pan’s too full, they’ll steam instead of sear, and we’re here for that crispy golden crust.
Cook for about 3 minutes per side, flipping once edges are brown and delicious. You’re not cooking them all the way through yet—they’ll finish in the garlic butter.
Remove the chicken and set it aside on a plate. Don’t wipe the pan—you want to keep those browned bits (aka FLAVOR).
Step 3: Garlic Butter Glory
Lower the heat to medium-low and add the remaining butter. Once melted, stir in the minced garlic. Let it sizzle for just 30 seconds—don’t let it burn or you’ll be sad. Return the chicken to the skillet and toss to coat it in all that fragrant butter goodness. Let everything mingle for another 2–3 minutes so the chicken finishes cooking and soaks up those dreamy flavors.
Meanwhile, in Pasta Land…
While your chicken is sizzling, get your pasta water boiling. Salt it like the ocean! Cook your pasta until just al dente—it’ll keep cooking a bit in the sauce later. Before draining, scoop out about ½ cup of pasta water. This starchy liquid gold helps emulsify your sauce and gives it that luxurious silkiness.
In the same skillet (yes, go ahead—less dishes!), add the half-and-half and warm it gently over medium heat. Sprinkle in your grated Parmesan, whisking constantly to melt it into a velvety sauce. If it’s too thick, add a splash of that pasta water. Too thin? Simmer for another minute or stir in a cornstarch slurry (1 tsp cornstarch + 1 tbsp cold milk).
Add your drained pasta to the skillet and toss everything to coat. The rigatoni should be gleaming and saucy. Now, for the final flourish—nestle those golden garlic butter chicken bites on top.
Plating: From “Meh” to “Michelin-Worthy” (Kinda)
Time to serve it up like a pro. Use tongs to twirl the pasta into high little nests—it’s all about the drama. Arrange the chicken bites on top like you’re stacking precious Jenga pieces. Sprinkle with chopped parsley and more grated Parmesan (obviously). If you’re feeling extra, a candle and glass of wine make this feel like a dinner party even if you’re in sweatpants.
Mix It Up! 5 Flavor Adventures
Here are five delicious twists to make this dish feel brand new every time you cook it. Perfect for picky eaters, adventurous souls, or just those of us who love a remix.
1. Lemon Zest Twist
Brighten things up with a pop of citrus! Add the zest of one lemon into your sauce as it simmers—it lifts the creaminess with a fresh zing. Right before serving, squeeze half a lemon over the finished dish for a restaurant-worthy finish. Bonus: it cuts through the richness like a pro.
2. Mushroom Madness
Craving umami? Slice up some baby bellas or creminis and sauté them with the garlic before adding the chicken back in. The mushrooms soak up that garlicky butter and become little flavor bombs. Add a splash of white wine while they cook if you’re feeling fancy.
3. Spicy Edition
For those who like a little heat with their comfort food, stir in ½ teaspoon of red pepper flakes when the garlic goes into the pan. You can also finish the dish with a dash of your favorite hot sauce or a spoonful of chili crisp. It’s the kind of warmth that makes your soul (and tongue) tingle.
4. Herby Overload
Toss in a handful of chopped fresh basil, parsley, or thyme right before serving. It makes the whole dish taste like a summer garden and pairs especially well with the Parmesan richness. Got leftover pesto? Swirl in a spoonful—it’s a total game changer.
5. Veggie Power-Up
Want to sneak in some greens? Wilt a few handfuls of baby spinach or chopped kale into the sauce as it thickens. Peas, roasted cherry tomatoes, or even steamed broccoli florets also make great additions. It bulks up the dish and adds a pop of color—and you can pretend it’s healthy!
Confessions from My Kitchen
True story: I once tried to “lighten things up” by using low-fat Parmesan. The sauce turned into what I can only describe as wallpaper paste. I’ve made peace with the fact that fat = flavor, especially here. Another hard-earned tip? Don’t forget the pasta water. I didn’t start adding it until 2020 (quarantine cooking epiphanies, anyone?), but it makes a huge difference in how the sauce clings to the pasta.
Also: this dish reheats like a dream. Add a splash of milk before microwaving and it’s just as creamy the next day. Meal prep win!
Burning Questions (Answered!)
Q: My sauce is too thin. Help!
A: No stress! Simmer the sauce for a few extra minutes to reduce it. Still not thick enough? Mix 1 teaspoon cornstarch with 1 tablespoon cold milk and whisk it in slowly until the sauce tightens up.
Q: Can I use rotisserie or pre-cooked chicken?
A: Yep! Just skip to the garlic butter step and warm the chicken in the butter mixture until coated and heated through. Super weeknight-friendly.
Q: What wine pairs well with this?
A: Glad you asked. A crisp white like Sauvignon Blanc or Pinot Grigio cuts through the richness beautifully. If red’s your thing, try a light Pinot Noir.
Nutrition (Per Serving):
-
Calories: 590
-
Protein: 45g
-
Carbs: 38g
-
Fat: 28g
Hearty, balanced, and absolutely soul-satisfying. It’s a hug in a bowl.
Whether you’re feeding your favorite people, meal-prepping your way through the week, or just needing a dinner that feels like a win, this Garlic Butter Chicken Bites with Creamy Parmesan Pasta is here for you. It’s comfort food that doesn’t ask too many questions—just delivers on taste, texture, and joy, every single time.
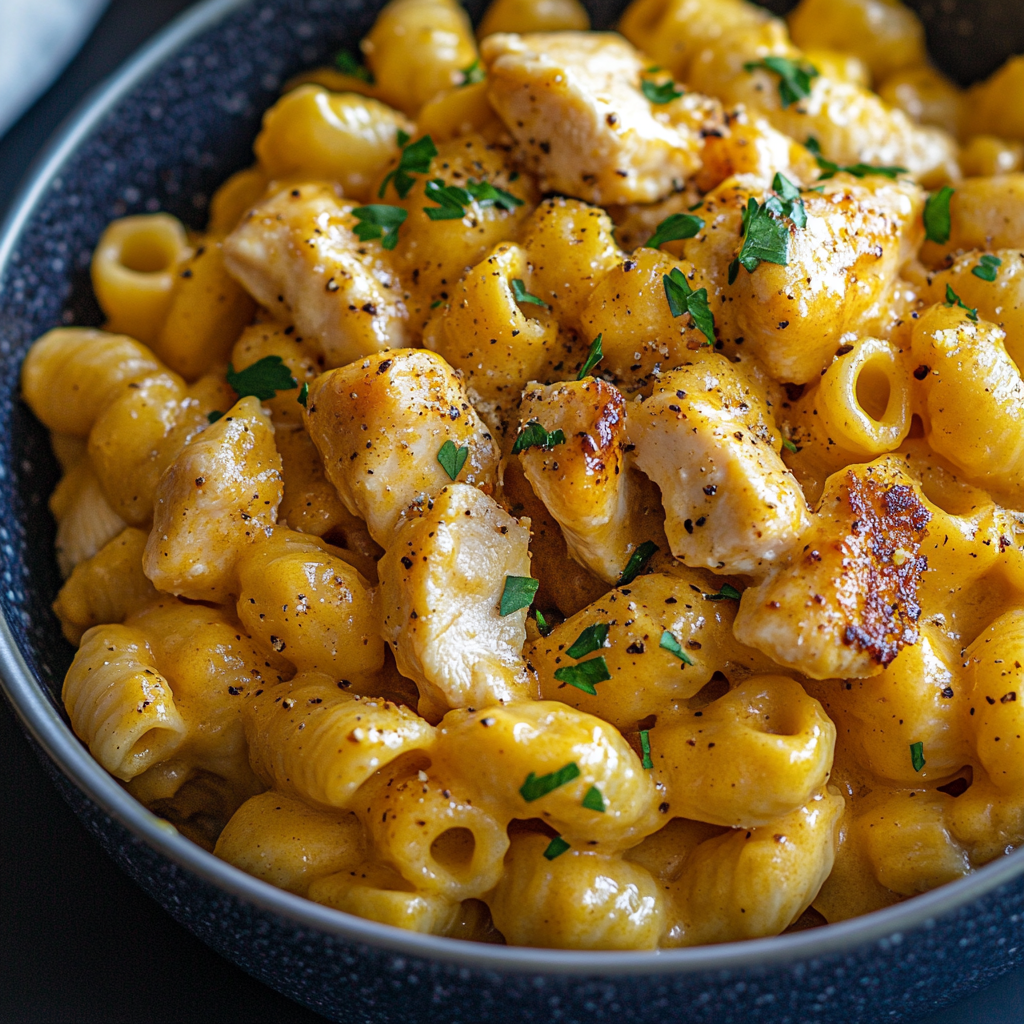
High Protein Honey Garlic Butter Chicken Mac & Cheese
How to Make the Creamiest, Dreamiest Baked Mac and Cheese of Your Life
Hey there, foodie friend! Chef Jamie here, your culinary hype-man and self-proclaimed cheese whisperer. Today, we’re diving headfirst into the ultimate comfort food: High Protein Honey Garlic Butter Chicken Mac & Cheese. Not just any mac and cheese, though. We’re talking golden, crispy edges, a sauce so velvety it could double as a blanket, and that magical moment when your fork breaks through the crust into a gooey, cheesy abyss. Are you drooling yet? I sure am.
Now, I know what you’re thinking: “Mac and cheese? That’s kid stuff!” But let me stop you right there. A truly great mac and cheese is an art form—a symphony of textures and flavors that can turn a rough day into a cozy night. Whether you’re feeding a crowd, meal-prepping for the week, or just treating yourself (no judgment here), this recipe is your golden ticket to cheesy bliss. Plus, I’ll spill all my chef secrets—like why a dash of hot sauce is non-negotiable and how to avoid the dreaded “grainy sauce” curse. Let’s get cheesy!
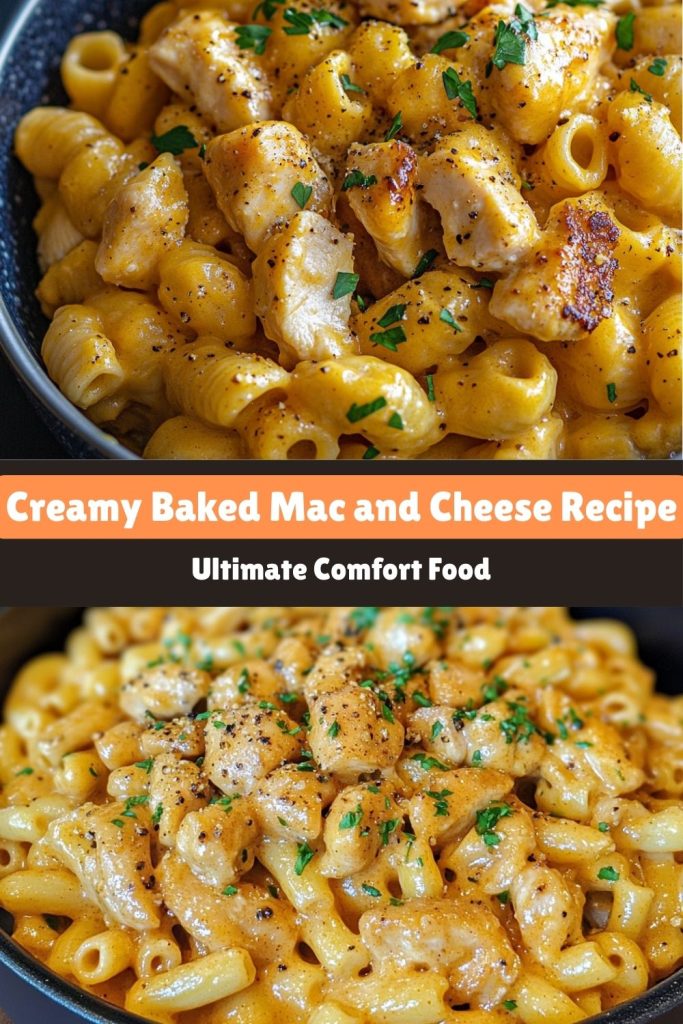
The Time I Almost Burned Down Grandma’s Kitchen (But Nailed the Mac)
Picture this: 12-year-old me, armed with a wooden spoon and a dangerously overconfident attitude, determined to surprise Grandma with her famous mac and cheese while she napped. Spoiler: Things got… dramatic. I forgot to set a timer for the roux (rookie mistake), and next thing I knew, smoke was billowing from the pan. Cue the fire alarm, a very startled grandma, and a kitchen smelling like burnt butter regrets.
But here’s the twist: Grandma, bless her, didn’t scold me. Instead, she handed me a fresh stick of butter and said, “Let’s try that again—together.” That second batch? Pure magic. We added a pinch of smoked paprika from her secret spice stash, swapped in sharp cheddar for extra punch, and laughed until our sides hurt. To this day, every time I make this recipe, I swear I can hear her saying, “More cheese, Jamie. Always more cheese.”
That was the moment I fell in love with food—not just eating it, but creating it, sharing it, celebrating it. And this mac and cheese became my signature dish. I’ve served it at potlucks, dinner parties, holiday feasts, and yes, even at 2 a.m. in pajamas straight from the baking dish. It never fails to hit the spot.
What You’ll Need (+ Why Each Ingredient Matters)
Let’s break it down. Every ingredient here plays a role in crafting a mac and cheese that’s both nostalgic and next-level. Here’s the grocery list—and the why behind it.
-
Elbow macaroni (16 oz): The OG pasta shape for a reason—those curves cradle the sauce like a pro. Want to change it up? Try cavatappi for extra twirl or shells for sauce pockets galore. Gluten-free? Brown rice pasta holds its shape best.
-
Unsalted butter (½ cup): Butter is the foundation of the roux, and flavor starts here. Browning it just slightly before adding flour adds an almost nutty, deep undertone that most people won’t clock—but they’ll know something tastes extra good.
-
All-purpose flour (⅓ cup): This thickens our béchamel base. Want it gluten-free? Use ¼ cup cornstarch, whisked into a slurry with some of the cold milk first, then added to the hot butter to avoid clumping.
-
Whole milk (4 cups): The higher the fat, the creamier the result. You can do a blend of 3 cups whole milk and 1 cup heavy cream if you’re feeling indulgent. Avoid skim—your cheese deserves better.
-
Sharp cheddar (3 cups, shredded): Use aged cheddar—it melts smoother and packs a punch. Grating your own is a must. Pre-shredded cheese is coated in anti-caking agents that make sauces gritty and sad.
-
Gruyère (1 cup, shredded): This cheese brings nutty complexity and stretches like a dream. No Gruyère? Emmental or Fontina are great backups.
-
Paprika (1 tsp): Adds a smoky sweetness and a touch of color. Smoked paprika is my personal favorite for that little wink of BBQ flavor.
-
Hot sauce (½ tsp): Not for heat, but for balance. Just a splash cuts the richness and rounds the flavor. Think of it as the citrus squeeze of the cheese world.
Let’s Build That Cheese Empire: Step-by-Step
Step 1: Cook the Pasta
Boil the macaroni in heavily salted water—think ocean-level salinity. Cook it 1 minute less than the package says. Trust me, overcooked pasta turns to mush in the oven. Drain it and toss with a drizzle of oil to keep it from sticking.
Pro Tip: Save about ½ cup of the pasta water before draining. It’s liquid gold if your cheese sauce needs loosening later.
Step 2: Make the Roux
In a saucepan, melt the butter over medium heat. Once it’s fully melted and just starts to foam, whisk in the flour. Cook it, whisking constantly, for about 2 minutes—until it smells like a buttery pie crust.
Burned it? It happens. No shame in starting over. A bitter roux ruins the whole vibe.
Step 3: Create the Béchamel
Now slowly pour in the milk, whisking as you go. No splashing, no clumping—smooth and steady wins the race. Bring the mixture to a gentle simmer, whisking constantly. After about 5–7 minutes, it should coat the back of a spoon. Stir in the paprika and hot sauce.
This is where the base transforms from plain milk into a rich, creamy canvas ready to welcome cheese.
Step 4: Cheese, Please!
Turn off the heat. Yes—off. Hot milk is enough to melt the cheese; high heat breaks it. Add the cheese by handfuls, stirring between each addition. It should melt into a smooth, luxurious sauce.
If the sauce is a bit thick, stir in a splash of that reserved pasta water. Taste it! Now’s your chance to add salt and pepper before it hits the pasta.
Step 5: Assemble & Bake
In a greased 9×13” baking dish, combine the sauce and cooked pasta. Stir gently to coat every nook and cranny. Top with extra shredded cheese because… more cheese. Bake at 375°F for 25 minutes, then broil for 2–3 minutes to get that crispy, golden top.
Don’t skip the 10-minute rest. It lets the sauce set and keeps your serving from sliding into soup territory.
How to Serve It Like a Pro
You made a masterpiece—let’s plate it accordingly.
-
For weeknights: Ladle into wide bowls, garnish with chopped parsley or chives, and pair with a tangy arugula salad.
-
For dinner parties: Serve in mini cast-iron skillets or ramekins. Top with crispy pancetta or breadcrumbs for flair.
-
For a crowd: Double the batch, bake in a deep roasting pan, and keep it warm in the oven. A mac and cheese bar with toppings? Instant party win.
Bonus tip: A drizzle of garlic-infused olive oil or a few flakes of smoked sea salt right before serving? Next-level.
Mix It Up: 5 Killer Twists
Want to jazz things up? Here are my five favorite variations:
-
Buffalo Chicken: Stir in 2 cups shredded rotisserie chicken and ¼ cup buffalo sauce. Crumble blue cheese on top before baking.
-
Truffle Shuffle: After baking, drizzle with white truffle oil and add sautéed mushrooms for a bougie twist.
-
Lobster Luxe: Gently fold in 1 lb cooked lobster meat right before baking. Finish with a squeeze of lemon.
-
Veggie-Packed: Add roasted cauliflower, spinach, or sun-dried tomatoes for color and texture.
-
Spicy Chorizo: Brown 1 cup Spanish chorizo and scatter over the top before baking for bold flavor and crispy bits.
Chef’s Final Thoughts
This recipe has been my ride-or-dish since culinary school, where my classmates dubbed me “Mac Daddy” (thanks, guys). Over the years, I’ve learned:
-
Grate your own cheese—it truly makes all the difference.
-
Let it rest after baking. Your patience will be rewarded with perfectly creamy forks of joy.
-
Share it. Comfort food is best when served with a side of laughter, conversation, and a whole lot of love.
At the end of the day, mac and cheese isn’t just food—it’s a memory in the making. Whether it’s a snow day lunch, a holiday table staple, or your go-to “I need something cozy now” meal, this dish delivers every time.
Your Mac and Cheese Questions—Answered!
Q: Why is my cheese sauce grainy?
A: You probably melted the cheese over too high a heat. Cheese likes to be coaxed into melting—never rushed. Take the pan off the heat first, then stir in cheese slowly.
Q: Can I make this ahead?
A: Yes! Assemble it fully (minus the baking), cover tightly, and refrigerate for up to 2 days. When ready to bake, add 10 extra minutes to account for the chill.
Q: My mac turned out dry. Help!
A: Stir in ½ cup warm milk just before serving. It brings the sauce back to life. For future batches, keep the pasta slightly undercooked and always add extra sauce before baking—it thickens as it bakes.
Nutritional Facts (Per Serving – Serves 8)
Note: Values are approximate and will vary based on specific brands and ingredient swaps. But hey, knowledge is cheese power.
- Calories: 520
- Total Fat: 32g
- Cholesterol: 95mg
- Sodium: 460mg
- Total Carbohydrates: 35g
- Protein: 22g
- Calcium: 35% DV
- Iron: 10% DV
Want to lighten it up a bit? Try using reduced-fat cheese, skim milk (but be warned: less creaminess!), or toss in some cauliflower florets to stretch the pasta. Or don’t—because sometimes, full-fat cheesy glory is exactly what the soul needs.




