
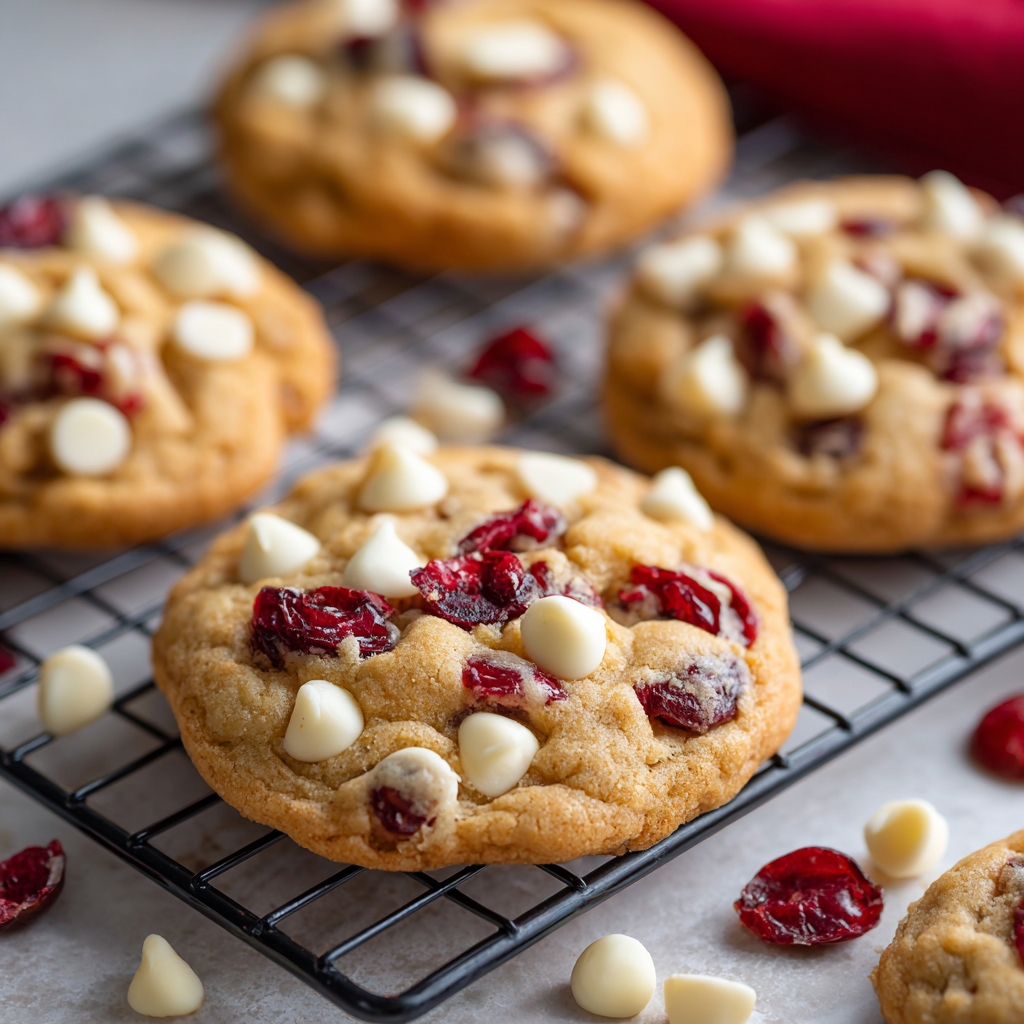
Your New Favorite Cookie Is Here: White Chocolate Cranberry Bliss!
Hey there, friend! Come on in, grab an apron, and let’s get something straight: life is just better with a warm cookie in hand. And not just any cookie. I’m talking about that perfect, just-out-of-the-oven moment where the chocolate is still a little melty, the edges are gently golden, and the smell of vanilla and butter has taken over your entire home. *That* feeling. That’s the magic we’re making today. If you’ve been searching for a cookie recipe that’s equal parts cozy, festive, and downright irresistible, you’ve just found your holy grail. These Soft-Batch White Chocolate Cranberry Cookies are the stuff of legends in my kitchen. They’re the cookie I bring to every potluck, package up for friends having a tough week, and secretly stash in the freezer for my own 3 pm pick-me-up. They strike the most incredible balance—the rich, creamy sweetness of white chocolate paired with the bright, tangy punch of chewy cranberries, all wrapped up in a soft, buttery, and impossibly chewy cookie base. They’re a hug in dessert form, and I am so incredibly excited to share them with you. So, preheat that oven, because we’re about to bake a whole lot of happiness.
The Cookie That Started It All
I’ll never forget the first time I truly fell in love with this flavor combo. It was my first Thanksgiving hosting for my then-boyfriend’s (now husband’s!) family. I was a ball of nerves, wanting everything to be perfect. The turkey was brining, the pies were prepped, but I felt like I needed one more “wow” factor—a little homemade something for folks to nibble on with their coffee after the feast. I spotted a bag of white chocolate chips and some dried cranberries in the pantry, and a little lightbulb went off. I whipped up a batch of these cookies, still warm and gooey, just as everyone was settling into the living room. The moment that platter hit the table, the room went quiet except for the sounds of happy munching. My future mother-in-law took one bite, her eyes lit up, and she said, “Olivia, these are absolute perfection. You have to give me the recipe.” That was the moment I stopped being nervous and started just being… me. In my kitchen. Sharing food I love with people I love. That’s the power of a good cookie, my friend. It’s not just dessert; it’s a memory maker.
Gathering Your Cookie Crew: The Ingredients
One of the best things about this recipe is that you probably have most of these ingredients in your pantry right now! Here’s what you’ll need and why each one is a superstar:
- 1/2 cup unsalted butter, softened – This is the foundation of our rich, buttery flavor. Using unsalted lets us control the salt level perfectly. Chef’s Tip: “Softened” means cool to the touch but your finger can leave a gentle indent. Don’t melt it! If you forget to take it out, cut it into chunks and it will soften faster.
- 1/2 cup brown sugar & 1/4 cup granulated sugar – The dynamic duo! Brown sugar brings molasses-y moisture and chew, while granulated sugar helps with spread and that lovely crisp edge.
- 1 large egg – Our binding agent, bringing everything together and adding structure. Make sure it’s at room temperature to blend seamlessly with the butter.
- 1 teaspoon vanilla extract – The flavor enhancer! Don’t skimp. A good quality vanilla makes a world of difference.
- 1 1/2 cups all-purpose flour – The main structure of our cookie. For a slightly more tender cookie, you can swap 1/4 cup with cornstarch (aka a “cake flour” hack!).
- 1/2 teaspoon baking soda – Our leavening agent. It helps the cookies rise and become nice and puffy. Make sure yours is fresh for the best lift!
- 1/4 teaspoon salt – The secret weapon! Salt balances the sweetness and makes all the other flavors pop. If you only have salted butter, just reduce this to a tiny pinch.
- 3/4 cup white chocolate chips – Go for good quality here! I love the chunks from a chopped white chocolate bar for extra pools of goodness, but chips work beautifully too.
- 3/4 cup dried cranberries – The tangy counterpart to the sweet chocolate. For an extra burst of flavor, try plumping them up by soaking in hot orange juice for 10 minutes before draining and adding to the dough!
Let’s Bake! Your Foolproof Step-by-Step Guide
Ready to make some magic? Follow these steps, and you’ll be a cookie pro in no time. I’ve packed this section with all my favorite kitchen hacks!
Step 1: Preheat and Prep. Preheat your oven to 350°F (175°C). Line your baking sheets with parchment paper. This is non-negotiable for me! It prevents sticking, makes cleanup a dream, and ensures an even, golden-brown bottom on every cookie. Silicone mats work great too!
Step 2: Cream the Butter & Sugars. In a large bowl, use a hand mixer or stand mixer fitted with the paddle attachment to cream together the softened butter, brown sugar, and granulated sugar. Now, listen up! This isn’t just about mixing; it’s about incorporating air. Beat it on medium-high speed for a good 2-3 minutes until the mixture is light, pale, and fluffy. This is the first secret to a perfectly textured cookie.
Step 3: Add the Egg & Vanilla. Beat in the egg and vanilla extract until they are fully combined and the mixture looks smooth and creamy. Scrape down the sides of the bowl with a spatula to make sure everything is getting to know each other.
Step 4: Whisk the Dry Ingredients. In a separate, medium-sized bowl, whisk together the flour, baking soda, and salt. Whisking is key here—it evenly distributes the baking soda so you don’t get any bitter bites, and it aerates the flour a little, making for a softer cookie.
Step 5: Combine Wet & Dry. Gradually add the dry ingredients to the wet ingredients, mixing on low speed just until the flour disappears. DO NOT OVERMIX! This is the second biggest secret. Overmixing develops gluten, which leads to tough, cakey cookies. A few streaks of flour are okay; we’ll finish mixing in the next step.
Step 6: The Fun Part: Fold-Ins! Switch to a sturdy spatula. Dump in your white chocolate chips and dried cranberries. Now, gently fold them into the dough until they are evenly distributed. This gentle motion prevents overmixing.
Step 7: Scoop & Space. Use a tablespoon or a small cookie scoop (my #1 kitchen tool for even baking!) to portion the dough into roughly 1-inch balls. Place them on your prepared baking sheet, spacing them about 2 inches apart. They need room to spread and become the gorgeous cookies they’re destined to be.
Step 8: Bake to Perfection. Bake for 9-11 minutes. The cookies will still look very soft in the center, and the edges will be just set and lightly golden. This is exactly what we want! They continue to cook on the hot pan. For a chewier cookie, lean towards 9 minutes. For a crisper edge, go for 11.
Step 9: The Most Important Step: PATIENCE. Once out of the oven, let the cookies cool on the hot baking sheet for at least 5 minutes. I know it’s hard, but this allows them to set up properly. If you try to move them too soon, they might fall apart. After 5 minutes, you can transfer them to a wire rack to cool completely… or, you know, eat one immediately with a glass of cold milk.
How to Serve These Beauties
These cookies are stars all on their own, but presentation is part of the fun! For a casual family treat, pile them high on a simple rustic wooden board. If you’re gifting them, stack them in a clear cellophane bag tied with a pretty ribbon—they make the most heartfelt gift. For a party, I love to plate them on a beautiful cake stand. They pair wonderfully with a hot cup of coffee, a cold glass of milk, or even a sweet dessert wine. However you serve them, get ready for compliments!
Mix It Up! Delicious Recipe Variations
Once you’ve mastered the base, the flavor world is your oyster! Here are a few of my favorite twists:
- Orange Zest Delight: Add the zest of one large orange to the butter-sugar mixture. The citrus aroma is incredible and complements the cranberries perfectly.
- Nutty Professor: Fold in 1/2 cup of chopped pecans or walnuts for a delightful crunch and toasty flavor.
- Dark Chocolate Swap: Not a white chocolate fan? Use dark chocolate or semi-sweet chips instead for a deeper, richer flavor profile.
- Oatmeal Cookie Vibe: Replace 1/2 cup of the all-purpose flour with 3/4 cup of old-fashioned oats for a heartier, chewier texture.
- Gluten-Free Friendly: Use a 1:1 gluten-free all-purpose flour blend. I’ve had great success with Bob’s Red Mill and King Arthur brands.
From My Kitchen to Yours: Chef’s Notes
This recipe has been a living, evolving thing in my kitchen for years. I once, in a frantic pre-holiday baking marathon, accidentally used a whole cup of butter instead of a half. The result? Incredibly flat, buttery, lace-like cookies that were somehow still delicious. (We called them “cranberry crisps” and ate them all anyway!). My biggest evolution was learning the power of patience—not overmixing, and letting them cool on the pan. It truly makes all the difference between a good cookie and a *great* one. And a little secret? I almost always double the batch and freeze half the dough. That way, I can have warm, fresh cookies anytime a craving (or a last-minute guest!) strikes. Just scoop the dough balls onto a sheet, freeze them solid, then toss them into a zip-top bag. Bake from frozen, adding just a minute or two to the baking time. You’re welcome!
Your Questions, Answered!
Q: My cookies always come out flat. What am I doing wrong?
A: Flat cookies are usually a temperature issue! The most common culprits are: 1) Your butter was too warm or melted. It should be softened but still cool. 2) Your baking sheet was too warm. Always use a cool sheet for each new batch. 3) Your oven might be running cold. An oven thermometer is a cheap and game-changing tool to check!
Q: Can I use frozen or fresh cranberries instead of dried?
A: I don’t recommend it for this particular recipe. Fresh or frozen cranberries contain a lot of water, which will release during baking and make the cookies soggy and prevent them from setting properly. Dried cranberries provide that perfect chewy, tangy bite without altering the dough’s moisture balance.
Q: Why are my cookies cakey and puffy instead of flat and chewy?
A: This usually points to either too much flour or overmixing. Next time, try fluffing your flour with a spoon before gently scooping it into your measuring cup and leveling it off. And remember, mix just until the ingredients combine!
Q: How do I store these cookies to keep them soft?
A: The best way to keep them soft and chewy is in an airtight container at room temperature. I like to throw a single piece of bread in the container with them—the cookies will absorb the moisture from the bread and stay soft for days! (Just remember to change the bread if it gets hard).
Nutritional Information
(Approximate, per cookie, based on a yield of 24 cookies)
- Calories: ~140
- Protein: 1g
- Carbohydrates: 18g
- Fat: 7g
- Fiber: 0.5g
Prep Time: 10 minutes | Cook Time: 10 minutes | Servings: 24 cookies
Final Thoughts: Your New Signature Cookie Awaits
And there you have it! From a nervous Thanksgiving host to your trusted kitchen guide, I’ve shared my ultimate cookie secret with you. These White Chocolate Cranberry Bliss Cookies are more than just a recipe; they’re an invitation to create your own moments of joy. Whether you’re baking for a celebration, a quiet afternoon, or someone who needs a little pick-me-up, this recipe is your ticket to something truly special.
So don’t just save this for the holidays. Whip up a batch anytime you need a reminder that life’s simplest pleasures—butter, sugar, and a little bit of love—are often the sweetest. I have a feeling this recipe is about to become a beloved staple in your home, just as it is in mine.
Now, I’d love to hear from you! Did you add a twist with orange zest or nuts? Tag me on social media @[Your Blog Name] so I can see your beautiful creations. Happy baking!


