A Tasty Twist on Tradition: Sugar-Free Banana Pudding
Welcome back to my cozy kitchen, dear foodies! Today, we’re diving into a delightful dessert that’s certain to bring smiles to faces and warmth to hearts: Banana Pudding! But wait—this isn’t just any banana pudding; it’s a sugar-free version that still packs all the creamy, dreamy flavor you adore. Yes, you heard that right! We’re talking about a dish that marries nostalgia and health without sacrificing taste.
Banana pudding has always held a special place in my heart. Who can forget that first spoonful of velvety custard, perfectly ripe bananas, and layers of crisp vanilla wafers? It’s a dessert that takes me back to sunny afternoons spent at my grandmother’s kitchen table, listening to the cheerful clinking of spoons and the sweet laughter of family. Even as a child, I was drawn to the simplicity of its ingredients—the kind that whispered, "homemade love."
Today, I want to recreate that feeling for you—and even better, I’ll show you how to whip up a sugar-free version that’s just as dreamy! Whether you’re hosting a gathering, celebrating a birthday, or simply looking for a special treat to brighten your day, this sugar-free banana pudding recipe is here to make life a little sweeter (and healthier).
So, grab your apron, roll up your sleeves, and let’s get cookin’! I promise this recipe is simple, fun, and bursting with flavor. Plus, you’ll be proud to serve it to both your loved ones and yourself. Are you ready? Let’s go!
Personal Story
Growing up, one of my favorite summer traditions was helping my grandma make her famous banana pudding. I can still picture the two of us standing side by side in the kitchen, with her expertly slicing bananas and me smashing the vanilla wafers into the bowl with my tiny little hands. It was a beautiful mess! We would always sneak spoonfuls of the creamy custard before layering it all together, giggling at our little chef’s secret.
One particular afternoon stands out to me. Grandma, being the tropical nut she was, decided to surprise us all with a twist: she added a splash of coconut extract and some toasted coconut flakes on top. The entire family raved about it, and I remember wanting to recreate that perfect dessert every summer. So, when I started my healthy eating journey, I realized I couldn’t leave this beloved tradition behind. Why not adapt Grandma’s recipe to be sugar-free, so we could enjoy it guilt-free? That started my pursuit to blend nostalgia with nutrition. Now, I get to share this version with you, hoping it becomes a cherished memory in your home too!
Ingredients
Let’s gather our ingredients! For this sugar-free banana pudding, you’ll need the following:
-
Ripe Bananas: Choose bananas that have plenty of spots! The riper they are, the sweeter and more flavorful your pudding will be. If you’re looking for a twist, consider using plantains for a unique flavor!
-
Unsweetened Almond Milk (or any milk alternative): This will be the base for your pudding. Unsweetened almond milk keeps it low-calorie; however, you can substitute it with coconut milk for a richer flavor, or oat milk if you prefer a creamier texture.
-
Sugar-Free Instant Vanilla Pudding Mix: This is the magic ingredient that thickens and sweetens your pudding without the sugar. If you’re looking for a made-from-scratch option, you can combine cornstarch and a sugar substitute like Monk fruit for a healthier alternative.
-
Vanilla Extract: A dash of this will enhance all those beautiful flavors. Don’t skip it! If you’re feeling adventurous, try using almond extract for a different dimension.
-
Whipped Topping (sugar-free if possible): We’ll use this to lighten the mixture and add some fluffiness. You can substitute with homemade coconut whipped cream for a dairy-free version, or simply whip some heavy cream if you’re okay with the sugar.
-
Vanilla Wafers (optional): While traditional, you can opt for sugar-free wafers, or use crushed graham crackers for a twist.
The beauty of this recipe is that many ingredients can be swapped to suit dietary preferences while maintaining the heartwarming essence of banana pudding. Let’s get into creating this nostalgic treat together!
Step-by-Step Instructions
1. Prepare Your Ingredients
Start by gathering everything you need, (it’s like a mini-kitchen rally!). Make sure your bananas are ripe and ready, and if you haven’t done so already, grab your mixing bowls, spatulas, and those adorable little pudding cups if you’re feeling fancy!
2. Whisk Together the Pudding Base
In a large mixing bowl, pour 2 cups of unsweetened almond milk and add in the sugar-free instant vanilla pudding mix. Whisk vigorously until it thickens (about 2-3 minutes). Pro tip: Use a whisk instead of a spoon! It helps incorporate air and gives your pudding a fluffy texture.
3. Add the Vanilla Extract
Once your pudding has thickened, gently fold in 1 teaspoon of vanilla extract. This is where the magic happens! The aroma alone is enough to get your taste buds dancing, and it’s a simple step that amplifies the taste.
4. Mix in the Whipped Topping
Now, for that fluffy texture we crave, fold in about 1 cup of your sugar-free whipped topping. Be gentle here! You don’t want to overmix; just fold until smooth and creamy. It should look luscious and inviting!
5. Layer It Up
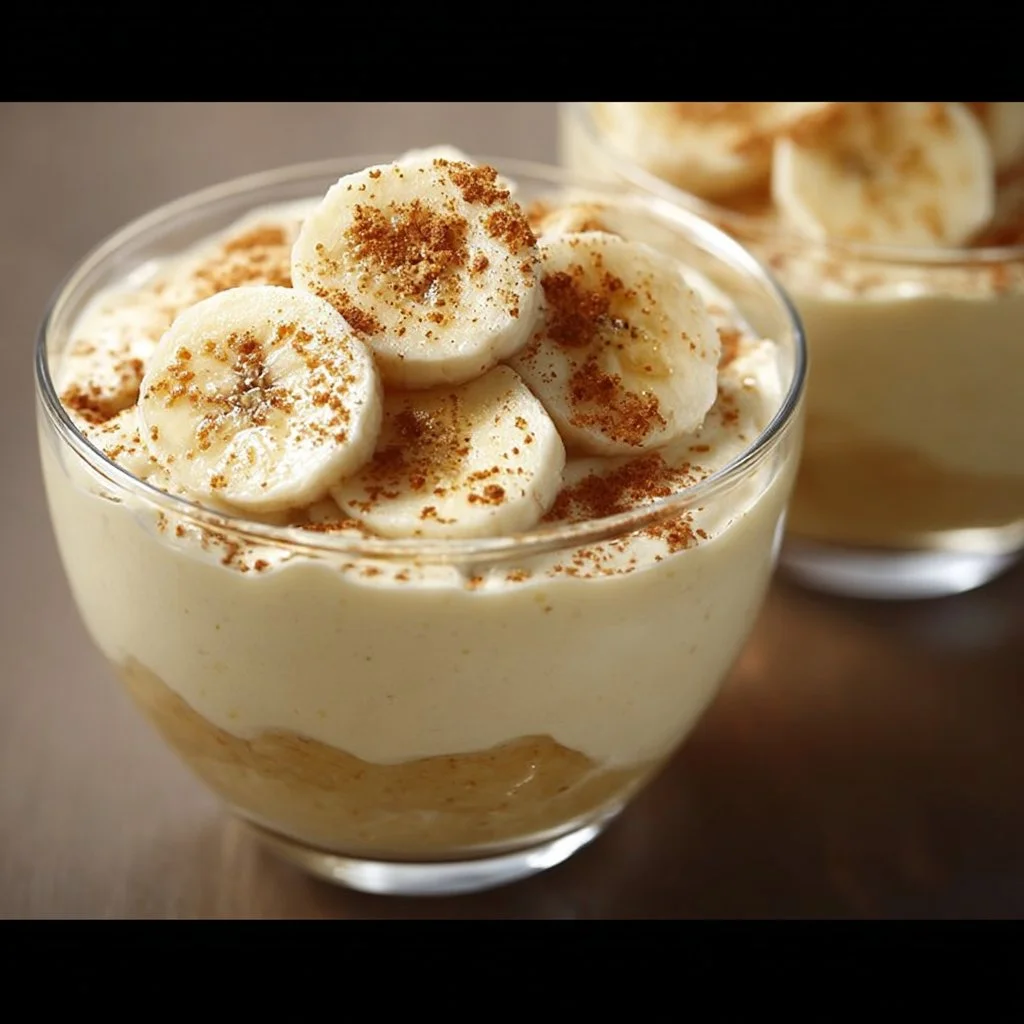
Now comes the fun part! In a trifle bowl or individual cups, start layering your luscious pudding. Begin with a layer of your pudding mixture, then add a layer of sliced bananas, and finish with a layer of vanilla wafers. Repeat until you’re out of ingredients. Get creative here, making sure to end with a delightful layer of pudding topped with a sprinkle of crushed vanilla wafers for a touch of crunch!
6. Chill Out
Cover the pudding with plastic wrap and let it chill in the refrigerator for at least 2 hours. Chilling is essential; it allows all those dreamy flavors to meld together, and trust me, you’ll want to give it this time!
7. Serve and Enjoy!
When you’re ready to serve, you can garnish with additional banana slices, a dollop of whipped topping, or a dash of cinnamon. Oh, and don’t forget the smiles! Share your delightful creation with friends and family and watch as they discover that sugar-free can be just as indulgent.
Serving Suggestions
This banana pudding is stunning served in clear trifle bowls for a beautiful presentation! Each layer tells a story, and it’s so pleasing to the eye. You could also opt for individual serving cups for a cute touch. Top each cup with a sprig of mint or a chocolate drizzle for flair. Remember, presentation matters—it adds to the experience!
Recipe Variations
Here are a few fun twists you can try to make this recipe your own:
-
Chocolate Lover’s Dream: You can add cocoa powder to the pudding mix for a chocolate banana pudding. Just 2 tablespoons will add a divinely rich flavor!
-
Nutty Banana: Consider folding in some crushed almonds or walnuts into the pudding for added texture and a nutty flavor. Delicious!
-
Caramel Swirl: Drizzle some sugar-free caramel sauce between the layers for an extra layer of sweetness without guilt.
-
Fruit Fusion: Swap some banana slices for strawberries or even peaches for a seasonal twist. You’ll get a beautiful contrast in flavor and color!
-
Dairy-Free Kick: If you want a completely dairy-free experience, swap out everything for plant-based products! Coconut cream is a fantastic alternative for a luxuriously rich pudding.
Chef’s Notes
This banana pudding recipe has evolved since the day I first learned it in Grandma’s kitchen. As I explored healthier alternatives, I discovered that sugar substitutes can work beautifully. The main goal was to retain that signature creaminess and nostalgic taste while making it fit within my healthier lifestyle—who knew it could be this easy?
Don’t take yourself too seriously in the kitchen. Embrace the fun! I once accidentally grabbed a can of coconut milk instead of almond milk for a recipe. I was mortified until I tasted it. The richness was divine! Now, it’s a routine twist I include regularly. Cooking is all about experimenting, enjoying, and creating delicious memories.
FAQs and Troubleshooting
-
Why is my pudding not thickening?
If your pudding mixture isn’t thickening, ensure you’re using cold milk and whisking vigorously. If all else fails, you can add a bit more instant pudding mix to thicken it up. -
How long can I store the banana pudding?
It’s best enjoyed within 2-3 days. Bananas tend to brown, so it’s best to make it a day ahead for optimal freshness. -
Can I use fresh vanilla beans instead of extract?
Absolutely! Fresh vanilla beans will add a fragrant and rich flavor. One bean is typically equivalent to 1-2 teaspoons of extract. Just scrape out the seeds and incorporate them into your pudding. -
What if I want to prepare it in advance?
You can assemble the pudding 24 hours in advance. Just make sure to keep it covered in the fridge until you’re ready to serve for the best results.
Nutritional Info
Although I’m not a nutritionist, I believe in being mindful of what you put into your body. Based on typical ingredients used in this recipe, here’s a rough estimate for one serving (1/6 of the recipe):
- Calories: 180
- Total Fat: 5g
- Carbohydrates: 27g
- Fiber: 2g
- Sugar: 4g (from bananas and other natural sources)
Remember, these numbers can vary based on the exact products you use, so always check the packaging if you’re counting macros.
And there you have it! A rich, comforting, and sugar-free banana pudding that will bring joy to your table. I hope you love making this dessert as much as I do, and may it become a delicious part of your family’s traditions too. Happy cooking! 🍌✨
Print
Sugar-Free Banana Pudding
- Total Time: 120 minutes
- Yield: 6 servings 1x
- Diet: Vegetarian
Description
A delightful sugar-free version of the classic banana pudding that maintains its creamy, dreamy flavor without the guilt.
Ingredients
- 4 ripe Bananas
- 2 cups Unsweetened Almond Milk
- 1 package Sugar-Free Instant Vanilla Pudding Mix
- 1 teaspoon Vanilla Extract
- 1 cup Sugar-Free Whipped Topping
- Vanilla Wafers or crushed graham crackers (optional)
Instructions
- Prepare your ingredients by gathering everything needed.
- Whisk together 2 cups of Unsweetened Almond Milk and the pudding mix in a large mixing bowl until thickened.
- Add in 1 teaspoon of Vanilla Extract and fold gently.
- Mix in 1 cup of Sugar-Free Whipped Topping until smooth.
- Layer pudding, sliced bananas, and wafers in bowls, repeating until ingredients are used.
- Chill covered in the refrigerator for at least 120 minutes.
- Serve and enjoy with additional toppings if desired.
Notes
Feel free to experiment with different plant-based alternatives or add-ins for a unique twist.
- Prep Time: 15 minutes
- Cook Time: 0 minutes
- Category: Dessert
- Method: No-Cook
- Cuisine: American
Nutrition
- Serving Size: 1 serving
- Calories: 180
- Sugar: 4g
- Sodium: 100mg
- Fat: 5g
- Saturated Fat: 1g
- Unsaturated Fat: 3g
- Trans Fat: 0g
- Carbohydrates: 27g
- Fiber: 2g
- Protein: 2g
- Cholesterol: 0mg
Keywords: banana pudding, sugar-free dessert, healthy pudding