
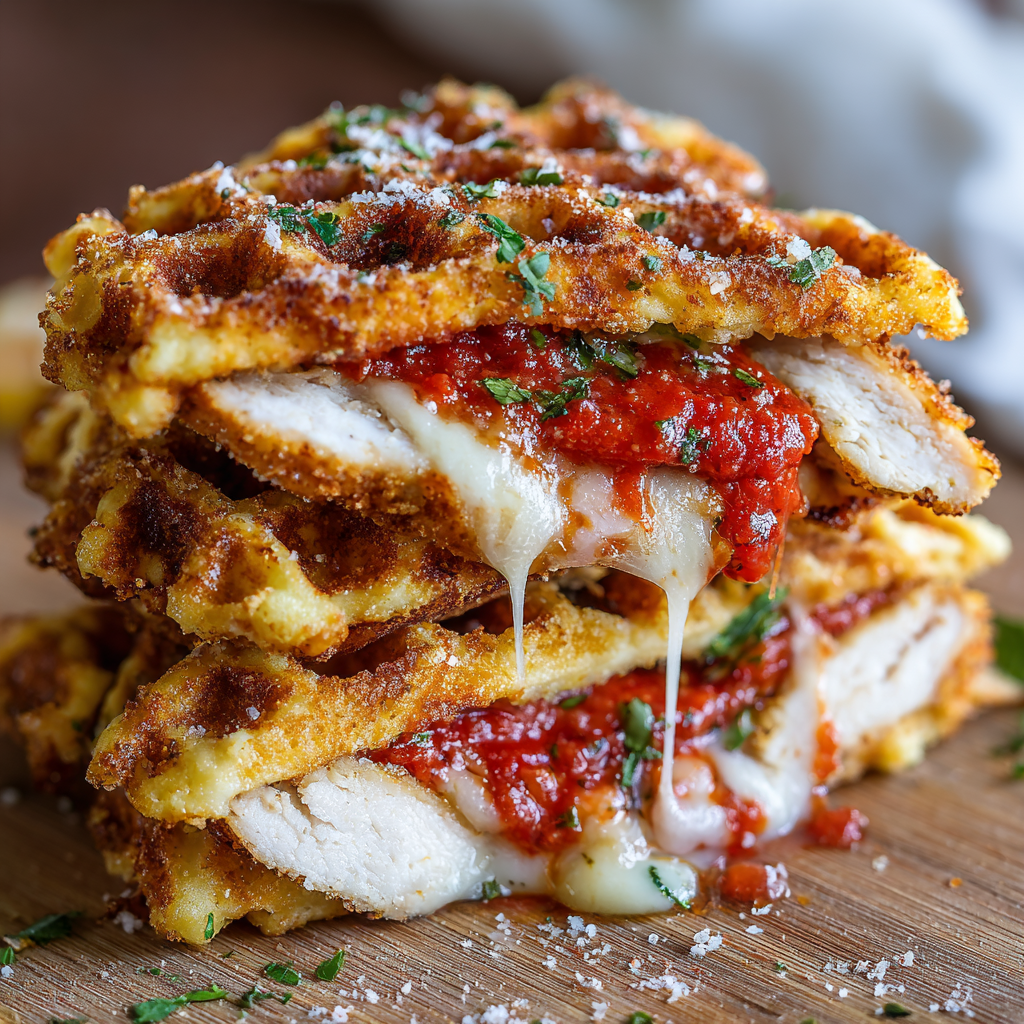
Stuffed Chicken Parm Waffle Pockets: Your New Comfort Food Obsession
Hey there, kitchen friends! Olivia here, waving from my flour-dusted countertop. Can you smell that? It’s the scent of crispy golden breadcrumbs, bubbling marinara, and melty mozzarella doing a happy dance in your waffle iron. If your heart just did a little leap (mine too!), you’re absolutely in the right place. Today, we’re throwing tradition out the window and giving classic Chicken Parm a wildly fun, handheld makeover. Forget preheating the oven for hours—your trusty waffle maker is about to become the MVP of your weeknight dinners. Imagine: tender chicken stuffed with garlicky marinara and oozy cheese, pressed into crispy, golden-edged pockets of pure joy. It’s the soul-warming hug of Italian comfort food, reinvented as a crunchy, dippable delight perfect for game nights, chaotic family dinners, or when you just need a *really* good food win. Whether you’re a waffle-iron newbie or a seasoned pro, I promise this recipe is faster than ordering pizza and way more satisfying. Ready to make some kitchen magic? Let’s grab those aprons!
How a Waffle Iron Saved My Dinner Party (True Story!)
Picture this: It’s pouring rain, my kitchen’s overflowing with hungry friends, and my original plan (fancy baked chicken parm) is tragically undercooked. Panic mode! Then I spotted my dusty waffle iron—the one I’d only used for Sunday brunch. In a “nothing left to lose” moment, I grabbed the chicken cutlets, slapped on some sauce and cheese, folded them like desperate little tacos, and shoved them into the waffle maker. Six minutes later… crispy perfection. The first bite? Silence. Then an actual round of applause. My friend Marco dubbed them “Parm Pockets,” and they vanished faster than my willpower near warm bread. That happy accident became our favorite tradition. Now, every time it rains, someone inevitably texts: “Waffle Parm night?” It’s proof that the best kitchen memories aren’t Pinterest-perfect—they’re messy, improvisational, and shared with people who cheer when you turn a near-disaster into pure deliciousness.
Gather Your Flavor Squad
Here’s what you’ll need to make 2 glorious pockets (double it for leftovers—trust me!):
-
- 2 large boneless, skinless chicken breasts – The canvas! Pick plump ones for easy stuffing. Chef Tip: Freeze for 15 mins before slicing for cleaner butterflying.
- ½ cup shredded mozzarella – Low-moisture works best (less leakage!). Sub: Provolone or fontina for extra tang.
- ¼ cup marinara sauce – Use a THICK, robust jarred sauce or homemade. Key: Avoid watery versions! Drain excess liquid if needed.
- ½ cup flour – All-purpose is perfect. GF Swap: Almond flour or gluten-free panko blend works great.
- 1 large egg, beaten – Our “glue” for the breadcrumb armor. Insight: Add a splash of milk for easier dipping.
1 cup Italian breadcrumbs or panko – Italian adds herbs; panko = extra crunch. Hack: Blitz stale bread in a food processor!
¼ cup grated Parmesan – The flavor booster! Chef Secret: Mix it right into the breadcrumbs.
Salt & pepper, to taste – Season every layer! Pro Move: Add garlic powder to the breadcrumbs.
Cooking spray or oil – Nonstick ESSENTIAL. Pick: Avocado oil spray handles high heat best.
Extra marinara for dipping (optional) – Because more sauce = more joy.
Let’s Build Those Crispy Dream Pockets!
Step 1: Flatten the Chicken
Butterfly each breast: Slice horizontally through the thickest part, but don’t cut all the way through—open it like a book. Place between plastic wrap or parchment. Pound gently with a meat mallet, rolling pin, or even a heavy skillet until ¼-inch thick. Chef Hack: Use the bottom of a glass if you’re tool-less! Goal: Even thickness = even cooking.
Step 2: Fill & Fold Like a Pro
Lay pounded chicken flat. On ONE HALF, spoon 2 tbsp marinara, then top with ¼ cup mozzarella (keep it ½-inch from edges!). Fold the bare half over the filling. SECURE: Press edges HARD with fingers. Slide 2-3 toothpicks through the seam like tiny stitches. Panic Preventer: Too much filling? Scoop some out. Leaks = waffle iron mess!
Step 3: Breadcrumb Bootcamp (The Fun Part!)
Set up your breading station: 1) Flour (seasoned with salt/pepper), 2) Beaten egg, 3) Breadcrumbs mixed with Parmesan (plus ½ tsp garlic powder if you’re fancy). Dredge each pocket: Flour (shake off excess!) → Egg (coat evenly) → Breadcrumbs (press firmly!). Golden Rule: Use one hand for dry steps, one for wet to avoid “clown fingers.”
Step 4: Waffle Iron Victory Lap
Preheat your waffle iron to MEDIUM-HIGH (crucial for crispness without burning!). Spray BOTH top and bottom plates generously with oil. Place one pocket in the center. Close LIGHTLY—don’t squash it! Cook 6-8 mins until deep golden brown and chicken hits 165°F internally. Watch Closely: All waffle irons vary! Peek at 5 mins. Steam = good; smoke = bad! Repeat for pocket #2.
Step 5: Rest & Devour
Transfer pockets to a wire rack (keeps them crispy!). WAIT 3 mins—this lets cheese settle so it doesn’t erupt like a volcano when sliced. Remove toothpicks! Slice diagonally, dunk in warm marinara, and try not to swoon.
Plate It Like a Party
Slice those beauties on the diagonal to show off the cheesy core! Pile them high on a rustic board or colorful plate. Pour warm marinara into a tiny ramekin for dunking—add a sprinkle of fresh basil or parsley on top for a pop of green. Keep it casual finger food style, or fancy it up with a quick arugula salad tossed in lemon vinaigrette. Perfect for: Netflix binges, picnic baskets (they travel shockingly well!), or impressing your in-laws with zero stress.
The Genius of Waffle-Iron Cooking
Who knew a waffle iron could be the secret weapon in your kitchen? Beyond pancakes and waffles, this versatile appliance is a game-changer for crispy, quick-cooked meals. The high, direct heat ensures a golden crust while locking in juiciness—perfect for stuffed chicken parm pockets!
Why the Waffle Iron Works
-
Speed: Unlike oven-baked chicken parm (which can take 30+ minutes), the waffle iron cooks in 6-8 minutes flat.
-
Texture: The press creates deep ridges, maximizing crispy surface area—every bite has crunch.
-
No-Fuss Cleanup: Unlike frying, there’s no splattered oil. Just a quick wipe-down!
Waffle Iron Hacks for Savory Success
-
Preheat Well – A hot iron = better sear. Test with a drop of water—it should sizzle.
-
Grease Generously – Spray both plates to prevent sticking (avocado oil spray has a high smoke point).
-
Don’t Overcrowd – One pocket at a time ensures even pressure and crispness.
Beyond Chicken Parm: Other Waffle-Iron Savory Ideas
-
Grilled Cheese Waffles – Press sandwiches for ultra-crispy edges.
-
Hash Brown Patties – Shredded potatoes + cheese, pressed until golden.
-
Falafel Waffles – Crispy outside, tender inside—no frying needed!
The Art of Stuffing & Sealing
The magic of these pockets lies in their gooey, saucy center—but leaks can turn triumph into tragedy. Here’s how to master the fold.
Pounding the Chicken: Thin is In
-
Butterfly & Pound – Slice horizontally, then flatten to ¼-inch thickness for even cooking.
-
Pro Tip: Freeze chicken for 15 minutes before slicing for cleaner cuts.
Filling: The Goldilocks Rule
-
Too Little = Dry pockets. Too Much = Cheese explosion. Just Right = 2 tbsp sauce + ¼ cup cheese.
-
Avoid Watery Sauce – Thick marinara (or drained ricotta mix) prevents sogginess.
Sealing Like a Pro
-
Fold & Press – Crimp edges firmly (like a calzone).
-
Toothpick Sutures – Secure with 2-3 picks (remove after cooking!).
-
Double-Breading – Flour → Egg → Breadcrumbs creates a leak-proof barrier.
Troubleshooting Leaks
-
Problem: Cheese oozing out? → Press edges harder or trim excess filling.
-
Emergency Fix: Scrape the waffle iron while warm to avoid cement-like cheese buildup.
Dipping, Drizzling & Next-Level Serving Ideas
These pockets are delicious solo, but elevate them with creative pairings!
Sauces Beyond Marinara
-
Spicy Ranch – Mix ranch with hot sauce or chipotle.
-
Garlic Alfredo – Creamy, rich contrast to the crunch.
-
Balsamic Glaze – Sweet-tangy drizzle for gourmet flair.
Sidekick Stars
-
Arugula Salad – Toss with lemon vinaigrette to cut richness.
-
Garlic Bread Twists – Because carbs love company.
-
Roasted Veggies – Zucchini or bell peppers for a lighter balance.
Leftover Reinventions
-
Parm Pocket Sliders – Halve and tuck into mini buns with extra sauce.
-
Chopped Salad Topper – Slice cold pockets over greens for a protein boost.
-
Breakfast Hash – Dice, pan-fry with potatoes, and top with a fried egg.
Mix It Up, Chef’s Choice!
- Pepperoni Pizza Pocket: Add 10 sliced pepperoni + 1 tbsp chopped olives inside. Dip in ranch!
- Spinach & Artichoke Twist: Swap marinara for 2 tbsp cream cheese mixed with chopped spinach, artichokes, and garlic.
- Spicy ‘Nduja Rumble: Stir 1 tsp spicy ‘nduja paste or Calabrian chili into the marinara filling. Fiery heaven!
- Gluten-Free/Crispy AF: Use GF panko + almond flour. Add 1 tbsp nutritional yeast to crumbs for cheesy depth.
- Turkey or Eggplant Swap: Chicken not your jam? Use thin turkey cutlets or pre-grilled eggplant slices (pat them DRY first!).
Olivia’s Kitchen Confessions
Okay, real talk: My first test batch? Filling eruption. Cheese fused my waffle iron shut like culinary superglue. Cue the panic scraping! Lesson learned: DON’T overstuff, and SEAL those edges like you’re mad at them. Now, I let my kids do the toothpick sealing—they treat it like edible surgery. Over time, I’ve added the Parmesan to the crumbs (game-changer!) and learned that slightly thicker sauce prevents leaks. These pockets also freeze beautifully! Cool completely, wrap in foil, freeze. Reheat in a 400°F oven until crisp (about 15 mins). They’ve become my ultimate “look I cooked!” hack for potlucks. Pro tip: A drizzle of hot honey post-waffle? Life-altering.
Your Burning Questions, Answered
Q: My filling leaked everywhere! Help?!
A: Three common culprits: 1) Overstuffing (stick to ¼ cup filling max!), 2) Sauce too thin (drain excess liquid!), 3) Poor sealing (PRESS edges hard + use toothpicks). If minor leaks happen, scrape the iron while still warm with a wooden spatula.
Q: Can I use frozen chicken?
A: Thaw completely first! Frozen chicken won’t pound thin evenly and will cook unevenly, risking raw centers.
Q: Waffle iron won’t get crispy?
A: Ensure it’s preheated HOT (test with a drop of water—it should sizzle!). Also, press pockets GENTLY—squashing = steam = sog. Lastly, spray plates AGAIN if pockets stick.
Q: Toothpicks in the waffle iron? Safe?
A: Yes, if they’re fully inside! Wooden toothpicks won’t damage nonstick plates. Just REMEMBER to pull them out before serving (I leave one sticking out as a reminder!).

Stuffed Chicken Parm Waffle Pockets
- Total Time: ~25 mins
Description
Waffle iron + chicken parmesan = dinner joy. These golden, crunchy pockets are stuffed with melty mozzarella and garlicky marinara, sealed with breadcrumbs, and crisped to perfection in under 10 minutes. Forget forks—these are handheld happiness. Ideal for game night, weeknight wins, or impressing your inner circle with zero oven drama.
Ingredients
-
2 boneless, skinless chicken breasts
-
½ cup shredded mozzarella
-
¼ cup thick marinara sauce
-
½ cup flour
-
1 large egg, beaten
-
1 cup Italian breadcrumbs or panko
-
¼ cup grated Parmesan
-
Salt & pepper to taste
-
Cooking spray or avocado oil
-
Extra marinara, for dipping
Flavor Twists:
-
Add pepperoni or spinach inside
-
Use turkey cutlets or grilled eggplant
-
Drizzle with hot honey for sweet heat
Instructions
-
Flatten Chicken: Butterfly and pound chicken to ¼” thick.
-
Fill & Seal: Add sauce and cheese to one side. Fold over and secure edges with toothpicks.
-
Bread It: Dredge in seasoned flour → egg → breadcrumbs + Parmesan.
-
Waffle It: Preheat waffle iron to medium-high. Spray plates. Cook pocket 6–8 mins until golden and 165°F inside.
-
Rest & Slice: Let sit 3 mins before cutting. Remove toothpicks. Serve hot with marinara.
Notes
-
Use thick sauce to avoid leaks
-
Don’t overstuff—¼ cup filling max
-
Spray iron generously for crisp + easy release
- Prep Time: 15 mins
- Cook Time: 8 mins
Nutrition
- Calories: 420 cal Per Serving
- Fat: 20g
- Carbohydrates: 22g
- Protein: 38g
Nutritional Nibbles (Per Pocket)
Calories: 420 | Protein: 38g | Carbs: 22g | Fat: 20g
Note: Values are estimates. Using low-fat cheese or less oil reduces fat content.
Final Thoughts: Why This Recipe Deserves a Spot in Your Rotation
-
Speed: Faster than delivery pizza, fancier than freezer meals.
-
Fun Factor: Kids love assembling them, adults love eating them.
-
Versatility: Swap fillings, sauces, or proteins—endless combos!
This isn’t just a recipe; it’s a kitchen adventure waiting to happen. Whether you’re salvaging a dinner disaster (like Olivia’s origin story!) or craving crispy-cheesy comfort, these pockets deliver. So dust off that waffle iron—it’s time to press your way to dinnertime glory.


