
The Donut That Dreams Are Made Of: Strawberry Cheesecake Stuffed!
Hey there, friend! Come on in, grab an apron, and let’s get a little messy. Is there anything in the world that smells more like pure, unadulterated joy than something frying in a hot pan? That sweet, toasty scent that floats through the house and magically gathers everyone in the kitchen? Today, we’re making magic. We’re turning a humble can of biscuits into the most spectacular, show-stopping, conversation-halting treat you’ve ever tasted: Strawberry Cheesecake Stuffed Donuts.
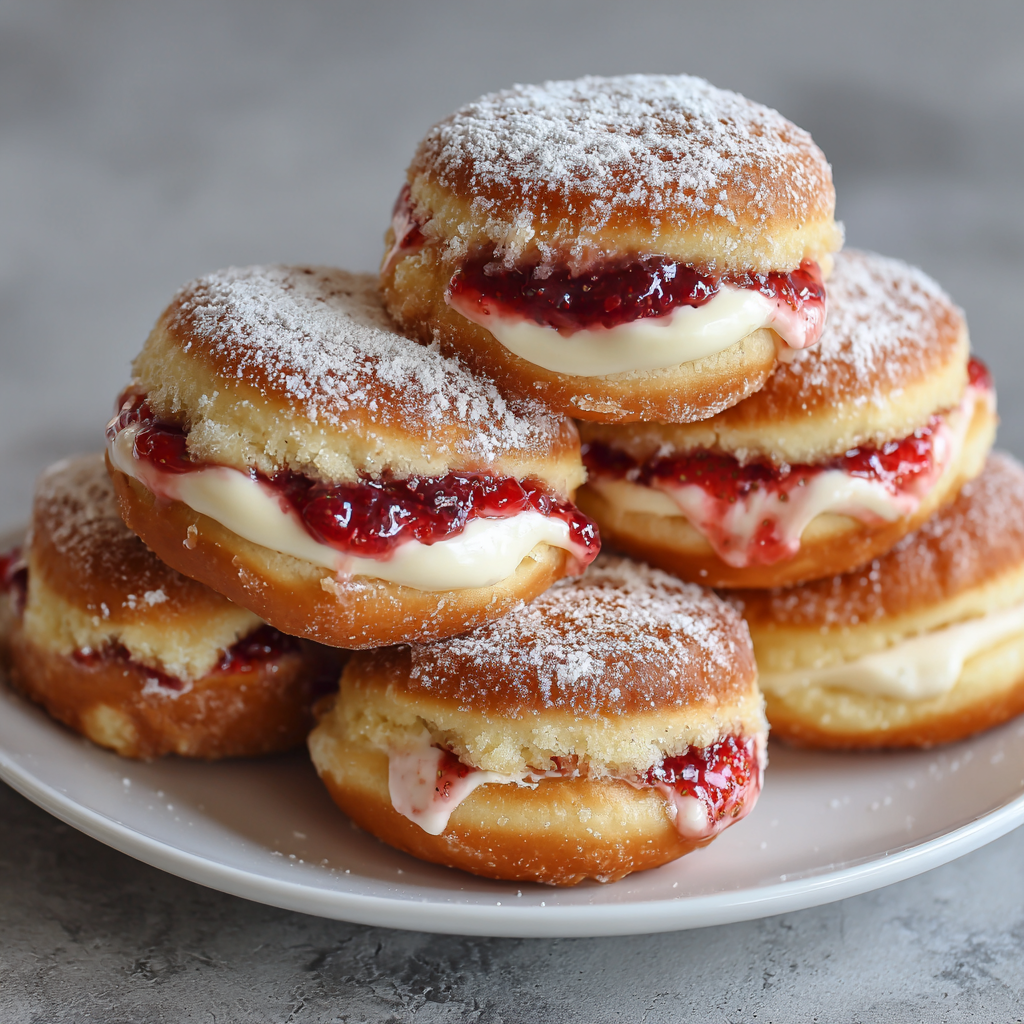
Imagine this: a golden-brown, crispy-on-the-outside, cloud-soft-on-the-inside donut. You pick it up, still warm, and take that first bite. Not just a bite into dough, but a bite into a hidden pocket of creamy, tangy cheesecake filling and a burst of sweet, fruity strawberry jam. It’s a surprise party in your mouth, and everyone’s invited. This isn’t just a dessert; it’s an experience. It’s the thing you make on a lazy Sunday morning that turns into a yearly tradition. It’s the “wow” you bring to a brunch that makes you a legend. And the best part? You don’t need to be a pastry chef or have hours to spare. We’re using a brilliant shortcut (refrigerated biscuit dough, you beautiful genius) and focusing all our energy on the fun part: the filling and the frying. So, are you ready to create some kitchen magic and probably become someone’s favorite person? Let’s do this.
My Grandma’s Apron and the Magic of “Fancy” Donuts
This recipe always takes me back to my grandma’s linoleum-floored kitchen. She was a wizard with simple ingredients. One rainy afternoon, when I was about seven and complaining of boredom, she pulled out a can of biscuits. My eyes went wide – we only had those with gravy! She smiled her secret-keeping smile, fried them in a shallow skillet of oil, and rolled them in cinnamon sugar. To my mind, it was the fanciest, most exotic donut ever created. The kitchen filled with that incredible smell, and for that hour, we were in our own warm, sugary world. These Strawberry Cheesecake Stuffed Donuts are my grown-up, extra-indulgent homage to her. It’s that same magical transformation of the ordinary into the extraordinary, but now with a creamy, fruity heart. It’s about creating that same sense of wonder, whether it’s for yourself, your kids, or your friends. Food memories are the best kind, and I have a feeling you’re about to make one.
Gathering Your Treasure: What You’ll Need
Here’s the beautiful lineup. Simple, accessible, and about to become something incredible. Let’s chat about each one:
- 1 can (8 count) refrigerated biscuit dough: Our golden ticket! These flaky, layered biscuits fry up into the most perfect, airy donut base. No yeast, no rising time—just instant pillowy potential. I like the classic buttermilk or “grands” flaky layers variety.
- 4 oz cream cheese, softened: Key word: softened! Leave it on the counter for a good 30-60 minutes before you start. Room temp cream cheese blends into a silky-smooth filling with zero lumps. Trying to beat it cold is a workout for your arm and your patience.
- 1/4 cup powdered sugar: Also called confectioners’ sugar. It dissolves instantly into the cream cheese, sweetening it perfectly without any grit. It also helps thicken the filling a touch.
- 1/2 tsp vanilla extract: The flavor enhancer. It rounds out the sharpness of the cream cheese and adds that warm, classic bakery note. Use pure vanilla if you have it!
- 1/4 cup strawberry jam or preserves: Here’s where you can shine. Use a good-quality jam you love. Preserves have little bits of fruit for texture, while jam is smoother. Either is delicious! Feel free to swap for raspberry, blueberry, or even a citrus marmalade.
- Oil for frying: You’ll need about 1-2 inches in your pot. A neutral oil with a high smoke point is best. Canola, vegetable, or peanut oil are all great choices. They’ll fry the donuts cleanly without imparting any odd flavors.
- Extra powdered sugar for dusting (optional): The snowy, pretty finish that makes them look (and taste) just a bit more special.
Let’s Get Frying: Your Step-by-Step Guide to Donut Bliss
Okay, team. Aprons on, hair tied back, and let’s get into the rhythm of creating. Follow these steps, and you’ll be a donut-stuffing pro in no time.
Step 1: Make the Dreamy Filling. In a medium bowl, plop in your softened cream cheese, powdered sugar, and vanilla. Grab a hand mixer (or a sturdy whisk and some determination) and beat it all together on medium speed until it’s completely smooth, creamy, and lump-free. This should only take a minute or two. Give it a taste – be your own quality control! Set this bowl aside. Chef’s Hack: If you want to pipe the filling later for neatness, scrape it into a plastic baggie, snip off a corner, and you’ve got a makeshift piping bag. Otherwise, a spoon works perfectly!
Step 2: Flatten and Prep the Dough. Pop open that can of biscuits (the best sound in the world, right?). Separate the rounds. On a lightly floured surface, use your fingers or a rolling pin to gently press and stretch each biscuit into a circle about ¼-inch thick. Don’t stress about perfection—we’re not aiming for a perfect circle here! Just a nice, even, flat round that’s about 4-5 inches across. This gives us plenty of room for our filling.
Step 3: The Grand Stuffing Operation. This is the fun part! Lay out your flattened dough rounds. Spoon about 1 ½ teaspoons of strawberry jam into the center of each round. Then, add about 1 tablespoon of the cheesecake filling right on top of the jam. Now, imagine the dough is a little taco. Carefully fold it over the filling to create a half-moon shape. Here’s the MOST IMPORTANT STEP: Pinch the edges together incredibly tightly. Really seal it well, then go back and crimp it with the tines of a fork. We’re creating a watertight (or jam-tight!) seal so our delicious filling doesn’t escape during its hot oil bath. Take your time here.
Step 4: Fry to Golden Perfection. In a heavy-bottomed pot or deep skillet, heat 1-2 inches of oil over medium heat until it reaches 350°F (175°C). If you don’t have a thermometer, test it by dropping a tiny piece of dough in. If it sizzles immediately and rises to the top, you’re good to go. Carefully slide in 2-3 donuts at a time—don’t crowd the pan! Fry for 2-3 minutes on one side until deep golden brown, then gently flip and fry for another 2 minutes. They cook fast, so keep an eye on them. That gorgeous color is your guide.
Step 5: Drain and Glam Up. Use a slotted spoon or spider strainer to lift the donuts out of the oil. Let the excess oil drip off for a second, then transfer them to a plate or baking sheet lined with paper towels. Let them cool for just a minute—they’re molten inside! While still warm, you can dust them generously with that extra powdered sugar. The warmth helps the sugar stick in a lovely, snowy layer.
How to Serve These Little Pieces of Heaven
Serve these beauties warm! The filling will be luxuriously creamy and the jam pleasantly soft. Pile them high on a rustic wooden board or a pretty plate. I love serving them with mugs of strong coffee, glasses of cold milk, or even little cups of espresso for dipping. They are messy, joyful, and meant to be eaten with your hands (napkins mandatory!). The ooze of filling is part of the charm, so lean in and enjoy every single bite.
Mix It Up! Fun Flavor Twists
Once you master the basic technique, the flavor world is your oyster! Try these delicious spins:
- Lemon Blueberry Cheesecake: Use blueberry jam and add 1 tsp of lemon zest to the cream cheese filling. So bright and fresh!
- Chocolate Hazelnut: Swap the jam for a spoonful of chocolate-hazelnut spread (like Nutella). Dust with cocoa powder instead of powdered sugar.
- Apple Pie: Use a thick apple butter or finely chopped cooked apples with a pinch of cinnamon in the filling. Add a pinch of cinnamon to the sugar for dusting.
- Glazed Instead of Dusted: Whisk together 1 cup powdered sugar with 2-3 tbsp milk and 1/2 tsp vanilla for a simple glaze. Dip the warm donuts right in.
- Baked Option: Want to avoid frying? Brush stuffed donuts with melted butter, place on a parchment-lined sheet, and bake at 375°F for 12-15 minutes until puffed and golden. They’ll be more like pastries, but still delicious!
Olivia’s Chef Notes & Kitchen Confessions
This recipe is my ultimate “cheat code” for impressing people. I’ve made it probably fifty times, and it never fails to get gasps. Over time, I’ve learned a few things: First, sealing is EVERYTHING. A poorly sealed donut is a leaky, messy (but still tasty) disaster. Second, don’t be afraid of the oil temperature. If it’s too low, the donuts absorb oil and get greasy. Too high, they brown before the inside cooks. 350°F is the sweet spot. My funniest kitchen fail? The first time I made these, I got so excited I overstuffed them to cartoonish levels. They burst open in the oil like little volcanoes, creating a delicious but chaotic strawberry-cheesecake lava flow in my frying pot. Lesson learned: a heaping tablespoon of filling is plenty! These donuts are best eaten the day they’re made, but honestly, they’ve never lasted more than an hour in my house.
Your Questions, Answered!
Q: My filling keeps leaking out while frying! What am I doing wrong?
A: This is almost always a sealing issue. Make sure you’re pinching the dough edges together very firmly, then double-seal by pressing with a fork. Also, don’t overfill! A tablespoon of cream cheese mix and 1.5 tsp of jam is perfect. Finally, ensure your oil is hot enough (350°F) so the outside sears and sets quickly, locking the filling in.
Q: Can I make these ahead of time?
A: You can prep the components ahead! Make the cream cheese filling and keep it covered in the fridge for up to 2 days. Let it come to room temperature before using. You can also flatten and fill the donuts, place them on a baking sheet, and refrigerate for an hour before frying. Fry just before serving for the best texture.
Q: What’s the best way to dispose of the used frying oil?
A> Great question! Never pour it down the drain. Let the oil cool completely in the pot. Then, carefully pour it back into the original bottle or another sealable container (like an old milk jug) and throw it in the trash. Some municipalities have oil recycling drop-offs—check your local guidelines!
Q: Can I use an air fryer?
A> You can experiment! Brush the stuffed, sealed donuts lightly with oil or melted butter. Air fry at 350°F for about 6-8 minutes, flipping halfway, until golden. The texture will be different—more like a baked pastry—but still tasty.

Strawberry Cheesecake Stuffed Donuts : Creamy, Crispy, and Irresistible
Description
Golden, pillowy donuts with a creamy cheesecake and strawberry jam surprise inside—this recipe is a showstopper for brunch, dessert, or anytime you want to impress (and indulge). Using a simple shortcut—refrigerated biscuit dough—you can make bakery-style stuffed donuts at home without yeast or long rising times.
Ingredients
Dough & Filling
-
1 can (8 count) refrigerated biscuit dough (flaky layers or buttermilk preferred)
-
4 oz cream cheese, softened
-
¼ cup powdered sugar (plus extra for dusting)
-
½ tsp vanilla extract
-
¼ cup strawberry jam or preserves
For Frying
-
1–2 inches neutral oil (canola, vegetable, or peanut)
Optional Decoration / Variations
-
Glaze: 1 cup powdered sugar + 2–3 tbsp milk + ½ tsp vanilla
-
Cocoa powder, cinnamon sugar, or extra sprinkles
-
Fruit variations: blueberry jam, raspberry, lemon curd, etc.
Instructions
1️⃣ Make the Cheesecake Filling
-
In a bowl, beat cream cheese, powdered sugar, and vanilla until smooth and lump-free.
-
Optional: transfer to a piping bag or a plastic baggie with a corner snipped for easy filling.
2️⃣ Prep the Dough
-
Flatten each biscuit on a lightly floured surface to about ¼-inch thick, 4–5 inches wide.
-
Doesn’t need to be perfect—just enough surface to hold the filling.
3️⃣ Stuff & Seal the Donuts
-
Spoon 1 ½ tsp jam onto the center, then top with 1 tbsp cheesecake filling.
-
Fold dough into a half-moon and pinch edges tightly.
-
Crimp with a fork to ensure a secure seal.
4️⃣ Fry to Golden Perfection
-
Heat 1–2 inches of oil to 350°F (175°C).
-
Fry 2–3 donuts at a time for 2–3 minutes per side until deep golden brown.
-
Remove with a slotted spoon and drain on paper towels.
5️⃣ Dust or Glaze
-
While slightly warm, dust with powdered sugar or drizzle with glaze.
-
Optional: top with cinnamon sugar or cocoa for a flavor twist.
Notes
-
Sealing is everything: Poorly sealed donuts = leaks. Pinch and fork-crimp edges.
-
Oil temperature: 350°F is ideal—too low = greasy, too high = browned outside but raw inside.
-
Filling amount: 1 tbsp cream cheese + 1 ½ tsp jam per donut keeps everything tidy.
-
Advance prep: Filling can be made 1–2 days ahead; dough can be stuffed and refrigerated 1 hour before frying.
Nutritional Information*
*Approximate values per donut, based on 8 donuts and using 1 tbsp oil absorption.
Calories: ~220 | Fat: 12g | Saturated Fat: 4g | Cholesterol: 15mg | Sodium: 380mg | Carbohydrates: 25g | Fiber: 0g | Sugar: 10g | Protein: 3g
There you have it! Your guide to creating pure, stuffed donut joy. I hope you make them, share them, and absolutely love them. Don’t forget to tag me if you share a photo—nothing makes me happier than seeing your kitchen creations! Now go forth and fry something wonderful.
Final Thoughts: The Alchemy of Everyday Magic
What we’ve made here is more than a recipe. It’s a lesson in alchemy—the transformative magic of turning the simple and humble into something extraordinary. A can of biscuits becomes a vessel for joy. Cream cheese and jam become a hidden treasure. A few minutes in hot oil creates a memory.
This recipe embodies a beautiful truth: you don’t need professional training or rare ingredients to create wonder. You just need a bit of courage (hello, frying!), a sense of play, and the desire to make an ordinary moment special. It’s a tribute to grandmas everywhere who understood that love is often best expressed through warm, homemade treats.
So remember, the next time you’re faced with a boring afternoon, a last-minute gathering, or simply a craving for something celebratory, you hold the power to create magic. It’s in your hands, your kitchen, and that wonderfully familiar pop of a biscuit can.
Embrace the mess. Share the warmth. Savor the sweet, creamy, golden-brown proof that a little effort can yield pure, unadulterated delight.


