
Your New Favorite Halloween Party Showstopper is Here!
Hello, my fellow food lovers! Can you smell that? It’s the crisp, cool air of autumn, the sweet scent of candy corn, and the faint, tantalizing aroma of something savory baking in the oven. That’s right, Halloween is just around the corner, and my kitchen is buzzing with excitement for all things spooky, cozy, and delicious. If you’re anything like me, you live for those moments of gathering around a table with good friends, laughing over a shared platter of something utterly irresistible. And let me tell you, this Spider Web Taco Dip is about to become the life of your party.
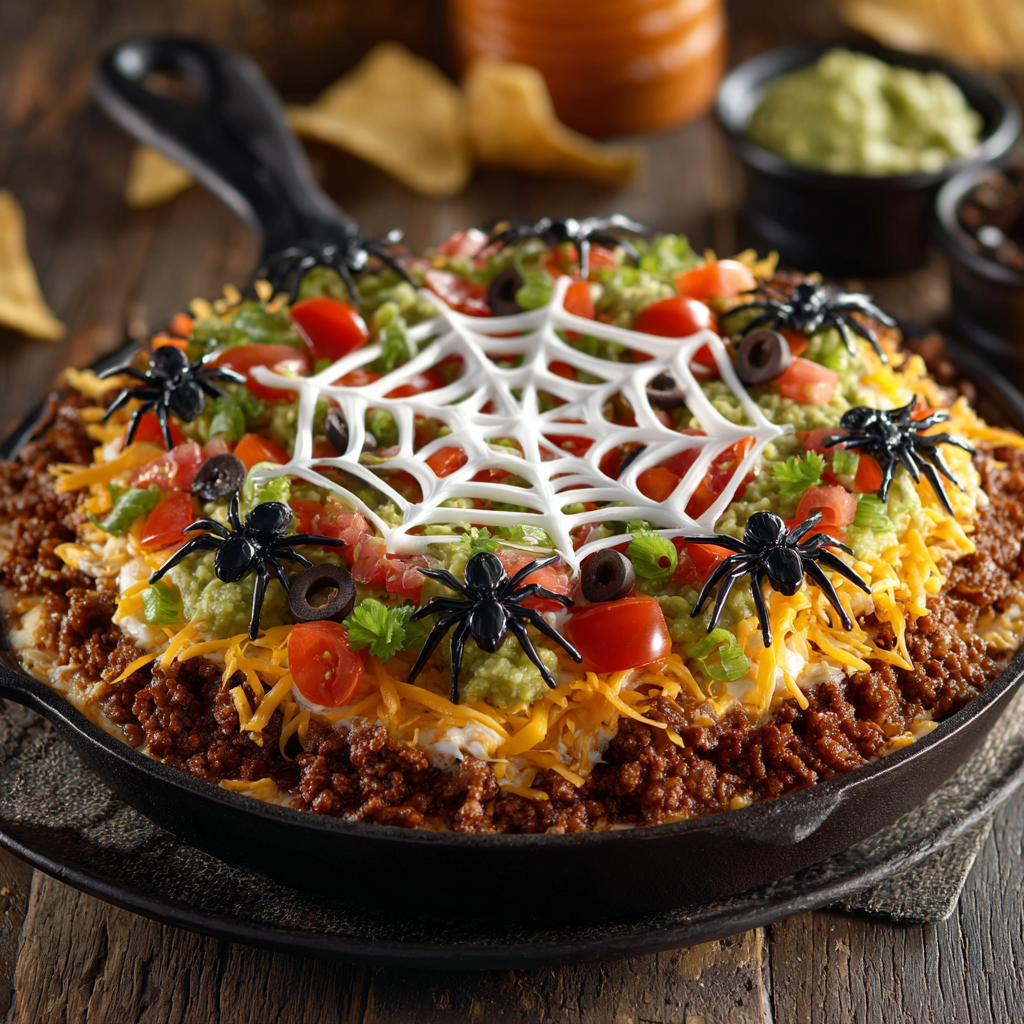
Picture this: a creamy, dreamy, multi-layered dip that’s packed with all your favorite taco night flavors, but transformed into a hauntingly beautiful centerpiece. It’s the kind of dish that makes everyone’s eyes go wide the second you bring it out. Kids will think you’re a culinary wizard, and adults will be scrambling for a chip to dive in. The best part? It’s incredibly easy to make. We’re talking minimal effort for maximum, spook-tacular impact. No fancy skills required, just a love for good food and a little bit of fun. So, tie on your favorite (probably messy) apron, put on some festive tunes, and let’s create some kitchen magic together!
The Party That Started It All
This recipe takes me back to my very first “grown-up” Halloween party. I was in my first apartment, the one with the tiny kitchen that could barely fit two people, and I was determined to host a spooktacular soiree. I wanted to make something that looked impressive but wouldn’t have me slaving away in the kitchen all night while my friends were having fun. I remember rifling through my mom’s old recipe box and finding a faded card for a simple layered taco dip. It was a classic—beans, guac, salsa, cheese. But then, a lightbulb moment! What if I turned that classic into something spooky?
I grabbed a tub of sour cream, snipped the corner of a plastic bag (a true chef’s hack if there ever was one!), and started piping circles on the dip. With a shaky hand, I dragged a knife through them, holding my breath… and it worked! A perfect, creepy spider web appeared. I topped it with a few olive “spiders,” and I swear, you would have thought I’d performed actual witchcraft. That dip was the talk of the party, demolished in minutes. It wasn’t just food; it was an experience, a conversation starter, a memory maker. And that’s exactly what I hope this recipe becomes for you.
Gathering Your Magical Ingredients
The beauty of this dip is in its simplicity and its layers. Each one brings a unique texture and flavor that works in perfect harmony. Here’s what you’ll need to create your own edible masterpiece:
- 1 can (16 oz) Refried Beans: This is our sturdy, flavorful base. I prefer the traditional kind, but feel free to use black refried beans for a slightly different flavor and color! Chef’s Insight: For an extra flavor kick, warm the beans in a bowl and stir in a half packet of taco seasoning before spreading. It makes a world of difference!
- 1 cup Guacamole: Creamy, cool, and essential. You can absolutely use store-bought to save time (no judgment here!), but if you’re feeling ambitious, my easy 5-minute guacamole is perfect for this. Substitution Tip: If avocados aren’t your thing or are hard to find, a layer of plain mashed avocado with a squeeze of lime and a pinch of salt works just fine.
- 1 cup Chunky Salsa: This adds a juicy, tangy kick and a bit of texture. I recommend a medium or mild salsa unless you want a truly *haunting* level of heat! Chef’s Insight: To prevent a watery dip, drain your salsa in a fine-mesh strainer for a few minutes before layering. This keeps your web from sliding off!
- 1 cup Shredded Cheddar or Mexican Blend Cheese: Because what’s a dip without a glorious blanket of melty, salty cheese? The pre-shredded bags are a lifesaver for convenience. Substitution Tip: A pepper jack blend would add a lovely kick, or use a dairy-free cheese alternative to make this vegan-friendly.
- 1/2 cup Sour Cream (for the web design): This is your edible paint for the spider web! Make sure it’s full-fat for the best piping consistency. Substitution Tip: Plain Greek yogurt is a fantastic, protein-packed alternative that works just as well for piping.
- Optional Garnishes: Sliced Black Olives or Mini Plastic Spiders: The olives are perfect for creating little edible spiders (use a slice for the body and slivers for the legs!). The plastic ones are for pure decoration—just remember to remove them before serving!
- Tortilla Chips, for serving: The trusty vessel for all this goodness. I love a sturdy, restaurant-style chip that can scoop up all those layers without breaking.
Weaving Your Delicious Web: A Step-by-Step Guide
Alright, friends, let’s get building! This process is so much fun and almost foolproof. Follow these steps, and you’ll have a picture-perfect dip in no time.
Step 1: The Foundation. Grab your serving dish—a wide, shallow pie plate or a 9-inch round baking dish works perfectly. Spread your entire can of refried beans into an even, smooth layer on the bottom. This is the foundation of our dip mansion, so make it nice and level! Chef’s Hack: If your beans are too thick to spread easily, pop them in the microwave for 30 seconds first or add a teaspoon of water or lime juice to loosen them up.
Step 2: The Green Layer. Carefully spoon your guacamole over the bean layer. Using the back of your spoon or a small offset spatula, gently spread it out to the edges, trying not to disturb the beans too much. We want clean, distinct layers for that beautiful cross-section view when people dig in!
Step 3: The Zing! Now for the salsa! Remember that tip about draining it? Do it! Then, spoon it over the guacamole and spread it evenly. This layer brings the acidity and freshness that cuts through the richness of the beans and cheese.
Step 4: The Cheesy Blanket. Take your shredded cheese and sprinkle it generously and evenly over the salsa layer. This cheesy blanket not only adds amazing flavor but also creates a firmer surface for us to draw our web on. If you’re making this ahead of time, you can stop right here, cover the dish with plastic wrap, and refrigerate until you’re ready to create your web.
Step 5: Create Your Web! This is the star of the show! Spoon your 1/2 cup of sour cream into a small zip-top bag. Seal the bag, pushing out any excess air. Now, with a pair of kitchen scissors, snip a TINY corner off one end of the bag. You can always make it bigger, so start small! You’ve just made a DIY piping bag. Now, pipe 3-4 concentric circles onto the cheese layer, starting from the center and working your way out.
Step 6: The Magic Drag. Take a toothpick, a wooden skewer, or the tip of a small, sharp knife. Starting from the very center of the circles, gently drag your tool all the way out to the edge. Wipe the tool clean. Move about a half-inch over and drag from the edge back into the center. Repeat this process, alternating from center-out and out-center, all the way around the dip. Like magic, a spider web will appear before your eyes!
Step 7: The Final Touches. Now for the spiders! If using olives, place a whole olive slice in the center of the web for the spider’s body. Then, take another olive slice and cut it into thin slivers to create eight little legs, arranging them around the body. Alternatively, artfully place a few clean plastic spiders on the web for a creepy-crawly effect. Chill the dip for at least 30 minutes to let the flavors merry and the layers set, making it easier to scoop.
How to Serve This Spooky Sensation
Presentation is key! Place your chilled dip right in the center of your table or snack spread. Surround it with a generous mountain of sturdy tortilla chips—I like to use a mix of yellow and blue corn chips for a extra pop of color. For a truly grand effect, add some thematic elements around the platter: plastic spider rings, faux cobwebs, or even a few black and orange napkins. Don’t forget to have a small serving knife or spatula nearby for guests who want to really load up their chips with all those delicious layers. Watch it disappear faster than a ghost in the night!
Get Creative: Spooky Swaps & Twists
The best recipes are ones you can make your own. Here are a few fun ways to mix up this Halloween classic:
- “Bloody” Bandage Dip: Swap the sour cream web for a web of plain cream cheese thinned with a little milk. Then, using a squeeze bottle, drizzle lines of sriracha or hot sauce over the top to look like blood spatter. Spooky!
- Seven-Layer Specter: Add more layers! Between the beans and guac, add a mixture of cream cheese mixed with taco seasoning. After the cheese, add a layer of shredded lettuce and chopped tomatoes (add these after chilling, just before the web, so they stay crisp).
- Vegan Vampire Dip: Easily make this plant-based! Use vegan refried beans, store-bought vegan guacamole, salsa, dairy-free cheese shreds, and vegan sour cream or yogurt for the web. It’s just as delicious and inclusive for all your guests.
- Buffalo Boo Dip: For a zingy twist, replace the salsa layer with a layer of shredded cooked chicken tossed in buffalo sauce. Use a blue cheese or ranch dressing for the web instead of sour cream.
From My Kitchen to Yours: Chef’s Notes
This recipe has been my Halloween faithful for years, and it’s evolved in so many little ways. I once, in a pre-party rush, tried to pipe the web with a bag that had a hole that was way too big. Let’s just say I ended up with a “spider blizzard” instead of a web! I had to scrape it all off, re-smooth the cheese layer, and start again. The lesson? Always start with a tiny snip—you can add more pressure to push the sour cream out or make the hole bigger, but you can’t take it back!
I also love how this recipe encourages playfulness in the kitchen. Cooking shouldn’t always be serious; it should be fun. Let your kids help pipe the web or place the olive spiders. It’s those little moments of shared creativity that turn a simple recipe into a cherished tradition. This dip has seen so many Halloween parties, watched kids grow up, and been the catalyst for so much laughter. I hope it brings the same joy to your home.
Your Questions, Answered!
Q: Can I make this dip ahead of time?
A: Absolutely! You can assemble the dip through the cheese layer (Step 4), cover it tightly with plastic wrap, and refrigerate it for up to 24 hours. When you’re ready to serve, create the sour cream web and garnish. This prevents the web from getting watery or the colors from bleeding.
Q: My web isn’t showing up clearly. What did I do wrong?
A: The two most common issues are: 1) The sour cream was too thin. Make sure you’re using full-fat sour cream for the best consistency. If it seems runny, you can let it sit in a strainer for a bit to thicken. 2) The cheese layer wasn’t thick or even enough. The cheese provides a white backdrop that makes the white web pop. Make sure you have a solid, generous layer of cheese.
Q: How long can the dip sit out at room temperature during a party?
A: For food safety, you shouldn’t let any perishable dip (especially with dairy and beans) sit out for more than 2 hours. If your party is longer, consider placing the dip dish on a larger platter of ice to keep it chilled, or only put out half at a time, keeping the rest refrigerated.
Q: The layers are mixing together when I try to spread them. Help!
A: Patience is key! Make sure each layer is spread evenly and smoothly before adding the next. Using the back of a spoon and gentle, slow motions helps. Also, ensuring your beans and guacamole are chilled (not room temp) makes them firmer and easier to work with.

Spider Web Taco Dip
- Total Time: 15 minutes
Description
This spooky taco dip is the ultimate Halloween centerpiece—creamy, zesty, and layered with all your fiesta favorites, then topped with a spider web design that’s almost too cool to eat. It’s festive, fun, and guaranteed to disappear faster than candy on trick-or-treat night. No kitchen wizardry required—just layers of flavor and a playful spirit!
Ingredients
-
1 can (16 oz) refried beans (seasoned with taco spice, optional)
-
1 cup guacamole
-
1 cup chunky salsa (drained for less liquid)
-
1 cup shredded cheddar or Mexican blend cheese
-
½ cup sour cream (for piping web – or Greek yogurt)
-
Tortilla chips, for serving
-
Optional Garnish: sliced black olives (spiders), plastic spiders for décor (remove before eating!)
Instructions
-
Foundation: Spread refried beans evenly in a shallow dish.
-
Layer Up: Spoon guacamole over beans, then carefully spread salsa on top.
-
Cheesy Blanket: Sprinkle shredded cheese evenly over salsa.
-
Weave the Web: Place sour cream in a zip-top bag, snip a tiny corner, and pipe 3–4 circles on top of cheese. Drag a toothpick from the center outward, alternating directions to form a spider web.
-
Creepy Crawlers: Place olive “spiders” on the web for a spooky finish.
-
Chill & Serve: Refrigerate 30 min to set, then serve with sturdy tortilla chips.
Notes
-
Use pepper jack cheese for extra kick.
-
Swap sour cream for ranch or cream cheese thinned with milk.
-
Make it vegan with plant-based cheese, beans, and sour cream.
-
Add buffalo chicken instead of salsa for a fiery twist.
- Prep Time: 15 min
Nutrition
- Calories: 180 cal Per Serving
- Sodium: 370mg
- Carbohydrates: 15g
- Protein: 6g
Nutritional Information*
*This is an estimate provided for informational purposes only. Calculations will vary based on your specific ingredients and brands.
Per Serving (based on 8 servings): approx. 190 calories | 10g fat | 16g carbs | 6g protein
Final Thoughts: A Dip to Remember
So there you have it, my ghoulish gourmands! Your ultimate guide to creating a Halloween party legend that’s equal parts delicious, spooky, and shockingly simple. This Spider Web Taco Dip is more than just a recipe; it’s a ticket to being the host everyone remembers. It’s the joy of watching your guests’ faces light up with delight, the pride of creating something beautiful with your own hands, and the satisfaction of knowing you’ve served up a truly unforgettable flavor experience.


