The Simple, Soul-Satisfying Joy of Homemade Whole Wheat Bread
Is there anything in the world that smells more like home than a loaf of bread baking in the oven? That warm, yeasty, slightly sweet aroma that seems to hug every corner of your kitchen? It’s a universal signal of comfort, of care, of something wonderful about to happen. And I’m here to let you in on a little secret: that magical experience doesn’t belong only to professional bakers or your grandmother. It belongs to you.
For so long, I thought baking a proper loaf of whole wheat bread was out of my league. I’d picture dense, crumbly bricks from my early cooking experiments—worthy of being a doorstop, but not exactly something you’d want to slather with jam. But then I discovered this recipe, and friends, it was a game-changer. This isn’t just any whole wheat bread. This is the one that will make you feel like a kitchen superstar. It’s soft, tender, and has a subtle sweetness from honey that makes it utterly irresistible. It’s sturdy enough for your favorite turkey sandwich but soft enough to melt in your mouth when toasted and buttered.
We’re creating two beautiful, golden-brown loaves that are wholesome without being heavy, flavorful without being complicated. Whether you’re a seasoned baker or this is your very first time working with yeast, I’m walking you through every single step. We’re going to make a little mess, learn a lot, and end up with the most satisfying reward: the proud, happy feeling of pulling your very own homemade bread out of the oven. So, tie on that apron (a messy one is a happy one!), and let’s bake some memories.
My First Loaf and the Lesson It Taught Me
I’ll never forget my first solo attempt at baking bread. I was in my first apartment, feeling very “adult,” and decided to surprise my then-boyfriend (now husband) with a from-scratch dinner. The main course was… well, let’s just say it’s forgotten to history. But the bread? The bread is legendary. I was so nervous, treating the yeast like a fragile, sleeping beast I might accidentally wake too aggressively. I measured the flour with the intensity of a scientist in a lab, and I kneaded that dough with all the strength my 22-year-old arms could muster.
When I pulled it out of the oven, it was… small. And a little lopsided. But it was golden, and it smelled like heaven. We tore into it while it was still dangerously warm, steam rising from the soft center, and slathered it with butter that pooled into the little pockets. He took one bite, looked at me, and said, “You made this? This is incredible.” In that moment, it didn’t matter that it wasn’t perfect. What mattered was the shared experience, the warmth, the pure, simple joy of creating something with our own hands and sharing it. That loaf taught me that the goal isn’t perfection; it’s connection. And that’s the spirit I want to bring to your kitchen today.
Gathering Your Ingredients: A Little Insight on Each
Great bread starts with great ingredients, but you don’t need anything fancy! Here’s everything you’ll need, along with a few notes on why each one matters and how you can swap things in or out.
- 2 cups warm water: Think baby-bottle warm, not hot. Too hot, and you’ll shock the yeast; too cold, and it won’t wake up. A good rule of thumb is water that feels warm to the touch but not scalding.
- ½ cup milk (any kind, room temp): Milk adds richness and helps create a softer, more tender crumb. I use 2%, but whole milk will make it even more decadent, and unsweetened almond or oat milk work perfectly for a dairy-free version!
- 6 tablespoons honey: This is our natural sweetener, and it plays a dual role. It feeds the yeast for a good rise and gives the bread a lovely, mild sweetness that balances the nuttiness of the whole wheat. In a pinch, you can use maple syrup or even brown sugar.
- 4 ½ teaspoons active dry or instant yeast (2 packets): The magical little organism that makes our bread rise! I typically use active dry yeast, which I let proof in the warm water first. If you use instant yeast, you can mix it right in with the flour—no waiting needed.
- 6 cups (678 grams) whole wheat flour, plus extra for kneading: Using weight measurements for flour is the most accurate way to bake, as scooping can pack in too much. If you don’t have a scale, fluff your flour with a spoon, then spoon it into your measuring cup and level it off. This prevents a dense loaf!
- 3 teaspoons salt: Do not skip the salt! It’s crucial for flavor and also helps control the yeast’s activity so your bread doesn’t rise too quickly and then collapse.
- 6 tablespoons unsalted butter, softened and cut into small chunks: Butter is our secret weapon for a soft texture and rich flavor. Using unsalted lets you control the salt level. Make sure it’s softened so it incorporates evenly into the dough.
- Optional add-ins: 2 tablespoons ground flaxseed, 1 tablespoon sunflower seeds or oats for topping: I love adding ground flaxseed for a boost of omega-3s and fiber—it blends right in! A sprinkle of oats or seeds on top before baking gives it that gorgeous, professional bakery look.
Let’s Get Baking: Your Step-by-Step Guide to Bread Bliss
Ready? Let’s turn these simple ingredients into something spectacular. I’ll be right here with you, offering tips and tricks for every step. Don’t be intimidated—we’re just guiding the dough on its journey to becoming bread!
- Wake Up the Yeast: In the bowl of your stand mixer (or a large mixing bowl if you’re kneading by hand), combine the warm water, milk, and honey. Give it a good stir. Now, sprinkle the yeast over the top. Let this mixture sit for 5-10 minutes. You’re looking for a foamy, creamy layer on top—this is your sign that the yeast is alive, happy, and ready to work! Chef’s Hack: If your mixture doesn’t foam, your yeast might be old or your liquid was too hot/cold. It’s best to start over to ensure a good rise.
- Create the Dough: Add the whole wheat flour and salt to the yeast mixture. Using the dough hook attachment on a low speed (or a wooden spoon), mix until a shaggy, floury dough forms. It will look messy, and that’s perfect! Now, with the mixer running on low, start adding the softened butter pieces one at a time, letting each piece incorporate before adding the next.
- The Kneading Stage: Once all the butter is in, increase the mixer speed to medium and knead for 8-10 minutes. The dough will start out sticky, but as the gluten develops, it will become smooth, soft, and elastic. It should pull away from the sides of the bowl and form a ball around the hook. If it’s still sticking to the sides, add an extra tablespoon of flour at a time until it clears the sides. Chef’s Insight: If kneading by hand, turn the dough out onto a lightly floured surface and use the heels of your hands to push it away from you, then fold it back over. Rotate and repeat. It’s a wonderful, therapeutic process!
- The First Rise: Shape your lovely, smooth dough into a ball. Place it in a lightly greased bowl, turning it once to coat all sides. Cover the bowl with a clean kitchen towel or plastic wrap and place it in a warm, draft-free spot. Let it rise for about 1 hour, or until doubled in size. To test, gently poke the dough with your finger; if the indentation remains, it’s ready.
- Shape the Loaves: Gently punch down the dough to release the air. Turn it out onto a lightly floured surface and divide it in half. To shape each half into a loaf, flatten it slightly into a rectangle, then tightly roll it up from the short end, pinching the seam closed. Place each loaf, seam-side down, into a greased 9×5-inch loaf pan.
- The Second Rise: Cover the loaf pans loosely with the towel and let them rise again for about 45 minutes. They should dome just over the tops of the pans. During the last 15 minutes of this rise, preheat your oven to 375°F (190°C). This ensures your oven is perfectly hot and ready to go.
- Bake to Golden Perfection: If you like, you can brush the tops of the loaves with a little water or milk and sprinkle with oats or seeds. Bake for 35-40 minutes. You’ll know it’s done when the tops are a deep golden brown and the bottom of the loaf sounds hollow when you tap it. Pro Tip: An instant-read thermometer is your best friend here! The bread is done when the internal temperature reaches 190-200°F (88-93°C).
- Cool (The Hardest Part!): Let the loaves cool in their pans for 10 minutes. Then, carefully turn them out onto a wire rack to cool completely. I know, I know—you want to slice into it immediately! But letting it cool ensures the structure sets properly, so you get perfect, non-gummy slices.
Serving Your Masterpiece
How you serve this bread is a celebration in itself! For the ultimate experience, slice a still-warm piece (I won’t tell!) and watch as a pat of good, salted butter melts into every nook and cranny. For breakfast, thick slices toasted until golden and topped with avocado or your favorite jam are divine. At dinner time, it’s the perfect side to soak up soup or stew. And let’s not forget the humble, yet glorious, sandwich—this bread holds up to all your favorite fillings without getting soggy or falling apart.
Get Creative: Fun Twists on the Classic
Once you’ve mastered the basic loaf, have fun playing with flavors! Here are a few of my favorite variations:
- Seeded Harvest Loaf: Knead in ¼ cup each of sunflower seeds, pepitas, and rolled oats into the dough for a wonderful texture.
- Cinnamon-Raisin Swirl: After the first rise, roll each dough half into a large rectangle. Brush with melted butter and sprinkle generously with a mix of cinnamon and sugar. Scatter raisins over top, roll up, and bake as directed.
- Herb & Garlic: Knead in 2 tablespoons of your favorite dried herbs (like rosemary and thyme) and 1 teaspoon of garlic powder for a savory bread that’s incredible with pasta.
- 50/50 Loaf: For a slightly lighter texture, use 3 cups whole wheat flour and 3 cups bread flour.
- Vegan Version: Simply swap the honey for maple syrup and the butter for an equal amount of vegan butter or coconut oil.
Olivia’s Kitchen Notes
This recipe has been a living, evolving thing in my kitchen for years. The version you see here is the happy result of many, many test batches. I found that adding the butter after the initial flour mix creates a more tender crumb. And that second rise in the loaf pan? It used to frustrate me when it seemed slow, but now I see it as the dough gathering its strength for its final, beautiful oven spring.
One of my favorite kitchen blunders involved this very recipe. I was filming a reel for Instagram, talking to my phone, and I completely forgot to add the salt. The dough rose like a champion—so fast and so high! I was so proud until we tasted it. It was… bland and strangely cake-like. A total “facepalm” moment. It was a delicious (and funny) reminder of how every single ingredient has a job to do. So learn from my mistakes, and don’t forget the salt!
Your Bread Questions, Answered!
Baking bread can bring up questions, and that’s totally normal! Here are answers to the ones I get asked most often.
Q: My dough didn’t rise much. What went wrong?
A: The most common culprits are old yeast or an environment that wasn’t warm enough. Always check the expiration date on your yeast. For the perfect rising spot, I sometimes turn my oven on to the “warm” setting for just a minute, then turn it off and place the covered bowl inside. Just make sure it’s not hot!
Q: Why is my whole wheat bread so dense and heavy?
A> Whole wheat flour has more bran than all-purpose, which can weigh down the gluten. The key is a good, long kneading time to develop that gluten structure. Also, be careful not to add too much extra flour during kneading—a slightly tacky dough is better than a dry one. Using the weight measurement for flour is the best way to avoid accidentally using too much.
Q: Can I make this dough ahead of time?
A> Absolutely! After the first rise, punch the dough down, shape it into loaves, and place them in the pans. Cover tightly with plastic wrap and refrigerate for up to 24 hours. When you’re ready to bake, let the loaves sit on the counter (still covered) for about an hour to come to room temperature and complete their second rise, then bake as usual. The flavor develops even more with this slow, cold rise!
Q: How do I store the baked bread, and can I freeze it?
A> For the best texture, store completely cooled loaves in a plastic bag at room temperature for 3-4 days. To freeze, wrap the cooled loaves tightly in plastic wrap and then in foil. They’ll keep beautifully for up to 3 months. Thaw at room temperature or pop a frozen slice directly into the toaster!
Soft Whole Wheat Bread : Homemade, Wholesome & Perfect for Every Slice
Description
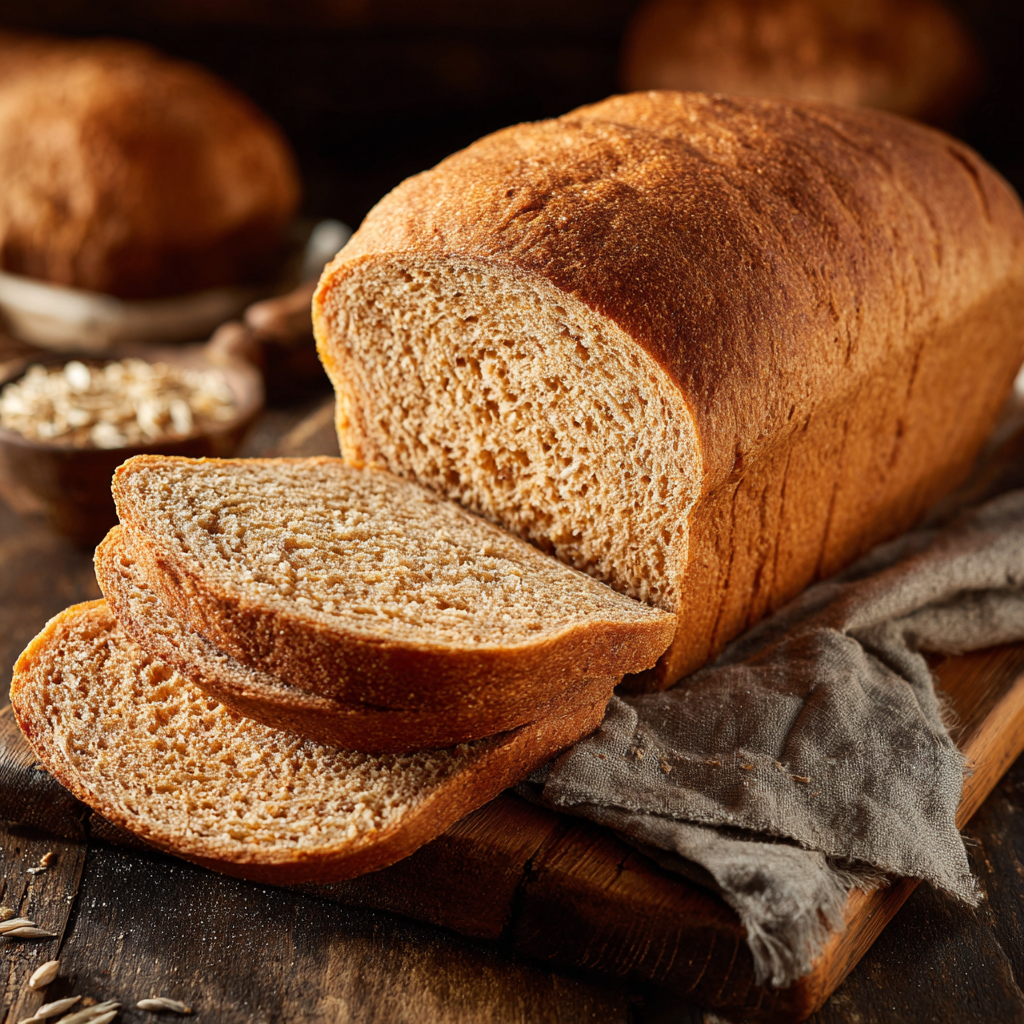
Homemade Whole Wheat Bread – Soft, Tender, and Soul-Satisfying
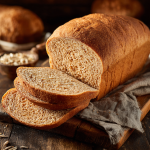
Two golden-brown loaves, soft yet sturdy, subtly sweet, and perfect for sandwiches, toast, or just eating warm with butter.
Ingredients
Wet Ingredients
-
2 cups warm water (105–115°F / 40–46°C)
-
½ cup milk (any kind, room temp)
-
6 tbsp honey
Dry Ingredients
-
4 ½ tsp active dry or instant yeast (2 packets)
-
6 cups (678 g) whole wheat flour, plus extra for kneading
-
3 tsp salt
Fat / Enrichment
-
6 tbsp unsalted butter, softened, cut into small pieces
Optional Add-ins / Toppings
-
2 tbsp ground flaxseed (kneaded into dough)
-
1 tbsp sunflower seeds, oats, or other seeds (for topping)
Instructions
1. Proof the Yeast
-
In a large bowl (or stand mixer), combine warm water, milk, and honey.
-
Sprinkle yeast over the top and let sit 5–10 minutes until foamy.
Tip: If using instant yeast, mix directly with flour—no proofing needed.
2. Make the Dough
-
Add whole wheat flour and salt to the yeast mixture. Mix on low speed (or with a wooden spoon) until shaggy.
-
Add softened butter pieces gradually, letting each incorporate before adding the next.
3. Knead
-
Stand mixer: Medium speed, 8–10 minutes, until dough is smooth, soft, and elastic.
-
By hand: Turn dough onto floured surface. Push, fold, and rotate repeatedly until elastic.
Slight tackiness is better than a dry dough. Add flour sparingly if needed.
4. First Rise
-
Shape dough into a ball and place in a lightly greased bowl, turning to coat all sides.
-
Cover and let rise in a warm, draft-free spot ~1 hour, until doubled.
Check: Gently poke dough; indentation remains = ready.
5. Shape Loaves
-
Punch down dough and divide in half.
-
Flatten each into a rectangle, roll from short end, pinch seam, and place seam-side down in greased 9×5-inch pans.
6. Second Rise
-
Cover and let rise ~45 minutes, until dough domes over pan edges.
-
Preheat oven to 375°F (190°C) during last 15 minutes.
7. Bake
-
Optional: Brush tops with water or milk, sprinkle seeds/oats.
-
Bake 35–40 minutes until golden brown.
-
Done when bottom sounds hollow or internal temp reaches 190–200°F (88–93°C).
8. Cool
-
Cool in pans 10 minutes, then transfer to wire rack.
-
Wait to slice until fully cooled for perfect texture.
Serving Suggestions
-
Warm slices with butter, jam, or avocado.
-
Perfect for sandwiches, toast, or alongside soup/stews.
Notes
Dense bread? Knead longer and measure flour by weight. Slightly tacky dough = better.
Dough didn’t rise? Yeast may be old or liquid too hot/cold. Try proofing again in a warm spot.
Make ahead? After first rise, shape and refrigerate up to 24 hrs. Let rise before baking.
Storage: Room temp 3–4 days, or freeze tightly wrapped up to 3 months.
Nutrition
- Calories: 140cal Per Serving
- Fat: 4g
- Saturated Fat: 2g
- Carbohydrates: 23g
Nutritional Information (Per Slice)
This is an estimate based on the recipe making 32 slices total.
- Calories: 140
- Fat: 4g
- Saturated Fat: 2g
- Carbohydrates: 23g
- Fiber: 3g
- Sugars: 3g
- Protein: 4g
- Sodium: 170mg