
Shrimp Protein Bowls: Your New Go-To for a Clean, Protein-Packed Feast
Hey there, friend! Have you ever had one of those days where you’re craving something seriously satisfying, but you also want to feel light, energized, and good about what you’re eating? You’re staring into the fridge, the clock is ticking, and the siren call of takeout is getting louder by the minute. I’ve been there more times than I can count, especially after a busy day of recipe testing (which, let’s be real, often means a lot of tasting and a very messy kitchen).
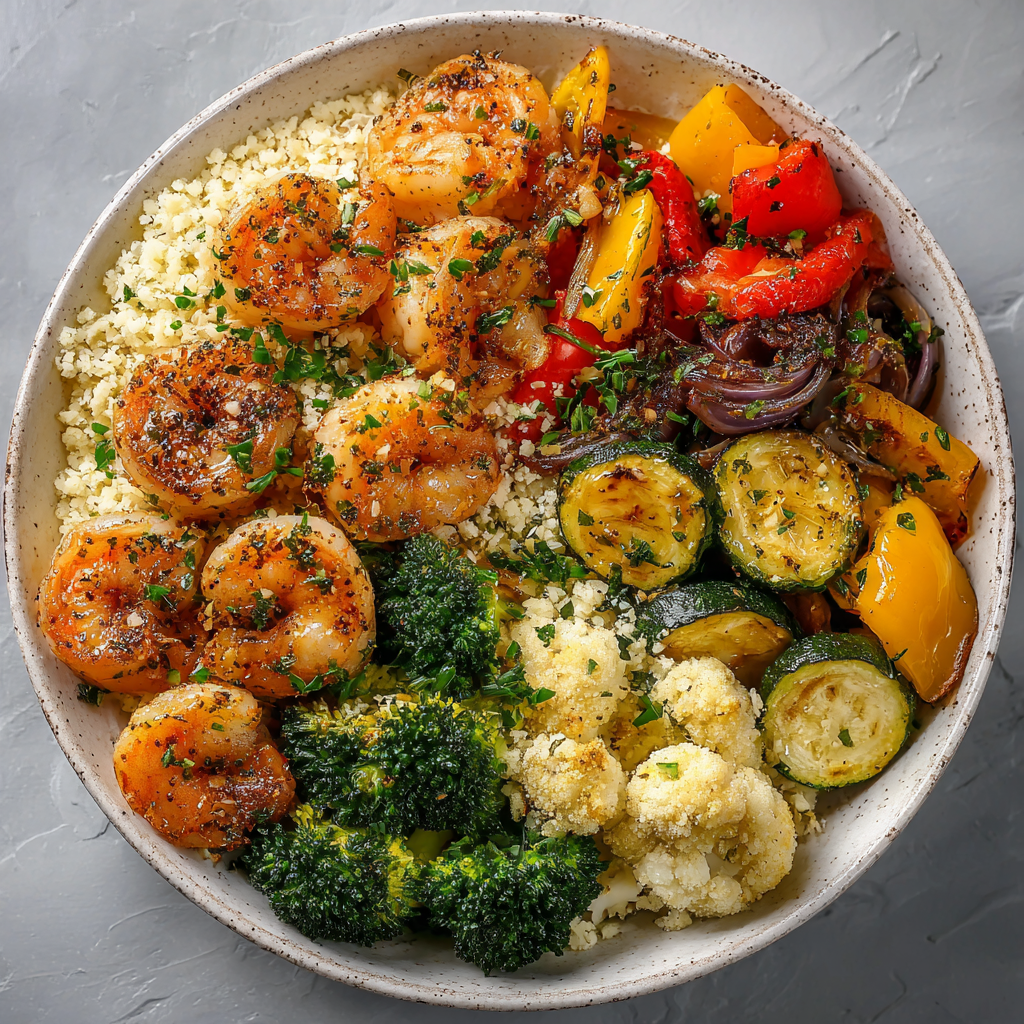
That’s exactly why I’m utterly obsessed with these Shrimp Protein Bowls. They are my culinary superhero – landing in my life to save the day when I need a meal that’s lightning-fast, wildly flavorful, and packed with the kind of clean protein that makes my body sing. We’re talking juicy garlic shrimp, a rainbow of caramelized roasted veggies, and a fluffy base of cauliflower rice that keeps things light and low-carb. All together, it’s a whopping 45 grams of protein per bowl, and it comes together in about 35 minutes, start to gorgeous finish.
This isn’t about deprivation or boring “health food.” It’s about celebrating vibrant ingredients that work together to make you feel fantastic. It’s a meal that fuels your adventures, satisfies your taste buds, and honestly, looks so pretty in a bowl it might just deserve an Instagram post. Whether you’re meal-prepping for a winning week, needing a powerful post-workout refuel, or just want a delicious dinner that doesn’t weigh you down, this bowl is your answer. Let’s grab our aprons and make something amazing!
The Coastal Inspiration Behind This Bowl
This recipe always takes me right back to a tiny, sun-drenched cottage on the coast of Maine my family used to rent every summer. The air smelled like salt pine and the promise of adventure. My job, as the “official sous-chef” at age ten, was to help my dad peel the day’s catch of shrimp for our big family dinner. It was a messy, fun, finger-tingling affair.
We’d sauté them in a ridiculous amount of garlic and fresh lemon right there on the porch, eating them straight out of the pan with chunks of bread. It was pure, simple joy. This bowl is my grown-up, protein-packed homage to those memories. It captures that same feeling of lightness and celebration, but built into a complete, nourishing meal that powers me through my modern, bustling life. It’s the taste of summer freedom, now in bowl form.
Gathering Your Bowl Building Blocks
Here’s everything you’ll need to create this protein powerhouse. The beauty is in the simplicity and flexibility!
For the Garlic Lemon Shrimp:
- 1 lb large shrimp, peeled and deveined – I prefer “large” (31/40 count) for a meatier bite. Chef’s Insight: If you have time, pat them *very* dry with paper towels. This is the secret to getting a beautiful sear instead of them steaming in their own juice!
- 1 tablespoon olive oil – Good olive oil adds fruity depth. Avocado oil is a great high-heat alternative.
- 3 garlic cloves, minced – Fresh is best here! That punchy aroma is non-negotiable.
- Juice of 1/2 lemon – Adds the bright, acidic pop that makes the shrimp sing. Always juice it fresh!
- Salt and pepper to taste
- Optional: a pinch of chili flakes or 1/2 tsp smoked paprika – This is my little “wink” of flavor. The chili flakes add a subtle heat, and the smoked paprika gives a whisper of warmth and complexity. Highly recommend!
For the Bowl Foundation:
- 4 cups cauliflower rice – Fresh or frozen both work perfectly! Pro Tip: If using frozen, cook it straight from frozen and let any extra moisture steam off in the pan.
- 2 cups of your favorite roasting vegetables – This is where you can clean out the fridge! My go-to trio is broccoli florets, diced zucchini, and colorful bell pepper strips. Sweet potato cubes, asparagus, or red onion wedges are also fantastic.
- 1 tablespoon olive oil (for roasting)
- Optional garnish: Fresh chopped parsley, cilantro, or sliced green onions – Don’t skip the herbs! They add a final layer of fresh color and flavor that makes the whole bowl come alive.
Let’s Build Your Bowl: A Step-by-Step Journey
Ready to cook? I’ll walk you through each step with all my favorite kitchen hacks to ensure your bowls are perfect.
Step 1: Roast Those Veggies to Golden Perfection
First, fire up your oven to 425°F (220°C). This high heat is our friend—it gives us those delicious caramelized edges without making the veggies soggy. While it’s heating, chop your chosen veggies into roughly even-sized pieces. Toss them on a baking sheet with the tablespoon of olive oil, a good pinch of salt, and a few cracks of black pepper. Get your hands in there and massage everything together—it’s therapeutic! Spread them out in a single layer. Chef’s Hack: Crowding the pan is the enemy of roasty goodness. Give them space! Roast for 20-25 minutes, giving them a quick shuffle halfway through. You’ll know they’re done when they’re tender and have those beautiful brown spots.
Step 2: Wake Up the Cauliflower Rice
While the veggies roast, let’s tackle the cauliflower rice. Heat a large non-stick skillet over medium heat. Add a quick spray of oil or a teaspoon of olive oil. Toss in your cauliflower rice (no need to thaw if frozen) and let it cook, stirring occasionally, for 5-7 minutes. You’re just warming it through and letting any excess moisture evaporate. Season it lightly with a pinch of salt. Important Note: We’re not looking to make it mushy! Just tender-crisp. When it’s done, set it aside in a bowl.
Step 3: Sauté the Shrimp (The Star of the Show!)
Using the same skillet (fewer dishes = happier cook), heat the remaining tablespoon of olive oil over medium-high heat. Add the minced garlic and your optional chili flakes or paprika. Let it sizzle for just 30 seconds until incredibly fragrant—but don’t let it burn! Now, add your very-dry shrimp in a single layer. Do not overcrowd! Cook for 2-3 minutes per side. You’ll see them transform from grey and translucent to a gorgeous pink and opaque. The moment they’re cooked through, turn off the heat and immediately squeeze the fresh lemon juice all over them. The pan will sizzle and create the most amazing little bit of garlic-lemon sauce. Biggest Tip: Overcooked shrimp are rubbery. They cook FAST, so keep a close eye!
Step 4: The Grand Assembly
This is the fun part! Grab your favorite bowls. Start with a fluffy base of the warmed cauliflower rice. Pile on a generous helping of those gorgeous roasted vegetables. Artfully arrange your glistening garlic-lemon shrimp on top. Finish with a sprinkle of fresh herbs or green onions for that final pop of color and freshness. I sometimes add an extra tiny squeeze of lemon right at the end. And just like that, you have a restaurant-quality, nutrient-dense masterpiece ready to devour!
How to Serve & Savor
I love serving these bowls family-style! Pile the cauliflower rice, veggies, and shrimp into separate sections of a large platter and let everyone build their own perfect bite. For a single serving, layer it all in a deep bowl for a beautiful presentation. The contrast of the white rice, colorful veggies, and pink shrimp is honestly so pretty. All it needs is a fork—this is a wonderfully satisfying one-bowl meal.
Make It Your Own: Creative Twists
This bowl is a perfect template! Here are some of my favorite ways to mix it up:
- Asian-Inspired: Swap the olive oil for sesame oil. Add a splash of tamari or coconut aminos and a teaspoon of grated ginger to the shrimp. Garnish with sesame seeds.
- Spicy Cajun: Toss the shrimp and veggies in 1-2 teaspoons of Cajun seasoning before cooking. Serve with a dollop of creamy, cool Greek yogurt.
- Mediterranean Meets Mexico: Use a taco seasoning on the shrimp. Swap cauliflower rice for cilantro-lime cauliflower rice and add a spoonful of pico de gallo.
- For the Carb-Lovers: Ditch the cauliflower rice and use quinoa, brown rice, or farro for a hearty, fiber-rich base.
- Pescatarian Power-Up: Add 1/2 an avocado, sliced, or a soft-boiled egg for extra healthy fats and protein.
Olivia’s Kitchen Notes
This recipe has been my trusty sidekick for years, and it’s evolved with me. I initially made it with regular rice, but switching to cauliflower rice made it feel like I’d discovered a magic trick for eating a giant, satisfying bowl without the post-meal slump. The biggest lesson I’ve learned? MISE EN PLACE! Having your shrimp dried, veggies chopped, and garlic minced before you even turn on the stove makes this 35-minute promise a reality. No frantic searching for the lemon juicer while the garlic burns! Also, my husband once used frozen pre-cooked shrimp (a cardinal sin in this recipe, in my opinion) and was confused why they were so tough. We had a good laugh, and now he knows: raw, fresh or thawed frozen shrimp are the only way for this dish. Live and learn, right?
FAQs & Troubleshooting
My cauliflower rice is watery and soggy. What happened?
This is almost always because it wasn’t cooked long enough to evaporate the moisture, especially if using frozen. Make sure your pan is over medium heat and give it a full 5-7 minutes, stirring occasionally. Don’t cover the pan—you want the steam to escape! If it’s still wet, cook it for another minute or two.
Can I use pre-cooked shrimp to save time?
You can, but I don’t recommend it for this specific recipe. Pre-cooked shrimp are very easy to overcook and become rubbery when reheated in a skillet. Using raw shrimp ensures they stay juicy and soak up all that glorious garlic-lemon flavor. If you must use pre-cooked, add them at the very last second just to warm through.
How do I store and reheat leftovers for meal prep?
This bowls meal preps beautifully! Store the components separately in airtight containers in the fridge for up to 3 days. To reheat, I microwave the cauliflower rice and veggies first, then quickly reheat the shrimp in a hot skillet for just 60-90 seconds to avoid overcooking. You can eat it cold, too, like a shrimp salad bowl!
My shrimp stuck to the pan! Help!
Two likely culprits: 1) The pan wasn’t hot enough before adding the shrimp, or 2) The shrimp weren’t dry enough. Make sure your oil is shimmering (not smoking) before adding the garlic, and absolutely pat those shrimp dry with paper towels. A good non-stick skillet is also a worthy investment for seafood.
Print
Shrimp Protein Bowls : Clean, Lean, and Packed with 45g Protein
Description
When you want a meal that feels fresh, satisfying, and energizing—without feeling heavy—these Shrimp Protein Bowls are the answer. Juicy garlic-lemon shrimp, caramelized roasted vegetables, and light cauliflower rice come together in one colorful bowl that’s packed with flavor and nutrition.
Ingredients
Garlic Lemon Shrimp
-
1 lb large raw shrimp, peeled and deveined
-
1 tablespoon olive oil
-
3 garlic cloves, minced
-
Juice of ½ lemon
-
Salt and black pepper, to taste
-
Optional: pinch of red pepper flakes or ½ teaspoon smoked paprika
Bowl Base
-
4 cups cauliflower rice (fresh or frozen)
-
2 cups mixed vegetables (broccoli, zucchini, bell peppers, asparagus, or onion)
-
1 tablespoon olive oil (for roasting)
- Optional garnish: fresh parsley, cilantro, or green onions
Instructions
1. Roast the Vegetables
Preheat oven to 425°F (220°C).
Toss vegetables with 1 tablespoon olive oil, salt, and pepper.
Spread in a single layer on a baking sheet and roast for 20–25 minutes, stirring halfway, until tender and lightly caramelized.
2. Cook the Cauliflower Rice
Heat a large skillet over medium heat with a small amount of oil.
Add cauliflower rice (straight from frozen if needed) and cook for 5–7 minutes, stirring occasionally, until heated through and moisture evaporates. Season lightly with salt and set aside.
3. Sauté the Shrimp
Pat shrimp very dry with paper towels.
Heat olive oil in the same skillet over medium-high heat. Add garlic (and optional spices) and cook for 30 seconds until fragrant.
Add shrimp in a single layer and cook 2–3 minutes per side until pink and opaque.
Remove from heat and squeeze fresh lemon juice over the shrimp.
4. Assemble the Bowls
Divide cauliflower rice between bowls.
Top with roasted vegetables and garlic shrimp.
Finish with fresh herbs or green onions if desired. Serve immediately.
Notes
-
Dry shrimp thoroughly to get a good sear and avoid steaming
-
Do not overcook shrimp — they cook very quickly
-
Avoid overcrowding the pan for both shrimp and vegetables
-
Meal-prep friendly: store components separately for best texture
Nutritional Information*
*Please note: This is an estimate for one complete bowl, based on the specific ingredients listed. Values may vary with substitutions.
- Calories: ~400
- Protein: ~45g
- Carbohydrates: 10g (Net Carbs)
- Fat: 18g
- Fiber: 4g
Prep Time: 15 mins | Cook Time: 20 mins | Total Time: 35 mins | Servings: 2
Final Thoughts
These Shrimp Protein Bowls are more than just a meal—they’re a feeling. They represent that beautiful balance we’re all chasing: food that’s as nourishing as it is delicious, as quick to make as it is satisfying to eat. In just 35 minutes, you can create something that looks like it came from a trendy cafe but feels like home—a home filled with the scent of garlic, lemon, and roasted veggies, and the promise of a meal that truly fuels you.
Whether you’re a meal-prep pro, a busy parent, a fitness enthusiast, or just someone who wants to eat well without the hassle, this bowl is for you. It’s flexible, forgiving, and endlessly adaptable. Make it once, and it’ll become a trusted recipe you return to again and again—a blank canvas for your cravings and a reliable source of clean, vibrant energy.
So here’s to simple ingredients doing extraordinary things. Here’s to feeling light, strong, and satisfied. And here’s to that moment when you take the first bite and think, “Yes. This is exactly what I needed.”
Now, go build your bowl. And don’t forget to snap a picture—you’ve earned it.
Happy cooking,
Olivia


