
Sweet, Salty, and Seriously Addictive: Let’s Make These Bites!
Hey there, friend! Come on in, grab an apron, and get ready for some serious kitchen magic. Is there anything better than that moment when a recipe comes together and you just know you’ve created something incredible? The kind of treat that makes people’s eyes light up and has them asking for the recipe before they’ve even swallowed their first bite? That’s exactly the feeling we’re chasing today.
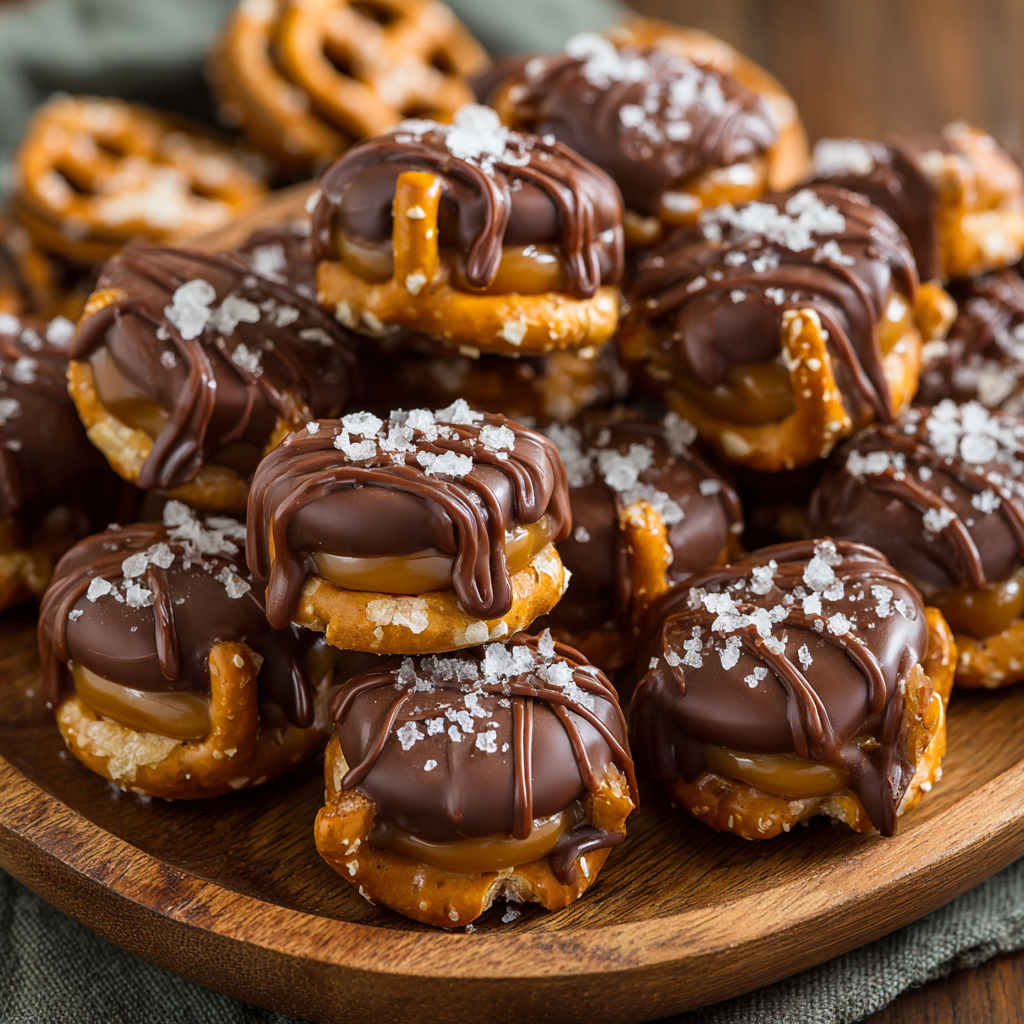
We’re talking about my legendary Salted Caramel Peanut Butter Pretzel Bites. Let that name just wash over you for a second. Imagine: a creamy, sweet-and-salty peanut butter center, hugged by two crunchy pretzels, dipped in rich, gooey caramel, cloaked in a robe of smooth chocolate, and finished with a delicate sprinkle of flaky sea salt. It’s a symphony of textures and flavors in one perfect, bite-sized package.
The best part? You don’t even need to turn on your oven. These little bites of bliss are a no-bake wonder, which means they’re perfect for those days when you need a spectacular treat without the fuss. They’re my go-to for holiday platters, party favors, or for stashing in the freezer for those… ahem… emergency snack situations we all have. So, let’s roll up our sleeves, make a happy little mess, and create something unforgettable together!
A Happy Accident in Grandma’s Kitchen
This recipe, like so many of the best ones, wasn’t born from a grand plan, but from a happy kitchen accident. I was about ten years old, “helping” my grandma make her famous chocolate-dipped pretzels for a church bake sale. We had all the usual suspects laid out: pretzels, melting chocolate, and sprinkles. But I was a kid with a mission and a serious peanut butter obsession.
While Grandma’s back was turned, I decided to “improve” a few pretzels by slathering them with peanut butter and sticking them together. When she turned around and saw my creation, she didn’t scold me. She just laughed that wonderful, crinkly-eyed laugh of hers and said, “Well, Olivia, let’s see what we’ve got here.” She helped me dip my peanut butter pretzel sandwiches into the chocolate, and we sprinkled them with a little salt from a fancy jar she saved for special occasions. We broke one in half to taste-test, and I remember our shared look of pure, unadulterated joy. They were a hit at the bake sale, of course, but more importantly, that moment of playful experimentation in my grandma’s sunny kitchen is a core food memory for me. This recipe is that childhood memory, all grown up with a decadent caramel upgrade.
Gathering Your Cast of Characters
One of the beautiful things about this recipe is its simplicity. You likely have most of these ingredients in your pantry right now! Here’s what you’ll need to make about 30-40 of these irresistible bites.
- 1 cup creamy peanut butter – This is the heart of our filling! I love using a standard, no-stir creamy peanut butter for the best texture. The oils help it stay smooth and easy to work with. Chef’s Insight: If you’re feeling adventurous, a natural, drippy peanut butter can work, but your filling might be a bit softer. For a nut-free version, sunflower seed butter is a fantastic swap!
- ½ cup powdered sugar – This isn’t just for sweetness; it’s a key structural ingredient that thickens the peanut butter so it can hold its shape beautifully between the pretzels.
- 2 tbsp unsalted butter, softened – A little bit of butter adds a luscious, rich creaminess to the filling. Using unsalted lets us control the salt level perfectly. Substitution Tip: For a dairy-free version, a plant-based butter works wonderfully.
- 60–80 mini pretzels – The crunchy, salty shell of our operation! I find the standard mini twists work best. Their nooks and crannies hold onto the fillings and dips for dear life. Give the bag a little shake to pick out the whole ones—we need two per bite!
- 1 bag (11 oz) caramel bits OR soft caramels – Caramel bits are my absolute hero here because they melt evenly and quickly without you having to unwrap a million little squares. If you use traditional caramels, just unwrap them before melting. Chef’s Insight: The quality of your caramel makes a big difference! A good, creamy caramel will taste infinitely better than a super-chewy one.
- 1 tbsp heavy cream or milk – This is our melting partner for the caramel. It thins it out to a perfect dipping consistency. You can use any milk you have on hand, but cream will give you the richest, smoothest result.
- 1 ½ cups semi-sweet or milk chocolate chips – The final, glorious coating! I’m a semi-sweet girl myself—I love how its slight bitterness balances the sweet caramel. But if you have a serious sweet tooth, milk chocolate is pure heaven. Chef’s Insight: While chocolate chips work great, using high-quality chocolate baking bars (chopped) will give you an even smoother, more professional-looking finish.
- Flaky sea salt, for topping – Don’t you dare skip this! A light sprinkle of flaky salt (like Maldon) right after dipping is the pro move that makes all the flavors pop. It’s the difference between “yum” and “WOW.”
Let’s Build Some Bliss: Your Step-by-Step Guide
Alright, team, it’s go time! This process is more about assembly than complicated techniques, and I’ve got plenty of little hacks to make it a breeze. Read through all the steps once before you start—it’s like having a road map to deliciousness.
- Create the Peanut Butter Filling. In a medium bowl, combine the creamy peanut butter, powdered sugar, and softened butter. Use a spatula or a hand mixer on low to mix it until it’s completely smooth and comes together into a soft, pliable “dough.” Chef’s Hack: If your peanut butter mixture seems a little too soft or sticky to handle, don’t panic! Just pop the whole bowl into the fridge for 15-20 minutes. It will firm up perfectly and be much easier to scoop.
- Form the Pretzel Sandwiches. Line a large baking sheet with parchment paper or a silicone baking mat—this is non-negotiable for easy cleanup! Scoop up about a teaspoon of the peanut butter mixture. I love using a small cookie scoop (a #100 size is perfect) for uniformity, but a simple teaspoon works just fine. Roll the scoop into a little ball between your palms, then gently press it between two mini pretzels to form a cute little sandwich. Place it on your prepared tray. Repeat until all the filling is used up. You should get between 30-40 bites.
- The Chill Factor. This step is your secret weapon for success. Carefully transfer the entire baking sheet to your freezer. Let the pretzel bites chill for at least 20 minutes. This firms up the peanut butter center, which is crucial for the next step. A firm center means your sandwiches won’t fall apart when you dip them into the warm caramel. Trust me on this one!
- Melt the Caramel. While the bites are chilling, let’s make the caramel dip. Combine the caramel bits (or unwrapped caramels) and the tablespoon of cream in a medium, microwave-safe bowl. Heat in the microwave in 30-second bursts, stirring vigorously between each burst, until the caramel is completely smooth and liquid. Chef’s Hack: You can also do this in a small saucepan over low heat on the stove, stirring constantly to prevent scorching. Just keep a close eye on it!
- The First Dip: Caramel Bliss. Take your tray of chilled pretzel bites out of the freezer. Working with one bite at a time, hold it carefully and dip it halfway into the warm caramel. Let any excess drip back into the bowl, then place it back onto the parchment-lined tray. The caramel will start to set fairly quickly because the bites are cold. Repeat with all the bites. If your caramel starts to thicken and get too sticky, just pop it back in the microwave for 15 seconds to re-loosen it.
- The Second Dip: Chocolate Heaven. Now for the grand finale! Melt your chocolate chips in another microwave-safe bowl, again using 30-second intervals and stirring until perfectly smooth. Just like before, dip the other half of each pretzel bite into the melted chocolate. Use a fork or a dipping tool to gently swirl it and lift it out, letting the excess chocolate drip off. Place it back on the tray. You’ll now have beautiful bites that are half caramel, half chocolate. Isn’t that a gorgeous sight?
- The Finishing Touch. This is the most important step: before the chocolate sets, give each bite a light, elegant sprinkle of flaky sea salt. This isn’t just for looks; that tiny hit of salt will cut through the sweetness and elevate every single flavor in the bite.
- Set and Serve! Once all the bites are dipped and salted, return the entire tray to the refrigerator (or freezer for a faster set) for at least 15-20 minutes, or until the chocolate and caramel are completely firm. And voilà! You’ve just created a masterpiece.
How to Serve These Show-Stopping Bites
Presentation is part of the fun! I love arranging these bites on a beautiful wooden board or a tiered dessert stand. For a party, you can even place them in mini paper cupcake liners—it looks adorable and makes them super easy for guests to grab. They are rich, so one or two per person is usually plenty, but let’s be real… I’ve never seen anyone stop at just two. They pair wonderfully with a hot cup of coffee, a glass of cold milk, or even a dessert wine. However you serve them, get ready for the compliments to roll in!
Get Creative! Fun Flavor Twists
Once you’ve mastered the classic, feel free to play with the formula! Here are a few of my favorite variations:
- Nutty Professor: Swap the peanut butter for almond butter or cashew butter for a different flavor profile.
- White Chocolate Wonder: Use white chocolate instead of semi-sweet for a sweeter, creamier coating. Try adding a sprinkle of crushed freeze-dried raspberries with the sea salt for a stunning look and a tart kick.
- Dark & Stormy: For the dark chocolate lovers, use a high-quality 70% dark chocolate for dipping. It’s a sophisticated and deeply delicious twist.
- Festive Fun: During the holidays, mix a little sprinkle of crushed peppermint candies in with the sea salt on top for a festive touch.
- Double Crunch: Stir 2-3 tablespoons of very finely crushed pretzels right into the peanut butter filling for an extra crunch in every layer.
Olivia’s Kitchen Confidential
This recipe has been my trusty sidekick for years, and it’s evolved in little ways each time I make it. I’ve learned that the key to a stress-free dipping experience is all in the chilling—don’t rush the freezer time! I also have a funny story about the first time I made a triple batch for a friend’s wedding. I was so focused, I had chocolate and caramel on my elbows, my forehead, and probably in my hair. My husband came into the kitchen, took one look at me, and just started laughing. He said I looked like I’d lost a fight with a candy bar. But you know what? Every single bite was perfect, and the bride was thrilled. It’s a reminder that a little mess is just a sign of love and effort. These bites are meant to be fun, so don’t stress if they’re not all perfectly uniform. It’s the homemade charm that makes them so special!
Your Questions, Answered!
I’ve gotten so many wonderful questions about this recipe over the years. Here are the answers to the most common ones to help you on your way.
Q: My caramel became really thick and hard to dip with. What can I do?
A: This is a common one! Caramel can seize up as it cools. The easy fix is to simply reheat it gently. Pop the bowl back in the microwave for 15-20 seconds and stir. If it’s still too thick, you can add another tiny splash of cream (about ½ a teaspoon) to loosen it up.
Q: Can I make these ahead of time? How should I store them?
A: Absolutely! They are the perfect make-ahead treat. Store them in a single layer in an airtight container in the refrigerator for up to 2 weeks. For longer storage, they freeze beautifully for up to 3 months. I actually prefer eating them straight from the freezer—the cold, crunchy, chewy texture is incredible!
Q: My peanut butter filling is too soft and sticky. Help!
A> No worries! Different peanut butters have different oil contents. The solution is simple: just chill it. Cover the bowl and refrigerate the filling for 20-30 minutes before you try to form the balls. It will be much more cooperative.
Q: Why did my chocolate get thick and clumpy when I was dipping?
A> It sounds like your chocolate may have seized. This usually happens if a tiny bit of steam or water gets into the melting chocolate. To prevent this, always make sure your bowls and utensils are completely dry. If it happens, you can sometimes save it by stirring in a teaspoon of coconut oil or vegetable shortening until it becomes smooth again.

Salted Caramel Peanut Butter Pretzel Bites : Sweet, Salty, No-Bake Bliss
Description
Hey there, friend! Grab an apron and get ready for a no-bake treat that’s a party in every bite. These Salted Caramel Peanut Butter Pretzel Bites combine a creamy peanut butter center, crunchy pretzels, gooey caramel, and a smooth chocolate coating, all finished with a sprinkle of flaky sea salt. Perfect for holidays, parties, or an emergency snack stash, they’re fun, easy, and utterly irresistible.
Ingredients
-
1 cup creamy peanut butter – smooth texture is key. Nut-free option: sunflower seed butter.
-
½ cup powdered sugar – helps thicken the filling.
-
2 tbsp unsalted butter, softened – adds richness. Dairy-free option: plant-based butter.
-
60–80 mini pretzels – standard mini twists work best.
-
1 bag (11 oz) caramel bits or soft caramels – for smooth melting.
-
1 tbsp heavy cream or milk – thins caramel for dipping.
-
1 ½ cups semi-sweet or milk chocolate chips – for coating.
-
Flaky sea salt – for sprinkling on top.
Instructions
In a medium bowl, combine peanut butter, powdered sugar, and softened butter. Mix until smooth into a soft, pliable dough.
Tip: If it’s too soft, chill for 15–20 minutes.
Line a baking sheet with parchment paper. Scoop about a teaspoon of peanut butter mixture, roll into balls, and press between two mini pretzels. Place on the sheet. Repeat for all filling.
Freeze the pretzel bites for at least 20 minutes. This firms up the centers for dipping.
Combine caramel bits and cream in a microwave-safe bowl. Heat in 30-second bursts, stirring until smooth.
Tip: Alternatively, melt over low heat on the stove.
Dip chilled pretzel bites halfway into caramel. Let excess drip, then return to tray. Reheat caramel if it thickens.
Melt chocolate chips in 30-second microwave intervals until smooth. Dip the other half of each bite into chocolate. Place back on the tray.
Sprinkle each bite with flaky sea salt before chocolate sets. Refrigerate 15–20 minutes to firm completely.
Notes
-
Nutty Twist: Swap peanut butter for almond or cashew butter.
-
White Chocolate: Use white chocolate and sprinkle freeze-dried raspberries on top.
-
Dark Chocolate: Use 70% dark chocolate for a rich twist.
-
Extra Crunch: Mix finely crushed pretzels into the peanut butter filling.
-
Make Ahead: Store in an airtight container in the fridge for up to 2 weeks or freeze for 3 months.
Nutrition
- Calories: 110 cal Per Slice
- Fat: 6g
- Carbohydrates: 12g
- Protein: 2g
Quick Nutrition & Prep Info
- Prep Time: 25 minutes
- Chill Time: 30 minutes
- Total Time: 55 minutes
- Servings: 30-40 bites
Approximate Nutrition per Bite: Calories: ~110 | Carbohydrates: 12g | Fat: 6g | Protein: 2g
Final Thoughts: A Bite of Pure Joy
And there you have it! From a happy accident in my grandma’s kitchen to a treat that never fails to bring smiles, these bites are so much more than the sum of their parts. They’re a perfect little package of crunch, cream, sweetness, and salt—a true testament to the magic that happens when simple, beloved ingredients come together. I hope this recipe becomes a staple in your home, creating its own messy, happy, and delicious memories for years to come. Now, go enjoy the fruits of your labor—you’ve earned it!


