
Your Guide to the Most Unforgettable, Jaw-Droppingly Good Prime Rib Roast
Hey there, friend! Come on in, grab an apron, and let’s get ready to create some serious magic. Is there any smell more quintessentially celebratory than a prime rib roast slowly roasting in the oven? It’s the scent of holidays, of gathered loved ones, of pure, unadulterated joy. It’s the kind of meal that turns a regular Sunday into an event and a special occasion into a core memory. If the thought of cooking this beautiful cut of meat has ever made you feel a little nervous, I’m here to tell you: take a deep breath. You’ve got this.
I’m a firm believer that the best recipes aren’t about fancy techniques or a million obscure ingredients. They’re about confidence, a few key secrets, and a whole lot of heart. This oven-roasted prime rib is the ultimate example of that. It looks like a million bucks and tastes even better, but the process? Honestly, it’s surprisingly simple. We’re talking about a handful of pantry staples, a reliable meat thermometer, and a little bit of patience. The oven does almost all the work for us, transforming a magnificent roast into a tender, juicy, flavor-packed masterpiece with a crackling, savory crust that will have everyone begging for seconds.
So whether you’re hosting your first holiday dinner, planning an anniversary surprise, or just deciding to treat yourself and your people to something extraordinary, this is your recipe. This is the one you’ll come back to year after year. Let’s make a roast that’s not just dinner, but a show-stopping experience.
The Christmas We Almost Had Cereal for Dinner
I have to share a little story with you. Picture it: my third year hosting Christmas dinner for my entire, very opinionated, food-loving family. I was determined to prove myself. I went all out: the perfect prime rib, Yorkshire puddings, the works. I had read the recipes, I had my timings down, I felt unstoppable. I got the roast in, the high heat sear was going beautifully… and then the oven died. Just… quit. No warning, no flickering lights. Just a silent, cold box with my beautiful, half-cooked centerpiece inside.
Panic does not even begin to describe it. My dad, ever the pragmatic one, already had the cereal boxes lined up on the counter. But my mom, my wonderful mom, just laughed and started calling the neighbors. Twenty minutes later, our prime rib was finishing its journey in the oven of the lovely retired couple who lived three doors down, whom we’d never formally met until that day. We ended up sharing a glass of wine with them while the roast rested. That dinner, eaten around a crowded, joyful table, was one of the best we’ve ever had. It taught me that the best meals aren’t about perfection. They’re about the love you put in, the people you share it with, and the wild, unexpected stories you gather along the way. Now, every time I make this roast, I smile remembering the year we almost had Cheerios for Christmas.
Gathering Your Prime Rib Toolkit
Here’s the beautiful part: the ingredient list is short and sweet. This recipe is all about highlighting the incredible, natural flavor of the beef itself. Quality is key here!
- 1 (4–5 lb) bone-in or boneless prime rib roast: This is your star! A bone-in roast (often called a “standing rib roast”) will have more flavor and tends to cook more evenly, as the bones act as a natural heat conductor. But a boneless roast is easier to carve and still absolutely delicious. Look for one with a nice, solid cap of fat on top—that’s your flavor gold! Ask your butcher for the first cut (ribs 10-12) for the most tender and evenly shaped roast.
- 2 tbsp olive oil or softened butter: This acts as the glue for our seasoning and helps create that phenomenal, crispy crust. I love the rich flavor of butter, but olive oil works perfectly too. For a next-level option, use softened, herb-infused butter!
- 1 tbsp kosher salt: Do not use fine table salt here. Kosher salt has larger flakes, which allows for better coverage and seasoning without over-salting. It creates that perfect savory crust we’re after.
- 1 tbsp black pepper: Freshly cracked is always best! It gives a wonderful aromatic warmth.
- 2 tsp garlic powder: While I adore fresh garlic, powder gives us a more even, non-burning garlic flavor that permeates the entire crust beautifully.
- 1 tsp onion powder: This adds a subtle sweetness and depth to our simple seasoning blend.
- 1 tbsp fresh rosemary or thyme (optional): Highly recommended! Fresh herbs add a lovely aromatic layer. If you only have dried, use about 1 teaspoon.
- Optional: 4 cloves garlic, halved: For the garlic lovers! We can tuck these into little slits in the fat cap for roasty, mellow pockets of flavor.
- Optional: 1 onion, sliced for roasting bed: This isn’t just for flavor—it creates a natural rack if you don’t have one, lifting the roast out of its juices so the bottom doesn’t steam. Plus, you get deliciously caramelized onions as a bonus side!
Let’s Get Roasting: Your Foolproof Step-by-Step Guide
Ready? This is where the magic happens. Follow these steps, trust the process, and you are guaranteed a perfect result.
Step 1: The Patient Prep
This might be the hardest step because it requires patience, but it is non-negotiable! Take your roast out of the refrigerator at least 1-2 hours before you plan to cook it. Let it sit on the counter, unwrapped, to come to room temperature. Why? A cold roast going into a hot oven will cook extremely unevenly—you’ll end up with a overcooked outer layer and a cold, raw center. Letting it warm up ensures it cooks perfectly from edge to edge. Pat the entire roast completely dry with paper towels. A dry surface is the secret to a brown, crispy crust, not a steamy one!
Step 2: Season with Confidence
Preheat your oven to a blazing 450°F (230°C). While it heats up, get hands-on with your roast. Rub it all over with your olive oil or softened butter—this is the “glue.” Now, mix your kosher salt, black pepper, garlic powder, and onion powder (and dried herbs if using) in a small bowl. Sprinkle this seasoning mix over every single surface of the roast, and don’t be shy! Really massage it into the meat. This isn’t a gentle sprinkle; it’s a full-coverage crust mission. If you’re using the optional fresh garlic, use a small paring knife to make tiny slits in the fat cap and tuck a garlic half into each one.
Step 3: The Sizzling Start
Place your optional sliced onions in the bottom of a roasting pan to create a bed. Set a roasting rack on top of the onions. Place your seasoned roast on the rack, fat-side up. This is crucial! As the fat renders, it will baste the entire roast as it cooks, making it incredibly juicy. Slide the pan into your preheated 450°F oven and set a timer for 20 minutes. This initial blast of high heat is what sears the outside, creating that incredible, flavorful, crackling crust we all love.
Step 4: The Low & Slow Finish
After 20 minutes, without opening the oven door (keep that heat in!), reduce the oven temperature to 325°F (165°C). Now, we slow-roast the prime rib to perfection. The total cooking time from this point will vary based on the size of your roast and your desired doneness. This is where you become best friends with your meat thermometer. Do not guess. Do not rely on time alone. A thermometer is your key to perfect results every single time.
Insert your probe into the very center of the roast, making sure it’s not touching bone or fat. We’re aiming for these internal temperatures before resting:
- Rare: 120–125°F
- Medium-Rare (my recommended sweet spot!): 130°F
- Medium: 135–140°F
For a 4-5 lb roast, expect this low-temperature phase to take roughly 1 to 1.5 hours. Start checking about 45 minutes in.
Step 5: The Non-Negotiable Rest
Once your roast hits your target temperature, carefully take it out of the oven. Immediately transfer it from the roasting pan to a clean cutting board. Do not slice it! Tent it loosely with aluminum foil and walk away for a full 25-30 minutes. I know, the temptation is real! But this rest period is what makes the roast juicy. The muscle fibers relax, reabsorbing all those incredible juices. If you cut it open now, those juices will just run out all over your cutting board, leaving you with dry meat. Trust me, it’s worth the wait. The internal temperature will also continue to rise by about 5-10°F during this time (this is called carryover cooking).
Plating Your Masterpiece
After its long rest, your prime rib is ready for its grand debut! For the cleanest slices, use a long, sharp carving knife. If you have a bone-in roast, slice the bones away from the bottom first (save them for an incredible stock!), then turn the roast on its flat side and slice across the grain into beautiful, ½ to 1-inch thick slabs. Arrange the slices on a warm platter. Don’t forget to pour any of those precious juices that collected on the cutting board over the top of the sliced meat. Serve immediately to a very happy and impressed audience.
Make It Your Own: Delicious Twists & Swaps
The classic recipe is perfect, but it’s also a fantastic canvas for creativity! Here are a few of my favorite ways to mix it up:
- Coffee & Cocoa Rub: Add 1 tsp of finely ground coffee and ½ tsp of unsweetened cocoa powder to your seasoning mix. It sounds wild, but it adds an incredible, rich, smoky depth that pairs amazingly with beef.
- Herb Crust: Combine your oil with a hearty paste of fresh rosemary, thyme, parsley, and a few cloves of minced garlic. Smother the roast in this paste before seasoning.
- Reverse Sear: For ultimate edge-to-edge perfection, start in a low oven (250°F) until the roast hits about 115°F internally. Then, blast it in a 500°F oven for just 10-15 minutes to sear the crust at the very end.
- Horseradish Cream Sauce: A classic pairing! Whip together ½ cup sour cream, 2 tbsp prepared horseradish, 1 tbsp Dijon mustard, a squeeze of lemon, and salt & pepper. Serve on the side.
- Au Jus: While the roast rests, place your roasting pan (with the onions and drippings) on the stovetop. Add 1 cup of red wine or beef broth, bring to a simmer, and scrape up all the browned bits. Strain and serve as a simple, flavorful dipping juice.
Olivia’s Chef Notes & Kitchen Confessions
This recipe has been my holiday ride-or-die for over a decade, and it’s evolved in tiny ways. I used to be terrified of undercooking it, so I’d inevitably overcook it. The single biggest game-changer was investing in a good digital meat thermometer with a probe. It took all the guesswork and anxiety out of the process. Now I get perfect results with zero stress.
Another confession: I am the queen of making a mess with the seasoning. I inevitably get salt and pepper all over the floor and counter. My dog loves it because he hangs out hoping for a dropped onion slice. Embrace the mess! It’s a sign of a cook who isn’t afraid to get in there. The best meals often come from the messiest kitchens.
Finally, don’t save this roast just for holidays. A smaller, boneless roast is a spectacular way to turn an ordinary weekend into something special. Life’s too short for boring food!
Your Prime Rib Questions, Answered!
Q: My roast is bigger/smaller than the recipe. How do I adjust the cooking time?
A: Time is a guide, but temperature is your boss! The initial 20-minute sear at 450°F remains the same regardless of size. After that, the low-and-slow cooking time will vary. A good rule of thumb is to expect about 15-20 minutes per pound at 325°F for a medium-rare finish, but always, always use a meat thermometer to be sure. A 3lb roast will cook faster, a 7lb roast will take longer.
Q: Why did my temperature spike so fast/not move at all?
A: Oven temperatures can be notoriously inaccurate! I highly recommend using an independent oven thermometer to check your oven’s true temperature. A “slow” oven will make cooking take forever, and a “hot” oven will cook things much faster than recipes state. This is another reason the meat thermometer is your best friend—it tells you the truth about what’s happening inside the roast, not what your oven dial says.
Q: I forgot to take the roast out of the fridge early. Can I still cook it?
A: You can, but you’ll need to adjust. Add about 50% more time to the low-temperature roasting phase. The center will be much colder, so it will take longer to heat through. Check the temperature early and often to avoid overcooking the outside. The results won’t be quite as perfectly even, but it will still be delicious!
Q: The crust is getting very dark. Should I be worried?
A: A dark, deep brown crust is exactly what we want! However, if it’s starting to look like it’s burning, you can tent the roast loosely with foil for the remainder of the cooking time. This will slow down the browning on the outside while the inside continues to cook.

Perfect Prime Rib Roast (Oven Method)
- Total Time: 2.5 hrs
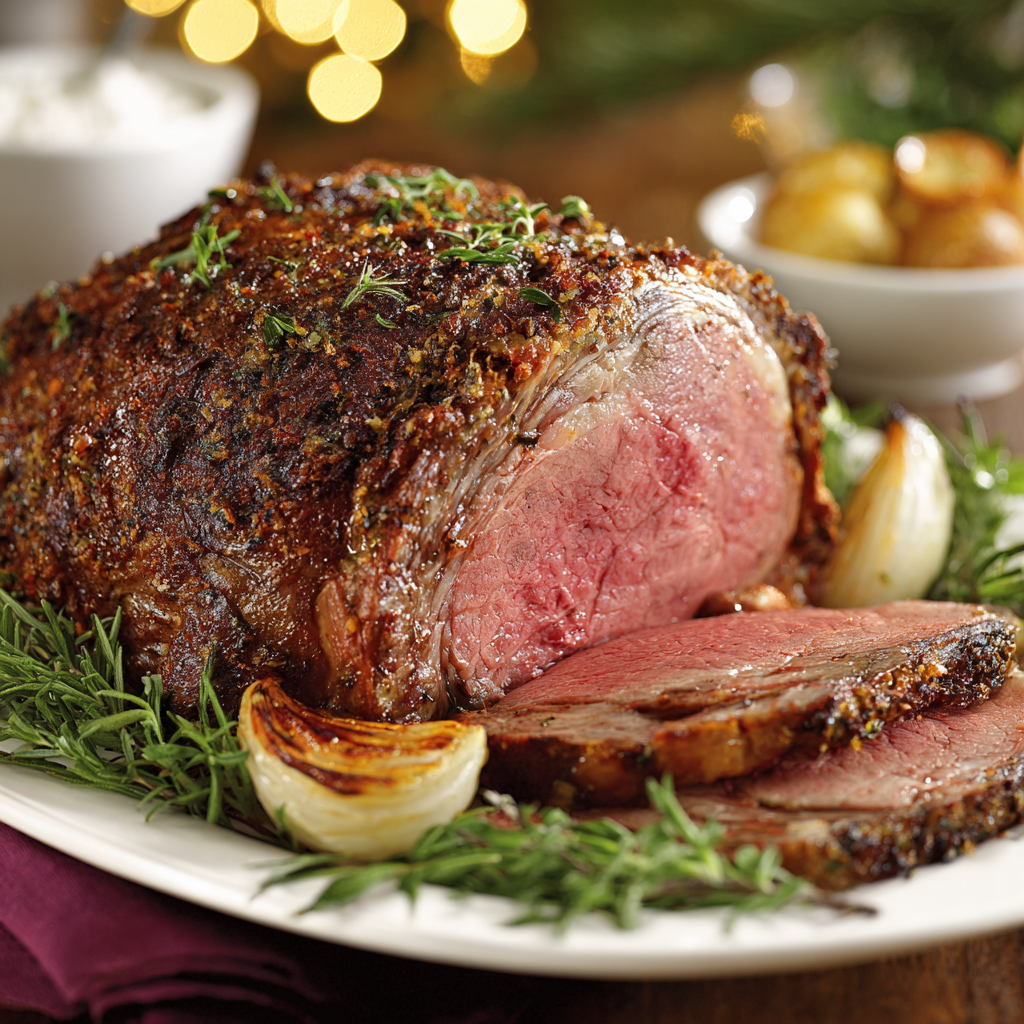
Description
Nothing says “celebration” quite like a perfectly roasted prime rib. Juicy, tender, and crowned with a savory crust, this recipe proves you don’t need a culinary degree to pull off restaurant-level magic. With just a handful of pantry staples, a good thermometer, and some patience, you’ll create a masterpiece that will have everyone talking long after the plates are cleared.
Ingredients
-
1 (4–5 lb) bone-in or boneless prime rib roast (ask for first cut, ribs 10–12)
-
2 tbsp olive oil or softened butter
-
1 tbsp kosher salt
-
1 tbsp freshly cracked black pepper
-
2 tsp garlic powder
-
1 tsp onion powder
-
1 tbsp fresh rosemary or thyme (optional)
-
Optional: 4 garlic cloves, halved | 1 onion, sliced for roasting bed
Instructions
-
Prep – Remove roast from fridge 1–2 hrs before cooking; pat dry.
-
Season – Rub with oil/butter, then coat with salt, pepper, garlic, onion powder, and herbs. Tuck garlic into slits if using.
-
Sear – Place on rack (fat-side up) over sliced onions. Roast at 450°F (230°C) for 20 mins.
-
Slow Roast – Lower oven to 325°F (165°C). Cook until internal temp reaches:
-
Rare: 120–125°F
-
Medium-Rare: 130°F (recommended)
-
Medium: 135–140°F
(Approx. 15–20 mins per lb. Use a thermometer!)
-
-
Rest – Transfer roast to a cutting board, tent with foil, and rest 25–30 mins.
-
Slice & Serve – Carve bones off (if bone-in), then slice across grain into ½–1 inch slabs. Pour resting juices over top.
- Prep Time: 15 mins + resting
- Cook Time: 1.5–2 hrs (for 4–5 lb roast)
Nutritional Information*
*This is an estimate for informational purposes only.
Per Serving (6 oz of cooked meat, trimmed):
Calories: ~400 | Protein: 30g | Fat: 32g | Carbohydrates: 0g | Fiber: 0g | Sugar: 0g
Final Thoughts: You Are Now a Prime Rib Legend
And there you have it. From a simple, beautiful cut of meat to a glorious, jaw-dropping centerpiece for your table. You walked in maybe feeling a little nervous, and now you’re walking out with all the secrets, the stories, and the sheer confidence to absolutely nail it.
Remember, this is more than just a recipe. It’s a promise of gathered laughter, of satisfied sighs around the table, and of creating a moment that your people will talk about for years to come. It’s about the year you made the most incredible prime rib they’d ever tasted.


