
Welcome to My Kitchen, Friend!
Is there anything in this world that smells quite as comforting as peanut butter and chocolate melting together? I don’t think so. It’s the smell of after-school snacks, of happy birthday parties, and of that deep, soul-satisfying joy that comes from creating something incredibly delicious with very little effort. If you’re here, I’m guessing you’re my kind of person—someone who believes that the best recipes are often the simplest, and that feeding people is a direct line to the heart.
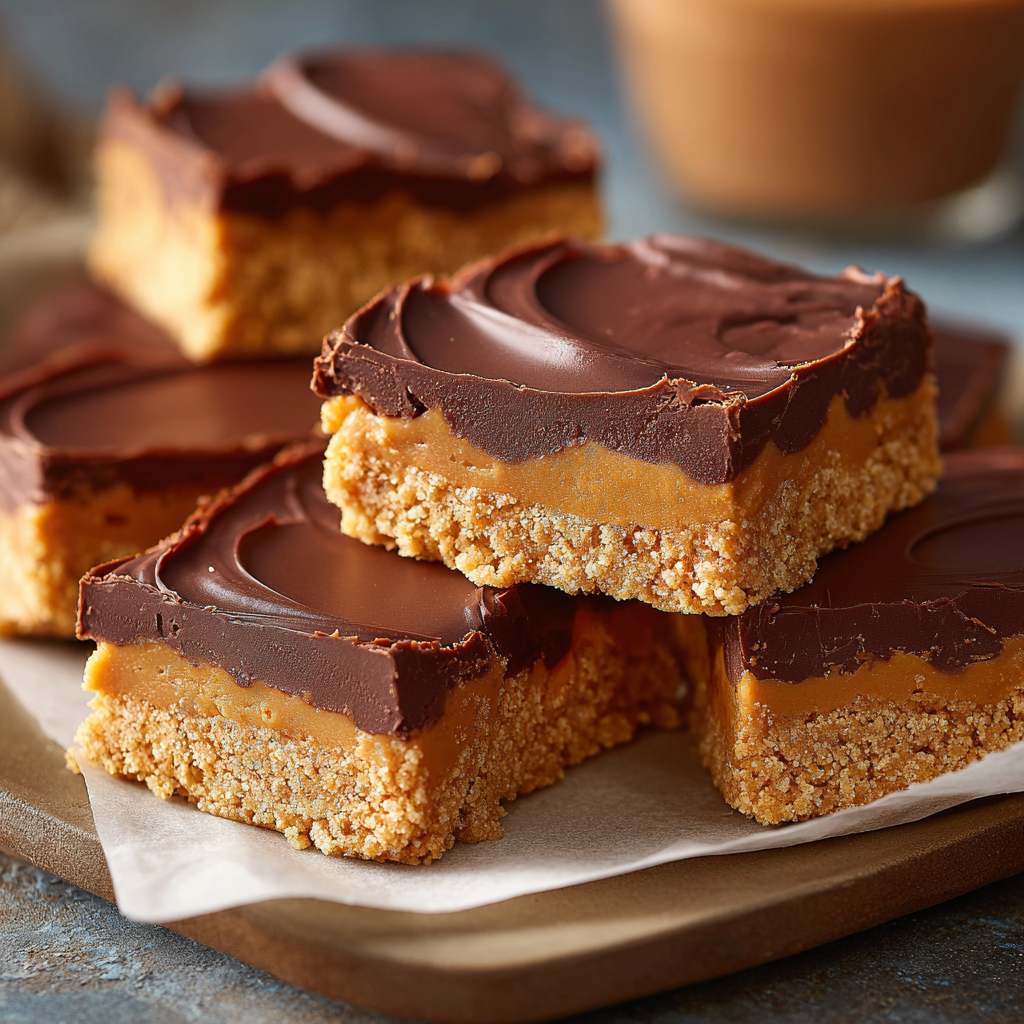
Today, we’re making my legendary No-Bake Peanut Butter Bars. These aren’t just any bars, my friend. These are the bars that disappeared in under five minutes at my last neighborhood potluck. They’re the bars my nephew specifically requests for his birthday instead of cake. They are, quite simply, a perfect dessert. With a crumbly, salty-sweet graham cracker base and a luxuriously smooth chocolate-peanut butter topping, they taste like a gourmet peanut butter cup that decided to level up.
The best part? You don’t even need to turn on your oven. We’re talking about 15 minutes of active kitchen time. Whether you’re a seasoned baker or someone who considers toast a culinary achievement, this recipe is for you. So, tie on your apron (embrace the mess, it’s part of the fun!), and let’s make something unforgettable together.
The Little League Legacy
This recipe is so much more to me than a list of ingredients. It’s a time machine. Every time I press that graham cracker mixture into the pan, I’m instantly transported to a sun-drenched Saturday morning twenty years ago, standing in my mom’s kitchen. She’d be whipping up a double batch of these for my brother’s little league team.
She wasn’t a fancy cook, but she was a strategic one. She needed something that could survive a few hours in a hot bleacher-side cooler, feed a dozen hungry 10-year-olds, and be universally declared “awesome.” These bars were her secret weapon. I was her official “chocolate spreader” and, more importantly, the “bowel-licker” (a title I wore with immense pride). The smell of melting chocolate and peanut butter is, for me, the smell of anticipation, of community, and of my mom’s quiet love language—feeding her people. It’s a legacy of simplicity and sweetness that I’m just so happy to carry on and now share with you.
Gathering Your Ingredients
Here’s the beautiful cast of characters that will come together to create magic. I’ve included some of my favorite insights and swaps to make this recipe your own!
For the Base:
- 2 cups graham cracker crumbs: This is our foundation! It gives that iconic, slightly honeyed crunch. Chef’s Tip: If you don’t have pre-crushed crumbs, just throw whole graham crackers into a zip-top bag and roll them with a rolling pin. It’s a fantastic (and free!) stress reliever. For a gluten-free version, gluten-free graham-style crackers work perfectly.
- 2 cups confectioners’ sugar: Also known as powdered sugar or icing sugar. This sweetens the base and helps bind it together. There’s no real substitute here, as its fine texture is key to the smooth, fudgy base.
- 1 cup unsalted butter, melted: Richness alert! Using unsalted butter lets you control the salt level. Chef’s Insight: I use unsalted because the peanut butter already has salt. If you only have salted butter, that’s okay! Just maybe skip the optional salt sprinkle later. Margarine also works if that’s your preference.
- 1 cup creamy peanut butter: The star of the show! Use a standard commercial brand like Jif or Skippy for the best texture and consistency. The oils in natural, stir-style peanut butter can separate and make the base greasy. This is the one time I’m a stickler for not going all-natural!
For the Topping:
- 1½ cups semisweet chocolate chips: The perfect partner for peanut butter. Semisweet strikes a lovely balance—not too bitter, not too sweet. Substitution Tip: Feel free to use milk chocolate for a sweeter bar, or dark chocolate for a more sophisticated, less sweet vibe. Chopped chocolate bars also melt beautifully.
- 4 tbsp peanut butter: Adding this to the chocolate topping is my secret weapon! It makes the topping softer, easier to slice, and gives it an incredible creamy peanut butter flavor throughout. It also helps it melt more smoothly.
Let’s Make Some Magic: Step-by-Step
Ready? This is the fun part. Let’s transform these simple ingredients into pure delight.
Step 1: Create the Crumbly Base
In a medium-sized bowl, combine your graham cracker crumbs and confectioners’ sugar. Give them a good whisk to get them acquainted and break up any lumps in the sugar. Now, pour in that glorious melted butter and your one cup of creamy peanut butter. Time to get your hands in there (or use a sturdy spoon)! Mix until everything is fully combined. It will look and feel like a thick, slightly sandy, but moldable dough. This is exactly what you want! Chef’s Hack: If the mixture seems too dry and isn’t holding together, add another tablespoon of melted butter. If it seems too wet, add another tablespoon of graham cracker crumbs.
Step 2: Press It Perfectly
Take a 9×13-inch baking pan. You can grease it lightly, but I’m a huge fan of lining it with parchment paper. Why? Because it creates a sling that lets you lift the entire block of bars out of the pan later for super clean, easy cutting. Trust me on this! Transfer your peanut butter mixture into the prepared pan. Now, press it down firmly and evenly into one unified layer. I like to use the flat bottom of a measuring cup to really press and smooth it out—this ensures you won’t have a crumbly base that falls apart. Get it nice and compact!
Step 3: The Dreamy Topping
In a microwave-safe bowl, combine the semisweet chocolate chips and the 4 tablespoons of peanut butter. Microwave on high in 30-second bursts. After each interval, stop and stir well. Why? Microwaves have hot spots, and stirring ensures everything melts evenly and doesn’t burn. It usually takes about 90 seconds total. You’re looking for a smooth, glossy, pourable lava of deliciousness. Chef’s Commentary: You can absolutely do this step in a double boiler on the stove if you prefer! I just love the speed of the microwave for this.
Step 4: The Big Pour
Pour your melted chocolate and peanut butter mixture directly over the base. Tilt the pan or use an offset spatula (a spoon works too!) to spread it into a perfectly even layer, making sure to cover the base right to the edges. This is your canvas. For a little professional flair, you can drag a butter knife through the topping in a zig-zag or swirl pattern to make it pretty.
Step 5: The Patience Game
This is the hardest part: waiting. Carefully place the pan in the refrigerator to chill. You need to let it set for at least one hour, though two is even better. The bars are ready when the top is firm to the touch and doesn’t give when you press it lightly. This chilling step is non-negotiable—it’s what transforms the layers from goo to glorious, sliceable bars.
Step 6: Slice and Serve!
Once fully set, lift the bars out of the pan using the parchment paper sling and place them on a cutting board. Use a large, sharp knife to slice them into 12 generous bars (or 24 smaller squares for a party!). For the cleanest cuts, you can wipe the knife blade clean between slices. Then, try not to eat them all at once. I believe in you.
How to Serve These Beauties
These bars are stars all on their own, but a little presentation goes a long way! I love placing them on a simple white platter to let that chocolate top shine. For a fancy touch, you can drizzle a little extra melted peanut butter over the top or give them a tiny sprinkle of flaky sea salt right before serving—the salt cuts through the sweetness beautifully. They’re perfect with a cold glass of milk, a hot coffee, or just your bare hands standing over the kitchen sink (no judgment here).
Mix It Up! Recipe Variations
Once you’ve mastered the classic, the playground is open! Here are a few of my favorite twists:
- The Cookie Dough Lover: Replace the graham cracker crumbs with 2 cups of crushed vanilla wafers or Biscoff cookies.
- The Crunch Fanatic: Stir ½ cup of crushed pretzels into the base mixture for a salty crunch, or sprinkle them on top of the chocolate before it sets.
- The Nutty Professor: Mix ½ cup of chopped peanuts, pecans, or almonds into the base for extra texture.
- The White Chocolate Dream: Swap the semisweet chips for white chocolate chips for a sweeter, creamier bar.
- PB&J Swirl: Before chilling, drop small spoonfuls of your favorite jam or jelly over the chocolate topping and use a knife to swirl it in gently.
Chef’s Notes & Kitchen Confessions
This recipe has been my ride-or-die for decades, and it’s evolved in tiny ways. I started adding the extra peanut butter to the chocolate after a minor kitchen disaster where the topping was too hard and cracked when I sliced it. Adding the PB was a “hail mary” that turned into a permanent upgrade! I also used to just grease the pan, but after one too many batches that were hard to get out, the parchment paper sling became law in my kitchen.
A funny story? I once was so excited to make these for a date that I accidentally used garlic powder instead of confectioners’ sugar (they were in similar-looking containers in my pantry—a mistake I only made once!). We ended up ordering pizza and laughing about it, but let me tell you, garlic peanut butter bars are NOT recommended. Label your containers, folks!
FAQs & Troubleshooting
Q: My base is too crumbly and won’t hold together. What did I do wrong?
A: Don’t worry! This usually means the mixture needs a bit more “glue.” The butter is your binder. Try adding another tablespoon of melted butter and mix it in thoroughly. Press it into the pan even more firmly than you think you need to.
Q: Can I use natural peanut butter?
A: I really don’t recommend it for this specific recipe. Natural peanut butters have a different oil content and often separate. This can lead to a greasy, oily base that doesn’t set properly. The stabilizers in conventional creamy peanut butter are actually your friend here, ensuring a perfect, firm texture.
Q: How should I store these, and how long do they last?
A: Because of the butter and chocolate, these bars need to be stored in the refrigerator in an airtight container. They will keep beautifully for up to a week… if they last that long! You can also freeze them for up to 3 months. Just layer them between sheets of parchment paper in a freezer-safe container and thaw in the fridge before serving.
Q: My chocolate topping seized up and got grainy. Help!
A: This usually happens if a tiny bit of steam or water gets into the chocolate while melting. Chocolate is notoriously finicky. To fix it, try adding a tiny bit more fat—a teaspoon of coconut oil or even a little more peanut butter—and stir vigorously as it melts. This can often bring it back to a smooth state.

Peanut Butter Bars
Description
Welcome to my kitchen, friend! Is there anything more comforting than peanut butter and chocolate melting together? These No-Bake Peanut Butter Bars are the ultimate indulgence: a crumbly, salty-sweet graham cracker base topped with creamy chocolate-peanut butter. They taste like a gourmet peanut butter cup, but better. Best of all, no oven required—just 15 minutes of hands-on kitchen magic.
Ingredients
For the Base:
-
2 cups graham cracker crumbs (or crush your own)
-
2 cups confectioners’ sugar
-
1 cup unsalted butter, melted
-
1 cup creamy peanut butter (standard commercial brands recommended)
For the Topping:
-
1½ cups semisweet chocolate chips (or milk/dark chocolate)
-
4 tbsp peanut butter
Optional Variations:
-
Swap graham crackers for crushed vanilla wafers or Biscoff cookies
-
Add ½ cup crushed pretzels or chopped nuts to the base for texture
-
Use white chocolate chips for a sweeter topping
-
Swirl in your favorite jam for a PB&J twist
Instructions
-
Make the Base:
-
In a medium bowl, combine graham cracker crumbs and confectioners’ sugar.
-
Add melted butter and 1 cup peanut butter. Mix until fully combined into a moldable dough.
-
Adjust: too dry? add a tbsp more butter. Too wet? add a tbsp more crumbs.
-
-
Press the Base:
-
Line a 9×13-inch pan with parchment paper for easy removal.
-
Press the peanut butter mixture evenly into the pan using your hands or the flat bottom of a measuring cup.
-
-
Prepare the Topping:
-
In a microwave-safe bowl, combine chocolate chips and 4 tbsp peanut butter.
-
Microwave in 30-second bursts, stirring between each, until smooth and glossy. (Or use a double boiler.)
-
-
Assemble Bars:
-
Pour the melted chocolate-peanut butter mixture over the base.
-
Spread evenly with a spatula or spoon. Optional: make a swirl pattern with a knife.
-
-
Chill:
-
Refrigerate for at least 1 hour (2 hours is better) until firm.
-
-
Slice & Serve:
-
Lift bars out using the parchment sling.
-
Slice into 12 large bars or 24 small squares.
-
Optional: drizzle extra peanut butter or sprinkle flaky sea salt before serving.
-
Notes
-
Base too crumbly? Add more melted butter and press firmly.
-
Chocolate seized? Add a teaspoon of peanut butter or coconut oil and stir until smooth.
-
Storage: Store in an airtight container in the fridge for up to 1 week, or freeze for up to 3 months.
Nutrition
- Calories: 380 cal Per bar
- Fat: 24g
- Saturated Fat: 10g
- Carbohydrates: 35g
Nutritional Information (Per Bar)
Prep Time: 25 minutes | Chill Time: 1 hour | Total Time: 1 hr 25 mins | Servings: 12
Calories: ~380 | Fat: 24g | Saturated Fat: 10g | Carbohydrates: 35g | Fiber: 2g | Sugar: 28g | Protein: 5g
Please note: This is an estimated nutritional breakdown based on the specific ingredients listed. Values may vary depending on your specific brands.
Final Thoughts
There you have it—the legendary, no-fuss, soul-warming bars that have been a constant source of joy in my life. I hope this recipe finds its way into your own collection of go-to favorites, creating new stories and happy memories in your kitchen.
Remember, the very best recipes are the ones that make you feel like a genius, bring people together, and leave a little bit of chocolate on someone’s smile. You’ve absolutely nailed it.
Now, go enjoy your well-deserved treat. You’ve earned every delicious, peanut-buttery bite.


