Your New Favorite Party Trick: Olive Cheese Balls
Hey there, friend! Come on in, grab an apron, and let’s get one thing straight: the best party foods aren’t always the fanciest. Nope. The real MVPs are the ones that disappear from the platter in under five minutes, leaving behind a trail of happy, satisfied smiles and a chorus of, “Wait, you made these?” That, right there, is the magic of these Olive Cheese Balls.
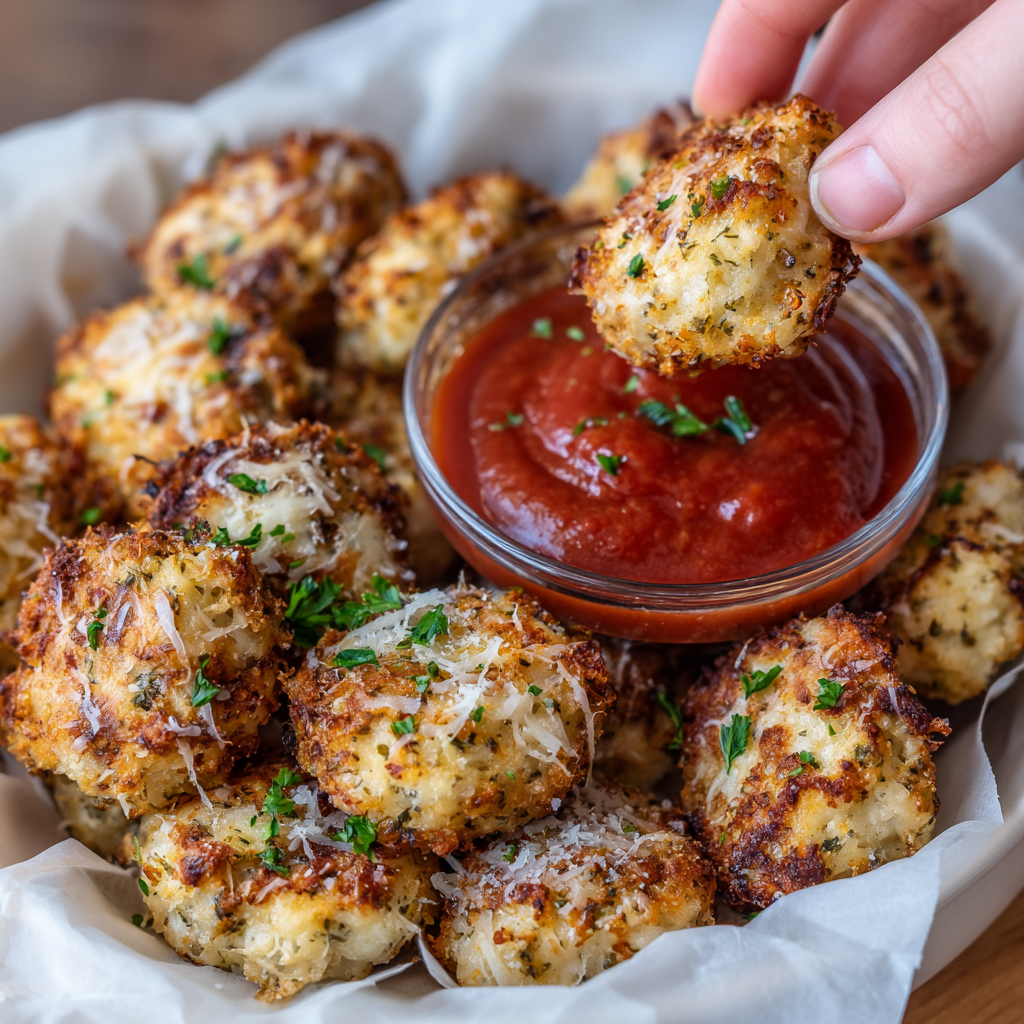
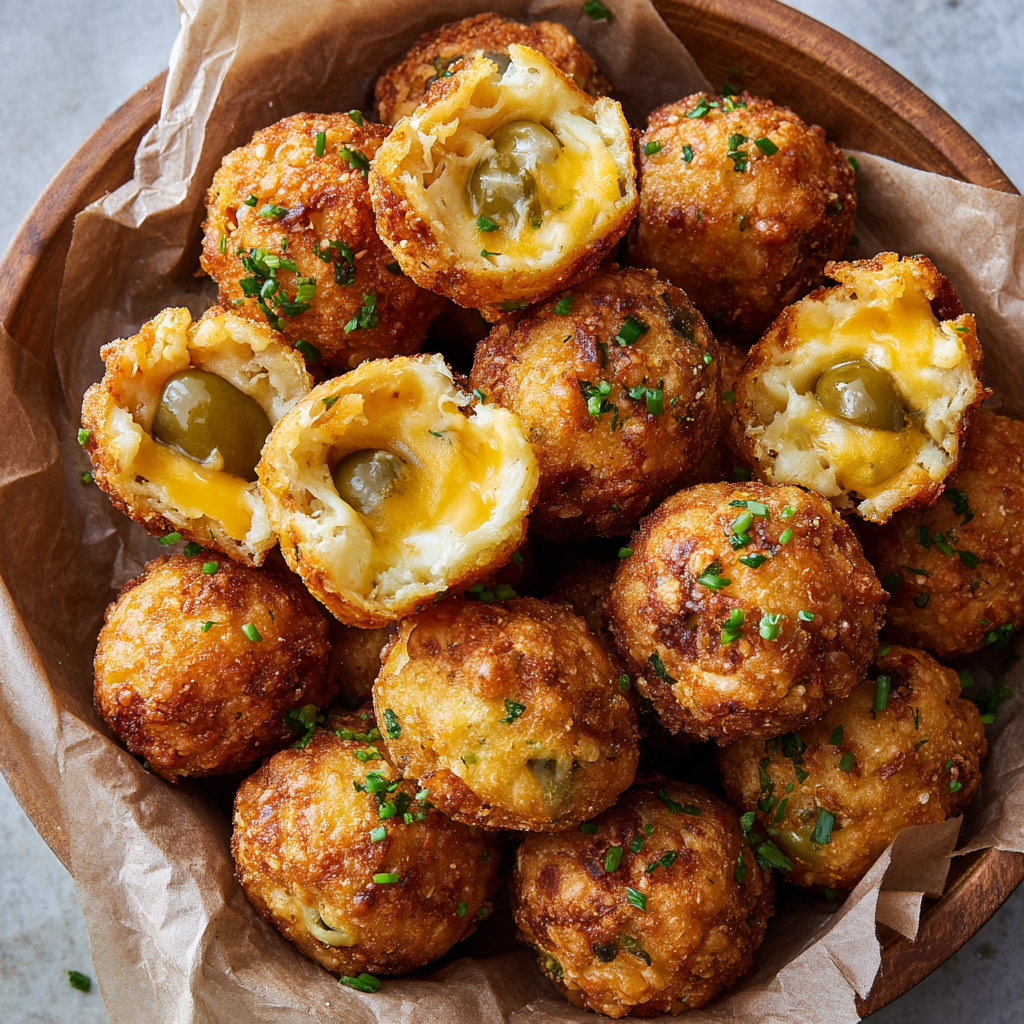
Imagine this: a flaky, buttery, impossibly cheesy dough that bakes up into a golden little sphere. And then, just when you think it can’t get any better, you bite into a tangy, briny surprise in the center—a pimento-stuffed green olive that cuts through all that rich, savory goodness. It’s a flavor explosion in one single, perfect bite. Salty, cheesy, crisp, and tender, all at once.
If you’re looking for a guaranteed crowd-pleaser for your next game day spread, holiday cocktail party, or just because-it’s-Tuesday treat, you’ve hit the jackpot. These little poppers are deceptively simple to make, they bake up beautifully, and they reheat like an absolute dream. So, let’s roll up our sleeves, preheat that oven, and create some kitchen magic that will have everyone begging for the recipe.
A Blast from the Past: My First Bite
I can still picture it perfectly: my Aunt Carol’s bustling kitchen during the holidays, the air thick with the scent of roasting turkey and pine needles. I was probably about eight, strategically positioned near the appetizer table, which was my version of heaven. Among the veggie platters and cheese logs was a humble plate of these warm, golden-brown balls. I was skeptical. An olive inside? But the allure of that melted cheddar crust was too strong.
I took one, still warm from the oven, and my entire world shifted. The initial crunch gave way to a melt-in-your-mouth cheesy interior, and then—BAM!—that salty, tangy olive center. It was a revelation. I must have eaten half the plate before dinner, much to my mother’s horror and Aunt Carol’s absolute delight. She winked at me and whispered, “They’re my secret weapon, kid.” From that moment on, they weren’t just an appetizer; they were a core memory. They’re my go-to recipe when I want to inject a little bit of that nostalgic, joy-filled energy into my own gatherings.
Gathering Your Cast of Characters
One of the best things about this recipe is its simplicity. You likely have most of these ingredients in your kitchen right now! Here’s what you’ll need and why each one is a star player.
- 36 Queen Green Olives Stuffed with Pimento, Well Drained: This is the heart of the surprise! The “queen” size is perfect for a satisfying bite. Make sure they are well-drained and even patted dry with a paper towel—any extra moisture can make the dough slippery. The pimento adds a tiny hint of sweetness and beautiful color when you bite in.
- ½ cup Unsalted Butter, Softened: The foundation of our flaky, rich dough. Using unsalted lets us control the salt level perfectly. Chef’s Tip: Your butter is perfectly softened when you can press a finger into it easily and leave an indentation, but it’s not greasy or melted.
- 8 oz Sharp Cheddar Cheese, Freshly Shredded Please, please, I beg of you—shred your own cheese! Pre-shredded bags are coated with anti-caking agents that can prevent your dough from coming together smoothly and melting beautifully. The sharpness gives a fantastic flavor punch that stands up to the salty olive.
- 1 cup + 2 tbsp All-Purpose Flour: This is the structure-holder of our dough. We’re using a bit more than a standard cup to get the perfect, pliable consistency that isn’t too sticky.
- ½ tsp Paprika: This isn’t just for color (though it gives a lovely golden hue)! It adds a subtle, sweet warmth that complements the cheddar beautifully.
- ½ tsp Kosher Salt & ½ tsp Black Pepper: The essential flavor enhancers. I prefer kosher salt for its clean taste, and freshly cracked black pepper for a little aromatic kick.
- Optional: Pinch of Cayenne or a Splash of Hot Sauce: This is my little secret for taking these from great to legendary. It doesn’t make them spicy, per se, it just adds a wonderful depth and a background warmth that keeps people coming back for more.
- Optional: 2 tbsp Finely Chopped Fresh Herbs (like Parsley or Chives): A fantastic way to add a pop of fresh color and a subtle herbal note that brightens up all the rich flavors.
Let’s Get Our Hands Dirty: The Fun Part!
Ready to create some magic? This is where the cozy, hands-on fun begins. Don’t be afraid to get in there—this dough is wonderfully forgiving.
- Preheat and Prep: First things first, get that oven heating to a nice, hot 400°F (200°C). This high heat is key for getting a golden, crisp exterior while keeping the inside tender. Line a baking sheet with parchment paper. Trust me, this is a non-negotiable for easy cleanup and preventing any sticking!
- Mix the Dough: In a medium-sized mixing bowl, blend the softened butter and your freshly shredded sharp cheddar cheese until it’s relatively smooth. I like to use a sturdy wooden spoon or even my (clean!) hands for this. It’s therapeutic! Once they’re combined, stir in the flour, salt, pepper, paprika, and any of your optional add-ins (cayenne, herbs, etc.). Keep mixing until a soft, pliable dough forms. It might seem crumbly at first, but it will come together as you work it. Chef’s Hack: If your dough is too crumbly, let it sit for 5-10 minutes. The flour will hydrate, and it will become easier to handle.
- Wrap the Olives: This is the most important step! Take your well-drained olives and give them one last pat with a paper towel. Now, take about a tablespoon of the dough and flatten it into a small disc in the palm of your hand. Place one olive in the center and gently wrap the dough around it, pinching the seams to seal it completely. Then, gently roll it between your palms to form a smooth, round ball. The goal is a uniform, thin layer of dough around each olive so everything cooks evenly. Pro-Tip: If the dough starts sticking to your hands, dip your fingers in a little bit of flour.
- Bake to Perfection: Place your beautifully formed cheese balls on the prepared baking sheet, giving them a little space (about an inch apart) so they can get nice and crisp all around. Pop them into the preheated oven and bake for 13-15 minutes. You’re looking for them to be lightly golden brown and slightly firm to the touch. Your kitchen will smell absolutely incredible right about now.
- The Hardest Part: Let Them Rest! As soon as you pull them out, you’ll want to eat one. I get it! But let them cool on the baking sheet for at least 5 minutes. They are molten lava on the inside straight from the oven, and this resting time allows the cheesy dough to set just enough so you get the perfect texture when you bite in.
Plating Up the Perfect Bite
Presentation is part of the fun! I love serving these warm on a beautiful wooden board or a simple white platter that really makes their golden color pop. Stick a festive toothpick in each one for easy grabbing. While they are absolutely stellar all on their own, I always offer a couple of dipping sauces on the side for my guests. A creamy garlic aioli is a classic pairing, or a small bowl of spicy marinara for those who love an Italian twist. They also pair wonderfully with a zesty ranch dip!
Mix It Up! Creative Twists on a Classic
Once you’ve mastered the basic recipe, the flavor world is your oyster! Here are a few of my favorite ways to play with this versatile dough:
- Jalapeño Popper Style: Swap the green olives for slices of pickled jalapeño and add 2 tablespoons of real bacon bits to the dough.
- Everything Bagel Bliss: Before baking, brush the cheese balls with an egg wash and roll them in an “Everything Bagel” seasoning blend. The sesame, poppy seeds, and garlic are a game-changer.
- Go Greek: Use a mix of feta and mozzarella cheese and wrap the dough around a small, pitted kalamata olive.
- Gluten-Free & Keto Friendly: Simply swap the all-purpose flour for the same amount of blanched almond flour. The texture will be a bit more delicate, but just as delicious!
- Pepperoni Pizza: Add ¼ cup of finely chopped pepperoni and ½ tsp of dried oregano to the dough, and use a small, solid mozzarella ball (like a mini bocconcini) instead of an olive.
Chef’s Notes: A Few Parting Thoughts
This recipe has been a part of my life for so long, and it’s evolved in the best ways. I used to be so precise about making every cheese ball perfectly round and uniform. Now? I embrace the rustic, slightly imperfect look—it shows they’re homemade with love! One of my favorite kitchen memories is the time I was making a double batch for a big party and ran out of green olives. In a panic, I used a mix of green and kalamata olives. It turned out to be a happy accident, creating a fun “surprise” platter where every bite was a little different. My guests loved it!
Another pro-tip: you can absolutely make these ahead of time. Assemble the cheese balls, place them on the baking sheet, and freeze them solid. Then, transfer them to a freezer bag. When you’re ready, bake them straight from the freezer, just adding 2-3 extra minutes to the baking time. It’s the ultimate lifesaver for effortless entertaining!
FAQs & Troubleshooting: Your Questions, Answered!
Over the years, I’ve gotten a lot of questions about this recipe. Here are the answers to the most common ones to ensure your success!
Q: My dough is too crumbly and won’t hold together around the olive. What did I do wrong?
A: Don’t worry, this is common! It usually means your butter was a bit too cold or your flour was packed too tightly. The fix is easy: just let the dough sit for 5-10 minutes to allow the flour to fully hydrate. You can also try using your hands to knead it very gently for another 30 seconds, as the warmth from your hands can help bring it together.
Q: Can I use a different kind of olive?
A: Absolutely! While pimento-stuffed green olives are the classic, feel free to experiment. Just make sure whatever olive you use is pitted and well-drained. Black olives, kalamatas, or even garlic-stuffed olives would all be delicious. Just be mindful that strongly flavored olives will, of course, change the final flavor profile.
Q: My cheese balls spread a lot and lost their round shape in the oven. Why?
A: This typically happens if the butter was too warm or the dough was overworked. Make sure your butter is softened but still cool to the touch. Also, when you’re forming the balls, handle the dough as little as possible—just enough to seal it. Chilling the formed balls on the baking sheet for 15 minutes before baking can also help them hold their shape perfectly.
Q: Can I make these dairy-free?
A: You can certainly try! Use a high-quality, meltable vegan cheddar cheese and a plant-based butter substitute. The flavor and texture will be different, but it can be a great option for those with dietary restrictions. I’d recommend doing a small test batch first to see if you like the results.

Olive Cheese Balls : Flaky, Cheesy Party Poppers
Description
I first had these in my Aunt Carol’s bustling holiday kitchen. Warm appetizers everywhere, but those little golden cheese balls? I must have eaten half the plate. The crunch, the melt, the salty olive center — instant obsession. Aunt Carol called them her “secret weapon,” and now they’re mine too.
Instructions
1️⃣ Preheat
Heat oven to 400°F (200°C).
Line a baking sheet with parchment paper.
2️⃣ Make the Dough
In a bowl, mix together:
-
softened butter
-
shredded cheddar
Then add:
-
flour
-
salt
-
pepper
-
paprika
-
(optional spices/herbs)
Mix until a soft, pliable dough forms. A little crumbly at first is normal — keep working it.
If too crumbly: rest 5–10 minutes so the flour hydrates.
3️⃣ Wrap the Olives
Flatten a tablespoon of dough into a small disc.
Place an olive in the center.
Wrap and seal completely, rolling into a smooth ball.
Tip: Lightly flour your hands if the dough sticks.
4️⃣ Bake
Place on the sheet about 1 inch apart.
Bake 13–15 minutes, until lightly golden.
5️⃣ Cool
Let rest 5 minutes — they’re extremely hot inside!
Notes
-
Assemble balls
-
Freeze on a tray until solid
-
Store in a freezer bag
Bake straight from frozen — add 2–3 minutes.
Quick Nutritional Snapshot
Please note: This is an approximate estimate calculated using an online tool and will vary based on your specific ingredients and serving sizes.
Per Olive Cheese Ball: Calories: ~85 | Fat: 7g | Carbohydrates: 3g | Protein: 2g | Fiber: <1g
Final Thoughts: More Than Just an Appetizer
So there you have it—the humble, irresistible Olive Cheese Ball in all its glory. It’s a recipe that proves you don’t need complicated techniques or exotic ingredients to create something truly memorable. What you’re making here isn’t just an appetizer; you’re crafting little edible moments of joy.
These cheese balls are a bridge between generations, a conversation starter, and the ultimate proof that the best party foods are often the simplest. They carry with them the warmth of Aunt Carol’s kitchen, the excitement of a holiday gathering, and the promise of a satisfied smile with every single bite.
Whether you stick religiously to the classic version or embark on your own flavor adventures—jalapeño, everything bagel, or a happy accident with mixed olives—you’re participating in a tradition of sharing and delight. So the next time you’re asked to bring a dish, or simply want to treat your family on a random weeknight, remember this: your secret weapon is waiting. Just a bit of cheese, a little dough, and a tangy olive heart.