
Why These Bites Will Become Your Autumn Obsession
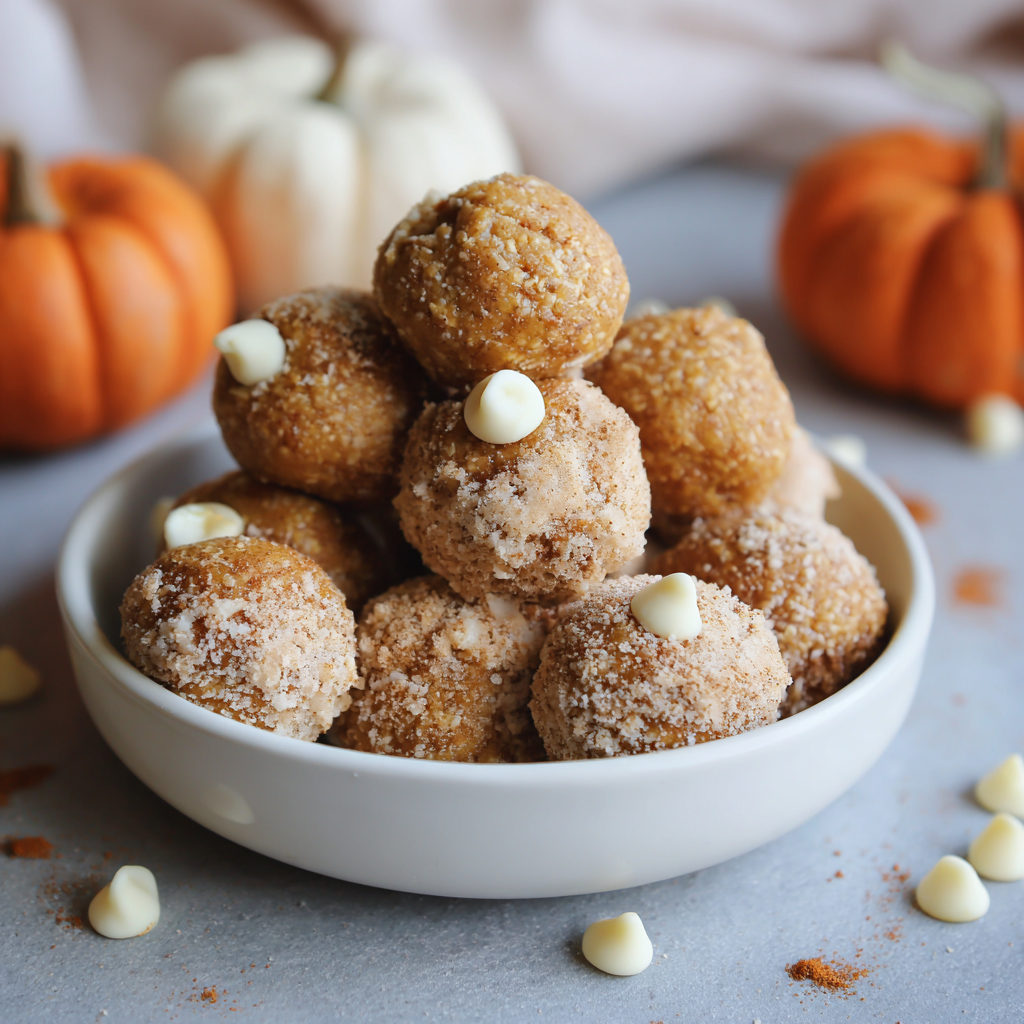
Hey friends! Olivia here, apron slightly dusted with cinnamon (as usual), ready to share a little piece of autumnal magic that’s been on heavy rotation in my kitchen. Picture this: It’s a crisp October morning. Golden light streams through the window, there’s a slight chill in the air, and you’re craving something that tastes like pumpkin cheesecake… but without the hours of baking, water baths, or that slight panic about cracks forming. Enter: These No-Bake Pumpkin Cheesecake Energy Bites! They’re your pumpkin spice dreams come true – packed with cozy flavors, creamy texture, and a serious protein punch to keep you glowing through apple picking, leaf raking, or just conquering your inbox.
Seriously, these little bites are my secret weapon for surviving (and thriving!) through fall’s busy days. They’re ready in about 30 minutes flat – most of that time is just hands-off chilling! No oven required, no fancy equipment needed, just a bowl, a spoon, and your hands. Imagine the creamy tang of cheesecake swirled with rich pumpkin purée, kissed with warm cinnamon and pumpkin pie spice, studded with melty pockets of sweet white chocolate, all held together with hearty oats and protein power. They’re naturally gluten-free (just check your oats!), endlessly adaptable, and perfectly portioned for grab-and-go goodness. Whether you need a quick breakfast bite, a post-workout refuel, a lunchbox superstar, or just a sweet little treat with your afternoon chai, these bites are your answer. Let’s dive in and make your kitchen smell like a cozy fall hug!
The Leaf-Peeping Trip That Sparked a Bite Revolution
Okay, story time! Remember that epic leaf-peeping trip up to Vermont a few years back? Gorgeous reds and golds everywhere, crisp air, the whole shebang. My best friend Sarah and I planned this picturesque picnic lunch. We had visions of crusty bread, local cheeses, and… a gorgeous pumpkin cheesecake I’d slaved over. Fast forward: We’re halfway up a stunning hiking trail, backpacks loaded, when *crunch*… yup. My beautiful cheesecake met an untimely end against a rogue rock. Sarah just looked at the sad, smooshed container and said, “Well, at least it smells amazing?” We salvaged what we could with spoons, laughing hysterically, but I vowed then and there: I needed a pumpkin cheesecake experience I could take anywhere, no fragility allowed!
Back home, fueled by that memory (and a serious pumpkin craving), I started experimenting. I wanted all the flavor – the creamy richness, the warm spices, the sweet hint – but in a sturdy, no-bake, energy-boosting form. After a few happy accidents (too much nut butter = hockey pucks, too little = mush!), these magical little bites were born. The first time I took a batch on a hike? Pure triumph! No crumbs, no mess, just pure pumpkin cheesecake joy enjoyed on a mountaintop. Now, making them feels like recreating that perfect autumn day, minus the cheesecake casualty! Every bite is a little reminder that sometimes, the best things come in small, resilient packages.
Your Pumpkin Cheesecake Bite Toolkit
Gather your cozy squad! Here’s what you’ll need to whip up these autumnal wonders. Don’t stress if you need to swap something – I’ve got your back with tips:
- 1 cup Rolled Oats (Old-Fashioned): The sturdy, heart-healthy base! They give structure and chew. Chef’s Insight: Rolled oats soak up moisture perfectly without getting gluey like quick oats can. Swap: Use certified gluten-free oats if needed. Quick oats work in a pinch but the texture will be slightly less distinct.
- 1/2 cup Pumpkin Purée: The star! Pure pumpkin (NOT pie filling) adds moisture, flavor, fiber, and that gorgeous orange hue. Chef’s Tip: Blot excess moisture with a paper towel if your purée seems super watery. Swap: Mashed sweet potato works surprisingly well!
- 1/3 cup Almond Butter: Our creamy binder and healthy fat source. It adds richness reminiscent of cheesecake. Chef’s Insight: Use natural, drippy almond butter (stir it well!). The oil helps bind everything. Swap: Creamy peanut butter, cashew butter, or sunflower seed butter all work beautifully.
- 1/4 cup Vanilla Protein Powder: The secret protein boost! It helps firm up the bites and adds sweetness. Chef’s Tip: Whey protein concentrate works best for texture. Swap: Plant-based vanilla protein (pea, brown rice blend) works great for vegan bites. Omit it and add an extra 2 tbsp oats + 1 tbsp maple syrup if needed.
- 1/4 cup White Chocolate Chips: Those sweet, melty pockets that scream “cheesecake!” Chef’s Insight: Mini chips distribute even better! Swap: Dark chocolate chips, chopped pecans, dried cranberries, or pepitas (pumpkin seeds) for a different twist.
- 1 tsp Pumpkin Pie Spice: The warm, cozy essence of fall! Chef’s Tip: Make your own blend (see Variations!) for ultimate freshness. Swap: Extra cinnamon (about 1.5 tsp total) + a tiny pinch each of nutmeg, ginger, and cloves.
- 1/2 tsp Cinnamon: Deepens the warmth and complements the pumpkin perfectly.
- Pinch of Sea Salt: DO NOT SKIP! It balances the sweetness and makes all the flavors pop.
Let’s Roll! Your Foolproof Bite-Making Adventure
Ready for the easiest “baking” session ever? No oven preheating required! Just follow these steps for perfect, no-stress bites:
- Mix the Dry Crew: Grab your largest mixing bowl. Dump in the rolled oats, vanilla protein powder, pumpkin pie spice, cinnamon, and that crucial pinch of sea salt. Chef’s Hack: Give this a really good whisk! This ensures the spices and protein powder are evenly distributed, so every single bite is perfectly spiced. No one wants a bland bite or a pocket of protein powder surprise! Why dry first? It prevents clumping when we add the wet stuff.
- Welcome the Wet Team: Plop the pumpkin purée and almond butter right on top of your dry ingredients. Chef’s Tip: If your almond butter is super thick or cold, warm it slightly for 10 seconds in the microwave – it’ll mix in like a dream! Now, channel your inner kid making mud pies and stir, stir, stir! Use a sturdy spatula or even clean hands (my fave method!). Get right into the corners of the bowl. You want it fully combined into a thick, slightly sticky dough. Texture Check: It should hold together when pinched. If it seems too dry, add a teaspoon of almond butter or maple syrup. Too wet? A sprinkle more oats or protein powder.
- Fold in the Fun: Time for the white chocolate chips! Sprinkle them over the dough. Chef’s Hack: Reserve a small handful (about 1 tbsp) for topping later if you want some visible chips on the outside! Now, gently fold them in with your spatula. Don’t vigorously stir – we want to keep those chips intact, not smash them into bits. Just turn the dough over itself until they’re evenly distributed.
- Chill Out (The Dough, Not You… Yet!): Cover the bowl tightly with plastic wrap or pop a lid on it. Stick it in the fridge for at least 20 minutes. Chef’s Insight: This is NON-NEGOTIABLE for easy rolling! The chilling firms up the fats (from the nut butter) and allows the oats to absorb moisture, transforming your slightly sticky dough into a perfectly scoopable and rollable consistency. Trying to roll warm dough is a sticky mess – trust me, I’ve learned the hard way!
- Roll & Revel: Line a baking sheet or large plate with parchment paper. Take your chilled dough out of the fridge. Using a small cookie scoop (about 1 tbsp size) or a spoon, portion out the dough. Chef’s Pro Tip: Lightly dampen your hands with water! This prevents the dough from sticking like crazy to your palms. Roll each portion between your hands into a smooth, round ball. Place each finished bite onto your prepared sheet. If you saved some white chocolate chips, gently press a few onto the top of each ball now for extra pretty points.
- The Finishing Flourish (Optional but Fancy!): For that bakery-worthy look and extra texture, give your bites a little roll or dust! You can roll them in: extra cinnamon (hello, cozy!), crushed oats (for a rustic look), finely chopped pecans, or even a light dusting of vanilla protein powder. Get creative!
And that’s it! See? I told you it was easy. Now, try not to eat them all straight off the tray!
How to Serve Your Pumpkin Bliss Balls
Presentation is half the fun, right? These bites are incredibly versatile. For a casual snack, pile them high in a cute mason jar or a rustic wooden bowl on your counter – they disappear fast! Pack them in small reusable containers for lunches or gym bags (they’re the perfect post-workout refuel). Feeling fancy? Arrange them on a pretty platter for your next fall gathering – think book club, pumpkin carving party, or Thanksgiving appetizer spread. They pair divinely with a hot cup of coffee (pumpkin spice latte, anyone?), a mug of spiced chai, or even a cold glass of almond milk. They’re sturdy enough to thread onto mini skewers for a fun bite-sized dessert tower! Store any leftovers (if you have any!) in an airtight container in the fridge. They’ll stay fresh and delicious for up to 1 week – the flavors actually deepen after a day or two!
Mix It Up! Creative Twists on Your Bites
Don’t be afraid to play with your food! These bites are a fantastic canvas. Here are some of my favorite riffs:
- Decadent Double Chocolate: Swap the white chocolate chips for dark chocolate chips. Add 1 tbsp unsweetened cocoa powder to the dry ingredients for an intense chocolate-pumpkin experience.
- Cranberry-Pecan Harvest: Omit white chocolate. Fold in 1/4 cup dried cranberries (chopped if large) and 1/4 cup finely chopped toasted pecans. Hello, Thanksgiving vibes!
- Vegan Dream: Use maple syrup or agave-sweetened almond butter, plant-based vanilla protein powder, and vegan white chocolate chips (like those made with cocoa butter). Ensure your oats are certified GF if needed.
- Ginger Snap Kick: Add 1/4 tsp ground ginger + 1/8 tsp ground cloves to the spices. Fold in 2 tbsp finely chopped crystallized ginger instead of (or with!) the white chocolate. So zingy!
- Nut-Free & Seed-Tastic: Swap almond butter for sunflower seed butter or tahini (use light tahini for best flavor). Use seeds like pepitas or sunflower seeds instead of nuts for add-ins.
Olivia’s Kitchen Confessions & Bite Evolution
Confession: The very first batch of these I ever made was… a delicious disaster! I got overzealous with the pumpkin purée and skipped the chilling step. Let’s just say I ended up with more of a “pumpkin cheesecake spread” than bites. Lesson learned: Patience (and blotting pumpkin!) is key! Over the years, this recipe has become my fall security blanket. I’ve made them with my niece (who declared them “pumpkin cookie dough bites” – accurate!), taken them on countless road trips, and even mailed them to a homesick friend studying abroad. The core recipe stays the same, but I love how adaptable it is.
Print
No-Bake Pumpkin Cheesecake Energy Bites
- Total Time: 30 mins
Description
Hey friends! Olivia here, apron dusted with cinnamon and ready to share a little autumn magic straight from my kitchen. These No-Bake Pumpkin Cheesecake Energy Bites are your pumpkin spice dreams come true—creamy, cozy, and packed with protein to keep you energized through apple picking, leaf raking, or busy workdays. Ready in about 30 minutes with zero baking, they’re perfect for breakfast, snacks, or anytime fall cravings hit. Let’s make your kitchen smell like a cozy fall hug!
Ingredients
-
1 cup rolled oats (old-fashioned; gluten-free if needed)
-
½ cup pumpkin purée (not pie filling)
-
⅓ cup natural almond butter (or peanut/cashew/sunflower seed butter)
-
¼ cup vanilla protein powder (whey or plant-based)
-
¼ cup white chocolate chips (mini chips recommended)
-
1 tsp pumpkin pie spice (or cinnamon + pinch of nutmeg, ginger, cloves)
-
½ tsp ground cinnamon
-
Pinch of sea salt
Instructions
1. Mix Dry Ingredients:
In a large bowl, whisk together oats, protein powder, pumpkin pie spice, cinnamon, and sea salt. This prevents clumps and evenly distributes flavors.
2. Add Wet Ingredients:
Add pumpkin purée and almond butter to the dry mix. If almond butter is thick, warm it slightly for easy mixing. Stir well until a thick, slightly sticky dough forms. Adjust with extra almond butter or oats if too dry or wet.
3. Fold in White Chocolate Chips:
Gently fold in most of the white chocolate chips, reserving some for topping.
4. Chill the Dough:
Cover the bowl and refrigerate for at least 20 minutes. This firms up the dough for easy rolling.
5. Roll into Bites:
Line a tray with parchment paper. Using a tablespoon scoop or spoon, portion dough and roll into balls with damp hands to prevent sticking. Press reserved chips on top for a pretty finish.
Notes
-
Use old-fashioned rolled oats for the best texture.
-
Blot watery pumpkin purée with a paper towel if needed.
-
Chill dough is easier to roll and less sticky.
-
Don’t overmix white chocolate chips to avoid breaking them up.
-
Store bites in an airtight container in the fridge for up to 1 week; flavors deepen after a day or two.
- Prep Time: 10 minutes
- Cook Time: 20 mins
Nutrition
- Calories: 110 cal Per Serving
- Fat: 6g
- Carbohydrates: 12g
- Protein: 5g
Final Thoughts: Why These Bites Will Steal Your Heart (And Your Snack Drawer)
Let’s be real—fall is the season of indulgence. Pumpkin spice lattes, apple cider donuts, and all the baked goods that make sweatpants feel like a lifestyle choice rather than a wardrobe crisis. But these No-Bake Pumpkin Cheesecake Energy Bites? They’re the guilt-free exception that still feels like a treat.
Here’s why they’ve earned a permanent spot in my rotation:
-
They’re Sneaky-Nutritious – Packed with fiber from oats, protein from almond butter, and vitamin A from pumpkin, they’re basically a wellness shot disguised as dessert.
-
They’re Foolproof – No baking anxiety, no cracked cheesecake tops, no water bath disasters. Just mix, roll, and devour.
-
They’re Portable Joy – Whether you’re hiking, hustling through errands, or hiding from your family in the pantry (no judgment), these bites are your edible sidekick.
-
They’re Nostalgia in a Bite – That pumpkin-spice-cheesecake flavor? It’s like autumn condensed into a single, poppable moment.
So here’s my challenge to you: Make a batch. Share them (or don’t—I won’t tell). Then watch how fast they become your fall obsession. Because the best recipes aren’t just about taste—they’re about the memories you make while eating them. These bites? They’re memory-makers.
Now go forth, roll those bites, and let pumpkin spice reign supreme!


