
The Snack That Beats the 3 PM Slump: Fudgy, No-Bake Protein Brownie Bites
Hey there, friend! Let’s talk about that moment. You know the one. It’s mid-afternoon, your energy is doing that weird disappearing act, and a deep, undeniable craving for something chocolatey, rich, and fudgy starts whispering your name. But then the other voice chimes in—the one that reminds you of your goals, your workout, or just your desire to feel good, not sluggish. For the longest time, I felt stuck in this tug-of-war. Reach for a processed snack bar that tastes like sweetened cardboard, or cave and have a brownie, promising to be “better” tomorrow?
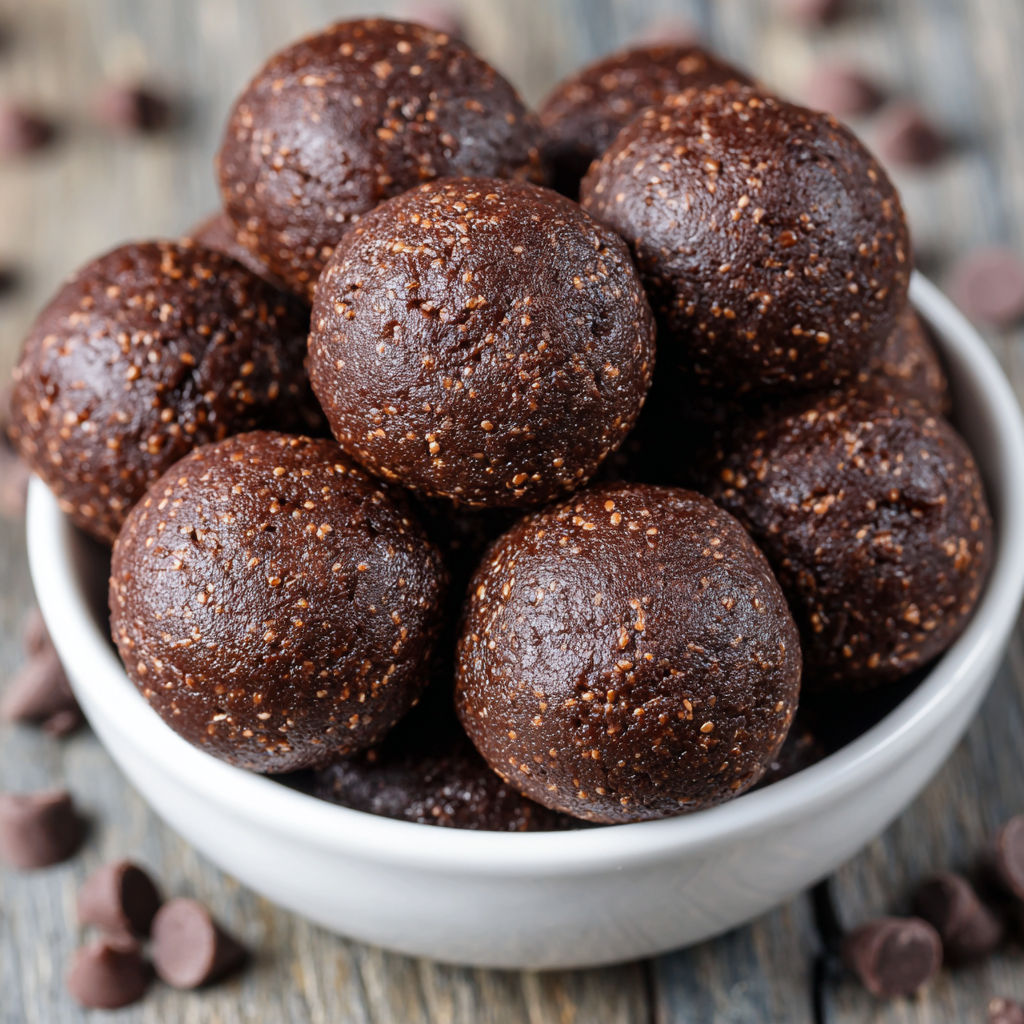
Well, I’m here to tell you the game is over, and we all win. These No-Bake Protein Brownie Bites are my kitchen’s happy ending to that daily drama. Imagine the deepest, darkest, chewiest corner of a brownie pan. Now, imagine that transformed into a blissful, pop-in-your-mouth bite that’s secretly packed with protein and fiber, naturally sweetened, and requires exactly zero oven time. That’s what we’re making today.
This isn’t about deprivation; it’s about delicious empowerment. Whether you’re dashing out the door for a busy day, need a post-workout refuel that actually excites you, or just want a sweet treat that loves you back, these little guys are your new best friends. So, tie on that apron (embrace the mess with me!), and let’s make something that proves healthy and decadent can absolutely be the same thing.
The Brownie Batter Spoon & A Healthier Promise
My love affair with brownies started, as many great food stories do, with a spoon and a bowl. As a kid, I was my grandma’s official “batter taster.” Her classic brownie recipe was a thing of beauty, and she’d always hand me the wooden spoon laden with that glossy, dark batter, a wink in her eye. The raw, chocolatey goodness was, in my opinion, even better than the baked version. (We didn’t know about raw flour risks back then—shhh!).
Fast forward to my early days of trying to eat more mindfully, and I missed that experience. I missed the fudgy texture, the intense chocolate hit, and the simple joy of a no-fuss treat. Store-bought “healthy” snacks felt like a compromise on flavor, and I just wouldn’t have it. The mission was clear: recreate that nostalgic, spoonable brownie feeling, but in a way I could enjoy any day of the week. After more batches than I can count (a delicious, if messy, research process), these Protein Brownie Bites were born. They capture every bit of that childhood joy and my grandma’s secret wink, now with a powerful protein punch that keeps me going. It’s the best of both worlds, straight from my kitchen to yours.
Your Simple, Wholesome Lineup
Here’s the beautiful part: you probably have most of this in your pantry already! This is about simple, real ingredients coming together to make something magical.
- ½ cup oat flour: This is our wholesome base, giving structure and a lovely, soft chew. Chef’s Insight: You can easily make your own by blitzing rolled oats in a food processor or high-speed blender until fine and powdery. It’s cheaper and adds that satisfying homemade touch!
- ¼ cup cocoa powder: Not just any cocoa—use the best quality unsweetened cocoa powder you can find. This is where the deep, sophisticated chocolate flavor comes from, so skip the drinking chocolate mixes here.
- ¼ cup chocolate chips: The double chocolate delight! I prefer dark chocolate chips (70% or higher) for a less sweet bite. Substitution Tip: Need it dairy-free? Use your favorite vegan chocolate chips. You can also chop up a dark chocolate bar for lovely, irregular melty bits.
- ¼ cup protein powder: The protein powerhouse! A chocolate or vanilla whey/casein blend works beautifully and binds well. Chef’s Insight: For a plant-based version, a chocolate vegan protein powder (like pea or brown rice protein blend) is fantastic. Just note the texture might be slightly drier, so have that extra milk handy.
- 1 tbsp chia seeds: Our tiny nutrient superheroes! They add fiber, omega-3s, and help bind everything together as they absorb moisture. If you don’t have chia, ground flaxseed works just as well.
- 1 tsp vanilla extract: The flavor enhancer. It rounds out the chocolate and makes everything taste more… well, brownie-like! Pure vanilla extract is worth it, I promise.
- 2–4 tbsp milk: The unifier. Start with 2 tablespoons of your milk of choice (I love almond or oat milk) and add from there. The type of protein powder and oat flour you use will affect how much you need.
- A generous pinch of salt: This is non-negotiable! Salt makes the chocolate flavor pop and balances the sweetness. Don’t you dare skip it.
Let’s Get Rolling: Your Foolproof Steps to Brownie Bliss
See? I told you it was easy. Ten minutes is all you need for active prep. Let’s walk through it together.
- The Dry Team Huddle. In a medium mixing bowl, add your oat flour, cocoa powder, protein powder, chia seeds, and that all-important pinch of salt. Grab a whisk and give them a good, enthusiastic stir. We want everything evenly distributed so every bite is perfectly chocolatey. This is also your moment to make sure there are no sneaky clumps in your protein powder.
- Bring in the Flavor & Fat. Now, you have a choice for ultimate customization! For an ultra-fudgy, cohesive dough, melt your chocolate chips gently (microwave in 20-second bursts, stirring in between) and pour it into the dry mix. For a chunkier, texture-filled bite, just toss the whole chocolate chips in. I love the melty pockets the second method creates! Add the vanilla extract here too.
- The Magical Transformation to Dough. Here’s where your chef intuition shines. Pour in 2 tablespoons of milk and start mixing with a sturdy spoon or spatula. It will seem dry at first—that’s okay! Keep mixing, pressing and folding the mixture. If it’s still very crumbly and won’t hold together when pinched, add milk one tablespoon at a time. Pro-Tip: We want a pliable, slightly sticky dough that holds its shape when squeezed, not a wet batter. Different ingredients absorb liquid differently, so go slow!
- Rolling Time—Get Those Hands Dirty! Using a small cookie scoop or a tablespoon, portion out the dough. Then, roll it between your palms into smooth, bite-sized balls. Life-Changing Hack: If the dough is sticking to your hands, lightly dampen them with water or a tiny bit of oil. It creates a non-stick barrier and makes the process blissfully clean.
- The Optional (But Highly Recommended) Glaze of Glory. Want to take these from amazing to “I can’t believe this is healthy” incredible? Melt a few more tablespoons of chocolate chips, dunk or drizzle each bite, and place them on a parchment-lined tray. It creates a professional-looking shell and an extra hit of chocolate ecstasy.
- The Chill Factor. Pop your tray of brownie bites into the fridge for at least 20-30 minutes. This is crucial! It allows the chia seeds to fully hydrate, the flavors to marry, and the bites to firm up into that perfect, fudgy texture. Consider this the hardest part of the recipe—waiting!
How to Serve Your Chocolatey Treasures
Once they’re chilled and set, the world is your oyster! I love storing them in an airtight container in the fridge. They’re fantastic straight from the cold, with a satisfying, dense bite. Pack a few in a small container for a desk-side energy boost, or arrange them on a pretty plate for a guilt-free dessert platter at your next gathering. A dusting of extra cocoa powder or a tiny sprinkle of flaky sea salt on top before chilling makes them look utterly gourmet. Pair one with your afternoon coffee or post-dinner tea for the ultimate moment of cozy satisfaction.
Make It Your Own: Delicious Twists & Swaps
The basic recipe is a canvas for your creativity! Here are a few of my favorite riffs:
- Salted Caramel Pretzel: Swap 2 tbsp of the oat flour for crushed pretzel bits. After rolling, press a tiny piece of soft, gooey date or a grain-free caramel into the center of each ball.
- Orange Zest Zing: Add the zest of one small orange to the dry ingredients. The bright citrus paired with dark chocolate is a classic, elegant combo that will wow a crowd.
- Mint Chocolate Chip: Use a scoop of chocolate mint protein powder if you can find it, or add ¼ tsp of pure peppermint extract (not mint extract!) with the vanilla. Fold in mini chocolate chips for that classic ice cream vibe.
- Nutty Double Chocolate: Replace the chia seeds with 2 tablespoons of finely ground almonds or hazelnuts. Roll the finished bites in crushed, toasted nuts for a gorgeous, crunchy exterior.
- Peanut Butter Cup: Use a chocolate peanut butter protein powder, or add a tablespoon of natural powdered peanut butter to the dry mix. For the ultimate treat, press a small, square of dark chocolate into the top of each bite before chilling.
A Few More Thoughts From My Kitchen to Yours
This recipe has evolved more than any other on my blog, and that’s because of you! Reader feedback has been the best ingredient of all. The big “aha” moment was realizing that melting the chocolate chips into the dough, rather than keeping them whole, solved the “dry bite” issue some people had with certain protein powders. It acts as an extra binder and fat source, creating that foolproof fudgy texture.
One funny kitchen fail story? The first time I made these, I was so excited I completely forgot the chia seeds. The “dough” was a sad, crumbly pile that refused to roll. I almost tossed it, but instead, I pressed it into a small dish, chilled it, and ate it with a spoon like brownie crumble over yogurt. It was delicious! So remember, even a “mistake” can be a happy accident. Cooking is about play, not perfection. These bites are forgiving and flexible—trust yourself and have fun with it.
Your Questions, Answered!
Q: My dough is too dry and won’t stick together, even after 4 tbsp of milk. Help!
A: Don’t panic! This usually means your protein powder or oat flour is extra absorbent. Add more liquid, one teaspoon at a time, until it comes together. You can also add a tiny bit of nut butter (½ tsp) or maple syrup for extra binding power and moisture.
Q: Can I use a different flour?
A: Absolutely. Almond flour works well, but it will yield a denser, oilier bite. You may need slightly less milk. I don’t recommend coconut flour as it’s a sponge and will throw off the ratios completely.
Q: Why do they need to chill? Can’t I eat them right away?
A: You can sneak one, of course! But the chilling step is key for texture. It allows the chia seeds to gel and the fats from the chocolate to firm up, transforming the dough from sticky to a perfect, firm-yet-chewy brownie bite. It’s worth the wait!
Q: How long do they last, and can I freeze them?
A: They keep beautifully in an airtight container in the fridge for up to 1 week. For longer storage, they freeze like a dream for up to 3 months! Place them on a tray to freeze solid first, then transfer to a bag. Thaw in the fridge or enjoy straight from the freezer for a frozen treat.
No-Bake Protein Brownie Bites : Fudgy, Healthy & Naturally Sweet
Description
When your energy dips and only chocolate will do, these No-Bake Protein Brownie Bites have your back. They taste like the fudgiest part of a brownie, but they’re made with wholesome ingredients, no oven, and just a few minutes of prep. Perfect for busy days, post-workout fuel, or a feel-good sweet snack.
Ingredients
-
½ cup oat flour (or finely blended rolled oats)
-
¼ cup unsweetened cocoa powder
-
¼ cup chocolate chips (dark chocolate recommended)
-
¼ cup protein powder (chocolate or vanilla)
-
1 tbsp chia seeds (or ground flaxseed)
-
1 tsp vanilla extract
-
2–4 tbsp milk of choice (almond, oat, dairy, etc.)
-
Pinch of salt
Instructions
-
Mix dry ingredients:
In a bowl, whisk together oat flour, cocoa powder, protein powder, chia seeds, and salt. -
Add flavor:
Stir in vanilla extract and chocolate chips (melt them first for extra fudginess, or leave whole for texture). -
Form the dough:
Add 2 tablespoons of milk and mix. Add more milk, one tablespoon at a time, until a thick, slightly sticky dough forms. -
Roll:
Scoop and roll into bite-sized balls using your hands. -
Chill:
Refrigerate for 20–30 minutes to firm up. Enjoy!
Notes
-
Too dry? Add milk a teaspoon at a time or a tiny bit of nut butter.
-
Too sticky? Chill for 10 minutes or lightly dampen your hands before rolling.
-
Protein powder matters: Plant-based powders may need a little extra liquid.
-
Storage: Keep in an airtight container in the fridge for up to 1 week, or freeze for up to 3 months.
Nutritional Info (Per Bite, Approximate)
This is an estimate and can vary based on your specific brand choices, especially the protein powder and chocolate.
Calories: ~90 | Protein: 5g | Carbohydrates: 8g | Dietary Fiber: 2g | Total Fat: 4g | Sugar: 3g
Final Thoughts: More Than Just a Snack
These No-Bake Protein Brownie Bites represent something simple yet profound: the joy of creating a treat that genuinely nourishes you, body and spirit. They are a small but mighty declaration that you don’t have to choose between what feels good in the moment and what feels good in the long run. The rich, fudgy satisfaction and the steady, uplifting energy they provide are one and the same.
What I love most about this recipe is its spirit of flexibility. It’s a foundational formula, a launchpad for your own creativity. Whether you stick to the classic version or venture into the fun twists, you’re participating in the best kind of kitchen magic—the kind that’s forgiving, personal, and deeply rewarding.
So, the next time that 3 PM whisper calls, or you need a pre-gym boost, or you simply crave a moment of chocolatey comfort, I hope you remember these little bites. I hope you give yourself the ten minutes of messy, joyful prep that leads to a week of ready-to-go goodness.


