
Your New Go-To Dessert is Here (And It Doesn’t Need an Oven!)
Hello, my fellow flavor-lovers! Olivia here, welcoming you back to my cozy kitchen corner. Is there anything better than the promise of cheesecake? That rich, creamy, tangy-sweet filling that just melts on your tongue… it’s pure magic. But let’s be real, my friends. Traditional cheesecake can be, well, a whole production. The water bath, the cracking, the agonizingly long cooling time—sometimes a craving hits and you just don’t have four hours to spare!
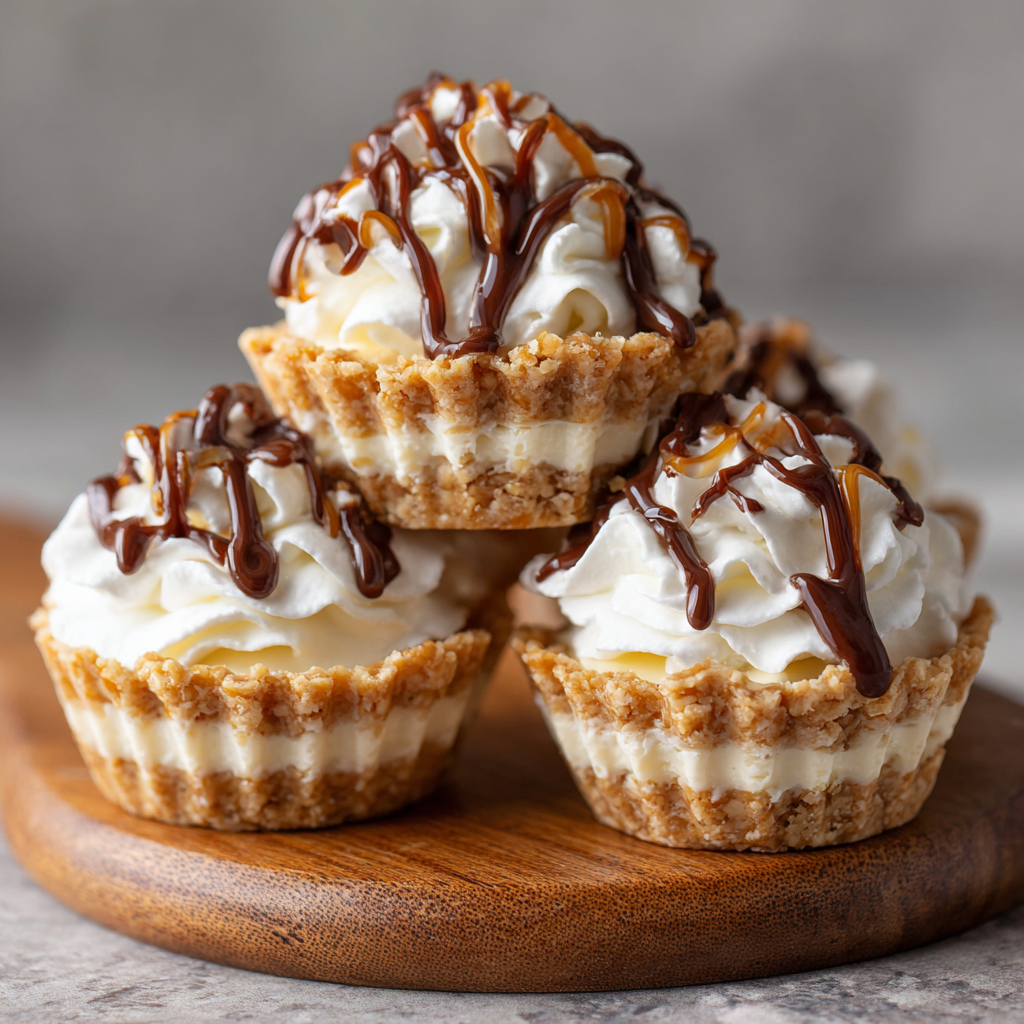
That’s exactly why I’m practically buzzing with excitement to share this recipe with you today. These No-Bake Cheesecake Cups are my ultimate dessert lifesaver. They are quick, impossibly creamy, and so much fun to make. We’re talking about that classic cheesecake joy, packed into adorable, personal-sized cups that are ready to charm everyone at your table. Whether you’re hosting a last-minute girls’ night, need a show-stopping treat for a potluck, or are just rewarding yourself after a long day (you deserve it!), this recipe has your back.
The best part? You are the master of your dessert domain. Fancy a burst of cherry? A drizzle of salted caramel? A mountain of fresh berries? Go for it! These little cups are the perfect blank canvas for your wildest topping dreams. So, grab your favorite mixing bowl and that trusty apron—let’s whip up some no-bake happiness together.
A Summer of Sweet, Simple Beginnings
This recipe takes me right back to one sweltering summer afternoon years ago. My air conditioner had decided to take an unscheduled vacation, and my tiny apartment felt like a baker’s oven. My family was coming over for a BBQ, and I had promised dessert. The thought of turning on my actual oven made me break out in a sweat!
In a mild panic, I stared into my fridge. Cream cheese, heavy cream… and a sleeve of graham crackers on the counter. A lightbulb went off. I remembered my grandma making a simple, stirred-together cheesecake filling when I was a kid. I didn’t have a springform pan, but I did have a set of old-fashioned juice glasses. I crushed the crackers, mixed them with butter, and layered everything up, topping them with the fresh blueberries I’d picked up at the farmer’s market. They were a little messy, far from perfect, but the second my cousins took a bite? The room went quiet, followed by a chorus of “Oh my gosh, Olivia, these are incredible!” That was the moment I truly learned that the best recipes aren’t about perfection; they’re about joy, improvisation, and sharing something delicious with the people you love.
Gathering Your Happy-Making Ingredients
One of the beautiful things about this recipe is its simplicity. You likely have most of these ingredients in your kitchen right now! Here’s the breakdown of what you’ll need and why each one is a star player.
For the Crust Layer:
- 1½ cups graham cracker crumbs: This is our foundation! That toasty, honey-kissed flavor is classic, but don’t feel tied down. Chef’s Insight: You can easily swap this for crushed digestive biscuits, vanilla wafers, or even Oreos (remove the filling first for a pure chocolate crust).
- ¼ cup melted butter: This is our “glue.” It helps the crumbs stick together to form that perfect, slightly sandy base. Use unsalted so you control the salt level, but salted will work in a pinch for a sweet-and-salty vibe.
- 2 tbsp sugar: A little extra sweetness to balance the slight bitterness of the crackers. You can skip this if you’re using a very sweet cookie base like Oreos.
For the Magical Cheesecake Filling:
- 16 oz (two 8-oz blocks) cream cheese, softened: This is non-negotiable, friends! SUPER IMPORTANT TIP: Your cream cheese MUST be at room temperature. If it’s cold, you’ll end up with a lumpy filling no matter how long you beat it. Take it out at least an hour before you start. This is the secret to that silky-smooth texture.
- 1 cup powdered sugar: We use powdered (or confectioner’s) sugar instead of granulated because it dissolves instantly and helps keep the filling smooth. It also contains a bit of cornstarch, which helps thicken our no-bake filling.
- 1 tsp vanilla extract: The soul of so many desserts! Use pure vanilla extract if you can—it makes a world of difference, adding a warm, complex flavor.
- 1½ cups heavy whipping cream (cold): This is what gives our cheesecake its incredible, cloud-like lightness. Chef’s Hack: Make sure your cream and the bowl you’re whipping it in are ICE COLD. I sometimes pop my metal bowl and beaters in the freezer for 15 minutes before I start. Cold cream whips faster and holds more air, giving you those gorgeous stiff peaks.
For the Toppings (The Fun Part!):
- Cherry or Blueberry Pie Filling: The classic diner-style topping! It’s nostalgic, beautiful, and delicious.
- Caramel or Chocolate Sauce: For a truly decadent treat. A sprinkle of sea salt on that caramel? *Chef’s kiss*.
- Fresh Berries: My go-to for a lighter, fresher feel. A mix of sliced strawberries, raspberries, and blueberries is stunning.
- Crushed Cookies or Nuts: Add a wonderful crunch! Toasted pecans, crushed peanut butter cups, or even more graham cracker crumbs are fantastic.
Let’s Build Some Cheesecake Magic: Step-by-Step
Ready to create? This is where the fun really begins. I’ll walk you through each step with all my favorite little hacks to ensure your no-bake cheesecake cups are absolutely perfect.
- Make the Crust: In a medium bowl, combine the graham cracker crumbs, melted butter, and sugar. Mix it with a fork until it looks like wet sand and the crumbs hold together when you pinch them. Chef’s Tip: I like to use a tablespoon or a small flat-bottomed glass to press the crumbs firmly into the bottom of each cup. A good, firm press means your crust won’t fall apart when you dig in with a spoon later! Aim for about 2-3 tablespoons of the mixture per cup, depending on their size.
- Whip the Dreamy Filling – Part 1: In a large bowl, beat the softened cream cheese with an electric mixer on medium speed until it’s completely smooth and lump-free. This should take about 1-2 minutes. Scrape down the sides of the bowl with a spatula to make sure you get every bit. Now, add the powdered sugar and vanilla extract. Beat again until everything is combined and creamy. Little Story: I can’t tell you how many times I’ve gotten distracted and forgotten to scrape the bowl, only to find a hidden pocket of un-mixed cream cheese! It’s a simple step, but it makes all the difference.
- Whip the Dreamy Filling – Part 2: Now, in a separate, clean bowl (remember, cold bowl for cold cream!), pour in your heavy whipping cream. Beat on medium-high speed until stiff peaks form. You’ll know they’re ready when you lift the beaters out and the peaks of cream stand straight up without flopping over. Chef’s Hack: Don’t walk away! Cream can go from perfectly whipped to over-whipped (and then to butter) very quickly. Keep a close eye on it.
- Bring It All Together: This next step is key for that light, airy texture. Add about one-third of the whipped cream to the cream cheese mixture. Use your spatula to GENTLY fold it in. “Folding” means you’re cutting down through the middle of the mixture, sliding the spatula along the bottom of the bowl, and folding it over the top. Rotate the bowl a quarter turn and repeat. This keeps all that lovely air in the whipped cream. Once the first addition is incorporated, gently fold in the remaining whipped cream until no white streaks remain. Be patient—it might feel like it’s taking a while, but you’ll be rewarded with the fluffiest cheesecake filling ever!
- Assemble Your Masterpieces: You can spoon the filling into the cups, but for a super-professional look, scoop the filling into a large piping bag fitted with a large star or plain round tip. Pipe a generous swirl of filling over each crust layer. I love doing this because it looks so elegant with zero extra effort. Smooth the tops with the back of a spoon if you prefer a more minimalist look.
- Top It Off & Chill: Now, the grand finale! Add your chosen toppings. If you’re using a sauce like caramel or chocolate, sometimes I like to add it just before serving for a prettier presentation. Once they’re all dressed up, cover the cups with plastic wrap and pop them in the refrigerator. They need at least 2 hours to set up properly, but 4 hours or even overnight is even better. The wait is the hardest part, I know!
How to Serve These Little Cups of Joy
Presentation is part of the fun! I love serving these in clear glasses or mason jars so you can see all the beautiful layers. For a party, arrange them on a tray with an assortment of toppings in small bowls so everyone can customize their own—it’s such a fun, interactive dessert station! Pair them with a cup of strong coffee for a delightful end to a dinner party, or pack one in a lunchbox for a very special midday treat. They’re perfectly portable, which makes them the ultimate potluck or picnic hero.
Make It Your Own: Delicious Variations
Once you’ve mastered the basic recipe, the world is your cheesecake oyster! Here are a few of my favorite twists:
- Lemon Sunshine: Add the zest of two lemons and 2 tablespoons of lemon juice to the cream cheese mixture. Top with a dollop of lemon curd and a thin slice of lemon.
- Chocolate Hazelnut Dream: For the crust, use crushed chocolate cookies. Fold ½ cup of Nutella into the cream cheese mixture before adding the whipped cream. Top with chopped, toasted hazelnuts.
- Berry Swirl: Before chilling, dollop a few teaspoons of seedless raspberry or strawberry jam on top of each filled cup. Use a toothpick to gently swirl it into the filling for a gorgeous marbled effect.
- Dairy-Free Delight: Use your favorite vegan cream cheese and chilled coconut cream (the solid part from a can of full-fat coconut milk) in place of the heavy whipping cream. It works like a charm!
- Samoa Style: Use a shortbread cookie crust. Fold ½ cup of toasted coconut into the filling. Top with a drizzle of caramel and a drizzle of melted chocolate.
Olivia’s Kitchen Notebook
This recipe has been a living, evolving thing in my kitchen. I’ve made it for baby showers, birthday parties, and countless “I just need cheesecake” Tuesdays. One of my funniest kitchen fails was the time I was chatting away with my sister and accidentally used granulated sugar instead of powdered sugar in the filling. Let me tell you, it was… gritty. We laughed so hard, but it was a valuable lesson in paying attention! Now, I always make sure my ingredients are lined up and labeled before I start.
Over time, I’ve found that letting the filled cups sit in the fridge overnight produces the absolute best texture—incredibly firm yet meltingly soft. It’s also become my go-to freezer dessert. I make a double batch, freeze them without toppings (just wrap them well!), and then I have instant, elegant desserts for unexpected guests. Just move one to the fridge in the morning, and it’s ready by dinner. It’s a trick that has saved my hostess sanity more times than I can count!
Your Questions, Answered!
I’ve gotten so many wonderful questions about this recipe over the years. Here are the most common ones to help you on your no-bake journey.
Q: My filling is runny! What did I do wrong?
A: This usually comes down to one of three things:
1. The Cream Cheese: If it wasn’t fully softened, it can create lumps and prevent the mixture from becoming smooth and thick.
2. The Whipped Cream: If the cream wasn’t whipped to truly stiff peaks, it won’t have enough structure to hold up the filling.
3. Not Enough Chilling Time: Patience is key! The filling needs a full 2-4 hours in the fridge to set properly. If it’s still runny, just give it more time. If you’re in a real pinch, 30-45 minutes in the freezer will help firm it up quickly.
Q: Can I make these ahead of time?
A: Absolutely! In fact, I highly recommend it. They keep beautifully in the fridge for up to 3 days. Just hold off on adding fresh fruit toppings until you’re ready to serve, as they can get watery. They also freeze incredibly well for up to a month. Thaw in the refrigerator for a few hours before serving.
Q: My crust is soggy. How can I prevent that?
A: A soggy crust is often caused by the filling being added while it’s too warm, or from sitting in the fridge for several days. To prevent this, make sure your filling is cool when you assemble, and press the crust down very firmly. For make-ahead cups, storing them with a paper towel under the lid in the fridge can help absorb any excess moisture.
Q: I don’t have an electric mixer. Can I make this by hand?
A> You can, but be prepared for a little arm workout! For the cream cheese, make sure it’s very, very soft. Use a sturdy whisk and a lot of elbow grease to get it smooth. For the whipped cream, a whisk and a chilled metal bowl will work, but it will take time and vigorous whipping. It’s a great way to burn off a few calories before you enjoy the dessert!
No-Bake Cheesecake Cups : Quick, Creamy & Perfectly Portable
Description
Hello, dessert lovers! If you adore cheesecake but dread the oven, these No-Bake Cheesecake Cups are your new best friend. Creamy, fluffy, and endlessly customizable, they’re perfect for last-minute gatherings, a fun weeknight treat, or a show-stopping dessert. With a buttery crust, velvety cheesecake filling, and endless topping possibilities, these little cups are pure joy in every bite.
Ingredients
For the Crust:
-
1½ cups graham cracker crumbs (or digestive biscuits/Oreos, filling removed)
-
¼ cup melted unsalted butter
-
2 tbsp sugar
For the Cheesecake Filling:
-
16 oz (2 blocks) cream cheese, softened to room temperature
-
1 cup powdered sugar
-
1 tsp vanilla extract
-
1½ cups heavy whipping cream, cold
Optional Toppings:
-
Cherry or blueberry pie filling
-
Caramel or chocolate sauce
-
Fresh berries (strawberries, raspberries, blueberries)
-
Crushed cookies, nuts, or toasted coconut
Instructions
-
Make the Crust:
In a medium bowl, combine graham cracker crumbs, melted butter, and sugar. Mix until crumbly but holds together when pinched. Press 2–3 tbsp firmly into the bottom of each serving cup. -
Prepare the Filling:
-
Beat cream cheese in a large bowl until smooth.
-
Add powdered sugar and vanilla, and beat until creamy.
-
-
Whip the Cream:
In a separate cold bowl, whip heavy cream to stiff peaks. Keep a close eye—over-whipping turns it into butter. -
Fold Cream into Filling:
Gently fold one-third of whipped cream into cream cheese mixture, then fold in the rest until fully combined and airy. -
Assemble the Cups:
Spoon or pipe filling over the crust in each cup. Smooth tops if desired. -
Add Toppings & Chill:
Decorate with your choice of toppings. Cover and chill for at least 2 hours (or overnight) to set.
Notes
-
Soft Cream Cheese: Ensure it’s at room temperature for a smooth, lump-free filling.
-
Cold Whipping Cream: Use chilled cream and a cold bowl for better volume.
-
Avoid Soggy Crust: Press crust firmly and add cool filling.
-
Make Ahead: Refrigerates 3 days or freezes up to 1 month (toppings added after thawing).
Nutrition
- Calories: 320 cal Per Serving
- Fat: 22g
- Carbohydrates: 25g
- Protein: 4g
Quick Nutrition Info
Prep Time: 15 minutes | Chill Time: 2+ hours | Servings: 8-10 cups
Per Cup (approximate, without toppings): ~320 calories | 22g fat | 25g carbs | 4g protein
Final Thoughts: Your New Dessert Secret is Safe With Us
And there you have it! The secret to instant cheesecake joy, no oven required. As you pull these chilled, beautiful cups from the fridge, I hope you feel a surge of pride. You’ve created something truly special—a dessert that feels indulgent and elegant, but was born from simplicity and a little bit of kitchen cleverness.
This recipe is more than just a method; it’s an invitation to play, to customize, and to share a little moment of happiness. It’s the answer to a last-minute craving, the star of a summer picnic, and the treat that will have friends and family asking, “You made this?” with awe in their voices.
So, the next time a cheesecake craving strikes, I hope you remember these little cups. Remember that you don’t need a fancy setup or hours of time. All you need is a bowl, a whisk, and a willingness to create something delicious.
Whip them up, top them with love, and savor every creamy, dreamy bite.
Happy no-baking!


