
The Unbeatable Magic of Sourdough Discard Banana Bread
Hey there, friend! Come on in, pull up a stool, and let me tell you about the little loaf of joy that’s been making my kitchen smell absolutely divine lately. You know that moment when you spot a bunch of bananas on the counter that have gone from bright yellow to beautifully, gloriously speckled? My heart does a little happy dance. It’s not a sign of defeat; it’s an invitation. An invitation to bake the world’s coziest, most comforting treat: banana bread.
But what if I told you we could make that classic even better? What if we could add a subtle, sophisticated tang, create an incredibly moist crumb, and do a little victory dance for reducing food waste, all at the same time? Enter the hero of our story: sourdough discard. That extra bit of sourdough starter you might normally toss is about to become your new secret weapon.
This Sourdough Discard Banana Bread is my current obsession, and I have a feeling it’s about to become yours, too. It’s everything you love about traditional banana bread—deeply banana-flavored, tender, and soul-warming—with a little something extra that makes people go, “Wow, what’s in this?” It’s incredibly easy, requires just one bowl (hello, easy cleanup!), and no fancy mixer skills whatsoever. Whether you’re a sourdough pro with a jar of discard always on hand or a curious newbie looking for a delicious place to start, this recipe is your ticket to banana bread bliss. Let’s turn those overripe bananas and that leftover starter into something truly unforgettable.
More Than Just Bananas: A Story of Messy Aprons and Sweet Memories
This recipe takes me right back to my grandma’s linoleum-floored kitchen. She wasn’t a “sourdough” baker, but she was a wizard with brown bananas. She’d see them softening on the windowsill, give a knowing nod, and without a word, pull out her big yellow mixing bowl. The ritual was sacred: the muffled *thump-thump-thump* of the potato masher, the rich smell of melting butter in her ancient saucepan, the way she’d let me crack the eggs, promising it was good luck if no shells fell in.
Her banana bread was the definition of comfort. It was the slice wrapped in a napkin and tucked into my lunchbox, the still-warm reward for helping weed the garden, the answer to a bad day at school. When I started my own sourdough journey years later, I felt that same pull to create something meaningful from simple ingredients. The first time I stirred a scoop of discard into my banana bread batter, it felt like a quiet revolution. I was merging my new passion with that deep-rooted nostalgia. The resulting loaf, with its perfect moistness and hint of tang, felt like my own kitchen story—a blend of past comfort and present curiosity. Every time I bake it now, I think of her, and I hope this recipe becomes part of your story, too.
Gathering Your Kitchen Crew: Ingredients & Why They Matter
Here’s the beautiful part: you likely have almost everything you need already. This is pantry magic at its finest. Let’s talk about each player in our one-bowl wonder.
- 1 cup mashed ripe bananas (about 2–3 bananas): The star! The darker and spottier, the better. They’re sweeter and pack more flavor. Chef’s Tip: Don’t use a fork—throw them in a bowl and use a pastry cutter or even the back of a sturdy whisk. It’s faster and more satisfying!
- ½ cup sourdough discard (unfed): Our secret weapon! This can be straight from the fridge—no need to activate it. It adds a lovely tang, tenderizes the crumb, and helps reduce food waste. Substitution: No discard? Use ½ cup of plain yogurt or buttermilk mixed with ¼ cup of flour. You’ll lose the sourdough flavor but keep the moisture.
- ½ cup brown sugar: I prefer brown sugar for its molasses-y depth and moisture. It makes for a richer, more caramel-like flavor. Chef’s Insight: Light or dark brown works; dark will give a deeper flavor. You can use white sugar in a pinch, but your bread will be slightly less moist.
- 2 large eggs: Our binders and structure-builders. They give the loaf its lovely rise and tender texture. Pro Tip: Using room-temperature eggs helps them incorporate more smoothly into the batter.
- ⅓ cup melted butter or neutral oil: Hello, moisture! Melted butter gives incredible flavor. A neutral oil (like avocado or vegetable) yields an even more moist, tender crumb that stays soft for days. You truly can’t go wrong.
- 1 tsp pure vanilla extract: The flavor enhancer. It rounds out all the other notes. Always use real vanilla if you can!
- 1 ½ cups all-purpose flour: The foundation. Spoon and level your flour to avoid a dense, dry loaf. Dietary Swap: A 1:1 gluten-free baking blend works wonderfully here.
- 1 tsp baking soda: Our leavening hero. It reacts with the acidic bananas and sourdough discard to give us that perfect rise. Make sure it’s fresh!
- ½ tsp fine sea salt: The flavor booster. It makes the sweetness and banana flavor pop. Never skip it.
- 1 tsp cinnamon (optional): My personal must-add. It adds a warm, cozy layer that feels like a hug. Try it once, you’ll never go back.
- ½ cup chopped nuts or chocolate chips (optional): The fun mix-ins! Walnuts or pecans add crunch. Chocolate chips turn it into dessert. Or do both for the ultimate treat.
Let’s Get Baking: Your Simple, One-Bowl Roadmap
Ready? Aprons on! This is where the magic happens, and it’s so much easier than you think.
Step 1: Prep Your Stage. Preheat your oven to 350°F (175°C). Grease your 9×5-inch loaf pan generously with butter or baking spray, or line it with parchment paper for foolproof removal. Getting this ready first means no frantic searching while your batter waits.
Step 2: Banana Mash Fest. In your large mixing bowl, mash those gorgeous ripe bananas until mostly smooth. A few small lumps are totally fine—they promise little pockets of intense banana flavor! Chef’s Hack: If your bananas are being stubborn, pop them in the microwave for 30 seconds to soften first.
Step 3: The Wet Team Mix. To the banana mash, add your sourdough discard, brown sugar, eggs, melted butter (or oil), and vanilla. Grab your whisk and stir, stir, stir until it’s one beautifully chaotic, creamy, homogenous mixture. Don’t worry about overmixing here—we’re just getting the wet ingredients acquainted.
Step 4: Bring in the Dry Crew. Now, sprinkle the flour, baking soda, salt, and cinnamon (if using) right on top of the wet mixture. Here’s the crucial part: switch to a spatula and fold just until the flour disappears. A few streaks are okay! Overmixing after adding the flour develops gluten, which leads to a tough, rubbery bread. We want tender. We want gentle. Trust me on this.
Step 5: The Fun Fold-In. Got nuts or chocolate chips? Now’s their time to shine. Gently fold them into the batter until they’re evenly distributed. Your batter will be thick and glorious.
Step 6: Pan & Smooth. Pour (or rather, scoop) the batter into your prepared loaf pan. Use your spatula to smooth the top into an even layer. For a pretty, professional-looking crack down the center of your baked loaf, run a wet finger down the middle of the batter before baking. It’s a little baker’s secret!
Step 7: Bake to Golden Perfection. Slide the pan into your preheated oven. Set your timer for 50 minutes, but do not open the oven door before then! The peek of cold air can cause a sunken loaf. At 50 minutes, do the trusty toothpick test: insert it into the very center of the loaf. If it comes out with just a few moist crumbs (not wet batter), it’s done. If not, give it 5-10 more minutes. The top should be a deep golden brown, and the edges will just be pulling away from the pan.
Step 8: The Crucial Cool Down. This is the hardest part! Let the bread cool in the pan on a wire rack for a full 10 minutes. This allows it to set so it doesn’t fall apart. Then, run a knife around the edges, gently lift it out (using parchment sling if you used it), and let it cool completely on the rack. Slicing into warm banana bread is tempting, but waiting ensures clean slices and the texture is at its absolute best.
How to Serve Your Masterpiece
This bread is a superstar all on its own, but a little styling goes a long way! For breakfast, I love a thick slice toasted until the edges are just crisp, slathered with salted butter that melts into all the nooks. For an afternoon snack, a smear of creamy peanut or almond butter takes it to another level. Want to make it a dessert? Gently warm a slice and top it with a scoop of vanilla ice cream and a drizzle of caramel sauce. To serve to guests, slice it thick, arrange it on a rustic board, and watch it disappear. It also makes the most heartfelt homemade gift—just wrap the cooled loaf in parchment and twine.
Make It Your Own: Delicious Twists & Swaps
Once you master the base, the playground is open! Here are a few of my favorite riffs:
- Double Chocolate: Swap ¼ cup of the flour for unsweetened cocoa powder and fold in dark chocolate chips. Decadence defined.
- Lemon Blueberry: Add the zest of one lemon to the wet ingredients and fold in 1 cup of fresh or frozen blueberries (tossed in a spoonful of flour to prevent sinking). The tang on tang is incredible.
- Morning Glory Muffins: Turn this into muffins! Pour batter into a lined muffin tin and bake at 375°F for 20-25 minutes. Perfect for grab-and-go.
- Gluten-Free & Vegan: Use a 1:1 GF flour blend, replace eggs with flax eggs (2 tbsp ground flax + 5 tbsp water, let sit 5 mins), and use oil instead of butter. The sourdough discard is already vegan-friendly!
- Coconut Dream: Replace ⅓ cup of the flour with unsweetened shredded coconut and use coconut oil. Top with a sprinkle of extra coconut before baking.
Olivia’s Kitchen Notes & Stories
This recipe has become my go-to for so many reasons. I’ve learned a few things along the way: First, if your discard is particularly watery, your batter might be a bit looser—that’s okay, it will still bake up beautifully. Second, this bread tastes even better the next day! The flavors meld and the tang from the sourdough becomes more pronounced. I often bake it in the evening for the perfect next-morning treat.
Funny story: I once, in a sleepy morning haze, forgot the baking soda. The resulting loaf was… dense. Deliciously banana-flavored, but as heavy as a brick. My husband kindly called it “banana focaccia.” Now, I always measure my soda and salt into a little bowl before I start, so I never miss an ingredient. It’s my failsafe ritual! This recipe is forgiving, but it does need that lift. So learn from my mistake and give your baking soda a little nod of respect before it goes in.
Your Questions, Answered!
Q: My loaf is dense/gummy in the middle. What happened?
A: This is almost always due to overmixing once the flour was added, or underbaking. Remember, fold just until combined! And make sure that toothpick comes out clean or with crumbs, not wet batter. Also, ensure your baking soda is fresh—old leaveners lose their power.
Q: Can I use frozen bananas?
A> Absolutely! It’s my favorite freezer trick. Thaw them completely in a bowl (they’ll release a lot of liquid), and use the bananas AND all that flavorful liquid in your mash. No need to drain.
Q: My sourdough discard isn’t bubbly/has a gray liquid on top (hooch). Is it still okay?
A> Yes! That’s totally normal, especially for discard stored in the fridge. Just stir the hooch back in or pour it off—your choice. As long as it doesn’t have pink, orange, or fuzzy spots (just toss it if it does), it’s perfect for baking in this recipe.
Q: Can I double this recipe?
A> You bet! It doubles beautifully. You can make two loaves (great for gifting) or pour the doubled batter into a well-greased Bundt pan for a stunning centerpiece. Just increase the baking time by about 10-15 minutes and keep an eye on it.

Moist & Easy Sourdough Discard Banana Bread : One Bowl Recipe
Description
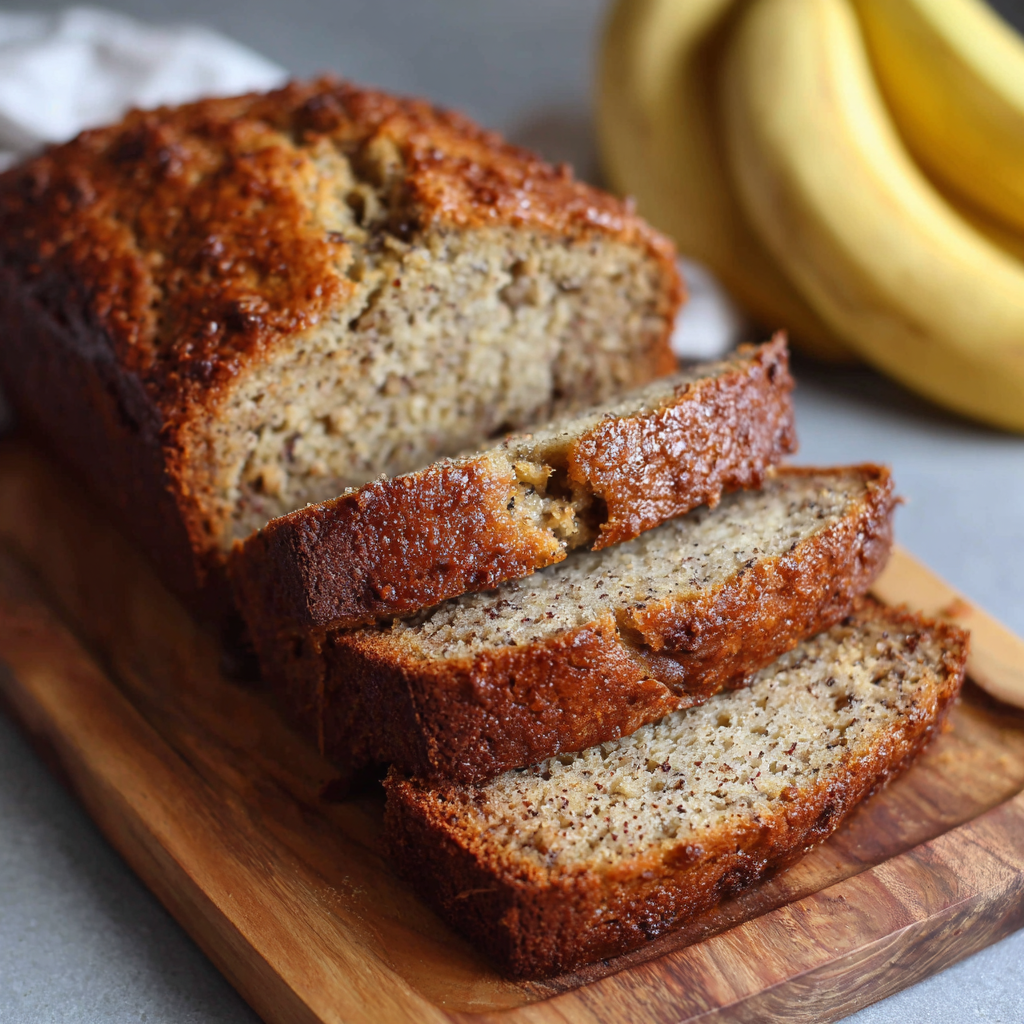
There’s something special about turning overripe bananas into a warm, comforting loaf of banana bread. This version takes things one step further by using sourdough discard—adding moisture, a gentle tang, and helping reduce food waste at the same time.
The result is a soft, tender banana bread that tastes familiar yet just a little more interesting. It’s easy, made in one bowl, and perfect for breakfast, snacks, or sharing with friends.
Ingredients
-
1 cup mashed ripe bananas (about 2–3 bananas)
-
½ cup sourdough discard (unfed, straight from the fridge is fine)
-
½ cup brown sugar
-
2 large eggs
-
⅓ cup melted butter or neutral oil
-
1 teaspoon vanilla extract
-
1½ cups all-purpose flour
-
1 teaspoon baking soda
-
½ teaspoon salt
-
1 teaspoon cinnamon (optional)
-
½ cup chopped nuts or chocolate chips (optional)
Instructions
-
Preheat oven to 350°F (175°C). Grease or line a 9×5-inch loaf pan.
-
In a large bowl, mash the bananas until mostly smooth.
-
Add sourdough discard, brown sugar, eggs, melted butter (or oil), and vanilla. Whisk until well combined.
-
Sprinkle in flour, baking soda, salt, and cinnamon. Gently fold just until combined—do not overmix.
-
Fold in nuts or chocolate chips if using.
-
Pour batter into the prepared pan and smooth the top.
-
Bake for 50–60 minutes, until a toothpick inserted in the center comes out with a few moist crumbs.
-
Cool in the pan for 10 minutes, then transfer to a rack to cool completely before slicing.
Notes
-
Riper bananas = better flavor. Dark, spotty bananas are ideal.
-
Don’t overmix. Stirring too much after adding flour can make the bread dense.
-
Discard flexibility: Thick or thin discard both work—this recipe is forgiving.
-
Even better tomorrow: The flavor improves after resting overnight.
-
Storage: Keep wrapped at room temperature for 2 days or refrigerate up to 5 days.
Final Thoughts
There you have it—your very own kitchen-crafted rainbow, ready to brighten your lunch break and fuel your day. The Mermaid Bowl is proof that “healthy” doesn’t have to mean bland, and that “beautiful” food doesn’t have to be complicated. It’s a celebration of color, texture, and the pure fun of putting together a meal that makes you feel good, inside and out.
Remember, this isn’t just my recipe anymore—it’s yours. Tweak it, play with it, and make it a canvas for whatever ingredients spark joy for you. Whether you stick to the script or create your own spicy, zen, or kitchen-sink variation, the goal is the same: to enjoy the process and savor every vibrant bite.
So, the next time you see one of those stunning bowls online, smile knowing you have the magic right in your own kitchen. No fancy café required. Just you, a few colorful ingredients, and the power to make lunch an absolute delight.
Now, go grab that bowl and make some magic! I can’t wait to see what you create.
Happy cooking,
Olivia


