
Your New Go-To Sweet Fix: Mini Brownie Bites!
Hey there, friend! Olivia here, waving at you from my flour-dusted kitchen. Is there anything in the world that smells more like a hug than brownies baking in the oven? That rich, chocolatey aroma just seems to wrap itself around you, promising something truly wonderful is about to happen. But what if I told you we could take that classic, soul-warming comfort and turn it into something even more fun, more shareable, and downright irresistible? Enter: the Mini Brownie Bite.
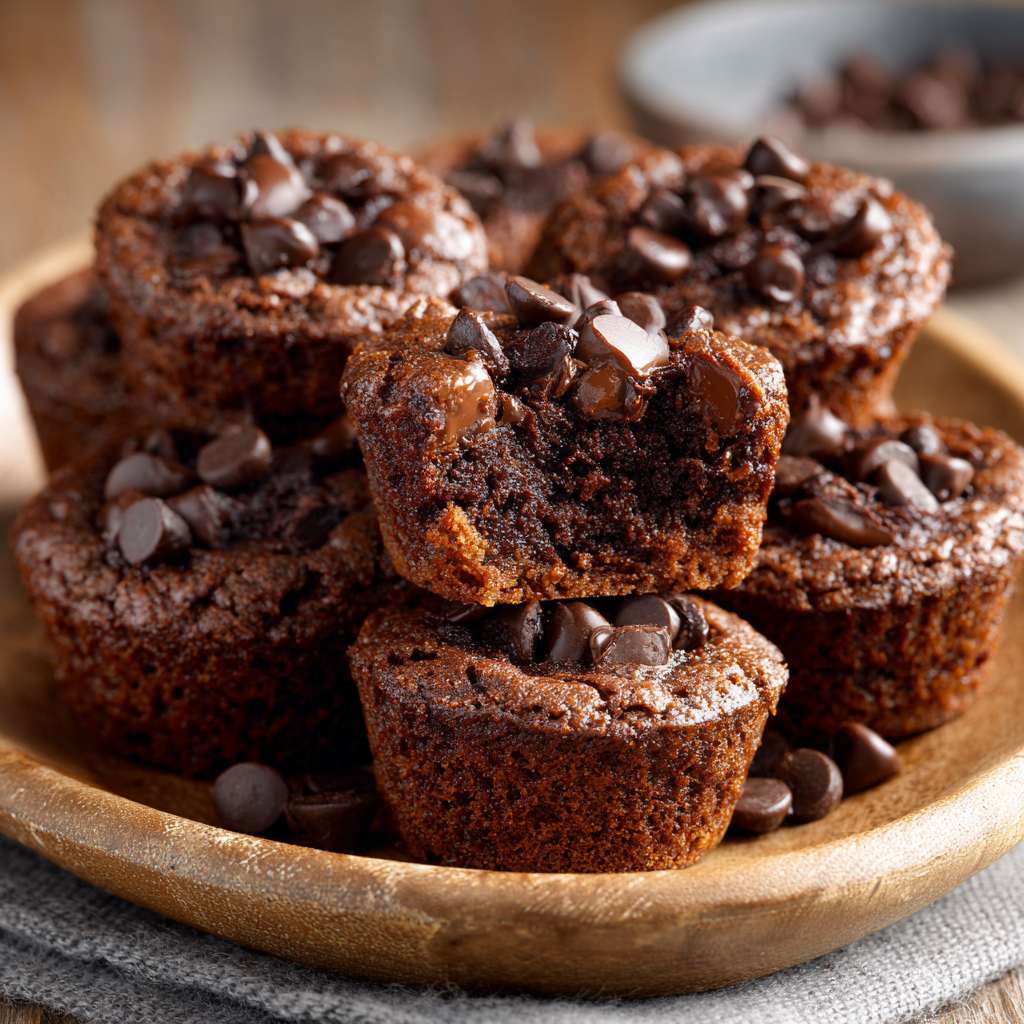
These aren’t just miniature brownies. Oh no. They are tiny, two-bite explosions of pure joy. They’ve got that magical, crispy-crackly top we all crave, giving way to a center that’s so fudgy and rich, it’s practically a chocolate revelation. And the best part? They come together in one bowl—I’m serious, just one!—and are ready to devour in under 30 minutes. Whether you’re packing a lunchbox surprise, prepping for a last-minute book club, or just need a little something-something with your afternoon coffee, these poppable pockets of chocolate are about to become your new kitchen superhero. So, grab your favorite mixing bowl and let’s make a mess and some memories. You are moments away from pure, unadulterated chocolate bliss.
A Little Batch of Big Memories
My love affair with these mini bites started long before this blog, back in my grandma’s kitchen. She wasn’t a fancy baker, but she was a master of making people feel loved through food. Her signature move was a “just because” treat, and her classic sheet-pan brownies were legendary. But one rainy afternoon, we were out of a proper baking pan. With a “we’ll make it work!” attitude that I now channel daily, she looked at her mini muffin tin, then back at me with a twinkle in her eye. “Let’s make them little,” she declared.
What emerged from the oven were these perfect, individual brownie gems. We stood at the counter, still in our aprons, taste-testing them straight from the rack, their warm centers melting on our tongues. It wasn’t just about the chocolate (though, let’s be honest, it was mostly about the chocolate). It was about the spontaneity, the problem-solving, and the shared secret of a kitchen experiment that turned out better than we could have imagined. That day, my grandma taught me that the best recipes aren’t always about following rules to a T; sometimes, they’re about a little improvisation and a whole lot of heart. Every time I make these, I’m right back there with her, and I hope they create some of that same magic in your kitchen, too.
Gathering Your Chocolatey Arsenal
Here’s the beautiful part: you likely have almost everything you need already waiting in your pantry. This is a simple, humble list, but each ingredient plays a starring role in creating that perfect fudgy-crispy texture.
- 1/2 cup butter, melted: This is the base of our rich flavor and that delightfully chewy edge. Chef’s Insight: I use unsalted to control the salt level, but salted will work and give a lovely sweet-and-salty vibe! For a dairy-free swap, an equal amount of melted coconut oil works beautifully.
- 1 cup granulated sugar: Sweetness is a given, but sugar also helps create that beautifully crackly, paper-thin crust on top. It’s science, and it’s delicious.
- 2 large eggs: Our binding agents! They give the brownies structure and a lovely rise. Make sure they’re at room temperature for a smoother, more cohesive batter.
- 1 teaspoon vanilla extract: The ultimate flavor enhancer. It deepens the chocolate notes and adds a layer of warm, aromatic complexity. Don’t you dare skip it!
- 1/3 cup unsweetened cocoa powder: This is where the deep, dark chocolate magic happens. Chef’s Insight: For an extra-rich flavor, use a dark cocoa powder. It’s a game-changer!
- 1/2 cup all-purpose flour: Just enough to hold our chocolate dream together without turning it into cake. For a gluten-free version, a 1:1 gluten-free flour blend is a perfect substitute.
- 1/4 teaspoon baking powder: A tiny touch gives these bites a slight lift, ensuring they aren’t too dense.
- 1/4 teaspoon salt: The secret weapon! Salt makes the chocolate flavor pop and balances the sweetness perfectly.
- 1/2 cup chocolate chips (optional): I say “optional,” but in my kitchen, they’re mandatory! They create molten pockets of chocolate throughout. Use milk, dark, or semi-sweet—follow your heart!
Let’s Get Baking: Your Foolproof Guide to Brownie Bliss
Ready? This is where the fun begins. I’ll walk you through every step, and I promise, it’s as easy as, well, eating brownies!
- Preheat & Prep: Fire up your oven to 350°F (175°C). While it’s warming up, generously grease your mini muffin tin with butter or non-stick spray, or line it with cute mini paper liners. Chef’s Hack: Liners make for ZERO cleanup and super-easy removal. I’m all for anything that makes life simpler!
- The Butter & Sugar Shuffle: In your favorite mixing bowl, combine the melted butter and granulated sugar. Stir it with a whisk or a spatula until it becomes a smooth, glossy, and utterly irresistible-looking mixture. You’re not just mixing; you’re dissolving the sugar into the butter, which is the first step to that perfect texture.
- Egg-cellent Addition: Crack in the two eggs and add that glorious teaspoon of vanilla extract. Now, mix, mix, mix until everything is perfectly blended and the batter looks a little paler in color. This is where you’re building the foundation, so give it some love!
- The Dry Team Dive: Here’s a pro-tip for extra fudgy brownies: sift your cocoa powder, flour, baking powder, and salt directly into the wet ingredients. Yes, sifting! It breaks up any lumps and incorporates everything more evenly, giving you a silky-smooth batter. Once sifted in, gently fold the dry ingredients into the wet. Do not overmix! Stir just until the last streaks of flour disappear. A few tiny lumps are totally fine—overmixing is the enemy of a fudgy brownie.
- Chip Chat (The Fun Part): If you’re using chocolate chips (and you really should), now is the time to fold them in gently. This ensures every single bite has a little extra chocolate surprise.
- Spoon & Fill: Using a small cookie scoop or two spoons, portion the batter into your prepared mini muffin cups, filling each one about 3/4 of the way full. This gives them just enough room to rise without creating a messy overflow situation in your oven.
- The Big Bake: Slide that tin into your preheated oven and let the magic happen for 12-15 minutes. Chef’s Hack: The toothpick test is your best friend here, but remember, we want fudgy! So, you’re looking for the tops to be set, and a toothpick inserted into the center to come out with a few moist crumbs clinging to it, not completely clean. A clean toothpick means you’ve overbaked them.
- The All-Important Cool Down: This is the hardest part—the waiting! Let the brownie bites cool in the hot tin for exactly 5 minutes. This allows them to firm up just enough to handle. Then, carefully transfer them to a wire rack to cool completely. Resisting the urge to eat them all immediately is a true test of willpower.
How to Serve These Tiny Treasures
Presentation is part of the fun! Pile these little gems high on a rustic wooden board or in a colorful ceramic bowl for a casual, shareable treat. Feeling fancy? Place a single brownie bite on a small plate, add a tiny dollop of freshly whipped cream and a single raspberry for a stunning, restaurant-worthy dessert. They’re also incredible slightly warmed with a scoop of vanilla ice cream melting over the top—pure heaven! For a party, I love sticking a mini flag or a fun pick into each one.
Mix It Up! 5 Fun Twists on the Classic
Once you’ve mastered the basic recipe, the playground is open! Here are a few of my favorite ways to shake things up:
- Peanut Butter Paradise: Drop 1/4 teaspoon of creamy peanut butter into the center of each unbaked brownie bite for a gooey, surprise core.
- Mint Chocolate Chip: Swap the vanilla extract for peppermint extract and use dark chocolate chips for a cool, refreshing twist.
- Salted Caramel Swirl: Drizzle a little store-bought or homemade caramel sauce over the batter in each cup and use a toothpick to swirl it gently before baking. Finish with a flake of sea salt right when they come out of the oven.
- Rocky Road: Fold in mini marshmallows and chopped walnuts along with the chocolate chips for a classic campfire flavor.
- Orange Zest Zing: Add the zest of one orange to the batter with the eggs. The bright, citrusy notes cut through the richness of the chocolate so elegantly.
From My Kitchen to Yours: A Few Parting Thoughts
This recipe has been my little kitchen workhorse for years, and it has evolved in the best ways. I’ve learned that using a dark cocoa powder (like the one from my favorite Dutch-process brand) takes the chocolate intensity to an 11. I’ve also had my share of kitchen fails—like the time I accidentally used powdered sugar instead of flour (don’t ask, it was a long day). The result was a delicious, but flat, chocolate puddle! The moral of the story? Always label your containers. These brownie bites are wonderfully forgiving, but even the best recipes can’t always survive a major ingredient mix-up. They’ve been there for me through potlucks, bad days, celebrations, and everything in between. I hope they become that kind of reliable, joy-spreading recipe for you, too.
Your Brownie Bite Questions, Answered!
Over the years, I’ve gotten a lot of questions about this recipe. Here are the answers to the most common ones to ensure your baking success!
- Q: My brownie bites stuck to the pan! Help!
A: Oh no, we’ve all been there! For guaranteed non-stick success, I am Team Mini Liners all the way. If you’re going liners-free, make sure you grease that tin REALLY well, getting into every nook and cranny. Letting them cool for exactly 5 minutes is also key—they need that time to pull away from the sides.
- Q: Can I make these in a regular muffin tin?
A: Absolutely! You’ll get fewer, but larger, brownie “muffins.” Just increase the baking time to about 18-22 minutes, and keep a close eye on them, using the trusty toothpick test to check for doneness.
- Q: Why are my brownie bites cakey and not fudgy?
A: The two most common culprits are overmixing the batter (which develops the gluten in the flour) or overbaking. Remember, fold gently until *just* combined, and pull them out when there are still a few moist crumbs on the toothpick. They continue to cook as they cool!
- Q: Can I freeze these?
A: You sure can! They freeze like a dream. Once completely cooled, place them in a single layer on a baking sheet to freeze solid, then transfer to a freezer bag. They’ll keep for up to 3 months. Thaw at room temperature or pop one frozen into your lunchbox—it’ll be perfectly thawed by your coffee break!
Mini Brownie Bites : Rich, Fudgy & Irresistibly Easy
Description
If you’re craving something rich, chocolatey, and perfectly portioned, these Mini Brownie Bites are about to become your new favorite treat! They have the same crackly tops and fudgy centers as classic brownies, but in adorable two-bite form. Perfect for lunchboxes, parties, or a quick chocolate fix with your afternoon coffee. Best of all? They’re made in one bowl and ready in under 30 minutes!
Ingredients
-
½ cup butter, melted
-
1 cup granulated sugar
-
2 large eggs (room temperature)
-
1 tsp vanilla extract
-
⅓ cup unsweetened cocoa powder
-
½ cup all-purpose flour
-
¼ tsp baking powder
-
¼ tsp salt
-
½ cup chocolate chips (optional but highly recommended!)
Instructions
-
Preheat oven to 350°F (175°C). Grease a mini muffin tin or line with mini paper liners.
-
In a bowl, whisk together melted butter and sugar until smooth and glossy.
-
Add eggs and vanilla extract; whisk until pale and well combined.
-
Sift in cocoa powder, flour, baking powder, and salt. Gently fold until just combined—don’t overmix!
-
Stir in chocolate chips, if using.
-
Scoop batter into mini muffin cups, filling each about ¾ full.
-
Bake for 12–15 minutes, or until tops are set and a toothpick comes out with a few moist crumbs.
-
Cool in the tin for 5 minutes, then transfer to a wire rack to cool completely.
Notes
-
For extra fudgy bites, use dark cocoa powder.
-
Don’t overbake—slightly underdone centers turn gooey as they cool.
-
Line your pan for easy removal and zero cleanup.
-
Add a surprise center—like a dollop of peanut butter or caramel—before baking for fun variations!
Just the Facts
Nutrition information is an estimate per mini brownie bite (based on a yield of 24), calculated without optional add-ins.
- Calories: 95
- Total Fat: 5g
- Saturated Fat: 3g
- Cholesterol: 20mg
- Sodium: 40mg
- Carbohydrates: 12g
- Sugars: 9g
- Protein: 1g
Prep Time: 10 minutes | Cook Time: 15 minutes | Total Time: 25 minutes | Yield: 24 mini brownie bites
Pin Title: Mini Brownie Bites: Easy, Fudgy & Irresistible!
Final Thoughts: Your New Go-To Recipe for Joy
And just like that, in less time than it takes to watch your favorite sitcom, you’ve created a batch of pure, unadulterated chocolate happiness. These Mini Brownie Bites are proof that the biggest flavors and the warmest memories often come in the smallest packages.
They are more than just a convenient treat; they are a versatile little powerhouse ready for any occasion life throws at you—the spontaneous celebration, the needed pick-me-up, or the simple desire to make an ordinary afternoon feel special. I hope this recipe earns a permanent spot in your repertoire, becoming a tool for creating your own kitchen memories, just like the one I cherish with my grandma.
Remember, your kitchen is your playground. Don’t be afraid to swirl in that caramel, sprinkle on some sea salt, or add a hidden peanut butter heart. Make this recipe your own.


