
Hey There, Meal Prepper Extraordinaire!
Is there anything more satisfying than opening your fridge to see a week’s worth of delicious, ready-to-go meals staring back at you? Especially ones that taste like they’ve been lovingly crafted by a Korean grandma with a secret spice stash? If you’re nodding along, my friend, you’ve landed in the right spot. I’m Olivia, your slightly chaotic but always enthusiastic kitchen companion, and today we’re tackling the ultimate crowd-pleaser and time-saver: Beef Bulgogi Bowls scaled for 10 glorious servings!
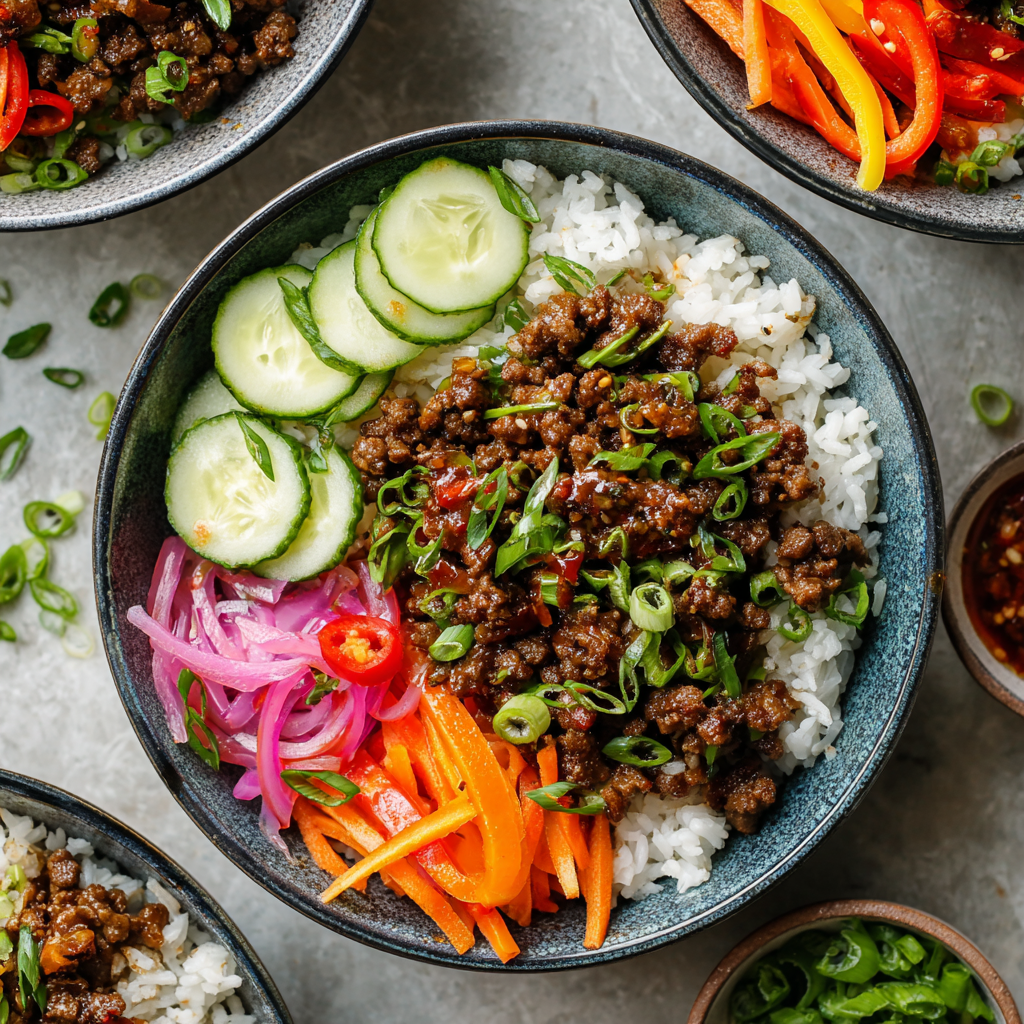
Picture this: tender, savory-sweet-spicy beef, kissed with garlic and ginger, piled high over fluffy jasmine rice, and topped with crunchy, colorful veggies. It’s the kind of meal that makes your taste buds do a happy dance while your future self (probably wearing comfy pants on a Wednesday night) does a victory fist pump. We’re doubling down on flavor AND convenience here. Whether you’re feeding your hungry brood, hosting a casual get-together, or simply refusing to cook dinner every single night this week, these bowls are your golden ticket. No fancy techniques, no obscure ingredients—just big, bold flavor and the kind of efficiency that’ll make your weeknights feel like a breeze. Grab your biggest skillet and your favorite apron (the messy one tells the best stories, right?), and let’s get prepping!
The Potluck That Started It All
This recipe? It’s got roots in a legendary potluck disaster-turned-triumph. A few years back, I signed up to feed 15 friends at a backyard BBQ. My plan? Delicate, individually grilled bulgogi skewers. Reality? A thunderstorm rolled in five minutes before guests arrived. My grill dreams drowned faster than you can say “gochujang.” Panic mode activated! I stared at my marinating beef, then at my giant Dutch oven like it held the secrets of the universe. Spoiler: It kinda did.
I browned that beautiful beef in batches, dumped in the marinade (tripled, because why not?), threw in every veggie I had, and let it all bubble into a chaotic, fragrant masterpiece. I layered it over rice in every container I owned—Tupperware, mixing bowls, even a cake pan (don’t judge!). The result? Utter silence around the picnic table… followed by demands for the recipe. Turns out, that frantic, scaled-up, one-pot wonder was BETTER than my original fussy plan. It became my go-to for feeding armies (or just my freezer). That storm? A delicious blessing in disguise reminding me that sometimes, the best flavors come from happy accidents and keeping things joyfully simple.
Your Flavor-Packed Arsenal (Let’s Chat Ingredients!)
Here’s where the magic starts! Don’t stress about perfection—I’ve packed this list with swaps and chef-y whispers to make it work for you.
Beef Mixture (The Hearty Star)
- 3 lbs 96/4% lean ground beef: Lean is key here for meal prep – less greasy when reheated! Chef’s Swap: Ground turkey or chicken works great, or use plant-based crumbles for a veggie twist. If using higher fat beef, drain excess grease after browning.
- 2 small yellow onions, diced: They melt into sweet, savory goodness. Chef’s Insight: Dice them small so they practically disappear into the beef, adding depth without big chunks.
- 3 cups white mushrooms, chopped: Earthy flavor and meaty texture boosters! Chef’s Swap: No mushrooms? Zucchini or bell peppers add nice bulk.
- ⅔ cup green onions, diced: Fresh, oniony bite. Save the dark green parts for garnish! Chef’s Tip: Slice them on a slight diagonal for prettiness.
- 2 tbsp minced garlic: Non-negotiable flavor bomb! Use fresh or jarred for ease.
- 2 tbsp squeeze minced ginger: That bright, spicy kick. Squeeze tubes are my meal prep BFF. Chef’s Swap: 1 tbsp ground ginger in a pinch, but fresh is zingier!
Bulgogi Sauce (The Flavor Boss)
- 1 cup reduced sodium soy sauce: The salty, umami base. Reduced sodium lets us control the salt. Chef’s Swap: Tamari for gluten-free, or coconut aminos for soy-free.
- 1 cup Swerve brown sugar: Sweetness without the carbs! Chef’s Insight: Swerve brown mimics real brown sugar texture perfectly here. Use regular brown sugar if preferred.
- ¼ cup seasoned rice vinegar: Balances sweetness with tang. Chef’s Swap: Apple cider vinegar + 1 tsp sugar works too.
- ¼ cup gochujang (Korean chili paste): The soul of bulgogi! Complex heat & funk. Chef’s Tip: Find it in Asian grocery stores or the international aisle. Start with less if sensitive to spice!
- 2 tsp crushed red pepper flakes: Adjustable heat kick! Omit or reduce for milder bowls.
Base & Toppings (The Fresh Finish)
- 8 cups cooked jasmine rice (about 3–3½ cups dry): Fragrant, slightly sticky perfection. Chef’s Swap: Brown rice, quinoa, or cauliflower rice for lower carb.
- 2 cups shredded carrots: Color, crunch, and a hint of sweetness. Buy pre-shredded to save time!
- 2 cups mini cucumbers, sliced: Essential cool crunch. Chef’s Tip: Mini cukes have fewer seeds and stay crisper longer than large ones. Slice them just before assembling if possible!
Let’s Build Those Bowls! (Step-by-Step with Chef Hacks)
- Make the Sauce (Your Flavor Foundation):Grab a medium bowl and whisk together the soy sauce, Swerve brown sugar, seasoned rice vinegar, gochujang, and red pepper flakes. Chef’s Hack: Whisk until the Swerve and gochujang are completely dissolved – no gritty bits allowed! Taste a tiny dab (careful, it’s potent!). Want more heat? Add another 1/2 tsp pepper flakes. More tang? A splash more vinegar. This is YOUR sauce! Why it works: Doing this first lets the flavors start mingling while you cook the beef.
- Cook the Beef Mixture (Sizzle & Savor):Heat a splash of neutral oil (like avocado or canola) in your largest skillet or Dutch oven over medium heat. Add the diced onions and chopped mushrooms. Sauté for 5-7 minutes, stirring occasionally, until the onions are soft and translucent and the mushrooms have released their liquid and browned slightly. Chef’s Hack: Don’t crowd the pan! If your skillet isn’t huge, sauté the veggies in two batches for better browning. Add the ground beef, minced garlic, and minced ginger. Crank the heat up to medium-high. Cook, breaking the beef apart constantly with a sturdy wooden spoon or meat chopper, until it’s fully browned and cooked through (about 8-10 minutes). Chef’s Tip: Get in there and break it up well – we want a nice, fine texture perfect for spooning over rice! Drain any excess fat if needed (especially if not using super lean beef).
- Simmer in Sauce (Marry Those Flavors!):Pour that glorious, whisked bulgogi sauce right over the cooked beef mixture. Stir everything together until the beef and veggies are completely coated. Bring the mixture to a lively simmer. Reduce the heat to medium-low and let it bubble gently, uncovered, for 7-10 minutes. Stir occasionally. You’re looking for the sauce to thicken slightly and cling beautifully to the beef. Chef’s Hack: Simmering is key! It deepens the flavors and helps the sauce penetrate the beef. If it looks too dry, add a splash of water or beef broth. Too thin? Simmer a few minutes longer. Right at the end, stir in the diced green onions (the white and light green parts). They add a fresh pop! Remove from heat.
- Assemble Your Masterpiece (The Grand Finale):Grab your 10 meal prep containers (I love the 3-compartment ones for this!). Portion about ¾ to 1 cup of cooked jasmine rice into the main section of each container. Fluff it slightly before spooning it in. Next, generously top the rice with the simmered beef bulgogi mixture. Aim for a good balance! Finally, add a vibrant pile of shredded carrots and a cheerful heap of sliced mini cucumbers. Chef’s Pro Tip: For maximum freshness, let the beef mixture cool slightly (about 10-15 minutes) before assembling. This prevents the residual heat from steaming the crisp veggies in the containers. Want to get fancy? Sprinkle with reserved sliced dark green onion tops or a sprinkle of sesame seeds right before sealing the lids! Pop them in the fridge, and pat yourself on the back.
Serving Up the Goodness
These bowls are designed for grab-and-go ease, but that doesn’t mean presentation gets left behind! When it’s time to eat, I love popping my container open (or transferring it to a real bowl if I’m feeling fancy at home), giving everything a gentle stir to let the savory sauce mingle with the rice and crisp veggies. The contrast of the warm, flavorful beef against the cool, crunchy carrots and cucumbers is pure magic. Feeling extra? Top it with a sprinkle of toasted sesame seeds, a few extra sliced green onions, or even a tiny drizzle of sriracha mayo or a squeeze of lime juice right before digging in. They reheat beautifully in the microwave (about 2 minutes, stirring halfway) or can even be eaten cold straight from the fridge for a refreshing lunch!
Mix It Up! (Delicious Variations)
Don’t be afraid to make these bowls your own! Here are some tasty twists:
- Protein Power Swap: Swap the ground beef for ground turkey, chicken, or pork. For a plant-based win, use crumbled extra-firm tofu (pressed well!) or your favorite plant-based ground “meat”.
- Veggie Blast: Stir in a bag of frozen stir-fry veggies (like broccoli, snap peas, carrots) during the last 5 minutes of simmering the beef mixture. Or swap the cucumber topping for quick-pickled radishes or shredded cabbage.
- Grain Game: Ditch the jasmine rice for brown rice, quinoa, cauliflower rice (for low-carb), or even soba noodles! Adjust cooking times accordingly.
- Spice Level: Control the heat! Omit the red pepper flakes for mild, add an extra tablespoon of gochujang for intense heat, or stir in a diced fresh jalapeño with the onions.
- Egg-cellent Addition: Top your reheated bowl with a perfectly fried or soft-boiled egg for extra protein and richness. A total game-changer!

Meal Prep Beef Bulgogi Bowls
- Total Time: 45 minutes
Description
If meal prep had a crown, this recipe would wear it. Think savory-sweet bulgogi beef, jazzed up with garlic, ginger, and a whisper of heat, all nestled over jasmine rice and topped with crisp, colorful veggies. This is the kind of meal that turns chaotic weeks into a flavorful breeze. Let’s make your fridge feel like a personal Korean bistro!
Ingredients
Beef Mixture
• 3 lbs lean ground beef (96/4%)
• 2 yellow onions, diced
• 3 cups chopped white mushrooms
• ⅔ cup green onions, diced (reserve dark greens)
• 2 tbsp minced garlic
• 2 tbsp minced ginger
Bulgogi Sauce
• 1 cup reduced sodium soy sauce
• 1 cup Swerve brown sugar (or regular)
• ¼ cup seasoned rice vinegar
• ¼ cup gochujang
• 2 tsp red pepper flakes (optional for heat)
Base & Toppings
• 8 cups cooked jasmine rice
• 2 cups shredded carrots
• 2 cups sliced mini cucumbers
Instructions
-
Mix the Sauce:
Whisk all sauce ingredients in a bowl until smooth. -
Cook the Beef:
Sauté onions & mushrooms 5–7 mins. Add beef, garlic, ginger—cook until browned. Drain fat if needed. -
Simmer in Sauce:
Add sauce, stir well. Simmer uncovered 7–10 mins. Stir in green onions (light parts). -
Assemble Bowls:
Divide rice into 10 containers. Top with beef, then carrots and cucumbers. Cool slightly before sealing.
Notes
• Add a fried egg for next-level flavor.
• Want crunch? Sprinkle sesame seeds before serving.
• Store in fridge up to 5 days. Reheat ~2 min in microwave.
- Prep Time: 20 mins
- Cook Time: 25 mins
Nutrition
- Calories: 460cal Per bowl
- Fat: 20g
- Carbohydrates: 38g
- Fiber: 3g
- Protein: 28g
Final Thoughts: Why This Recipe Wins Every Time
This isn’t just meal prep—it’s a flavor-packed, time-saving revolution. Whether you’re feeding a family, hosting friends, or just refusing to cook every night, these bowls deliver:
✅ Restaurant-quality taste with pantry staples.
✅ Endless customization for picky eaters or diets.
✅ Freezer magic for future lazy nights.


