
Your New Favorite Holiday Treat is Just a Stir Away
Hey there, friend! Come on in, the kitchen’s warm, and I’ve got something simmering on the stove that smells like pure, unadulterated joy. If you’ve ever walked through a festive market, caught a whiff of something sweet and nutty, and instantly felt that cozy, holiday spirit wrap around you like a favorite sweater—then you, my friend, know the magic of maple. And today, we’re bottling that magic (no fancy equipment required) into the creamiest, dreamiest, most melt-in-your-mouth Maple Nut Fudge you’ll ever taste.
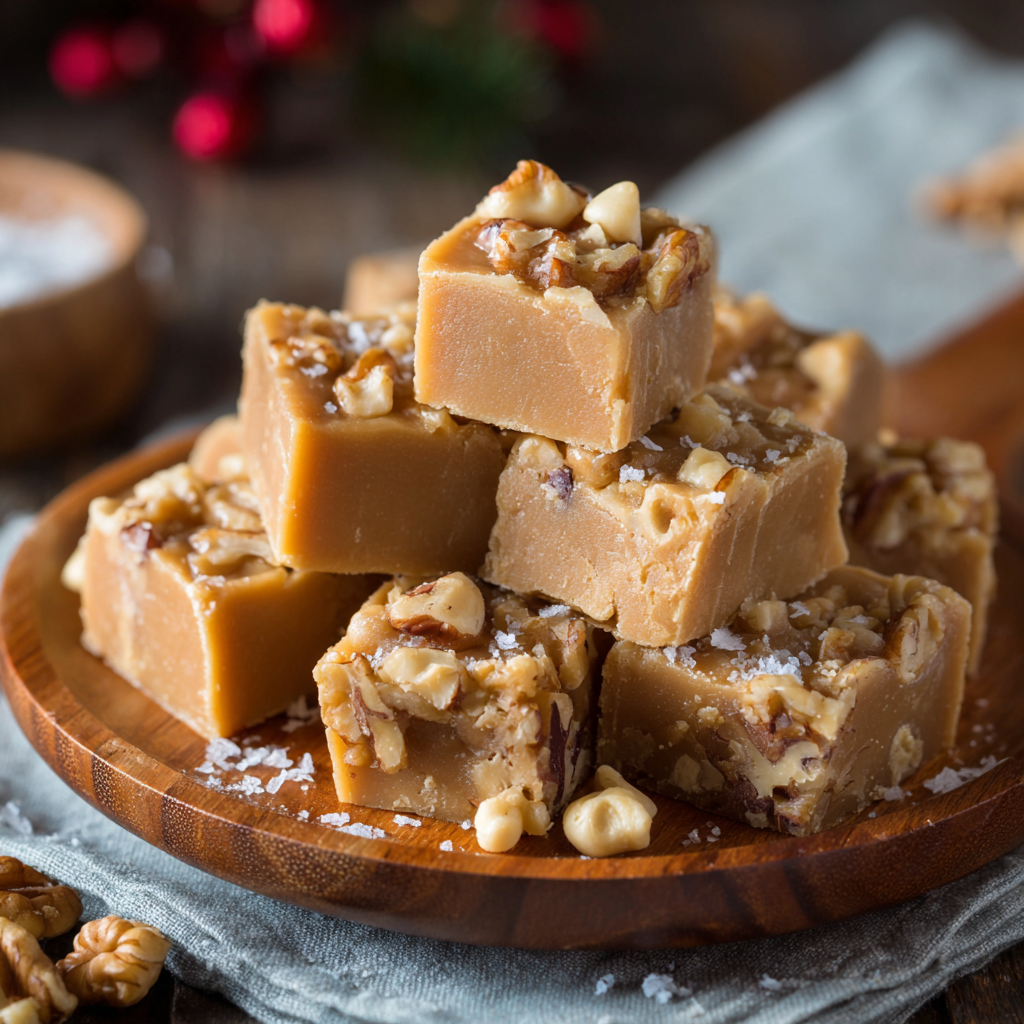
I’m a firm believer that the best recipes are the ones that bring immense happiness without causing a ton of stress. This fudge is exactly that. We’re skipping the finicky candy thermometers and the frantic panics over ‘soft-ball stages.’ Nope. This is a stir, melt, pour, and chill situation. It’s virtually foolproof, incredibly forgiving, and the payoff is huge. Imagine rich, velvety white chocolate, the deep, warm embrace of pure maple, and the satisfying, toasty crunch of walnuts, all coming together in one perfect, bite-sized square. This isn’t just a candy; it’s a memory maker, the star of your cookie tray, and the most heartfelt homemade gift you can give. So, tie on your apron (it’s okay if it’s a little messy, mine always is!), and let’s make something unforgettable together.
A Sweet Slice of Vermont Winter
This recipe always takes me right back to a specific, snowy weekend in Vermont. My husband and I were visiting friends, and we’d spent the entire day out in the cold, sledding and building a truly pathetic-looking snowman. We finally tumbled back inside, cheeks flushed and fingers numb, and were immediately greeted by the most incredible aroma. Our friend’s grandmother, a tiny, formidable woman named Mabel who ruled her kitchen with a gentle iron fist, was pulling a pan of her famous maple fudge from the fridge.
She handed us each a square, still cool from setting. That first bite was a revelation. It wasn’t cloyingly sweet; it was deep and complex, with the maple flavor singing front and center. The nuts provided this wonderful textural contrast to the impossibly smooth, creamy base. We sat by the fire, silently savoring our treats, the warmth finally returning to our bones. It was a moment of pure, simple, delicious contentment. That’s the feeling I try to bake into every batch of this fudge I make. It’s more than a dessert; it’s a little square of warmth and comfort.
Gathering Your Cozy Ingredients
The beauty of this recipe is in its simplicity. You only need a handful of pantry staples to create something truly spectacular. Here’s what you’ll need:
- 3 cups white chocolate chips: This forms the creamy base of our fudge. I recommend a good-quality brand like Ghirardelli or Guittard for the smoothest melt and best flavor. Chef’s Insight: White chocolate can be a bit temperamental. Make sure you’re using real white chocolate chips, not vanilla or white baking morsels, which have a different fat content and won’t set as well.
- 1 (14 oz) can sweetened condensed milk: This is the magic ingredient that gives the fudge its classic, soft-yet-firm texture and delightful sweetness. There’s no real substitute here—evaporated milk will not work!
- 2 tbsp unsalted butter: Added for extra richness and a beautiful, glossy sheen. Using unsalted allows us to control the salt level ourselves. If you only have salted, that’s okay! Just omit the pinch of salt later.
- 1½ tsp maple extract: This is key for that powerful, authentic maple flavor. While you can use pure maple syrup, extract delivers a more potent punch without adding extra liquid. Substitution Tip: In a pinch, you can use 2 tablespoons of pure maple syrup, but be aware your fudge might be slightly softer. For the best flavor, use the extract!
- 1 cup chopped walnuts or pecans: I’m team walnut all the way for that classic flavor and crunch, but pecans are a deliciously buttery alternative. Chef’s Insight: Toasting your nuts beforehand is a GAME-CHANGER. Just pop them on a baking sheet at 350°F for 5-7 minutes until fragrant. It deepens their flavor immensely!
- Pinch of salt: Don’t skip this! Salt is the flavor enhancer that makes the sweet maple and rich chocolate pop. It balances everything out perfectly.
Let’s Make Some Magic: Step-by-Step
Ready? This is so easy, you’re going to be amazed. Let’s walk through it together.
- Prep Your Pan: First things first, line an 8×8-inch baking pan with parchment paper. I like to cut two strips—one for the length and one for the width—leaving a little overhang on each side. This isn’t just for easy cleanup; it’s your golden ticket to effortlessly lifting the entire slab of fudge out of the pan later for pristine, crumb-free cutting. Lightly grease the paper with a dab of butter or cooking spray to ensure nothing sticks.
- The Gentle Melt: In a medium-sized, heavy-bottomed saucepan, combine your white chocolate chips, the entire can of sweetened condensed milk, and the butter. Now, here’s the most important step: use LOW heat. I’m talking medium-low at most. White chocolate is delicate and can scorch or seize (turn into a grainy mess) if you rush it. Stir constantly and patiently with a rubber spatula or wooden spoon. You’re not just preventing sticking; you’re encouraging everything to melt together into one gloriously smooth, homogeneous mixture. This should take about 5-7 minutes. You’ll know it’s ready when you can’t see any individual chip remnants and the mixture is perfectly smooth.
- Off the Heat & Flavor Time: As soon as your mixture is silky smooth, immediately remove the pan from the heat. Stir in the maple extract and that all-important pinch of salt. Give it a good stir to combine. Now, fold in your chopped nuts. I like to reserve a small handful to sprinkle on top for a pretty finish, but that’s totally optional!
- Into the Pan: Pour your beautiful fudge mixture into your prepared pan. Use your spatula to spread it into an even layer, pushing it gently into the corners. If you saved some nuts, sprinkle them evenly over the top now and press them down lightly so they adhere.
- The Patient Chill: This is the hardest part—waiting! Carefully transfer the pan to your refrigerator. You need to let it chill, uncovered, for at least 2-3 hours, or until it’s completely firm to the touch. Don’t try to rush this by putting it in the freezer! While it might set faster, it can cause the fudge to become overly hard and can sometimes create condensation, making the top slightly sticky.
- The Grand Finale: Cutting! Once fully set, use the parchment paper overhang to lift the fudge block out of the pan and onto a cutting board. Using a large, sharp knife, slice it into squares. Pro-Tip: For super clean cuts, wipe your knife blade with a hot, damp cloth between each slice. It makes all the difference!
How to Serve Your Masterpiece
This fudge is a star all on its own! For serving, I love to arrange the squares on a beautiful ceramic platter or a rustic wooden board. Let it sit out for about 10 minutes before serving to take the deep chill off—this allows the flavors to bloom and the texture to become perfectly soft and creamy. It pairs wonderfully with a hot cup of coffee, a glass of cold milk, or even a sweet dessert wine. If you’re gifting it, stack a few pieces in a clear cellophane bag tied with a pretty ribbon, or layer them in a festive tin between sheets of parchment paper.
Get Creative: Fun Flavor Twists!
Once you’ve mastered the classic, feel free to play with the formula! Here are a few of my favorite riffs:
- Maple Bacon Bliss: Add ½ cup of finely chopped, cooked crispy bacon along with the nuts. The sweet-salty-smoky combo is incredible.
- Double Chocolate Maple: Swap out 1 cup of the white chocolate chips for semi-sweet or dark chocolate chips. You’ll get a swirled, marbled effect and a richer flavor.
- “Everything but the Kitchen Sink” Maple: Fold in a mix of toasted nuts, dried cranberries, and even a handful of toffee bits for a fun texture explosion.
- Vegan Maple Fudge: Use dairy-free white chocolate chips, vegan sweetened condensed coconut milk, and vegan butter. It works like a charm!
- Maple Espresso Crunch: Stir in 1-2 teaspoons of instant espresso powder with the maple extract for a sophisticated coffee kick.
Olivia’s Chef Notes & Kitchen Stories
This recipe has become my go-to for last-minute hostess gifts and holiday potlucks. It’s saved my bacon more than once! I remember one year, I signed up to bring three dozen cookies to a school bake sale and completely forgot until the night before. Panic mode! I whipped up a double batch of this fudge, cut it into tiny one-bite squares, and packaged them up. They were the first thing to sell out, and I got so many requests for the recipe. The lesson? Simple, heartfelt food always wins.
Over the years, I’ve learned that the quality of your maple extract really matters. Splurge on the good stuff—it makes a world of difference. And don’t be afraid to make this fudge your own. Recipes are just guidelines; your kitchen, your rules! The best dishes are the ones filled with a little bit of your own spirit.
Your Maple Fudge Questions, Answered!
Q: My fudge turned out grainy. What happened?
A: Graininess is almost always caused by the white chocolate seizing. This happens if the heat was too high or if a tiny bit of steam or water got into the mixture while melting. Always make sure your pot and tools are completely dry, and melt over low, gentle heat, stirring constantly.
Q: Can I use pure maple syrup instead of extract?
A: You can, but I don’t always recommend it for beginners. Syrup adds extra liquid, which can prevent the fudge from setting up as firmly. If you want to try, use 2-3 tablespoons of real maple syrup and reduce the sweetened condensed milk by 2 tablespoons. The maple flavor will be more subtle.
Q: How long does this fudge keep? And how should I store it?
A: Stored in an airtight container in the refrigerator, this fudge will stay fresh and delicious for up to 2 weeks! You can also freeze it for up to 3 months. Just separate layers with parchment paper and thaw in the fridge overnight.
Q: My fudge is too soft and won’t set. Help!
A: First, make sure you gave it enough time to chill—sometimes it needs a full 3-4 hours. If it’s still too soft, it’s likely due to inaccurate measuring or a brand of chocolate that has a lower cocoa butter content. You can pop it back in the fridge for longer, or you can re-melt it and add a bit more chocolate chips to help it firm up.
Maple Nut Fudge
- Total Time: 3 hours 10 minutes
Description
Hey there, friend! Imagine walking into a cozy kitchen filled with the warm, sweet aroma of maple and chocolate. That’s exactly what this fudge brings—a rich, creamy, melt-in-your-mouth treat that’s perfect for holiday gatherings, gift-giving, or just a cozy snack by the fire. The combination of velvety white chocolate, warm maple flavor, and toasty nuts makes this fudge utterly irresistible, and best of all—it’s easy to make, even if you’ve never made candy before!
Ingredients
-
3 cups white chocolate chips (use a good-quality brand for best results)
-
1 (14 oz) can sweetened condensed milk
-
2 tbsp unsalted butter
-
1½ tsp maple extract (or 2 tbsp pure maple syrup as a substitute)
-
1 cup chopped walnuts or pecans (toasted for extra flavor)
-
Pinch of salt
Instructions
-
Prep Your Pan: Line an 8×8-inch baking pan with parchment paper, leaving a bit of overhang on each side. Lightly grease the paper with butter or cooking spray.
-
Melt the Base: In a medium saucepan over low heat, combine white chocolate chips, sweetened condensed milk, and butter. Stir constantly until smooth (about 5–7 minutes). Avoid high heat to prevent scorching.
-
Add Flavor: Remove from heat and stir in maple extract (or syrup) and a pinch of salt. Fold in the chopped nuts, reserving a few for topping if desired.
-
Pour & Chill: Pour the mixture into the prepared pan and spread evenly. Sprinkle reserved nuts on top. Refrigerate for 2–3 hours, until firm.
-
Cut & Serve: Use the parchment overhang to lift the fudge from the pan. Slice into squares with a sharp knife (wipe the blade between cuts for clean edges).
Notes
-
Toast the Nuts: Baking nuts at 350°F for 5–7 minutes intensifies their flavor.
-
Avoid Grainy Fudge: Always melt chocolate over low heat and ensure no water touches the mixture.
-
Flavor Variations: Add crumbled bacon, espresso powder, or dried cranberries for creative twists.
-
Storage: Keep in an airtight container in the fridge for up to 2 weeks, or freeze for up to 3 months.
- Prep Time: 10 minutes
Nutrition
- Calories: 160 cal Per Serving
- Sugar: 16g
- Fat: 9g
- Saturated Fat: 4g
- Carbohydrates: 18g
- Protein: 2g
Nutritional Information*
*Please note: This is an estimate provided for informational purposes only. Calculations will vary based on your specific ingredients and brands.
Per Square (based on 25 squares): Calories: 160 | Fat: 9g | Saturated Fat: 4g | Carbohydrates: 18g | Sugar: 16g | Protein: 2g | Sodium: 35mg
Prep Time: 10 minutes | Chill Time: 3 hours | Total Time: 3 hours 10 minutes | Yield: 25 squares
Final Thoughts: A Little Jar of Holiday Comfort
And just like that, you’ve done it. You’ve created more than just a treat; you’ve bottled the very essence of the season—the warmth, the comfort, the joy of sharing something made entirely by hand.
This fudge is a reminder that the most magical moments often come from the simplest recipes. It doesn’t demand perfection, just a little bit of patience and a whole lot of heart. It’s the perfect gift for the neighbor who shovels your walk, the sweet surprise for your book club, or the secret weapon you stash in the fridge for when you need a moment of quiet, maple-y bliss with a cup of tea.
So, as you package up your beautiful squares or arrange them on a platter, remember my friend Mabel in Vermont. Remember that the true magic isn’t just in the perfect, creamy texture or the rich flavor—it’s in the love you stirred into the pot. It’s in the memories you’ll create and the smiles you’ll inspire with every single bite.


